

We gonna get an update this week? Little bird told me you were working on it.
Tag
PS. Happy B-Day!!
Tag
CH14 by a rookie - starting year 3
-
Jerry-rigged
- Very Active Poster

- Posts: 634
- Joined: Tue Oct 04, 2005 3:22 pm
- Location: Hopefully fishing Christmas Bay
OK, a no pics update -
I spent Tagged's birthday in the garage (sorry for not calling, but I got a boat to build! ) started working with a borrowed router. RE: the What router should I buy thread - I REALLY like that Boche Colt - a small, 1hp "Trim" router - light and easy to use... biggest bit I used in it was a 1/2" straight cut bit, cutting 15/32" deep, 1/4" material removed (using as a planer) feed rate about 1/2" per second before it bogged down. (I had the speed set on "2" out of 6-8? running the bit slow). I got all my routing done, but I may want/need to do the outer gunnel top with a longer radius - right now it has 1/4" on it, but a few spots that didn't cover my gaps... got the inside and outside of the gunnel tops rounded over - 1/4"r, and used a fence on the router to plane the bottom of the rubrail (sort of) fair (with that 1/2" straight bit). Minor repairs needed after trying that...
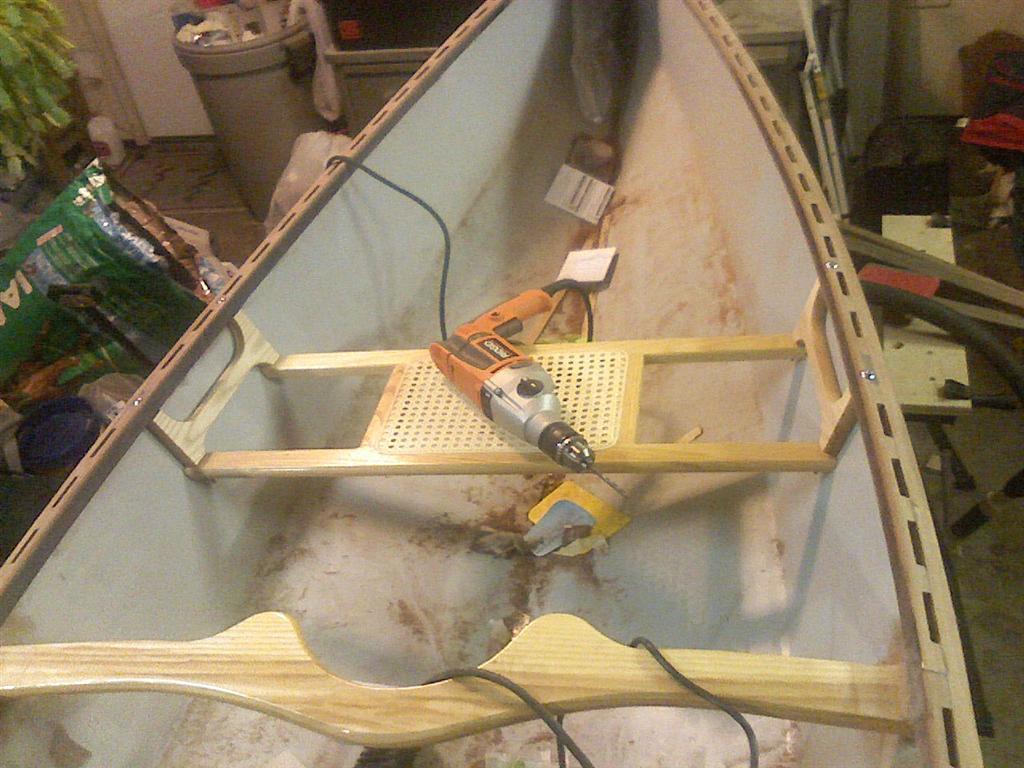
After the routing, and light sanding the newly machined areas, I started trying to hang seats again... Last time I was working on this, I had one seat (front) fitted, when I relized I needed to cut an angle on the bottom of the hangers - they are angled to match the hull side, and the seat is flat... and I relized after I cut the angles, my seat would be too short... luck for me, the rear seat is shorter than the front, so I could move the cut seat to the back, and re-cut, no problem. Fast forward to today, I am measuring to cut the new seat, and my neighbor, Emmit ( the retired high-school wood-shop teacher) comes over and asks about progress... Yes, he checkes in on me every month or two, and every time he does I learn something new... todays lesson was on proper use of a disc sander... not that I have one, but he does, so we take some measurents and the seats and hangers, and 30 minuits later, I have 4 hangers that have a perfect fitting angle on the bottom, and one seat that is within a 1/64" of being the exact size in every way... Rough cut (within 1/4") with a bandsaw, and all fit work done with his 12" disc sander He said I could come over on Tuesday to fit the other seat... it will probable take me 3 hours...
To do before Spring break -
1 - Fit one seat -
2 - Seal coat rubtail, gunnel, inwale, breast hooks, and router "marks" on hull sides
3 - Sand and repeat #2
4 - new tires and lugnuts for the flounder boat (somewhat unrelated, but needs to be done before I go to the creekhouse)
I spent Tagged's birthday in the garage (sorry for not calling, but I got a boat to build!
After the routing, and light sanding the newly machined areas, I started trying to hang seats again... Last time I was working on this, I had one seat (front) fitted, when I relized I needed to cut an angle on the bottom of the hangers - they are angled to match the hull side, and the seat is flat... and I relized after I cut the angles, my seat would be too short... luck for me, the rear seat is shorter than the front, so I could move the cut seat to the back, and re-cut, no problem. Fast forward to today, I am measuring to cut the new seat, and my neighbor, Emmit ( the retired high-school wood-shop teacher) comes over and asks about progress... Yes, he checkes in on me every month or two, and every time he does I learn something new... todays lesson was on proper use of a disc sander... not that I have one, but he does, so we take some measurents and the seats and hangers, and 30 minuits later, I have 4 hangers that have a perfect fitting angle on the bottom, and one seat that is within a 1/64" of being the exact size in every way...
To do before Spring break -
1 - Fit one seat -
2 - Seal coat rubtail, gunnel, inwale, breast hooks, and router "marks" on hull sides
3 - Sand and repeat #2
4 - new tires and lugnuts for the flounder boat (somewhat unrelated, but needs to be done before I go to the creekhouse)
Fishing from a paddle boat...
-
Jerry-rigged
- Very Active Poster
- Posts: 634
- Joined: Tue Oct 04, 2005 3:22 pm
- Location: Hopefully fishing Christmas Bay
Well, chips were falling again last night, and I got pics this time...
I got the rear seat cut, following my my nieghbors advice, it went quick, and actuall fits great
In the pic, it us just sitting there, no screws, tape, glue nothing, but it fits like it was bolted in...
Inspired by this sucess, I decided to "Adjust" the front seat fit - it was a bit sloppy, and it wanted to sit crooked besides... after several minor adjustments, it fit better, but still didn't have that "drop in" fit the rear seat has... (cut it twice and it's still too short ) Good enough, though. Drill four holes to hang it with and I would be done with it for now... I didn't relize 4 holes could give me souch heartburn... took about 30 minutes total to drill those 4 off-camber, caddy-wampouse, holes - 15 minutes for the first, 10 for the second and 5 for the last two In the end, the lag bolts dropped in nice, and the seat fit! Good timing, about the time I got it done, wife called "no more power tool" time, getting late. hanging the rear seat will have to wait a day or three...
For those that are intrested, the drill motor was my birthday present - a Ridged 8.5 amp. 1/2" chuck, 2-speed hammer-drill Yea, it's a little more drill than I need for hanging pictures, but I have my 9.6v Makita for the light stuff...
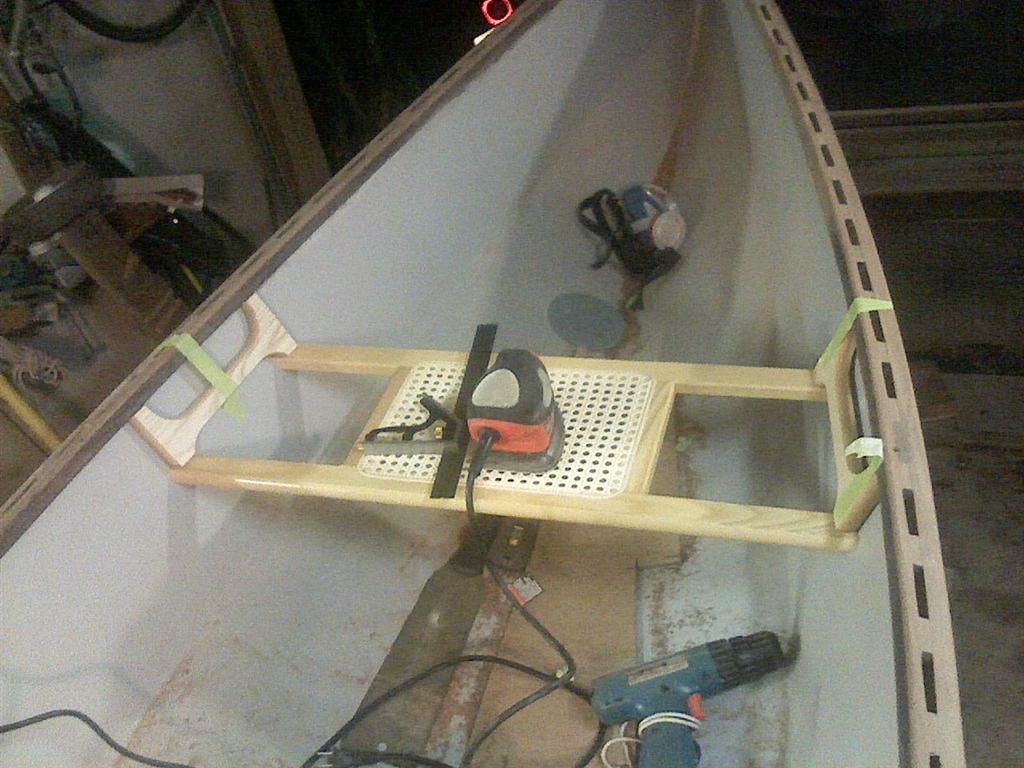
In other news, some Nascar fans were asking me for pics of my router "incident" so here is the worst of it -
I was using a 1/2" stright cut bit with a fence to plane the bottom of the rubrail... But if I let the router droop, the back of the bit would gouge the hull... this was the worst spot, (linear), these cuts were thru the epoxy, just into the ply, and about a foot long... I had one other 4" spot that was about 1/32" into the ply - nice step there... No worrys, a little bit of poxy, and no-one will notice...
Tonight, Hang the rear seat, and clean and Vac the hull - tomorrow, seal-coat the gunnels where needed... Saterday - Splash!
I got the rear seat cut, following my my nieghbors advice, it went quick, and actuall fits great
In the pic, it us just sitting there, no screws, tape, glue nothing, but it fits like it was bolted in...
Inspired by this sucess, I decided to "Adjust" the front seat fit - it was a bit sloppy, and it wanted to sit crooked besides... after several minor adjustments, it fit better, but still didn't have that "drop in" fit the rear seat has... (cut it twice and it's still too short
For those that are intrested, the drill motor was my birthday present - a Ridged 8.5 amp. 1/2" chuck, 2-speed hammer-drill
In other news, some Nascar fans were asking me for pics of my router "incident" so here is the worst of it -
I was using a 1/2" stright cut bit with a fence to plane the bottom of the rubrail... But if I let the router droop, the back of the bit would gouge the hull... this was the worst spot, (linear), these cuts were thru the epoxy, just into the ply, and about a foot long... I had one other 4" spot that was about 1/32" into the ply - nice step there... No worrys, a little bit of poxy, and no-one will notice...
Tonight, Hang the rear seat, and clean and Vac the hull - tomorrow, seal-coat the gunnels where needed... Saterday - Splash!
Fishing from a paddle boat...
-
Jerry-rigged
- Very Active Poster
- Posts: 634
- Joined: Tue Oct 04, 2005 3:22 pm
- Location: Hopefully fishing Christmas Bay
outside of the hull will be Bright. Inside will be SIII tan. I have done a little fairing inside with the "mixed filler" fluffy stuff, plus a few coats of the high-build. Still needs a lot of work though...
As for the outside, wood grain does a great job of hiding finish imperfections...
As for the outside, wood grain does a great job of hiding finish imperfections...
Last edited by Jerry-rigged on Fri Mar 14, 2008 9:26 am, edited 1 time in total.
Fishing from a paddle boat...
-
Jerry-rigged
- Very Active Poster
- Posts: 634
- Joined: Tue Oct 04, 2005 3:22 pm
- Location: Hopefully fishing Christmas Bay
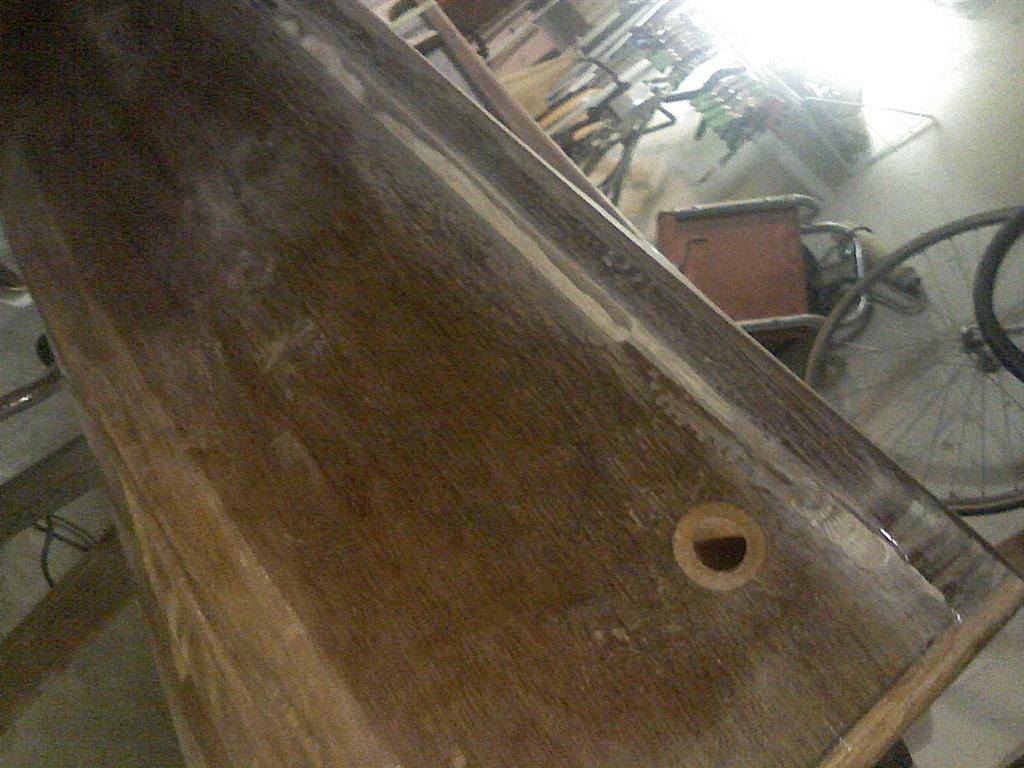
Seal coated all the exposed wood last night... I was rushing, and worried about running out of epoxy, so I ended up rolling the epoxy a little thin for a seal coat, but it should be OK for the weekend. I'll take my sander and epoxy with me over spring break and give it another coat at the creekhouse.... As for total epoxy used so far - last night I emptied the last bit out of my 1.5 gallen kit... All I have left is the epoxy from the "trial kit" - 8oz of resin, 4 of harnder. I still want to give the outer hull a good sanding and a coat or two of epoxy, so I may have to order some more...
Anyway, on with the pics:
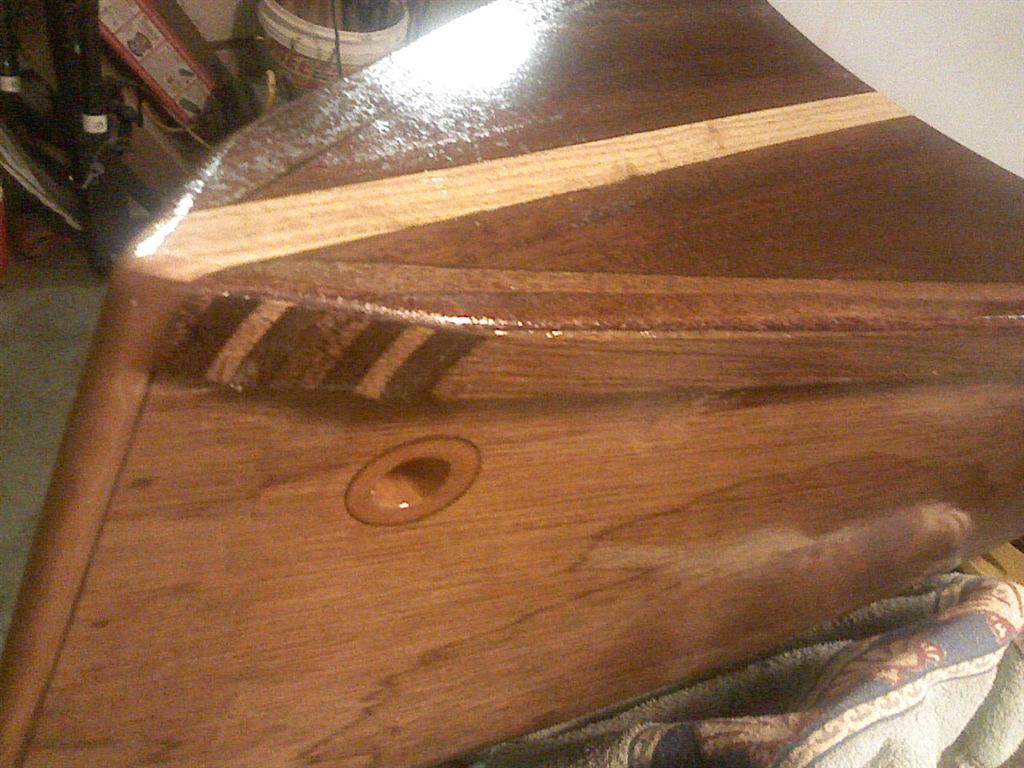
Looks good, the ash really jumps out.
The color diffrence between the Pilon on top of the rubrail and the meranni on the side is not as dramatic, or even as noticable as I had hoped, but oh well, it still look good:
Anyway, on with the pics:
Looks good, the ash really jumps out.
The color diffrence between the Pilon on top of the rubrail and the meranni on the side is not as dramatic, or even as noticable as I had hoped, but oh well, it still look good:
Fishing from a paddle boat...
-
Jerry-rigged
- Very Active Poster
- Posts: 634
- Joined: Tue Oct 04, 2005 3:22 pm
- Location: Hopefully fishing Christmas Bay
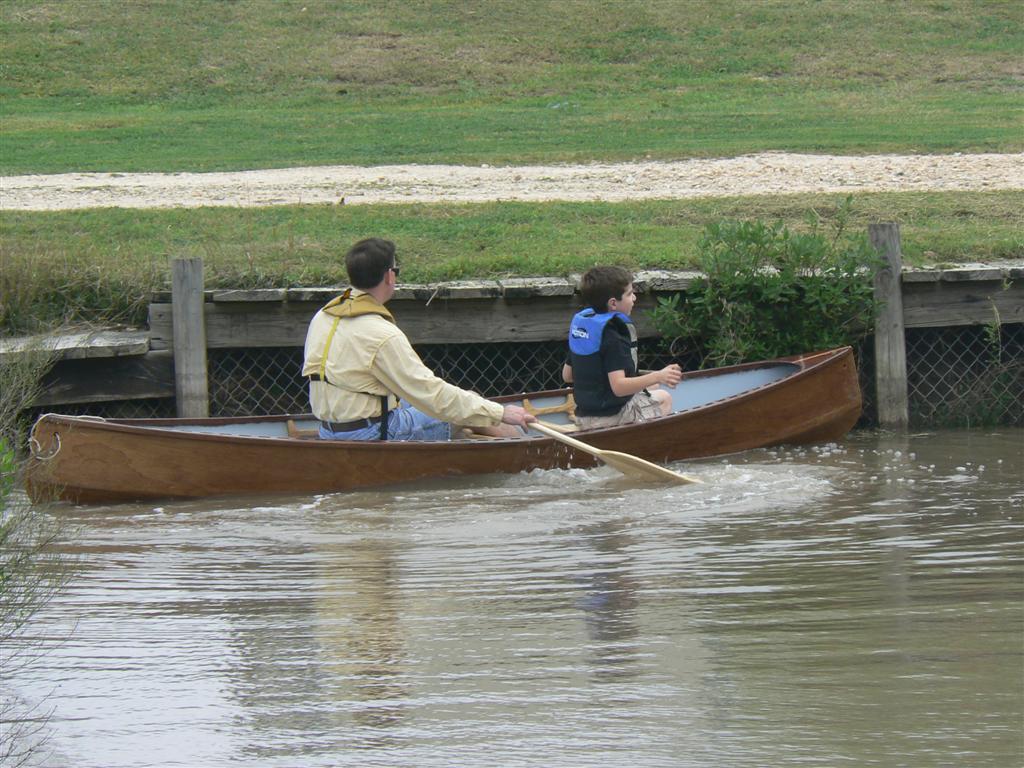
Splash Day! - a real splash this time, not just a get it wet just because, like the first one was... Tagged took a ton of pics, and I posted a bunch to my gallery, but here are a few -
My son and I, poking along...

Note the trim: almost dead level. We are actually paddling backwards in this pic, the "front" seat is 12" closer to the mid line than the "rear" seat.
Here we have changed seats - Ben is in the proper front seat; note the bow is trimmed up, but it is still not bad.
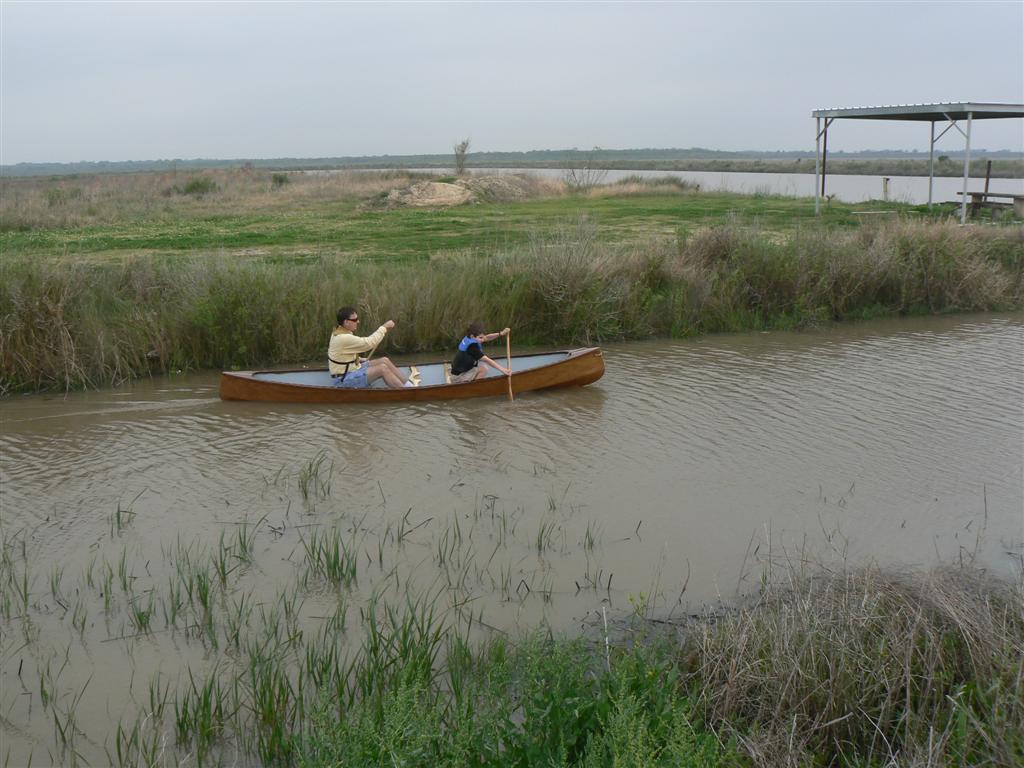
This was the closest we had to a shot of the inside layout: currently it is S3 primer grey, someday it will be S3 San Juan Tan.
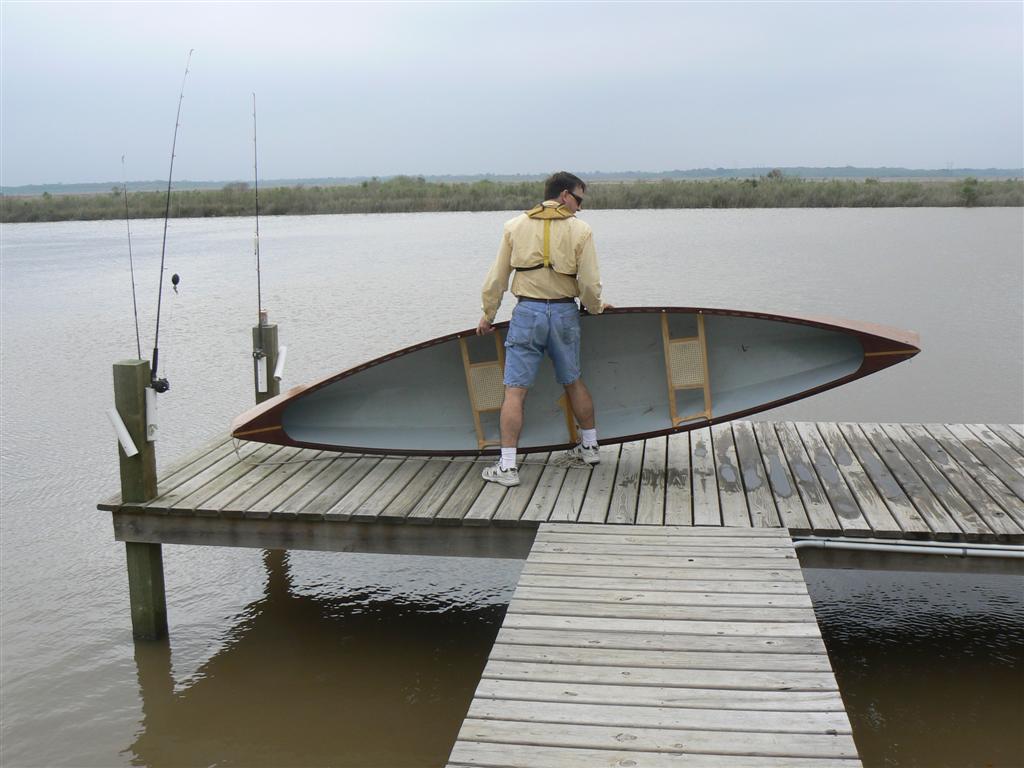
Last pic - a good weekend on the water:

My son and I, poking along...
Note the trim: almost dead level.
Here we have changed seats - Ben is in the proper front seat; note the bow is trimmed up, but it is still not bad.
This was the closest we had to a shot of the inside layout:
Last pic - a good weekend on the water:
Fishing from a paddle boat...
Who is online
Users browsing this forum: No registered users and 5 guests