Page 1 of 1
Aquasport Rebuild - Classic "Flatback"
Posted: Thu Aug 03, 2006 11:43 am
by tech_support
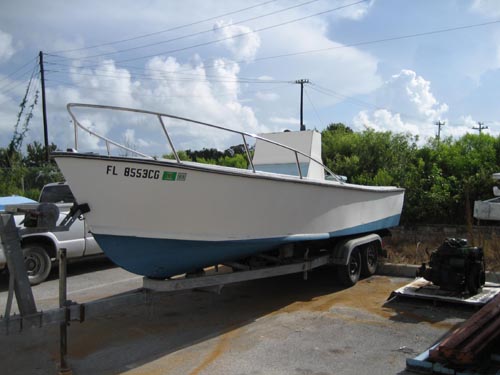
This thread will be used to document the rebuilding of the flatback Aquasport. Once the project is complete, we will turn all the content into a static webpage.
To all the pictures we take (not all will be shown it the thread), check out the gallery......
http://gallery.bateau2.com/thumbnails.php?album=495
This entire thread has been condensed into a tutorial located at BBC help page. Here is the link...
http://boatbuildercentral.com/howto.php
end product....
Posted: Thu Aug 03, 2006 11:44 am
by tech_support
July 18, 2006
A little further along with the demo. A few things to share:
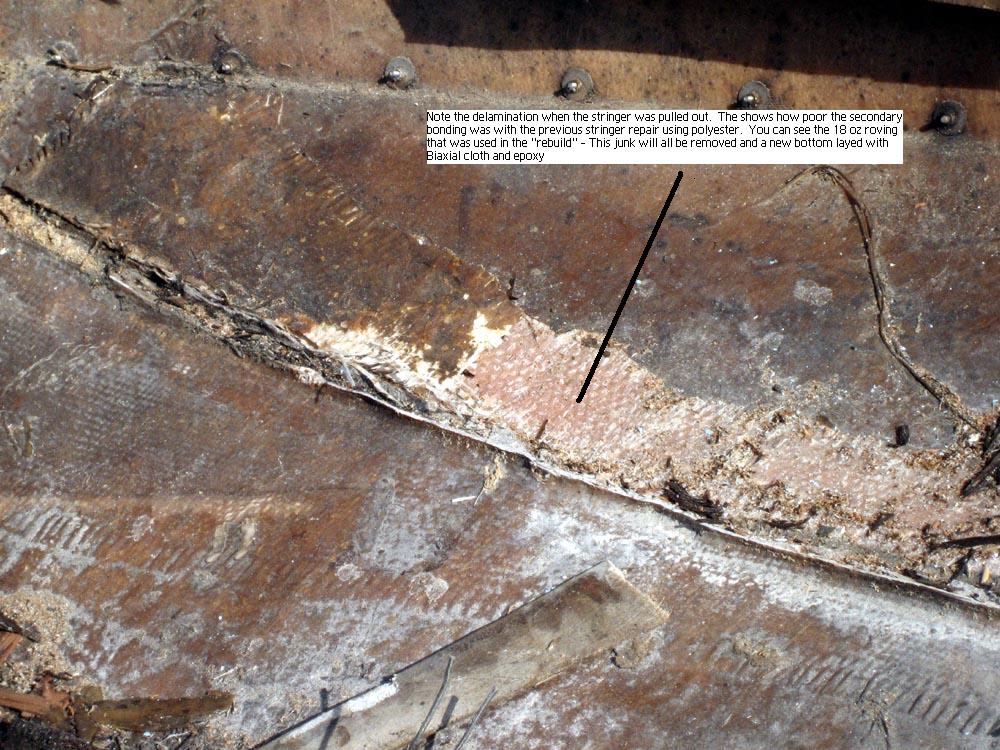
The stringers (not original) were laminated o the bottom with what looks like 18 oz roving. In several places it was possible to peel the glass back – see one of the below pictures. The secondary bond of the stringers to the hull was very poor. Also, the glass had separated from the stringer wood in all but a few spots.
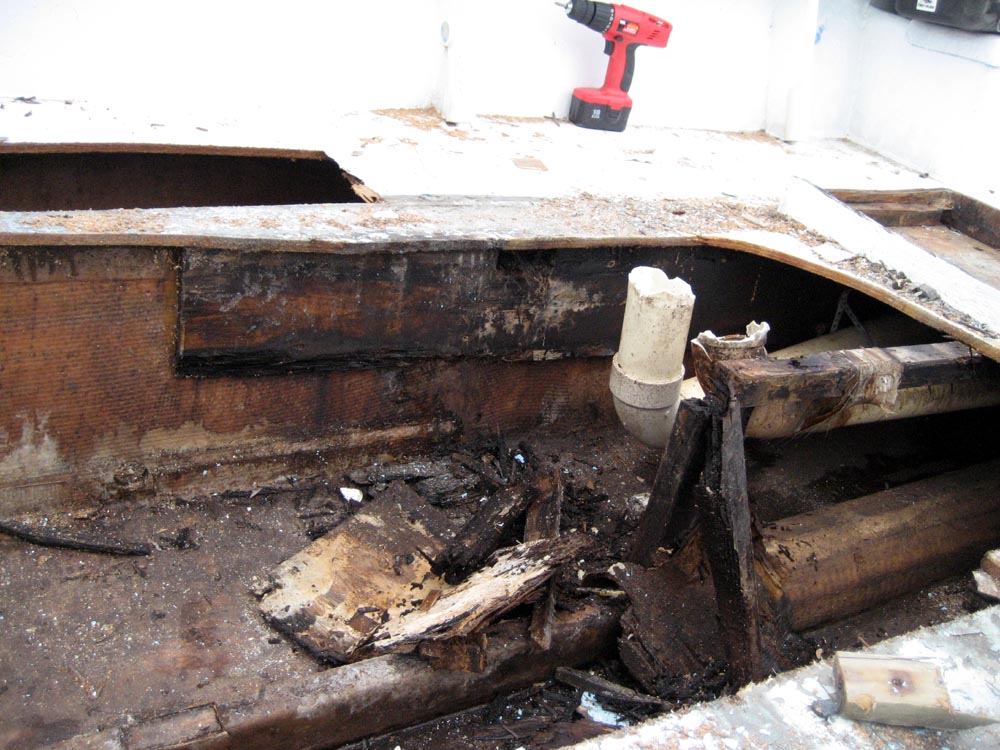
We are going to take extra precaution to ensure the shape of the hull doesn’t change before we get new stringers and frames installed. Similar to pulling a brand new hull from a mold, unless there is some structure in the hull, it could “oil canâ€
Posted: Thu Aug 03, 2006 11:56 am
by tech_support
more pictures.... July25
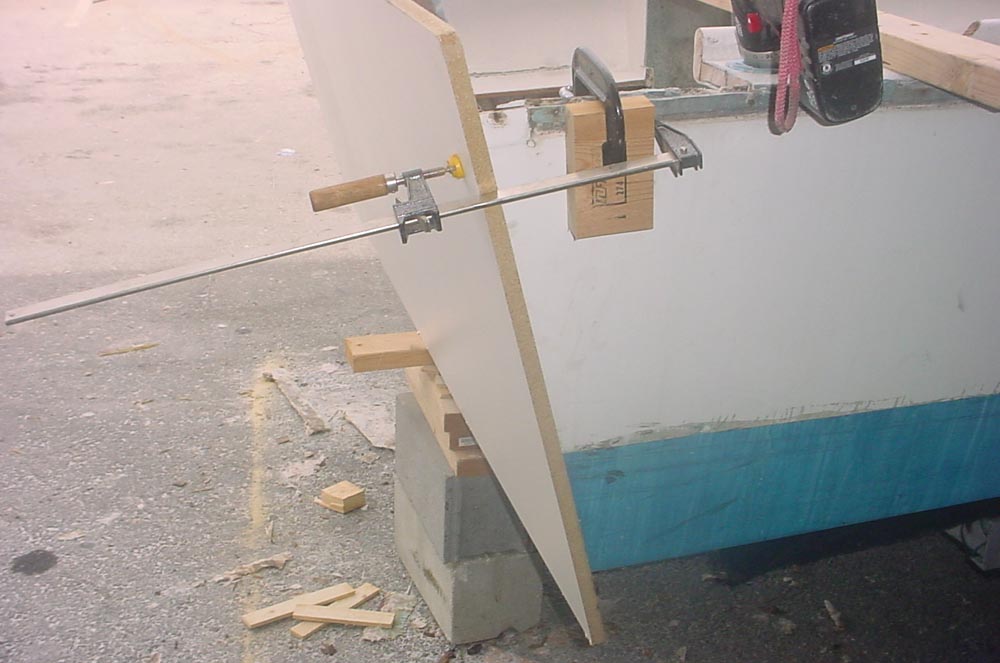
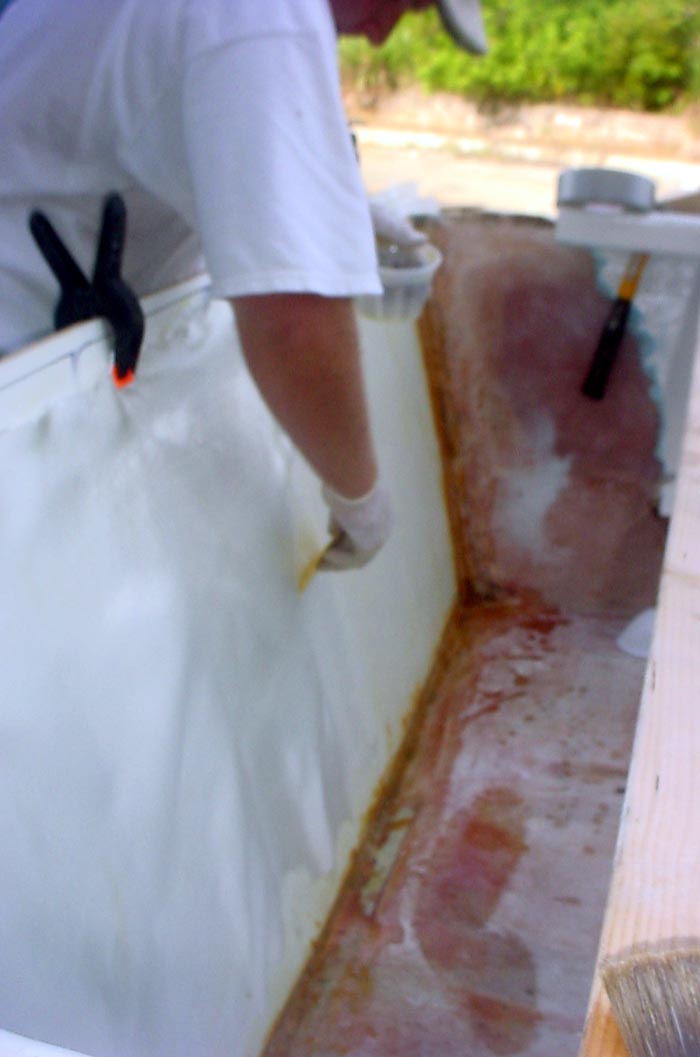
After measuring diagonals from chine to shear to make sure the hull was square, we made a mold for the new transom. Its basically a dam for the new outside skin. The dam is made from Melanine which is secured to a lip of original fiberglass left around the transom. The melanine is coated with mold release wax and
PVA. The clamps are only temporary until the dam is secured with screws.

Some small fillets of epoxy/woodflour are laid in followed by a layer of
6 oz cloth. This acts more like a skin coat and also makes a smoother surface for the
1708 Biaxial cloth.
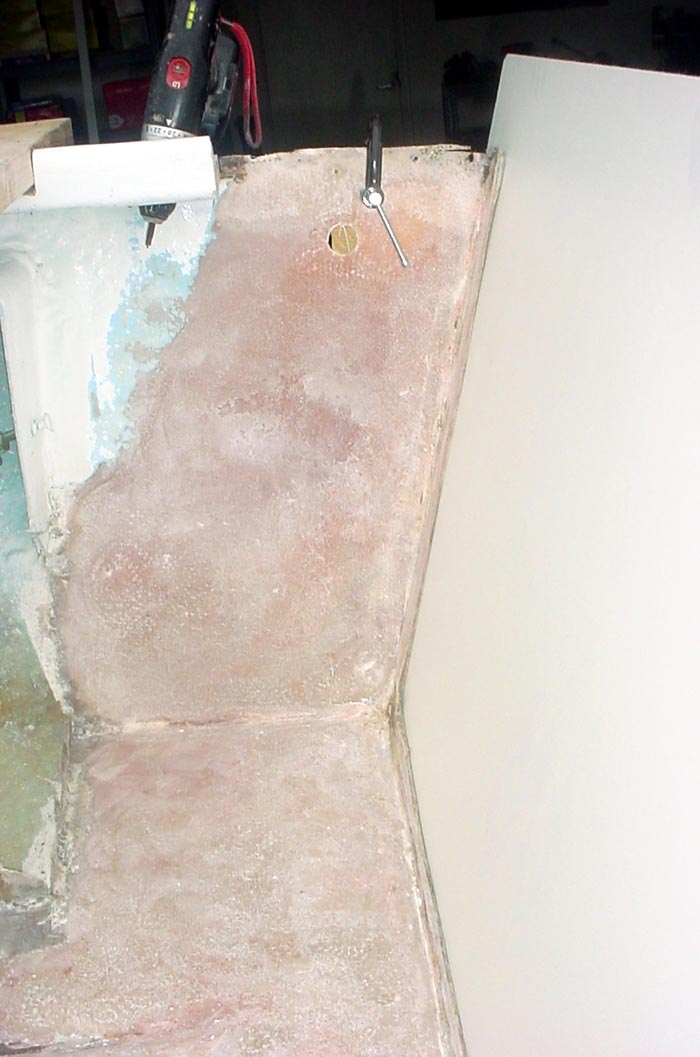

A cardboard template of the inside transom is useful for cutting the 1708 to fit, and will later be used to cut the [url=
http://boatbuildercentral.com/proddetai ... cell_E2402]2â€
Posted: Thu Aug 03, 2006 12:05 pm
by rustnrot
You mention, in your tutorials, that when using epoxy as laminating resin, that it is mostly not necessary to use matt when laying up yet in this situation you are using 1708 which has matt with the biax. Why did you use 1708 and not just straight 17 oz biax cloth?
When you tab in the stringers will you also use 1708 or will you just use straight biax cloth for that?
Posted: Thu Aug 03, 2006 12:14 pm
by tech_support
rustnrot wrote:You mention, in your tutorials, that when using epoxy as laminating resin, that it is mostly not necessary to use matt when laying up yet in this situation you are using 1708 which has matt with the biax. Why did you use 1708 and not just straight 17 oz biax cloth?
When you tab in the stringers will you also use 1708 or will you just use straight biax cloth for that?
Excellent question

We want to build some outside thickness for puncture resistance (foam doesnt have much by itself

) so the 24 oz total of mat on the outside is just added "bulk". On the inside skin you will see 17 and 12 oz biax without matt, some 45/45 adn 0/90 wil be used. If we used 1708 on the inside it would be a huge waste of epoxy for no added stiffness.
Just a rough estimate, there is probably 5 extra pound of resin in that mat now - thats about $25 in epoxy
Joel
Posted: Thu Aug 03, 2006 12:33 pm
by rustnrot
OK, fair enough. If one were use marine ply instead of foam, could one skip the layers of matt on the 3 layers that will be going outside the foam? Or, to ask another way, would the lamination schedule be the same if one were to use plywood?
Would Greenwood XL treated boat ply be a good choice for a transom? I noticed that you used to stock it but no more. Reason?
Posted: Thu Aug 03, 2006 12:43 pm
by tech_support
For a wood core and epoxy, no mat. The lamination would be quite different for a wood transom.
We no longer sell/stock fir because the Meranti is much higher quality, and cost the same or less.
Would you mind starting a new thread on your boat? that way we can give specific answers for your boat.
Joel
Posted: Mon Aug 07, 2006 11:55 am
by tech_support
August 4
Bedding the transom core. The Transom core is [url=
http://boatbuildercentral.com/proddetai ... cell_E2402]Renicell E240 from DIAB, 2â€
Posted: Mon Aug 07, 2006 1:26 pm
by anonymous
I like the project you got me jones'n to do one....Just curious as to why you didn't do the Renicell first and by pass the melanine part...then laminate the outside, as well as the inside...I like the post and the project, maybe a TV show with less SeaRay commericials in the future

Posted: Mon Aug 07, 2006 1:30 pm
by Chalk
Dat Be Me

Posted: Mon Aug 07, 2006 2:19 pm
by jacquesmm
The reason is the seam over the sides: we want it clean without that ridge, too difficult to fair. This way we don't touch the sides on the outside.
Joel and I discussed the possibility of building a transom away from the boat and then taping it but it is much stronger this way. All the layers overlap the sides and participate in the bond to the hull.
Joel may add to that, he his doing 99% of the work.
About the mat: a lamination must not only be strong but stiff and resistant to puncture. We quickly get sufficient strength with a few layers of directional glass but it's not thick enough for the other porperties. We need more thickness and we can get that with expensive material or cheap stuff like mat. We use mat.
That problem rarely appears with a plywood core because we get the sitffness from the plywood.
Posted: Mon Aug 07, 2006 2:20 pm
by tech_support
The new outside skin is tied into the hull by overlapping 12" up the sides and bottom. We could not have done this from the outside without a whole lot of grinding and fairing. from the outside of the hull


Also its nearly impossible to get
1708 to stay on a such an angle above vertical (transom angle) - it would just fall down. Unless we flipped the hull, then it would work.
Joel
I get your reference to the TV show

Next time you watch "that show", notice the trim angle on that SeaBird project boat

Posted: Mon Aug 07, 2006 3:11 pm
by Chalk
I understand...More or less saved time (less sanding)
Posted: Mon Aug 07, 2006 3:46 pm
by tech_support
Posted: Wed Aug 09, 2006 6:23 am
by Robertk
Great job Shine,
I installed the lift on mine yesterday. It is a CMC with 5.5" setback. The transom was sound on it except for 2 hairline cracks. They were at the corners of the deepest cut out for the engine (Suzuki DT 200). I added three layers of 12 oz biaxial across the transom in that area. I have to decide what to do about paint as I need it inside and out. The floor is badly stained by rust. The fold out seat in front of the console is shot and I have added a hard T-top that I want to paint to match the boat. I was lucky that the boat was kept inside most of the time. I don't like the ventilation intakes on the bow deck, but know they are needed. Also there is a damaged area just behind the front deck on the port side. It looks like a heavy sharp object has been dropped there. I was told my boat is a 1991 year. I have the HIN number and would like to verify that date. The registration says 1990, but the engine is a 91 year model.
Best regards,
Robertk
Posted: Wed Aug 09, 2006 10:26 am
by roob76
wow that came out very nice and clean. i see now why you did it from the inside. plus it makes total sense that the 1708 would not stay on unless the boat was flipped. this is why i check this forum on a regular basis. i learn something new every day. you guys are amazing and i really appreciatte you sharing your expertise with us forum members.

Posted: Tue Aug 15, 2006 11:02 am
by tech_support
August 14, 2006
Put in first 2 layers of inside transom skin. First layer is
1708, second is
DB1700. The inside skin will be 4 layers total of
17 oz. Biaxial glass. The first layer has mat (1708) because the mat helps conform to any uneven spots in the fillet. Subsequent layers will not have mat as it will just use more epoxy and not add strength.
I worked “wet on wetâ€
Posted: Tue Aug 15, 2006 11:27 am
by 2stinger
Joel,
Looks like your boat is back in floating order.
Do you have an estimated BOM for the transom replacement, I am getting ready to order materials and would love to have something to base my amounts on. The transom that I am replacing is roughly 33"x83".
How do you plan to clean the interior mat and roving glass, just sanding it. How about a lite pressure washing, it's not as if it hasn't been wet for 30 years anyway and with 99 degree heat (FLORIDA) it should be dry in a week.
Posted: Tue Aug 15, 2006 11:35 am
by tech_support
You need a 24 grit grinding wheel attached to a grinder - and a tyvek suit
Posted: Thu Aug 24, 2006 9:04 am
by tech_support
August22
Transom is complete!

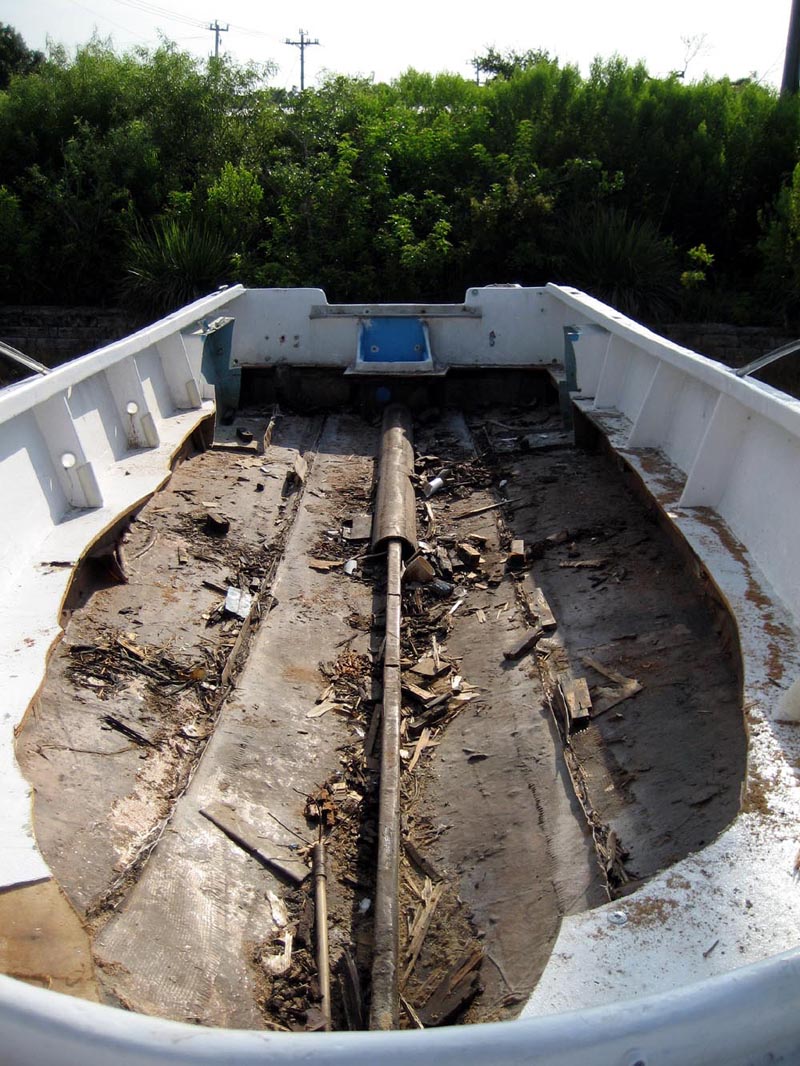
Have spent the last couple days grinding out a path for the new stringers. Unfortunately it want not just a matter of cleaning a path, but removing 2 layer of roving and matt. Even with a 24 grit grinding disk, it took 6 hours total. Results are a clean path for the bond of the new stringers and about 40 pounds of fiberglass dust in the trash can.

Now I start taking some measurements for the stringers. I sure wish I could find someone who could give me some measurements of the original sole height
Joel
Posted: Thu Aug 24, 2006 10:10 am
by fishingdan
Joel,
Was the sole of that boat have a core? Mine does and I'm trying to figure out how to replace the floor and deal with the two skins when it is time to integrate a new floor.
Dan
Posted: Thu Aug 24, 2006 10:34 am
by tech_support
Dan,
Im not sure how practical it would be to save the lower skin of a cored sole. Its the lower skin that will be bonded to stringers and frames, so if your removing any of that I would be very hard to keep the lower sole skin intact.
I would take it all out.
Joel
Posted: Thu Aug 24, 2006 11:29 am
by 2stinger
The channels that I see, are they left from the stringers or are they a feature of the hull.
If they are do you plan to run the new stringers in them or just fill them?
Posted: Thu Aug 24, 2006 12:01 pm
by tech_support
2stinger wrote:The channels that I see...
Those are strakes molded into the hull, the stringers were a couple inches inside thos strakes.
Im 90% sure we will fill them in and glass over before installing the stringers
Posted: Thu Aug 24, 2006 2:11 pm
by Robertk
Joel I have some inspection plates and openings in the sole of my boat, Could I just use a dowel and get the measurements for you? I live in Sebastian.
Robertk
Posted: Thu Aug 24, 2006 2:31 pm
by tech_support
Hi Robert,
I thought yours was a newer Aquasport? Im just looking for the sole height so I make the stringers high enough that the boat will self bail.
If its a flatback, then I'd love to know the distance from the sole surface to the top of the gunnels, also the distance from the transom to the console. Thanks
Joel
Posted: Thu Aug 24, 2006 4:11 pm
by rustnrot
What is that round looking thing? Is it a PVC pipe covered with glass?
What are your thoughts on using Prisma preforms that have an outer layer(s) of fiberglass bonded to an inner foam core for the stringers? I remember "That TV show boat guy" using them once.
Posted: Thu Aug 24, 2006 4:21 pm
by tech_support
That PVC pipe is a stiffener put in by the previous rebuilder - Im leaving it in until I get the new stringers in. the it comes out and a new center stringer goes in.
If you take all the internal supports out of the hull at once it will deform. Thats why we laft the gunnel cap and a lip of the sole - holds things in shape.
Also before putting in the stringers we are going to lay the hull into a "cradle" to ensure its fair.
Posted: Thu Aug 24, 2006 10:08 pm
by Steve_MA
This is a great thread; I ran across the album and couldn't figure out how you were building the transon...now I see. Great project. A couple basic questions... (a) there always seemed to be some debate of how well epoxy would bond to polyester resin. Properly prepped, I guess its no problem? (b) I generally like to Aquasport lines, but what is so special about the flatback? How is different from newer ones?
Looking forward to see more....
Posted: Fri Aug 25, 2006 8:26 am
by tech_support
Epoxy to polyester is about as good as it gets. Epoxy to polyester is MUCH MUCH better than polyester to polyester.
The flat back is popular because there is nothing made like it anymore. Nearly completely flat deadrise at the transom allows for a 10" true draft (better than most modern "bay" boats), but its still enough boat to take out in the Ocean. Plus it has a pretty shear line
Posted: Fri Aug 25, 2006 9:00 am
by jacquesmm
Steve_MA wrote:... (a) there always seemed to be some debate of how well epoxy would bond to polyester resin. Properly prepped, I guess its no problem?
The debate is about secondary bond between polyester. Nobody ever questioned epoxy, it is without doubt the strongest bond you can get.
In most cases, it is impossible to get a good bond between polyester and polyester. Unfortunately, many repair shops lack technical knowldege or are too cheap to use the correct resin.
Many polyester boat manufacturers now use DCPD poly. It is a better resin that ortho or isophtalic but you can't repair it except with epoxy. Polyester will peel off DCPD polyester.
That may be the debate that you had in mind.
Posted: Fri Aug 25, 2006 4:39 pm
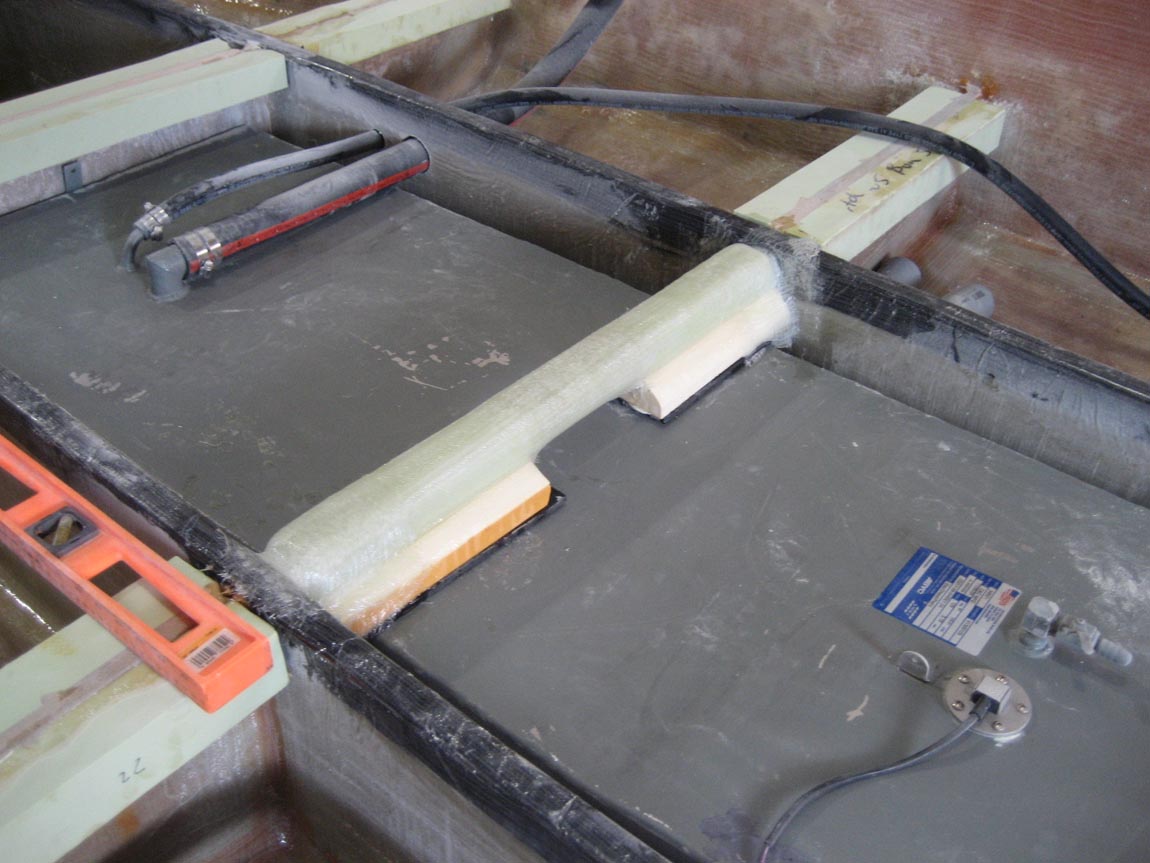
by tech_support
August 25

Made templates for stringers. Having a lip of the old sole still in place allowed me to take a straight edge and square to take rough measurements of the stringer depth. Using those rough measurements I cut out templates from scrap plywood. Make sure when you join the scrap that you maintain a straight edge for the top. I cut the template an inch or so short on the hull side of the stringer so I could “floatâ€
Posted: Fri Aug 25, 2006 4:58 pm
by Robertk
Joel you are right about my hull being different. It has a shallow "V" in the back.
Robertk
Posted: Sat Aug 26, 2006 9:51 am
by Steve_MA
jacquesmm wrote:Steve_MA wrote:...
That may be the debate that you had in mind.
How about on the outside of the transom where you are going to probably fill and tape to the hull - which is gelcoat. How do you repair and transition that area....I guess that might be a wait and see
Posted: Sat Aug 26, 2006 10:11 am
by jacquesmm
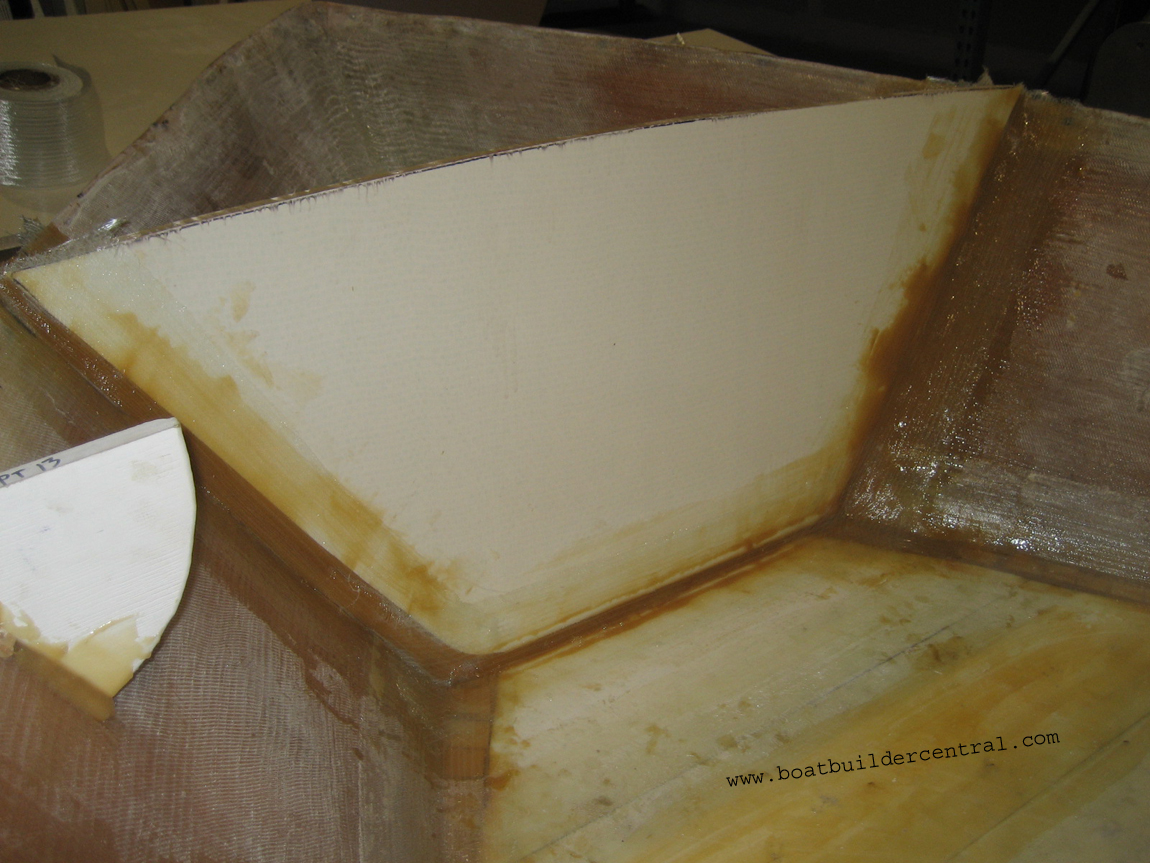
The fiberglassing of the outside of the transom is complete.
I understand that some expect an extra overlap on the outside of the transom but this is not needed. The bond between the sides and transom is perfect as it is. Plus, the torque of the engine will go mostly to the stringers, sole and motorwell assembly. Count on us to make that part much stronger than it was.
Joel started with the outside skin in a fake mold: the Formica panel.
He did build up and overlapped the sides, the overlaps are there, nicely staggered.
Then he installed the foam core, build the inside skin with overlaps.
The whole thing is done with epoxy and much stronger than the original hull.
An epoxy lamination with directional glass has almost twice the tensile strength of a standard mat and roving in polyester.
The Aquasport like many boats of that period was made of the traditional 24 oz. roving alternated with 1.5 oz mat. And when Joel grinds, I see a lot of mat in there, those guys overused their chop gun.
The outside is very smooth. To finish he will use QuickFair but very little will be needed then apply the Sterling paint system over the whole boat.
No gel coat. Gel coat is cheap polyester and does not have as much gloss as LPU. Plus, the LPU has almost twice the Barkol hardness of gel coat.
All luxury yachts are finished with LPU, not gel coat.
This is going to be a much better boat than the original Aquasport or than the ones rebuild with polyester resin.
!
Posted: Sat Aug 26, 2006 10:17 am
by laporter
Jacques/Joel
I've enjoyed this thread a lot and have referred a couple of guys rebuilding boats to it for reference.
Will this project to refit the Aquasport influence any of your existing or future designs for similar boats? Possibly a foam only project?
It's something to read about these materials & processes but it's a million times better to see it happen. I can't way to try it for myself
Rick
Re: !
Posted: Sat Aug 26, 2006 10:26 am
by jacquesmm
laporter wrote:
Will this project to refit the Aquasport influence any of your existing or future designs for similar boats? Possibly a foam only project?
Rick
We always have foam or honeycomb sandwich in mind. My very first professional design in the 70's was for foam sandwich. I started using plywood only 14 years ago, for small boats.
Unfortunately, foam sandwich construction doesn't make sense for small boats. Those boats would be heavier and costly to build.
We have a PH15 version in foam sandwich but it is twice as expensive as the plywood version and maybe 10 times more difficult to build.
Sandwich construction becomes a valid material around 28'.
Foam scantlings are available for the VG26 and TW28. The new PG28 and the TW34 will each have foam sandwich as an alternate hull material.
Posted: Mon Aug 28, 2006 8:55 am
by 2stinger
I noticed that on your project as in mine the boats really don't have any bulkheads. Maybe one or two around the fuel tank but even they don't go outside the stringers. How do you plan to change this configuration or will you keep it the same and just glass the sole to the sides. I would think that a bulkhead at each deck sole seem would be the minimum.
Posted: Mon Aug 28, 2006 9:15 am
by tech_support
We will build a "egg crate" stinger /frame grind just as in our designs.
Posted: Thu Sep 07, 2006 4:49 pm
by tech_support
Progress is being made
Just finished one of the stringers. We have a nice flat/long bench on one of the walls behind the office, this made laminating the multiple layers of
17 ox Biaxial glass on each side a snap. The stringers are 2 layers of
H80 Divinycell 1/2" glued together. The stringer probably weighs 40 pounds. It will be tabbed in with
Biax tape as well as “cappedâ€
Posted: Sat Sep 09, 2006 9:56 am
by bearhare
what year and size is this boat??
was it a salvage, or a backyard bargin??
great job and keep all the info coming.
we need more like this.
Posted: Mon Sep 11, 2006 10:25 am
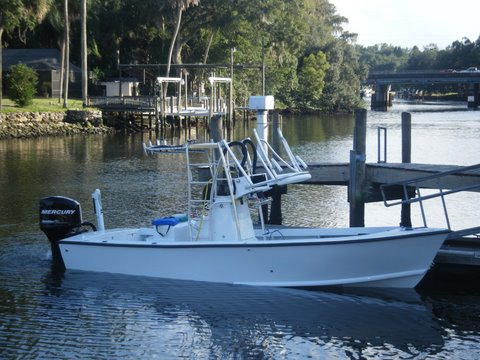
by tech_support
Its a 22.2 "flatback" Aquasport. Title says 1977, but I'm not 100% thats correct. 22' long and relatively narrow, only 72" from chine to chine at the transom. Boat came from E-bay.
Posted: Fri Sep 15, 2006 2:50 pm
by tech_support
The hull is on a cradle. The purpose of the cradle is to make sure the hull is straight before glassing in the new stringers. The new stringers are made, they will go in the boat next week. Once they are in, you will see a pick up in the pace. (hopefully)
This is how we took it off the trailer...


BTW, I found a flatback only a few miles from our office. It was a late 60' model and structurally was all original - got my cockpit depth measurement from him. Does 20" from sole to cap sound right to you all?
Joel
Posted: Fri Sep 15, 2006 7:42 pm
by anonymous
Joel,
Would wood stringers of sufficient thickness encapsulated in epoxy have weighed less than the foam ones?
Laszlo
Posted: Sat Sep 16, 2006 10:10 am
by jacquesmm
No, wood stringers would be heavier.
Posted: Mon Sep 18, 2006 8:04 am
by tech_support
Maybe 20 pounds heavier, each. They are pretty light, even without vacuum bagging.
Joel
Posted: Mon Sep 18, 2006 9:17 pm
by Digger873
I couldnt help but notice in the pics of the bottom after you sanded/ground you did not grind out the grooves that were to small for the grinder.
Will the glass stick well enough when you fill them?
I also notice you did not remove the small stringer down the center.
I am asking because I have the same type of repair and have been trying to figure out how to sand down in the grooves.
I also have a small center stringer with no rot at all and am not sure I need to take it out. I dont want to have to grind any more than I allready have to

When I can resize my pics I will post them in the Arrowglass Cheeta thread
Jared
Posted: Tue Sep 19, 2006 8:09 am
by tech_support
The little "grooves" formed by grinding are pretty small when using a 5" sanding disk - you try to blend them in. Your right if there is a hard edge, it will cause an air pocket.
2 things help in avoiding the air pockets. First is to grinding away "sharp" edges, so the glass can conform. The second is to use a Biaxial with mat like
1708 or 1208 for the first layer. Mat is like a sponge to some extent and it helps in getting a quality with an uneven surface.
If you work "wet on wet" thereafter, no need for mat.
Posted: Tue Sep 19, 2006 8:35 pm
by Digger873
You said
[Those are strakes molded into the hull, the stringers were a couple inches inside thos strakes.
Im 90% sure we will fill them in and glass over before installing the stringers ]
Those are the grooves I was asking about.
If you cant sand down inside those strakes will the filler stick well enough?
Jared
Posted: Tue Sep 19, 2006 8:51 pm
by gk108
Digger873 wrote:Those are the grooves I was asking about.
If you cant sand down inside those strakes will the filler stick well enough?
You could try a wire wheel or brush, vacuum the dust and wipe with acetone. That should knock off the top layer of bilge crud give you a good surface for the resin to bond to.
Posted: Wed Sep 20, 2006 8:26 am
by tech_support
OK, I uderstand now.
Yes, we will fill them in with filler and glass over. I will clean them out a much as possible, but its not super important.
Posted: Wed Sep 20, 2006 11:16 am
by tech_support
Stringers are cut to the correct height and are held in place with braces for glassing. The braces hold the stringers are the correct spacing and also parallel – which is important

That piece of PVC pipe will be removed and new center stinger laid down – pretty easy.
We may cap the stringers with some uni-directional carbon fiber


Posted: Wed Sep 20, 2006 11:46 am
by fishingdan
Why would the carbon fiber be necessary?
Is that a Perko flush mount hammer holder there! I've been looking for one of those.
Posted: Wed Sep 20, 2006 11:57 am
by Knottybuoyz
fishingdan wrote:Is that a Perko flush mount hammer holder there! I've been looking for one of those.
I got mine on e-Bay for $149.99! A real bargain! It was the De-Lux model with the built in chisel sharpener!
Looking good Joel. Silly question; are you going use an outboard or I/O on this boat?
Rick
Posted: Wed Sep 20, 2006 12:03 pm
by tech_support
fishingdan wrote:Why would the carbon fiber be necessary?
Its not, but we have some
We will sell this boat at some point, so the carbon fiber goes right along with the "no wood".
If it were a boat I was building for myself to keep forever, I would have used Meranti throughout.
Knottybuoyz wrote:are you going use an outboard or I/O on this boat?
A 25" outboard, probably 150 hp. The engine will hang a few inches below the red line you see on the transom
Posted: Wed Sep 20, 2006 12:45 pm
by jacquesmm
Theoritically, the carbon fiber cap will add stiffness to the hull. Practically, it will not make a difference because the hull will be stiff enough but, as Joel say, to be able to use the words carbon fiber and Kevlar can raise the price tag out of proportions of the small cost increase.
We have to find a way to use Kevlar . . .

Posted: Wed Sep 20, 2006 2:39 pm
by fishingdan
That is interesting about the kevlar. Will this be just a strip across the top (probably no additional strength) or will it completely cover the stringer?
Posted: Wed Sep 20, 2006 3:12 pm
by jacquesmm
No idea . . . maybe a strip along the keel for improved resistance to abrasion?
That way we can say: Carbon-Kevlar-Epoxy composite.
Posted: Wed Sep 20, 2006 5:15 pm
by 2stinger
You mean a Carbon-Kevlar-Fiberglass-Epoxy-Polyester Composite Boat. Not to shabby.
Do you Plan on replacing the rails, I noticed that you have cut up a small portion. Because if you didn't it would be a Carbon-Kevlar-Fiberglass-Wood-Epoxy-Polyester Composite Boat. Say that three times fast.
It looks good so far, how do you plan to adhere the stringers to the hull?
-Fillet and tape or set in adhesive epoxy filler then fillet and tape.
Posted: Thu Sep 21, 2006 8:23 am
by tech_support
2stinger wrote:
Do you Plan on replacing the rails, I noticed that you have cut up a small portion.
All that will be ripped out soon. I had to leave the cap/gunnels in to help keep the boat in shape while we put in new structure.
the only thing that will remain of the original boat is the last couple layers of fiberglass of the hull bottom and sides - basically is 99% new boat. i liken it to taking a rusted classic car body and putting it on a new chassis - the only thing that is original is some of the sheet metal.
If its not a pain, we will re-title it as a 2007 boat
Posted: Thu Sep 21, 2006 9:42 am
by gk108
On the subject of places to add CF tape:
Capping the transom between the motor well sides might be a good place. That would just about eliminate what little flex there might be across the transom since the rectangle that the motor bolts to would then be braced on three sides with the motor well and the top would have an inverted U shaped CF beam across it. Probably not absolutely necessary, but still not a bad place to add a little overkill for promotional purposes.

Posted: Thu Sep 21, 2006 10:39 am
by anonymous
2stinger wrote:You mean a Carbon-Kevlar-Fiberglass-Epoxy-Polyester Composite Boat. Not too shabby.
with Perko flush mount hammer holders... that should get another 50 bucks asking price...
Posted: Thu Sep 21, 2006 10:47 am
by tech_support
hardware will be by Accon
They are the "kings" of pop-up hardware.
Posted: Thu Sep 21, 2006 11:09 am
by anonymous
A pop-up hammer holder sounds dangerous...
Posted: Thu Sep 21, 2006 11:53 am
by Knottybuoyz
Anonymous wrote:A pop-up hammer holder sounds dangerous...
'specially if yer sittin' on the rail when it pops! Yikes!!! I'm sorry, I couldn't resist that opportunity!
Posted: Thu Sep 21, 2006 1:53 pm
by ks8
Name the boat *Three Stooges*?

also needs an oversized boat hook to swing around knocking people in the head...
Posted: Mon Oct 02, 2006 12:19 pm
by tech_support
Posted: Mon Oct 02, 2006 1:35 pm
by Daniel Huckleberry
If we could all manage laminations that nice there would be no more questions to ask!
Daniel
Posted: Mon Oct 02, 2006 1:55 pm
by ArizonaBuilder
If we could all manage laminations that nice there would be no more questions to ask!
Daniel
You too will soon be there grasshopper.
Posted: Mon Oct 02, 2006 2:50 pm
by tech_support
Thanks guys, but there is nothing to it besides "wet on wet"
Posted: Mon Oct 02, 2006 5:42 pm
by Knottybuoyz
Nice job Joel.
Looks like the tops of the stringers are not glassed. Will you glass over the top of them or just bed the decking directly to the tops of the strings as they are?
Rick
Posted: Tue Oct 03, 2006 10:30 am
by Daniel Huckleberry
Looks like the tops of the stringers are not glassed. Will you glass over the top of them or just bed the decking directly to the tops of the strings as they are?
I was wondering that myself. I just decided to watch and listen and I knew it would be addressed.
Daniel
Posted: Tue Oct 03, 2006 10:44 am
by jacquesmm
The tops will be capped.
Posted: Tue Oct 03, 2006 11:30 am
by tech_support
jacquesmm wrote:The tops will be capped.
On the previous page we talked about capping the stringers and how we may even use carbon fiber
Posted: Fri Oct 13, 2006 9:55 am
by tech_support
The hull is getting new glass
Below we show 50 oz. of new fiberglass one one side of the boat. We will hopefully get the rest of the bottom glassed next week.
It took hours of grinding to remove the "repair" layers of glass. The previous repair was done with polyester and mat, they just slopped it in. There were water filled voids every where, also huge pools of plain resin. The 7" grinder with 24 grit disk made it a little easier vs. the old 4.5" grinder.
It was easy to tell when we ground down to the original 30+ year old glass, as it was much better.


Posted: Fri Oct 13, 2006 10:21 am
by 2stinger
I found some 16 grit grinding disks for the 4.5" grinder and they cut glass like butter. What was taking me HOURS was reduced to minutes. A local tool shop in St. Augustine carries them, I had never seen 16 grit disks before but I am glad I found them.
If you have more than one grinder (I have three) you can rotate them so they can cool. I rotate them because 16 grit is a big load for a little grinder.
Keep on Itching.
Posted: Fri Oct 13, 2006 10:42 am
by tech_support
The torque of the 7" Makita is nice also for those agressive disks. Lets see an update on your project Stinger
Posted: Fri Oct 13, 2006 12:04 pm
by ks8
16? Yikes!
Did you try 36 first? 36 seemed dangerous to me, but I use it often now for the initial ridge removal. 36 is so fast. I'd be afraid of 16 ripping into wood fibers before I knew it, but then, technique becomes so important, and if you are doing demolition on a glass hull for a rebuild, and if your 16 is doing it, go to it man! Let the glass fly! (respirator)
Posted: Fri Oct 20, 2006 10:23 am
by tech_support
Posted: Fri Oct 20, 2006 1:11 pm
by anonymous
What a difference already!
ks
Posted: Tue Oct 31, 2006 9:02 am
by tech_support
Progress is slow but steady, the bottom has new glass. 50 oz. of new
1708/epoxy.
The rest of the old cap, sole, and frames are out. I also have taken out a couple hundred pounds of mat that was laid on in the previous "re-build" to the sides. You can see from the below pictures, its all been removed to the original glass on the port side. I am going to put more new epoxy/biax on the sides. Instead of using
1708 (like on the new bottom) we will probably use jut
DB1700 (no need for the mat on the sides).
This is the last of the demo work, thank goodness.


Posted: Tue Oct 31, 2006 12:31 pm
by Davef
Joel is doing one heck of a job on this. I stopped by friday and checked it out. Can't wait to see it finished.
Posted: Tue Oct 31, 2006 1:45 pm
by Doug
Having been there myself before on a Supra, at what point do you say is it worth it? Would it have been cheaper and or quicker to build a C21 or CS23?
Posted: Tue Oct 31, 2006 2:00 pm
by chrisobee
Having been there myself before on a Supra, at what point do you say is it worth it? Would it have been cheaper and or quicker to build a C21 or CS23?
Yeah but Joel has an ulterior motive. He doesn't really want the boat in the end. For him its the process that has value.
Posted: Tue Oct 31, 2006 2:10 pm
by tech_support
This one is worst case and I would never rebuild another boat that was this far gone, but as Chris said the value is in the pictures and tutorial value. We may even sell it before we rig it.
Most of the guys we help with re-pair/re-builds are doing the transom, sole or both – which is a lot easier than this project.
I bet we could have a CS23 to the same stage in less time and about the same $$$ - less itching also

Posted: Wed Nov 01, 2006 9:31 am
by JimW
shine wrote:This one is worst case and I would never rebuild another boat that was this far gone, but as Chris said the value is in the pictures and tutorial value. We may even sell it before we rig it.
Most of the guys we help with re-pair/re-builds are doing the transom, sole or both – which is a lot easier than this project.
I bet we could have a CS23 to the same stage in less time and about the same $$$ - less itching also
This is what I tell folks when they suggest a rebuild instead of from scratch new construction. Very few believe me. The demo work is the worst, the poly and glass break apart more than epoxy and glass and the itching is way worse. Life can be miserable during a rebuild

, life is good during new construction!
Posted: Wed Nov 01, 2006 9:56 am
by gk108
One valuable thing we learn here is just how scary some "repairs" can be. It looks like the extra mat on the hull sides just sort of chipped and peeled away. It was a good way to add extra weight without adding much strength to the structure.
Whether it is economically feasible or not, using proper materials and techniques will give you a rebuild that you can depend on when you need that extra strength the most. That might just be worth the extra cost and hassle when you are having a real bad day on the water.
Posted: Thu Nov 02, 2006 8:22 am
by tech_support
Used an air chisel to peal the mat off. Then we will use the 7â€
Posted: Thu Nov 02, 2006 12:03 pm
by anonymous
About three more power tools and we will give you the "Norm Abrams certificate of Achievement"
Posted: Thu Nov 02, 2006 2:18 pm
by tech_support
More like "Tim the Toolman"

Posted: Tue Nov 14, 2006 2:52 pm
by tech_support
Grinding is complete
Tomorrow the stringers get capped with unidirectional carbon fiber and a new "stem" of
Renicell foam core and
biax tape. The bow stem will be built as tough as the transom.


Posted: Wed Nov 15, 2006 3:17 pm
by tech_support
Stringers are capped with carbon fiber and regular
biaxial fiberglass tape. We used
Silvertip epoxy with the carbon fiber. In order to get the best of the carbon's properties, you need to use a more high performace epoxy.
The carbon and glass tapes were wet out on the long table, then rolled up and taken to the boat. Once all 3 layers were on (1 layer carbon, 2 layers glass) we squeezed and rolled on a sheet of plastic. This holds the lamination dwn very well and gets rid of all/most air bubbles.
Also today we glued in new foam core into the bow, tomorrow we will lay new glass over this (several layers of Biaxial) to make a new bow "stem". The foam is the same material as the transom
(E240 Renicell from DIAB), we just ued a grinder to shape it.


Posted: Thu Nov 16, 2006 7:25 am
by JimW
Joel,
Grasshoppa have question?
Tell me about the stringer cap and why it is so different that it needs or could warrant the carbon? Is it because the foam isn't "helped" with wood cleats to support the sole? Sorry just read those old pages - got it, marketing.
Also the foam bow "stem" purpose? Just a nice strong cored structure up front to stiffen that area up?
Just curious and trying learn from da masta. Thanks.
Jim
Posted: Thu Nov 16, 2006 8:02 am
by tech_support
Foam stringers need more glass. The unidirectional CF is much, much stiffer than glass (not counting S-Glass). So the idea is that we can use one layer of 9 oz. uni carbon tape in place of several (if not more) layers of 12 oz. Biax tape. So its lighter, stronger, and takes less time/labor. The downside is only cost, around $10/yard for this particular tape.
We want to show as many different materials and techniques with the project boat. Plus, I am pretty sure this will be the only 222 flatback aquasport in the world with Carbon fiber stringers
For the bow, its mainly to stiffen things up and to give a nice transition for the glass we are going to put in. The angle up in the bow was beyond the bend of what we can get 1708 to take.
Joel
Posted: Fri Nov 17, 2006 4:50 pm
by tech_support
2 layers
17 oz. Biaxon sides
New glass up the bow
Next week comes the frames
New pictures at the gallery.....
http://gallery.bateau2.com/thumbnails.p ... 495&page=9
Posted: Sat Nov 18, 2006 6:14 am
by Laszlo
Joel,
What's with the screws along the chine up at the bow?
Laszlo
Posted: Mon Nov 20, 2006 9:26 am
by tech_support
Laszlo wrote:Joel,
What's with the screws along the chine up at the bow?
Laszlo
Those are the bolts holding on the spray rails. We decided to keep the spray rails, and just reshape them to look nicer.
Some filler over the bolts and a layer of tape, then the 2 layers of
17 oz Biax just went right over them.
Joel
Posted: Mon Nov 20, 2006 5:55 pm
by brian in cc
I noticed on your boat joel that there is no keel stringer,my 76 aquasport has a small stringer laid inside the keel.It also has a piece of plywood on either side of this stringer,which are soft can I possibly just grind out the soft stuff and re glass the stringer with out those pieces of ply.
Posted: Wed Nov 22, 2006 11:34 am
by tech_support
there was on in ours, but we took it out.
Posted: Wed Nov 22, 2006 11:43 am
by tech_support
More pictures. We used cardboard to make templates for all the floor frames.


Cut the pieces out from a
pre-made divinycell panel.

Those pieces then get "tacked" in place with thickend epoxy.

Then we lay in fillet material, followed by 2 layers of 6"
12oz. Biaxial tape - all "wet on wet".


Here is the console, its very similar to a Pathfinder Bayboat

And the 66 gallon tank with digital sender unit

Posted: Wed Nov 22, 2006 6:16 pm
by timoub007
Looking great!
Maybe I missed it earlier, but did you guys build or buy that console?
Tim
Posted: Mon Nov 27, 2006 7:55 am
by tech_support
its a surplus console, we are going to use a lot of prefabed parts for this boat. (console, leaning post/live well, hatches, etc...)
Joel
Posted: Mon Nov 27, 2006 9:47 am
by bearhare
Okay I'm going to speak my mind now about this project.
It's not Fair. Ya'll have a supplies of materials that look like it will never end. My knee have sores on them from kissing my wife butt for extra money to finish the 3 boats in my shop. go ahead and gloat.
Posted: Mon Nov 27, 2006 6:08 pm
by frazoo
Three boats? You best hush and keep kissing!
frazoo
Posted: Wed Nov 29, 2006 6:42 pm
by jghall
No kidding, I'm still having issues with the first one...
Posted: Thu Nov 30, 2006 10:27 am
by tech_support
Quick update:
Beginning to glue cleats to frames - the 2" Renicell foam is overkill, but its what we had left over from the transom. the sole will have A LOT of support and gluing area.

These are "frames" made of the same renicell and a few layers of Biax - this is what the fuel tank will rest on. The black strips are
1/4" neoprene - use strips of this all around the fuel tank.


This is the baitwell/leaning post we are going to use. Its going to need some work. 30 gallon live.

Posted: Thu Dec 07, 2006 12:40 pm
by tech_support
Update:
The last of the cleats are glued to the frames. We are going to use pre-finished
Nida-Core honey comb panelsfor the sole – the large cleats will give a nice base for the seams of the panels to rest.


The motorwell bulk head is being classed in, we made it from
H80 and 2 layers of
17 oz biax on each side (45/45 and 0/90).
Silvertip epoxy was used for this very important part.


Tank is installed.
Next week the sole goes on
Posted: Thu Dec 07, 2006 7:21 pm
by stickystuff
Joel Did you seal outside of tank with epoxy? I think I would if it is under the sole like you have it. will help keep any moisture off of it and keep it from corrosion in the future. Just a thought. Looks great. To me Nida core is really a pain to use. filling in all the edges after trim is on takes a lot of time. The Xf is almost done and ready for consol and tower. Still have to fair the top decks and finish sanding the rubrails and interior trim. All Sapelli Mahogony. Beautiful stuff. I will say this Xf 20 is not your basic no frills boat. Not going to have the 1" draft like the normal plans show. going to be showroom sharp when finished.
Posted: Thu Dec 21, 2006 11:33 am
by tech_support
Posted: Thu Dec 21, 2006 6:45 pm
by Cracker Larry
Would those sole panels be suitable for a GF18?
Posted: Thu Dec 21, 2006 9:35 pm
by Boomer
they come with 18 oz glass on each side.
That's 36 oz. glass per sq. ft, plus a like amount of epoxy = 72 oz. per sq. ft. (epoxy is rule of thumb, may be slightly less)
Looks a little stout to me for the GF18. An equivalant weight of plywood would be (4X8ft) 32 sq. ft. x 36 oz. = 72 lbs. just on the glass alone.
Hmmmmmm................................
Looking at this picture, I'm wondering if it really is 18 oz.

Joel??
Posted: Fri Dec 22, 2006 7:17 am
by Laszlo
Boomer,
I think those pre-fabbed panels are vacuum-bagged. If so, the epoxy should be a lot less than 36 oz per sq. ft. That would also explain why the glass layers look so thin on the picture.
Laszlo
Posted: Fri Dec 22, 2006 8:34 am
by jacquesmm
Those premade honeycomb panels are lighter than 1/2" plywood and much stiffer.
Joel already left for the Christmas holiday and I will ask him when he returns but the skin maybe less than 18 oz. plus, it is either vacuum bag or RTM = high glass content.
Yes, you could use them on a GF18 but take in account shipping cost. Those panels are shipped by truck which is fine if you add it to a plywood order but expensive if you order just 2 or 3 panels.
Posted: Fri Dec 22, 2006 9:39 am
by Boomer
If so, the epoxy should be a lot less than 36 oz per sq. ft.
Brain fart. FG weight is per sq. yard, and I was thinking per sq. foot. So we're talking 36 oz. fabric per sq yard, plus whatever epoxy, equals 4 oz. fabric per sq. ft,, and using the 1:1 ratio of fabric to resin, 8 oz. per sq ft. which is pretty light.
Posted: Fri Dec 22, 2006 9:44 am
by anonymous
it is 18 roving. Made in a panel press. Stiffness is very close to 1/2" meranti.
Merry Christmas
Posted: Fri Dec 22, 2006 2:27 pm
by Cracker Larry
Cool. What are the pros and cons? I will be ordering plywood anyway, so shipping cost is not a concern. I'd like to keep the weight down where I can, without giving up strength. What does a sheet of it cost?
Posted: Wed Dec 27, 2006 7:40 am
by tech_support
Hi Larry,
A sheet of 20mm is about $240
Posted: Wed Dec 27, 2006 8:53 am
by Cracker Larry
WOW
So what's a little extra weight?
Posted: Wed Dec 27, 2006 5:05 pm
by Knottybuoyz
A sheet of 20mm is about $240
Hey Joel
So how does that compare to say a 15 mm sheet of marine ply laminated both sides with with 18oz glass & epoxy plus figuring in your time to produce it? I'm thinking it would come out pretty close to the same cost in the the long run eh?
Rick.
PS. Hope everybody had a good holiday!
Posted: Wed Dec 27, 2006 5:27 pm
by tech_support
It would weight close to double the 20mm nidacore panel, but prob cost half as much.
You do not save money with Nida-core panels - you do save a good amount of weight though
Posted: Thu Dec 28, 2006 11:24 am
by ks8
Cracker Larry wrote:
WOW
So what's a little extra weight?
Yes... I keep telling myself that!
ks
Motor Bulkhead
Posted: Thu Jan 04, 2007 10:45 am
by 2stinger
How far out from the transom did you set you motor bulkhead and how did you come up with this distance.
Posted: Thu Jan 04, 2007 10:54 am
by tech_support
Its about 17" from the top of the transom. You have to take into account how the motor will trim up. If we mount the motor right at 25", the there will have to be a cutout of the top of the motorwell bulkhead to allow the cowling to clear. Its my intention to put the motor on a jack plate with at least 8" set back and 6" of vertical travel. this will allow the engine to be trimmed all the way up and over the rear deck (no motorwell).
for your boat, you will need to decide what sort of motor well you will have. Either one with a full height bulkhead (like most our designs) or one with a splash well and board like in some production boats (Seacraft still does it this way) The benefit of the later is more cockpit space.
Posted: Fri Jan 05, 2007 12:56 pm
by tech_support
Posted: Fri Jan 05, 2007 1:12 pm
by tech_support
This is the bottom of the leaning post/live well. We are going to glass this to the sole on the outside. On the inside we will epoxy glue a 90 degree "flange" that we made in a mold out of 6" ox Biax tape and a divinycell triangle. You might notice that the sides of the leaning post are mishaped.

We are going to epoxy the 90 degree pieces to the sole, they will then force the base of the leaning post back to shape. Then we glass all around the outside. This is the 90 degree bracket or "cleat"....

Posted: Wed Jan 10, 2007 8:52 am
by tech_support
The sole is not glassed down yet, we are just getting final placement on the leaning post and console.

This is how the scuppers will fit....

Stern view...

Next, we fill bottom sections with foam, then glass down sole. After that comes the deck
Posted: Wed Jan 10, 2007 9:43 am
by gk108
After that comes the deck
Is 3 pallets of plywood going to be enough to finish the deck?
It's really starting to look good now that we can see the layout. Are you planning on or making provisions for a T-top?
Posted: Wed Jan 10, 2007 11:05 am
by 2stinger
I am at the same point with my project and had a couple of questions on yours.
The placement of you console, how did you decide. Did you look at someone else's Aquasport or calculate it.
The Leaning post/live bait well, what would be a good separation distance from the console. Is there a standard? 18"?
Posted: Wed Jan 10, 2007 11:22 am
by tech_support
The placement of you console, how did you decide. Did you look at someone else's Aquasport or calculate it.
We located an original Aquasport (very same hull) and I took a lot of measurements. Ours had be "re-built" once before so I wanted to start with the original numbers. I also used scaled pictures of other rebuilt hull to locate things.
The Leaning post/live bait well, what would be a good separation distance from the console. Is there a standard? 18"?
Just by feel. You need enough space to get by the wheel. Being too far away from the wheel is very uncomfortable when running in a chop or swell. Our is just about 18".
Another measurement I have used all around the boat is the width of a 5 gallon bucket. Buckets should be able to slide around console, between the deck and console
Posted: Fri Jan 19, 2007 3:54 pm
by tech_support
Posted: Fri Jan 19, 2007 10:37 pm
by Q
Boy am I glad I found this thread! My next project after the D5 I'm building is to get my 77-78 Robalo 190 wet again, after Hurricane Irene.
Joel, Question?
It looks like you just installed a new tank, perhaps a Moeller? Was it impossible to find one of the original dimensions? My Robalo has a 55 gallon Aluminum tank that I have pulled and saved....and was thinking of glassing and epoxying....what's your advice on that? The tank has "issues".
On the new tank on the Aquasport, did you shop for a tank and adjust your stringer installation to accomodate? Was this a factor in whether to go all the way to the stringers?
Thanks! Q
Posted: Sat Jan 20, 2007 8:18 am
by jacquesmm
Any tank will do as long as it fits between the stringers and under the sole.
We did not search for an original tank, there is probably not such a thing.
We were ready to have one made to our specs when Joel found a tank that did fit in a local marine surplus place.
It's a new one and the price was right.
It doesn't cost much more to have a tank made to your specs.
Check the location of fill, vent and pickups because they stick out. In this case, they are all under the console.
Locate the center of the tank where the previous one was or close.
How much time?
Posted: Sun Jan 21, 2007 7:53 am
by anonymous
I was wondering How long this project has taken so far? Realizing that you do this for a living.
Bluefish
Posted: Sun Jan 21, 2007 8:17 am
by stickystuff
I hope you double clamped all hoses under the hull. I have a friend who has a 23 ft. Sea Pro cuddy that has a fuel leak under the sole. Major expense to repair. They wanted $13,000 to take up hull, replace foam soaked in fuel and repair. He traded in the hull to a dealer . He did tell him the problem and made him sign a waiver sayin he knew about the leak and would not hold him responsible. Bummer.
Posted: Mon Jan 22, 2007 7:42 am
by tech_support
stickystuff wrote:I hope you double clamped all hoses under the hull. .
Of course.
They are double clamped everywhere, plus there will be an inspection part at every fitting.
Posted: Mon Jan 22, 2007 7:55 am
by Knottybuoyz
Sorry for the stupid question but, where do the scuppers in the deck drain to Joel?
Posted: Mon Jan 22, 2007 8:18 am
by tech_support
They drain overboard
Posted: Mon Jan 22, 2007 8:25 am
by tech_support
Kidding
The drain will go straight through the bulkhead and out the transom
Posted: Mon Jan 22, 2007 9:19 am
by Knottybuoyz
Thx Joel. I was looking at the photos couldn't figure out where they went. What did you use for piping them out the stern? Hose? PVC pipe? Would you put a rubber flapper on the end to prevent water getting back into the boat?
Posted: Mon Jan 22, 2007 9:22 am
by tech_support
This weekend we started on the temp molds for the deck.....

The molds have the correct camber in them so the deck will flow nice and even all the way up to the bow. We will blank those temp. molds with foam core. Then laminate them in place with Biax and Vinyester. Remove the deck, flip it over and glass the under side. (this is the point were you put in the higher density foam inserts for rod holders, cleats, etc...) The we will glass it (with epoxy) to the hull.
This is a TON of work that you will not need to do if your cap is in good shape. Of course you could still do it if you wanted a on of a king custom look.
Posted: Mon Jan 22, 2007 9:24 am
by tech_support
Thx Joel. I was looking at the photos couldn't figure out where they went. What did you use for piping them out the stern? Hose? PVC pipe? Would you put a rubber flapper on the end to prevent water getting back into the boat?
Just thru hulls. Will probably use the flapper type. I have not made my mind up 100% on how it will be set up.
Posted: Mon Jan 22, 2007 4:28 pm
by rustnrot
It is at this stage where I would have to plank the deck with mahogany and cut a hole for a rear cockpit and have me one nice Gentleman's Racer!!
Seriously though, does the wood stay in the boat, at least at the edges or is it just for forming a deck surface??
Posted: Mon Jan 22, 2007 4:41 pm
by tech_support
i does look funny to have all that mold jut for a 8" wide deck. It will get wider up towards the bow and thats when having all those molds will make her pretty.
The deck will have a shape similar to the Dorado 23 deck, see picture...
http://www.dorado-marine.com/DSC_5828.jpg
But ours will have camber, and I think look better.
There will also be permanent frames to supporting the deck, the ones in the rear will have cut-outs for rod storage.
Posted: Sat Jan 27, 2007 3:56 pm
by frazoo
Shine, what would be an estimate of the retail cost of the materials for the transom repair as performed on the aquasport?
thanks, frazoo
Posted: Mon Jan 29, 2007 10:28 am
by tech_support
1 sheet of Foam (smaller boat you might be bale to get away with 1/2 sheet)....
http://boatbuildercentral.com/proddetai ... cell_E2402
6 gallons of epoxy resin for lamination and glue/putty...
http://boatbuildercentral.com/proddetai ... E_kit_6gal
5 lbs of woodflour and 2 bags of silica...
http://boatbuildercentral.com/categorie ... ing&filler
If you outside skin is to be left, then you would have 4 layers of 17 oz. Biax, (2 layers are 45/45 and 2 are 0/90) with the overlaps you probably looking at 12 yards....
http://boatbuildercentral.com/products.php?cat=45
So the retail cost of this boats transom materials would be just under $1,000
Posted: Mon Jan 29, 2007 10:52 am
by tech_support
We were able to get a full day of work this weekend, made good progress on the deck.
Using a batten to visually check for the fairness of the deck molds. Deck molds are spaced every 16â€
vinylester suitable for sole?
Posted: Mon Jan 29, 2007 11:55 am
by C-Ox
I've been watching your progress on the Aquasport while in the initial stages of a similar project (initial stages=grinding hell). I noticed in todays post that you plan on using vinylester on the deck (w/ epoxy secondary bonds). Would vinylester/1708 also be suitable for my boats sole (i.e., sole panels glassed top and bottom w/ vinylester/1708, tabbed to the hull and bonded to stringers utlizing epoxy? The costs of approaching my rebuild would be greatly reduced if this approach were used. (I plan on using epoxy on the transom and stringers, due to what I've learned re: 2nd bond strength). Thanks for all of the great photos and resources, someday, at the end of the grinding (is there an end), I'll start a thread and post some photos. Thanks again!
Posted: Mon Jan 29, 2007 12:13 pm
by tech_support
Yes, you can make foam core parts with Vinyester, then glass them in with epoxy. Not the other way around though (vinyester will not stick to epoxy).
If your sole panels are made from wood, then you should use epoxy. Vinyesters do not stick to wood much better than polyester (not good at all).
The savings of using vineyster in foam core panels (vs. plywood epoxy) is lost in the extra fiberglass required for a foam core panel, not to mention the foam core is expensive also.
Posted: Mon Jan 29, 2007 12:35 pm
by fishingdan
That is a great visual demonstration on how to build out decks on an existing hull. Great work!
Posted: Mon Jan 29, 2007 12:42 pm
by FLYonWALL9
Cool stuff Joel, you get to have all the fun
Posted: Mon Jan 29, 2007 12:48 pm
by tech_support
FLYonWALL9 wrote:Cool stuff Joel, you get to have all the fun
There is plenty fun still left on this boat for anyone who wants it.

Right now we are only able to put 10 to 15 man hours a week
Posted: Mon Jan 29, 2007 2:31 pm
by FLYonWALL9
I'll take it just ship it up to the return address on
the PG22 plans I sent ya
Posted: Mon Jan 29, 2007 2:55 pm
by jacquesmm
That is a great visual demonstration on how to build out decks on an existing hull. Great work!
A very similar method is used on new boats, for example, the foam superstructure of the VG26 is build that way.
Posted: Mon Feb 05, 2007 10:12 am
by tech_support
Underside of deck getting glassed. We used the “negativesâ€
Posted: Tue Mar 06, 2007 12:56 pm
by TexasFlats
Shine,
I am also using NidaCore to re-deck my boat. What did you do to prep the sections of the sole before you glassed them in? Did you join the sections of the sole together before bonding them to the stringers or are they tabbed together on the top side?
Posted: Tue Mar 06, 2007 3:35 pm
by tech_support
The sole is three parts each made of two panels. Joint sit on a very wide cleat section. The edges are beveled back and filled with thickened epoxy.
If the joint is not supported underneath with a wide cleat of flange, then you will need to make a fiberglass splice under neither (a couple layers of Biax tape) and bevel the joint on top, then fill with thickened epoxy and fiberglass the top.
I looked, but I do not have a good picture of the joint.
Posted: Tue Mar 06, 2007 4:08 pm
by TexasFlats
Thanks Joel.
I believe the Nidacore I bought from you a while back has 18oz roving on both sides - should I add a layer of cloth over the entire deck for a little more protection, or is it fine as is?
Troy
Posted: Fri Mar 23, 2007 1:52 pm
by tech_support
Not completely necessary, but we had scrap - so we added some.
we are making progress again on the boat. Templates for under gunnel rod racks. Due to the low freeboard, there is really only enough room for one rack. Personally, I do not like keeping anything there, save maybe a deck brush.


Templates for the front of the casting deck and the anchor locker are being made now. 2 longitudinal supports will also be under the casting deck "stringer extensions"
I am hoping to see a good boost of progress on the boat over the next few weeks
Posted: Thu Mar 29, 2007 9:12 am
by tech_support
we have the front of the casting deck in (frame)

as well as the anchor locker bulkhead. You can see we transfered the deck camber to this part also
Also here are pictures of the small frames/rodholders. Because we used nida core, we must route back in the honeycomb, then fill it with epoxy putty. (the putty is silica, so its difficult to see) Later, we will round this all off with a router bit. Then they get glassed into the hull. I personally do not like under-gunnel rod holders but it might be a good place for a deck brush of landing net

Posted: Mon Apr 09, 2007 10:14 am
by tech_support
We are building the casting deck. The longitudinal supports are 1/2" Divinycell with 1708 on each side, they are taped into the boat with 12 oz biax and epoxy.
This picture shows the supports just tabbed into place. We next make a fillet, let it tack up, then come right back "wet on wet" with the biax tape and marinepoxy.


I know its overkill, but the supports are double taped (offset seams)......

Here are the two pieces that will be the casting deck....

Here the top skin of the casting deck has been laminated. Again its over kill, but we went with 2 layers 1708 for top skin. Bottom skin will be just one. The great thing about using composites (foam core/honeycomb/epoxy) is that you don't mind adding extra weight in strategic places, because you have saved weight in others.
In other words I would rather have added weight in fuel capacity/bait well capacity, and thicker deck skins

We also are working on a mold for drain channels that will make our hatches waterproof. Its something will eventually sell - this is something that will save a lot of time.
Joel
Posted: Mon Apr 09, 2007 10:18 am
by jacquesmm
i"m glad Joel insist on saying that it is overkill because it really is. However, despite all that, this boat will be lighter than when it came out of the factory.
Lighter but stronger and stiffer thanks to the quality of the materials.
Posted: Mon Apr 09, 2007 11:02 am
by Old E.
shine wrote:
We also are working on a mold for drain channels that will make our hatches waterproof. Its something will eventually sell - this is something that will save a lot of time.
I've seen people do that sort of thing with PVC, on the edged of the floor/deck/sole (whatever). I couldn't figure out how to do it on hatches without an immense expenditure of time and $$... so I gave up. I can't wait to see what y'all come up with.
Its looking great!!!!!!!!!
Posted: Mon Apr 09, 2007 11:26 am
by Bayport_Bob
Posted: Mon Apr 09, 2007 11:27 am
by tech_support
I couldn't figure out how to do it on hatches without an immense expenditure of time and $$... so I gave up.
I know, I was looking for a place to buy it myself
So if we invest some time and $$ into the mold, then we can produce them and sell them to recoup the investment.
With labor and materials they will not be cheap - but they will be less than everyone making their own mold.
Posted: Mon Apr 09, 2007 11:52 am
by Cooper
If you go to pages 12 and 13 of this thread you can see where somebody made their own hatch:
http://www.classicseacraft.com/forum/sh ... o=&fpart=1
Posted: Mon Apr 09, 2007 12:48 pm
by Old E.
I know, I was looking for a place to buy it myself
So if we invest some time and $$ into the mold, then we can produce them and sell them to recoup the investment.
With labor and materials they will not be cheap - but they will be less than everyone making their own mold.
How will you do it so that you can use them for any size hatch.... or was that even part of the plan?
I cant wait till y'all come out with t-top plans and a free standing baitwell plan.
Posted: Tue Apr 10, 2007 9:22 am
by 2stinger
I was thinking the same thing, make a mold of the hatch rim and then talking you guys into selling it be the foot. You could just miter the ends and follow up with some glass under each miter. I have already started to make a mold for myself.
That is a great idea.
You would need to employ an extra lip so there could be two mounting choices. Say you want to mount to a bulkhead or the deck. If you mount to the deck then just cut off the extra lip.
Cool.
Posted: Tue Apr 10, 2007 9:26 am
by jacquesmm
That's the idea: miter the corners. Joel is working on the mold as I write this. he will keep you up to date but let him work on it.
Posted: Wed May 02, 2007 4:21 pm
by 2stinger
I am on the edge of my seat. Any progress on those hatch lip things?
Good luck,
and
Posted: Wed May 02, 2007 4:29 pm
by tech_support
I take some pictures, but I do not like my mold. I am going to order some UHMWPE and make a super clean mold with the router
Posted: Wed May 16, 2007 9:20 am
by tech_support
The casting deck is down, and we are fitting the deck. Next we have to build the coming, cut a few more hatches (transom and anchor locker), then its glassing in the console and leaning post.


Posted: Thu May 17, 2007 10:57 am
by tech_support
Gluing up strip of 1/2" Renicell foam to make long coaming strips for gunnels. Aluminum straight edges keep parts fair - very important for gunnels! We keep a few aluminum extrusions around for straight edges, they are the inexpensive screen porch parts from the home store.

Used the sander to make recess so the the fiberglass joint is level with foam - keeps fairing to a minimum.

Use plastic to keep the epoxy off your tools and a clean/flat surface


Posted: Thu May 17, 2007 2:16 pm
by Old E.
I can't tell you how long I spent trying to think of an easy way to do that... of course, I have no idea what Renicell is.
Posted: Thu May 17, 2007 2:27 pm
by tech_support
Old E. wrote:I have no idea what Renicell is.
It the same foam as what we used in the transom. Its a high density foam. It machines and it stiffer than H80 divinycell. So the idea is that we will let that nice stiff foam "batten" define the shear nicely.
Right now we are cutting out the coming curve at the bow. There will be a hole for the anchor locker, but it will be faired into the casting deck. The top of the deck will be clean - just a pop up cleat. It should look very pretty.
Posted: Fri May 25, 2007 10:24 am
by tech_support
more progress, slow as it is....
Routed out the edges of the hatches and covers, then fill with thickened epoxy. You must do this with foam core and nida-core to keep the edges from compressing.


We glassed the casting deck to the sides....
This is a video clip of taping down the casting deck....
http://www.youtube.com/watch?v=x6BIr0Kq0Bs
We also glassed the front of the casting deck to the casting deck frame.
The coaming is made, we just have to secure it to the deck. Then we clean it up with the router, then glass it to the deck. The deck is not secured (glassed down yet) we want to use the coaming as a sort of big faring batten - to ge the lines right and pretty to the eye. Then the entire deck and coaming will be glassed together and become one piece!
Posted: Fri May 25, 2007 9:44 pm
by sgorey
nice job on the boat and the videos. The videos will be very helpful for first timers.
Posted: Tue May 29, 2007 12:32 pm
by crasea
Ditto on the videos, very helpful. Might want to add a link from the how to section.
Posted: Thu May 31, 2007 2:13 pm
by tech_support
making a foam core "box" to hide the fuel fill and vent hose running up the gunnels......
cut the foam to shape - this is H80 Divinycell 1/2"

use finish nails or tooth picks to hold it to shape (in more critical parts you would take more care for squareness)

make a fillet on the inside (epoxy/woodflour fillet)

working "wet on wet", lay glass into part (fillet is still tacky). we just used scrap cloth on the inside and then scrap 17 oz Biax ont he out side


After the inside glass stiffened up, we turn it over, remove nails
, round the corner of the foam using a Stanly sureform plane, then glass the outside skin. Also added some fairing after the out side tacked up. And here you have your box....

Posted: Thu May 31, 2007 8:55 pm
by anonymous
i just bought a 1976 chrysler 21' center console sport fisherman
i am starting to perform the work on it saturday june 1/ 07 please if you can help me in anyway it would really be appreciated
i am going to cut the flooring up and replace it because it is soft in alot of areas so my question is how do i know where to start also the transome looks like it is in very good condition the guy i bought it from said that he had used the boat last year and everything is ok but the flooring needs to be fixed please if anyone knows anythig about chrysler boats or has any specs or plans on this boat please contact me or email me some info where to start and how to start
i also want to add some washdown pumps should i put them thru the back part of the hull or thru the transome
phone - (718) 316-2719 email -
mountaintile@aol.com
thank you so much and please feel free to contact me asap anytime
thanks pete
Posted: Fri Jun 01, 2007 12:40 pm
by tech_support
Anonymous wrote:
phone - (718) 316-2719 email -
mountaintile@aol.com
thank you so much and please feel free to contact me asap anytime
thanks pete
Please read this...
http://forums.bateau2.com/viewtopic.php?t=13371
We are happy to help, but it must be done over this forum.
joel
Posted: Fri Jun 01, 2007 12:45 pm
by tech_support
made a bunch of 90 degree composite brackets. they are made from 12 oz Biax tape and scrap transom foam ......


They have come in very handy. I used them to secure the deck to the sides of the boat and to the frames - Very stiff.....

Posted: Fri Jun 01, 2007 1:06 pm
by crasea
Nice, did you cut the foam on a saw, and then tape it in?
Posted: Tue Jun 19, 2007 9:49 am
by tech_support
yes, the foam it scrap transom foam (super high density). We cut a lot of angles strips with the table saw, then used them as a core and glass taped on each side in a 90 degree plastic mold. Which produced a long piece of this...
You can see we used these on the hull to deck and also frame to deck. They stiffen up the deck quite a bit (you could almost walk on the deck after we glued them up). They are holding the deck in the correct position so that we can begin working on glassing the deck to the side of the hull
Posted: Tue Jun 19, 2007 10:09 am
by tech_support
Here you can see those composite braces at work under the deck - holding the deck to the frames and the sides.
with the deck held in place, we can begin shaping the hull to deck joint. The foam core of the deck is ground back a little, then we use some thin plywood (any cheap door skin/luan works) covered in packing tape (quick and easy mold release) to make a shaped fillet on the outside.

We used screws to hold the mold in place. pilot holes will keep the glass from cracking. The thin plywood will conform to the shape of the hull resulting in a clean extension of the lines up to the top of the deck level.

So now we have a clean angle. We will next run the router around the outside with a 1/2" round over bit to make a nice turn for the biax tape (you could also use a surform or sanding block if you dont have a router). We will use 2 layers of 12 oz biax tape for our outside hull/deck joint


Posted: Fri Jun 22, 2007 10:13 am
by milner351
Wow you guys do nice work!
I can't tell you how much I wish I'd have found this site BEFORE I did so much work to my boat.
I've done most of it as you'd recommend, but something's I'd have done differently - but it's too late now.
The worst part is the amount of time I spent thinking and re thinking and thinking some more about how to do each step - you guys could have set me up with the right cloth, right epoxy, lamination schedule, and I've likely saved several months of headaches!
This site ROCKS!
Posted: Fri Jun 22, 2007 11:54 am
by dewers
shine wrote:yes, the foam it scrap transom foam (super high density). We cut a lot of angles strips with the table saw, then used them as a core and glass taped on each side in a 90 degree plastic mold. Which produced a long piece of this...
You can see we used these on the hull to deck and also frame to deck. They stiffen up the deck quite a bit (you could almost walk on the deck after we glued them up). They are holding the deck in the correct position so that we can begin working on glassing the deck to the side of the hull
Could you possibly take a picture of the mold?
Posted: Fri Jun 22, 2007 11:58 am
by tech_support
here is the "mold" ....

Posted: Fri Jun 22, 2007 1:26 pm
by Q
Will you be cutting an "access" to the fuel tank in the deck to facilitate it's removal say, I don't know....20 years from now?
Posted: Fri Jun 22, 2007 1:33 pm
by tech_support
Q wrote:Will you be cutting an "access" to the fuel tank in the deck to facilitate it's removal say, I don't know....20 years from now?
There are holes for 2 deck plates, one over the fill/vent and another over the sender unit.
Posted: Fri Jun 22, 2007 2:10 pm
by dewers
shine wrote:here is the "mold" ....
THanks, that helps alot. It almost looks like some plastic roof railing
Posted: Fri Jun 22, 2007 2:22 pm
by tech_support
its a plastic fence post ripped in half, not a perfect mold but good enough for a few pulls
Posted: Tue Jun 26, 2007 4:02 pm
by dpurcell
I just looked through this thread for the first time, great tutorial on so many different areas. Very helpful and you guys are doing a phenomenal job on this boat. I have one question, why did you decide to cut the entire transom out when replacing/re-coring it rather than leaving the original outer skin cleaning it up and bedding the core into it? I may have to do the same thing on my restoration and just wanted to know the logic behind that decision. Thanks again for an awesome tutorial.
Donny
Posted: Tue Jun 26, 2007 4:34 pm
by tech_support
dpurcell wrote:I have one question, why did you decide to cut the entire transom out when replacing/re-coring it rather than leaving the original outer skin cleaning it up and bedding the core into it?
The outside skin was rotten and cracked, otherwise we would have kept it. If it would have bee even in decent shape, you just lay some new glass and reinforce the old outside skin. But, this one was too far gone
Today we glassed the rest of the hull to deck. Im thinking of doing something special with the hull/deck to show it off. This boat will have a perfect clean radius hull/deck - seamless, so I hate to cover that up with a big bulky rubrail (like they do in production boats) Maybe just a stainless steal profile. any ideas?
Posted: Tue Jun 26, 2007 5:09 pm
by Knottybuoyz
shine wrote:
Today we glassed the rest of the hull to deck. Im thinking of doing something special with the hull/deck to show it off. This boat will have a perfect clean radius hull/deck - seamless, so I hate to cover that up with a big bulky rubrail (like they do in production boats) Maybe just a stainless steal profile. any ideas?
The stainless will be nice Joel but how practical? I guess it depends on how you see the boat being used, bumping off of pilings and docks etc. I'm guessing some sort of accent brightwork is out of the question eh?
Posted: Thu Jun 28, 2007 10:58 am
by JimW
shine wrote: ....., so I hate to cover that up with a big bulky rubrail (like they do in production boats) Maybe just a stainless steal profile. any ideas?
How well do you pilot around the docks?
I agree it will look very good without the clunky tug boat hemp bumbers. Question is for how long?
Posted: Mon Jul 02, 2007 7:00 am
by Q
They do make some somewhat stylish rubrail in different colors, now. I was going to go this route with the Robalo eventually...to match the T-top canvas.

Posted: Mon Jul 02, 2007 7:49 am
by tech_support
JimW wrote:
How well do you pilot around the docks?
The near complete absence of tidal flow in the Indian River make us all look pretty good at the dock
Posted: Mon Jul 02, 2007 9:19 am
by JimW
Growing up near Tampa I was spoiled with nice easy tides. When I came here and started boating it blew me away that the creeks all swelled and dumped twice each day to the tune of 6 or 7 feet!
I guess you can only fit so much water through sebastian inlet.
Posted: Mon Jul 02, 2007 1:35 pm
by steve292
Try the bristol channel with 30 ft range on a neap tide.opened my eyes i'll tell you.
Posted: Tue Jul 10, 2007 5:18 pm
by tech_support
Posted: Tue Jul 10, 2007 5:45 pm
by dewers
are those shallow cuts I see in the wood?
Thanks
Dave
Posted: Wed Jul 11, 2007 7:56 am
by tech_support
yes, cuts in the foam allow it to take that tight radius at the. the cuts are filled before glassing the whole thing
Posted: Wed Jul 25, 2007 11:42 am
by tech_support
Great Thread
Posted: Wed Jul 25, 2007 1:39 pm
by keysrat
This is the finest tutorial I have ever seen on hull rebuilding. It shows me that virtually every repair I made on previously owned boats was done incorrectly.
My hats off to Joel- thank you for all of this excellent info. I will continue to follow this thread with great interest.
Posted: Wed Jul 25, 2007 2:27 pm
by Daniel Huckleberry
Did you happen to take before and after pics and measurements of your biceps and chest. I would be a neat comparison after the fairing is done!
Her lines are beautiful. Very nice work.
Huck
Posted: Wed Jul 25, 2007 2:53 pm
by tech_support
Daniel Huckleberry wrote:Did you happen to take before and after pics and measurements of your biceps and chest. I would be a neat comparison after the fairing is done!
Her lines are beautiful. Very nice work.
Huck
Goof fairing tools, proper techniques, and
having someone else on the fairing board will go a long way to reducing the agony
Posted: Wed Jul 25, 2007 4:09 pm
by TomW
Shine, I have rebuilt parts of boats before, but never before have I seen such craftsmanship in one complete rebuild. My hat is off to you and I assume the staff at Bateau helping you. It is a classic example of the way it should be done. I am so glad you are documenting it for all the future rebuilders to come.
My hats is off to you, especially with all your other duties.
Tom
Posted: Wed Jul 25, 2007 4:52 pm
by tech_support
Thank you for the kind words. I hope ii does turn out as nice as someof our recent customer's boats
So many projects, so little time
Posted: Wed Jul 25, 2007 9:56 pm
by Knottybuoyz
shine wrote: having someone else on the fairing board will go a long way to reducing the agony
My ole' grandpa used to say "the best tool in the shop was the apprentice" *lol* Since I don't have an apprentice, I'm trainin' the admiral in the fine art of fairing as we speak.
Nice work Joel. Looking forward to seeing the finished product.
Posted: Thu Jul 26, 2007 12:37 pm
by Q
Posted: Thu Jul 26, 2007 12:51 pm
by tech_support
There is fuel hose coming up from the gunnel (the fill will be on the deck) its hidden by the box under the gunnel. The hose coming from the sole is the bait well drain and fill.
The fuel hose is WAY too long, but it was the same price to buy a full length. Fuel hose is not cheap, we will use the excess sometime
Mounting motor?
Posted: Thu Jul 26, 2007 4:28 pm
by Tagged
Okay, maybe I missed something, but I thought you were going to build a splashwell at the transom. I don't see it. For that matter, I can't figure out how you're going to mount the motor.
Are you planning on adding a bracket? Oarlocks?
Tag
Posted: Thu Jul 26, 2007 4:41 pm
by tech_support
Since we are most likey going to sell the boat, I conformed to the desire of most for a clean closed transom with jackplate/bracket set up

I do admit it looks better that way. That how 100% of these boat are rebuilt. Like this one in Tampa....

Posted: Thu Jul 26, 2007 7:33 pm
by Cracker Larry
An OD18 would look real good with that interior setup
Less the tower. i'm saving that picture.
Great job Joel! Good education, good boat to work with. Those old Aquasports have always been a favorite of mine
Posted: Fri Jul 27, 2007 10:23 am
by tech_support
Posted: Fri Aug 03, 2007 9:46 am
by tech_support
Posted: Fri Aug 03, 2007 10:08 am
by gk108
shine wrote:just more fairing of the deck, expect to hear a lot about fairing
in the future...
Awww, c'mon now. You didn't even have to fair the outside.
I think that's the first time we've seen the cockpit drains in place. That always seems like a popular topic around here. I hope we get to see more about them.
Posted: Fri Aug 03, 2007 10:23 am
by tech_support
gk108 wrote:I think that's the first time we've seen the cockpit drains in place. That always seems like a popular topic around here. I hope we get to see more about them.
A few pages back we show how we made those drains. They will connect to scuppers - straight out the transom.
Posted: Tue Aug 07, 2007 12:32 am
by BuenKarma
Any luck on making some molds for the hatches? I am very eager to see what you came up with as I am new to the game and would love to be able to put flush hatches on my build when I get to that stage.
Caleb
Posted: Wed Aug 08, 2007 3:40 pm
by tech_support
We started on the new hatch drain mold. Its hard to see how it will turn out now. The flat part is the lip that is glued under the hatch, then the gutter is 1" from where the hatch rests, then there is a half turn where we trim the glass flush (the rectangle stock with the fillet). When we pull a part it will make sense.


Its made with (2) 1/2" quarter-round trim pieces and one 1/2" x 3/4" trim piece. Glued onto a 1/2" sheet of plywood, then wrapped in 6 oz. cloth and faired. From this point they will get more fairing.
This is a cheap and easy mold, not something withstand production level. But for anyone building or re-building a larger boat it makes sense to make a mold like this for all those hatches.
More fairing.....

Posted: Thu Aug 09, 2007 1:12 pm
by tech_support
More faring work and some work on the hatch lip mold.
Rolled on a thin coat of epoxy tinted with blue pigment, let cure, sanded with 60 grit. We later applied coat of white primer. After the primer dries we will sand it and the high spots will stand out (dark).


Rolled extra primer onto the boat. You can never be sure how fair your surface is until you get an even white coat on. The majority of this primer will be sanded off and then will go back to quickfair to fill in what needs more filling. Quick Fair is epoxy, the primer is epoxy, there is no problem going over the primer with the quick fair
It looks real nice.....


Until you get this close
Just need more work and it will be prefect

Look at the sides of the boat (between the frames). You will notice for the first fairing we used a mix of our blended filler and Marinepoxy - its the dark purple/brown surface.

After sanding the first fairing, we go to Quick Fair, QF is the light tan material. There is nothing wrong with using QF on the entire surface. We just like to get the big areas filled with our own blend, then save the QF for the last. QF is better than what you can mix yourself.


Posted: Fri Aug 10, 2007 11:13 am
by tech_support
"dusted" the port side deck with quick dry spray primer (over the white primer from the day before).


Using a 30" fairing board, we sand the deck exposing the highs and lows. If you do not use a long board, you will just sand the highs lower and also sand the lows lower. The idea is that the long board spans over the lows and only removes from the highs. If you are to have any shot at a perfect finish, you should use a fairing board. We sell the one we use (3M hook and loop), or you can build a less fancy one from thin plywood (do a search of the forum to find the thread where we show how to do this)
This is the very same spot as we showed yesterday. (BEFORE)
(AFTER)

you can now "read" the surface as you would a topographical map
The very high spots are where you see fairing and/or glass (far left side of picture). The large spot in the middle where you can still see the gray spray primer mist is the low spot. The plain white is where we sanded just enough off to remove the spray primer. Next we will fill the lows with more Quick Fair
Also did more work on the hatch lip mold. Basically we are fairing it in the same way as the deck. With the low angle shot you can really see the highs and lows. The mold will require more work until its good enough to pull parts from...


These are the hatch covers, now being faired - they are about finished, next step will be primer. I am so glad I did not go the pre-made hatch route. These babies are going to be slick

[/img]
Posted: Fri Aug 10, 2007 4:44 pm
by Cracker Larry
Looking good. Glad to know I'm not the only one sanding
The finishing information is just what I needed to know. You answered several questions that I had. Thanks. That was very timely
One more question. What is the pot life and working time of the primer in this heat? Can you mix and apply a whole quart at once ,or should I mix it in smaller batches?
Posted: Mon Aug 13, 2007 11:18 am
by Mad Dog
I know you are going the extra mile to perfect the finish of the cap, that makes a lot of sense. What about the sole? Will you do it the same way or since it is inside and under foot not worry with the finish quite as much?
By the way, seeing your work is really motivating. And, makes me think I actually might be able to do a decent job on my project.
Posted: Tue Aug 21, 2007 2:30 pm
by tech_support
more fairing work, put the console in just for the picture.
We are getting ready to put her on the trailer, should be on there tomorrow. The we will finish the fairing and glass down the console and leaning post.


Posted: Tue Aug 21, 2007 3:20 pm
by timoub007
That thing is looking sweet Joel. What color scheme are you thinking about for the exterior? Maybe I missed it, but what motor did you guys decide on, if you have yet?
Thanks for the update,
Tim
Posted: Tue Aug 21, 2007 3:39 pm
by tech_support
Thanks Tim.
Nothing is decided on the color or power. I am pretty sure we will sell this boat, so it would be best to let the buyer pick colors. We will get her all faired and primed so she looks pretty.
The power could be anything from a 130 to 200. A 200 would be very heavy, but some of the guys running these boats prefer to over power them
. Engine will be mounted on either a 10" jack plate, or a scissor type lift...

Posted: Tue Aug 21, 2007 10:43 pm
by timoub007
Yeah, I've seen those Portabrackets and find them interesting. I imagine that putting the motor that far back, even a lighter motor, would impact static draft a good bit.
If you went with a 200 ETEC, the small block, it only weighs about 420 +/- pounds, the same as the 150 and 175. The small block (2.6 L) Yamaha HPDI 150/175/200 is close to the same weight, maybe 50 pounds more. I think those are the only two 200's that are still trim around the middle. I could be wrong though.
Tim
Posted: Wed Aug 22, 2007 4:57 pm
by tech_support
Posted: Thu Aug 23, 2007 10:17 am
by Daniel Huckleberry
Is this her "coming out" party?
Posted: Thu Aug 23, 2007 10:45 am
by tech_support
she is out, moved some stuff around in the warehouse, then moved her right back in.
having the boat blocked up the warehouse for the last 8 months has kept us from being able to use all our storage space. Now that she is on the trailer, we can move her in and out. We did not want to move her until the deck was glassed to the hull.
I dont have a weight on the hull, but I am sure she is lighter than before.
Wet on wet
Posted: Wed Aug 29, 2007 4:59 pm
by javelin90
Joel, i know that you apply wet on wet when working on the woof flour fillet. Can you do the same wet on wet when appling fiberglass 1708 to the hull and or other areas?
Thanks
Re: Wet on wet
Posted: Thu Aug 30, 2007 12:14 pm
by tech_support
javelin90 wrote:Joel, i know that you apply wet on wet when working on the woof flour fillet. Can you do the same wet on wet when applying fiberglass 1708 to the hull and or other areas?
Thanks
Yes, Ideally you would do all the laminations at one time. For example when putting in the new inside and outside skins for the transom, we put in all the layers of heavy biax (used a combination of 1708, 1810, and LT1700). I HIGHLY Recommend doing it this way. It will go quickly if you have all the pieces pre-cut and fitted. Look back in this thread and you will see we used reference lines drawn with the a Sharpie pen on the transom and the pieces of glass - then everything folded where it was supposed to. You will have to make slits in the heavy biax to allow it to confrom in corners. Use this technique on your boat, and it will save you time and make for cleaner laminations
In thi picture we are laying in the new outerskin into a mold, you can see the line up markes and also see how the glass folds over itself int he corner where the side/transom/bottom meet.

As an aside, if you tried to do this with polyester or vinylester, you would run a huge risk of an exotherm and big time shrinkage
Shrinkage meaning the part would buckle and deform because the resin kicked off - not a issue with the epoxy!
Layers?
Posted: Tue Sep 04, 2007 12:51 pm
by javelin90
Joel, I have removed two (2) layers of fiberglass from my hull and am replacing all the wood. How many layers should i place back? The original two? Or would three layers(1 layer 1708 w/ 8 oz mat/ 2 layers 1700 w/out mat be overkill? After removing the two layers i only ground the hull smooth removing any loose fiberglass/dried polyester resin. I am taking my time and removing all the wood that has gotten wet. I read how to use a wood flour mix to make a nice fillet. I tried it in one area and it worked perfect no the hull. The second time the cloth did not set well and i had air bubbles underneath and decided to remove the cloth before it set. I also was doing it outside under the bright sun. Would that have any affect on the resin itself? On the fillet i need to wait till the fillet is jsut tacky to the touch and then aply the cloth?
I will post some pictures tomorrow night and highlight the areas and see what your thoughts are for the best method of laying the glass in this area.
Many thanks, G.
Re: Layers?
Posted: Tue Sep 04, 2007 1:00 pm
by jacquesmm
Joel is on vacation but since I am the one usually giving the specs, I can do it directly. See below:
javelin90 wrote:Joel, I have removed two (2) layers of fiberglass from my hull and am replacing all the wood. How many layers should i place back? The original two?
Where on the hull?
Transom? Sides? When you say two layers, what thickness was that?
Let's assume that this was standard lamination of 24 oz. roving and 1.5 oz mat per layer. In that case, I would replace it with 2 layers of 1708 in epoxy.
Or would three layers(1 layer 1708 w/ 8 oz mat/ 2 layers 1700 w/out mat be overkill?
Depends where . . . but no need for mat. there is enough mat in the 1708.
After removing the two layers i only ground the hull smooth removing any loose fiberglass/dried polyester resin. I am taking my time and removing all the wood that has gotten wet. I read how to use a wood flour mix to make a nice fillet. I tried it in one area and it worked perfect no the hull. The second time the cloth did not set well and i had air bubbles underneath and decided to remove the cloth before it set.
Do you mean you were trying to install a new stringer? Where is that fillet? Between which parts?
I also was doing it outside under the bright sun. Would that have any affect on the resin itself?
Try to work in the shade. The heat from the sun may provoke some degassing but as long as don;t know on which parts you work, I can not tell.
On the fillet i need to wait till the fillet is jsut tacky to the touch and then aply the cloth?
I will post some pictures tomorrow night and highlight the areas and see what your thoughts are for the best method of laying the glass in this area.
Many thanks, G.
Yes please, I will understand much better with pictures. Sorry but I have no idea what you are working on.
Are you reinforcing the bottom or installing the transom or installing stringers?
pics
Posted: Tue Sep 04, 2007 8:46 pm
by javelin90
Jacques, I will get the pictures tomorrow night.
thanks for your patience and help.
Garland
Posted: Wed Sep 05, 2007 11:07 am
by jacquesmm
Please start a new thread when posting pictures. Let's reserve this one for the Aquasport.
Floatation Foam?
Posted: Sun Sep 09, 2007 12:41 pm
by anonymous
Joel, I thoroughly enjoy your forum and would like to thank you for all of the insight you have provided. My question is a simple one, what are your plans for floatation now that the decking is installed?
Posted: Sun Sep 09, 2007 1:03 pm
by anonymous
Everyone of the compartments under the sole is filled with foam. At least 24 cubic feet, or 1,500 pounds of flotation. Also the sole itself is bouyant, as well as the deck. We will prob. add more flotation blocks under the gunnels (out of site). The boat will be unsinkable
Posted: Wed Sep 12, 2007 12:08 pm
by anonymous
Great work! If you don't mind me asking, how much will this Aquasport go for when finished.
Posted: Wed Sep 12, 2007 12:22 pm
by tech_support
it really depend how far we take it (how much we have in it). If your interested, please shoot me an email
Posted: Fri Sep 21, 2007 11:43 am
by tech_support
Gluing up the the hatch lips, which have a drain built into them. The pieces are made on a mold, they we will fit together with a 45 degree miter cut (which is filled with epoxy glue).
Here is the profile.....

Here is the first piece being glued up...

mold type
Posted: Sun Oct 28, 2007 6:37 pm
by javelin90
Joel, I am interested in what you used as a mold? I'm going to place a recessed tray for the trolling motor in the front and would like to know what you used as a mold. I like the lip for the drainage.
Thanks, G
Posted: Mon Oct 29, 2007 8:16 am
by tech_support
We made a simple mold from a piece of plywood and a couple of the shelf trim stock from the home despot
I will get a finished picture of the mold, but here is shot of it while is being faired...
Posted: Tue Oct 30, 2007 10:49 pm
by Seamonkey
Any interest in selling lengths of those hatch lips? I would like to save some time making and faring my own mold. If so can you estimate the price per foot? I am not sure how much I would need at this time, but I can make some measurements if you are interested in selling them.
Thanks again.
Posted: Wed Oct 31, 2007 2:10 am
by SkeeterSK
Seamonkey wrote:Any interest in selling lengths of those hatch lips? I would like to save some time making and faring my own mold. If so can you estimate the price per foot? I am not sure how much I would need at this time, but I can make some measurements if you are interested in selling them.
Thanks again.
X2
Posted: Thu Nov 01, 2007 5:32 pm
by txtrailerdaddy
SkeeterSK wrote:Seamonkey wrote:Any interest in selling lengths of those hatch lips? I would like to save some time making and faring my own mold. If so can you estimate the price per foot? I am not sure how much I would need at this time, but I can make some measurements if you are interested in selling them.
Thanks again.
X2
Ummm, yeah, me too!
Posted: Wed Nov 14, 2007 3:59 pm
by tech_support
Posted: Thu Nov 15, 2007 7:28 am
by javelin90
looks good. Is the fiberglass sock something you have recently started selling? I need to run some drain tubes from the front of the boat to the rear. Could i use something like this or better to use heavy scd pvc pipe?
Thanks
Posted: Thu Nov 15, 2007 7:53 am
by tech_support
We have had it for a few years. Mainly we use with a carbon fiber sock for masts/push poles.
BBC is down right now, but I will post a link to the sock later
Posted: Mon Nov 19, 2007 2:05 pm
by Mad Dog
Shine,
I was just reviewing your gallery on this AS project. I have some thoughts about my own project and was looking for answers before I posted a question. But, I did not see what I was looking for. In my AS there is a liner (for lack of a better description) inside the gunnels that runs from the sole to up under the cap. It is not part of or attached to the cap. It is tabbed to the gunnel under cap enough to be out of sight. At the bottom the liner is where the sole edge is tabbed in, not to the gunnel. My question is did your AS have a liner like that which you would have removed during the tear down? Mine is a thin wall which would not hold any sort of attachments like horizontal rod holders or tie downs, etc. I am of a mind to remove those in order to attach braces as you did. Would that be an issue? Should I keep the liner because it is part of the original design?
Also, as I reviewed the gallery I never saw any bilge vents installed. Will your rebuild include any? Are they necessary/required with under deck fuel tanks? Since all the electrical runs in chase tubes are the vents necessary? Come to think of it unless the fuel tank springs a leak any gas fumes should escape through the tank vent. If the tank does leak I have a big problem anyway.
Thanks for your help.
Posted: Sat Dec 01, 2007 5:15 pm
by anonymous
Our AS was previously "re-built". There was not a liner, just a cap.
The only bilge area in our AS is right in the transom area, about 8" deep and 20" wide - more of a small sump area than a bilge. All the boxes under teh sole are sealed and full of foam - nothing to vent.
Posted: Sat Dec 01, 2007 7:13 pm
by jacquesmm
Joel, you are supposed to be at your brother's wedding. Stay away from that new laptop.
Posted: Sat Dec 01, 2007 10:10 pm
by Mad Dog
jacquesmm wrote:Joel, you are supposed to be at your brother's wedding. Stay away from that new laptop.
JM, Leave Joel alone. I've been waiting on this answer for a month.
Posted: Sat Dec 01, 2007 10:20 pm
by Mad Dog
shine at home wrote:Our AS was previously "re-built". There was not a liner, just a cap.
The only bilge area in our AS is right in the transom area, about 8" deep and 20" wide - more of a small sump area than a bilge. All the boxes under teh sole are sealed and full of foam - nothing to vent.
Thanks. I think I will remove the liner from my AS. It is beat up and flimsie. Plus, if I remove it I can put in braces to support the cap.
Posted: Thu Dec 06, 2007 8:43 am
by tech_support
The cap is worth saving unless its completely rotten. Not having a decent cap will add at least $2500 in material/labor to the cost of out AS rebuild. The plus side is that we made a deck that is totally unique and quite pretty
The liner will normally include the sole. the sole is EASY to replace fully because it is flat.
I will answer the questions specific to your boat in your thread, I dont want to confuse the two for someone just reading this for the first time
Joel
Posted: Tue Dec 11, 2007 10:08 am
by tech_support
Posted: Tue Dec 11, 2007 11:00 am
by PaulMcClure
The S3 Yacht Primer looks great, seems an improvement over the WR-155. I'm waiting for a shipment of it right now and can't wait to try it out. I feel a new paint job on my Invader coming on
Posted: Tue Dec 11, 2007 12:34 pm
by javelin90
Wow, it is looking nice and was good to see boat repaired from bad to really nice. I will keep the product on mind.
Posted: Tue Dec 11, 2007 1:32 pm
by steve292
PaulMcClure wrote:The S3 Yacht Primer looks great, seems an improvement over the WR-155. I'm waiting for a shipment of it right now and can't wait to try it out. I feel a new paint job on my Invader coming on
Good, you have just saved me a phone call, can you post on my build thread when it's in please Paul?Then i'll call you to discuss quantity, & other paint type stuff. Sorry for the small hijack Shine
BTW Thats a great job on the aquasport.
Steve
Posted: Tue Dec 11, 2007 1:53 pm
by PaulMcClure
Steve, no problem.
Posted: Thu Dec 13, 2007 5:45 am
by Q
shine wrote:The cap is worth saving unless its completely rotten. Not having a decent cap will add at least $2500 in material/labor to the cost of out AS rebuild. The plus side is that we made a deck that is totally unique and quite pretty
The liner will normally include the sole. the sole is EASY to replace fully because it is flat.
Joel, My Robalo comes home for restoration in a few days, so last night I spent hours going over this entire thread and I have a question...I understand this particular Aquasport was a previous rebuild attempt leaving you with an undesirable cap and minus the liner that would have included the sole...so the question is this:
How likely is anyone going to be able to remove a liner? Complete? In sections perhaps? Any advice on that? After perusing the Mako rebuild forum, I saw only ONE rebuild in which the liner and sole were removed, rennovated, then re-installed.

Posted: Sat Dec 15, 2007 8:13 am
by tech_support
Q wrote:
How likely is anyone going to be able to remove a liner? Complete? In sections perhaps? Any advice on that? After perusing the Mako rebuild forum, I saw only ONE rebuild in which the liner and sole were removed, rennovated, then re-installed.
NOt easy, because it should be bedded down with putty.
If you have to take it out in parts, try to make the cuts where they are easy to fair back in. (assuming you want to use the liner again)
There is a local guy rebuilding seacraft, he said his entire liner had broker free from the stringers - they brittle old polyester putty has finally given up. I guess the better the boat was put together the more difficult it will be to demo
Posted: Thu Jan 03, 2008 1:10 pm
by tech_support
Posted: Mon Jan 14, 2008 10:12 am
by tech_support
Posted: Mon Jan 14, 2008 10:56 am
by SkeeterSK
Wow, its starting to look like a boat! A U-boat, but a boat nonetheless
Damn, that would a cool paint scheme for a boat like that, paint it up gloss grey with some big white block letters like a navy ship. How many white, beige, yellow, baby blue, and seafoam green center consoles can we take?
Give the idea a little time to set, haha.
Hey Joel, did you punch the holes through for your bow eye yet? Did you do any repair to that area? Mine was all busted out, and currently it has a bunch of layers on the "inside" of biax, then a big glob of putty, and a peice of 3/8" Meranti plus another few layers of biax. Unfortunately before I put down the first layer of biax I didnt have the forthought to clean up the broken edge in the hull and put down some packing tape and putty, so essentially I have a solid surface on the inside but still a big oval hole in the hull where the bow eye went. Should I just feather the old glass back, then fill it with quick fair to match the surrounding contour, put two holes in it and be done(but have the bow eye sitting on a radius)..
I dont think thats the way to go, but I am torn between doing the above and simply flattening it where the bow eye sets, or actually building up a pad that sits above the surrounding contour. Your thoughts?
Posted: Mon Jan 14, 2008 11:11 am
by tech_support
You have plenty of glass/wood on the inside. I would just fair the outside and re-drill the hole. I would use wood flour (or another Hard filler) as apposed to fairing blend for this. A fairing blend (blended filler or quickfair) is too soft and may compress when you tighten down the bow eye
I like the gray color too, but its just primer. The last surfboard we built here we made gunmetal gray with red stripes. The Aquasport will get a white or off white paint job (neutral) whoever buys it from us can pick another color if they like.
Posted: Wed Jan 23, 2008 9:04 am
by tech_support
Fitting hardware.
I wanted to keep the deck super clean, so for the stern cleats we used hause pipes and kept the 6" SS cleats mounted to the rear bulkhead.

Bow cleat is a large pop up cleat, with stud mounts (no visible fasteners).

The hatched get nice SS twist latches


I still have to find the right rod holders for the gunnels. Will do the traditions 4 rod holders plus a couple more forward (for drift fishing).
Rubrail is ordered with any luck we will get to paint next week. I think we will do the outside hull/gunnel/and coming with a Hatters White (sterling LPU), then use a System three paint for the inside.
Posted: Wed Jan 23, 2008 11:07 am
by Mad Dog
I like where you put the cleat on the rear bulkhead. The original mounts where too high for my liking. You have made it so one can hold the rope while leanning against the cap and reach down with the other hand to tie off. If the cleat were higher the cap edge would be an obstruction. Good job
Posted: Wed Jan 23, 2008 5:30 pm
by topwater
Looks great shine
What kind of engine bracket are you thinking of useing?
Armstrong with built in swim platform?
Posted: Thu Jan 31, 2008 2:53 pm
by tech_support
We are going to sell the boat, so the future owner will be the one who rigs it. The boat could take either a 10" setback jackplate or one of those porta brackets
Got the first coat of Sterling on the outside of the boat... The color is Matterhorn White, it will look more "white" once we get another coat or two applied.

Posted: Thu Jan 31, 2008 4:47 pm
by javelin90
Wow, it looks nice. I do believe you have sold me on using some of that product.
Great my wife will love the money spent LOL
Thanks Joel
Posted: Fri Feb 01, 2008 11:21 am
by tech_support
Just put on the second coat this morning - it looks incredible.
Now check this out.... This taken from a 1965 issue of yachting magazine.....

Posted: Fri Feb 01, 2008 11:26 am
by tech_support
Adjusted for inflation that boat with a gas sterndrive sold for over $42k in 2006 dollars in 1965
Posted: Fri Feb 01, 2008 11:49 am
by gk108
Twin Homelite 55's
Posted: Fri Feb 01, 2008 12:08 pm
by javelin90
I am looking forward to seeing updated pictures of the additional coats.
Posted: Fri Feb 01, 2008 1:04 pm
by tech_support
gk108 wrote:Twin Homelite 55's
Posted: Fri Feb 01, 2008 3:14 pm
by jacquesmm
That warped bottom looks very much like the Abaco 23 except that the AB23 has more deadrise.
Posted: Mon Feb 04, 2008 9:01 am
by TexasFlats
Joel,
Are you spraying the Sterling, or is that roll and tip?
Looks great either way!
TF
Posted: Mon Feb 04, 2008 9:02 am
by tech_support
roll and tip
Posted: Mon Feb 11, 2008 10:02 pm
by Seamonkey
Any helpful hints for the rolling and tipping? We are doing the same but our work seems to be coming out with a little more brush marks. We are using Interlux Epoxy Primkote (with brushing thinner added).
Of course that is just the primer so maybe once we get the top coat of Interlux Perfection on there it will look similar to your work.
Posted: Tue Feb 12, 2008 7:53 am
by tech_support
i do not bother to tip the primer - its has to be sanded anyway.
Posted: Wed Feb 27, 2008 9:15 am
by tech_support
Posted: Thu Feb 28, 2008 12:26 pm
by javelin90
It looks greaT!!!!!!!!
G.
Posted: Thu Feb 28, 2008 6:18 pm
by stevet
Hi Shine,
Fantastic looking job on that Aquasport. Is that Kiwi Grip you're using on the deck?
Cheers -Steve
Posted: Fri Feb 29, 2008 8:34 am
by JimW
Damn you're good Joel!
Posted: Wed Mar 05, 2008 11:37 am
by 3rdday
gk108 wrote:Twin Homelite 55's
They put twin homelite 55s on the 21 seacraft also! johnson & Kirby sold lots of Em in Miami.
Posted: Wed Mar 05, 2008 1:26 pm
by tech_support
stevet wrote: Is that Kiwi Grip you're using on the deck?
Cheers -Steve
Yes. I believe we will it in stock and ready to ship in a few weeks.
Posted: Fri Mar 07, 2008 1:09 pm
by tech_support
Posted: Fri Mar 07, 2008 2:02 pm
by Mad Dog
That last pic really shows how sharp this lady is going to look. Great job gentlemen.
Posted: Fri Mar 07, 2008 2:06 pm
by TomW
Outstanding work Shine and all. It is really looking good.
Tom
Posted: Wed Mar 12, 2008 3:24 pm
by tech_support
Posted: Wed Mar 12, 2008 6:56 pm
by Knottybuoyz
Very nice work Joel. Excellant tutorial too! I don't think she'll sit for sale very long!
Rick
Posted: Fri Mar 14, 2008 11:52 pm
by Chickenhawk
I wish I could....very nicely done. I learned a lot here. Excellent job
Rusty
Posted: Mon Mar 24, 2008 3:04 pm
by dborecky
Fanstatic job Joel.
I was wondering if you have that Kiwi stuff available for sale? I'm thinking of using it on the FS14.
I also was wondering if you there are any gunnel mounted rod holders on the rig?
Derrick
Posted: Mon Mar 24, 2008 3:49 pm
by tech_support
dborecky wrote:
I was wondering if you have that Kiwi stuff available for sale? I'm thinking of using it on the FS14.
Derrick
Yes, its up at BBC and we shipped the first can today
here is the link
http://boatbuildercentral.com/products.php?cat=62
I also was wondering if you there are any gunnel mounted rod holders on the rig?
There is not enough cockpit depth to have more than one on each side, I put on on the port side - it would good for a deck brush.
Posted: Wed Mar 26, 2008 7:41 am
by JimW
Joel,
Flush mount gunwale rodholders, not under gunwale racks? You're probably leaving that personal decision to the lucky fisherman who steals this boat from you, right?
Posted: Sun May 11, 2008 9:34 pm
by Knottybuoyz
What's up with the boat Joel? Did it sell?
Posted: Mon May 12, 2008 9:18 am
by tech_support
yes, its sold. The new owner should be picking it up this week or next.
Posted: Mon May 12, 2008 9:24 am
by Knottybuoyz
shine wrote:yes, its sold. The new owner should be picking it up this week or next.
Cool! Way to go Joel. That was one helluva project!!!
What's next?
Posted: Mon May 12, 2008 9:50 am
by Mad Dog
shine wrote:yes, its sold. The new owner should be picking it up this week or next.
Congratulations on sale, not to mention a job well done.
We are looking forward to the "how to" video part of the project.
Did you tell the new owner we have to have pics of the fully rigged and splashed project?
Posted: Tue May 13, 2008 7:21 pm
by Copro
So what did it sell for??
Jody
Posted: Wed May 14, 2008 9:39 am
by tech_support
What's next?
I think an FS17
We are looking forward to the "how to" video part of the project.
Did you tell the new owner we have to have pics of the fully rigged and splashed project?
Yes the tutorial on this one is going to be enormous, I am going to try and cover everything from how to select a good re-build candidate to painting.
The boat is sold as is, so it still has a lot of rigging to be done (I hate rigging and we do not have time to do it anyway). For that reason, we sold it for a little more than the material and labor cost; a bit under what we were asking for ($12k).
The new owner is going to have a custom tower built, rig it with a bracket and a new Suzuki 175, he will have double in the engine and rigging than what he has in the hull
Part of the deal is that i get to go on a fishing trip when its ready.
Posted: Wed May 14, 2008 10:08 am
by tech_support
rubrail is on, white insert for rubrail goes in next, plus end caps...
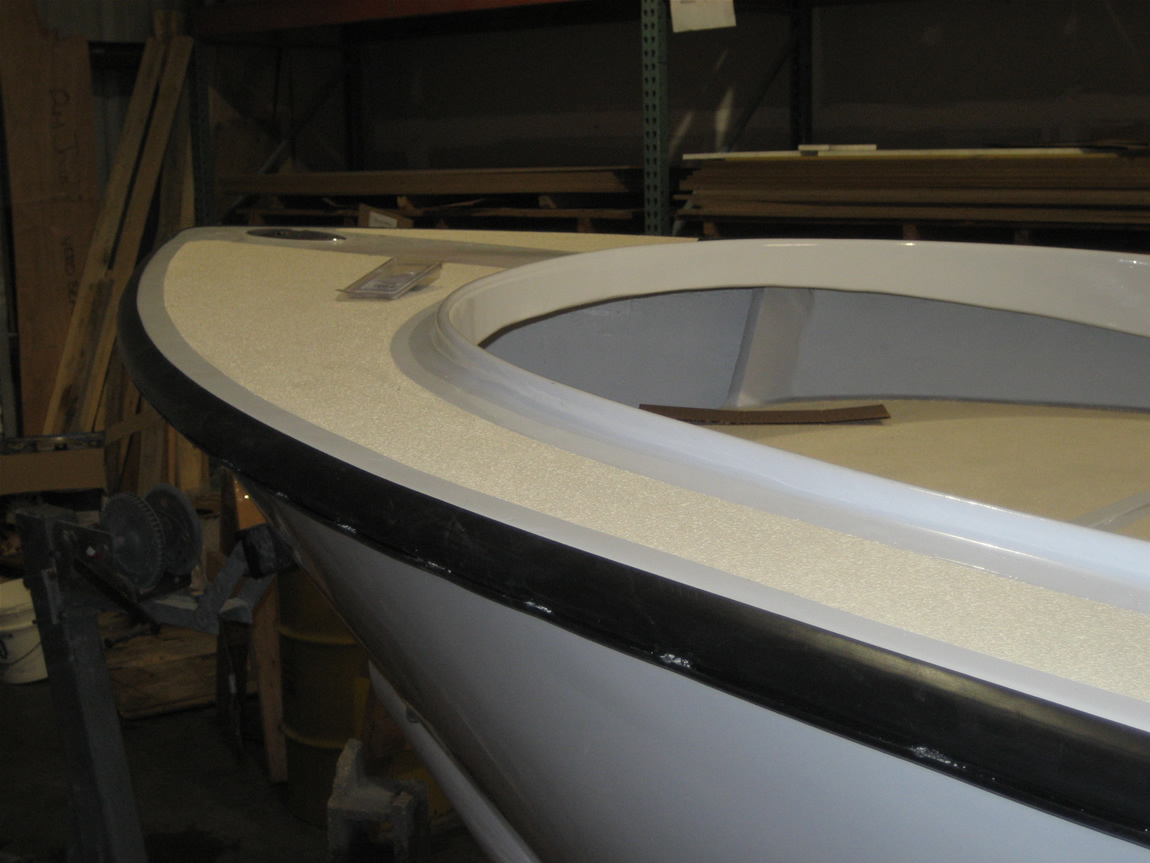
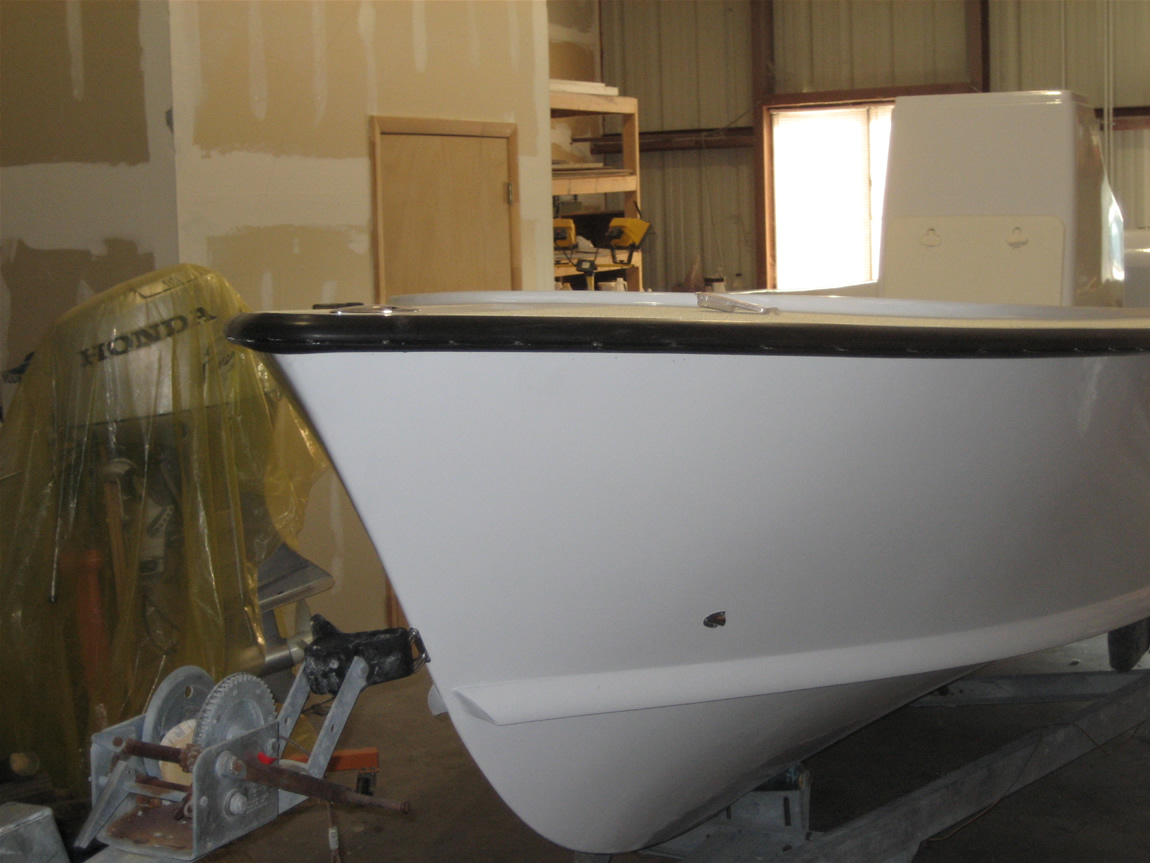
In the foreground of this picture you will see our rubrail heating tool (28 quart turkey fryer)
Used it to heat about 5 gallon of water to 180 degrees that was dumped into a drum with the rubrail and half filled with water - this was enough to make the rubrail quite limber for stretching
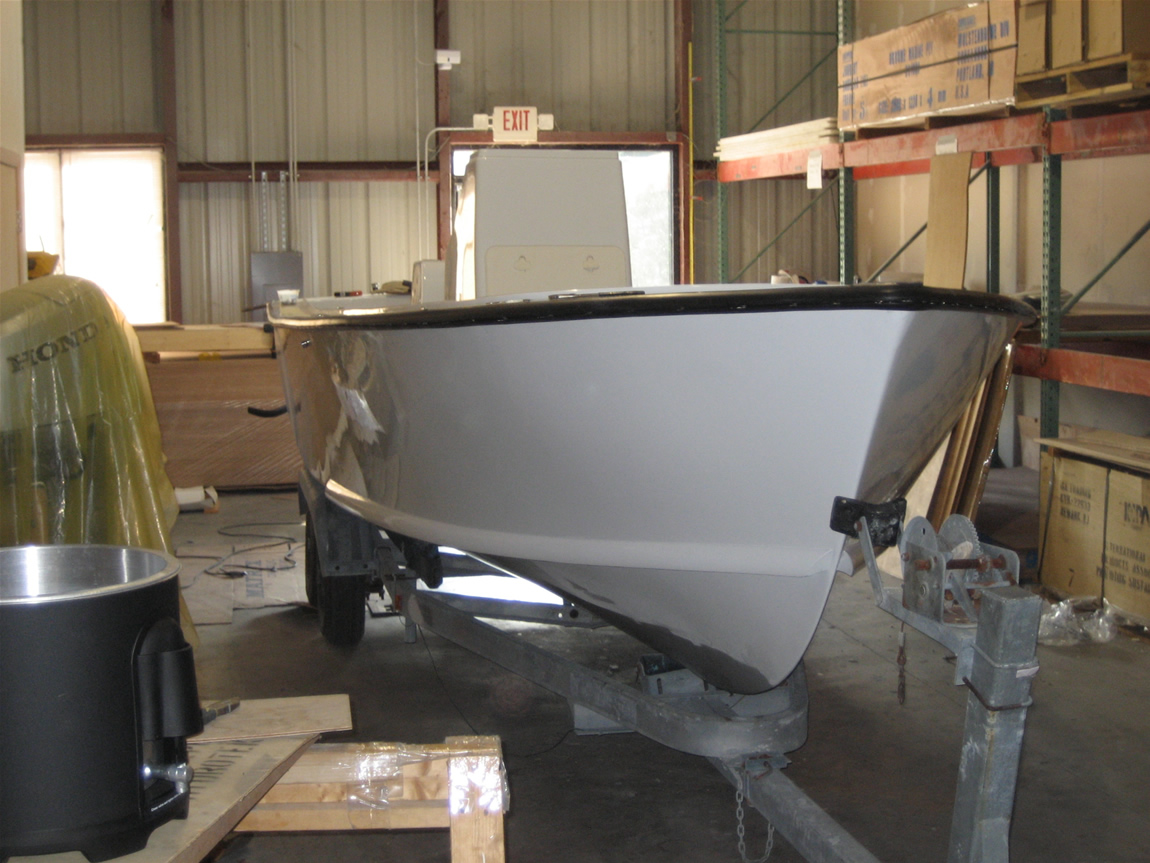
Posted: Wed May 14, 2008 11:03 am
by Mad Dog
shine wrote:
In the foreground of this picture you will see our rubrail heating tool (28 quart turkey fryer)
Used it to heat about 5 gallon of water to 180 degrees that was dumped into a drum with the rubrail and half filled with water - this was enough to make the rubrail quite limber for stretching

Thanks for posting that little tip
I never thought about how stiff the rubrail is going to be. This is going to save me some major frustration. Let me see if I got it straight;
Heat 5 gallons of water (got a big fryer).
Put rubrail in a barrel (what ever is available)
Dump hot water in the barrel (softens rubrail but too hot to handle)
Add tap water to about half (to cool down to working temp)
Posted: Wed May 14, 2008 11:18 am
by tech_support
tap water was already in the barrel so that it mostly covered the coiled up rubrail, the hot water just brought the level up over the rubrail. Yo may have to heat up more water until you feel it limber up. I would say 130-140 is plenty to soften the rubber.
If I were not inside a warehouse, I would have lit a fire under the drum
Posted: Wed May 14, 2008 11:47 am
by Mad Dog
shine wrote:
If I were not inside a warehouse, I would have lit a fire under the drum
Yea, I know what you mean. I can hear my neighbors now, "Uh, Charles why are building a fire on your driveway and what are you planning to cook in that big barrel?"
They already think I'm out of my mind for rebuilding a boat anyway.
MD
Posted: Tue Jul 08, 2008 10:23 am
by anonymous
I found that laying my rubrail in the afternoon sun for an hour or so was more than sufficient to soften it up for installation.
Josh
Posted: Wed Sep 10, 2008 9:10 am
by tech_support
Posted: Wed Sep 10, 2008 10:00 am
by Knottybuoyz
What the heck is that tube device on the left hand side of the motor bracket? It's got "power something XL" on it!
I would imagine the fit-out and rigging of a boat like that is a pretty impressive investment too eh?
Posted: Wed Sep 10, 2008 10:15 am
by Gramps
Knotty it is a PowerPole used for shallow water fishing. It is a hydraulic "anchor" much easier to deal with, good holding power and stops you immediately. They are used in up to 8' of water with the XL model. Many folks on the flats use them, pole or troll near a school, drop the power pole and fish to them. Only downside, $1,200 for the kit and rumor has it they need repair often.
Heck of a rig there, makes me itch for a truck and a big workshop.
Posted: Wed Sep 10, 2008 10:35 am
by Knottybuoyz
Ahhhhhhhh gotcha! On bigger ships they're called "spuds" or "jack spuds". Some of the Coast Guard ships used to have them for servicing buoys in shallow fast running water. Well same idea anyways. Nice piece of kit!

Posted: Wed Sep 10, 2008 11:29 am
by fmiles
Ok, have pondered a while, and cant resist asking stupid question: What's is that device mounted to the transom in the second picture? Is it an underwater light? It cant be a scupper, thats already there.
If its a light, why?
Posted: Wed Sep 10, 2008 11:32 am
by tech_support
yes, its an underwater LED light.
It purpose it to make the boat look really cool at night
It also attracts bait when night fishing.
Posted: Wed Sep 10, 2008 4:16 pm
by topwater
Shine i hope you told them to drill oversized holes
fill them and redrill them
thats alot of hardware.
Posted: Wed Sep 10, 2008 4:33 pm
by TomW
You definately sold that boat to someone who knew what they wanted Shine. They are doing an outstanding rigging job. Hopefully not to much?
Tom
Posted: Wed Sep 10, 2008 9:29 pm
by zach103
only one outboard? ONE? come on lol. that beauty deserves two.. two 200 hp babies
Posted: Thu Oct 23, 2008 9:36 am
by tech_support
Re: Aquasport Rebuild - Classic "Flatback"
Posted: Mon May 09, 2011 10:56 am
by ricklawren
is the boat for sale?
Re: Aquasport Rebuild - Classic "Flatback"
Posted: Tue Sep 20, 2011 1:33 pm
by tech_support
sold it 3 years ago
Re: Aquasport Rebuild - Classic "Flatback"
Posted: Tue Jul 24, 2012 8:42 pm
by Cracker Larry
Re: Aquasport Rebuild - Classic "Flatback"
Posted: Wed Jul 25, 2012 8:58 am
by Mad Dog
edmond92 wrote:Hi i am the seo manager of the sunset marine inc,
I've been in corporate life for 30 year but I have no idea what the SEO position is.
MD
Re: Aquasport Rebuild - Classic "Flatback"
Posted: Wed Jul 25, 2012 9:12 am
by tech_support
"search engine optimization"
I get at least one call a day from a telemarketer, and now they spam our forum
If you spend money with google or own websites, you will get same calls
I deleted his account
Re: Aquasport Rebuild - Classic "Flatback"
Posted: Wed Jul 25, 2012 9:24 am
by Mad Dog
Now, I get it.
I am so out of touch sometimes.
MD
Re: Aquasport Rebuild - Classic "Flatback"
Posted: Wed Jul 25, 2012 9:26 am
by tech_support
I am so out of touch sometimes.
not always a bad thing
Re: Aquasport Rebuild - Classic "Flatback"
Posted: Wed Jul 25, 2012 4:59 pm
by ks8
shine wrote:I am so out of touch sometimes.
not always a bad thing
too true...


 [/img]
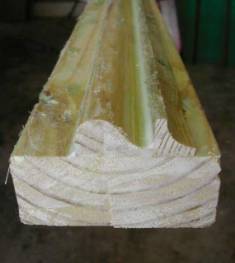
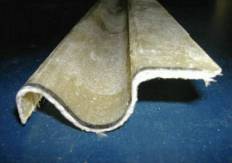
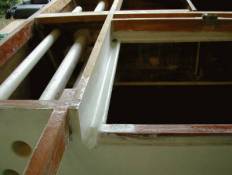


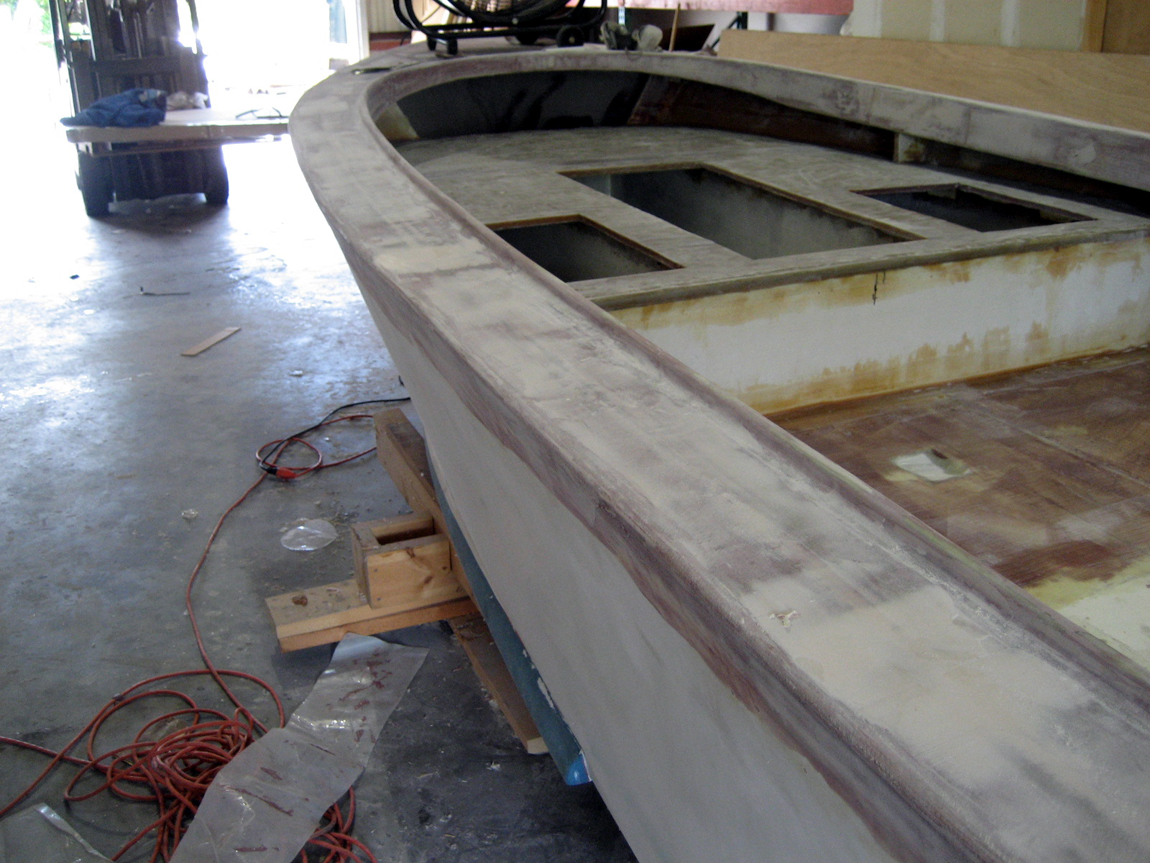


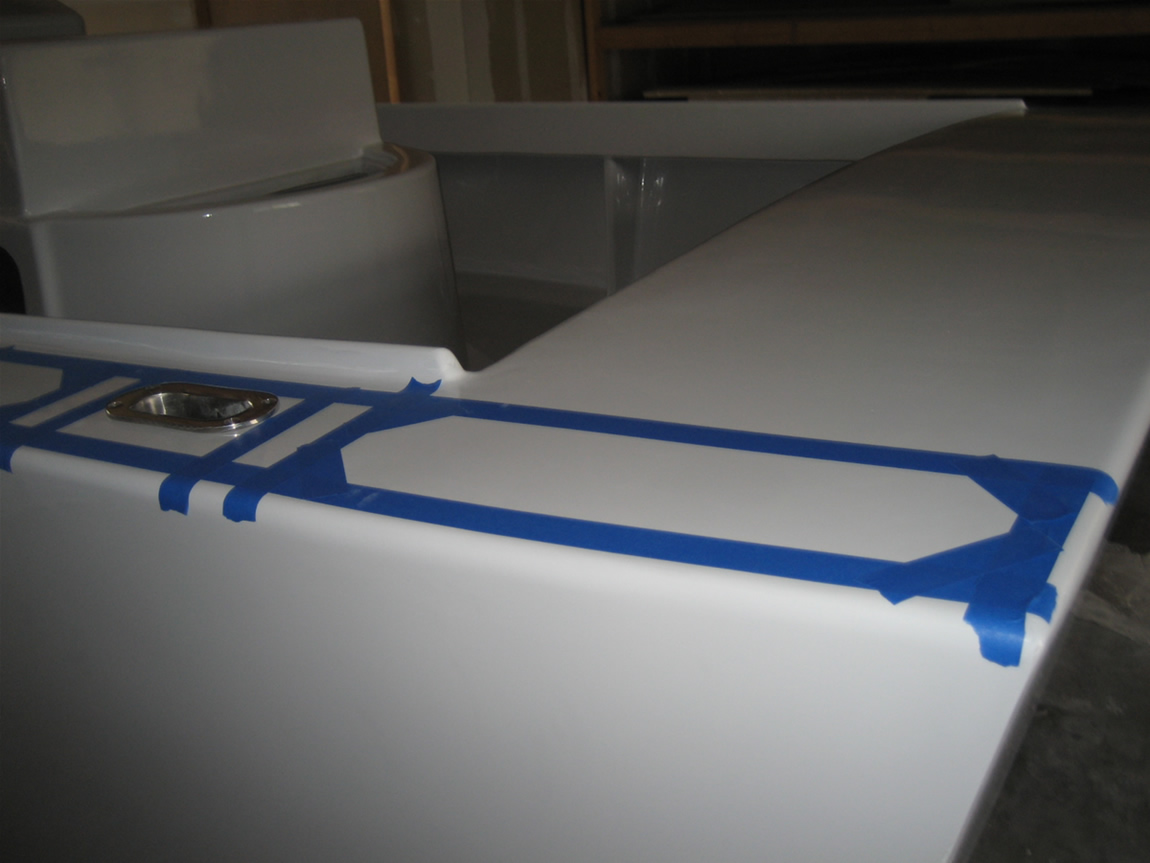
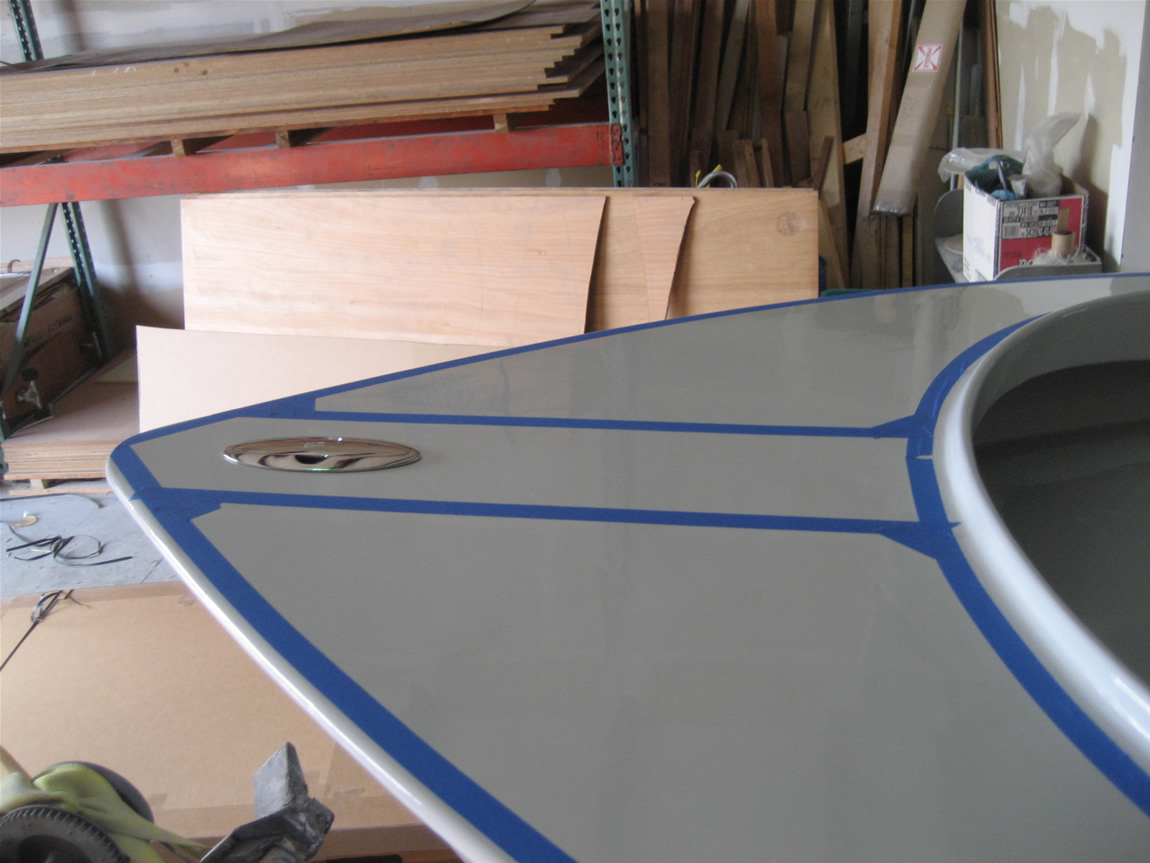
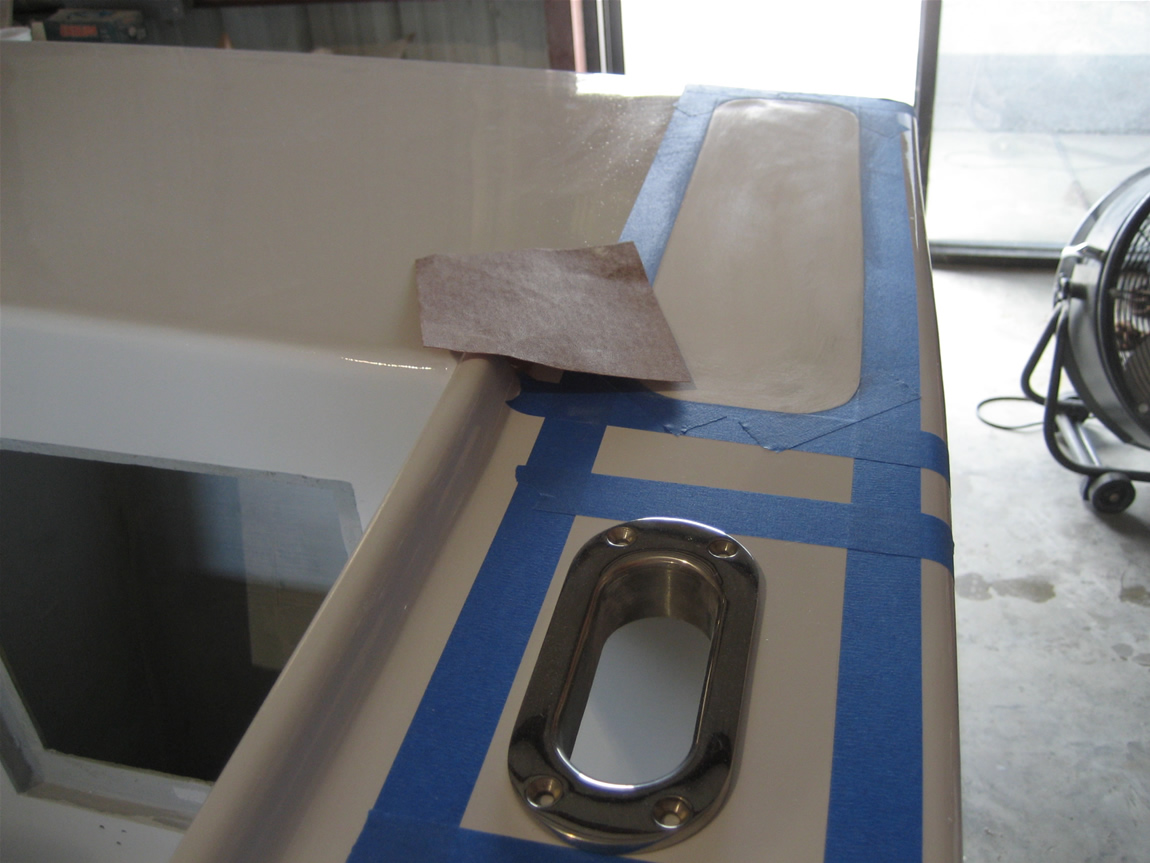
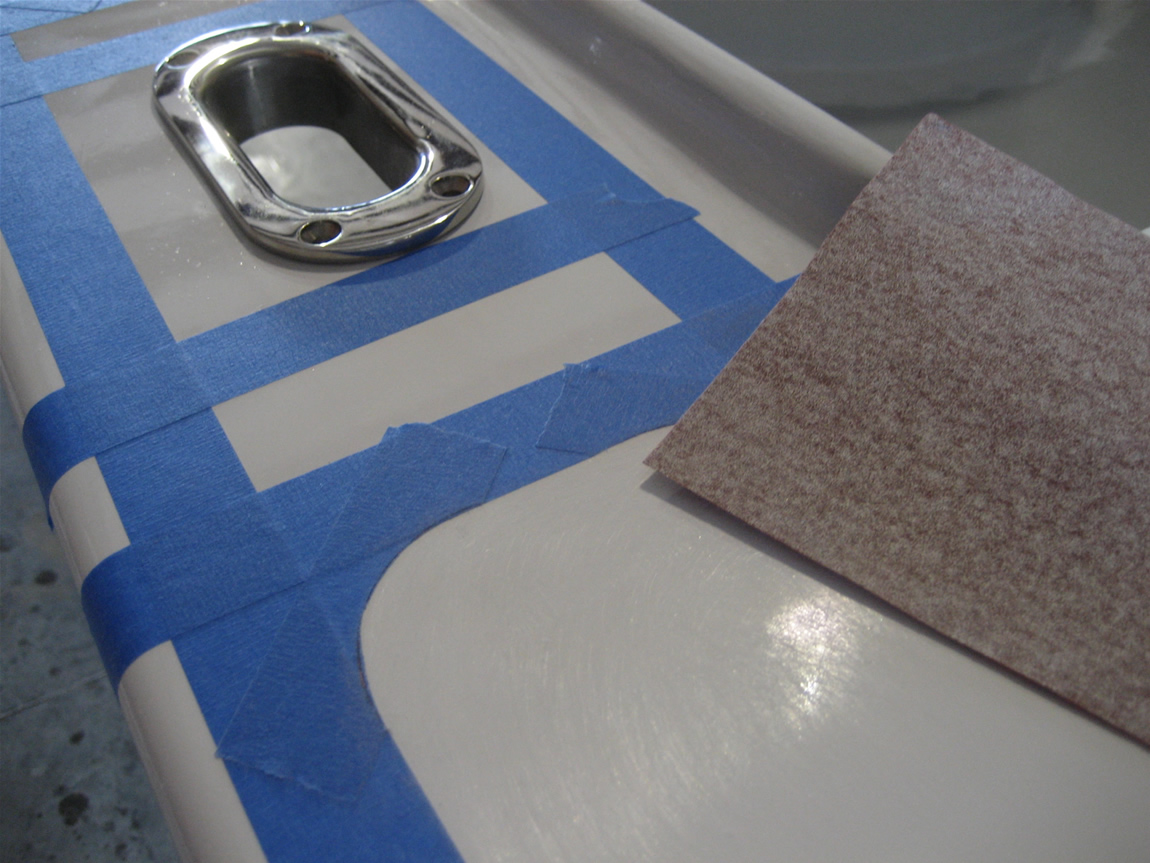

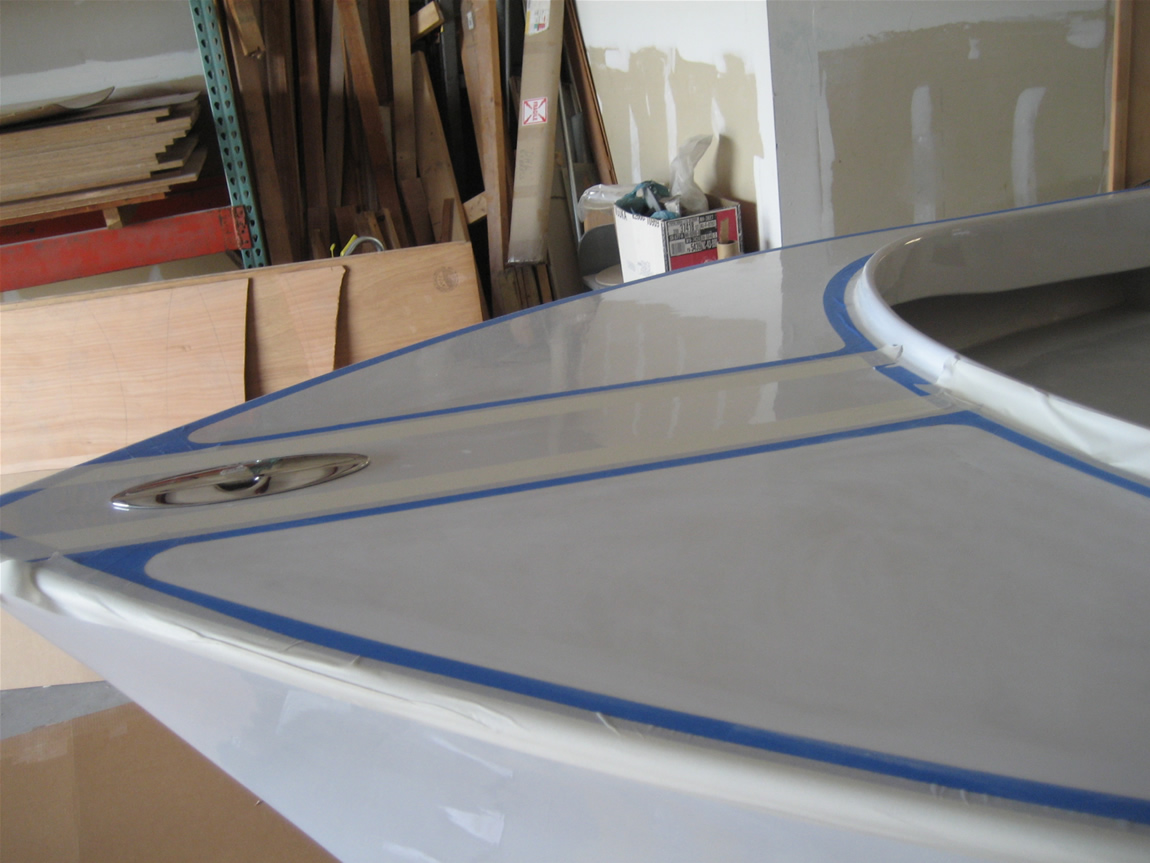
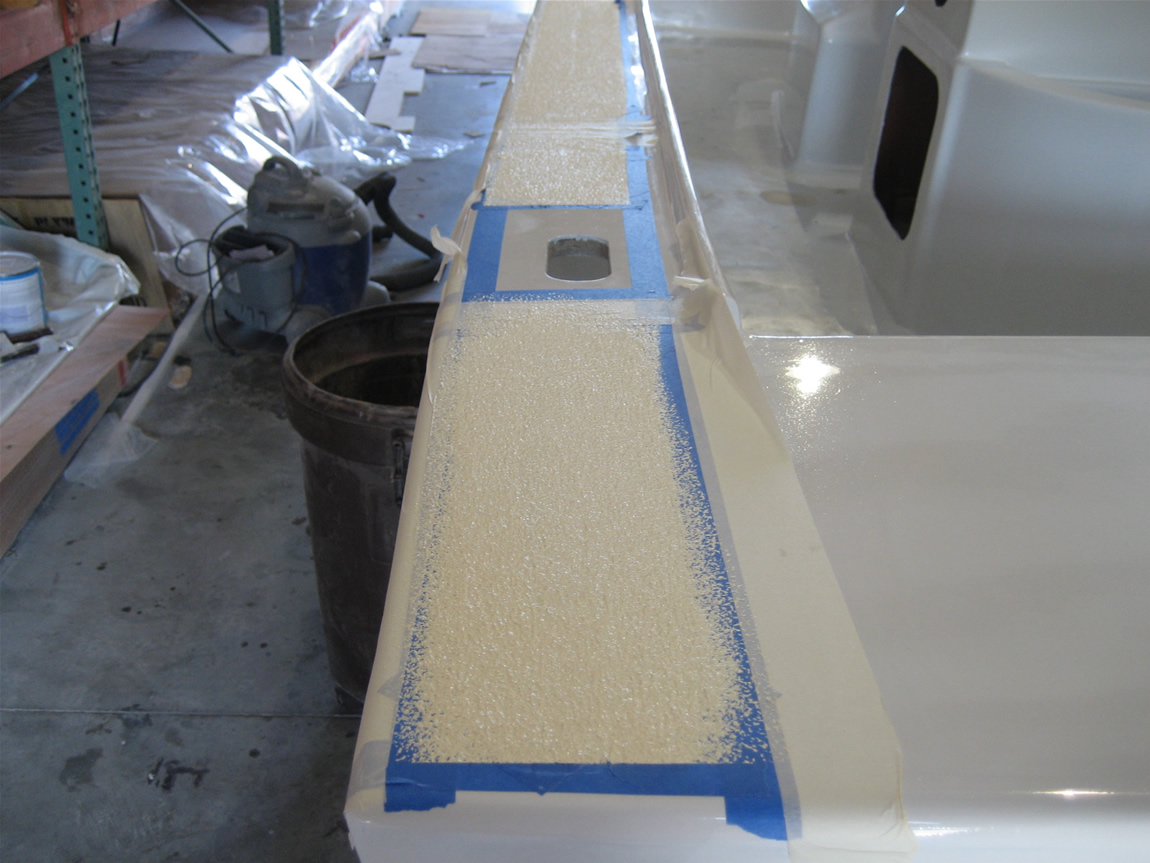
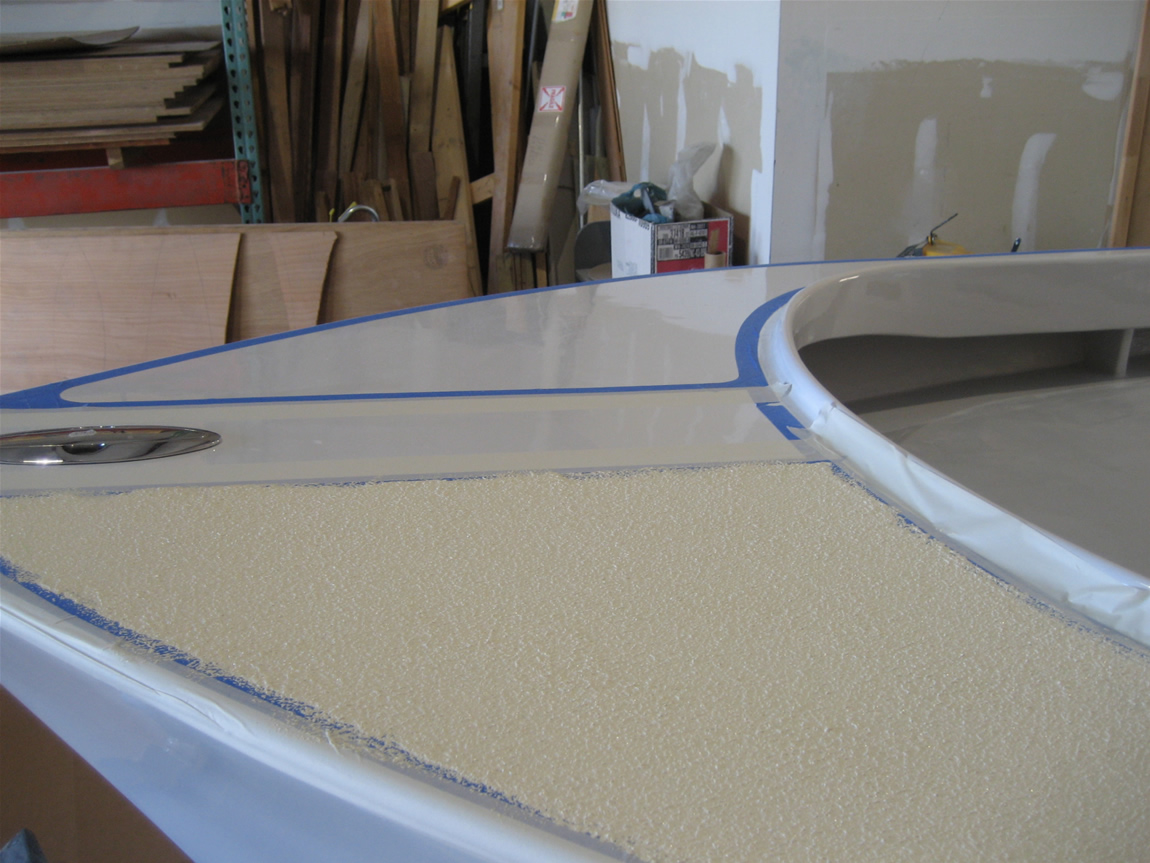
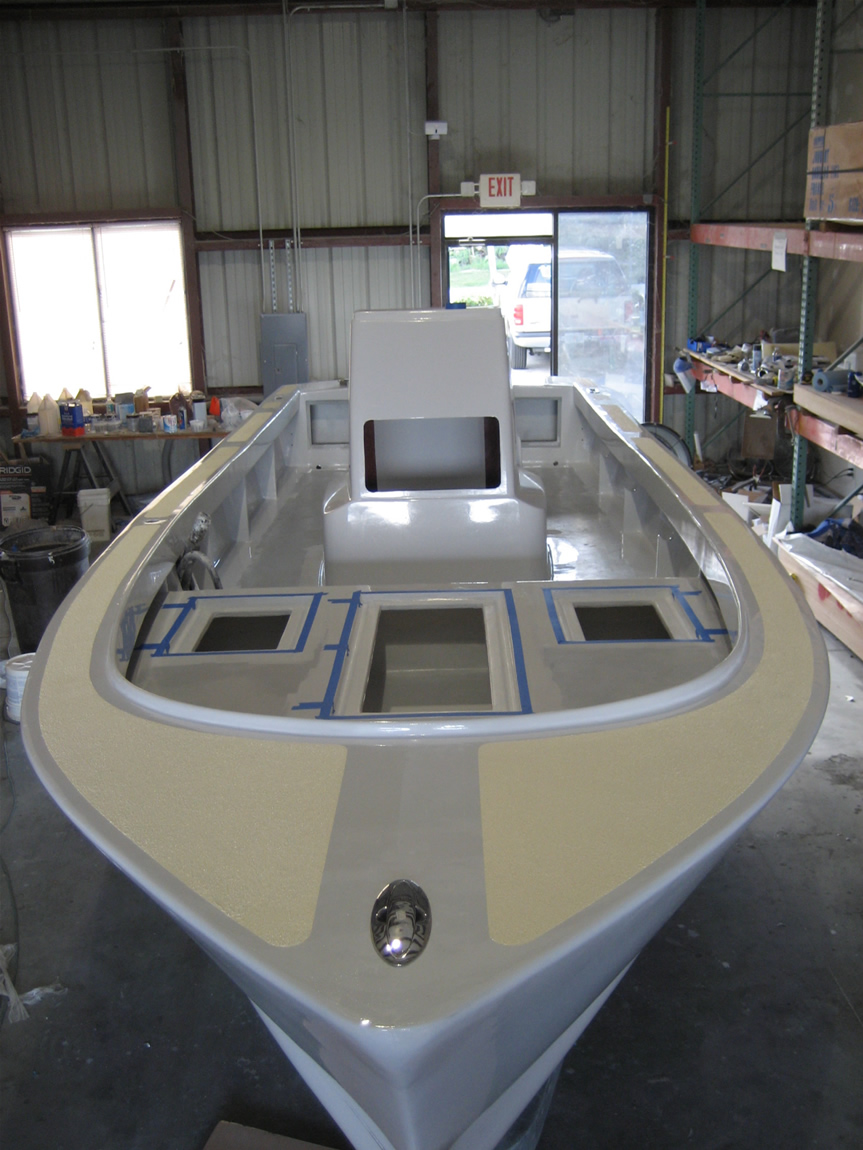
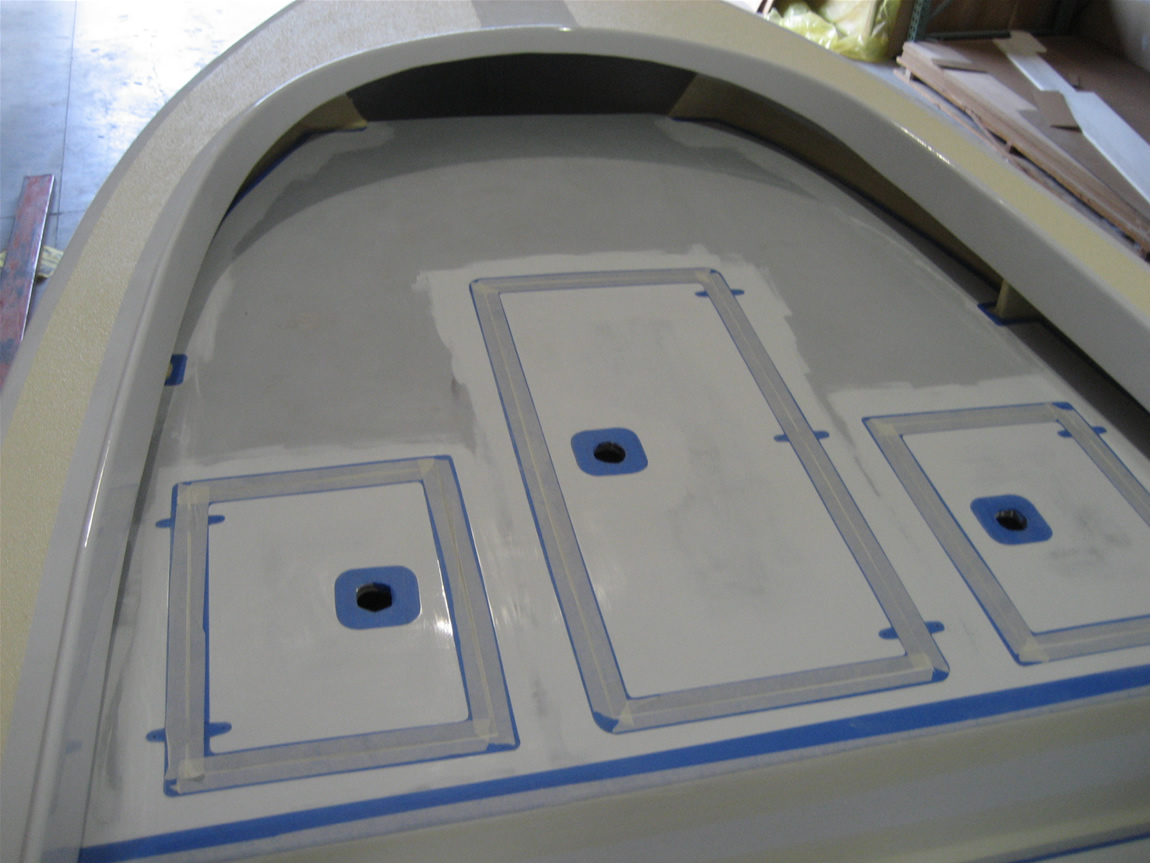
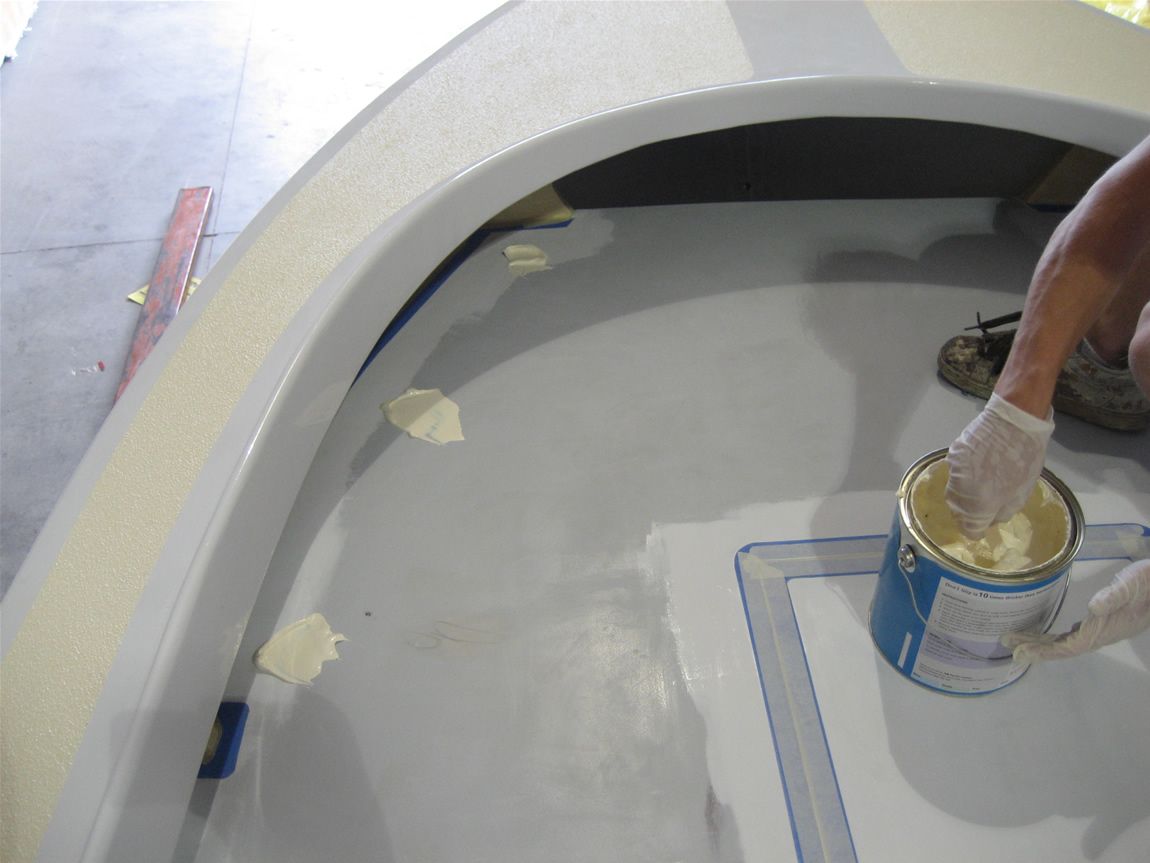
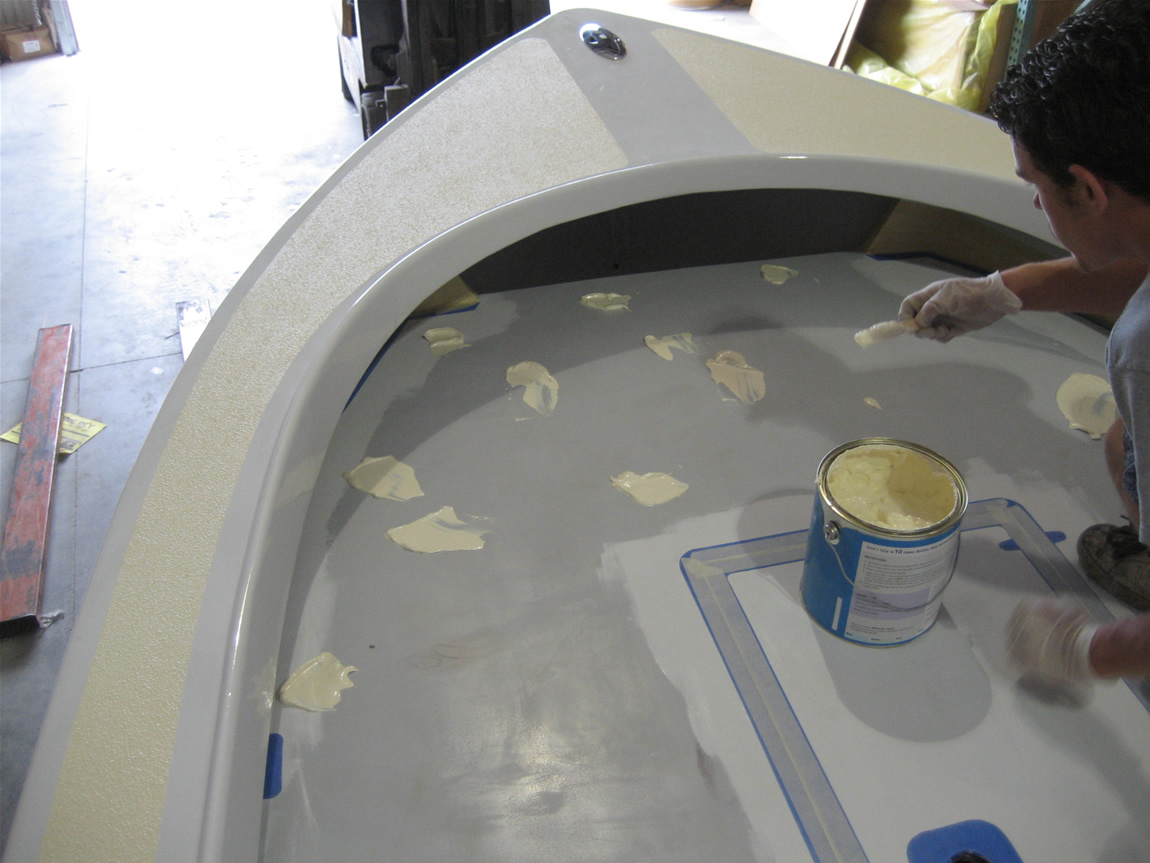
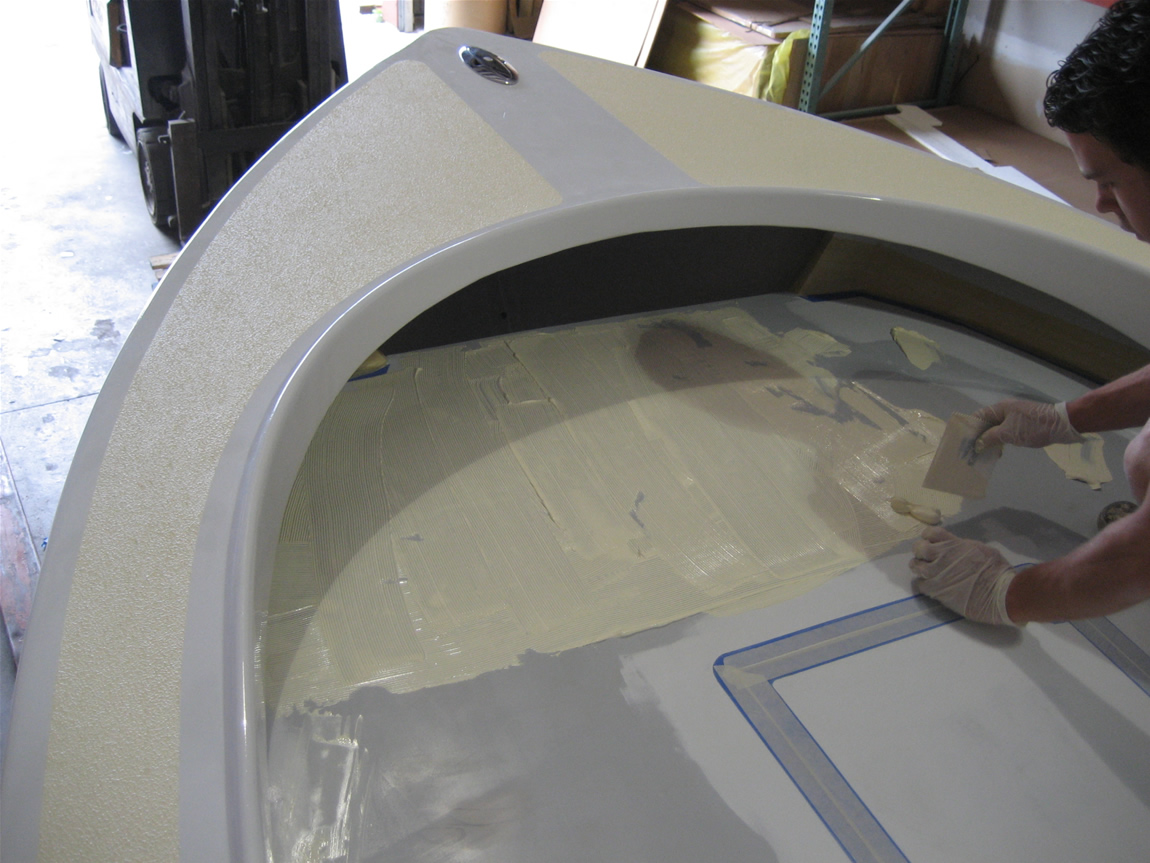
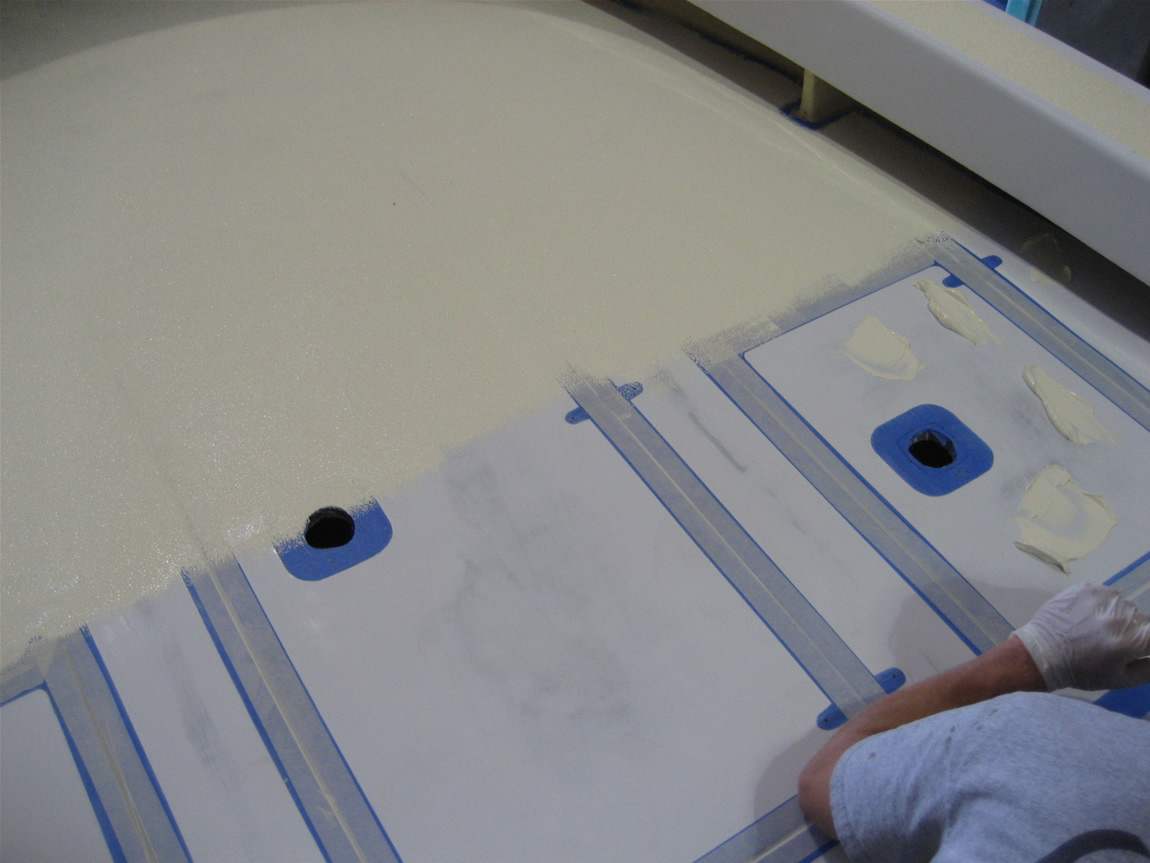
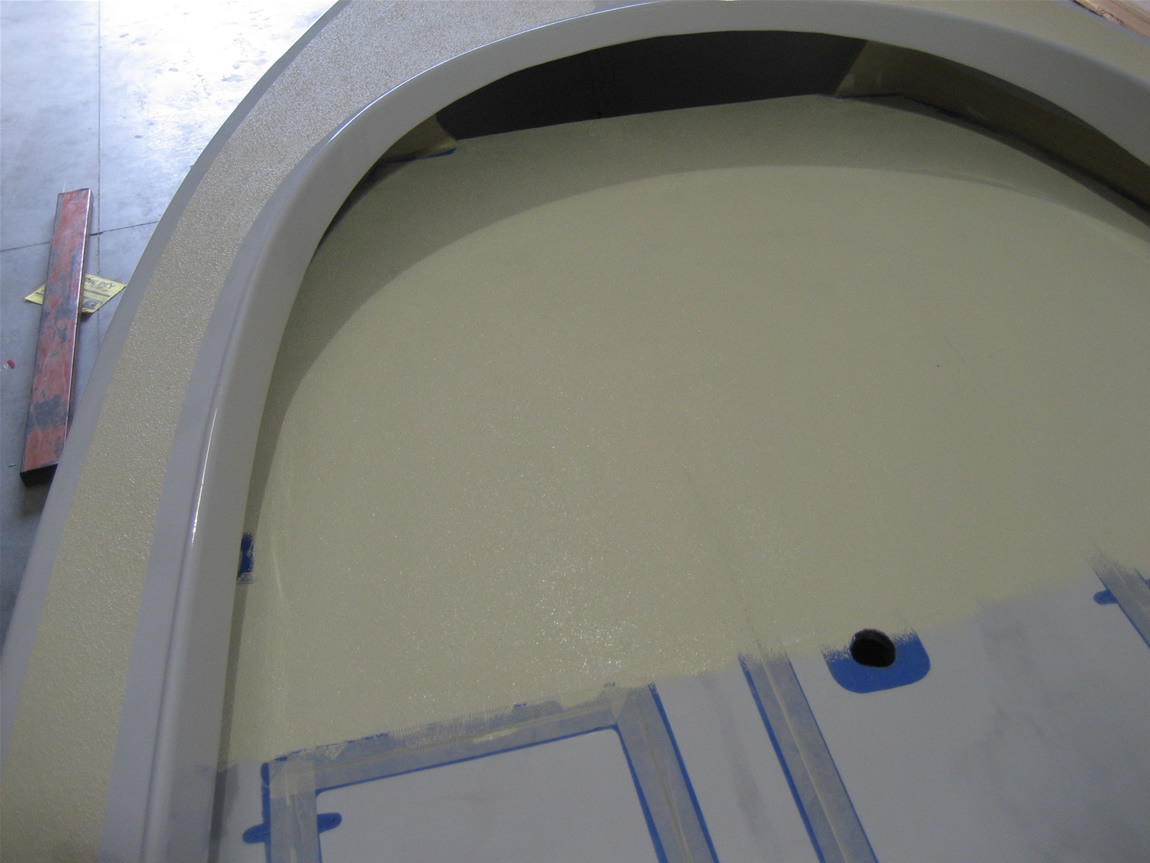


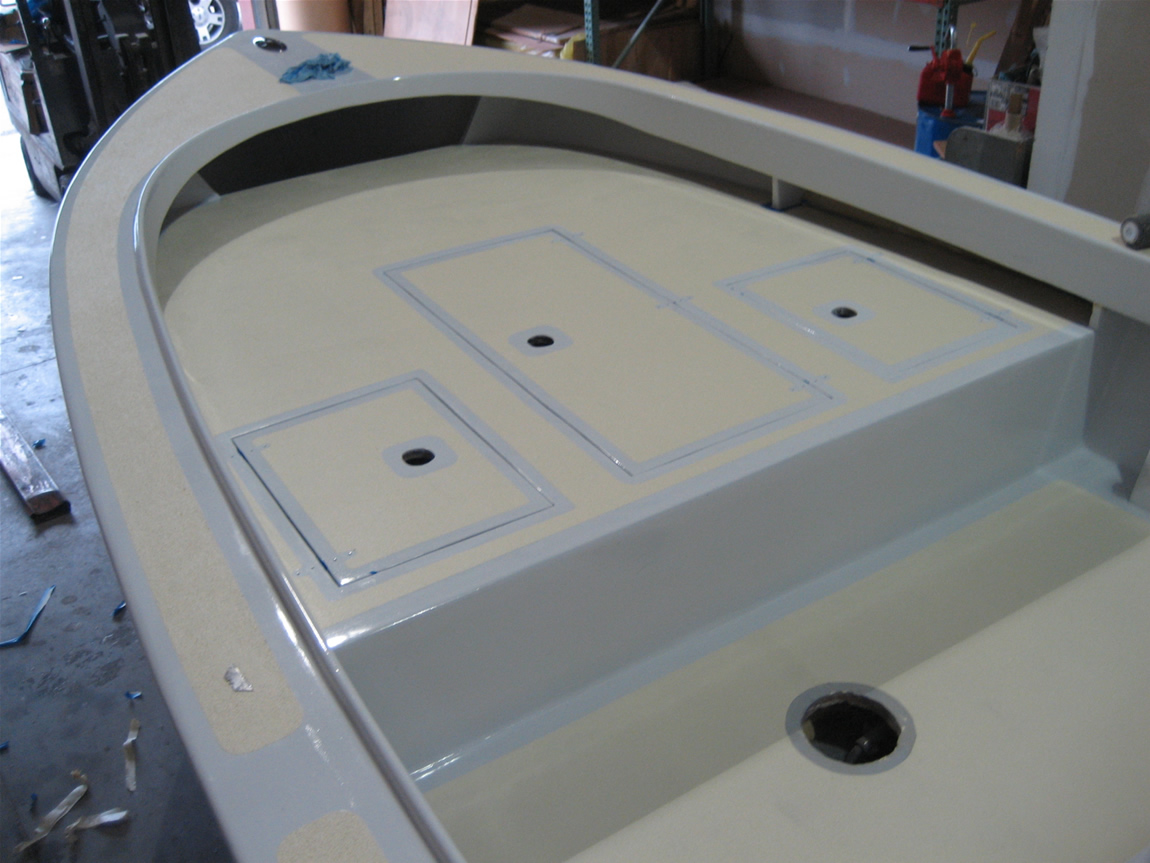
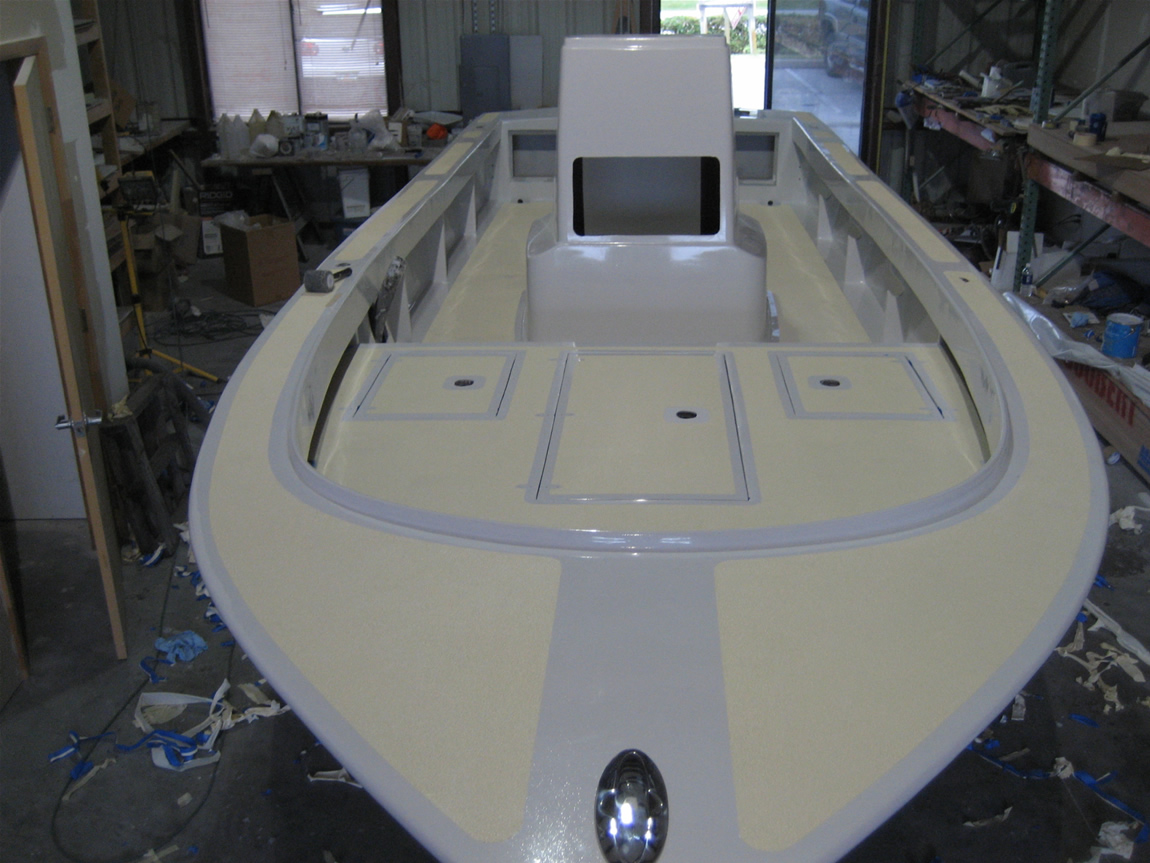
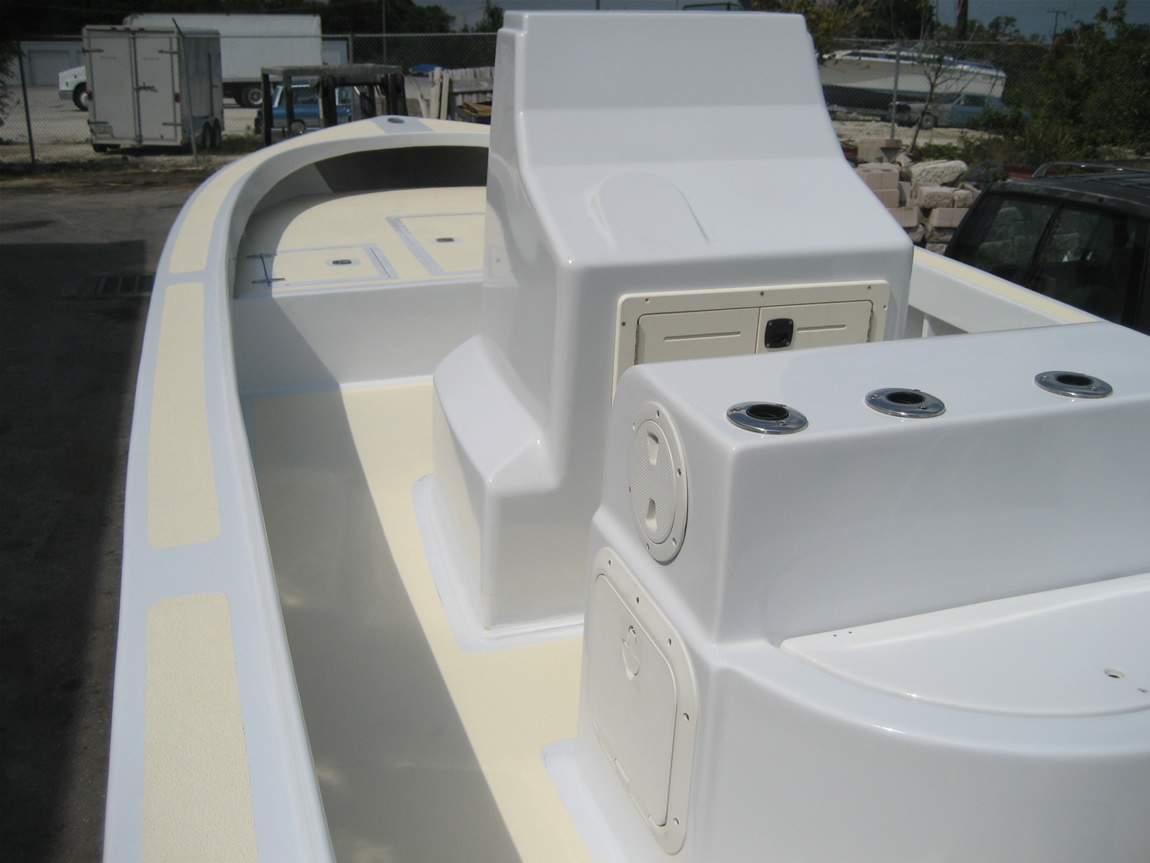
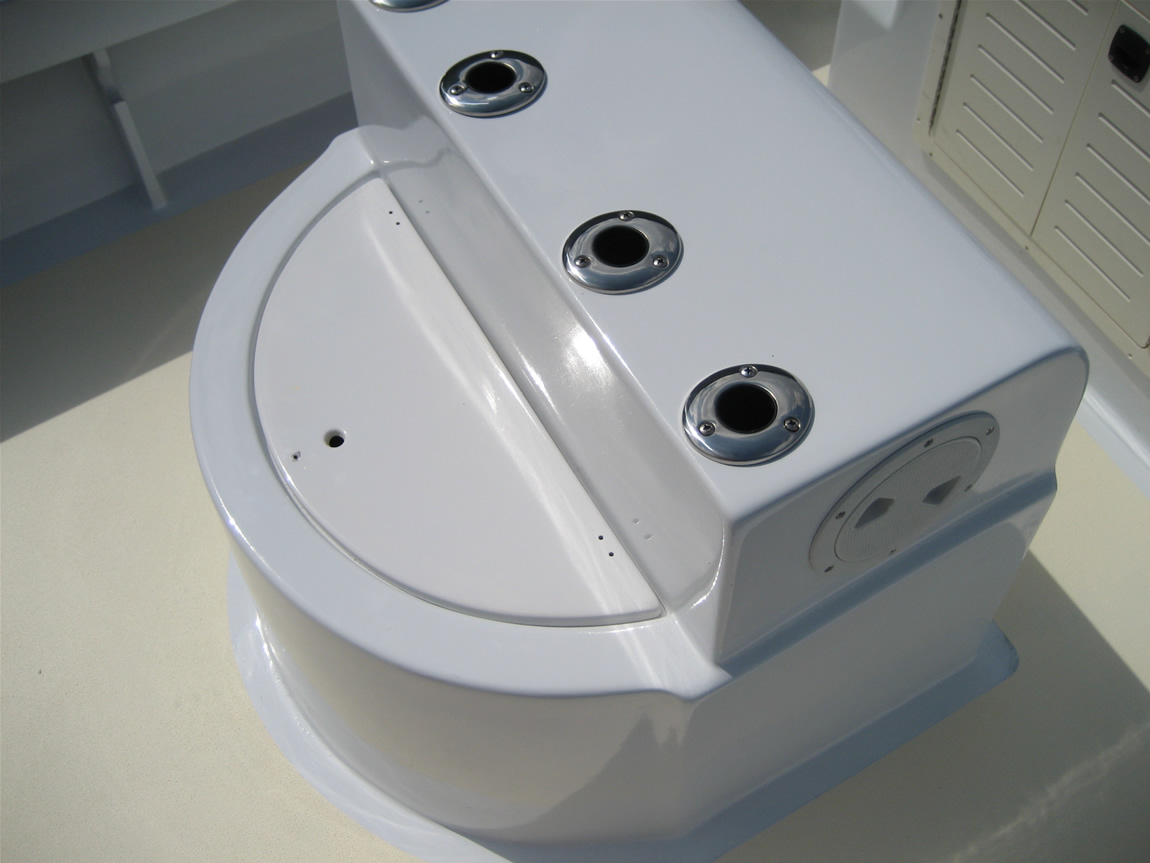
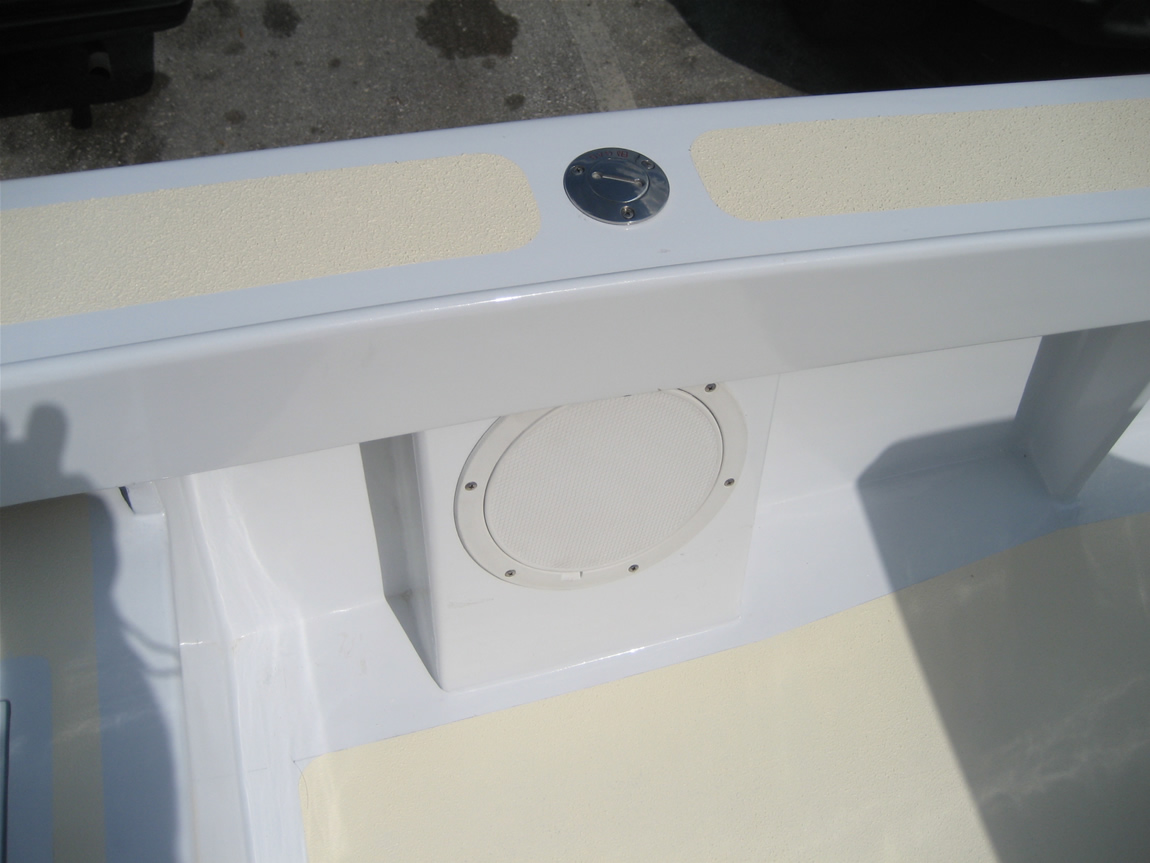
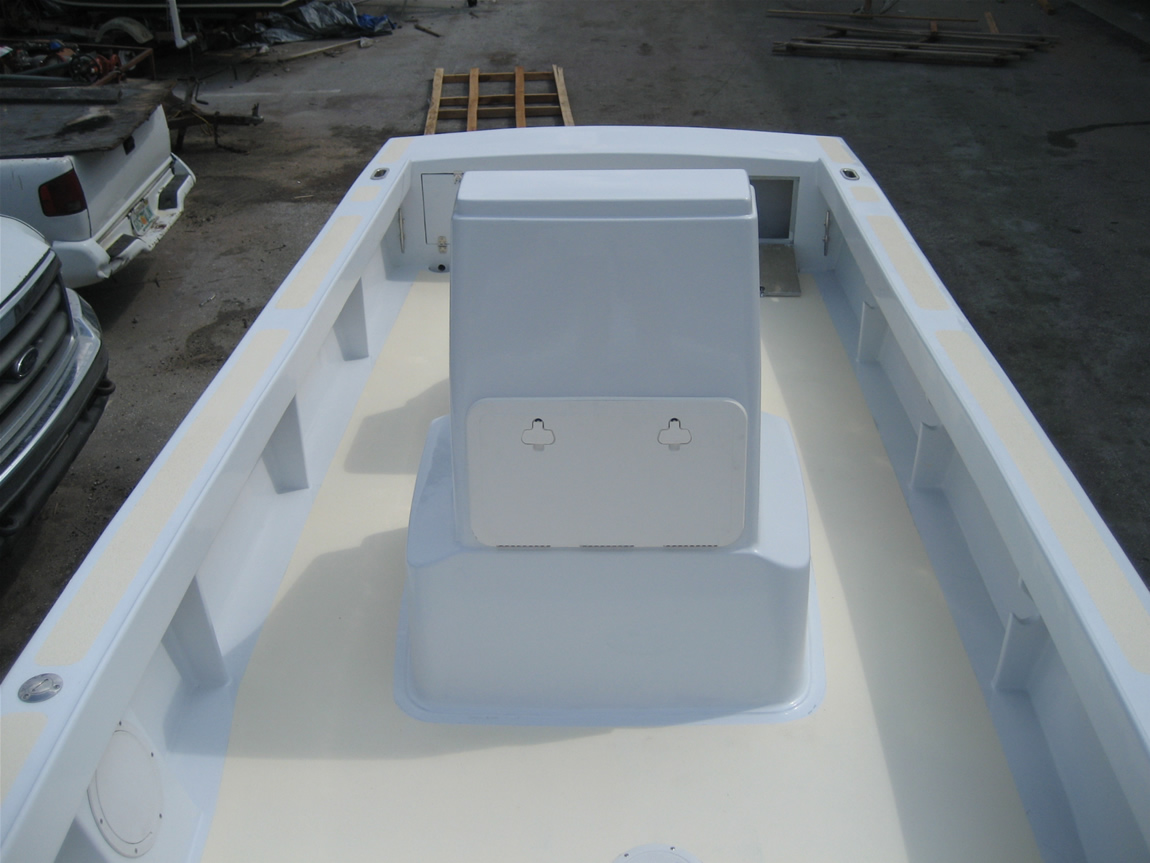
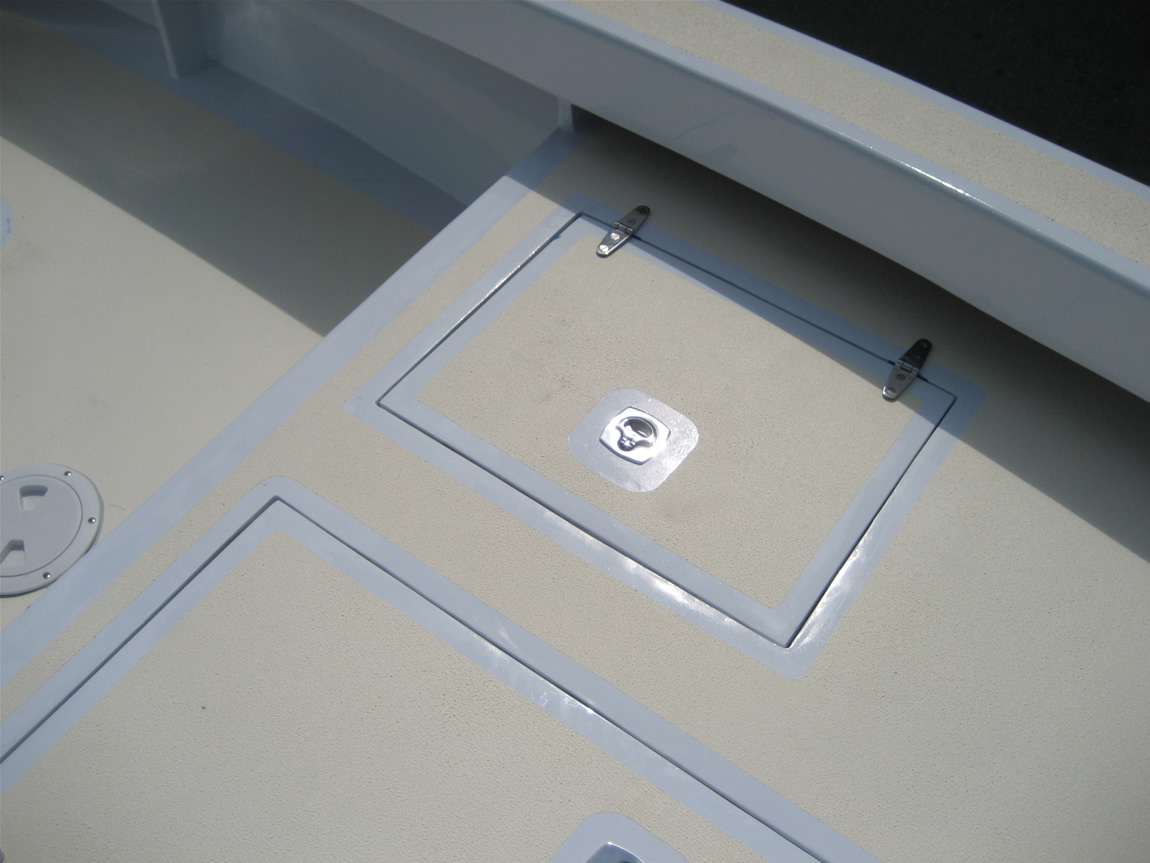
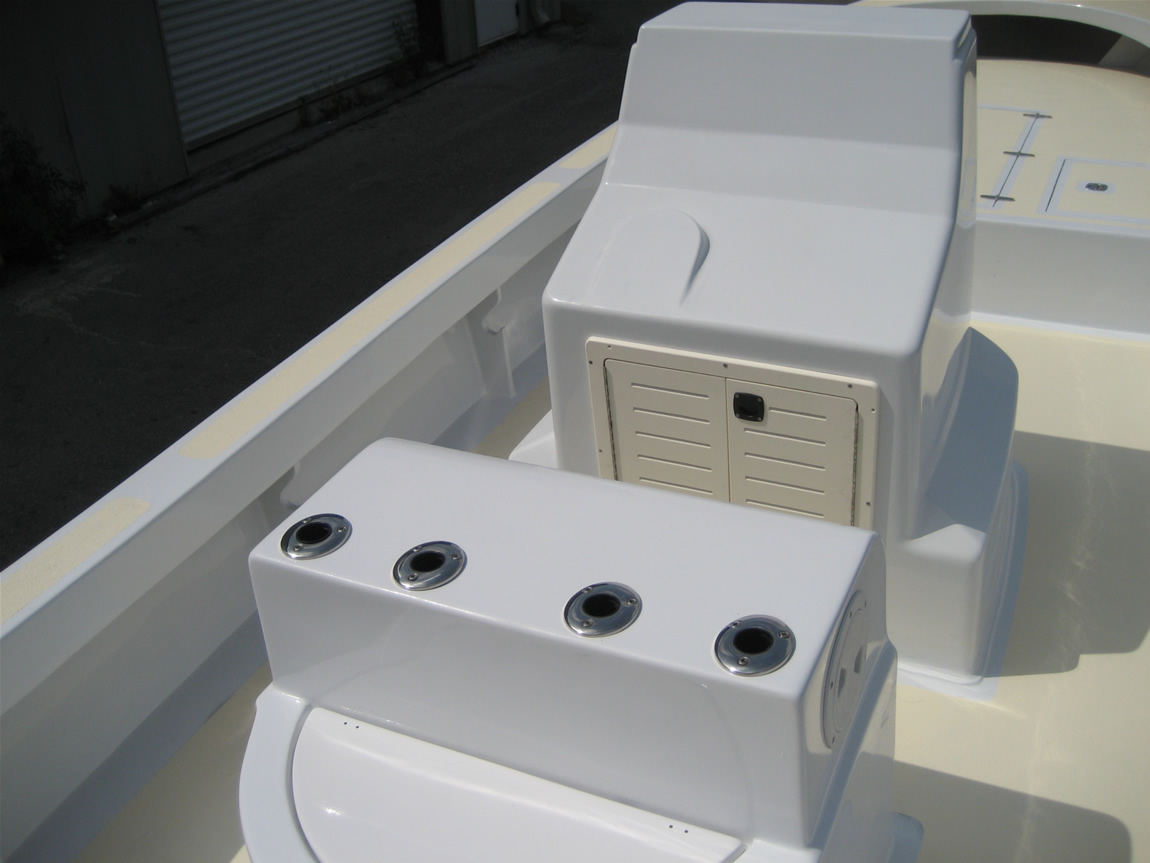
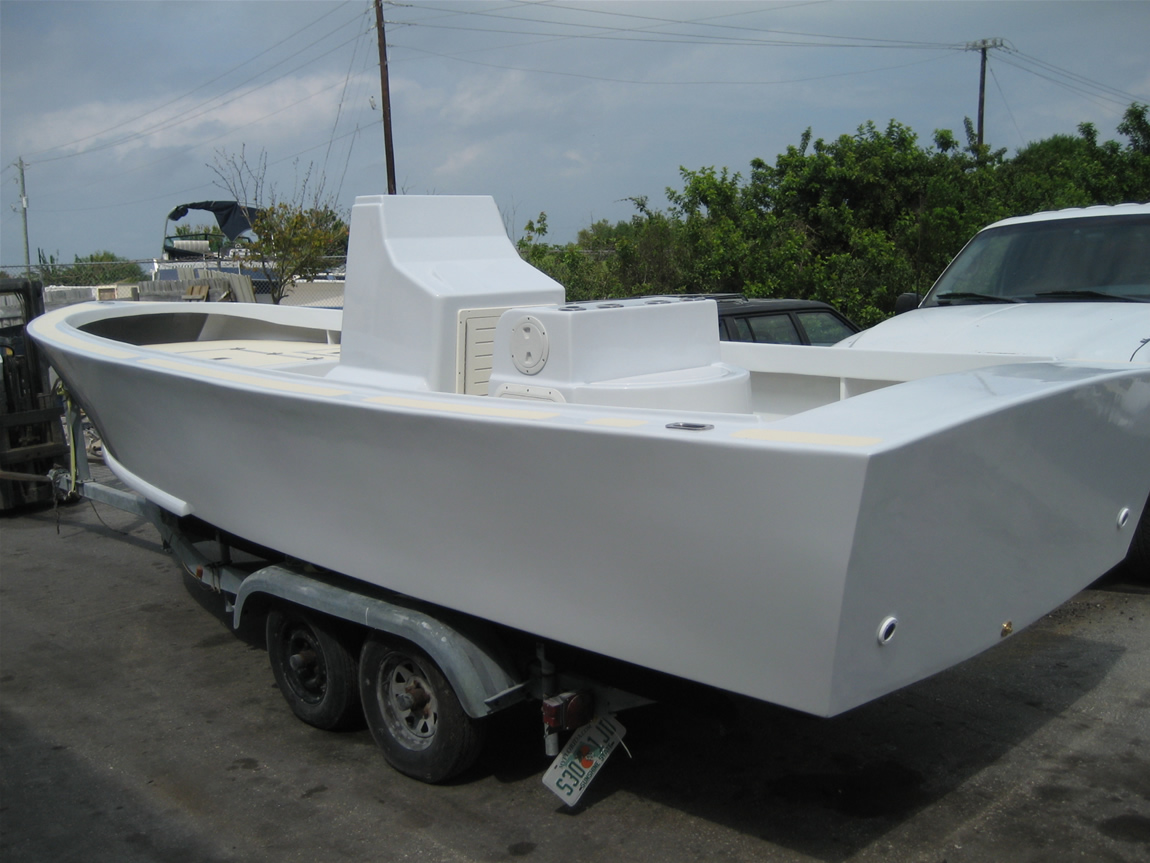

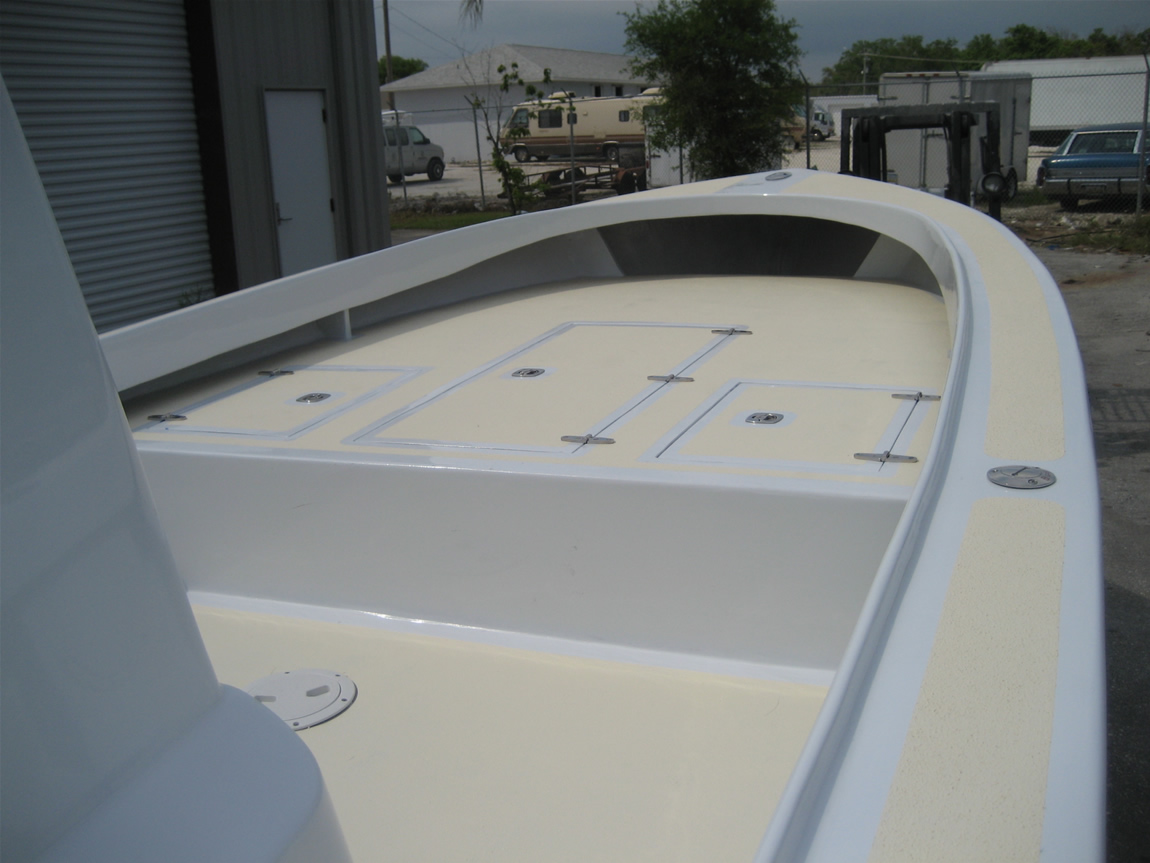
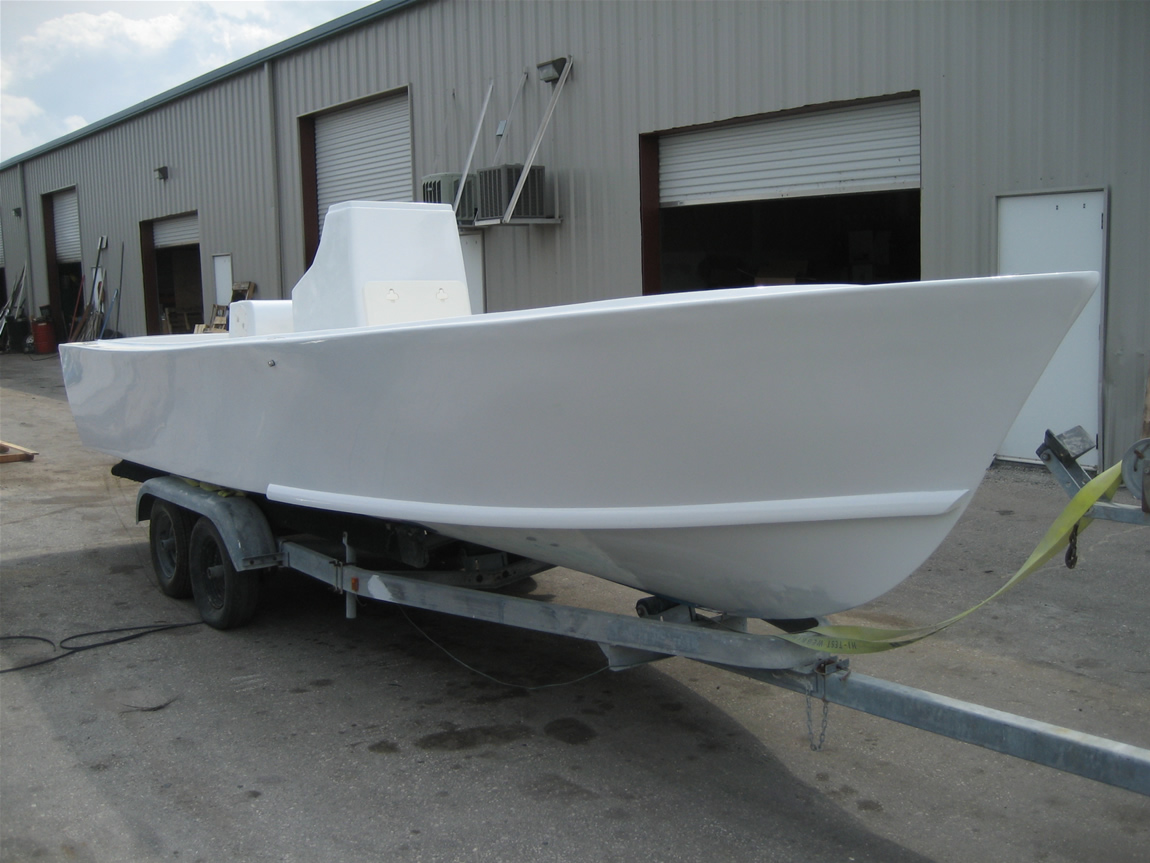
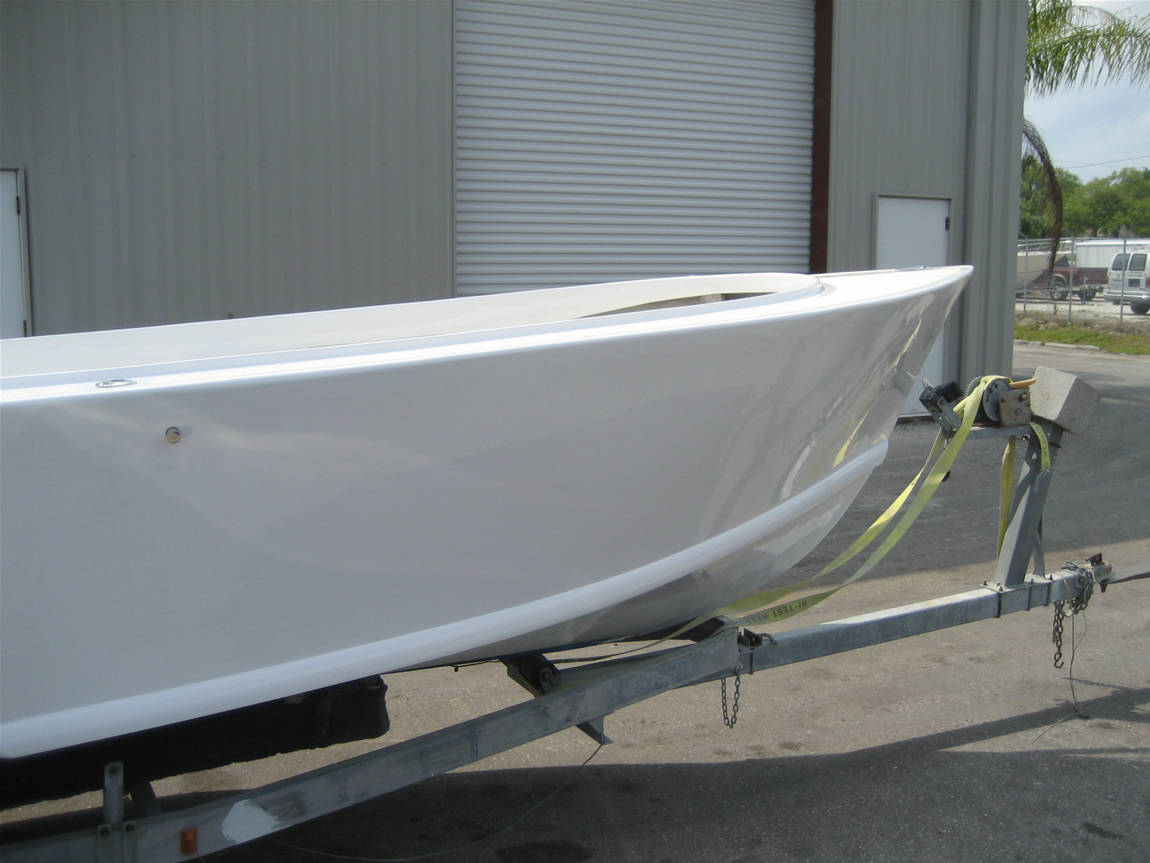
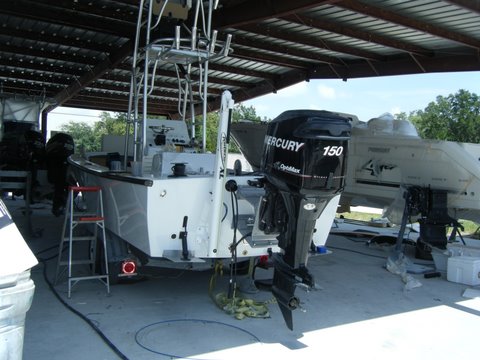
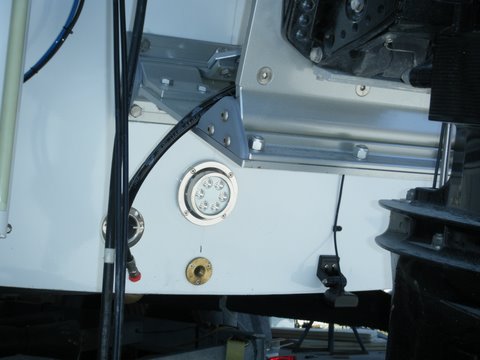

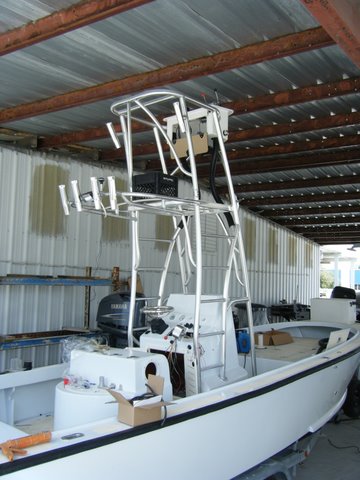
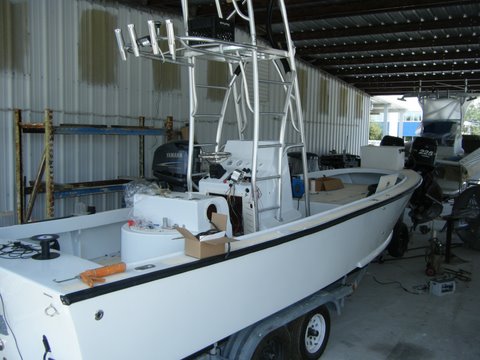