
the boat is looking great..
good to hear about the rain.. at least I got gravel on my road.. I know how a fresh load and then a good steady rain can make for a nice mess..
BTW.. I was wondering if you are going to do any fancy bright work on that thing..
GK's V10
-
Cracker Larry

- * Bateau Builder - Expert *

- Posts: 22491
- Joined: Fri Mar 11, 2005 3:39 pm
- Location: Savannah, GA
Oh yeah, I know that Georgia red clay  Hope you have 4WD.
I live on a dirt road also, but I own it and have to maintain it myself. About a mile of it. Lots of fun in this weather, but I can't bitch at the county for not doing it right. Mine is a mess and it's all my fault, according to my wife, who does not like her car to even get dirty.
I live on a dirt road also, but I own it and have to maintain it myself. About a mile of it. Lots of fun in this weather, but I can't bitch at the county for not doing it right. Mine is a mess and it's all my fault, according to my wife, who does not like her car to even get dirty.
Completed GF12 X 2, GF16, OD18, FS18, GF5, GF18, CL6
"Ships are the nearest things to dreams that hands have ever made." -Robert N. Rose
-
gk108

- * Bateau Builder - Expert *
- Posts: 3356
- Joined: Thu Jul 28, 2005 6:53 pm
- Location: The Peach State
Things are getting back to normal now. The road is still a mess, but most of the water has run off.
I worked on small stuff most of the weekend, including some of the components that will be bright finished. I roughed in the mast step which will have a solid mahogany cap on it.
The mast partner and transom knees will also be solid mahogany, bright finished.
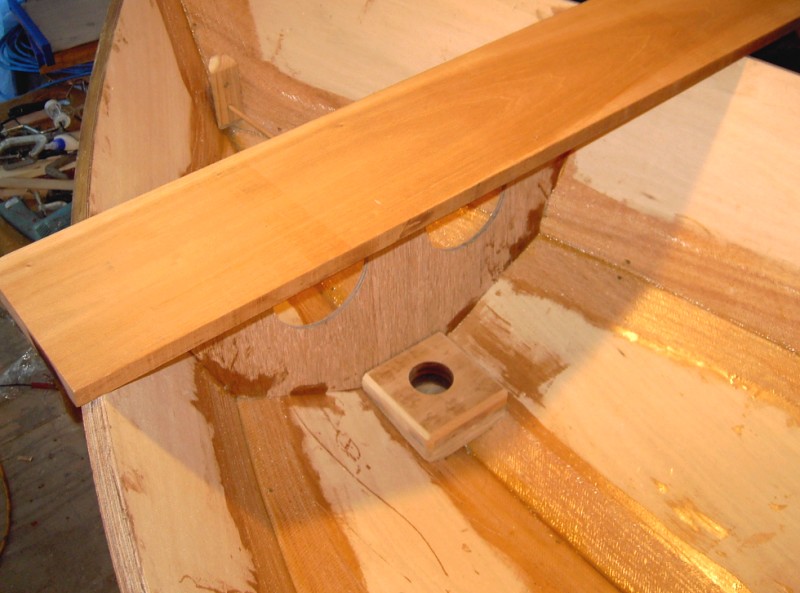
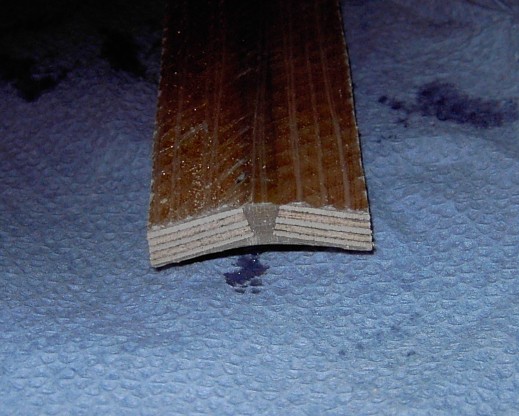
Here's the beginnings of the backing block for the bow eye.
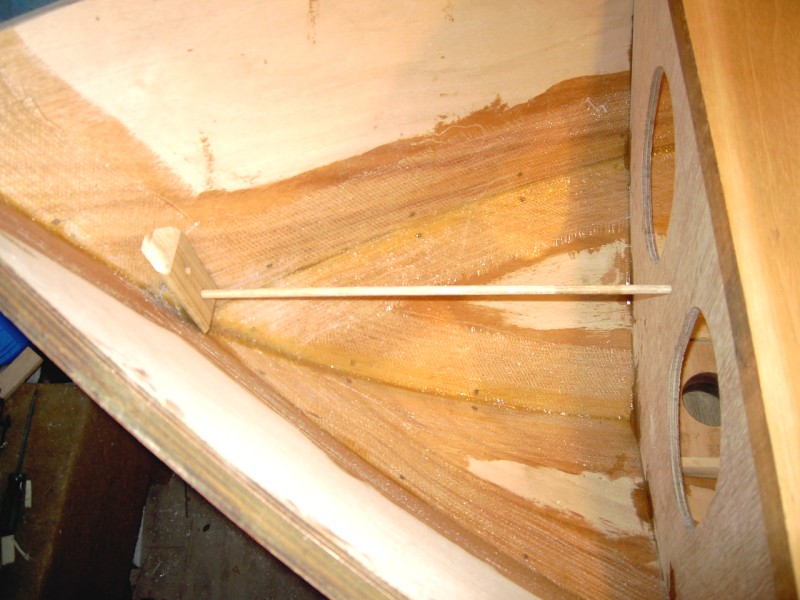
This shows the 2 pilot holes and a dowel to aid in alignment. When it's time to put it in place, I'll use a method described by Evan using epoxy putty and a couple of spots of hot glue. When it's all set up I should be able to just run my drill through the holes in the block and they should guide the bit straight out the front. At least that's how it worked on my D15.
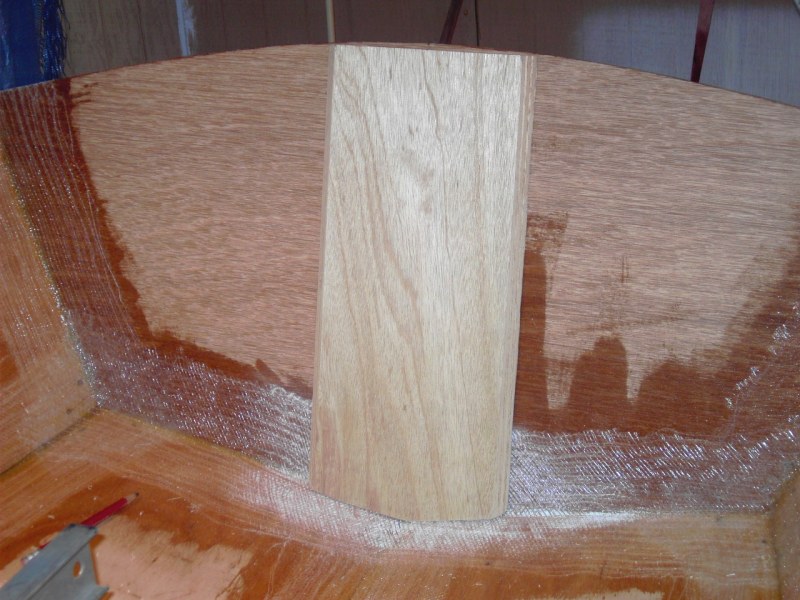
Also cut the transom doubler.
Most of this is being done while the daggerboard box is getting prepared to install. This week I'll finish taping the frames and install the DB box before anything else gets glued in so it will still be relatively light for the next flip.
I worked on small stuff most of the weekend, including some of the components that will be bright finished. I roughed in the mast step which will have a solid mahogany cap on it.
The mast partner and transom knees will also be solid mahogany, bright finished.
Here's the beginnings of the backing block for the bow eye.
This shows the 2 pilot holes and a dowel to aid in alignment. When it's time to put it in place, I'll use a method described by Evan using epoxy putty and a couple of spots of hot glue. When it's all set up I should be able to just run my drill through the holes in the block and they should guide the bit straight out the front. At least that's how it worked on my D15.
Also cut the transom doubler.
Most of this is being done while the daggerboard box is getting prepared to install. This week I'll finish taping the frames and install the DB box before anything else gets glued in so it will still be relatively light for the next flip.
CC, D15, V10

-
gk108
- * Bateau Builder - Expert *
- Posts: 3356
- Joined: Thu Jul 28, 2005 6:53 pm
- Location: The Peach State
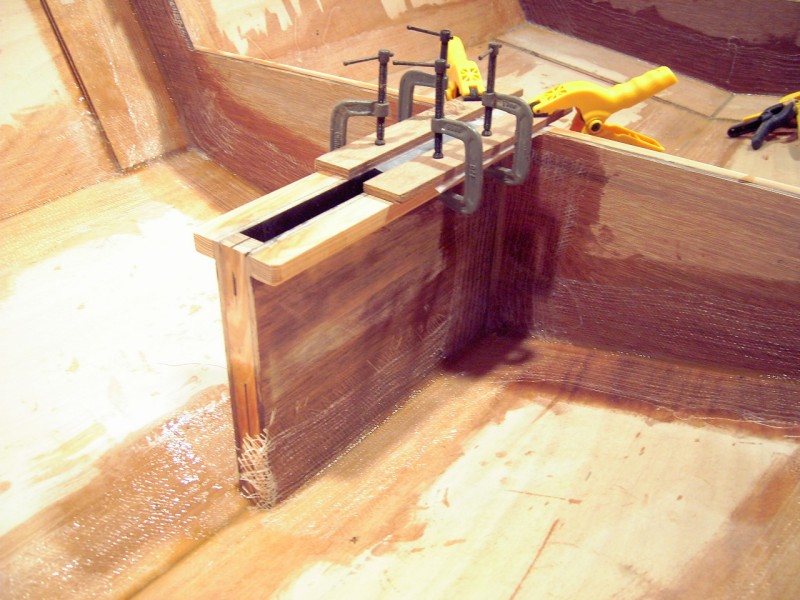
Thanks Dave. One more coat of graphite on the inside of the daggerboard box and I'll stick it together.
While I've been coating the DB box, I've also been putting graphite on a couple of other places like the mast step.
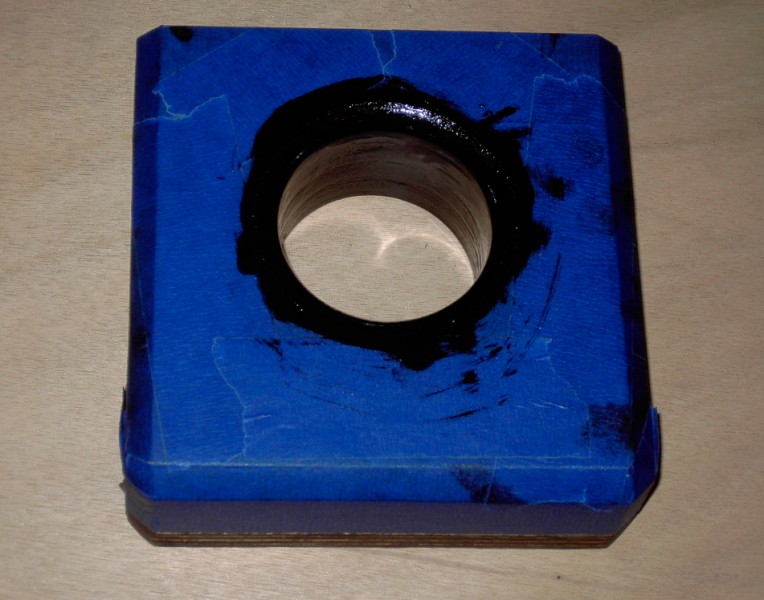
I gave the top of it a coat of neat resin, then masked the whole thing after that cured. I don't want messy black stuff complicating the bright finish. I took an x-acto knife and trimmed the masking tape around the hole, then routed a roundover on the edge of the hole. That also trimmed the masking tape so the graphite covers the radius in a neat fashion. At least that's what I hope will happen.
While I've been coating the DB box, I've also been putting graphite on a couple of other places like the mast step.
I gave the top of it a coat of neat resin, then masked the whole thing after that cured. I don't want messy black stuff complicating the bright finish. I took an x-acto knife and trimmed the masking tape around the hole, then routed a roundover on the edge of the hole. That also trimmed the masking tape so the graphite covers the radius in a neat fashion. At least that's what I hope will happen.
CC, D15, V10
-
gk108
- * Bateau Builder - Expert *
- Posts: 3356
- Joined: Thu Jul 28, 2005 6:53 pm
- Location: The Peach State
More fun with graphite.
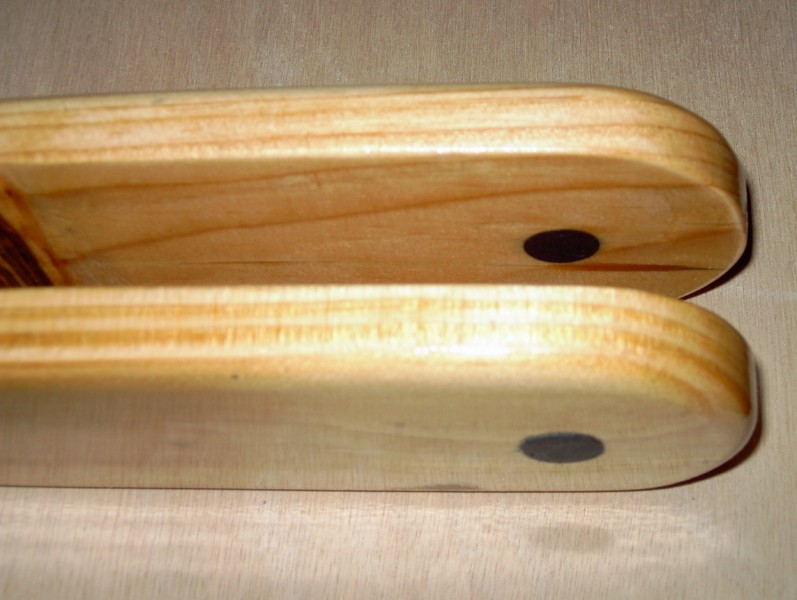
The pivot holes for the tiller were drilled oversize, masked and filled with fiberglass, graphite and epoxy. I did this by priming the hole with neat epoxy, then wrapping a strip of glass mat around a dowel and dipping it in graphite epoxy and stuffing it in the hole. The dowel slid back out, leaving the glass in the hole and I topped it off with graphite epoxy. After it cured, I filed most of it down flush, removed the masking along with the rest of the excess and this is the result. Now all I have to do is ring the center of the previous hole with my drill.
And the real reason for playing with graphite this early in the build.
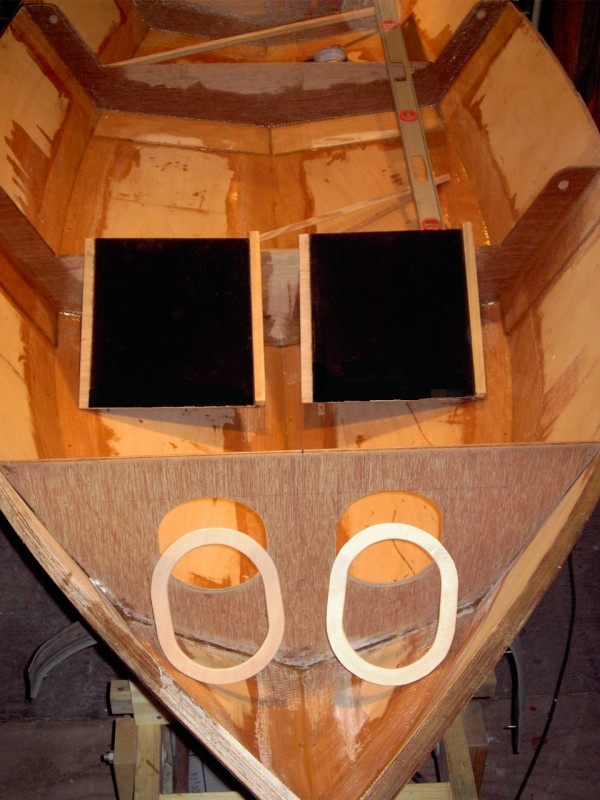
The insides of the daggerboard box are fully coated with graphite and the two halves are ready to glue together. I still have to wrap my head around the idea of cutting a big hole in the bottom of my boat, but I'm about to be ready for that.
Also shown are a couple of rings for the access hatches planned for the bulkhead.
The pivot holes for the tiller were drilled oversize, masked and filled with fiberglass, graphite and epoxy. I did this by priming the hole with neat epoxy, then wrapping a strip of glass mat around a dowel and dipping it in graphite epoxy and stuffing it in the hole. The dowel slid back out, leaving the glass in the hole and I topped it off with graphite epoxy. After it cured, I filed most of it down flush, removed the masking along with the rest of the excess and this is the result. Now all I have to do is ring the center of the previous hole with my drill.
And the real reason for playing with graphite this early in the build.
The insides of the daggerboard box are fully coated with graphite and the two halves are ready to glue together. I still have to wrap my head around the idea of cutting a big hole in the bottom of my boat, but I'm about to be ready for that.
Also shown are a couple of rings for the access hatches planned for the bulkhead.
CC, D15, V10
-
gk108
- * Bateau Builder - Expert *
- Posts: 3356
- Joined: Thu Jul 28, 2005 6:53 pm
- Location: The Peach State
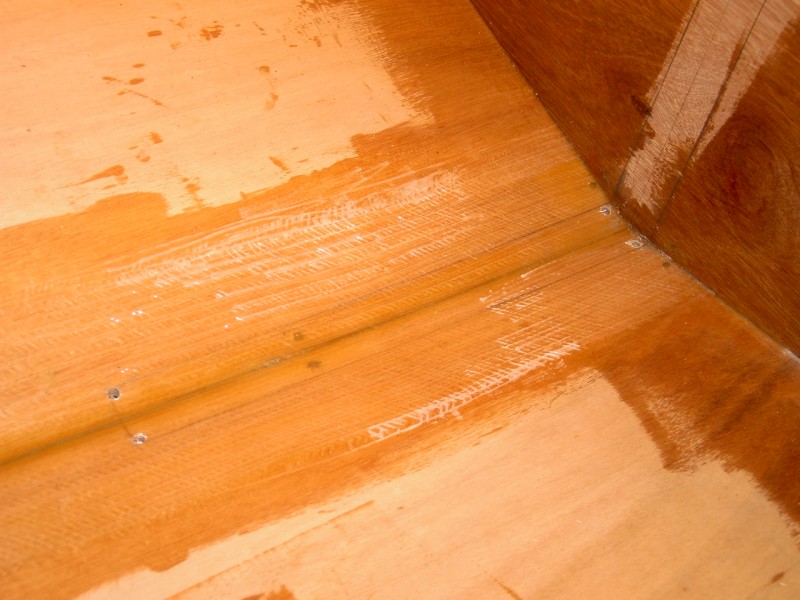
I put in a full day of it Saturday. I got the daggerboard box glued together and used it to mark the location of the hole in the hull. Then I drilled guide holes in the corners to transfer the lines to the other side of the hull.
Then I flipped the hull and connected the dots.
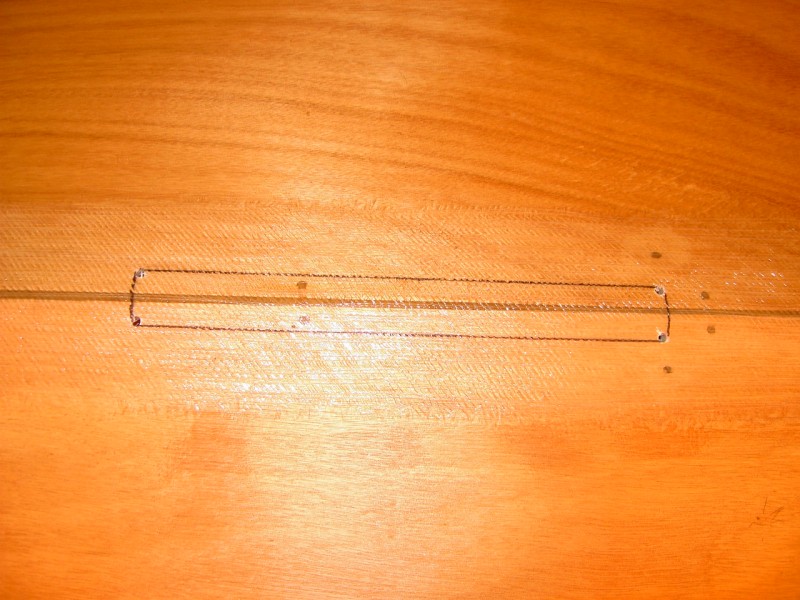
And cut a big hole in a perfectly good hull.
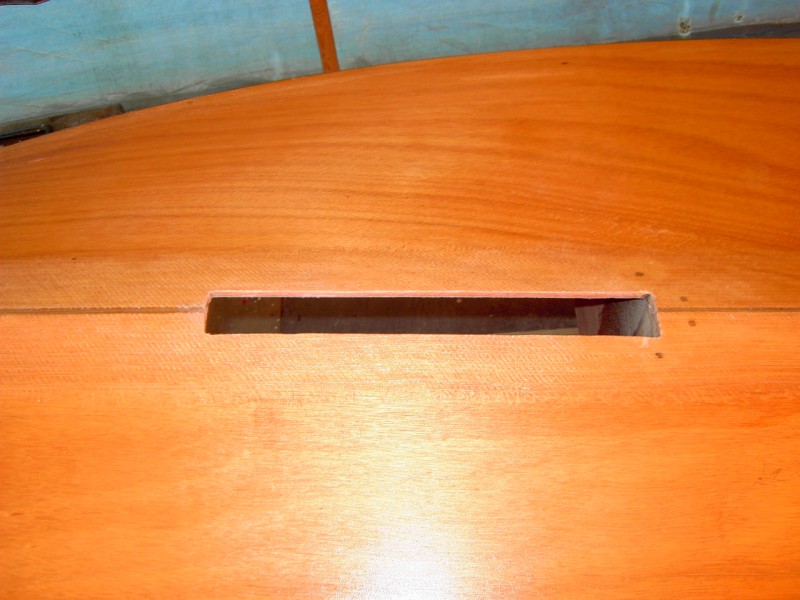
Then I cleaned up the hole with a rasp to make sure the box fit.
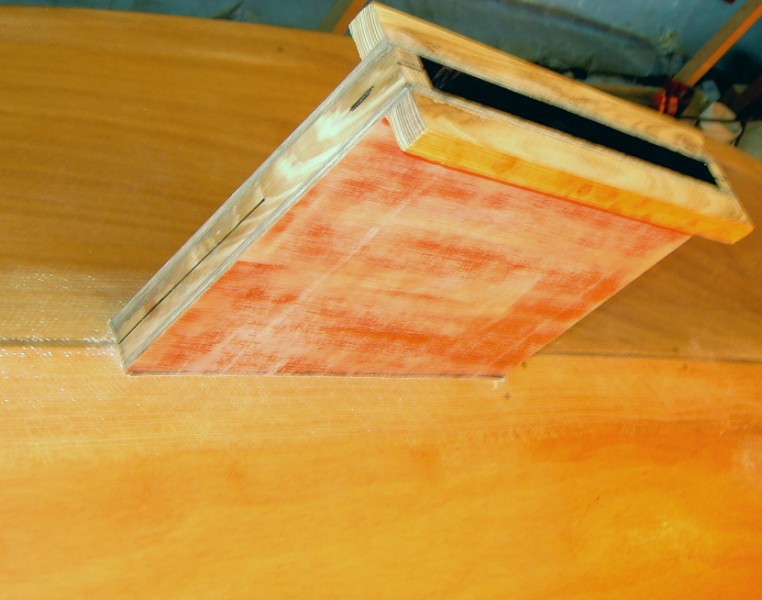
Then flipped the hull upright again and levelled it and aligned the box and glued and tabbed it in place.
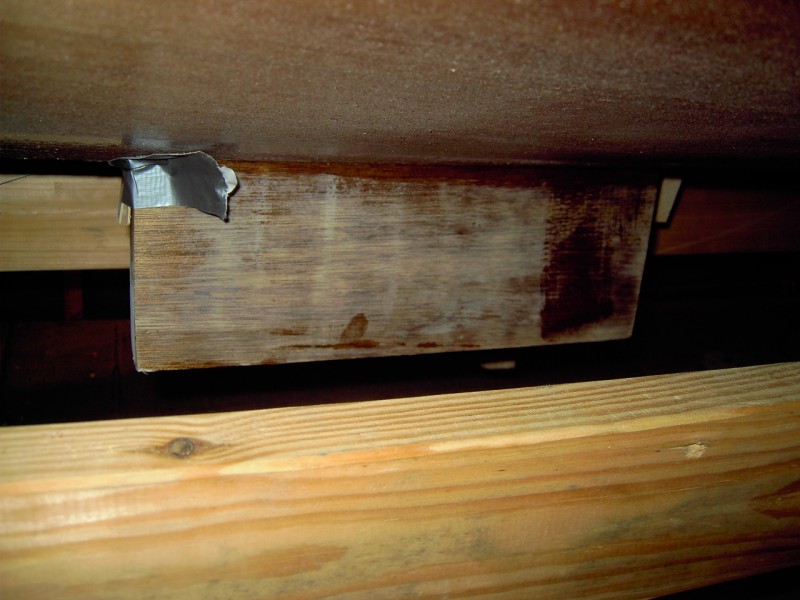
This much of the box hangs out of the bottom and must be trimmed flush with the hull.
And naturally, the best looking seam in the whole boat is the one I cut out.
I have a few more things to do while it's upright, but the next major step is flipping the hull again, trimming the excess box and fairing and painting the bottom.
Then I flipped the hull and connected the dots.
And cut a big hole in a perfectly good hull.
Then I cleaned up the hole with a rasp to make sure the box fit.
Then flipped the hull upright again and levelled it and aligned the box and glued and tabbed it in place.
This much of the box hangs out of the bottom and must be trimmed flush with the hull.
And naturally, the best looking seam in the whole boat is the one I cut out.
I have a few more things to do while it's upright, but the next major step is flipping the hull again, trimming the excess box and fairing and painting the bottom.
CC, D15, V10
-
gk108
- * Bateau Builder - Expert *
- Posts: 3356
- Joined: Thu Jul 28, 2005 6:53 pm
- Location: The Peach State
Looking into the future here.
I hope to have a bright finished foredeck made from Chinese okoume. Right now, it looks like it could turn out about like I want.
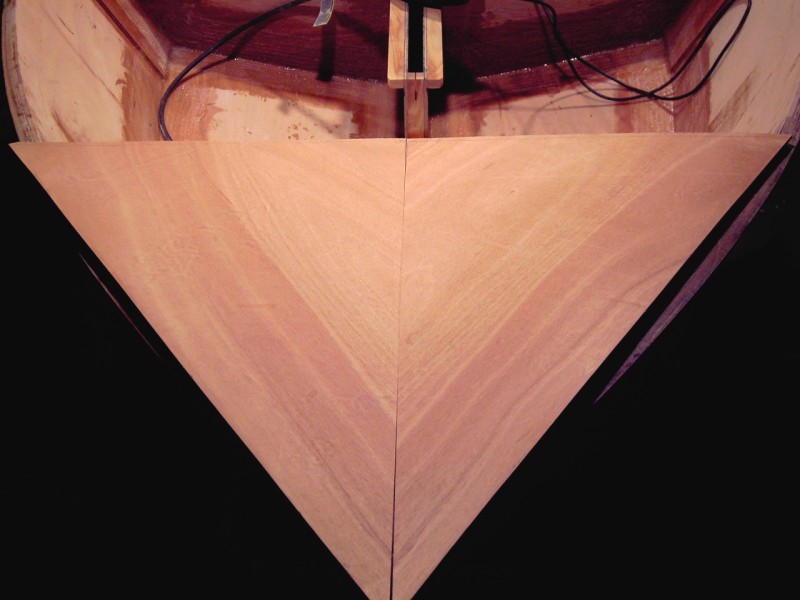
It's only 5mm thick, so I'll have to laminate it to something. I'll top it with some of the surfboard fiberglass. If my seam in the middle looks too bad I can always glue a strip of mahogany on top.
I hope to have a bright finished foredeck made from Chinese okoume. Right now, it looks like it could turn out about like I want.
It's only 5mm thick, so I'll have to laminate it to something. I'll top it with some of the surfboard fiberglass. If my seam in the middle looks too bad I can always glue a strip of mahogany on top.
CC, D15, V10
-
mecreature
- Very Active Poster

- Posts: 770
- Joined: Thu Jun 29, 2006 4:54 pm
- Location: Indiana
Who is online
Users browsing this forum: No registered users and 4 guests