
The kids liquid medicine syringe works well for this, if all you need is one or two the local pharmacy will give them to you, at least mine does.
Had to fill a few air pockets myself
Daniel
New Pictures
-
colonialc19
- Very Active Poster

- Posts: 612
- Joined: Tue Apr 24, 2007 4:09 pm
- Location: Colonial Heights,VA
-
bushmaster
- Active Poster

- Posts: 244
- Joined: Mon Dec 10, 2007 11:50 am
-
ks8
- * Bateau Builder *
- Posts: 8403
- Joined: Mon Nov 24, 2003 1:00 am
- Location: NC USA
- Location: Now a much longer sail to Tampa Florida! Back to NC, Youngsville FM05tw
I used syringes that West System sells. West Marine sells them... on sale now and then. I buy the 12 packs now so they are always handy. You basically get one, maybe two uses out of it, but you can really get the epoxy in those holes, after cutting a bit off the end of the syringe (they come with a very small hole that can be easily cut back wider with a single snip of the scissors). Let's say you have a 3 inch gap of air. You want to drill a small hole at each end of that gap, so that air can escape one hole as you squeeze the epoxy into the other. The strength of that seam depends on the glass and having a solid *core*. If there is a huge long air gap under the glass, this is not good.
The epoxy in the syringe, mixed, may cure faster than in a cup or bowl, so once you pull the mixed epoxy up into the syringe, work fast. Once the air gap(s) are filled, you can jam a woodflour blend in the holes so the epoxy doesn't wander.
I tend to think a good splice with a woodflour/epoxy blend in that seam is better than squeezing straight epoxy into the gap. Epoxy *glue* with woodflour in it will be stronger than plain epoxy. If you could squeeze a wood flour blend in there with a syringe, that would be better than plain epoxy, but that might be quite a job if the blend is too thick, getting it into and out of the syringe. You'd have to make all the holes larger. I've done this into some voids in plywood, with the blend just about at *ketchup*. *Peanut butter* consistency just doesn't get in there right, but ketchup can if you hold the syringe tight in the hole as you pump the syringe. I think even a thinner mayonaise consistency blend would be substantially stronger than plain epoxy, and certainly easier to get in there than ketchup, imho.
Enjoy the repair, or the grind and redo. These sorts of things are important and you might as well get it done right, right from the start.
-
bushmaster
- Active Poster
- Posts: 244
- Joined: Mon Dec 10, 2007 11:50 am
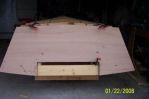
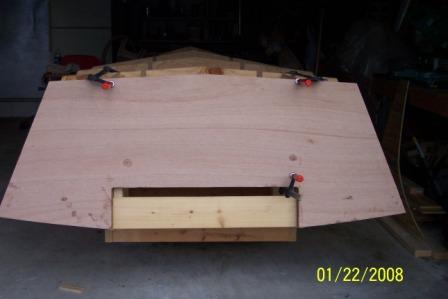
I need some advice on my transom innner radius, is the radius large enough?
It's about 1" right now. If it should be larger how do i fix this?
See picture
Thanks
http://gallery.bateau2.com/albums/userp ... 0_1783.jpg
It's about 1" right now. If it should be larger how do i fix this?
See picture
Thanks
http://gallery.bateau2.com/albums/userp ... 0_1783.jpg
-
bushmaster
- Active Poster
- Posts: 244
- Joined: Mon Dec 10, 2007 11:50 am
Don't link to the thumbnail, link to the actual image, like so:
The result:
Code: Select all
[img]http://gallery.bateau2.com/albums/userpics/18858/100_1783.jpg[/img]-
colonialc19
- Very Active Poster
- Posts: 612
- Joined: Tue Apr 24, 2007 4:09 pm
- Location: Colonial Heights,VA
Bush, on the radius in the motorwell part of the transom I drew it with a kids tupperware cup, set it down on the ply and traced it,
I read how to do that somewhere in the how to files , makes a nice round corner, if I had to guess the cup was about 2-2.5" across.
If you want to know for sure if your radius is large enough, post a question in the Power Boats section of the forum, Jaq. and Shine check that daily, and should reply.
Daniel
I read how to do that somewhere in the how to files
If you want to know for sure if your radius is large enough, post a question in the Power Boats section of the forum, Jaq. and Shine check that daily, and should reply.
Daniel
-
colonialc19
- Very Active Poster
- Posts: 612
- Joined: Tue Apr 24, 2007 4:09 pm
- Location: Colonial Heights,VA
Bush, I saw on another post you were wondering about stiching up the panels.
Steve292's thread has some great pics and some explanation if I remember correctly. It took myself 3 tries, I was trying to get them too tight first couple times, another good thread is the sticky Fs12 thread at the top of the builder's power boats section.
My suggestions
Buy a pack of at least 100 cable ties, it took me 200
Buysome dowl,cut them for use under the cable ties, you'll see why when you start pulling the bow together, it keep the panels from over laping.
Dont rush it, take your time and read those threads if you havent already, Good luck
Daniel
-
bushmaster
- Active Poster
- Posts: 244
- Joined: Mon Dec 10, 2007 11:50 am
Once again, thanks Daniel.
Yes, I have looked at Steve site and read and re-read the threads, but I would like to know if I should pull the ties tight for the bottom panels first before I attached the sides.
I have about 200 ties and they are 8" length. Is this long enough.
Keep those pictures coming Daniel, you are all an inspiration to all other builders.
Bushmaster
-
gk108

- * Bateau Builder - Expert *

- Posts: 3356
- Joined: Thu Jul 28, 2005 6:53 pm
- Location: The Peach State
It will probably work better to leave all the ties somewhat loose until you get all the panels on the mold, then pull everything up a little at a time. 200 ties is enough unless you have trouble and have to cut a bunch and stitch again. You'll probably have to do a few stitches that way, anyway.
CC, D15, V10
Who is online
Users browsing this forum: Google [Bot] and 8 guests