

Greetings all.
The florida boat builders meeting inspired me to get going on my build. I was only there for the bar-b-que but it was great seeing finished boats and meeting some of the other builders.
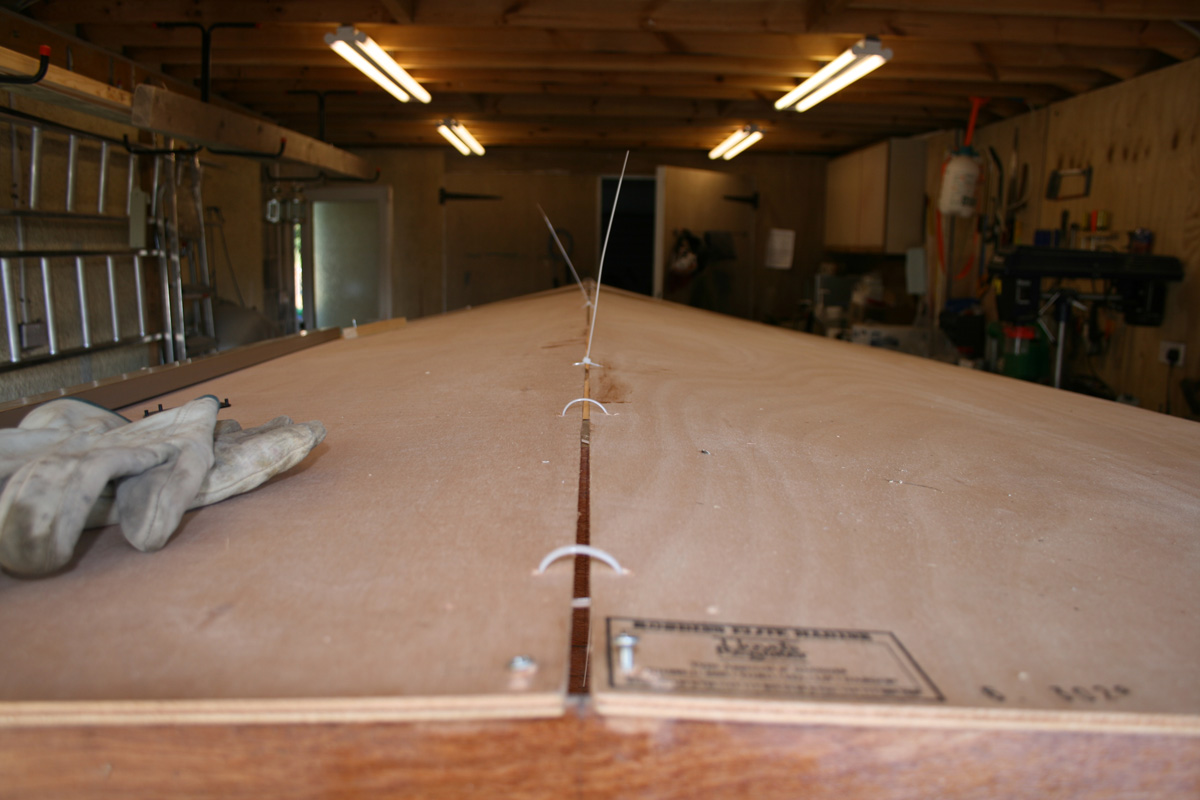
Last weekend I laminated the stringers, transom and clamping boards. I also spliced the hull panels. I did some good work and some not so good work.
First, I'm not bad at mixing epoxy. All of my batches cured nicely.
The hull splices turned out really nice. I probably could have used a roller to squeeze out excess epoxy from the biaxial tape. That tape seems like it is quite thick.
The stringer lamination went o.k. It is a good thing that measurements don't need to be exact.
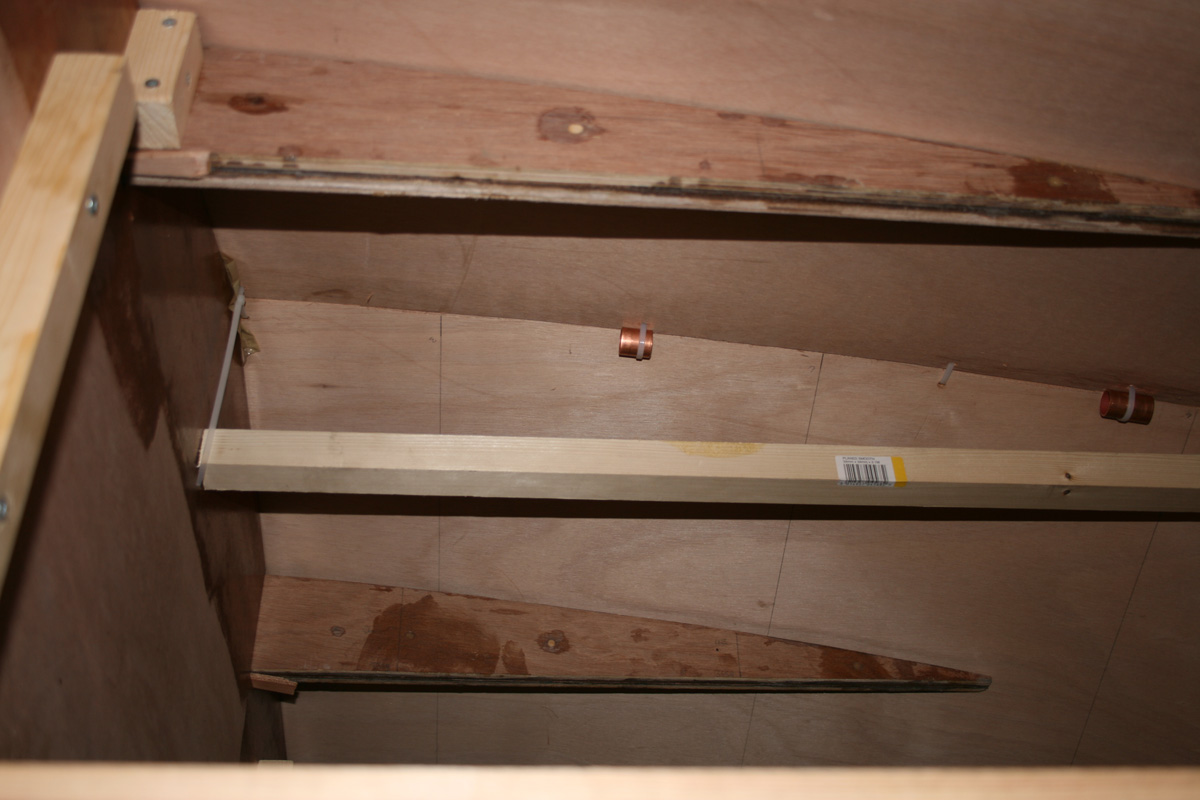
The transom and clamping board laminations did not turn out like I had hoped. I could have sworn that I used the transom as a template for the clamping boards. My cutting must have been way off. I'll need to trim and sand the top edge.
The lamination of the last clamping board may be a problem where I could use some help. I pre-coated the last clamping board piece with epoxy the night before and there may have been couple of clumps of epoxy on the board that I neglected to sand. There are definitely some voids along the edges of the last lamination. Should I try to fill those voids with epoxy? Should I try to separate the last lamination and try to redo?
This is an attempt to link to my gallery.
http://gallery.bateau2.com/displayimage ... at=0&pos=2
Lung Boy's FS17
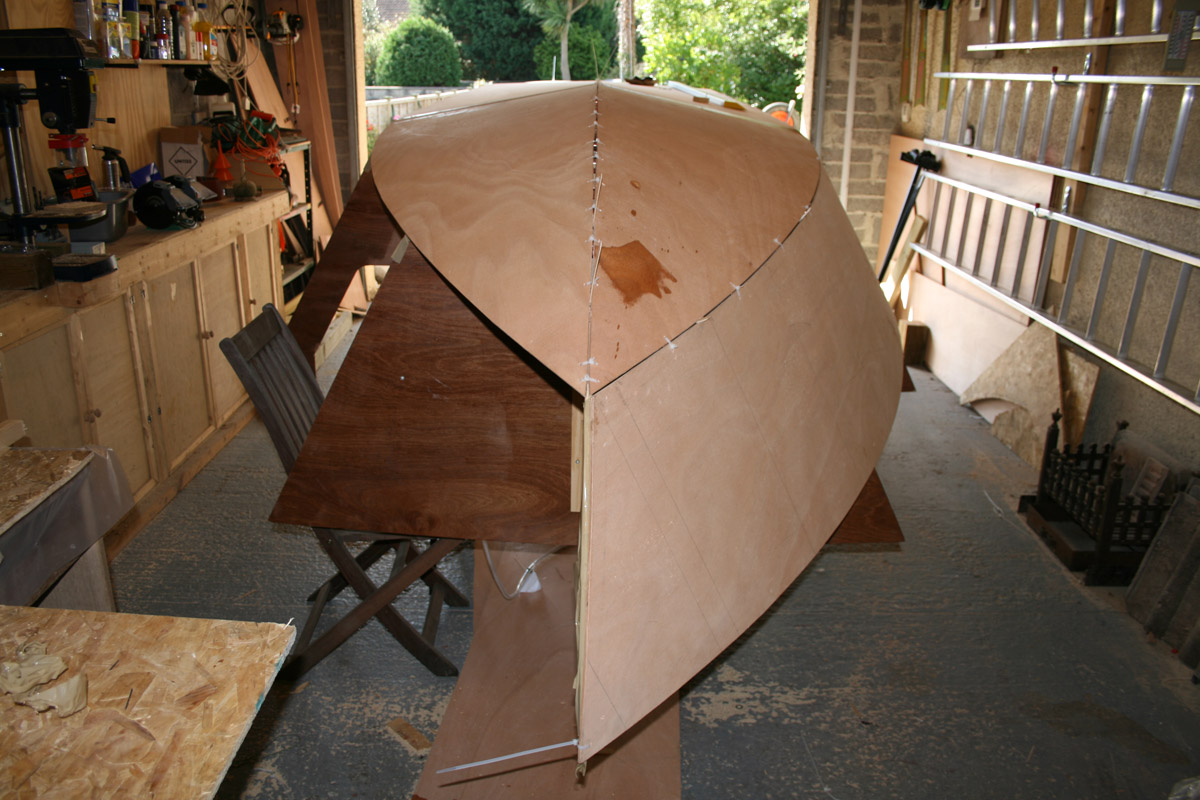
Hull panels loosely stitched on the jig
More progress. After tweeking the mold positions I finally got the hull panels up and loosely stitch. No major problems. It looks like everything lines up at the bow.
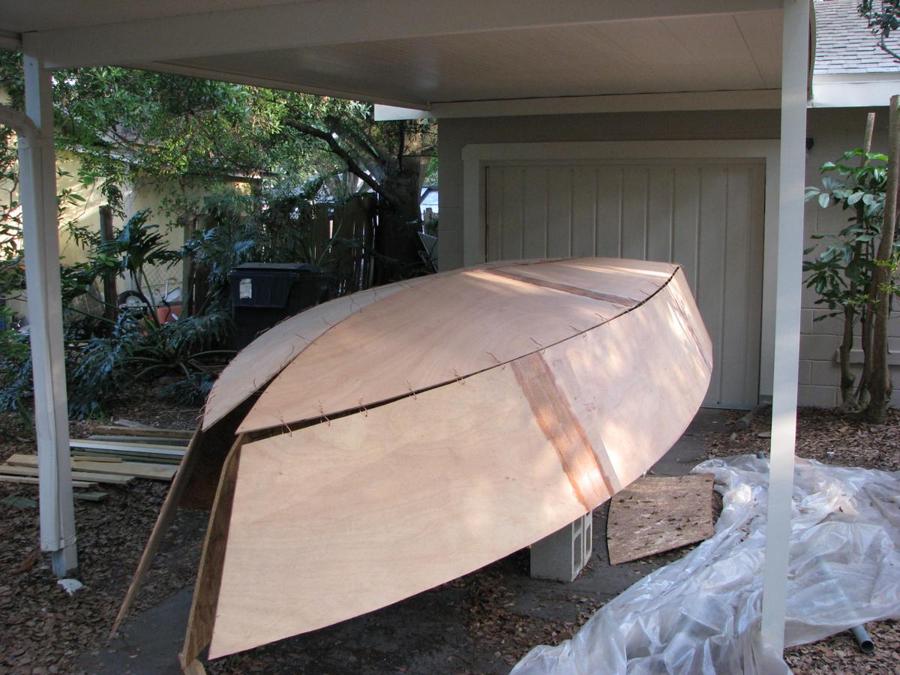
I will try the 1/2" dowel trick when I tighten the stitches.
Questions:
1. Do you stitch the hull panels to the transom or use screws?
2. Do you stitch the panels at the bow to the bow mold?
3. Is there anything you use as a spacer to keep a gap at the seams?
I will try the 1/2" dowel trick when I tighten the stitches.
Questions:
1. Do you stitch the hull panels to the transom or use screws?
2. Do you stitch the panels at the bow to the bow mold?
3. Is there anything you use as a spacer to keep a gap at the seams?
Re: Hull panels loosely stitched on the jig
1. I used a screw in each bottom panel to hold them on. Don't drive it all the way home, you want the panel to float.Lung Boy wrote: Questions:
1. Do you stitch the hull panels to the transom or use screws?
2. Do you stitch the panels at the bow to the bow mold?
3. Is there anything you use as a spacer to keep a gap at the seams?
2. I had to stich the panels to the bow mold to get them to come together properly in the end
3. I used tongue depressors as spacers. If the panels are really pushing on each other and it is obvious that they won't come together , I used a jigsaw to run between them to relieve the join, & create a gap.
Use as few stiches as you can, tighten slowly. I put pictures of how I did it in my gallery, and on Daniels thread (ColonialC19)
Hull looks great,very nice job
hope this helps,
Steve
-
tech_support

- Very Active Poster

- Posts: 12318
- Joined: Wed Dec 31, 1969 7:00 pm
- Location: Vero Beach, FL
- Contact:
I agree with steve, use screws only in a couple spots (bottom to transom near keel, side panel to transom near chine, and maybe one or two along the keel towards the center.
I also like to but a very thin finish nail tacked into the very top of the mold - this keep the bottom panles from touching and lets you visually line things up. Take it out after you tack weld.
In the FS12 tutorial we used nails to keep the spacing even....

I also like to but a very thin finish nail tacked into the very top of the mold - this keep the bottom panles from touching and lets you visually line things up. Take it out after you tack weld.
In the FS12 tutorial we used nails to keep the spacing even....
-
Lucky_Louis

- Very Active Poster
- Posts: 1081
- Joined: Wed Jun 25, 2003 1:00 am
- Location: West Coast, CANADA
lungboy said:
Hope this helps. Remember, there's almost nothing we can fix on our boats given enough epoxy, wood filler, and time
Separate? Not a prayer at this point, you'd destroy the whole transom trying to get it apart. That's a good thing. A void there can be very bad thing as it will try to wick moisture in. All is not lost. I would take a small circular saw and set the depth to an inch or so. Then I would clamp a 2x4 onto each side of the joint to provide a stable platform for the saw. Run the saw right down the seam. Now you should have a nice, even groove following the seam that you can fill with a real runny mixture of woodflour and epoxy (tomato soup, not ketchup), If you can't get at the area with the saw, use a Dremel or similiar tool to open up the area. The problem with just spreading epoxy over the voids is the air inside won't let the filler penetrate very far. If the voids are few and far between, just drill a 3/16" to 1/4" in the middle of the void and fill that. On non-horizontal surfaces, fill the hole and cover with a piece of masking tape to keep the mix where it belongs (or turn the piece to make it horizontal).The lamination of the last clamping board may be a problem where I could use some help. I pre-coated the last clamping board piece with epoxy the night before and there may have been couple of clumps of epoxy on the board that I neglected to sand. There are definitely some voids along the edges of the last lamination. Should I try to fill those voids with epoxy? Should I try to separate the last lamination and try to redo?
Hope this helps. Remember, there's almost nothing we can fix on our boats given enough epoxy, wood filler, and time
 OB17 Splashed June 2007
transom problem
Lucky, thanks for the advice. I already made a fix. I was able to remove the section of the clamping board that was the problem. The rest of the clamping board was on solid there was no way of getting it off other than grinding it off. Then I reglued the bad section. I happy with the fix for now. If it bothers me later I will grind it off after the flip.
-
Lucky_Louis
- Very Active Poster
- Posts: 1081
- Joined: Wed Jun 25, 2003 1:00 am
- Location: West Coast, CANADA
stitching
Shine, Steve, thanks for the comments. They were very helpful.
I see what you guys mean about tightening the stitches slowly. It's like trying to plug a hole in a dam. You plug one hole and then two new ones pop up.
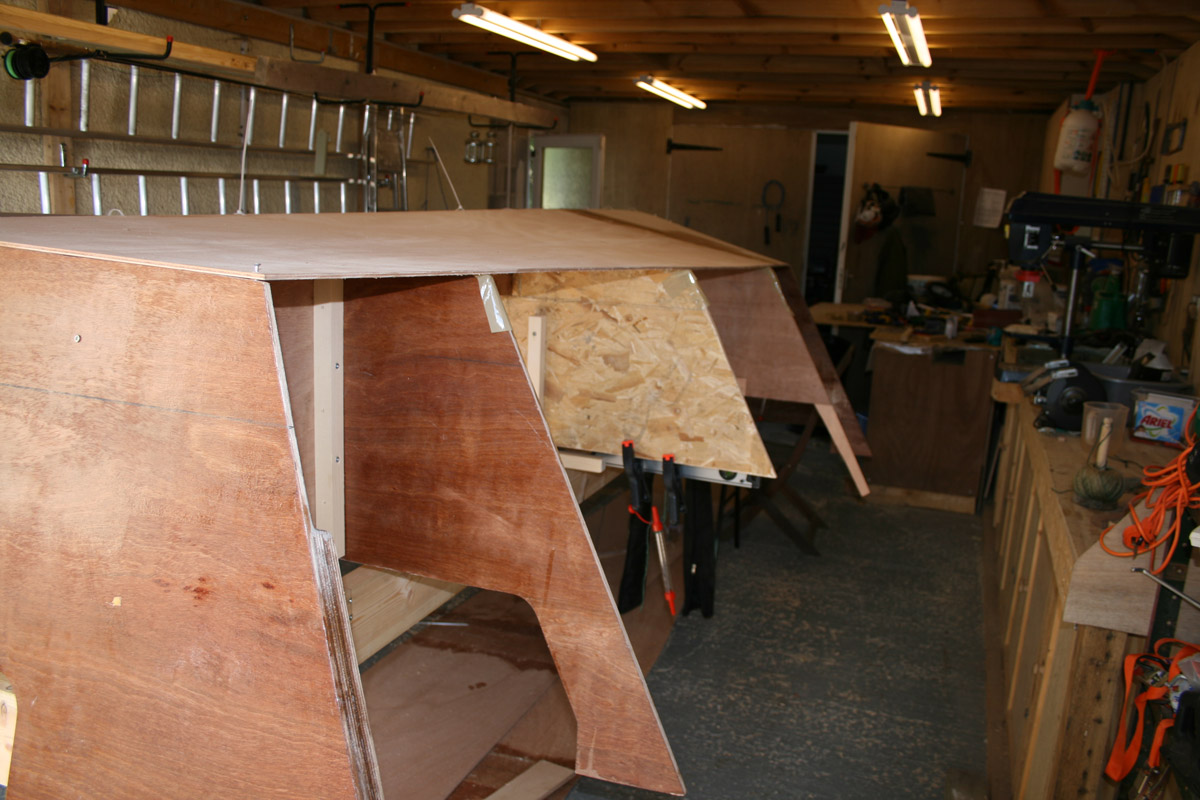
I stitched the keel seam up to the bow and also the chines up to the bow. I need to take a bit off of the front of the bow mold before I do the bow.
My cuts along the chines definately were not perfect. The gaps along the chines vary quite a bit. I think need to break out the jig saw or dremel to get a more consisent gap so that the tension on the stitches will equalize.
When I stitched the bottom panels to the bow, the panels raised up off of frame C a bit. Should I screw it down?
I see what you guys mean about tightening the stitches slowly. It's like trying to plug a hole in a dam. You plug one hole and then two new ones pop up.
I stitched the keel seam up to the bow and also the chines up to the bow. I need to take a bit off of the front of the bow mold before I do the bow.
My cuts along the chines definately were not perfect. The gaps along the chines vary quite a bit. I think need to break out the jig saw or dremel to get a more consisent gap so that the tension on the stitches will equalize.
When I stitched the bottom panels to the bow, the panels raised up off of frame C a bit. Should I screw it down?
To screw it down is a last resort really. It took me about 4/5 goes at it to get it right. It is worth persevering with it for a bit, as it will pay divedends in saved fairing(and sanding) later if you can get a nice flat planing surface, and fair hull now. I would look to see what is causing it to ride up at C. look at this-
Use as few stiches as you can get away with, tighten them the minimum that you need to get the hull fair.I think there are only 2 stiches tightened between the transom & frame B here.without seeing a picture of your hull I would think this is the most likely cause, to many stiches, too tight.I apologise if I am wrong, or you haven't done that .
You can see here what I used to stop the bottom panels riding over each other.
This is how I did the bow,I used stitches every 6" or so up to about mold B
I gave you some dud info in my last post, sorry. I used 2 screws in each bottom panel, not one.
Here, see the second screw on the chine corner?
You'll get there, it's just a bit of a faff about to get everything to line up properly, hope this helps,
Good luck,
Steve
Use as few stiches as you can get away with, tighten them the minimum that you need to get the hull fair.I think there are only 2 stiches tightened between the transom & frame B here.without seeing a picture of your hull I would think this is the most likely cause, to many stiches, too tight.I apologise if I am wrong, or you haven't done that
You can see here what I used to stop the bottom panels riding over each other.
This is how I did the bow,I used stitches every 6" or so up to about mold B
I gave you some dud info in my last post, sorry. I used 2 screws in each bottom panel, not one.
Here, see the second screw on the chine corner?
You'll get there, it's just a bit of a faff about to get everything to line up properly, hope this helps,
Good luck,
Steve
Who is online
Users browsing this forum: No registered users and 6 guests