Page 1 of 4
Trebuchet's FL12
Posted: Fri Jun 27, 2008 4:45 pm
by Trebuchet
So it's been about a year since I bought my plans and my two sheets of 1/4" plywood. Yesterday, I finally bought my 3/8" ply. Today, I started by gluing the buttblocks to the side hull members.
It was a bit of a mess, and didn't go nearly as smoothly as I would have liked. However, I'm pretty sure that it will turn out fine and they'll hold well. I had to recut one buttblock because I made a mistake.
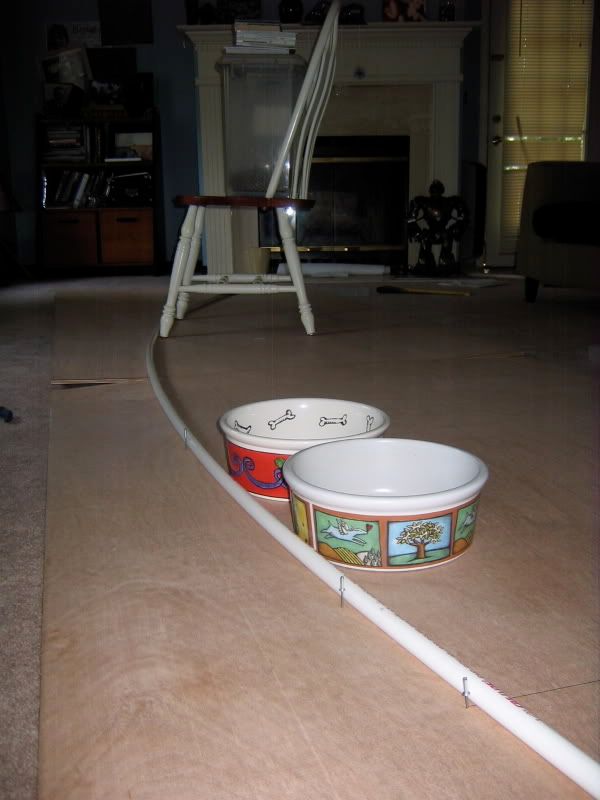
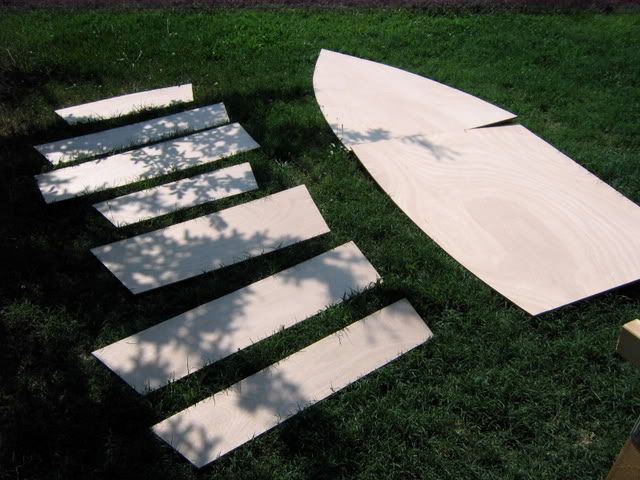
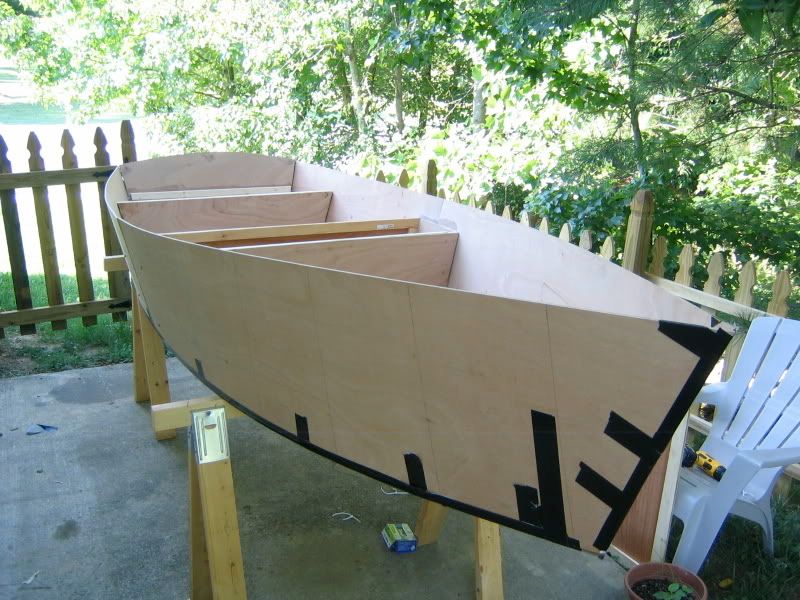
Next, I brought the 3/8" plywood inside since it's in the 90's today. Laid it out on the floor and drew out the hull bottom. I had to make a run to the hardware store to get an extra long pvc pipe to make the curve. The dog donated the use of his bowls to hold the curve.
Cut out:
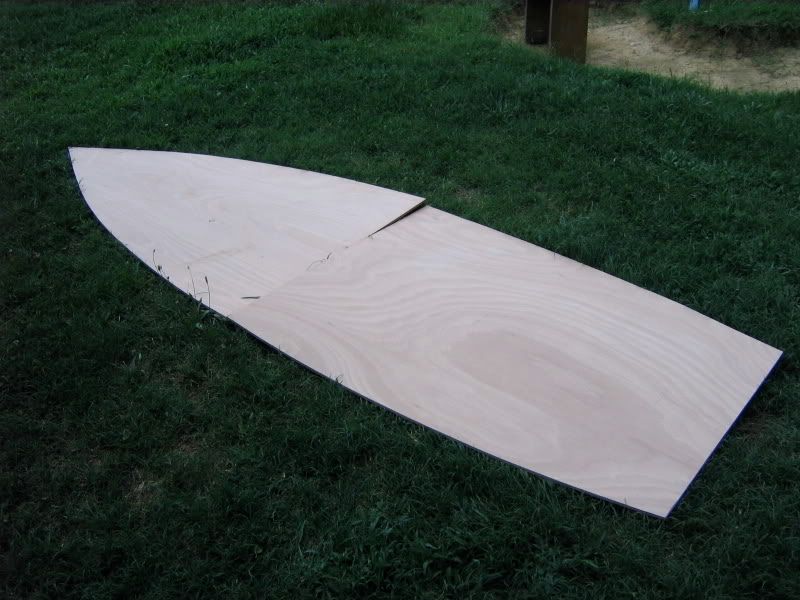
I then laid out all the other pieces. I tried to lay them all out on the wood in pencil before I cut. Luckily I was able to catch one mistake. Be sure to follow the nesting drawing that's in the plan, because the use of plywood is very maximized. Almost too maximized, because there were two pieces that I ran out of plywood. Only small bits of the corner. Here's all the pieces cut out:
Later tonight, or maybe tomorrow I'll go get some 1x3s to frame in the frames. After that, it's time to start stitching!
Posted: Sat Jun 28, 2008 9:28 pm
by Trebuchet
Got some more work done today.
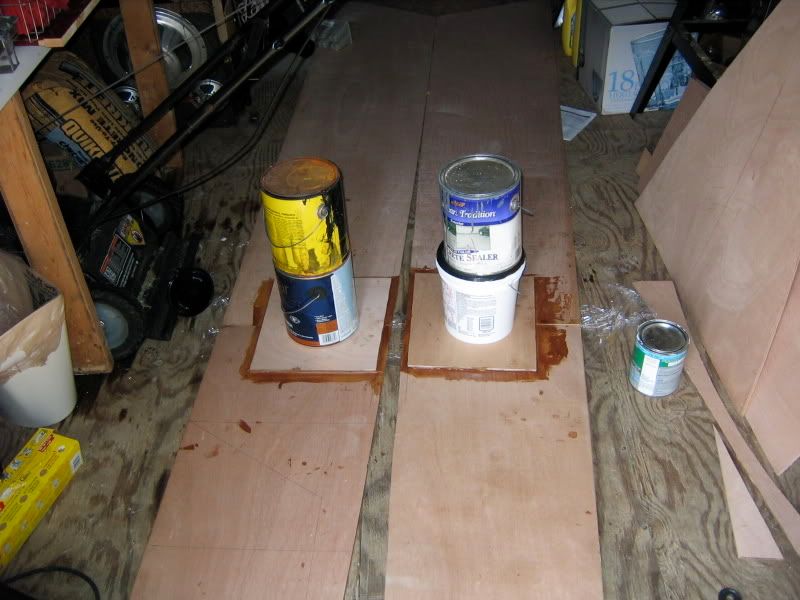
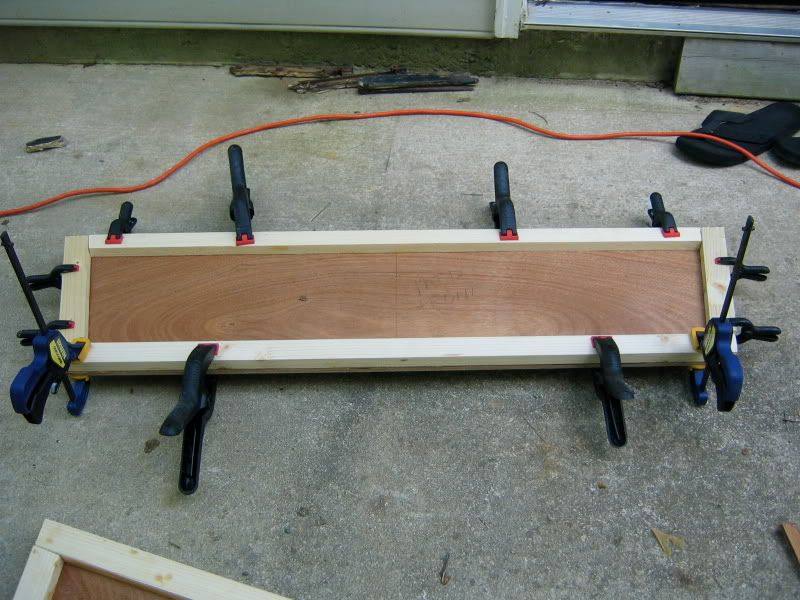
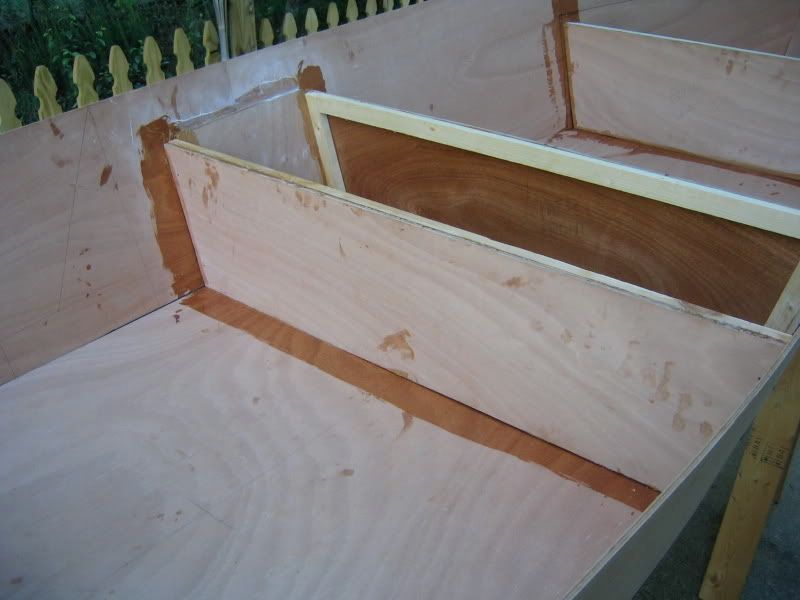
Started out with buying four 1x2x8s, cut them to fit around the frames. After that I mixed up some epoxy, precoated the plywood, and then mixed up another batch with some wood flour to glue the 1x2s to the plywood.
Must buy more clamps:
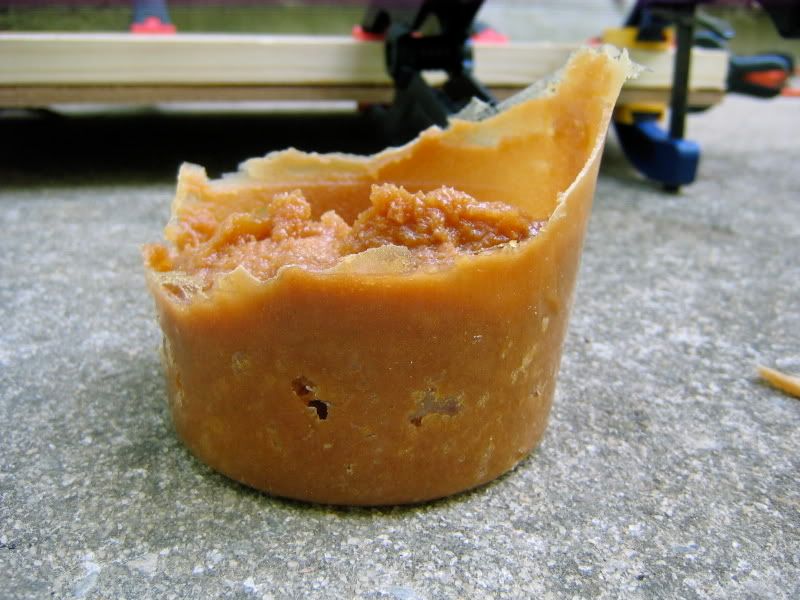
I had one batch go thermal on me... I was spreading some on the 1x2s and saw my epoxy smoking. Not good.
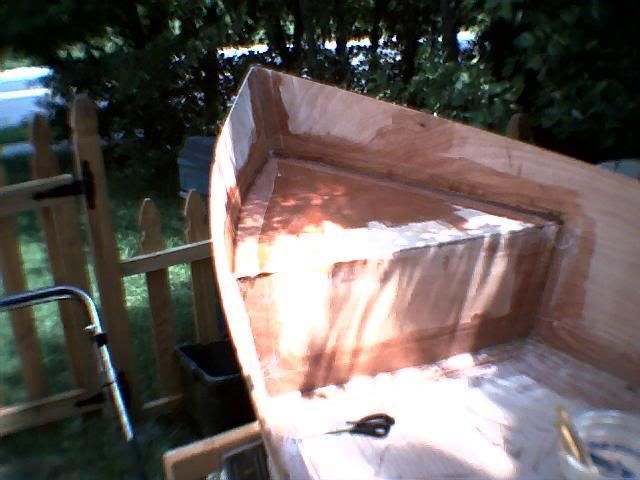
Finally, I was able to join the transom together. I started out by aligning the pieces putting pressure on them and drilling four pilot holes. I glooped on a bunch of epoxy and then screwed the three pieces together and actually to the floor. I added some extra weight to make sure that there would be good contact.

Posted: Mon Jun 30, 2008 9:27 pm
by Biker B.O.B.
Glad to see you've gotten started.

From what I understand, those FL12 builds go quick. Hoepfully it will have taken longer to purchase the plywood than to build the boat.
I've pretty much built my boat 3 ounces at a time. The only time I've mixed up more epoxy was when I was wetting out the fiberglass cloth on the bottom. Oh, yeah; and the one time I mixed up 6 ounces of fillet and only needed three.

Posted: Tue Jul 01, 2008 9:47 pm
by Trebuchet
Thanks Biker, I have been trying to do it 3oz at a time now, and haven't lost a batch yet.
The FL12 build is going well.
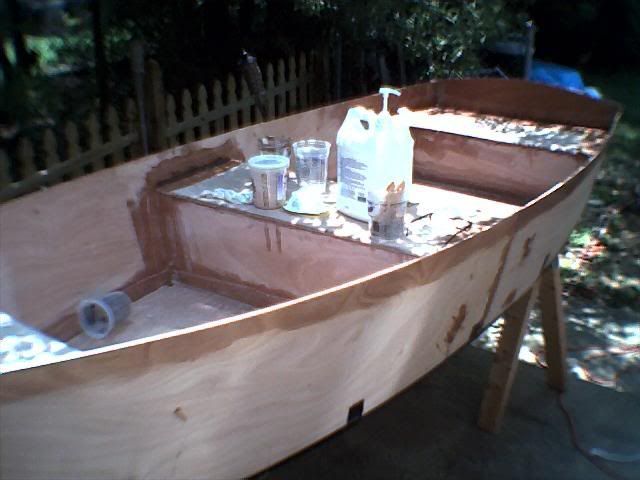
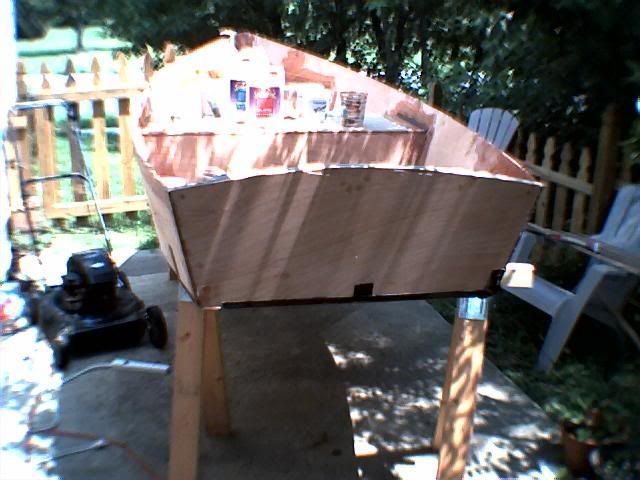
Today, I laid out the hull, put in the seat pieces and marked them. Held them in place temporarily with screws and flipped the hull. I was able to get the bottom piece of the hull onto the boat. I used Gorilla glue tape and it seems to work pretty well. Taped down the bottom sheet... thought about how I wanted it to lay... tried to get it to lay the way I wanted... tried some more to get it to lay the way I wanted... decided to let it lay the way it wanted to. I struggled trying to the bottom and side pieces to line up equally on either side. Eventually I gave up and got it as close as I could. Then I flipped the hull and screwed it all up anyhow.
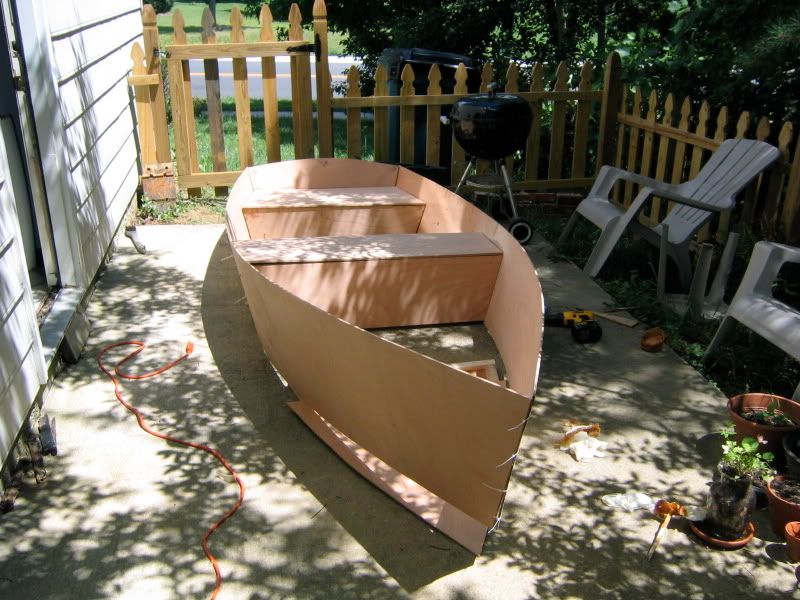
Mixed up a batch of epoxy and precoated the plywood, mixed up the glue and got it to stick to the seats. It was a little nerve wracking knowing that it was going to be so permanent... but I think it went well. I'll have some sanding to do, but I'm generally happy with the way today went.
Posted: Wed Jul 02, 2008 8:38 pm
by colonialc19
Your on a roll, keep at it

Posted: Thu Jul 03, 2008 11:12 pm
by Trebuchet
Unfortunately the battery on my camera is dead and I can't find the charger anywhere.
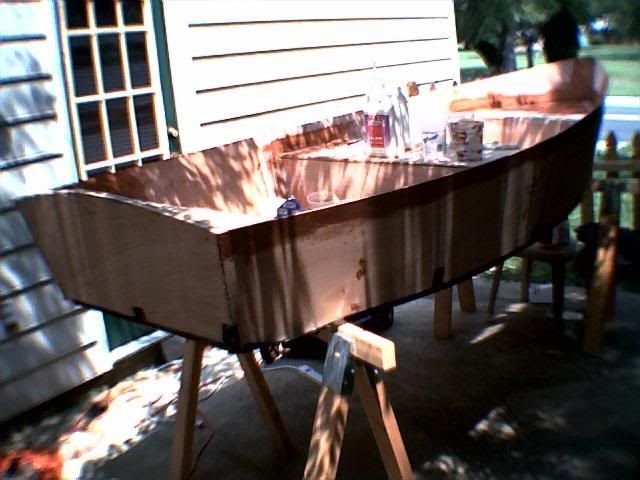
I did get the seats glassed in today though. I had a lot of help from the first mate (the Wife). Tomorrow, hopefully I'll be able to scrounge up enough scrap plywood in order to make the rubrail. I should also probably try to scrounge up a bunch more clamps. Maybe make some out of PVC, that seems to be a good and cheap way to go.
What's the minimum length of plywood I can use? Thinking of the scraps in the shed, I don't think there is many that's more than a few feet long. We'll see I suppose.
Posted: Fri Jul 04, 2008 8:22 pm
by colonialc19
Treb,
You can use the short pieces but, be carefull when clamping them on, its easy to make a "flat spot" on the rail where they join, and obviously the more joints you have the more chance of that. I guess you could use a scarf joint ( I think thats what its called

) not really good with the woodworking terminology.
You probally already figured this out but though I'd put it out there
Daniel
Posted: Fri Jul 04, 2008 11:20 pm
by Trebuchet
Thanks colonial. I sliced up a whole bunch of the scrap on the table saw today. They were longer than I remembered but a scarf joint might not be a bad idea. Thanks for that.
Hoping to get the seats down tomorrow, and then on to the rub rail. Things didn't go nearly as fast today as I would have liked, but there were other things that needed my attention.
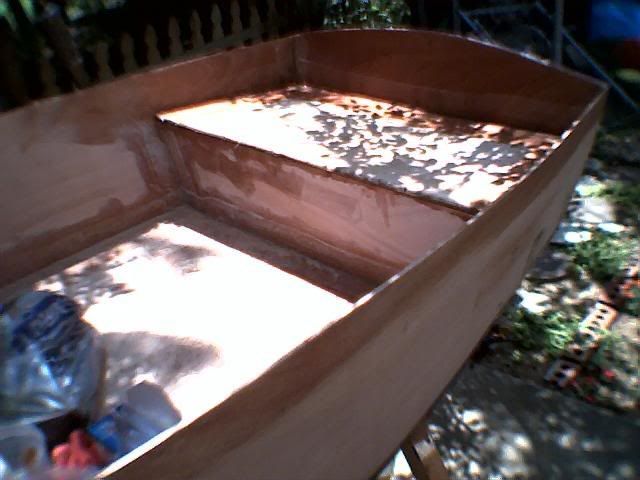
I gave most fiberglass we laid yesterday a quick sanding, coated the inside of the seat boxes with epoxy, glued on the blocks that'll support the transom and bow seat tops, precoated the bottom of the seats, and precoated the outside of the hull where the rub rail will be.
Things should come together much better tomorrow since I did so much ground work today. Some weather moved in, so I had to get the boat in the shed and call it a night.
Still no joy with the camera battery charger.
Posted: Mon Jul 07, 2008 6:31 am
by Bart
I don't think it is necessary to make scarf joints on the rubrail. Just use the longest pieces of plywood you can find, so that there'll be as few joints as possible. If you manage to glue and clamp all the layers in one time and make sure the joints in the different layers are not in the same area, I think you won't get "flat spots".
Bart.
Posted: Sun Jul 13, 2008 12:29 pm
by Trebuchet