Page 1 of 1
TX 18 Build
Posted: Sun Feb 06, 2011 7:03 pm
by dborecky
I have not really been following on here much but that is about to change.

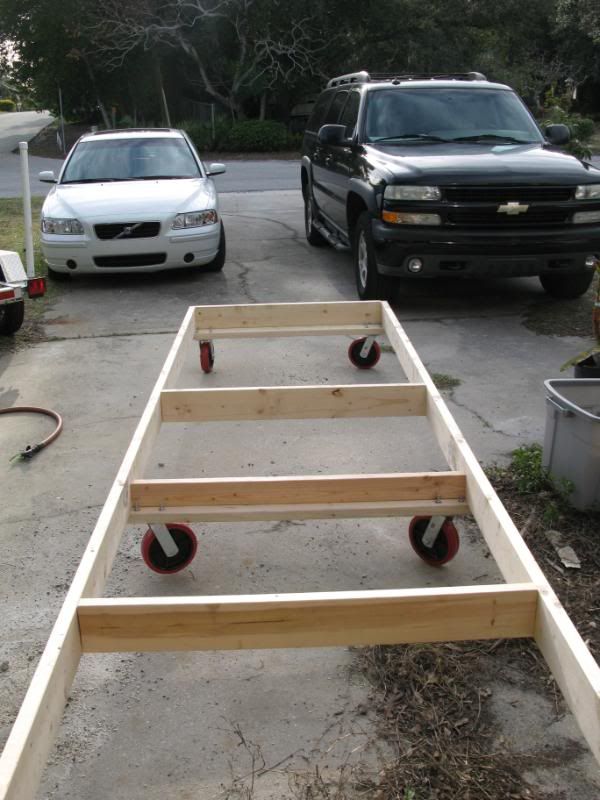
I decided to go for it and start my TX 18 Build. I had my eye on this boat since it first came out and Huck beat me to the build many years ago. A new born got in the way and I have been enjoying my FS 14. My wife made me promise to wait till Gavin was 1 year old before starting the build. His birthday was in Dec soooooo...... I ordered the wood from Bateau and it was delivered last week.
I am going to take my time and try and build the boat with my 4 year old Joseph. I learned that this can slow you down as I started to put together the strong back today. I figured I could slap this baby together in not time but it does take a little longer with the extra help. It is worth it though!!

I promise to document it here for you all to see and comment on. I am not sensitive at all and all comments will be taken without insult. I may not follow them all but I hope that no offense is taken.
Here are the first round of pictures.
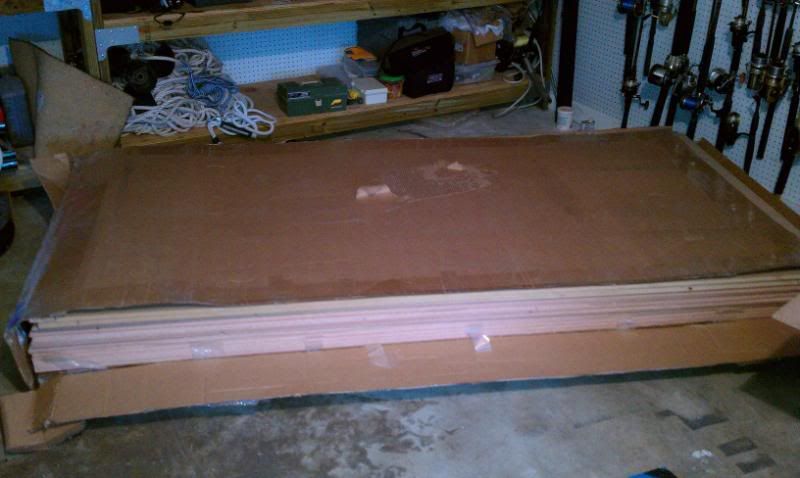
A buddy Dan delivered the ply from a good friend Charlotte who owns a buisness with a fork lift. I had the wood delivered to her and Dan brought to my house in his trailer.
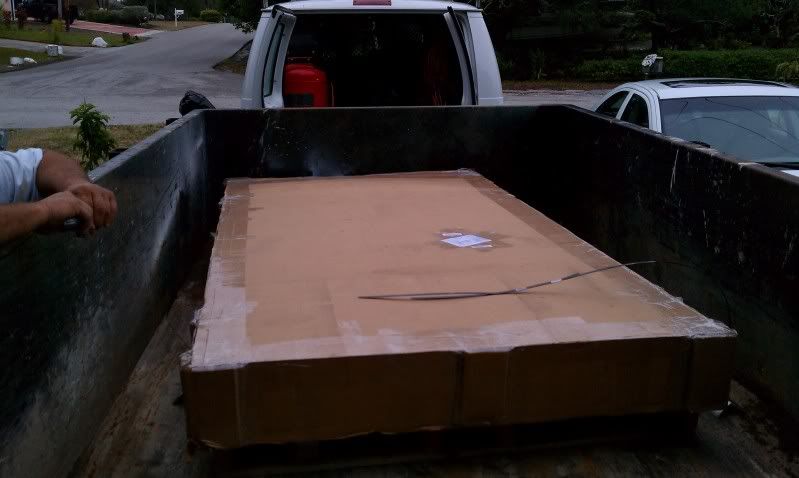
Unstacked and restacked back in the garage. I have been cleaning out the garaged for a few months and still have junk to clear out but I could not wait any longer and had to start the build and clean as I build.

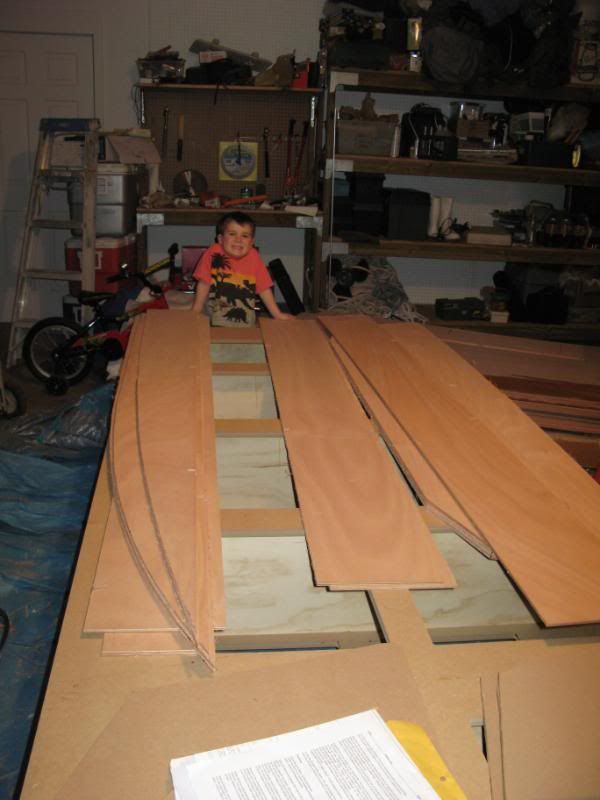
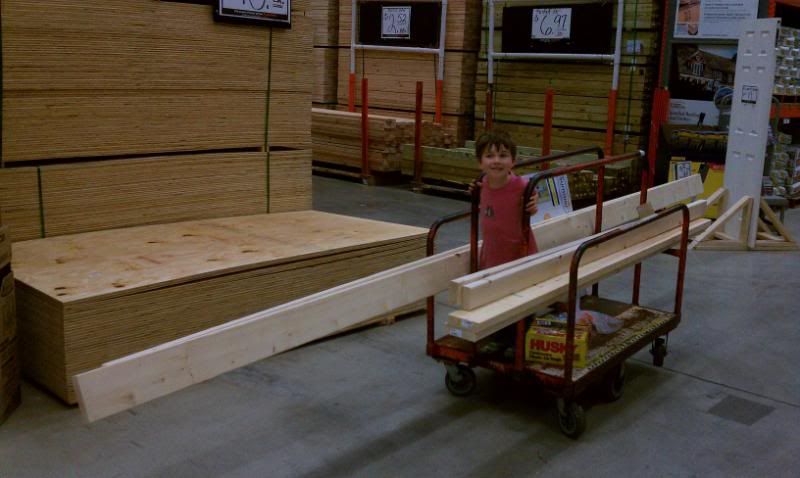
Joseph helping me buy the wood for the strongback.
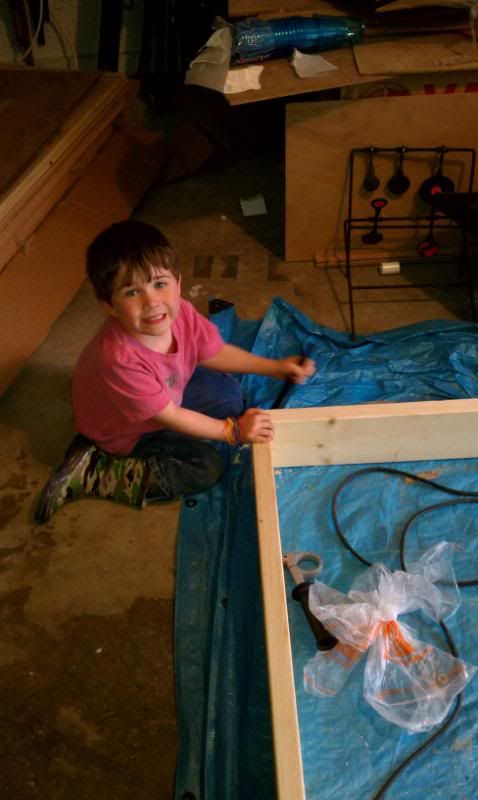
Joseph helping bolt the strongback with 2X6's.
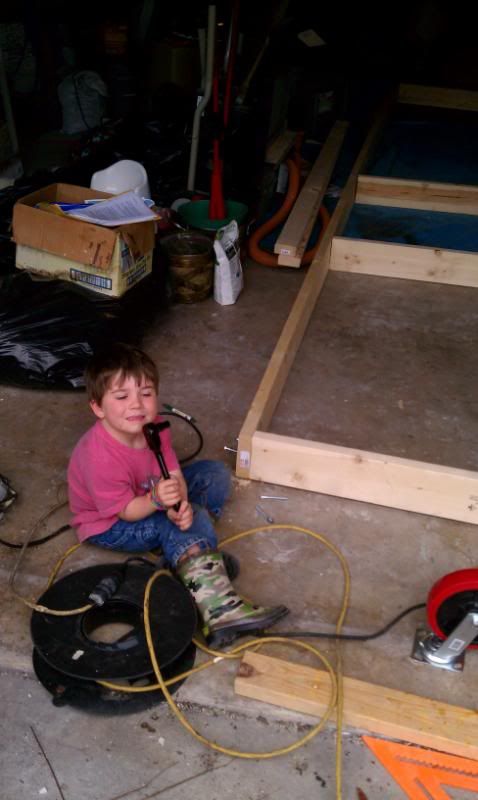
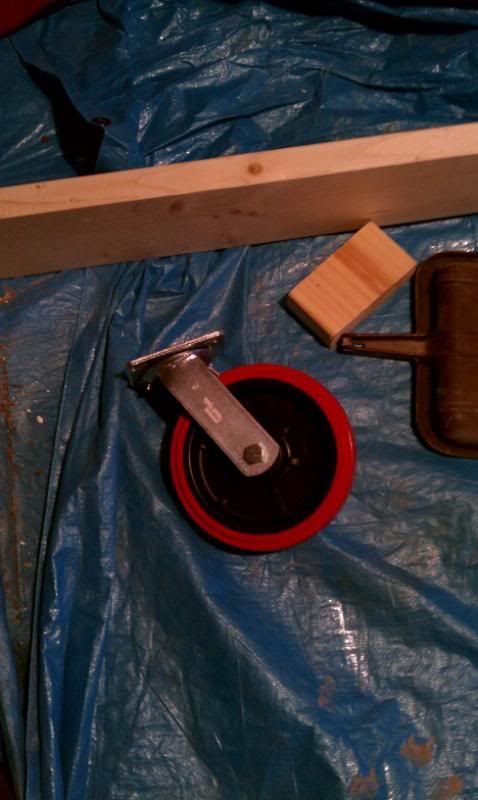
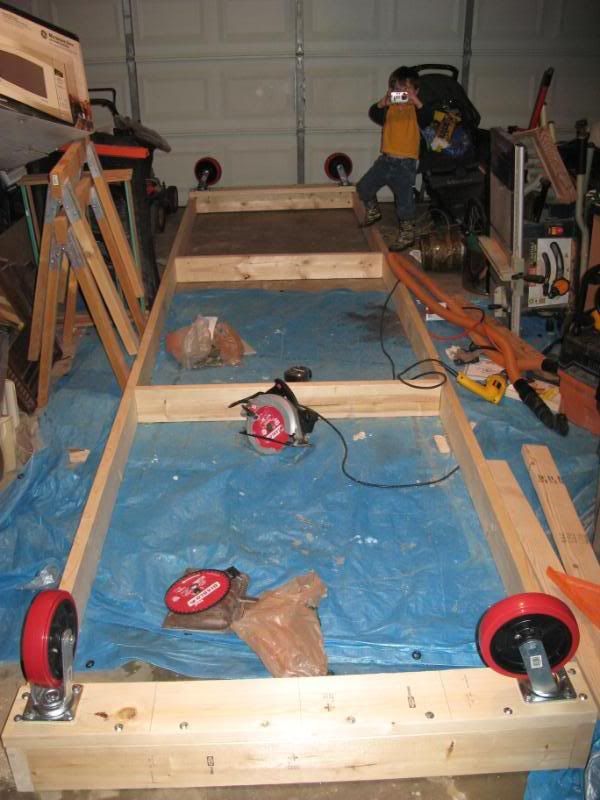
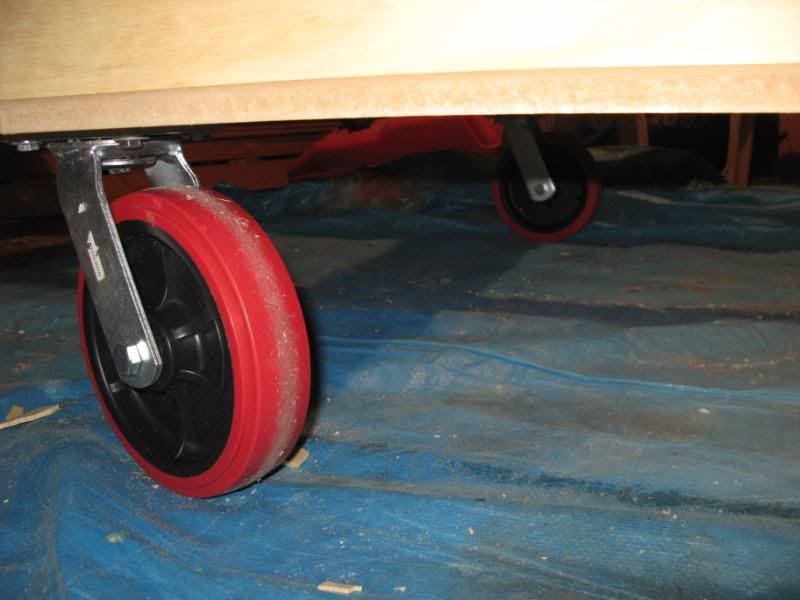
I am going to use these casters that are 6" and rated for 770 Lbs each.
That's it for today......
Re: TX 18 Build
Posted: Sun Feb 06, 2011 7:11 pm
by Cracker Larry
Great start Derrick. Joseph is his Daddy's boy
I thought you told me that you cleaned that garage

Re: TX 18 Build
Posted: Sun Feb 06, 2011 7:13 pm
by wadestep
Great to see you getting started on another one, and with such great help. Looks like every extra minute it takes to build will be time well spent.
wade
Re: TX 18 Build
Posted: Sun Feb 06, 2011 9:31 pm
by dborecky
Larry, You should have seen it before. It was about a 5 foot pile of stuff covering almost 90% of the floor space. I should have taken a before and after photo....
Wade, Joseph was really enjoying it and I got a kick out of him helping me. He actually has some raw talent with that socket wrench.
He was able to tighten them by himself while I drilled guied holes.
Re: TX 18 Build
Posted: Sun Feb 06, 2011 10:42 pm
by Rob Eades
If you need to borrow a rod & reel let me know,I have two.

Rob
Re: TX 18 Build
Posted: Sun Feb 06, 2011 11:37 pm
by Prarie Dog
Good job getting started. It will be interesting watching your build. I have been watching davidtx's build closely and am aware of some of his problems and issues. David is sworn to complete his before the Texas Builders Meet, hope to talk him into a ride.
edit: Check out his blog, the link is at the bottom of his posts, he posted the other day on the Texas Builders Meet thread.
Re: TX 18 Build
Posted: Mon Feb 07, 2011 7:09 am
by cottontop
You and your son will never forget this build. My kids are grown with their own now. I never regretted spending as much time as possible with them. They still talk about the many good times spent together. My only comlaint is they grew up too fast. Looks like you may have a "master mechanic" there. Good luck on your new adventure. John
Re: TX 18 Build
Posted: Mon Feb 07, 2011 11:59 am
by jacquesmm
Joel reminded me to write some notes about the kit assembly.
I will write that today and send you a PDF file but there is very little to it.
The kit goes together exactly as described in the notes that came with the plans.
The only difference is the use of MDF molds.
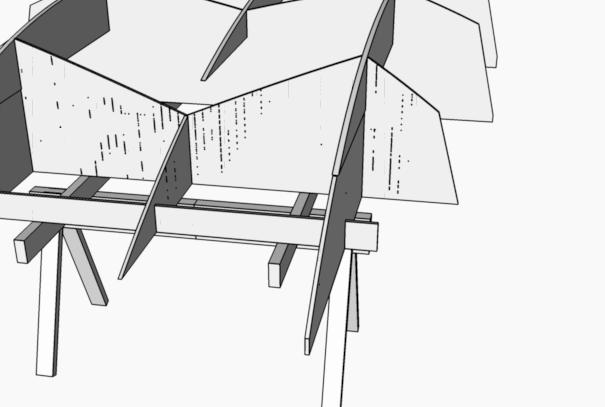
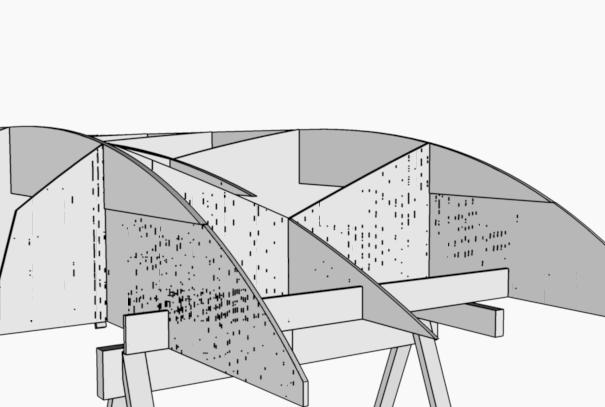
Here is a picture of the molds assembled with the stringers and transom, resting on 2x8's on saw horses:

Same viewed from side and above:

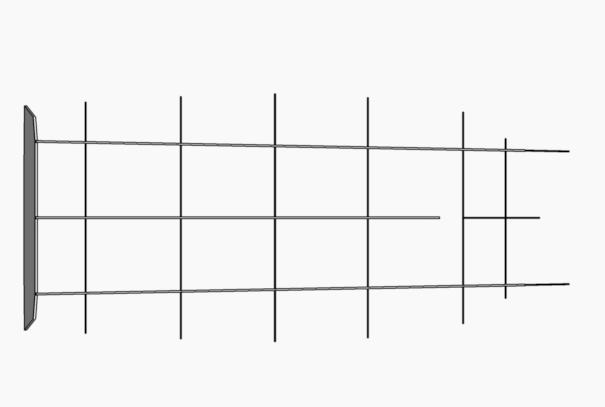
(I don't show the saw horses in the plan view).
You received 3 bow molds and a bow mold locator with your kit.
The locator is that cross beam.
Note how the stringers fit just on top of the bow molds.
Another view:
I made the notches for the stringers somewhat tight. You have to sand then down a little bit.
That's all. It should get together easily, post here if you have questions.
And don't epoxy glue the hull to the MDF: cover them with plastic at every seam.
Re: TX 18 Build
Posted: Tue Feb 08, 2011 8:45 am
by Aripeka Angler
Derrick, glad to see you have gotten underway on your boat! I am looking forward to seeing her come together. Let me know if there is anything I can do to help...
Have you told Jen yet?
Re: TX 18 Build
Posted: Tue Feb 08, 2011 11:51 am
by dborecky
Rich, I'm psyched about it. Jen did notice and was real quiet... That is not like her
She will get over it. She saw how Joseph was able to help and enjoy it. I thin that will help her warm up to the build.

Re: TX 18 Build
Posted: Tue Feb 08, 2011 3:43 pm
by cape man
I am not sensitive at all and all comments will be taken without insult.
Careful with this crowd!!
Glad to see you are building again, but dang it man...gonna make me build another one myself if you guys keep going.
Jen did notice and was real quiet...
Re: TX 18 Build
Posted: Wed Feb 09, 2011 6:48 am
by dborecky
Cape man,
I have tough skin so no worries....

If you ever get the urge to build, you can always drive over to my place and have at it..
We need to go fishing again!
Re: TX 18 Build
Posted: Wed Feb 09, 2011 6:58 am
by Aripeka Angler
Jen did notice and was real quiet...
It might be a good time for her to counterpunch by bringing home a new car
We need to go fishing again!
That is the best idea I have heard all week....
Re: TX 18 Build
Posted: Thu Feb 10, 2011 5:31 pm
by dborecky
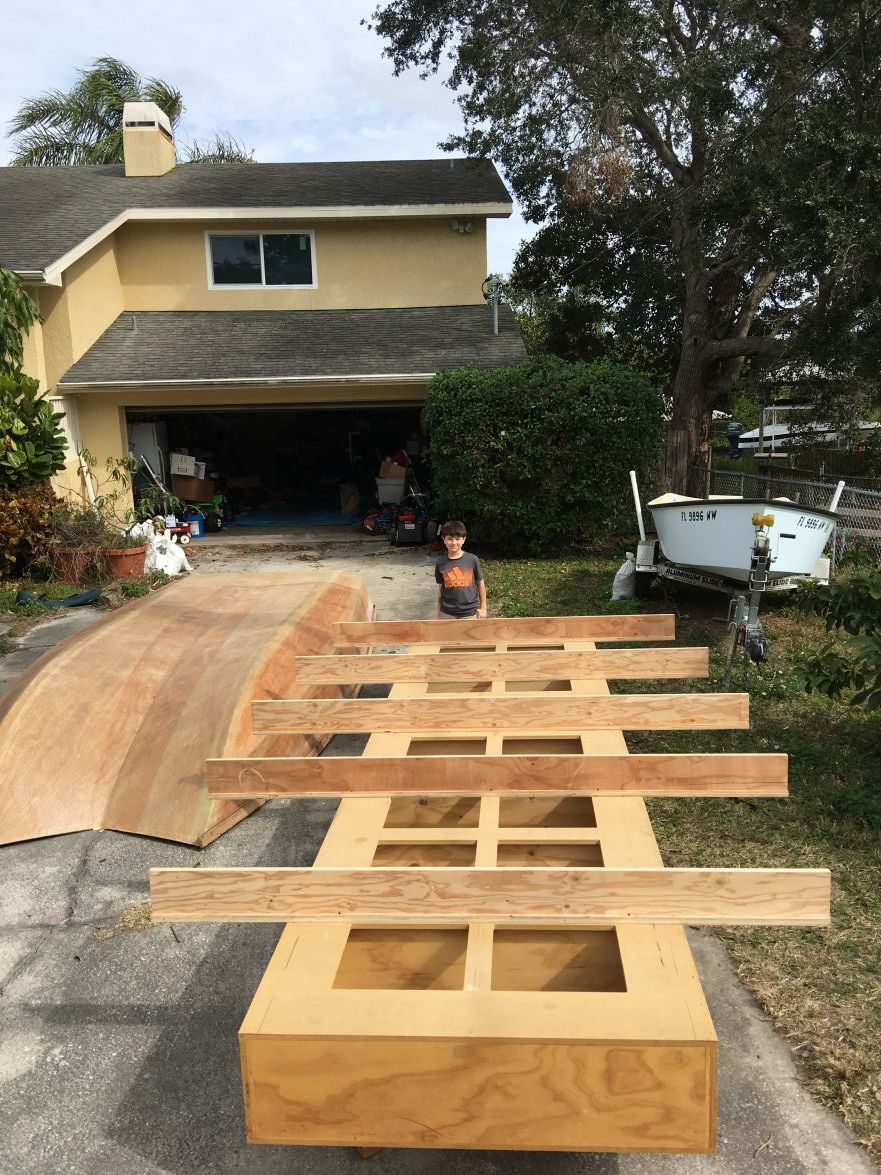
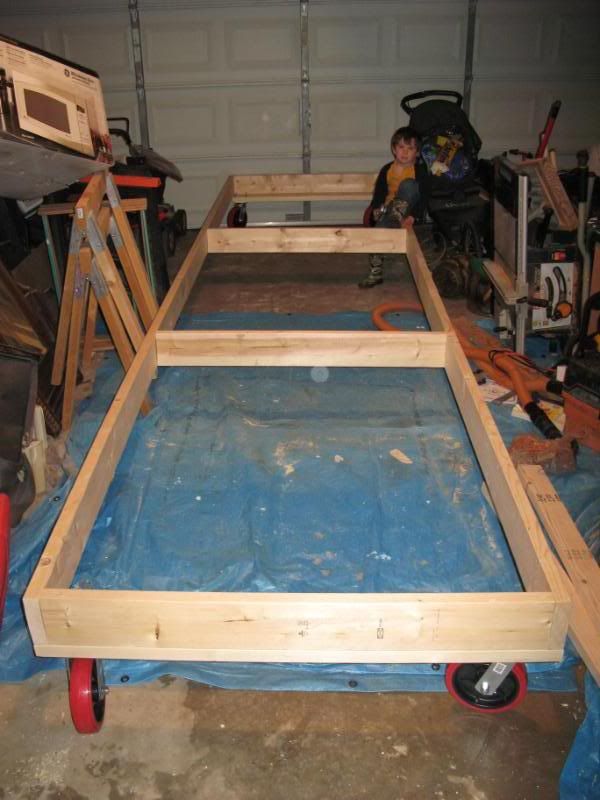
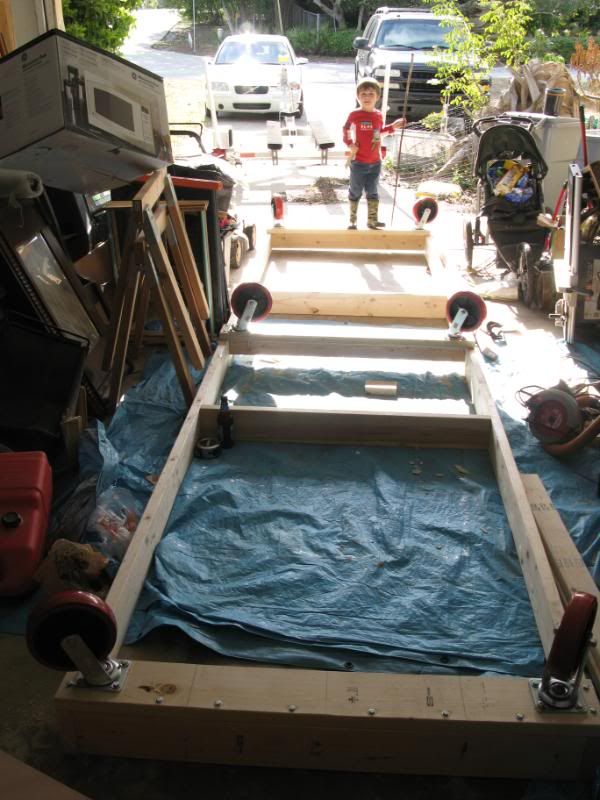
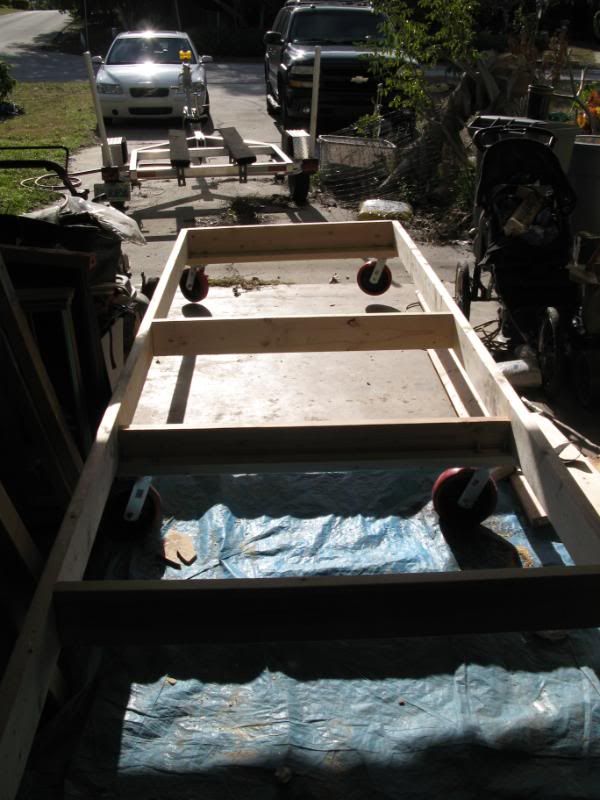
I got home early today and Joseph asked "can we build the boat" soooo.. We went in the garage and finished the strong back. Here is a picture with Joseph in it for scale. The strong back is 16 ft long by 4 ft wide. After flipping it, I realized the wheels don't have brakes and the thing really moves around. I guess I will need to make some blocks so it won't roll around on me when building and sanding.
Now to put the frames on it followed by glueing up the panels and stringers......
Re: TX 18 Build
Posted: Thu Feb 10, 2011 6:11 pm
by Cracker Larry
You don't think it might need a couple of wheels in the center? That's a long span.
I think you might need to clean the rest of the garage before you put a boat on that strongback

Re: TX 18 Build
Posted: Thu Feb 10, 2011 6:16 pm
by sitandfish
Cracker Larry wrote:You don't think it might need a couple of wheels in the center?...
And maybe you can find a pair with brakes.
Cool boots, Joseph!
Re: TX 18 Build
Posted: Thu Feb 10, 2011 6:29 pm
by dborecky
CL,
I thought about the wheels in the middle but at 20 bucks for each wheel I thought I could get away with the four. I could be wrong. I know that they can handle the weight with 770lb rating for each wheel. I may bite the bullet and get another pair and put them in the middle..... The 2X6's are on there sides which should help with stiffness.
sitandfish,
I had a hard enough time finding these that could handle the weight. I will just block them with wedges when I need to. Much cheaper that way...
Re: TX 18 Build
Posted: Thu Feb 10, 2011 6:39 pm
by Prarie Dog
Dborecky, I built a long table that is 16' X 8'. I put casters in the middle and on one end and put legs on the other end. When you want to move it I use a floor jack to jack up the legs an inch or two and move it where I want it. I kick the casters on the opposite end in line and it won't move. This same setup should work good for a strongback.
Re: TX 18 Build
Posted: Thu Feb 10, 2011 8:37 pm
by Steven
Just move the wheels in from the ends 2-3 feet. That's what I did for the OB19. Never had any downward flexing in the middle. Measured and watched carefully. 3 sets of wheels wasn't an option as I like to roll it out of the garage, which has a 1.5" lip to go down.
Re: TX 18 Build
Posted: Thu Feb 10, 2011 9:45 pm
by majorgator
Glad to see you are building again, but dang it man...gonna make me build another one myself if you guys keep going.
Everybody here just calm down for a minute

There's not a day that goes by where I don't consider building another, or re-building one...and I haven't even finished the one I got.
Derrick - I'm pretty interested in this style cause you don't see too many of these around our neck of the woods. Should be neat!
seth
Re: TX 18 Build
Posted: Fri Feb 11, 2011 12:41 am
by Prarie Dog
Did Huck ever post any performance data on his TX18? These are very interesting boats. Can't wait for a ride in Davids

Re: TX 18 Build
Posted: Fri Feb 11, 2011 1:23 am
by MarkOrge
DB, Kudos on making this a family project. I cherish the memories I had building something with my Dad or Grandfather, even though I was likely "getting inthe way" at the time...
I't's all precious.
Re: TX 18 Build
Posted: Fri Feb 11, 2011 8:05 am
by dborecky
Steven, I will consider that. I may just get another pair but I do have a slight drop going out of the garage... I did not think about the physics of three sets of wheels...
Seth, the reason I went with the tx over the phantom is that I wanted something different. I grew up in the keys and all the flats boats looked the same. Most still do....
Prarie dog, I rode on Hucks boat. It performed very well with the old 2 stroke he had on the back. I did not have my gps at the time but with 4 adults and one small kid it got right on a plane. I am not too good at estimating top end but I think it went 40mph or so. We will see what it will do with a brand new 2 stroke 90 yamaha.
Mark, Joseph really is enjoying the build.... He gets excited about doing it. I wonder how long that will last when it comes time to fair...
Re: TX 18 Build
Posted: Fri Feb 11, 2011 9:48 am
by Prarie Dog
Dborecky, you might consider a wing on the front deck to keep from blowing over.
90hp on that boat should fly
Re: TX 18 Build
Posted: Fri Feb 11, 2011 10:06 am
by jacquesmm
Prarie Dog wrote:Dborecky, you might consider a wing on the front deck to keep from blowing over.
90hp on that boat should fly
That is on the plans, we call it a "sneeze preventer".
Re: TX 18 Build
Posted: Fri Feb 11, 2011 11:54 am
by Prarie Dog
Jaques, I was under the impression that the sneeze preventer was there to keep the boat from sneezing when it is coming off plane. Is it there to kill lift too?
Thanks, Paul
Re: TX 18 Build
Posted: Fri Feb 11, 2011 1:15 pm
by Steven
Lost in translation

. Only to deflect spray.
Re: TX 18 Build
Posted: Fri Feb 11, 2011 1:23 pm
by Prarie Dog
GOTTCHA
Re: TX 18 Build
Posted: Sat Feb 12, 2011 2:17 pm
by Daniel Huckleberry
Good luck to you Derrick. I will be watching with lust and envy. I miss mine and would LOVE to put my next one together with a pre-cut!
I never took specs. I know she would do around 40 but no exact numbers. I didn't do the sneeze guard and didn't regret it. I like the look without it and spray wasn't an issue.
Huck
Re: TX 18 Build
Posted: Sat Feb 12, 2011 3:56 pm
by Prarie Dog
Huck, do you still have your TX?
Re: TX 18 Build
Posted: Sat Feb 12, 2011 9:13 pm
by Daniel Huckleberry
Sold it quite a while back. I am in WV working and have been for about 2.5 years now. The boat was just sitting down there in Alabama collecting dirt and mildew. It broke me heart to see it that way so I let her go to a very loving owner. Might do another one liker her in the future. I would really like to do the Hickman version for comparison.
Huck
Re: TX 18 Build
Posted: Sat Feb 12, 2011 9:44 pm
by Prarie Dog
Too bad you had to sell her. Hoping David will finish his soon so we can get some numbers. Take care Huck.
Re: TX 18 Build
Posted: Sat Feb 12, 2011 9:50 pm
by dborecky
Huck, It is great to hear from you!!!!
I pondered on the strong back.
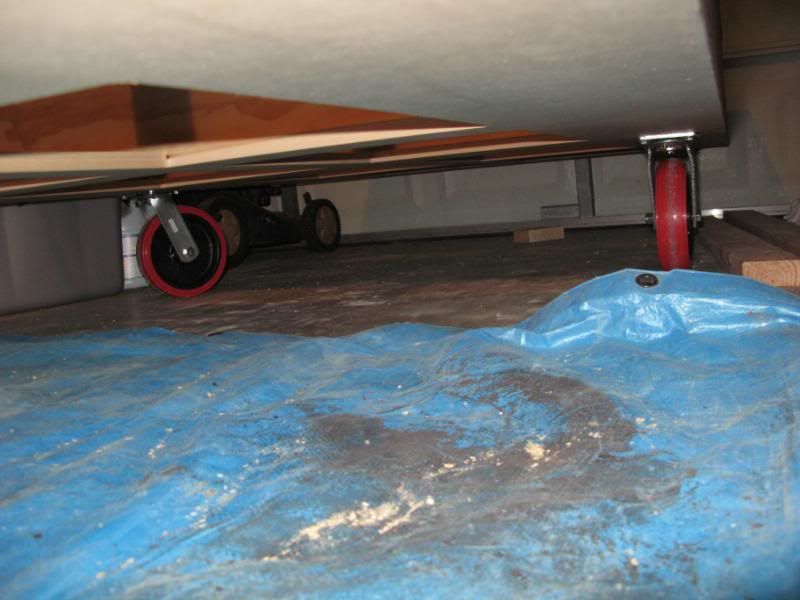
I decided to put a third set of wheels in the middle it after I stood on the middle and felt the flex.
The problem is that with three sets of wheels you need a very level surface and a perfectly level strong back or this happens......
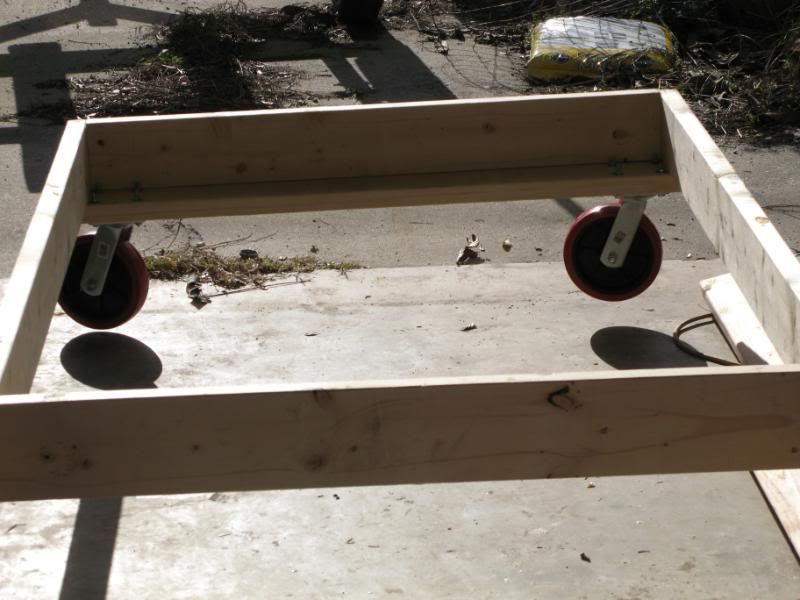
I was not sure what was going on so I rolled it out of the garage and the front and rear wheels were on the ground but the middle was like this.
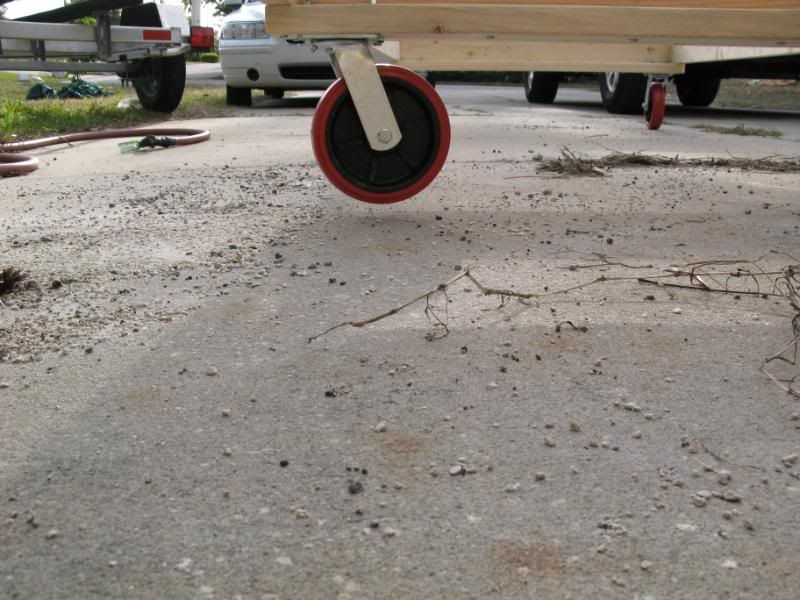
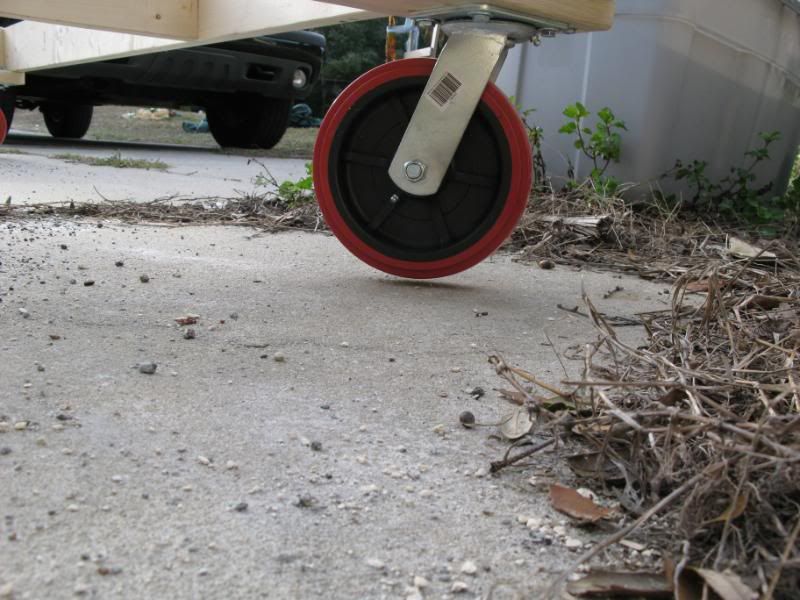
Now I have to figure out how to build with this going on. I may just have to put blocks under the wheels to make it level after rolling it in and out of the garage.
Re: TX 18 Build
Posted: Sat Feb 12, 2011 9:54 pm
by Prarie Dog
I bet when you get some weight on it it'll be fine.
Re: TX 18 Build
Posted: Sat Feb 12, 2011 10:24 pm
by Steven
I just went out and measured my frame. It's 16' long. The wheels on the front are 2 ' from the end and at the rear are 1 1/2 ' from the end. So I have 13 1/2' between the wheels. Never had any flexing issue. Gonna be tough on an uneven floor with 3 sets of wheels. By the time the hull gets any weight to it, it's just about stiff enough to keep from flexing anyway.
Re: TX 18 Build
Posted: Sat Feb 12, 2011 10:40 pm
by Prarie Dog
Steven. sounds like you may want to rent a laser level and mark the spots on the floor that the wheels should be so that it is level. If you need to put shims under some of the wheels then do that. I have alignment stands in my shop that are adjusted to be level in a fairly small area of the floor. Works fine.
Re: TX 18 Build
Posted: Sun Feb 13, 2011 7:31 am
by majorgator
Now I have to figure out how to build with this going on. I may just have to put blocks under the wheels to make it level after rolling it in and out of the garage.
Possibly the result of some of that really fine wood they're selling these days
I bought some 2 x 12 PT's yesterday, and when I laid them on the sawhorses to cut, I realized that the ends weren't square...not even close

seth
Re: TX 18 Build
Posted: Sun Feb 13, 2011 9:51 am
by topwater
Thats why i tore my jig apart and went out and bought lvl's, got everything level then bolted it to the floor.
Re: TX 18 Build
Posted: Sun Feb 13, 2011 10:35 am
by Cracker Larry
Thats why i tore my jig apart and went out and bought lvl's
Thanks for jogging my memory! Derrick called me about this yesterday and that's what I was trying to recommend to him, but I couldn't remember what they were called
I wouldn't fight that crooked lumber myself. I know you don't want to start over Derrick, but I think time spent now to get it right will pay off in grief savings over the long run.
Re: TX 18 Build
Posted: Sun Feb 13, 2011 7:02 pm
by wadestep
I've got a 16' strongback of 2x6s also (building the OB19). I've got a 3rd set of castor wheels with very carefully selected lumber. All wheels hit the ground before the build. DB - I'd be uncomfortable with your current setup both because you must have some lumber-based deflection and because of the large span between the wheels.
Also -I have about a 1/2" dropoff into my garage and the 3 sets of castor wheels are no big deal - I do see them come up off the ground only during moving in/out of the garage.
The other thing I'm glad I did is cut some triangles out of cheap plywood and fix them to the corners of the jig - really ensures that everthign is kept square.

Hope this info is of some use. - glad to hear you're getting building again, and that it's a family affair.
wade
Re: TX 18 Build
Posted: Mon Feb 14, 2011 12:51 pm
by dborecky
I agree with you all. I need to make sure I have the best base to start from to avoid future mistake trying to keep thing square. My last build had a square base.....
Richard called me and offered to help out. I am very grateful and was actually kind of speechless. He has great machines and tools that can make true boards. Pics to follow.
Derrick
Re: TX 18 Build
Posted: Mon Feb 14, 2011 3:35 pm
by Uncle D
I used a frame with 3 sets of wheel also and I incorporated leveling nuts on all-threads.
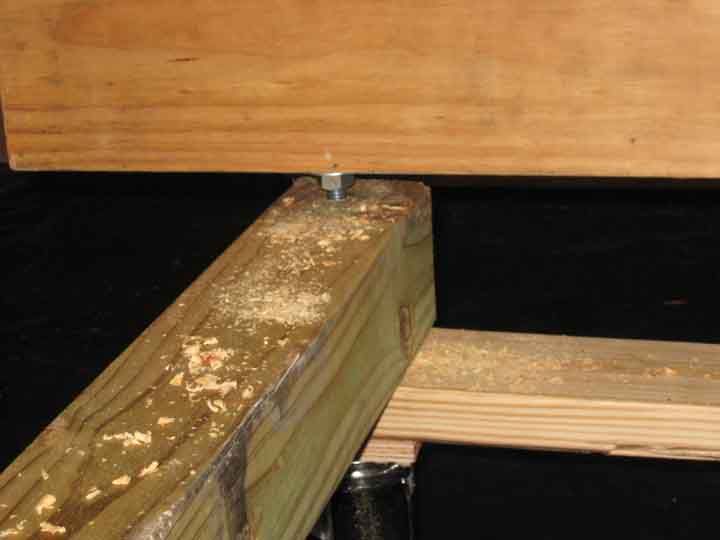
The bottom board is a 2x4 laded down for the wheels to attach to then 4x4's for cross beams and then the all threads in the 4x4's to a 2x6 along the length of the frame.
I leveled the frame in the spot I wanted to build it and now if I roll it out of the shop, everything is level when I roll it back in.
Re: TX 18 Build
Posted: Tue Feb 15, 2011 6:31 pm
by Aripeka Angler
Re: TX 18 Build
Posted: Tue Feb 15, 2011 6:37 pm
by Cracker Larry
There are good ships and wood ships, and ships that sail the seas. But the best ships are friendships, and may they always be.
Richard, a man could never ask for a better friend than you
That is a nice!
Re: TX 18 Build
Posted: Tue Feb 15, 2011 7:34 pm
by Steven
You're a heck of a guy Richard. Very nicely done.
Re: TX 18 Build
Posted: Tue Feb 15, 2011 7:57 pm
by Doc_Dyer
I didnt expect anything less from Richard
Re: TX 18 Build
Posted: Tue Feb 15, 2011 7:58 pm
by Aripeka Angler
You guys are too nice! I am glad to give Derrick a hand. He is like family to me. Always greets my family and myself with a hug. He is a super guy
Jen and the kids are great too
I really am glad I found this forum when I was searching for a used micro-draft boat a few years ago. I have met some wonderful folks and made some lifelong friends as well
Re: TX 18 Build
Posted: Tue Feb 15, 2011 8:13 pm
by Cracker Larry
Always greets my family and myself with a hug. He is a super guy
Yeah he is. I hate it when he sticks his tongue in my ear though
Re: TX 18 Build
Posted: Tue Feb 15, 2011 8:23 pm
by Aripeka Angler
That's funny
We need a throwing up emoticon on here
Re: TX 18 Build
Posted: Tue Feb 15, 2011 8:29 pm
by cape man
Re: TX 18 Build
Posted: Tue Feb 15, 2011 9:22 pm
by TomW
That's to cool we needed that a couple of weeks ago when things got heated!
Re: TX 18 Build
Posted: Tue Feb 15, 2011 10:30 pm
by Prarie Dog
Good job Richard
Really nice looking strongback.
Re: TX 18 Build
Posted: Wed Feb 16, 2011 7:52 am
by dborecky
I feel blessed to have such good friends... What else is there to say...
Re: TX 18 Build
Posted: Wed Feb 16, 2011 10:49 am
by Mad Dog
dborecky wrote:I feel blessed to have such good friends... What else is there to say...
I say start cutting and gluing already.
Keep hoping to see some boat building pic.
MD
Re: TX 18 Build
Posted: Wed Feb 16, 2011 11:01 am
by Uncle D
Think I'll delete my post. All I can say is WOW Richard...I'm drooling over that shop too.
Re: TX 18 Build
Posted: Wed Feb 16, 2011 11:03 am
by Aripeka Angler
Mad Dog wrote:dborecky wrote:I feel blessed to have such good friends... What else is there to say...
I say start cutting and gluing already.
Keep hoping to see some boat building pic.
MD
So you are saying enough of the mushy stuff?
I think we may see some progress by the weekend...
Re: TX 18 Build
Posted: Wed Feb 16, 2011 11:09 am
by Aripeka Angler
Uncle D wrote:Think I'll delete my post. All I can say is WOW Richard...I'm drooling over that shop too.
Thanks! Uncle D
I wouldn't delete the pic. That is a fine strongback you made and I think the leveling bolts were a great idea. BTW, the boat very nice too
Re: TX 18 Build
Posted: Wed Feb 16, 2011 2:07 pm
by Mad Dog
Aripeka Angler wrote:Mad Dog wrote:dborecky wrote:I feel blessed to have such good friends... What else is there to say...
I say start cutting and gluing already.
Keep hoping to see some boat building pic.
MD
So you are saying enough of the mushy stuff?
I think we may see some progress by the weekend...
EXACTLY! Some of us build boats and the rest of us (Me, wishing I SWMBO understood the need for a TX18) live vicariously through them.
MD
Re: TX 18 Build
Posted: Wed Feb 16, 2011 5:51 pm
by Prarie Dog
Maybe David can give her a ride Mad Dog, could change her mind
Re: TX 18 Build
Posted: Wed Feb 16, 2011 6:20 pm
by Mad Dog
Prarie Dog wrote:Maybe David can give her a ride Mad Dog, could change her mind
Oh sure. Then she'll look over at the Aquasport and say "and what do you plan to do with that mistress?"

However, that would be a good excuse for ME to get a ride on David's TX.
MD
Re: TX 18 Build
Posted: Wed Feb 16, 2011 6:53 pm
by dborecky
Richard came by and dropped of the work of art!!!
My wife took one look at it and declared it was too nice to use for my project and asked Richard if he could put doors on if for a cabinet...
I quickly distracted her and was able to bolt my 2 sets of wheels onto the bottom of it with the help of Richard.
Here is a few pics of the new improved strongback that I'm scared to spill epoxy on....
Here is the wheels setting as they should on the floor.
Now it's game on....
Re: TX 18 Build
Posted: Wed Feb 16, 2011 7:09 pm
by Cracker Larry
Re: TX 18 Build
Posted: Wed Feb 16, 2011 7:24 pm
by Prarie Dog
Beautiful
Re: TX 18 Build
Posted: Thu Feb 17, 2011 10:30 am
by Aripeka Angler
Derrick, here is the router bit I was telling you about...
http://www.homedepot.com/Tools-Hardware ... ogId=10053
Re: TX 18 Build
Posted: Thu Feb 17, 2011 6:29 pm
by TomW
Richard that's a good price for a bit like that!
Re: TX 18 Build
Posted: Sat Feb 19, 2011 3:40 pm
by dborecky
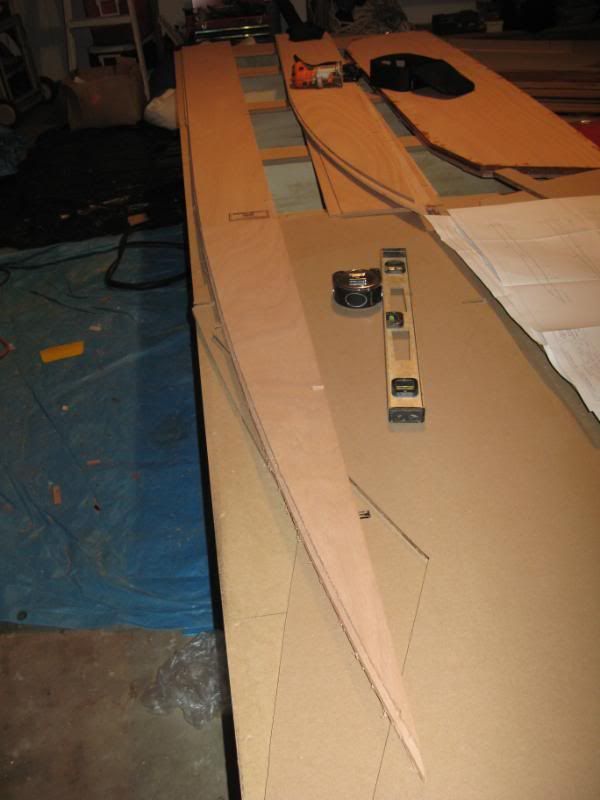
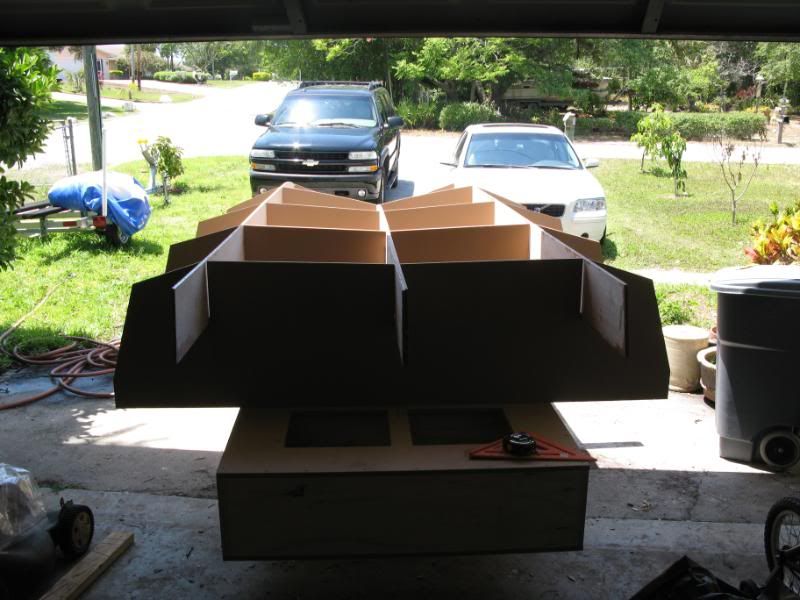
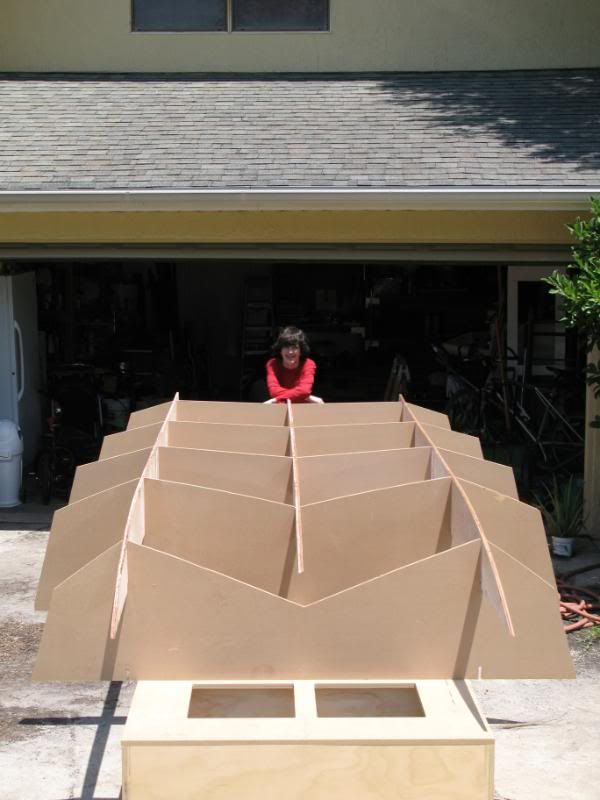
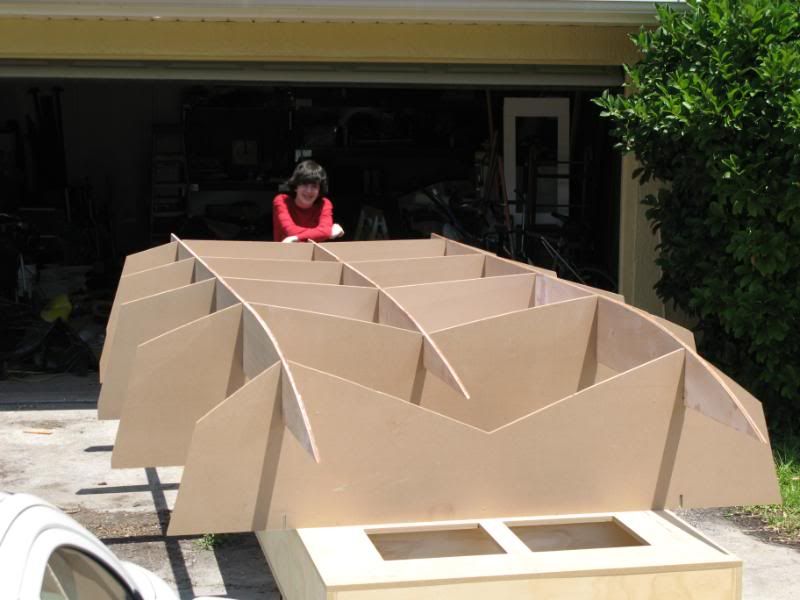
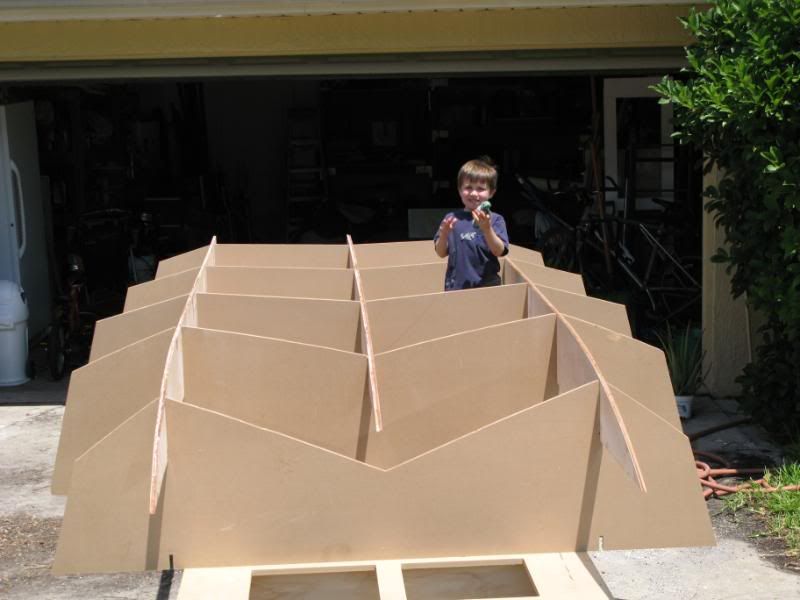
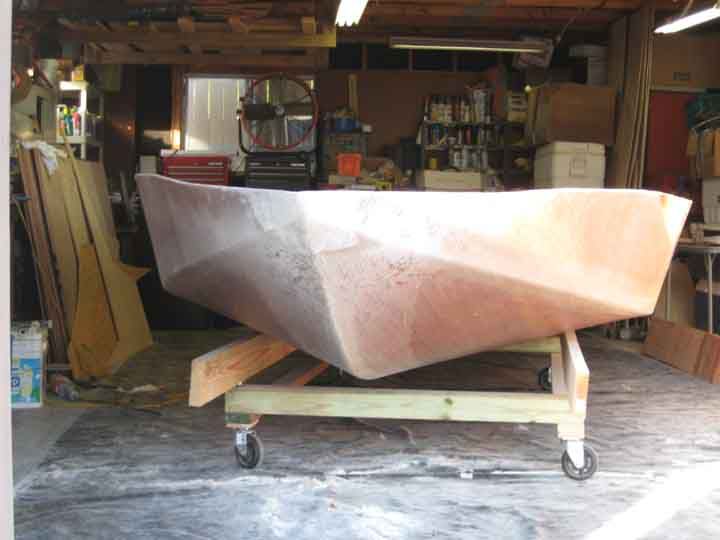
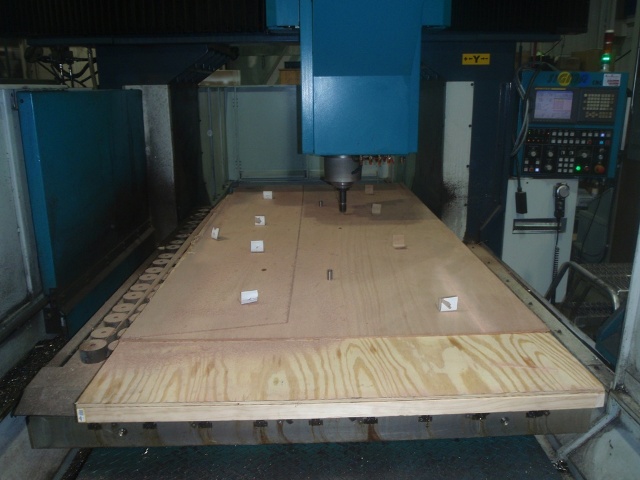
I started to plug away at the boat today with my boys. I did not get as far as I would have liked but we are done cutting out the MDF bulkheads and molds. This project will be like eating an elephant. I will get done by eating one bite at a time.
Here are the pics from today.
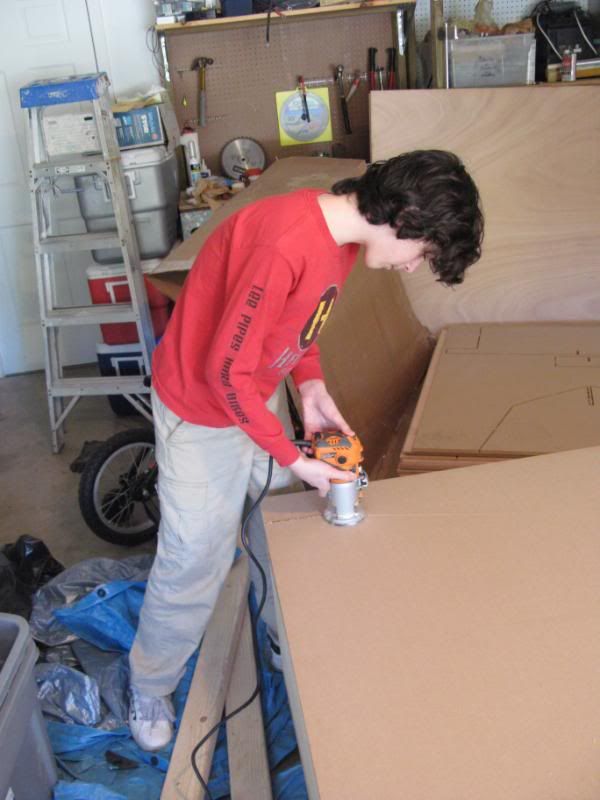
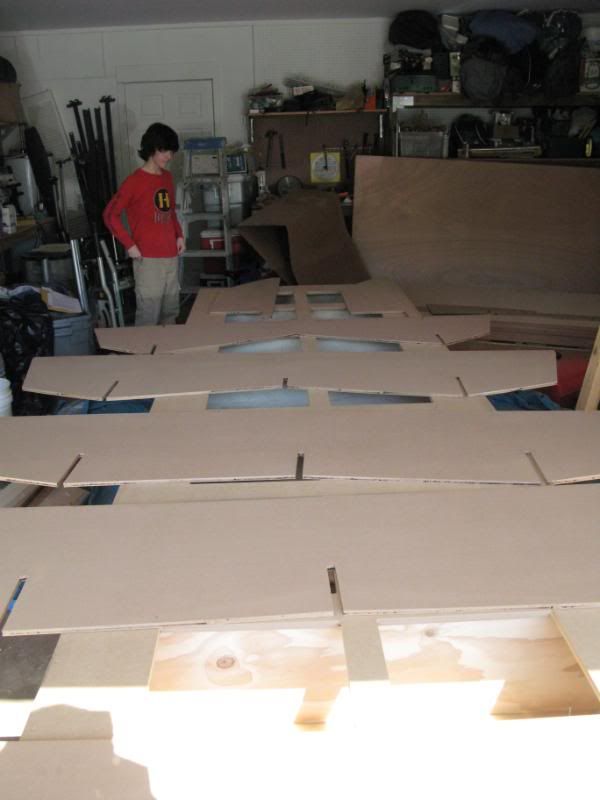
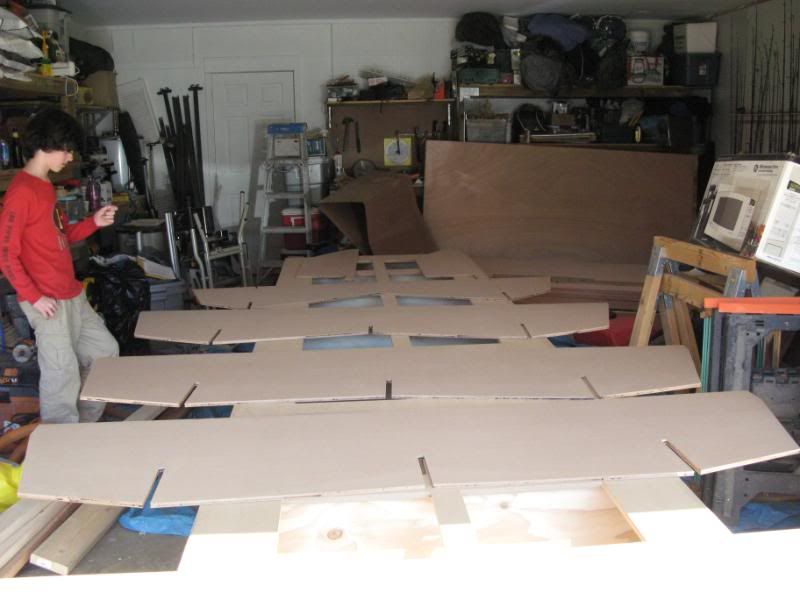
Derrick, Dexter, and Joseph
Re: TX 18 Build
Posted: Sun Feb 20, 2011 8:06 pm
by cape man
Looking like a boat to me!
Re: TX 18 Build
Posted: Wed Feb 23, 2011 4:39 pm
by Daniel Huckleberry
How nice to work with that perfectly cut stuff! I am jealous man. Wish I had some time I could take. I would run down and live in your garage.
Huck
Re: TX 18 Build
Posted: Wed Feb 23, 2011 6:40 pm
by dborecky
Re: TX 18 Build
Posted: Wed Feb 23, 2011 9:53 pm
by tech_support
I will check in the morning, but its not uncommon for Jacques to make the inside layer of the stringer taller to account for the angle of the hull bottom. Means less putty on the lower side.
Re: TX 18 Build
Posted: Thu Feb 24, 2011 4:47 pm
by dborecky
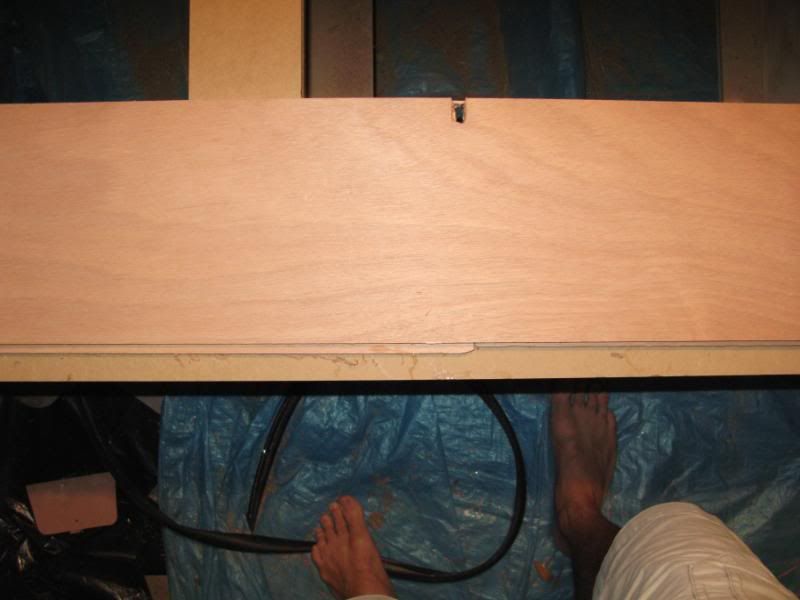
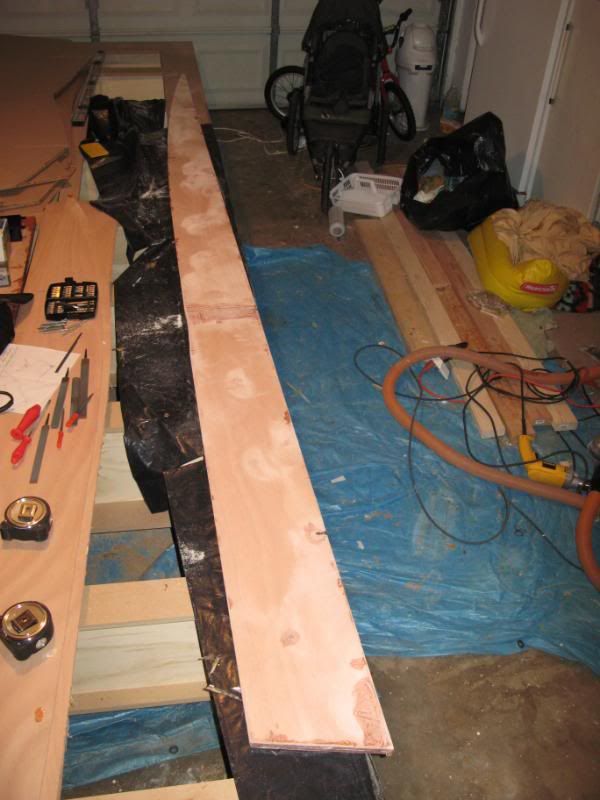
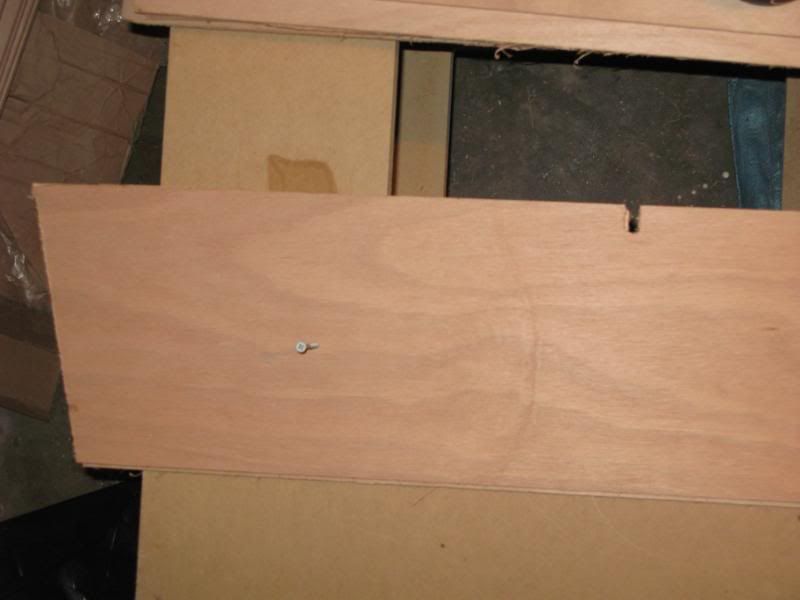
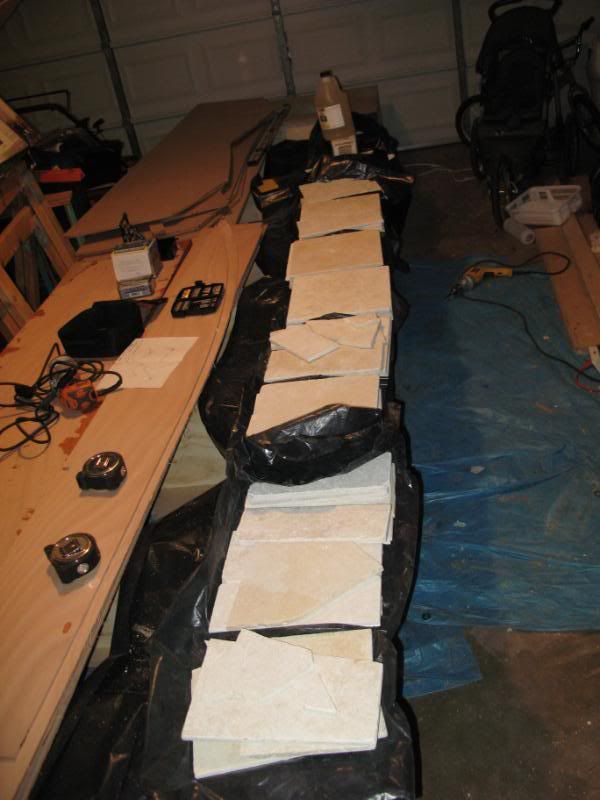
I glued up the first two transom panels with Gel Magic and used some spare stone tiles to weight it down.... I was worried I did not use enough Gel Magic but I think I used just enough but not too much. Here is a pic.

I'm still waiting to see what Joel says about the stringers before I glue them up.
Derrick
Re: TX 18 Build
Posted: Thu Feb 24, 2011 4:59 pm
by tech_support
Jacques was out today, I asked him to confirm about the stringers.
Re: TX 18 Build
Posted: Fri Feb 25, 2011 10:44 am
by jacquesmm
Yes, that's what it is. they are made differently on purpose. Align them at the top and it will give you a step like a bevel. That step follows the hull panels curvature.
The stringers are mirror images, not copies. The smallest side goes to the outside.
There is a picture of the concept here:
http://www.bateau2.com/howto/jig.php

We don't use that system on every boat, it depends on the panel curvature.
Re: TX 18 Build
Posted: Fri Feb 25, 2011 12:43 pm
by dborecky
Jacques,
Thanks...
I understand about the outer stringers being mirror images but what about the middle stringer? Does it matter which side is the short layer for the middle stringer?
Re: TX 18 Build
Posted: Sat Feb 26, 2011 5:00 pm
by Mad Dog
Okay, I'm seeing some boat building p$%n!
That's great! I'm going to watch this one very closely. I am most interested.
MD
Re: TX 18 Build
Posted: Wed Mar 02, 2011 4:28 pm
by storm serg
BOOOOOOOOOOOOOOOOOOOOOOOOOOOOOOOOOOOOO.....RECKY!!!!!!! My brother..... I've been keeping track of your new build. Looks like your off to a great start, I'll be in & out, if I can be of any help................ well you know. Did I see somewhere that you mentioned you cleaned out your garage? The kids look great, enjoy them all you can. I'm talking Richard into coming down for a few days and building the two kayaks that I started back in the 1800's, and "The Black Pearl" (my 1947 Thistle) is still on the back burner.
Serg
Re: TX 18 Build
Posted: Fri Mar 04, 2011 11:22 am
by dborecky
Serg,
Good to see you on here!!!
Rich was telling me that he was thinking of going down there one weekend and knocking out two kayaks. Two kayaks built in one weekend?.....
I didn't burst his bubble..
Talk to ta soon,
Derrick
Re: TX 18 Build
Posted: Fri Mar 04, 2011 12:25 pm
by jacquesmm
dborecky wrote:Jacques,
Thanks...
I understand about the outer stringers being mirror images but what about the middle stringer? Does it matter which side is the short layer for the middle stringer?
I didn't know that the middle ones were cut that way.
They are identical on my drawing but I may have moved the router bit on the CNC file.
It's a small difference, it doesn't matter, it will be filled with putty. Line up at the top.
Re: TX 18 Build
Posted: Sun Mar 06, 2011 10:02 am
by dborecky
Re: TX 18 Build
Posted: Sun Mar 06, 2011 10:27 am
by BamBam6877
If the small 1 is the right size just use a router and a flush cutting bit and you will have an exact copy.
Sheldon
Re: TX 18 Build
Posted: Sun Mar 06, 2011 12:20 pm
by dborecky
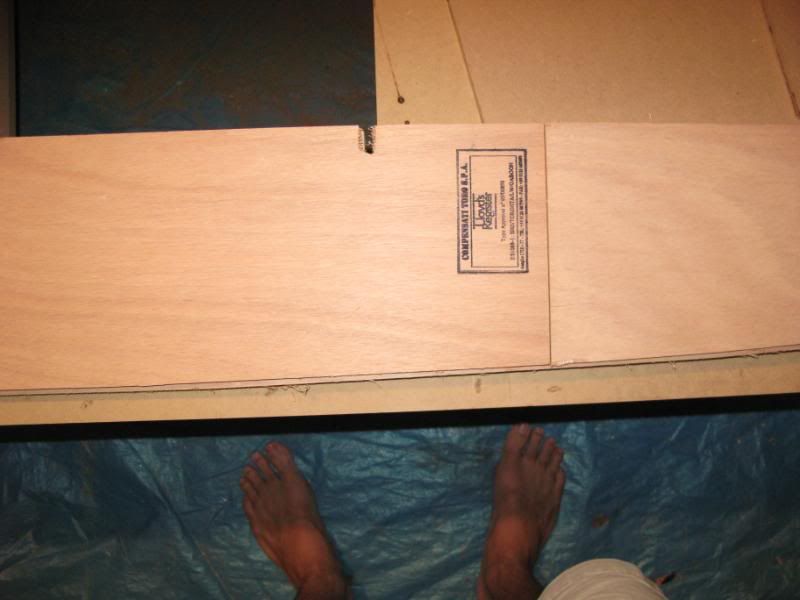
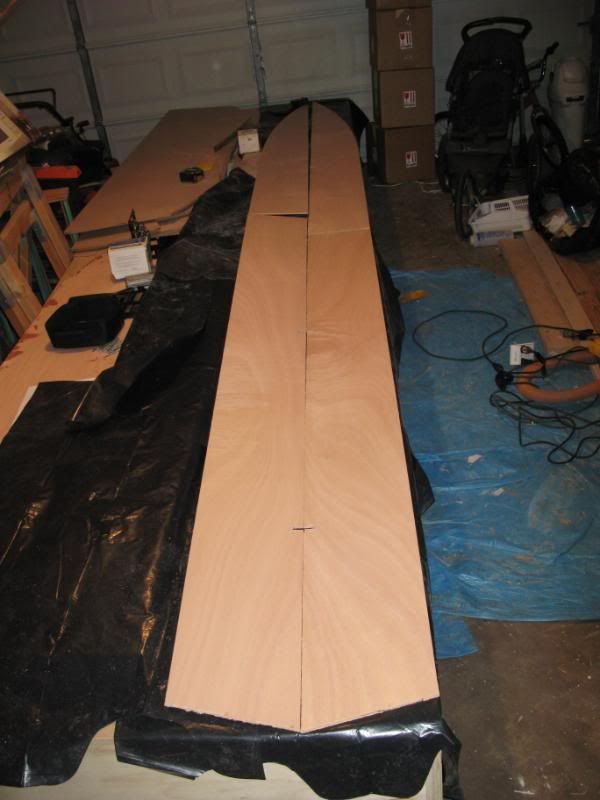
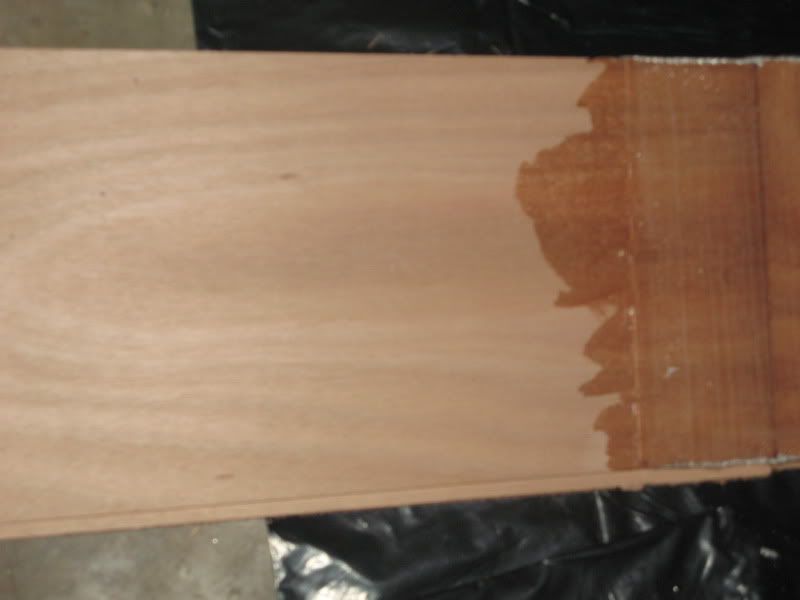
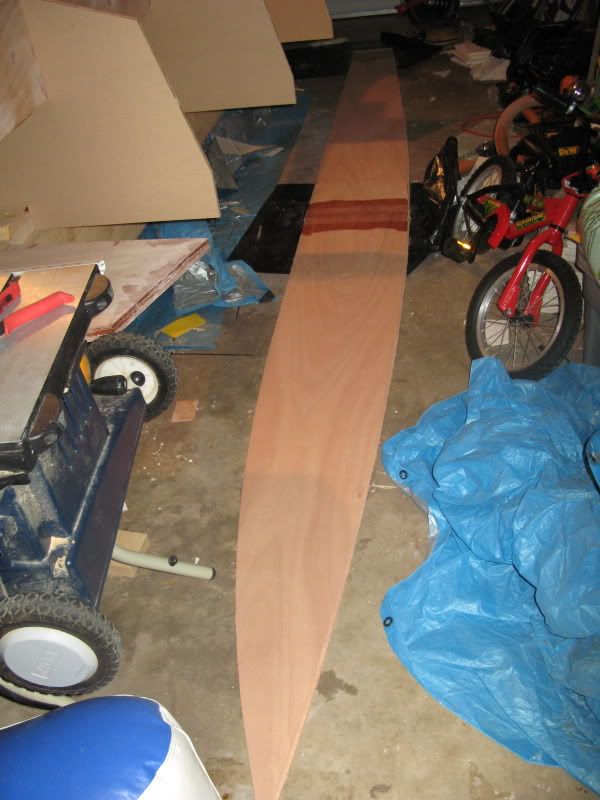
I wish it were that simple. The large one is the right size in the front end. Then we get to the back and if you look at the full length photo, it is too wide. So we really have three different widths.....
Re: TX 18 Build
Posted: Sun Mar 06, 2011 3:05 pm
by Doc_Dyer
Re: TX 18 Build
Posted: Sun Mar 06, 2011 10:04 pm
by davidtx
Its great to see another TX-18 build. I'm really looking forward to finishing mine. I'll try to keep up and maybe I can even remember some details from 3 years ago.
Re: TX 18 Build
Posted: Mon Mar 07, 2011 9:50 am
by jacquesmm
Don't cut anything.
There is a problem with those stringers but I don't know what the problem is: my drawing and CNC files look perfect.
Let's troubleshoot first then find a solution.
I emailed you a PDF file with the dimensions of the central stringer.
Let's compare with what you have and try to understand where the problem is.
Check your email.
We have sold many kits and they are accurate but there is a problem here and let's not jump to conclusions.
We will solve the problem, if necessary I'll drive to your place to fix it.
Re: TX 18 Build
Posted: Mon Mar 07, 2011 10:04 am
by jacquesmm
I emailed to your rocketmail account.
Re: TX 18 Build
Posted: Mon Mar 07, 2011 10:45 am
by gstanfield
We will solve the problem, if necessary I'll drive to your place to fix it.
How's that for customer service! Nobody and no system is perfect, but it's pretty refreshing to see a business that wants to make things right no matter what
Re: TX 18 Build
Posted: Mon Mar 07, 2011 12:21 pm
by dborecky
I was not trying to be difficult. I was frustrated a little but not really upset. I know the guys on this site and know that they will help with solutions to any issues.... Even the ones that I cause...
Re: TX 18 Build
Posted: Mon Mar 07, 2011 12:32 pm
by sitandfish
dborecky wrote:I was not trying to be difficult.
I was frustrated a little but not really upset. I know the guys on this site and know that they will help with solutions to any issues....
Even the ones that I cause...
It's easy to understand the frustration. I like your (and Jacques) attitude. Good to have passion for what you are doing.
Re: TX 18 Build
Posted: Mon Mar 07, 2011 12:44 pm
by jacquesmm
I did not feel that Dborecky was difficult, his worries about parts not matching are legitimate.
I want to understand what happened, we want our kits to be correct and easy to use. That problem must be solved.
We are currently exchanging emails with drawings and measurements. Once we understand what the problem is, we will post our conclusion here.
Re: TX 18 Build
Posted: Tue Mar 08, 2011 10:18 am
by jacquesmm
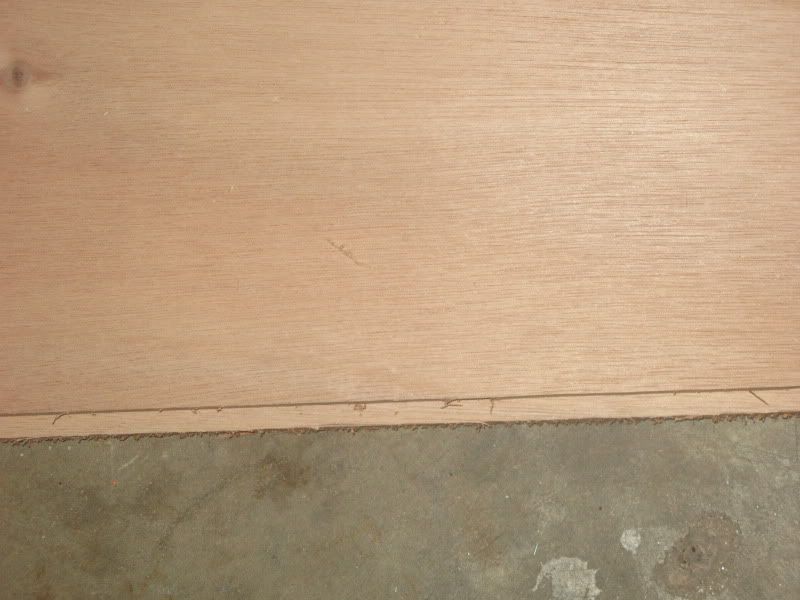
It looks like we are progressing. I wait for some more figures from Derrick but it looks like the differences between stringers is due to a difference in width of the plywood sheets.
Since we do not cut parts lined up along the edge of a sheet, if that sheet is 1/4" wider, the part will be 1/4" higher.
Solution: not trust the plywood sheet dimensions and tell our CNC to always cut along the edge.
More info later, Derricks is still measuring.
Re: TX 18 Build
Posted: Tue Mar 08, 2011 10:28 am
by cape man
Jacques,
Thanks for posting. I saw a similar issue when cutting my side panels for the OD18. The plans gave measurements from both sides of the plywood, but my sheets were not a standard 4'X8'. Had to convert everything based on measuring from one edge.
Re: TX 18 Build
Posted: Tue Mar 08, 2011 12:13 pm
by SmokyMountain
Thanks for posting. I saw a similar issue when cutting my side panels for the OD18. The plans gave measurements from both sides of the plywood, but my sheets were not a standard 4'X8'. Had to convert everything based on measuring from one edge.
I had the same issues cutting out for the PH18. No big deal as long as you recognize the potential problem before cutting.
Re: TX 18 Build
Posted: Tue Mar 08, 2011 12:45 pm
by jacquesmm
On every drawing, there should be a note stating that the nesting is done on standard 4x8 sheets.
In the CNC case, the problem is different.
I draw the cutting file assuming that the sheet is 48 by 96 or 48 by 98.375 if it's a metric sheet.
If one sheet is a little wider and if on that sheet, one part is lined up against the upper edge, the part comes out too wide.
Re: TX 18 Build
Posted: Tue Mar 08, 2011 8:17 pm
by cape man
It's all good Jacques, and your customer care is awesome. It's certainly not your fault the wood comes in different dimensions.
Re: TX 18 Build
Posted: Thu Mar 10, 2011 11:01 am
by jacquesmm
Derrick, I did not receive any email since 2 days.
Do you still need help with the stringers?
Re: TX 18 Build
Posted: Thu Mar 10, 2011 4:39 pm
by jacquesmm
Received your email and responded.
Our mail server is acting up, if you don't get my email post here.
Re: TX 18 Build
Posted: Thu Mar 10, 2011 6:13 pm
by Steven
jacquesmm wrote:Received your email and responded.
Our mail server is acting up, if you don't get my email post here.
Might explain the lack of emails for threads I'm watching.
Re: TX 18 Build
Posted: Fri Mar 11, 2011 9:24 am
by jacquesmm
We have a real email problem. It is due to the spammers bombarding our email addresses with thousands of emails a day.
Just my addresses receive more than 1,000 a day after the SpamAssasin filter, more than 3,000 before the filter.
This clogs the mail server and delays the delivery of legitimate emails.
It is not an attack, just a enormous amount of spam.
We are working on it.
Re: TX 18 Build
Posted: Fri Mar 11, 2011 10:34 am
by dborecky
Jacques,
I sent the side stringer info yesterday but I did send the middle stringer info this past tue. Did you get the middle stringer info.?
Re: TX 18 Build
Posted: Fri Mar 11, 2011 10:44 am
by jacquesmm
Yes. I received the two messages and each time responded in detail with PDF drawings.
You may not have received my responses because of our mail server problem.
I will send a copy through a gmail acccount.
Please respond to the gmail account.
I will be in your area this week-end for a bicycle race and may stop by to discuss the problem but it does not look bad at a all.
Re: TX 18 Build
Posted: Fri Mar 11, 2011 10:55 am
by jacquesmm
3 emails with drawings sent from my gmail account.
Re: TX 18 Build
Posted: Mon Mar 14, 2011 12:09 pm
by dborecky
Jacques came by on Saturday.
It was great to see him again!!! He helped me sort out what needs to be trimmed and what is good enough as well as how to line it up. It was a great help.
Re: TX 18 Build
Posted: Mon Mar 14, 2011 12:29 pm
by gk108
Not many places where you can get tech help like that!
So what's the holdup now? Any pictures? Are you fairing yet?
Re: TX 18 Build
Posted: Sat Mar 26, 2011 10:46 pm
by dborecky
I got some time this afternoon to work on the build.....
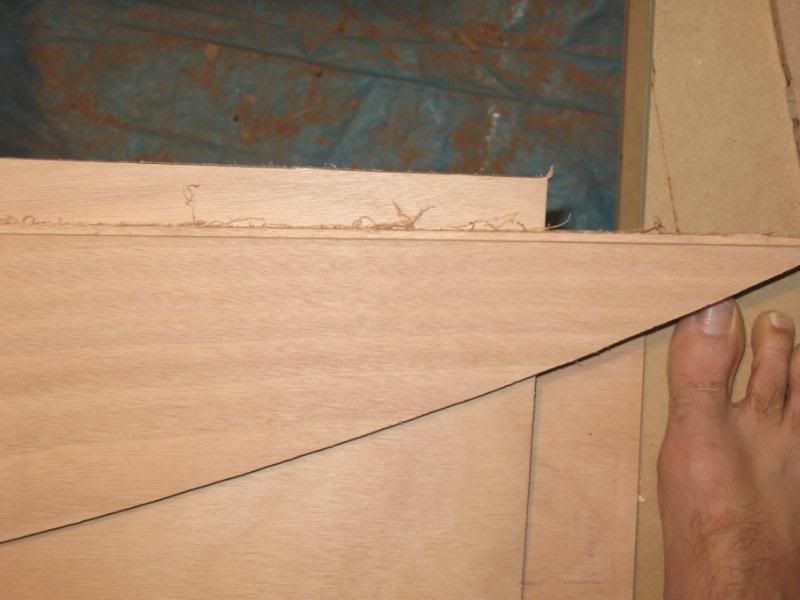
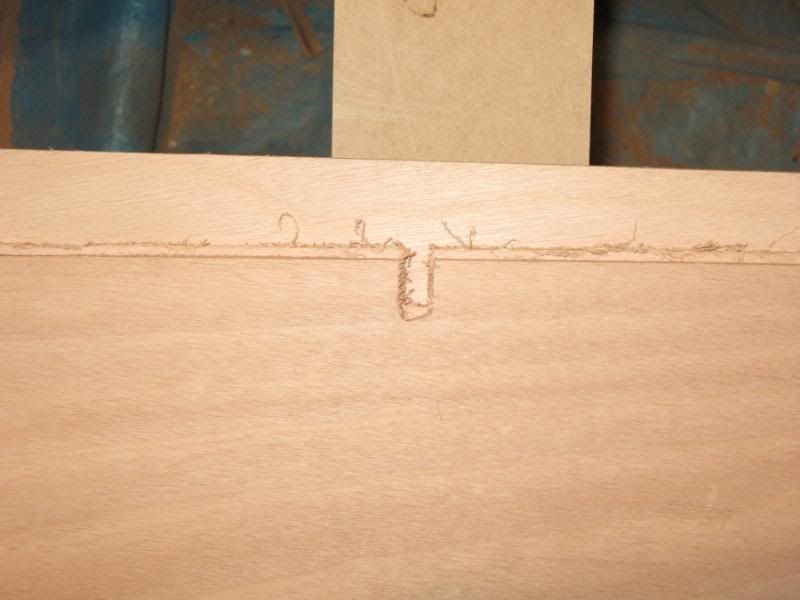
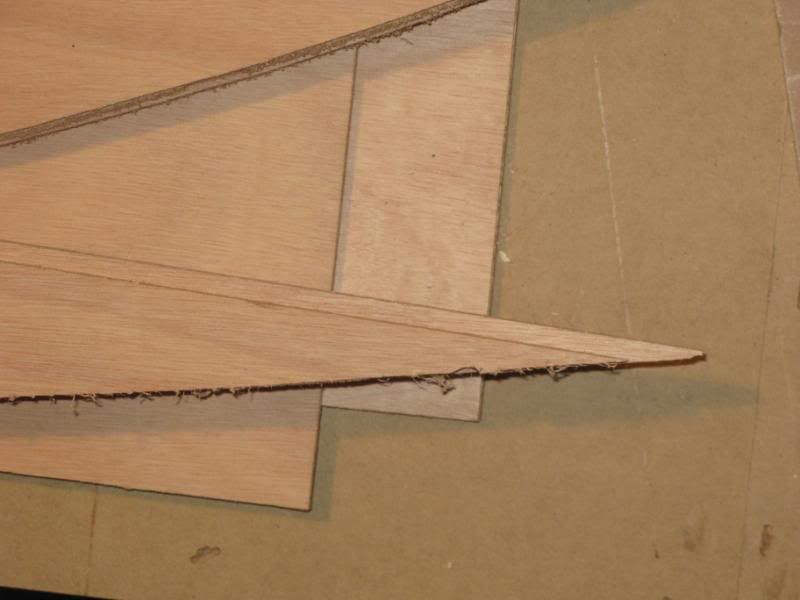
I got the middle stringer together. The stringer was not correct in measurment and I made a mistake trying to correct the mistake that was present. I lined it up like I wanted it to be but then made the mistake of starting to trim the wrong side.... DOH...

I don't think it will matter and can be corrected but I was not happy to say the least.....
Here is the tool I used to even the edges..

I lined up and drilled and screwed the pieces together. Then I used the above tool to flush cut the edges. You can see were I started to cut the wrong ( bottom edge) for few inches before realizing I screwed up.....
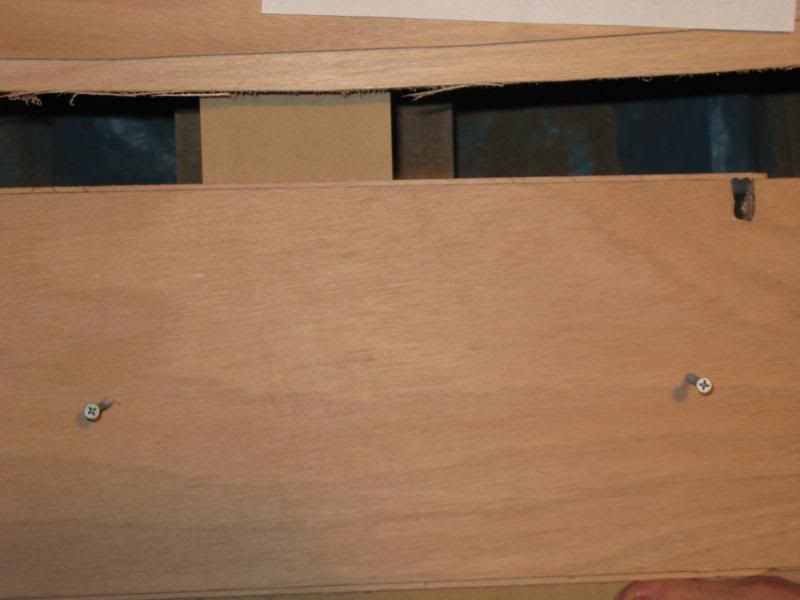
The third picture above shows the bottom edge that I cut by mistake......
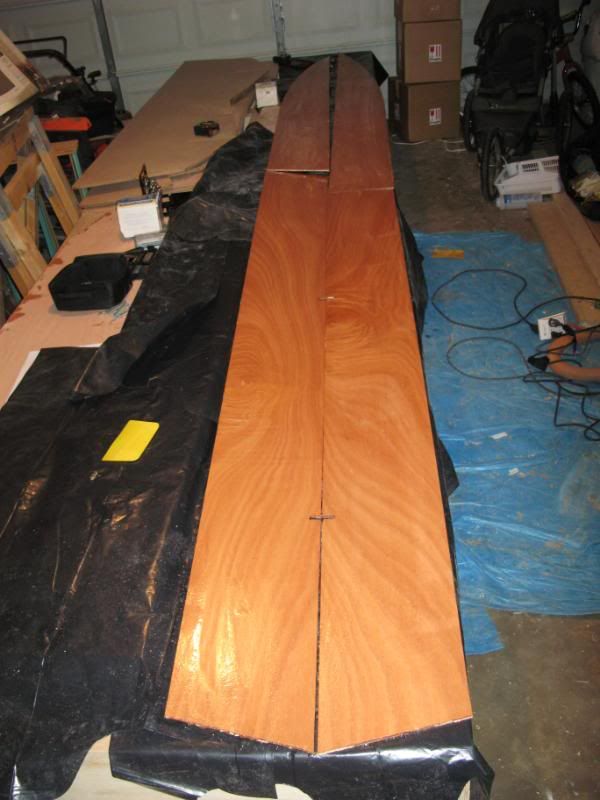
Here a pic of the stringer being glued.....
Re: TX 18 Build
Posted: Sun Mar 27, 2011 5:25 pm
by dborecky
Re: TX 18 Build
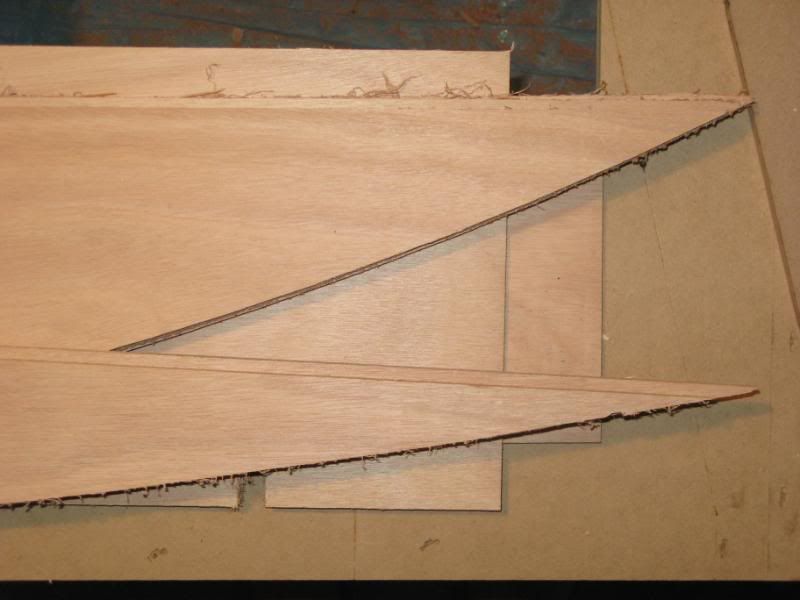
Posted: Sun Mar 27, 2011 9:04 pm
by davidtx
How much overlap is there - it sure looks short. The nesting diagram in my plans was wrong and I had to do some rework to get the required 2' overlap in the stringers.
Re: TX 18 Build
Posted: Sun Mar 27, 2011 9:09 pm
by dborecky
David,
I will have to measure it to see but I think that it is 2 inches at least. At the moment it is wet and weighted down......
Derrick
Re: TX 18 Build
Posted: Mon Mar 28, 2011 12:01 am
by davidtx
dborecky wrote:David,
I will have to measure it to see but I think that it is 2 inches at least. At the moment it is wet and weighted down......
Derrick
I think 2" is far too short. I can't remember if the recommendation was 12" or 24". I reported the problem to Jacques (and I think on the forum) back when I encountered it.
Re: TX 18 Build
Posted: Mon Mar 28, 2011 5:45 am
by dborecky
David,
I think it should be fine. Jacques was by the house and he cut the pieces in question. I just had to trim them some to get them to conform. I will measure the overlap once the epoxy it dry.
Derrick
Re: TX 18 Build
Posted: Mon Mar 28, 2011 9:06 am
by jacquesmm
The nesting on the kit is different, the overlap is 6".
More is better but we are limited by the size of the plywood and 6" works fine.
Re: TX 18 Build
Posted: Mon Mar 28, 2011 9:56 am
by davidtx
jacquesmm wrote:The nesting on the kit is different, the overlap is 6".
More is better but we are limited by the size of the plywood and 6" works fine.
OK. It's been a while, but I think I ended up using a 2' piece to overlap the seam so that I had 12" of overlap in both directions.
Re: TX 18 Build
Posted: Mon Mar 28, 2011 12:12 pm
by jacquesmm
That's perfect.
There is nothing wrong with adding a "butt block" between floor frames to cover the seam but it is not necessary. The fiberglass tabbing adds sufficient strength.
Re: TX 18 Build
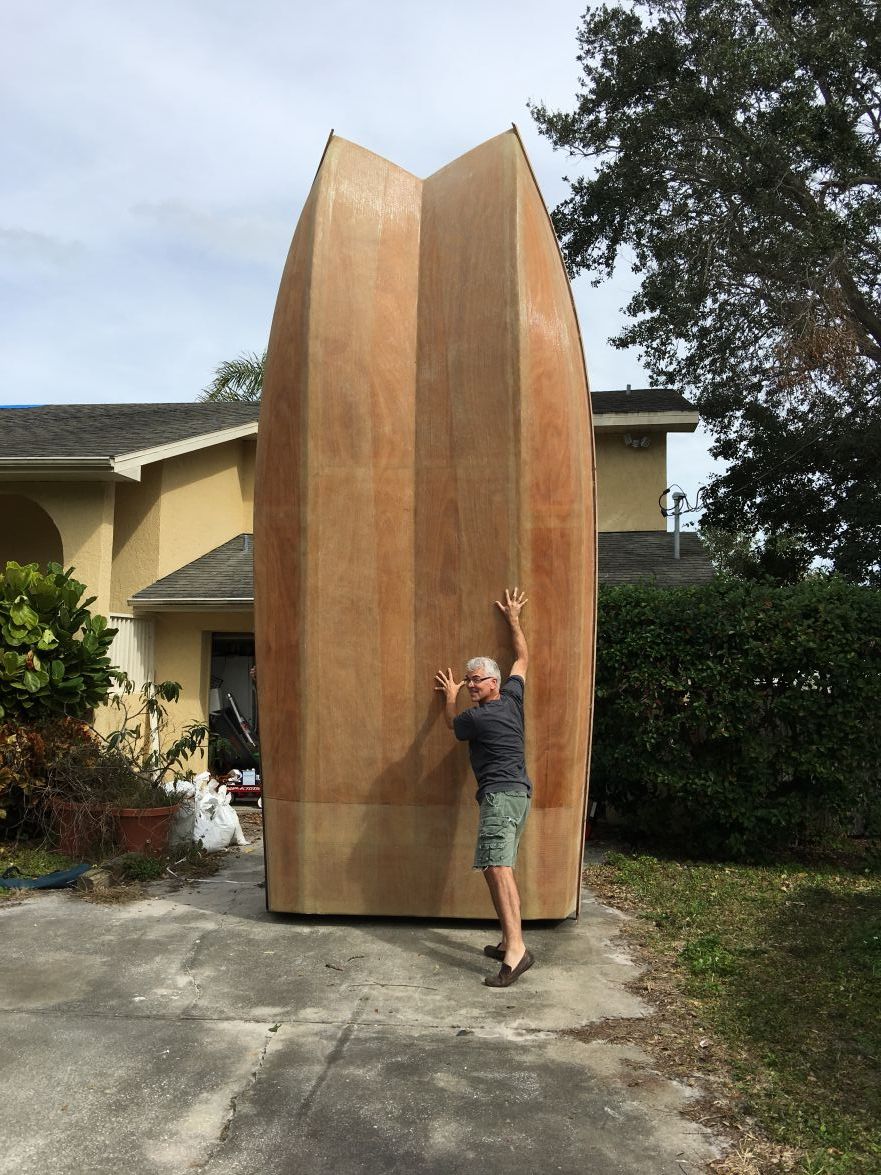
Posted: Sat Apr 23, 2011 11:49 pm
by dborecky
Re: TX 18 Build
Posted: Sat Apr 23, 2011 11:59 pm
by gstanfield
Nice progres and a good looking crew you have there
Re: TX 18 Build
Posted: Sun Apr 24, 2011 3:13 pm
by Daniel Huckleberry
Hope you have some slow hardener. I plan on glassing SOMETHING in July. The next part is the best part. Love the pictures after the skins go on.
Huck
Re: TX 18 Build
Posted: Sun Apr 24, 2011 3:22 pm
by dborecky
Gstanfield,
Thanks...
Huck,
I can't wait to get the skin on the boat now. I'm going to take my time getting this thing nice and true before stiching it up...
Re: TX 18 Build
Posted: Tue Feb 28, 2012 6:18 pm
by dborecky
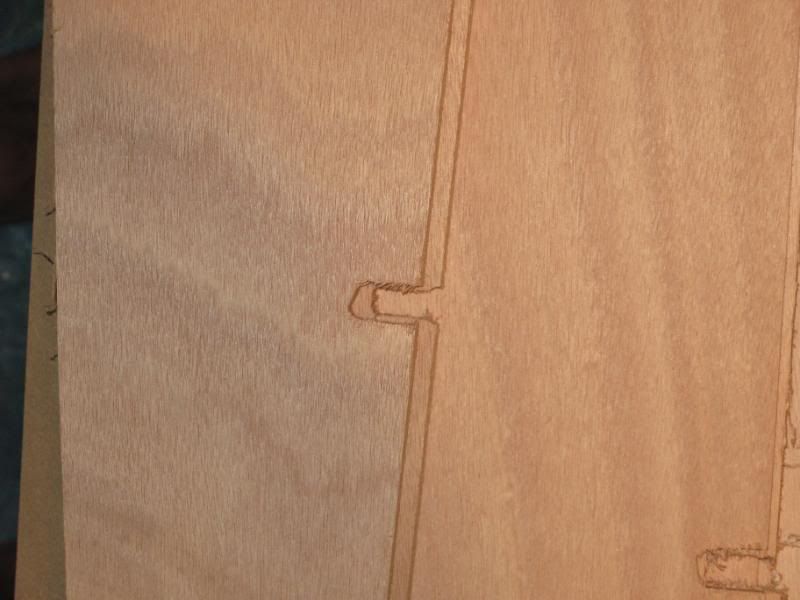
Re: TX 18 Build
Posted: Tue Feb 28, 2012 7:05 pm
by Cracker Larry
Well Derrick, it sure would be easier to cut 1/4" off the wide one than it would be to add 1/4" to the skinny one. Nobody will ever know the difference, except for everybody reading this
Re: TX 18 Build
Posted: Tue Feb 28, 2012 7:40 pm
by dborecky
Larry,
The only problem is if the larger one is the right size and I can't stitch it do to it being too small.....
Re: TX 18 Build
Posted: Tue Feb 28, 2012 7:43 pm
by Aripeka Angler
That's a CNC kit, the panels should be mirror images. If you have the cut sizes of your panels, I will help give you a hand checking them out when I see you on Saturday. If you don't have them, maybe Jacques can send you some before the weekend.
Re: TX 18 Build
Posted: Tue Feb 28, 2012 9:23 pm
by Steven
If the shape is correct, why not just leave a 1/8" gap on both seams. Shouldn't be a problem.
Re: TX 18 Build
Posted: Tue Feb 28, 2012 9:41 pm
by Aripeka Angler
Steven wrote:If the shape is correct, why not just leave a 1/8" gap on both seams. Shouldn't be a problem.
The problem is Derrick doesn't know which part is correct. They don't match, maybe both are wrong?
Re: TX 18 Build
Posted: Wed Feb 29, 2012 9:35 am
by jacquesmm
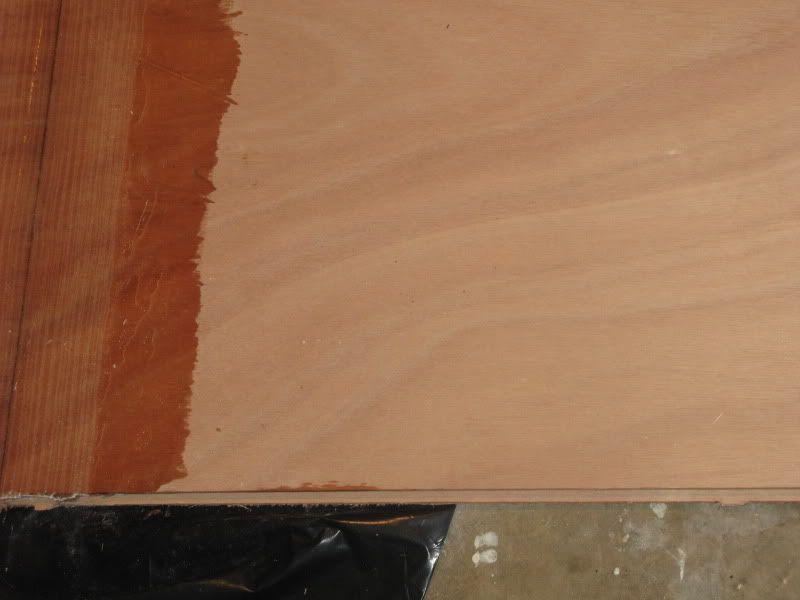
There was a problem with the plywood all through that kit.
Doing the kit nesting, I located some of the parts edges along the edge of the plywood. This will work if all plywood sheets are exactly 48" wide but in one plywood batch, we had sheets that were 1/8 to 1/4" wider.
If one sheet is 1/4" wider than the other, that will result in one side being 1/4" wider.
We never had that problem and did not expect it especially from the best plywood manufacturer in the world.
That is why one side may be wider than the other.
It is not difficult to correct, use the smallest side as a template to trim the wider one.
It took me a while to understand where all those 1/8 to 1/4" differences came from in a few kits.
Since that time, we changed the files and as much as possible, we do not line up parts with the edge of the plywood anymore, we cut all around.
Sorry about those problems but now that understand the reason, you can progress.
Re: TX 18 Build
Posted: Wed Feb 29, 2012 10:15 am
by dborecky
Jacques,
I just have one question. If I trim the larger panel to the smaller one and it is smaller then spec, will I have a problem when it comes time to stitch it together?
Re: TX 18 Build
Posted: Wed Feb 29, 2012 10:37 am
by jacquesmm
No.
The smaller one is correct.
Some of the plywood sheets were larger but none were smaller.
And in all cases, smaller with a large gap is always better.
The panels are cut exactly to the developed shape without any gap but during the assembly, it is always easier to have a gap.
In some cases, I deliberately cut a larger gap to avoid contact between panels.
Re: TX 18 Build
Posted: Wed Feb 29, 2012 10:46 am
by SmokyMountain
Derrick,
If your matching the smaller, then I would suggest using a straight router bit with a bearing on the bottom and use the smaller panel as a template. Should be a perfect match.
Good luck!!
Re: TX 18 Build
Posted: Wed Feb 29, 2012 12:29 pm
by Joe H
Hey Jacques,
I too had oversized panels for my P19, when I set-up the files for CNC cutting I used the same process we use for sheet metal in the auto industry, two locating pins along the C/L of the plywood, as you can see in the picture below.
I only cut the bottom panels this way but they came out perfect.
Hello Derrick, no hi-jack intended, your build is looking good, I'm glad it was an easy fix.
Joe H
Re: TX 18 Build
Posted: Wed Feb 29, 2012 12:36 pm
by Cracker Larry
Dang Joe, that sure beats a jig saw
Re: TX 18 Build
Posted: Wed Feb 29, 2012 1:06 pm
by jacquesmm
Joe H wrote:Hey Jacques,
I too had oversized panels for my P19, when I set-up the files for CNC cutting I used the same process we use for sheet metal in the auto industry, two locating pins along the C/L of the plywood, as you can see in the picture below.
Good idea but in many cases, the pins would be smack in the middle of a part.
Since we discovered that plywood sheet size is unreliable, I changed my files and always cut along all edges.
Re: TX 18 Build
Posted: Wed Feb 29, 2012 1:14 pm
by Joe H
That was one hell of a machine, and fun! But to complete the whole process was a pain, loading unloading,,,,,,,it didn't beat the jig saw, or circular saw in this case! ha.
Joe H
Good idea but in many cases, the pins would be smack in the middle of a part.
Yeah, that was the case for the transom, no more CNC cutting for me.
Re: TX 18 Build
Posted: Wed Feb 29, 2012 7:47 pm
by gstanfield
you just need to upgrade to a vacuum table for your cnc, those are really nice as they hold the part in place as well as help with dust control
Re: TX 18 Build
Posted: Sun Apr 15, 2012 10:40 am
by Daniel Huckleberry
Hey Derrick,
Just wondered if you got that transom mounted and those panels stitched up?!
Huck
Re: TX 18 Build
Posted: Tue Apr 17, 2012 1:46 pm
by dborecky
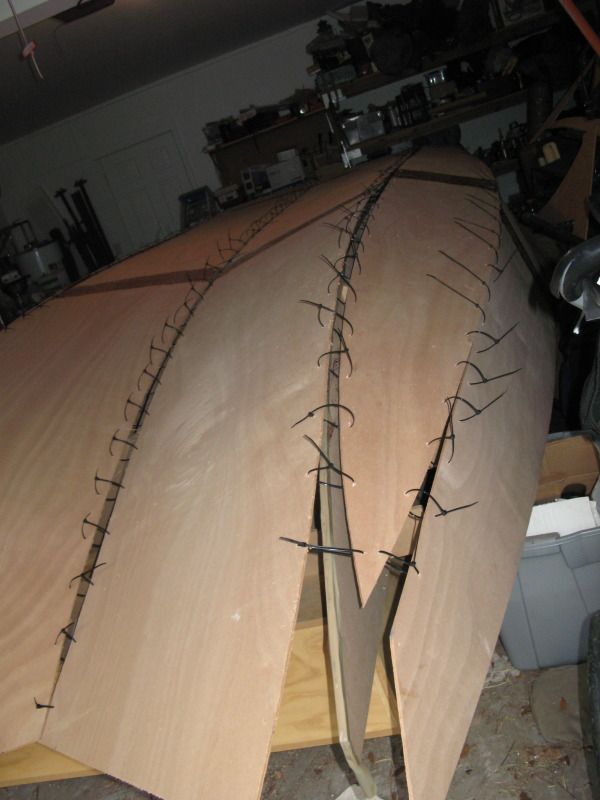
Huck,
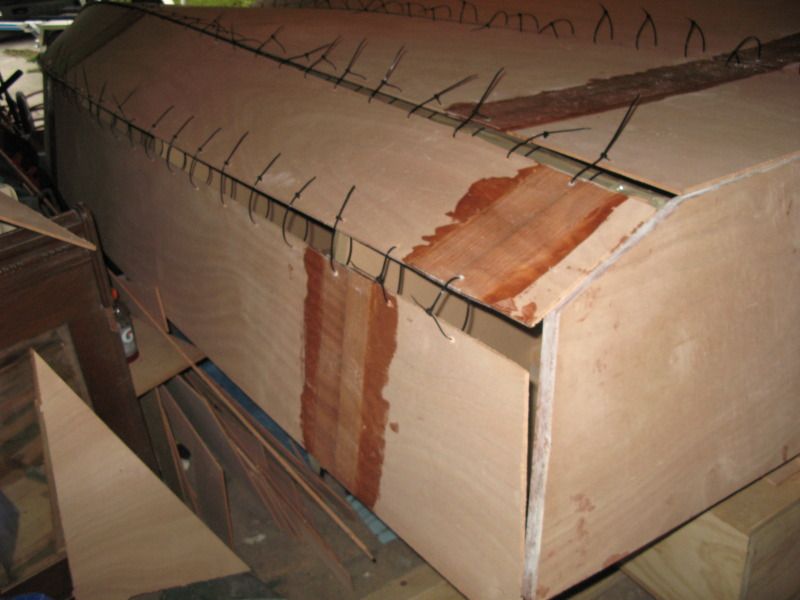
Transom mounted and stiching started. Large bottom panels loosely stitched... Now for the sides. There are lots of bends with the six panels..... I will just see how it goes.....
Re: TX 18 Build
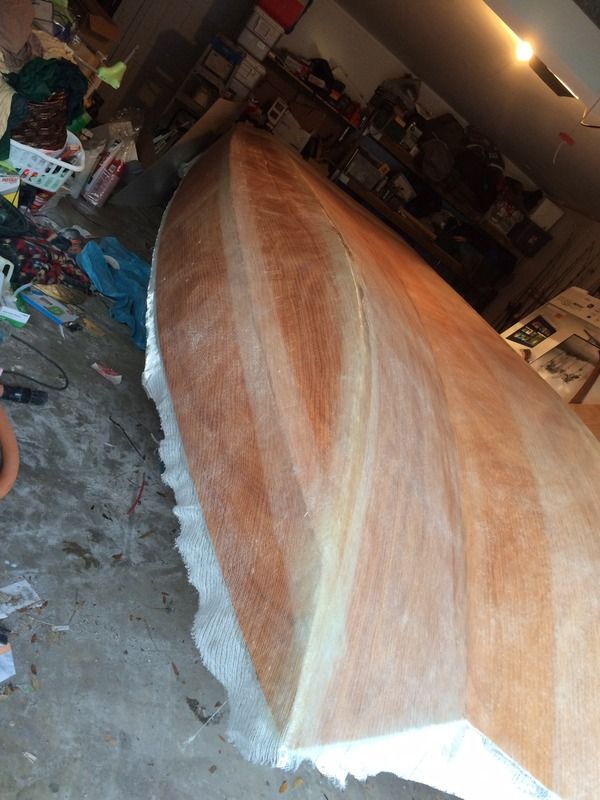
Posted: Sun Apr 22, 2012 8:47 pm
by dborecky
Re: TX 18 Build
Posted: Mon Apr 23, 2012 4:43 pm
by Daniel Huckleberry
Looks good to me! Cute kid, too! Looks like his mom.
The only thing I remember is that I glued a 1' wide piece of 3/8 plywood (on edge) under the front edge of the center panels. I am sure that is unclear and I can't access my photo gallery right now to show you. I found that without it the panel really got a bow in it from side to side and didn't lay down on my jig properly. Of course, you may not have that problem.
Wish I was closer. I would love to help. I had a very experienced friend helping and my younger brother mixing resin for us. Took us about 6 or 7 hours to glass the entire outside. That was tape and fabric.
I am tired of mountain weather. 36 here today with wet show. I am about ready to give up on land work and be a beach bum again! Florida's sounding really good.
Huck
Re: TX 18 Build
Posted: Mon Apr 23, 2012 8:27 pm
by dborecky
Hey Huck,
That kid does look like his mother.
This Okoume is pretty flexible stuff. I will see what it looks like once I stitch the front part of the panels to the foward bow molds. It will be interesting to see how it comes together. I just need to really make sure the transom is perfect from side to side and top to bottom...
I would love it if you would move over to this area. Let me know when you are over this way and we can hook up.
Re: TX 18 Build
Posted: Tue Apr 24, 2012 1:42 pm
by Aripeka Angler
Hey Derrick, looking good! I'm not doing anything on Saturday if you need a hand. Let me know...
Re: TX 18 Build
Posted: Tue Apr 24, 2012 3:08 pm
by Cracker Larry
Dang, that's a bunch of stitches
Re: TX 18 Build
Posted: Tue Apr 24, 2012 3:26 pm
by dborecky
Richard,
I would love your help this weekend. I'll give you a call later.
CL,
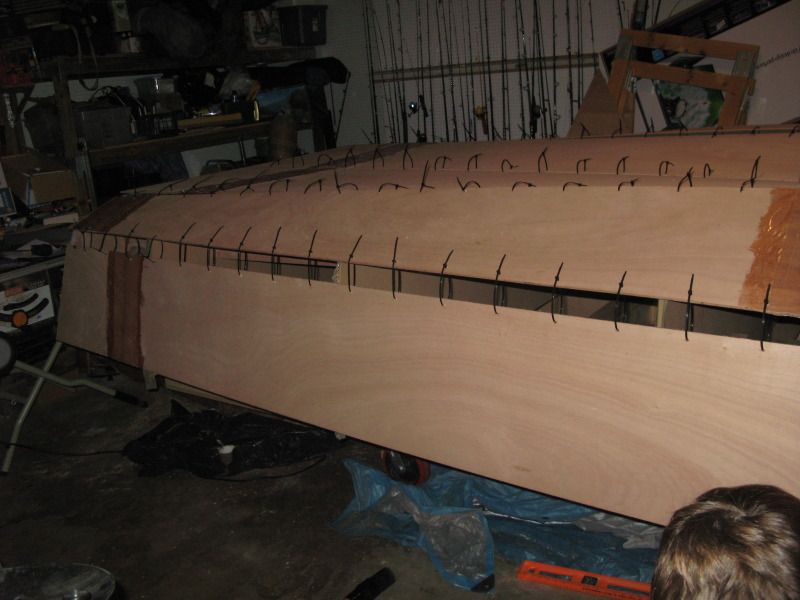
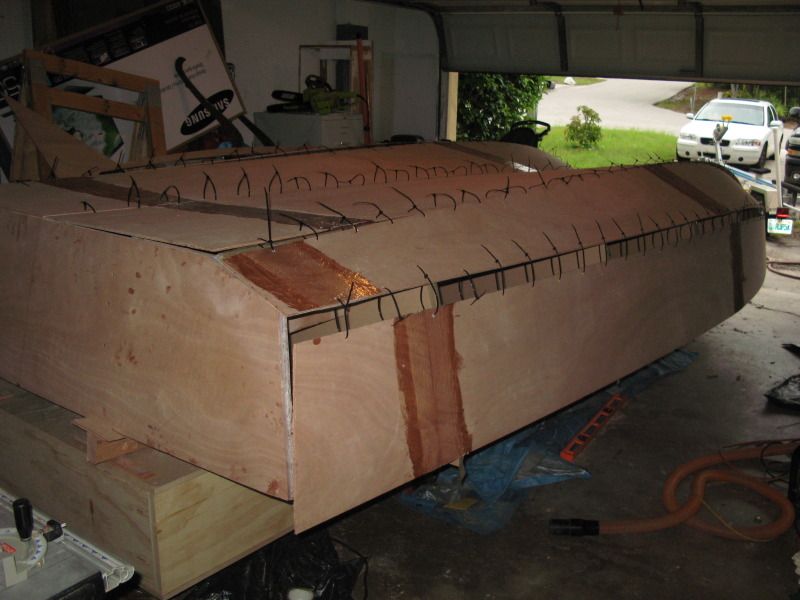
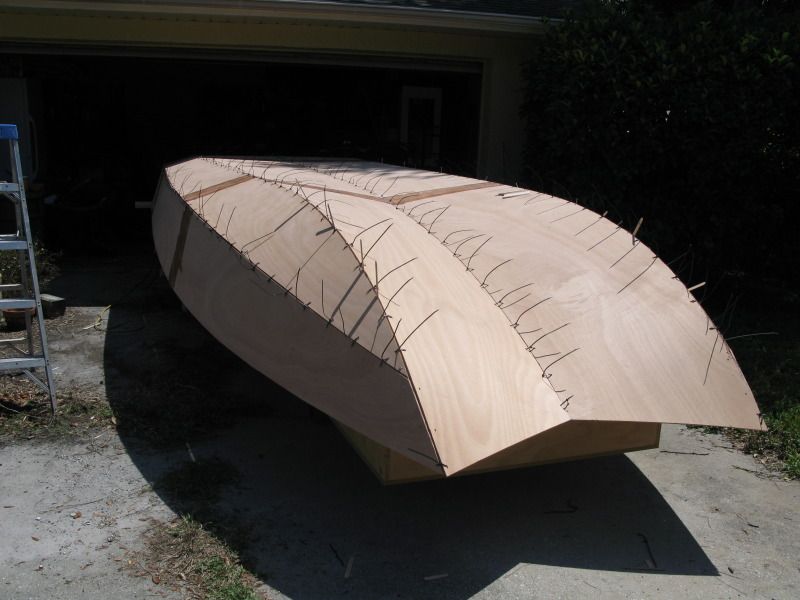
I put them every 6 inches and will tighten them very slowly to prevent bowing or warping between stitches. I just didn't want to have to keep adding more as I went along....
Re: TX 18 Build
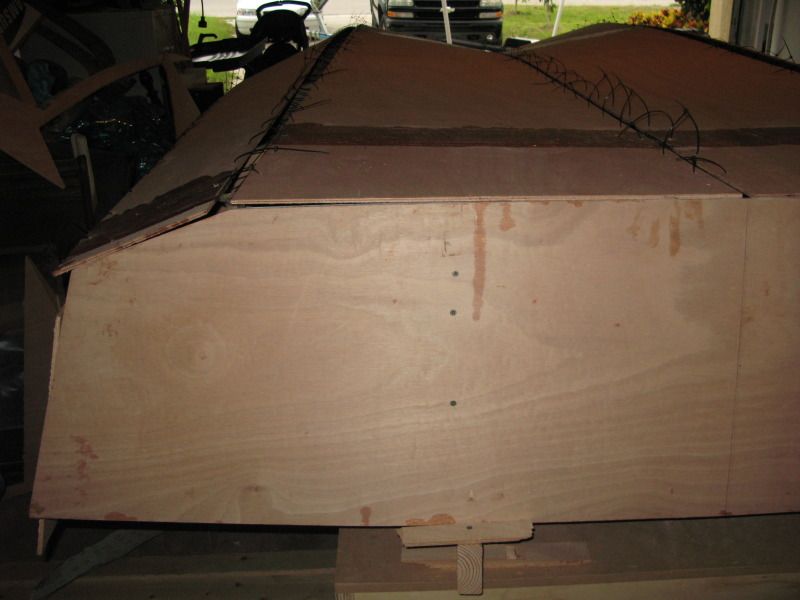
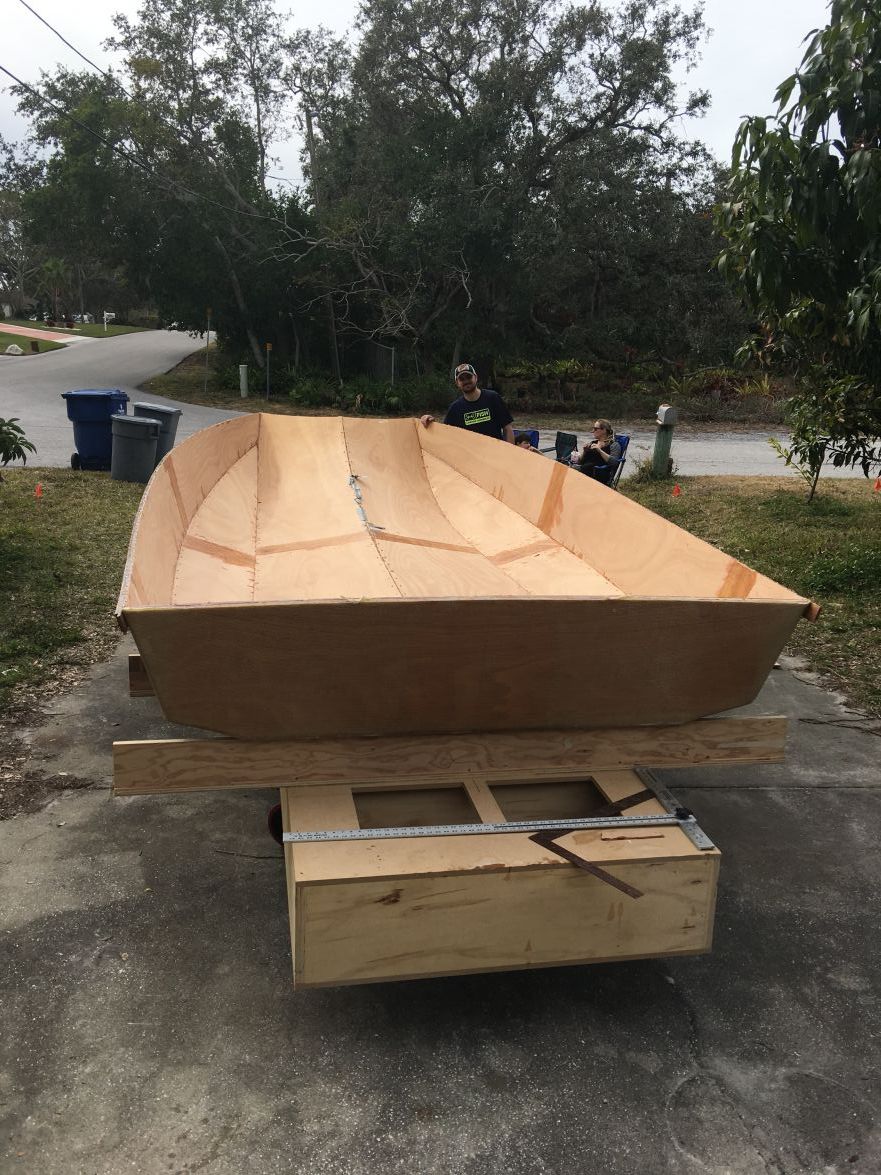
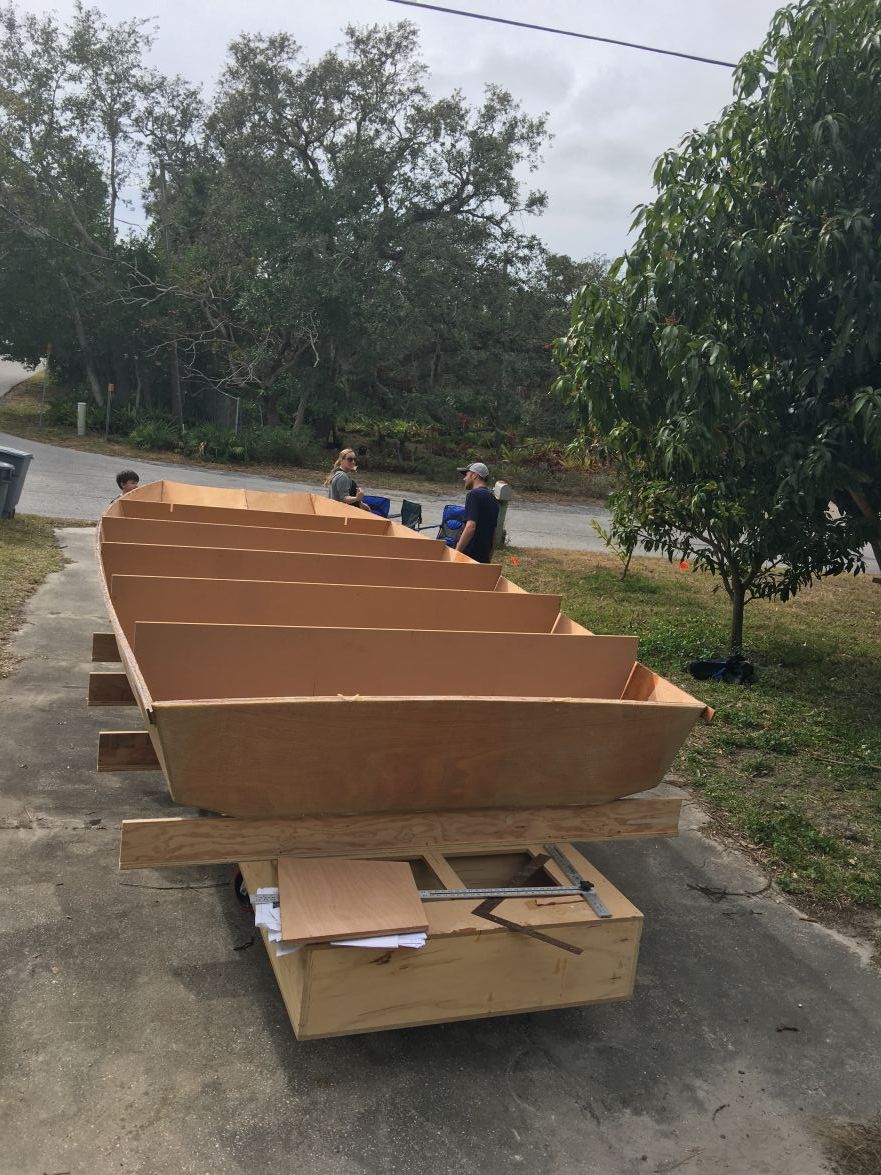
Posted: Sat Apr 28, 2012 3:43 pm
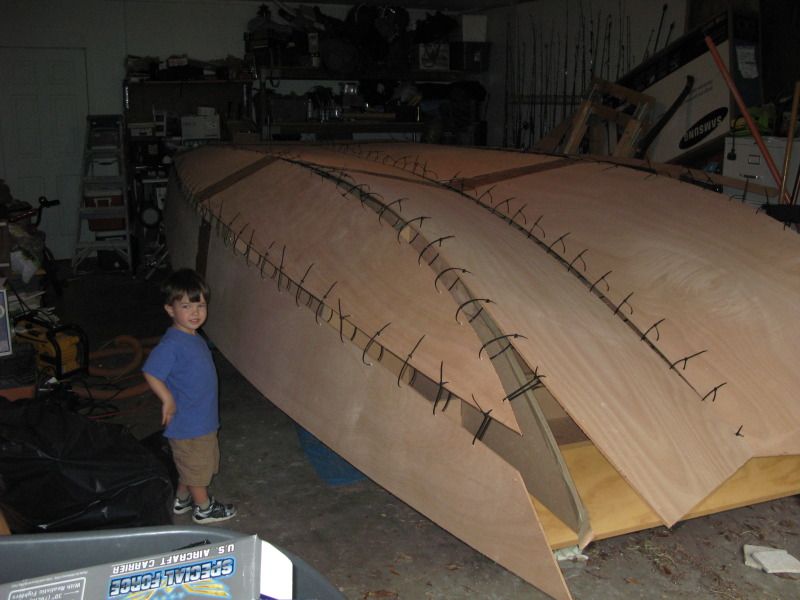
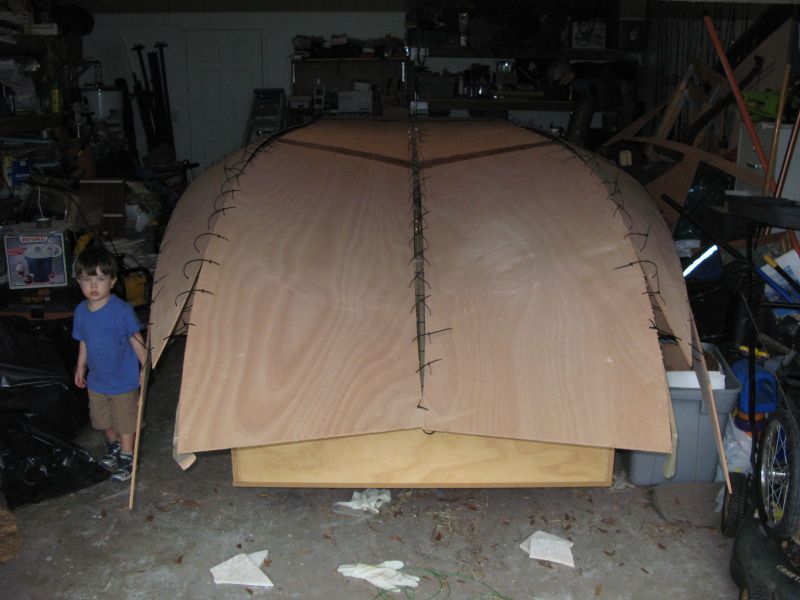
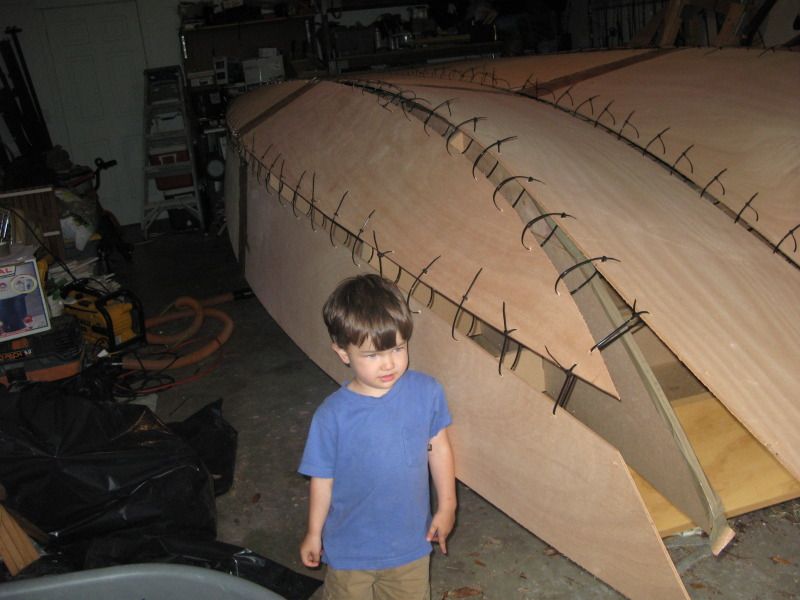
by dborecky
Re: TX 18 Build
Posted: Sat Apr 28, 2012 5:23 pm
by gstanfield
Looks good from here!
Re: TX 18 Build
Posted: Sat Apr 28, 2012 5:58 pm
by majorgator
That sure is a lot of zip-ties
And a lot of joints too...good work.
Re: TX 18 Build
Posted: Sat Apr 28, 2012 8:48 pm
by Prarie Dog
Looks awesome Derek!! I can remember brother Dave talking about this step, he didn't have much fun with it.
Re: TX 18 Build
Posted: Sun Apr 29, 2012 9:40 am
by wegcagle
Looks great from here
Looking at this boat getting stitched together makes me wonder how in the world someone could do the Cat22
Will
Re: TX 18 Build
Posted: Sun Apr 29, 2012 5:52 pm
by chicagoross
Will and I had the same thought - cat 22! This one will be good practice for the 15 panel boat!
Re: TX 18 Build
Posted: Sun Apr 29, 2012 6:10 pm
by gstanfield
... makes me wonder how in the world someone could do the Cat22
One stitch at a time
Re: TX 18 Build
Posted: Mon Apr 30, 2012 12:12 am
by Daniel Huckleberry
Looks great, man. Nice and fair! Wish I could be an elf!
Huck
Re: TX 18 Build
Posted: Mon Jul 16, 2012 1:00 pm
by davidtx
Looks good! And familiar - stitching the nose of my TX-18 was one of the tougher parts of the project.
Re: TX 18 Build
Posted: Mon Mar 30, 2015 12:34 pm
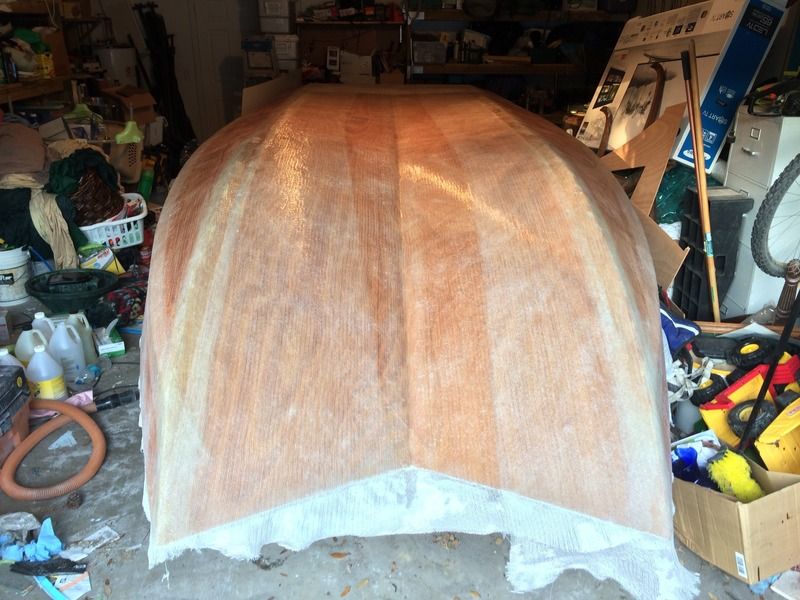
by dborecky
Got a break from the kids and a cool front. I glassed the entire bottom wet on wet....
[/URL]
[/URL]
Re: TX 18 Build
Posted: Mon Mar 30, 2015 1:32 pm
by Cracker Larry
It's about time you did something
And that garage is a mess!
Glass looks great.
Re: TX 18 Build
Posted: Mon Mar 30, 2015 2:08 pm
by jacquesmm
It looks good. I am glad you are progressing on the boat. I remember how i was scratching my head with the kit problems at the start but it's working now.
Re: TX 18 Build
Posted: Mon Mar 30, 2015 7:13 pm
by blueflood
Nice glass work
ditto what Larry said
Re: TX 18 Build
Posted: Mon Mar 30, 2015 8:23 pm
by jacquesmm
That looks like my garage.
He cleaned it up, last time I visited him, there were chicken running around.
Re: TX 18 Build
Posted: Mon Mar 30, 2015 9:41 pm
by Steven
Looks great. Such a cool boat.
Re: TX 18 Build
Posted: Tue Mar 31, 2015 11:37 am
by dborecky
Thanks guys. The garage needs help. My wife and kids continue to dump clutter in there. I can't wait to just dump most of the stuff but I need to work on the boat and not on decluttering the garage. I do miss those chickens though.....
Re: TX 18 Build
Posted: Sun Jan 28, 2018 2:58 pm
by dborecky
Tried to post some flip pics but it no longer works with photobucket and all prior pics are no longer showing...
Re: TX 18 Build
Posted: Sun Jan 28, 2018 3:05 pm
by peter-curacao
dborecky wrote: ↑Sun Jan 28, 2018 2:58 pm
Tried to post some flip pics but it no longer works with photobucket and all prior pics are no longer showing...
Just make a album here, you can almost be certain that it keeps working
Re: TX 18 Build
Posted: Sun Jan 28, 2018 3:53 pm
by cape man
Was wondering if this build still had a life! Go Derek!
Re: TX 18 Build
Posted: Sun Jan 28, 2018 4:14 pm
by Aripeka Angler
Re: TX 18 Build
Posted: Sun Jan 28, 2018 5:01 pm
by jacquesmm
Great news. The boat looks good.
I remember the problems with your kit: we got some Okume sheets that were not square. We don't cut parts that way anymore but we were scratching our head for a while.
It is going to go fast now.
Re: TX 18 Build
Posted: Sun Jan 28, 2018 8:13 pm
by dborecky
Thanks for posting Richard. You know the CNC strong back and cross braces are all you!! The most improtant thing is a square straight strong back and base. Everything is based on this,,,,
Jacques! Good to see you still around! I’m going to try and push this thing along. I had another kid that is now 5... hell I’ll be Medicare when this kid is still in school... not even college.....
Re: TX 18 Build
Posted: Thu Feb 01, 2018 5:27 pm
by cape_fisherman
I've been wanting to see one of these. Looking forward to it.
Re: TX 18 Build
Posted: Thu Feb 01, 2018 5:39 pm
by Aripeka Angler
cape_fisherman wrote: ↑Thu Feb 01, 2018 5:27 pm
I've been wanting to see one of these. Looking forward to it.
He's one of my best buddies, I hope he can keep the momentum up.
His work is extremely neat and clean.
Having time for Derrick to build is a challenge though. He has 5 boys, three are not teens yet...
I think he sent me some fresh pics, I'll post them later...
Re: TX 18 Build
Posted: Thu Feb 01, 2018 5:44 pm
by peter-curacao
Now that's a cool and daring way to flip a boat
Re: TX 18 Build
Posted: Sat Nov 06, 2021 1:47 pm
by fallguy1000
Why is there glass in a different direction on the aft section at the bottom? I am still considering this deal, but sort of want the ph22 as well.
If you were willing to split the motor and the hull, what price for hull only?
Re: TX 18 Build
Posted: Sun Nov 07, 2021 9:25 am
by wpstarling
fallguy1000 wrote: ↑Sat Nov 06, 2021 1:47 pm
Why is there glass in a different direction on the aft section at the bottom? I am still considering this deal, but sort of want the ph22 as well.
If you were willing to split the motor and the hull, what price for hull only?
It's an extra layer of cloth to strengthen the rear for the 90. I only know this because I talked to Derrick about it before he moved. Basically just built the transom to be able to handle anything

Re: TX 18 Build
Posted: Sun Nov 07, 2021 9:31 am
by fallguy1000
wpstarling wrote: ↑Sun Nov 07, 2021 9:25 am
fallguy1000 wrote: ↑Sat Nov 06, 2021 1:47 pm
Why is there glass in a different direction on the aft section at the bottom? I am still considering this deal, but sort of want the ph22 as well.
If you were willing to split the motor and the hull, what price for hull only?
It's an extra layer of cloth to strengthen the rear for the 90. I only know this because I talked to Derrick about it before he moved. Basically just built the transom to be able to handle anything
Thanks.