

I have to work nights starting July 29 thru August 1 and don't think I can get off. I just took off for 12 days in June and am currently off until the 12th of July. I would like to come see the boats I will see what I can do.
I’m trying to figure if there is an easy way to make a good corner after the stitch and glue process before I fiberglass the seams. I sanded the seams but there are still some spots that aren’t completely full of the glue. Will the epoxy fill this in or do I need to mix more EZ-fillet?
FOSTER'S XF20
Re: FOSTER'S XF20
Brent
Re: FOSTER'S XF20
Foster,
I would mix up some wood flour and epoxy to a peanut butter consistancy and fill all the gaps at your panel joints. Then after cured the next day, sand or hand plane them to the round shape you are looking for for the fiberglass biaxial tape to lay nicely on top. The 1708 cloth on top of that. Doing them all wet on wet. Seams can still be tacky when cloth put on top. My 2 cents worth. Wetting out 1708 takes some time and plenty of epoxy so nice to have helpers for that job.
Regards
Tom in Steinhatchee
-
tech_support

- Very Active Poster

- Posts: 12318
- Joined: Wed Dec 31, 1969 7:00 pm
- Location: Vero Beach, FL
- Contact:
Re: FOSTER'S XF20
here we are filling some holes and gaps with putty right before we cover them with a couple layers of Biax. You can save a step of sanding by doing this. So the order I would do it: putty up joints after the hull is stitched up, once cured remove stitches and round joint with sander/grinder, go over remaining gaps and holes with thickened epoxy right before applying glass.
Re: FOSTER'S XF20
Shine,
The problem I have is that the thickened epoxy will droop thru the holes when applying just enough to fill the contour. If you tape right over that, then you could have have a void where the woodflour/epoxy drooped. Of course I do not tape the underside of the joint with masking tape or duct tape to keep it from drooping thru to the inside.
I find it easier to get plenty on the outside and then contour after it sets up. No voids possible here as you can fill in any after the contouring
Whatever works.
Regards
Tom in Steinhatchee
-
Cracker Larry

- * Bateau Builder - Expert *

- Posts: 22491
- Joined: Fri Mar 11, 2005 3:39 pm
- Location: Savannah, GA
Re: FOSTER'S XF20
I cover the inside lengths of the joints with duct tape before applying the putty from the outside. No droop through, no messy clean upThe problem I have is that the thickened epoxy will droop thru the holes when applying just enough to fill the contour.
Completed GF12 X 2, GF16, OD18, FS18, GF5, GF18, CL6
"Ships are the nearest things to dreams that hands have ever made." -Robert N. Rose
-
majorgator
- * Bateau Builder *
- Posts: 1794
- Joined: Tue Apr 29, 2008 8:58 pm
- Location: High Springs, FL
Re: FOSTER'S XF20
That's exactly what I did...great minds think alikeI cover the inside lengths of the joints with duct tape before applying the putty from the outside.
seth


Re: FOSTER'S XF20
I think I will try the duct tape on the next build. My goobers on the inside are a bit of a pain to sand down with the dremel prior to making the inside fillets. Anything to avoid some sanding is a great idea. 
Tom
Tom
Re: FOSTER'S XF20
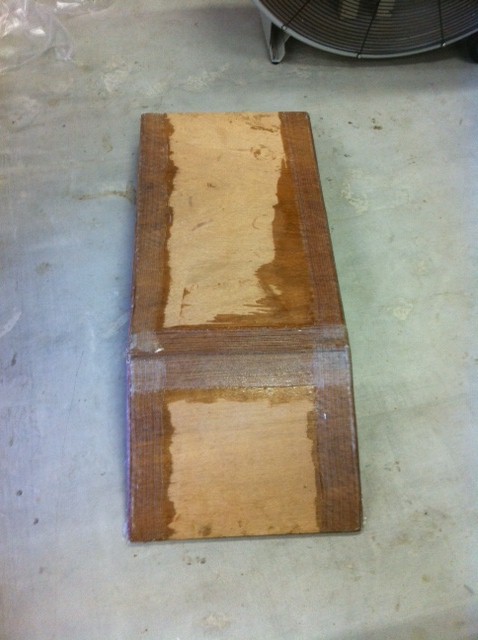
One thing I have learned is i could have saved myself a lot of sanding and EZ-Fillet if I would have found something to make a nice corner the first time I filled the seam with EZ-Fillet. I used a little hand held plastic shovel the kids had to make the corner and that worked great. I guess you live and learn.
I found my first mistake when I put the tunnel together instead of installing the side panels of the tunnel under the top panel of the tunnel I installed them on the side making the tunnel 1" to wide. My thought to fixing this is to just install a piece of 3/8" plywood on the inside of each side of the tunnel or make the cut out of the tunnel 1/2" wider on each side of the transom. What do y'all think?
I found my first mistake when I put the tunnel together instead of installing the side panels of the tunnel under the top panel of the tunnel I installed them on the side making the tunnel 1" to wide. My thought to fixing this is to just install a piece of 3/8" plywood on the inside of each side of the tunnel or make the cut out of the tunnel 1/2" wider on each side of the transom. What do y'all think?
Brent
-
Aripeka Angler
- * Bateau Builder - Expert *
- Posts: 6725
- Joined: Thu Sep 13, 2007 9:13 pm
- Location: Dade City, Florida
Re: FOSTER'S XF20
Your boat is looking nice Foster I built the same boat a few years ago, it sure looks big when it is stitched together.
Your fix will work fine. Just keep in mind that the stringers will move outward slightly and that will affect the notches in the seat frames. I'm going off memory, my plans are long gone.I found my first mistake when I put the tunnel together instead of installing the side panels of the tunnel under the top panel of the tunnel I installed them on the side making the tunnel 1" to wide. My thought to fixing this is to just install a piece of 3/8" plywood on the inside of each side of the tunnel or make the cut out of the tunnel 1/2" wider on each side of the transom. What do y'all think?
Richard
Completed boats...XF20 "Red Alert", Aripeka Angler's Strip Canoe, FS18 “Bare Bones”, GF12
Currently building...PY12 Kayak
viewtopic.php?f=12&t=62146
Completed boats...XF20 "Red Alert", Aripeka Angler's Strip Canoe, FS18 “Bare Bones”, GF12
Currently building...PY12 Kayak
Bare Bones build thread...If there is magic on this planet, it is contained in water. - Loren Eiseley
viewtopic.php?f=12&t=62146
Re: FOSTER'S XF20
OK tunnel is fixed by putting 3/8" plywood on the inside of each side panel. I added first layer of fiberglass tape to tunnel.
Spot for tunnel cut out
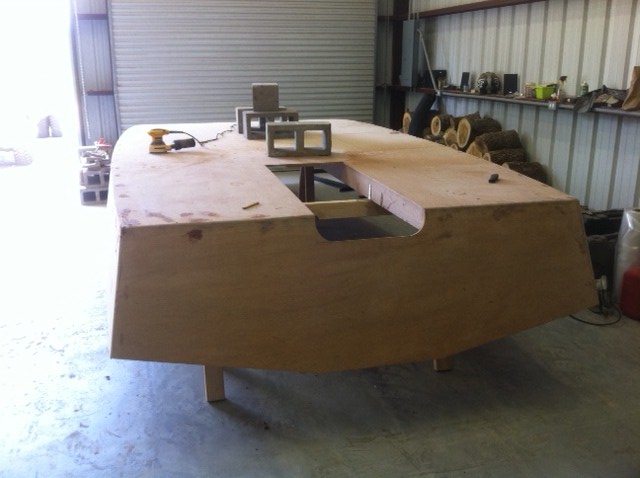
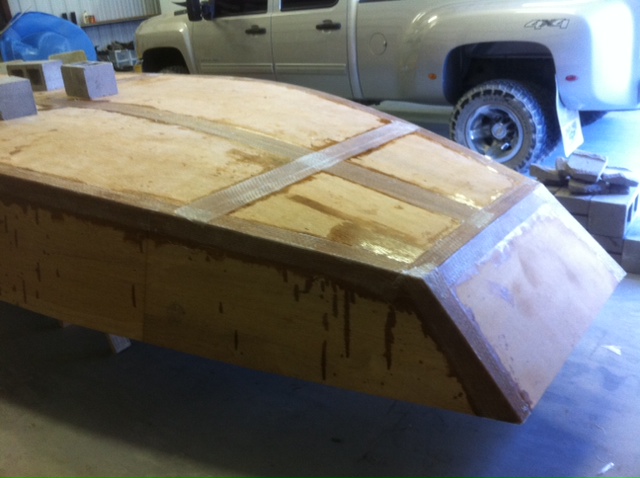
Fiberglass installed on all seams, but we forgot the side seams because my son Luke wanted to go to Gander Mountain to buy lures for fishing will finish them tomorrow. If you notice my son was helping me with the front of the bow and happened to spill a little resin on the hull. It sure is fun having him involved in the build though and he is actually pretty helpful.
Spot for tunnel cut out
Fiberglass installed on all seams, but we forgot the side seams because my son Luke wanted to go to Gander Mountain to buy lures for fishing will finish them tomorrow. If you notice my son was helping me with the front of the bow and happened to spill a little resin on the hull. It sure is fun having him involved in the build though and he is actually pretty helpful.
Brent
Who is online
Users browsing this forum: Bing [Bot] and 6 guests