Page 1 of 1
An AR15 in Paris
Posted: Fri Feb 06, 2004 12:28 pm
by ekerebel
Or should I say AR14 because as I was waiting for an answer for a possible workshop to welcome me, I could not refrain from playing around with the plans.
Now, I have the answer from the workshop and I will soon start building the boat in Paris (close to the Seine river).
The main modifications I did on the AR15 :
- decrease the length (to 14')
- lower the freeboard (by almost 10cm)
- decrease the waterline width (1.2 m. instead of 1.3)
- daggerboard instead of centerboard
- ...
I will order my plywood and epoxy next week. Plywood is marine 4mm, 6mm and 9mm.
Posted: Sat Feb 07, 2004 12:53 am
by richstrat
Excellent - good to see another builder joining the AR club. It's also good to see you modifying the boat - now I don't feel such a freak for what I've done to mine!!!
Pictures please as the build progresses...
Good luck,
Rich
Status 28/02/2004
Posted: Sat Feb 28, 2004 2:02 pm
by ekerebel
Hi,
Yesterday, I received my plywood.
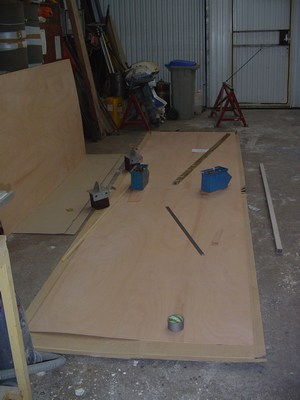
Today, cut all the stations :
+ Drew the 2 upper chines :
Status 06/03/2004
Posted: Sat Mar 06, 2004 5:05 pm
by ekerebel
One day, this will ba my boat :
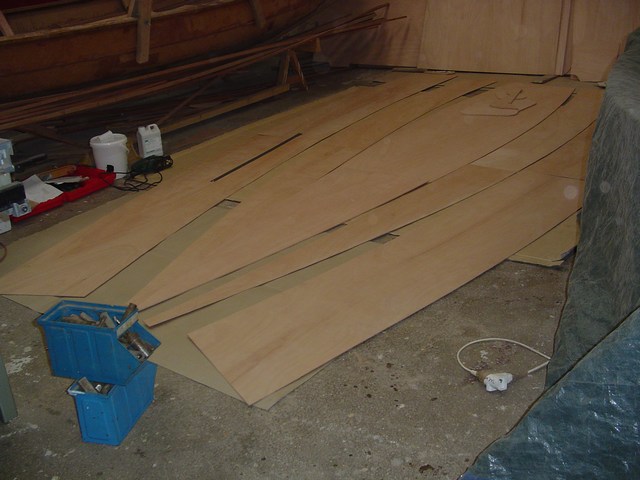
Today, I got my hull panels glued (butt blocks). It was quite hard to get the workshop to a suitable temperature but I finally got it thanks to this tent. (Hope my boat will not be transformed to ash tomorrow morning...)

Status 07/03/2004 and First Stupidity
Posted: Sun Mar 07, 2004 11:29 am
by ekerebel
The glue is solid like rock today !
The bad news is today was the day of my first stupidity : one piece of wood (9 mm, which was not supposed to be there) was glued to a panel :
After having repaired that (I was lucky to find a good belt sander), I started assembling the hull :
Posted: Sun Mar 07, 2004 12:25 pm
by richstrat
Looking good - enjoy it - this is the fun part, it soon turns into a sanding marathon!!!
Rich
Posted: Sun Mar 07, 2004 6:33 pm
by ks8
I'm curious why the modifications?
To compete perhaps in a particular class in France?
or...
inspiration?
sincerely,
ks
Why modifications
Posted: Mon Mar 08, 2004 4:21 pm
by ekerebel
Hi,
Freeboard : I thought the original freeboard of the AR15 was a bit high, compared to other dinghies and I prefer lower freeboards...
Waterline width : I was afraid the AR15 could be too stable (I want some speed and sensations). Unfortunately, my girlfriend does not completely agree on that point...
Overall length : I found an old small rig of a b14 (coming from Australia) for sale. The mast is only 6.5m high. I think a 14' dinghy would be better designed for this rig (I know, this is an original way of answering the problem...).
Other reason : I wanted to practice with a 3D design software...
Sincerely,
Erwan.
Posted: Tue Mar 09, 2004 7:37 pm
by ks8
I'm sure you will have a unique satisfaction in the build and sailing, knowing that you did put some mental energies into a performance altering design change. Though I wonder if it would plane better with the original design and give greater speed and sensations (?). You will be the first to know. And, if your relationship has long term intentions, hopefully your girlfriend will understand the *sensations*, or at least tolerate them!
Maybe at one of the Europe Bateau gatherings you may meet Rich and compare his spec AR14 to yours???
sincerely,
ks
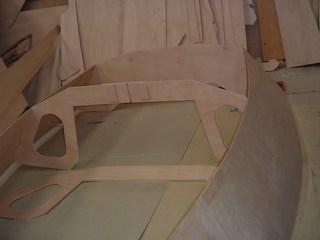
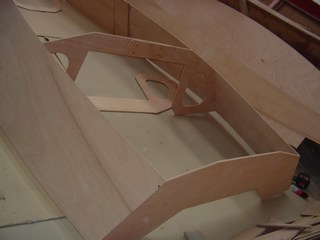
Status 12/03/2004
Posted: Fri Mar 12, 2004 3:53 pm
by ekerebel
Hi,
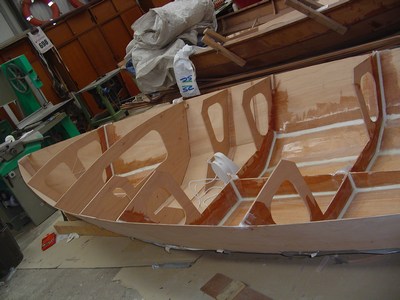
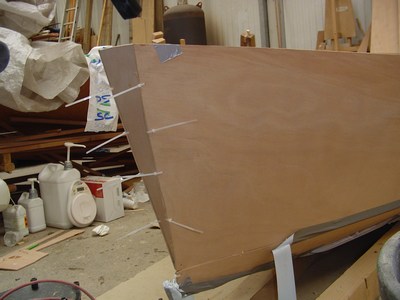
Today, I started assembling the frames (which was not an easy part for me as I had to stitch them to the upper panel :

Stitching :
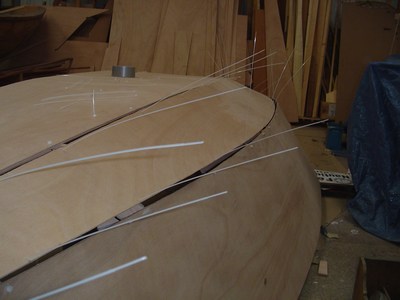
I still have a symetry problem at the bow (will that disappear after grinding ?) :
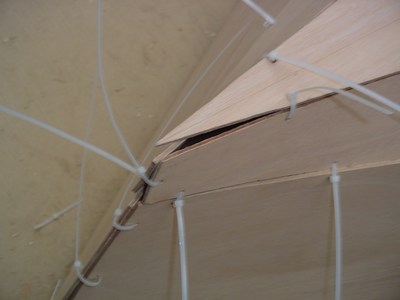
View from inside :
Upside is up :
Posted: Fri Mar 12, 2004 4:26 pm
by ArizonaBuilder
ekerebel,
Your boat is looking good.. i am envious, as i need to finish my D5
before i can start my AR15..
post lots of pics..
Posted: Sun Mar 14, 2004 2:02 am
by richstrat
Looking good - your mods make her look much 'sleeker' than a standard AR15. One suggestion (I don't know if you were planning on doing this anyway) - when you have adjusted your zip ties to set the fairness of the hull, cover the seams in duct tape (if you have this in France) - it will save you a lot of epoxy and working cleaning uo drips and runs...
Cheers,
Rich
Posted: Sun Mar 14, 2004 11:49 am
by ks8
Looking very nice and clean.
When you start taking pictures to show *the view inside*, we know you've got *the disease*!

Keep the pictures coming. It looks like it will be *sensational*.
sincerely,
ks
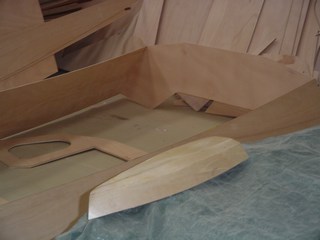
Status 14/03/2004
Posted: Sun Mar 14, 2004 11:59 am
by ekerebel
Thanx for your comments !
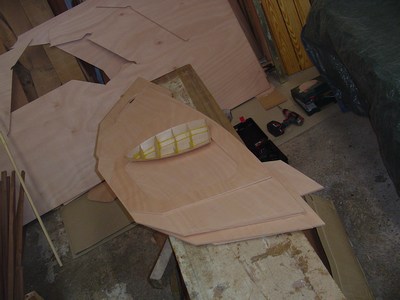
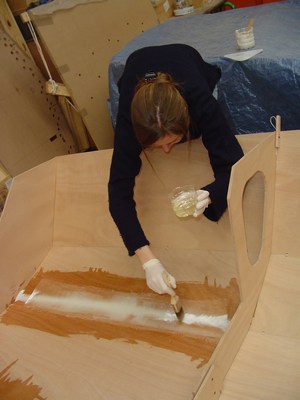
Today, first fillets (notice the cheap labor) :
Posted: Sun Mar 14, 2004 12:08 pm
by ks8
Regarding the symmetry problem and ginding...
What I did on the Caravelle was double the number of stitches where the wood was being opinionated. Of course too many holes, or, holes too close to the edge, will start pulling and breaking through the wood. I also used some 5 minute epoxy and wood flour to make small *welds* as I held the panels where the stitching would not hold, for about 20 minutes while the 5 minute epoxy set well. They were only small welds, just enough to hold a little more, since the 5 minute epoxy was cheap. I did not want it to be, by any means, the primary bond in the area. Then, when cured, I *carefully* roughed up those small welds ( a few hours later) and carefully laid in the *real* fillet and tape. The problem areas held with the small welds and the panels fit quite nicely. I still had to do a little grinding, but of course, make sure you have enough material behind where you are grinding so that you do not break through, or worse, barely NOT break through but have no strength there. I made fairly large fillets where all the panels come together so I had the material to make a nice rounded exterior seam. But I have a pram bow and things were not so critical as your bow. So all the more, have lots of material inside so you can grind and sand an excellent shape for parting the waters.
I think that as many people as respond to that question, will have that many different answers. The chief concern, I think, is that whatever you do, make sure you have plenty of strong material inside so you have a little more freedom to do a serious grind on the outside.
But it seams best to do what you can to get the symmetry as good as possible and NOT rely on grinding. You've been this inventive already. You'll come up with some sort of jig for the task.
Just think of the sensation when you get it figured out...
sincerely,
ks
Posted: Sun Mar 14, 2004 1:40 pm
by ArizonaBuilder
here is a previous discussion about the problems with the bow area.

I went back to the model and everything is correct but there is a very small area at the bow that requires compounding in the chine panel in theory.
It happens at the last 3 or 4 inches but only IF you try to get a tight fit within let's say 5 mm.
From the previous thread about that, you can see that the problem was solved when the stitches were loosened.
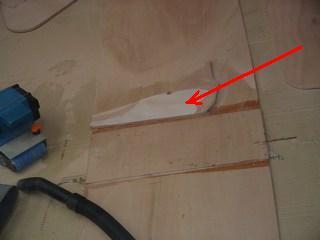
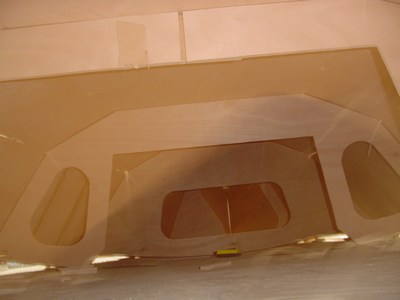
Now, let me explain something important.
The picture above shows the finished surface AND the lines. It is extracted from our original AR15 model. We lofted the surfaces from the blue lines but what we want to build is the green surface.
The dark blue lines are the ones who define the panels but the finished surface will be rounded. Rounded around the bow at least 1/2" (12 mm) and in profile 3" ( 75 mm). Without those radii, you would not be able to fiberglass the outside properly and also, it would look bad.
To create that surface, you start with the panels as designed and build the seams inside. During the panels assembly, you leave some play at the bow.
With the inside fiberglassed, you grind the outside to a nice radius as shown above.
The difference in length is significant: you grind one or two inches off depending on the spot. You can see that on the picture. And doing that, you eliminate the "problem", it becomes wood dust . . .
Richstart probably cut that radius before fiberglassing and that is fine too.
Maybe we should have shown that on the plans but I am afraid it would confuse people. Ideally, each panel should be shorter and builders should leave a nice gap like 1/2" (12 mm) but I am certain that if we show the panels that way, many builders will still go for a tight fit.
Our choice is to show the whole panel and grind it down.
It is one of those things that solves itself during the building.
If you try to get it perfect in theory, within 1 mm, it will not work but that compounded tip will dissapear, it is rounded down.
I will try to find a way to explain that in the building notes.
Just by curiosity, I measured how much to grind off: at the tip, lower edge of chine panel, it is 58 mm, 2"+.
_________________
Jacques Mertens
Posted: Mon Mar 15, 2004 9:26 am
by ks8
There ya go!
Build it up well inside so there's plenty, plenty, to grind into...
You must be itching to get it started eh Terry?
sincerely,
ks
Posted: Mon Mar 15, 2004 10:51 am
by ArizonaBuilder
You must be itching to get it started eh Terry?
Yes, it is getting worse everyday as the D5 gets closer and closer to completion. Since the D5 is my learner boat and a shore tender for a larger boat, i am anxious to build something i can play with on the lakes here.

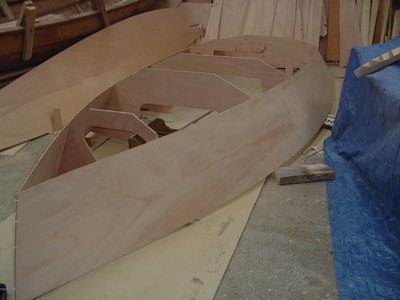
Status 04/04/2004
Posted: Sun Apr 04, 2004 4:05 pm
by ekerebel
Hi,
Quite a slow progress since last time.
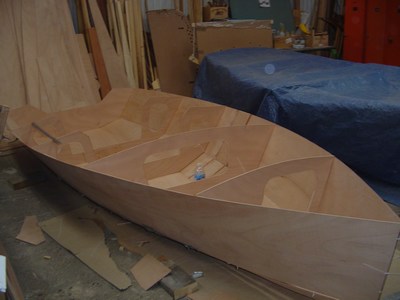
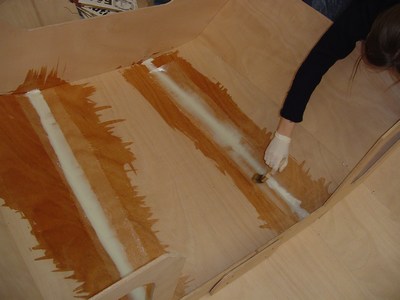
Still filetting :
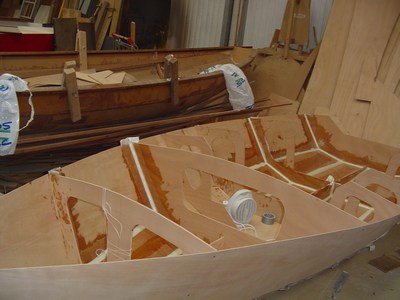
You will notice some changes I made to the bow. Bowsprit will be in the center, which will make the construction much easier I think. Bowsprit will be hold between frame A and the bow :

Posted: Tue Apr 06, 2004 9:47 am
by LarryA
Are you planning on putting a false stem on the boat?
False Stem
Posted: Tue Apr 06, 2004 12:26 pm
by ekerebel
I saw many boats designed with this sort of Square Stem and I like it, so, the answer is no.
Statut 2004/04/15
Posted: Thu Apr 15, 2004 5:42 pm
by ekerebel
Hello,
Sorry, not many new these days. I must say that I am also administrating another website :
http://www.kerebel.com . More photos there.
This week, I :
- Assembled the daggerboard case

- Finished all the inside fillets

- Cut and glued the rubrails


- Prepared and glued the cleats for sole and seats
