Page 1 of 1
CS23 - Dad's dream
Posted: Wed Mar 20, 2013 5:27 am
by antoniekruger
And so it begins:
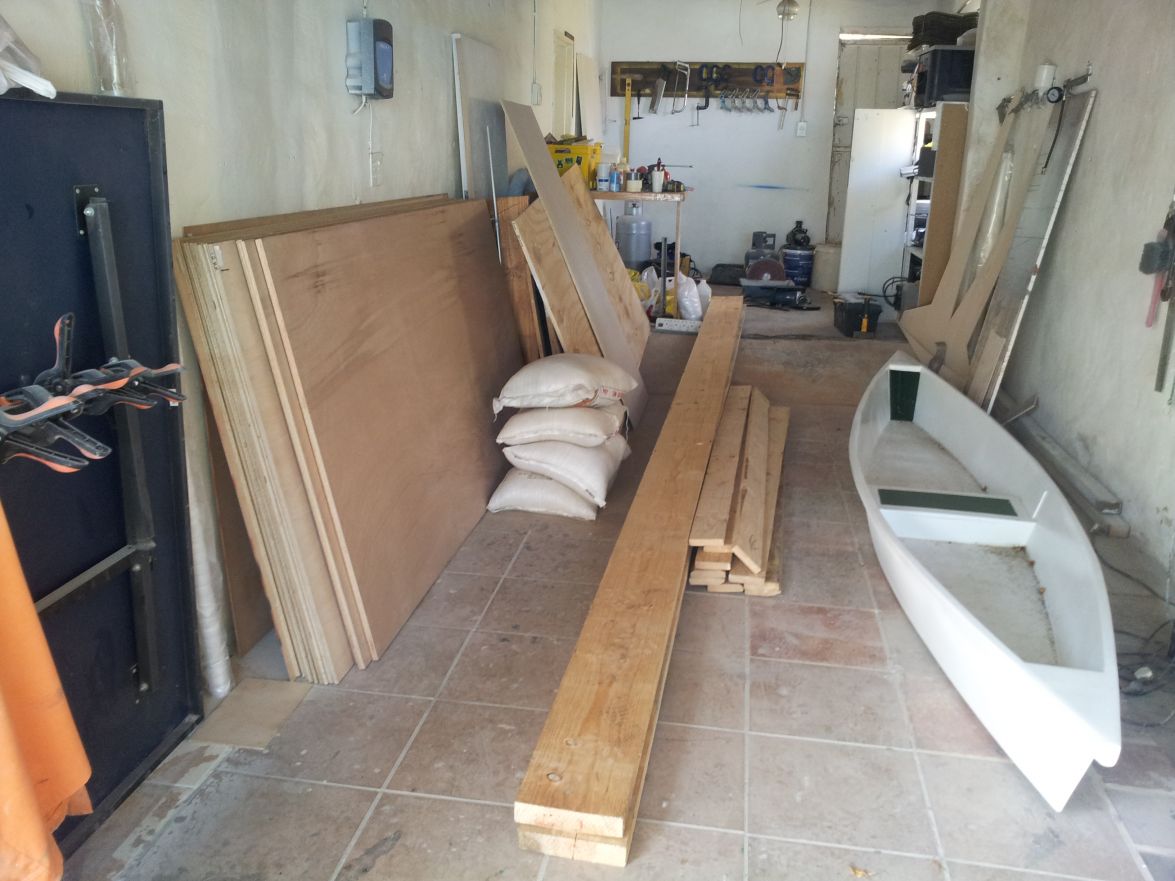
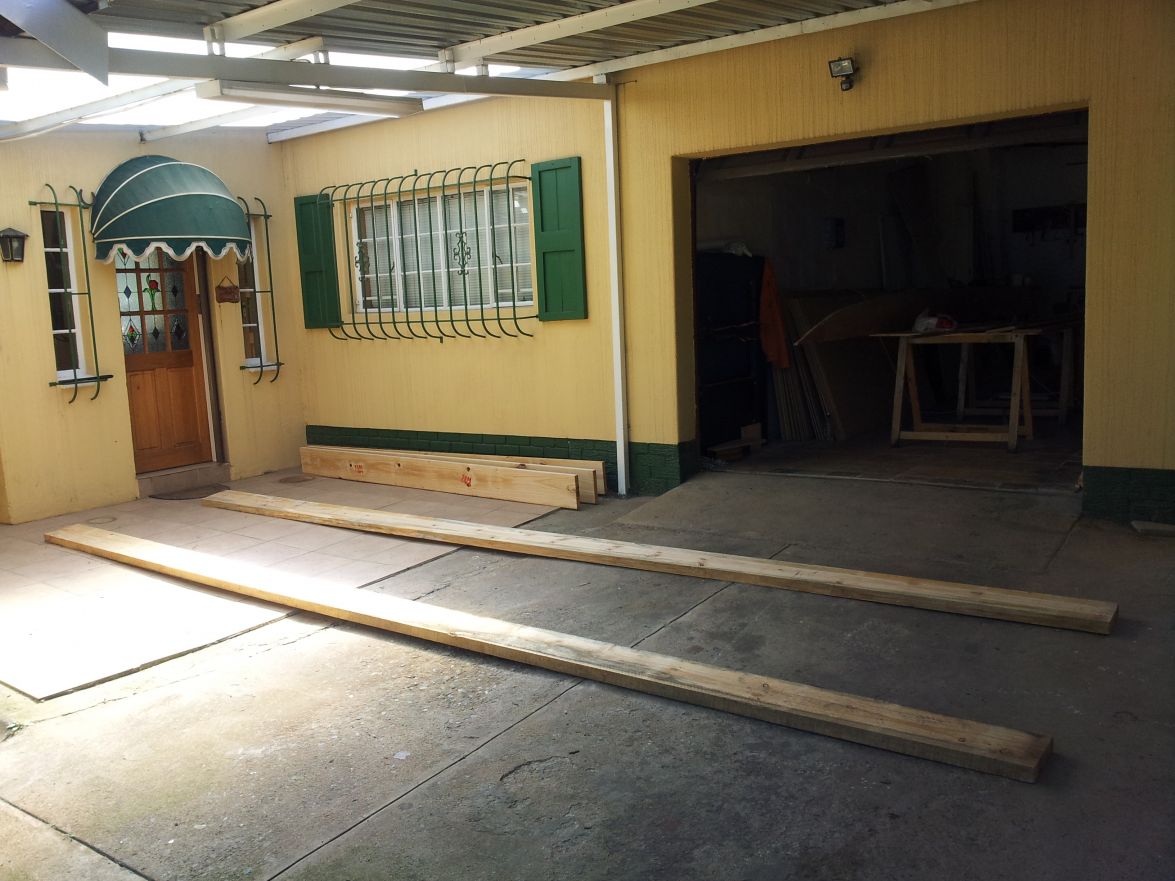
I finally received my design. Sorry order desk if I drove you ape with my queries. I soaked in the design for a good week or so to collect all my thoughts. I worked out a building program for materials and progress(Occupational habit)-to keep me on track. I ordered my first batch of materials up to the hull planking stage and picked it up through the week.

I asked my family around the dinner table what we should call the boat. My son answered without thinking about it : Dad's dream. So be it.
Heres the first stock. I have a another project deadline for end of March, so my start date for this is 1 April......unless I can sneak away and do a few markups.
Antonie
Re: CS23 - Dad's dream
Posted: Wed Mar 20, 2013 6:20 am
by Walkers Run
That's very exciting. Good luck with your build. Post lot's of pictures!
Re: CS23 - Dad's dream
Posted: Wed Mar 20, 2013 7:53 am
by cottontop
Good luck and have lots of fun. That's a mighty small space for the boat you are building?

Re: CS23 - Dad's dream
Posted: Wed Mar 20, 2013 8:19 am
by antoniekruger

No, this is my garage - we did an exercise with Jacques and found that I'll have to break out a piece of my garage to get the boat out. I'll just use it as a store and workshop whilst the boat will stand just outside under the carport. It is larger, covered and protected. Had to erect a different carport for the wifes car. That should be done by the weekend. I'm running out of yard.
Re: CS23 - Dad's dream
Posted: Wed Mar 20, 2013 10:28 am
by peter-curacao
Cool

good luck!
Re: CS23 - Dad's dream
Posted: Sun Mar 24, 2013 3:14 am
by antoniekruger
Hi,
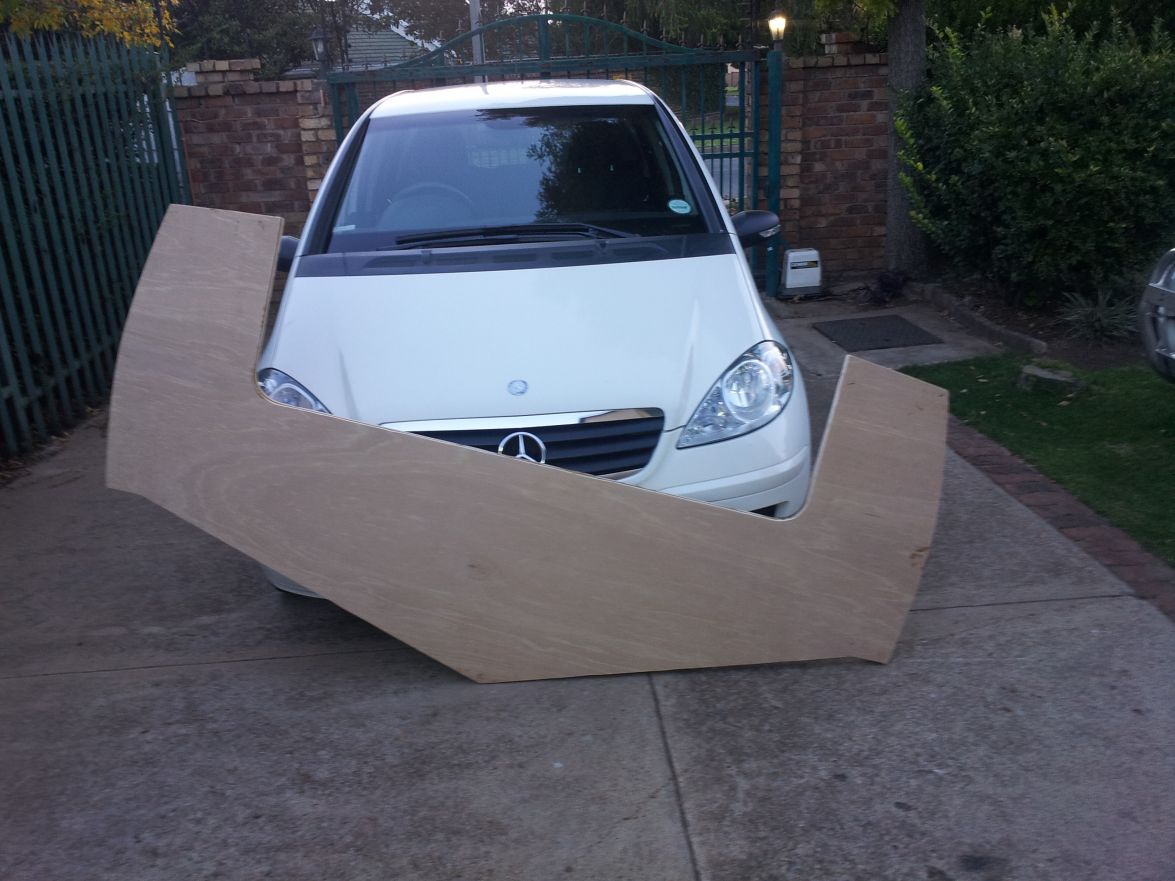
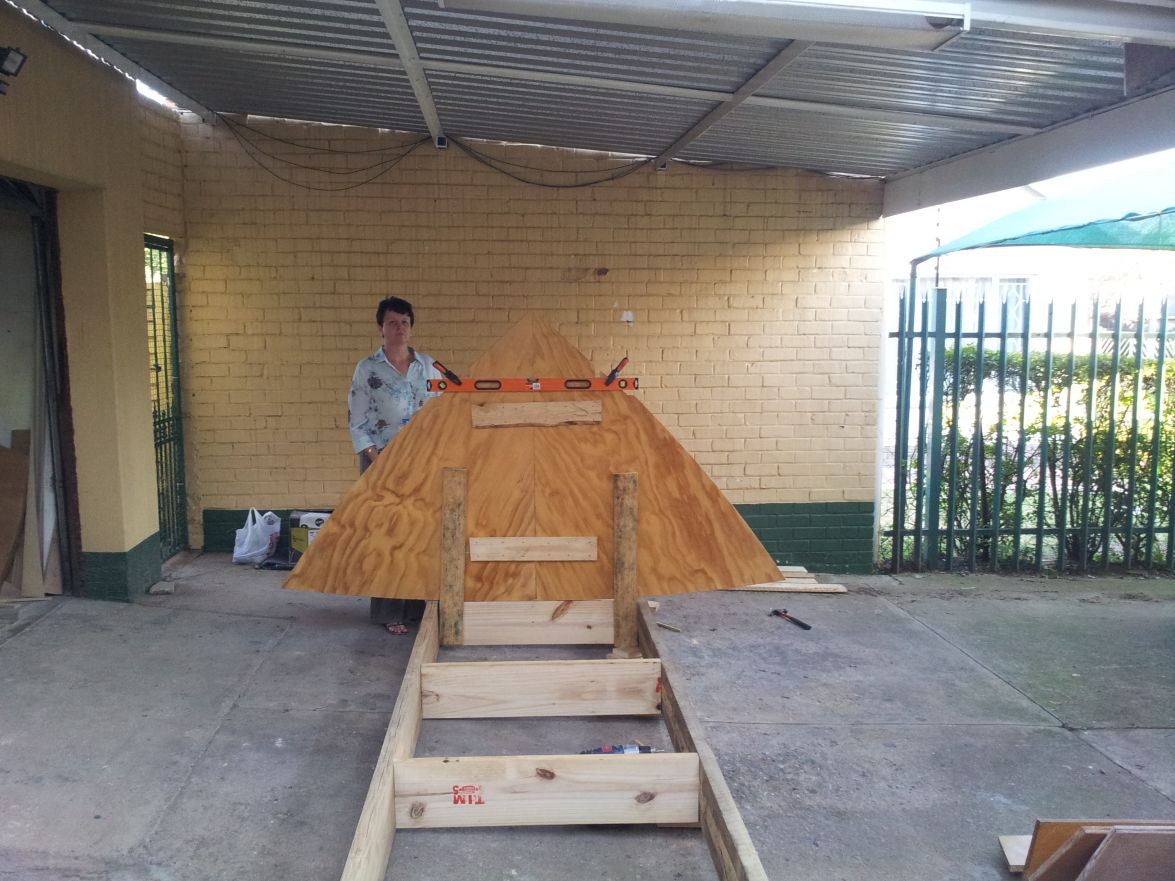
The carport is up, so I made the first cuts and glued the transom. Look at the smile on my wifes baby merc:
And here is station F:

I have a few questions around the clamping board:
1. A confirmation that the clampingboard dimensions are the same as the transom bottom up to the edge of the motorwell

2. Can I glue it onto the transom before I mount it on the strongback or do I fit it when I glass the interior - It would be better now since I can apply real good pressure for a good bond, although the transom would then be heavier to mount on the strongback.
3. Does the clamboard have to be cut from 1 piece. I can imagine the structural arguments. Let me explain: The cut from the transom for the dual motors gives large enough offcuts to cover around 80% of the clampboard. Now, If I use these offcuts and join it with enough wood to make up the whole clampboard dimensions and reinforce it with 200g glass between the 2 13mm sheets, would it not serve as a full sheet cut?
Whilst glueing the transom I was wondering what kind of penetration of the epoxy into the wood was required to be considered a good bond. Does the epoxy penetrate deeper than the first layer of the ply
And should it?
Any commnets welcome - thanks fellas,
Antonie
Re: CS23 - Dad's dream
Posted: Sun Mar 24, 2013 7:33 am
by WobblyLegs
antoniekruger wrote:Hi,
The carport is up, so I made the first cuts and glued the transom. Look at the smile on my wifes baby merc:
Hi Antonie,
Wow, looking at that pic it's gonna be a BIG boat!! Good luck with the build.
Regards,
Tim (also in SA, Western Cape near Hermanus).
Re: CS23 - Dad's dream
Posted: Sun Mar 24, 2013 7:51 am
by antoniekruger
Hi Tim, thanks.
I have family in Bettys bay and Somerset. Close to your doorstep.
Cheers, Antonie
Re: CS23 - Dad's dream
Posted: Sun Mar 24, 2013 11:15 am
by TRC886
antoniekruger wrote:And here is station F:
Is station F a permanent part of the boat, or is it a temporary mold? If it's temporary, I'd use the cheapest stuff I could find and save that expensive ply for where it's needed.
I have a few questions around the clamping board:
1. A confirmation that the clampingboard dimensions are the same as the transom bottom up to the edge of the motorwell
I don't have the plans so I can't say for certain, but if that's what the plans say, it sounds OK to me. The clamp'g board serves to reinforce the transom where the motor bolts to it.
However, on a boat that size, I usually don't expect to find a clamping board. I expect to find a full sized transom that is a
minimum of 38mm core thickness and 51mm total thickness.
3. Does the clamboard have to be cut from 1 piece.
No.
The cut from the transom for the dual motors gives large enough offcuts to cover around 80% of the clampboard. Now, If I use these offcuts and join it with enough wood to make up the whole clampboard dimensions and reinforce it with 200g glass between the 2 13mm sheets, would it not serve as a full sheet cut?
Unless you are using polyester (which is a "four letter word" around here
), you don't need 'glass between the sheets of ply.
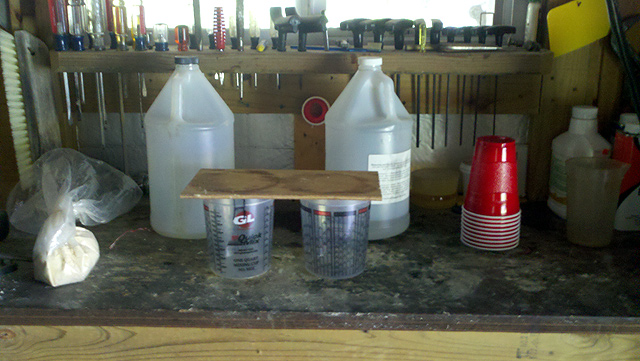
Whilst glueing the transom I was wondering what kind of penetration of the epoxy into the wood was required to be considered a good bond.
When making glue, you are using something to thicken the epoxy to between a ketchup and mayonnaise consistency
I believe that you used cotton flocks on you canoe?
"Paint" the wood with neat (unthickened) epoxy before spreading glue, then apply just enough pressure to get a little bit of glue squeezing out all the way around.
Good luck on your build
Re: CS23 - Dad's dream
Posted: Sun Mar 24, 2013 11:54 am
by pee wee
[quote="TRC886
When making glue, you are using something to thicken the epoxy to a peanut butter consistency
I believe that you used cotton flocks on you canoe?[/quote]
A small thing, but I believe the food related texture for epoxy glue is catsup, not peanut butter. The peanut butter consistency is used for making fillets. Yum!

Re: CS23 - Dad's dream
Posted: Sun Mar 24, 2013 12:10 pm
by peter-curacao
TRC886 wrote:Is station F a permanent part of the boat, or is it a temporary mold? If it's temporary, I'd use the cheapest stuff I could find and save that expensive ply for where it's needed.
Probably station F (in the 23 version) is the bulkhead before the transom
TRC886 wrote:However, on a boat that size, I usually don't expect to find a clamping board. I expect to find a full sized transom that is a minimum of 38mm core thickness and 51mm total thickness.
It is, transom is 3 x 13 mm clamp board 2 x 13mm (assuming it's the same as in the 25 version)
Re: CS23 - Dad's dream
Posted: Sun Mar 24, 2013 12:20 pm
by TRC886
pee wee wrote:[quote="TRC886]
When making glue, you are using something to thicken the epoxy to a peanut butter consistency
I believe that you used cotton flocks on you canoe?
A small thing, but I believe the food related texture for epoxy glue is catsup, not peanut butter. The peanut butter consistency is used for making fillets. Yum!
[/quote][/quote][/quote][/quote]
That's probably why I had so much trouble gluing my clamping board together
Thank you for making the clarification. I've just reviewed the "how to" mix glue again, and it should be between ketchup and mayonnaise. I will edit my previous post.
Again, thank you for helping to keep me straight
Re: CS23 - Dad's dream
Posted: Sun Mar 24, 2013 12:39 pm
by antoniekruger
Hi,
Thanks for the advice
The transom is 3x12mm sheets and the clamping board another 2x12mm, so your estimate is spot-on. I used a epoxy thickener for the transom glue(apparently similar stuff is used as a food thickener as well - go figure) on both sides. Now in hindsight I should have primed the transom parts with a 5% diluted epoxy before I did the glue....next time.
I'll cut and glue the clamping board tomorrow evening using this method.
Oh, yes, Station F is the back-end bulkhead of the motorwell. So yes, its permanent.
Antonie
Re: CS23 - Dad's dream
Posted: Sun Mar 24, 2013 3:42 pm
by peter-curacao
antoniekruger wrote:Now in hindsight I should have primed the transom parts with a 5% diluted epoxy before I did the glue....next time.
Antonie
If I understood you correctly you really should check the transom lamination's, rolling in the laminated parts with unthickened epoxy
(don't know where you get the diluted part from  )
)before laminating them with thickened epoxy is essential for a good bond, if you skip that step there is a good chance the wood will starve the glue, resulting in a bad bond.

Re: CS23 - Dad's dream
Posted: Mon Mar 25, 2013 5:38 am
by antoniekruger
Hi Peter,
Thats what I did, but I used normal mix epoxy as a primer and then the glue mix between those whilst all wet.
(don't know where you get the diluted part from )
I stumbled across a discussion about epoxy penetration from around 2003(if memory serves) on this site where it was suggested that wood should be sealed with a 5% diluted epoxy mix. I'll see if I can find it again with a link.
Thanks for keeping an eye.
Antonie
Re: CS23 - Dad's dream
Posted: Mon Mar 25, 2013 9:25 am
by tech_support
I stumbled across a discussion about epoxy penetration from around 2003(if memory serves) on this site where it was suggested that wood should be sealed with a 5% diluted epoxy mix. I'll see if I can find it again with a link.
Please let me know if you find it here and I will delete it.
DO NO THIN THE EPOXY
Hope that is clear enough.
Studies have proven it does not do much good (if any), but it can make the bonding of subsequent layers of epoxy weak.
Re: CS23 - Dad's dream
Posted: Mon Mar 25, 2013 10:32 am
by antoniekruger
Hi, OK here's the quote:
by jacquesmm » Mon Sep 29, 2003 7:40 pm
I dilute the first coat, the primer coat, with max. 5% of lacquer thinner.
BUT this is not my final coat.
If I am fiberglassing that part, I always pre-coat: wet the part again with undiluted resin then apply the glass plus more resin if needed etc.
If the part is not fiberglassed, I will pass another coat of undiluted resin over it as a final coat.
The purpose of the primer coat is to penetrate or saturate the wood. It doesn't take much to saturate, the resin never goes very deep but with the thinned primer coat, it will go a little deeper (I hope so) and not waste resin.
I find the 3 coats specified by System Three excessive especially since I know that first time builders use 3 times more resin per coat than I do!
BTW, I also disagree with the flow coating system described in the Gougeon book.
I have done it a few times but it was because I was too lazy to do a good sanding job.
With my system, you will have a better lamination, with less resin and more fiber (the plywood is made of cellulose fibers).
On parts that are not fiberglassed, you will have one primer coat plus one undiluted coat plus a paint primer plus paint. That's more than enough.
I learned the priming coat system many years ago from a boat upholstery shop. His problem was the moisture trapped in the foam, rot was spreading fast.
He coated all the plywood with several coats of resin but the pieces that were pre-coated with thinned resin resisted better than those with thick resin.Jacques Mertens - Designer
http://bateau.com
I'm not getting into a debate about this. NO thinning it would be-yes dad. Thanks for clearing that up. I'm on my way to cut and glue my clamping boards. Just picked up more wood and epoxy for the long weekend ahead.
I'll post some more pics by the weekend.BTW my BOQ states a 400g biax tape. I can only get a 450(same width). I do not foresee an issue with this except for a higher epoxy use. Any comments welcome.
Thanks Guys for all your input.
Re: CS23 - Dad's dream
Posted: Mon Mar 25, 2013 12:35 pm
by tech_support
thanks
Im glad to see that 10 year old thread s still useful.
I will add a line to the bottom of that thread explaining why we do not think thinning is a good idea.
Re: CS23 - Dad's dream
Posted: Wed Mar 27, 2013 7:57 am
by antoniekruger
Oh my word, this transom is heavy - I'll have to devise a holding mechanism over the beams in my carport to help hold it whilst I mount it on the strong back or I'm going to bend my chassis trying to hold and mount.
Shine, what do you mean old - it is only 2003 in South-Africa now
Another question about resin and glass : When I mix epoxy for 1m^2 wood coating - first coat, it should be 400g(argument sake for 400g biax), correct? How much should I mix extra to ensure the wood is soaked out as well or is it better to prime the wood before you start the layups.

Re: CS23 - Dad's dream
Posted: Wed Mar 27, 2013 8:12 am
by WobblyLegs
antoniekruger wrote:Another question about resin and glass : When I mix epoxy for 1m^2 wood coating - first coat, it should be 400g(argument sake for 400g biax), correct? How much should I mix extra to ensure the wood is soaked out as well or is it better to prime the wood before you start the layups.
Antonie,
Going by memory I used approximately 8 pumps of epoxy per sq. metre - rough estimate! My pumps are 30g a time (25g epoxy, 5g hardener) - so around 250g or so per metre.
Don't worry too much - you get a feel for it very quickly - but you won't be doing biax yet for a while...
Oh, and I'm satisfied with my results of laying dry cloth over dry wood and using a squeegee or foam roller to press the goo in. Just don't do it in direct sunlight or rising temperatures - you WILL get bubbles as air expands in the wood and out-gasses through the epoxy. Use slow hardener - it makes life easier.
Regards,
Tim.
Re: CS23 - Dad's dream
Posted: Wed Mar 27, 2013 9:17 am
by antoniekruger
Thanks Tim,
Yeah, I hope to get the strong back and frames up and aligned by the end of Easter. My gardener will be in on Saturday, so we can do the heavy lifting and aligning then.
I need to find some dispensing pumps for my resin. I'm still pouring from the 5l container into a cup whilst measuring(habit from vacuum bagging wings - biggest volume at a time is 150g). I make a point of using the slow hardeners - not only for pot life but because of our high day temps. I just noticed that AMP gave me 5l SP106 fast hardener instead of slow. Have to get that back on Tuesday.
Tim, just to be clear - 250g/m2 to wet the cloth and wood...doesn't sound right for 400g cloth.
I need to apply some control on my epoxy use to avoid overmix. My variable at this stage is the wood absorption of the first layer.
What is the reason for the gas in the wood(and then bubbles in the layup)
. I saw some guys complaining about oak generating a lot of gas. Is it a reaction with the epoxy? Is there a workaround/avoidance strategy?
Antonie
Re: CS23 - Dad's dream
Posted: Wed Mar 27, 2013 11:10 am
by peter-curacao
An easy way to mix also is by weight, find a digital kitchen scale you can reset to zero while there is weight on, put the cup on the scale fill with resin reset scale to zero and the pour in the hardener.
Re: CS23 - Dad's dream
Posted: Wed Mar 27, 2013 11:36 am
by Cracker Larry
I just use graduated mixing cups, it seems to be the easiest way for me. I keep one cup dedicated to resin and one dedicated to hardener. Measure out 2/1 and pour it into cheap plastic cups to mix.
Re: CS23 - Dad's dream
Posted: Wed Mar 27, 2013 11:55 am
by WobblyLegs
antoniekruger wrote:Tim, just to be clear - 250g/m2 to wet the cloth and wood...doesn't sound right for 400g cloth.
I need to apply some control on my epoxy use to avoid overmix. My variable at this stage is the wood absorption of the first layer.
What is the reason for the gas in the wood(and then bubbles in the layup)
. I saw some guys complaining about oak generating a lot of gas. Is it a reaction with the epoxy? Is there a workaround/avoidance strategy?
My guesstimate for the 250g is from 8-year-old memory, so may not be spot on - I mixed 4 pumps at a time, my max amount that I'm comfortable with and got about 0.5m2 out of each mix. I think my biax was 350g/m2.
As to the gas - it's just air expanding in the wood as it warms up - it has to go somewhere so you see it form as bubbles under the wet epoxy/glass layer. I now only do glass laminating in the late afternoons and evenings. The reverse is true to a slight extent - cooling air in the wood helps draw in the epoxy. I think...
Tim.
PS, here's a copy from my build thread post when I did the hull biax:
WobblyLegs wrote:Well, it's been a while since the last update, and things have been progressing slowly.
I think, though, that I'm over the main epoxy hump, that is covering the hull (I know the inside still has to be done, but at least that doesn't have to be fair!).
Since the last update, the weather has really been playing havoc, as for a couple of weeks it seemed to rain every afternoon so I couldn't work in the evenings, and then a couple of weekends too (not as bad as it seems some of you guys in Florida seem to be experiencing, from what I hear).
Anyway, summer seems to have well and truly arrived, so last weekend I managed to sand all the taped seems in preparation for the final lamination, then during the week I measured out the upper side panels (not cut yet).
Then, this weekend I finally bit the bullet and laid the cloth over the boat.
I eventually decided to go "wet on dry" as people here seem to refer to it. Laid down the cloth on the starboard side, positioned it and got on with mixing. Starting at the transom, I just poured the whole lot on the cloth at the centre-line over a distance of about 0.5m (1.5'). As this started to run down towards the chine, I very lightly and without trying to force the epoxy into the cloth, used a squeegee to spread the epoxy over the first area, then went to mix a second pot of goo.
By the time the second mix was ready, I was able to pour on to the cloth again, just below halfway between the centre and the chine, and the first pouring was soaked into the cloth enough to squeeze the air out. After spreading about three areas like this, I had my routine going pretty well.
The port side took about two and a half hours to lay. By now I was on a roll, but it was getting really hot and I was contemplating delaying the second half. But, a half hour break, and nearly two litres of water later, decided it had to go on.
The second (port) side took only one and a half hours to do, working with a nice method:
- Mix one pot, pour at centre and spread towards me (chine) lightly.
- Mix another pot, pour 2/3 of it closer to chine, spread lightly.
- Squeeze first mix to get air out.
- Pour half of remaining mix onto overlap on starboard side and spread lightly.
- Squeeze second batch on the bottom.
- Spread remaining epoxy onto the glass on the side lightly.
- Squeeze starboard side overlap.
- Squeeze side.
- Start again one step closer to the bow.
Measuring and mixing was made easy by having pumps in the resin and hardener that pump proportionally so each pot was four pumps resin, four pumps hardener (about 150ml/5oz). It also helped that the resin had warmed up quite a lot, so was thinner and easier to spread than the first half.
Of course, working in hot conditions did cause a little bit of out-gassing from the wood, but I was able to squeeze almost all of it down again. There are a few very small patches where air got caught under the glass, but looking at it this morning I will be able to grind a small area with a Dremel and squeeze some epoxy into that. Also, having already done the centre and chines, obviously no air could come out there and I have ended up with one very strong looking hull.
It really does look nice now, and as Mrs Wobbly said when looking at the dark wood through the glass, it seems a shame to paint it. I think I have now decided that I am going to try and keep the entire topside natural wood if I can get all the joints neat enough.
Also, I ordered all the wood that I need for the hull trimmings - keel, strakes, spray rail, rub rail laminations - which will be cut to shape (strakes and spray rail) and delivered on Saturday. This week I plan on filling the weave on the bottom in preparation for fairing and hopefully I'll be able to join the keel (skeg?) and spray rails on the weekend.
I shall let you know how I get on (hopefully things will start moving quicker again).
As usual, more pics here:
http://gallery.bateau2.com/thumbnails.p ... 286&page=6
Oh, and I've just noticed that the gallery pics seem a bit out of order, but I'm sure JM will sort that out...
Wobb.
Re: CS23 - Dad's dream
Posted: Wed Mar 27, 2013 12:19 pm
by antoniekruger
Thanks, Tim - good job.
I hope to be that far sooonisshh
The 209 gallery link is not working - can you give me a lint to your build gallery?
Thanks,
Antonie
Re: CS23 - Dad's dream
Posted: Wed Mar 27, 2013 10:34 pm
by TRC886
Re: CS23 - Dad's dream
Posted: Thu Mar 28, 2013 6:42 am
by antoniekruger
Hi Fellas,
I'm about to cut the motorwell sides. My drawings gives it as a 12mm ply cut, but I have 18mm offcuts that is the right size for these. My intention is to fit 2 115hp motors on the transom. I would imagine that a bit thicker wood in the motorwell sides would be beneficial in the load transfer from the transom to the hull(via station F)?
Any thoughts?
Thanks,
Antonie
Re: CS23 - Dad's dream
Posted: Thu Apr 11, 2013 12:57 pm
by antoniekruger
Hi,
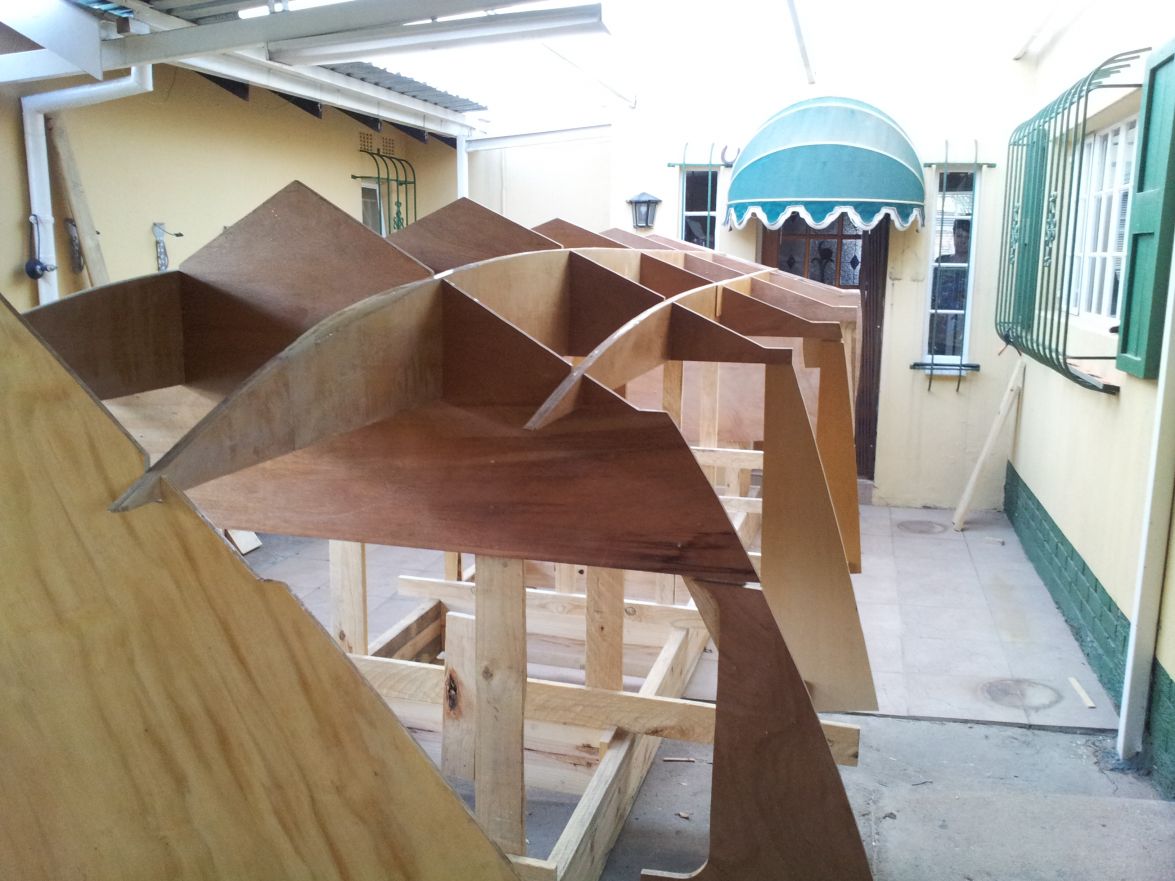
The 18mm motorwell sides did not work out so well. My 18mm offcuts were not big enough, so back to design thickness 12mm. I've been jumped with some crisis projects so the build is going slow, but steady. We had some rain - strange for this time of year, but it has been a dry summer, so I decided to prime the frames and stringers with a layer of epoxy before I mount then. This done, I started building the strongback and mounting the frames. This really brings the size of the boat to reality....Oh my goodness, it is awesome. I managed a frame a day
. Here is some pics:
Jig assembly start:
Frame A:
This frame is exterior ply. I'll replace it with marine once the hull is flipped.
Frame C:
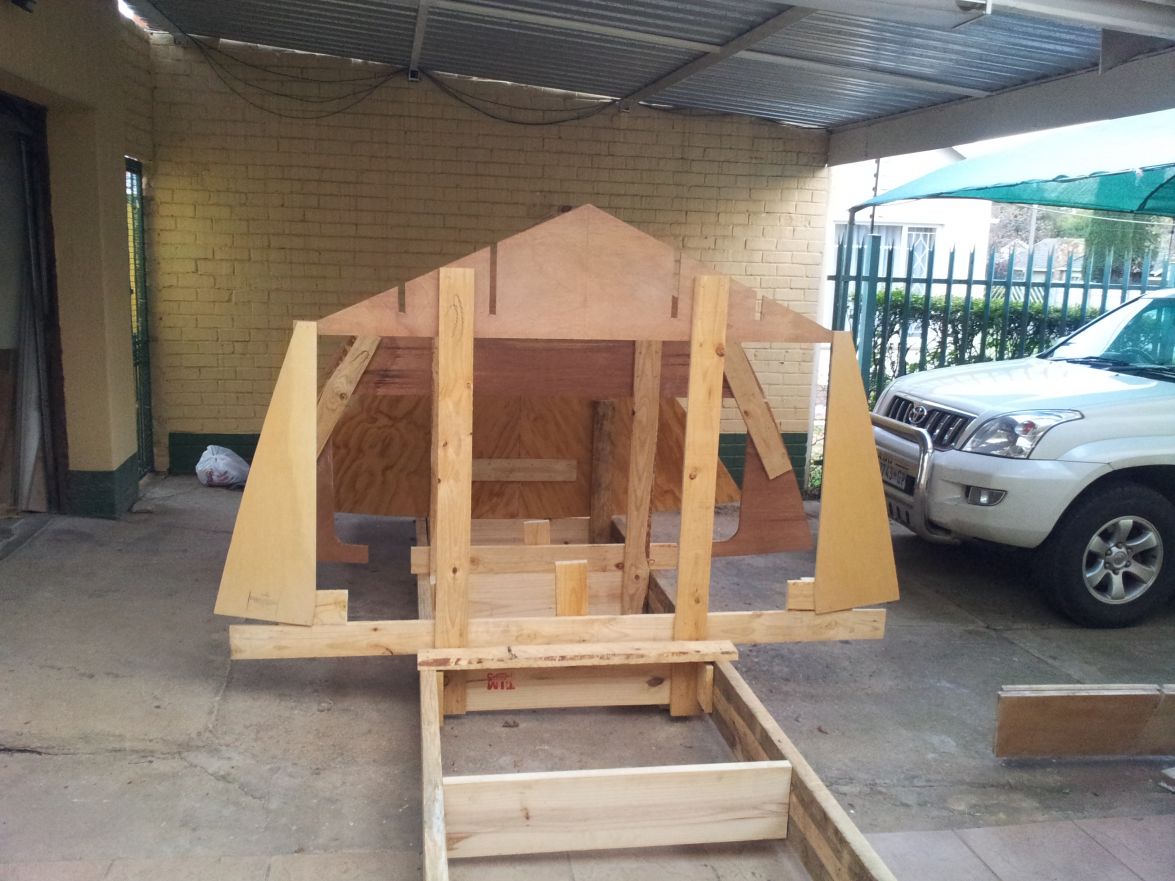
I hope to have the jig up by the weekend. I'm still working on a transom mount setup on the jig(mentally)
It is very heavy and I need to keep it spot on for the glassing.
I'm also feeling a bit of a sweat running down my back regarding the flip of the hull. I planned a in place lift and rotation. I have the infrastructure around to do so, but she is filling up the building space quickly. Time will tell.
Cheers,
Antonie
Re: CS23 - Dad's dream
Posted: Sun Apr 14, 2013 12:58 pm
by antoniekruger
Hi,
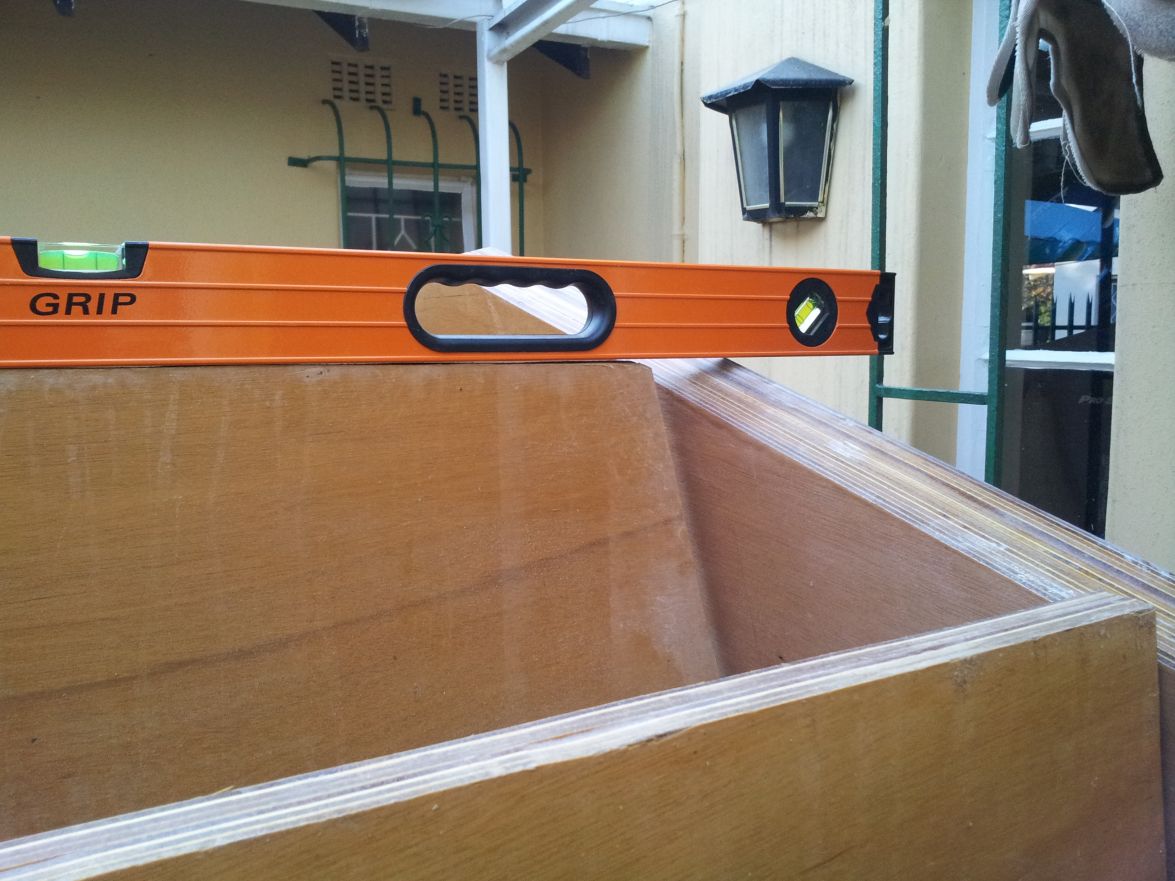
This weekend was very productive although we had some rain on Saturday. The jig is up and lined up.
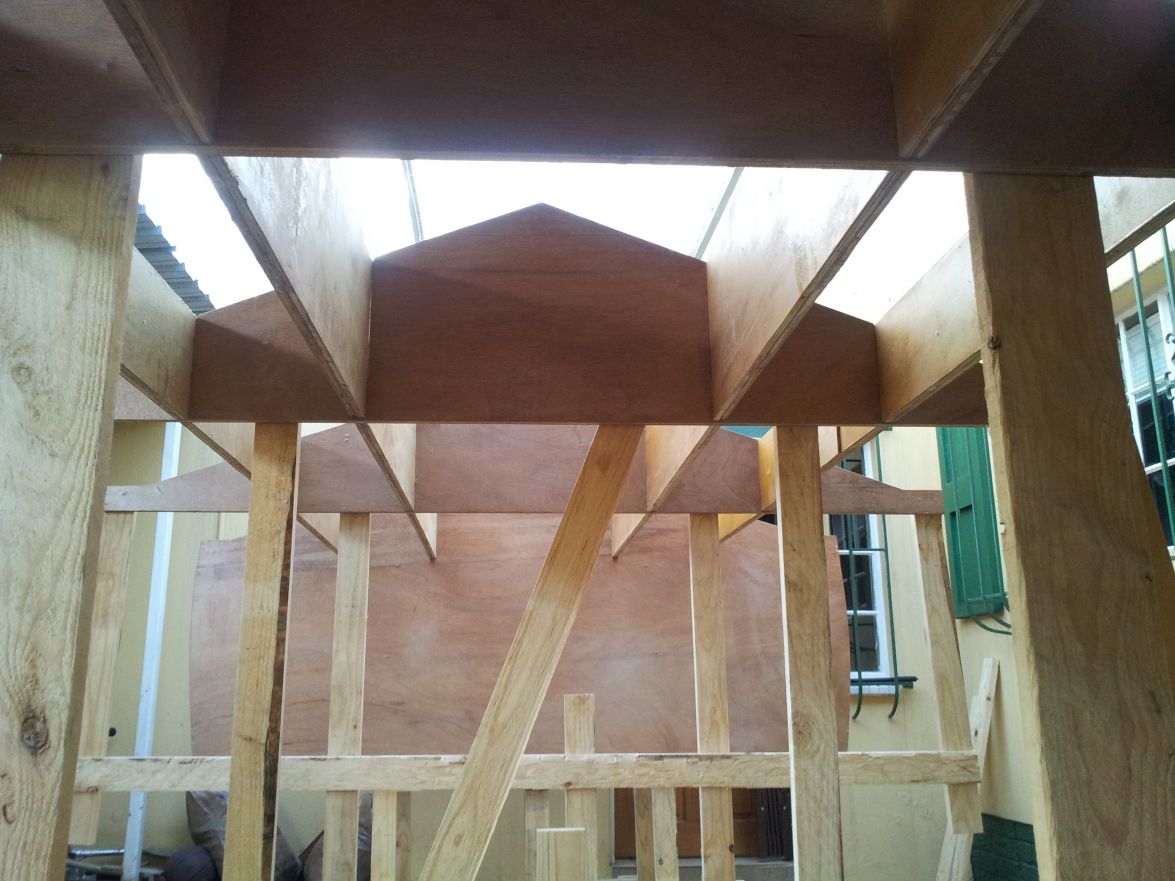
The transom mounted(its still heavy).
Station F(The motorwell bulkhead) was mounted with the motorwell sides attached for the transom angle. The little lip in the motorwell sides made life a lot easier to mount the transom. It just hooks on. A little adjustment for the line and tie it down.
. I almost had a heart attack - Looking at the line of the stringers coming towards the transom I thought I screwed up something, but after looking again, it seems OK:
All seems go for the planking. I have to go around the jig with my sander and make sure the stringers line does not protrude above the frames and cause a flat spot. I had a lot of fun this weekend. A quick observation - I primed all the frames and stringers before I assembled them on the frame since we are having unseasonal rain and the roof leaks at places. Although all the primed surfaces are dry and sands to a dust, they seem 'sticky' when I slip the stringer into the frame slot. Will not do this again.
I'm looking at ordering my trainer steel this week so I can cut the steel schedule. When I flip the hull I want to put her on the steel trailer without the undercarriage. Once done, I'll jack and mount the undercarriage. Thoughts?
Thanks
Antonie
Re: CS23 - Dad's dream
Posted: Mon Apr 15, 2013 12:36 pm
by antoniekruger
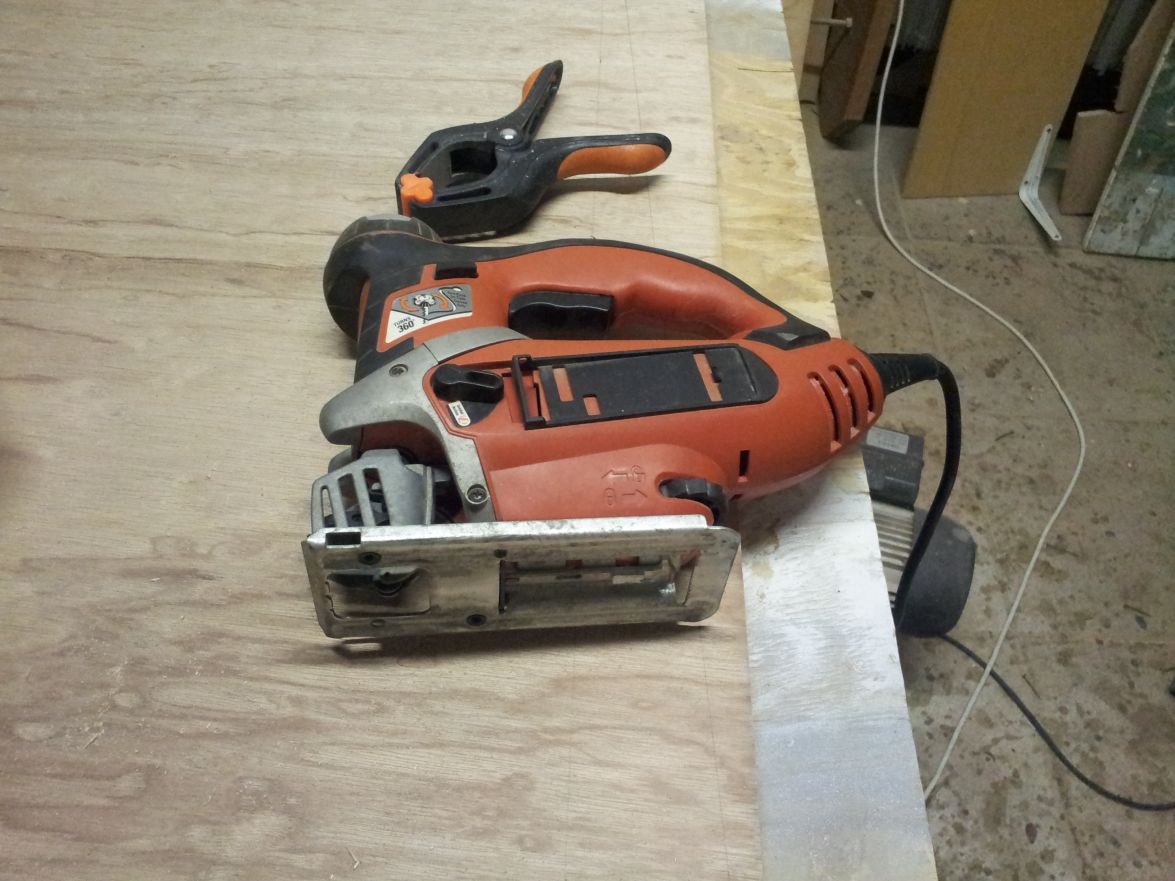
Aaaahhhh....my jigsaw died tonight whilst cutting the hull bottoms

. 7 Year service, not bad. Stopped work dead in its tracks. My orbital sander also gave up last week - I'll have to go shopping tomorrow. As much as I love new tools, I do not enjoy spending the money.
Re: CS23 - Dad's dream
Posted: Sun Apr 21, 2013 10:44 am
by TRC886
antoniekruger wrote:Aaaahhhh....my jigsaw died tonight whilst cutting the hull bottoms
. 7 Year service, not bad. Stopped work dead in its tracks. My orbital sander also gave up last week - I'll have to go shopping tomorrow. As much as I love new tools, I do not enjoy spending the money.
That's always frustrating

It could be something as simple as a loose or broken wire or a bad switch, or it could be as major as a burnt out armature. What aggravates me even worse is a tool that only runs
sometimes, which is always caused by a loose or broken wire.
You're coming along very nicely on your jig and set up
Re: CS23 - Dad's dream
Posted: Sun Apr 21, 2013 12:47 pm
by Kevin.G
Hi Antonie
We met on JJs site. You are not far from me, I am in Primrose. With the house renovations and coaching High school rugby I haven't been able to start with my build. In fact the 9mm ply I ordered is waiting for me at the timber yard because I do not have space at the moment

. Your build is looking good and if you need any power tools in a hurry just shout
and I may be able to help you out.
Kevin
Re: CS23 - Dad's dream
Posted: Mon Apr 22, 2013 12:27 pm
by antoniekruger
Hi Kevin,
Thanks for the offer, mate. The reason why a tool going down gets under my skin is because I believe in buying a proper tool that cost you a bit more, but gives better results and last. Buying the cheep crap will disappoint and at he time you need it the most. I went to Adendorfs n Boksburg and found a jigsaw with 5 year warrantee. Strange, they do not stock all the big brands, but the stuff they sell seem Ok.
The new jigsaw works like a dream and I have finished they bottom and top sides.
I've started planking the hull. The chine seem to be a bit of a mission, but all fitted ok. I plan to start glassing by the weekend. I have a chap from AMT living close to me. He looks after the marine products so I would expect that he sees a few of these builds. I'll ask him to put an eye over the hull before I glass.
Rugby season is only starting-seems like a while before can start your build.
Is there life at Jj's?
Thanks Trc886.
Antonie
Re: CS23 - Dad's dream
Posted: Mon Apr 29, 2013 3:18 pm
by antoniekruger
A quick update :
I've placed the 2 bottom pieces on the frame and it seemed to fit. I added the chines and still all seemed OK.
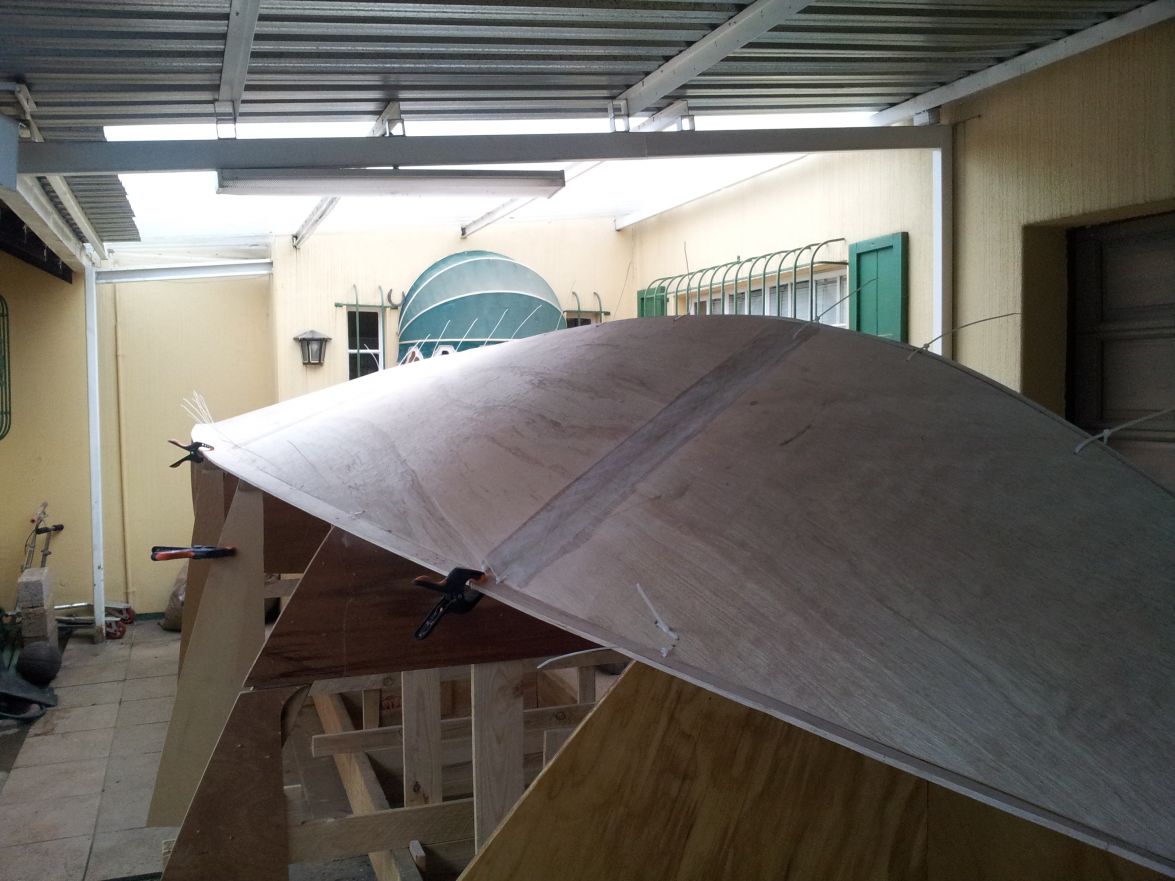
I started the long side panels (upper first 6mm). I extended my shop table to be able to hold around 3/4 of the complete length and screwed the pieces down for the join. I also used peel ply on the joins to have them clean and neat.
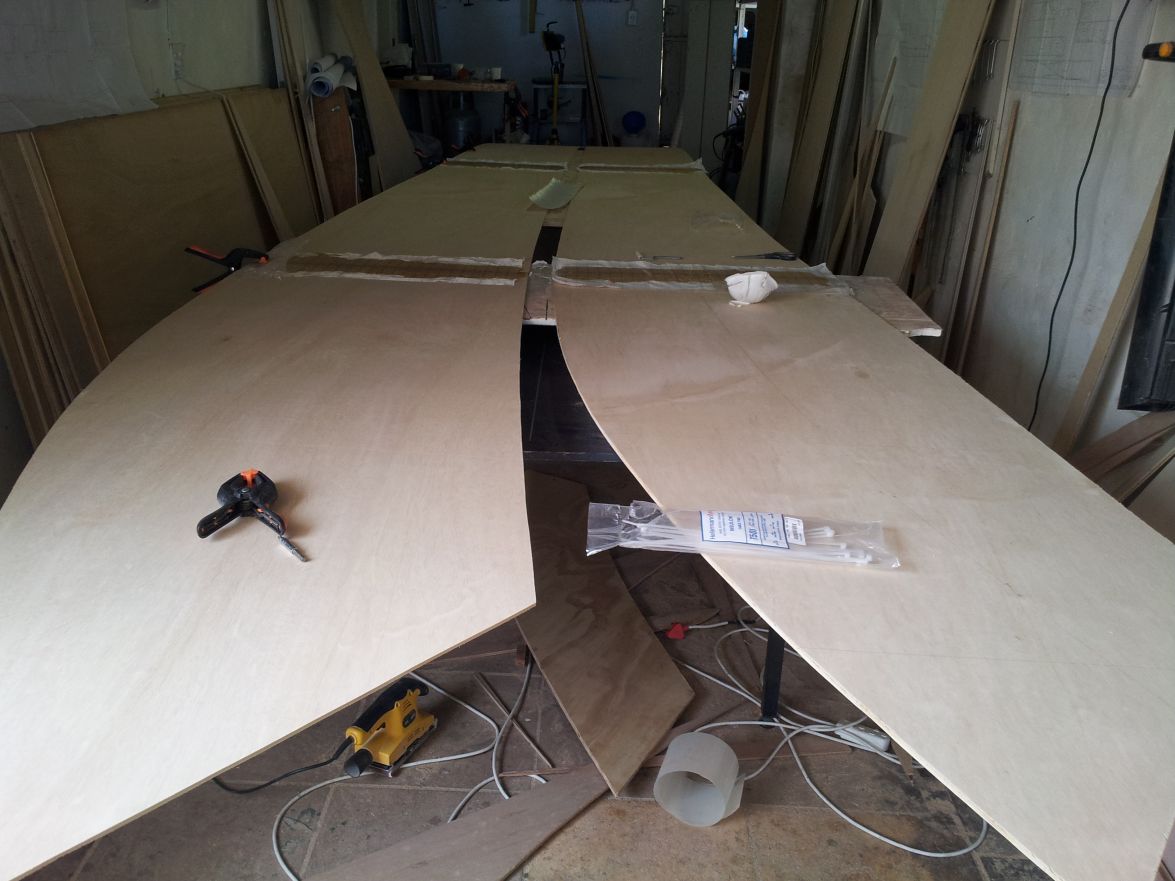
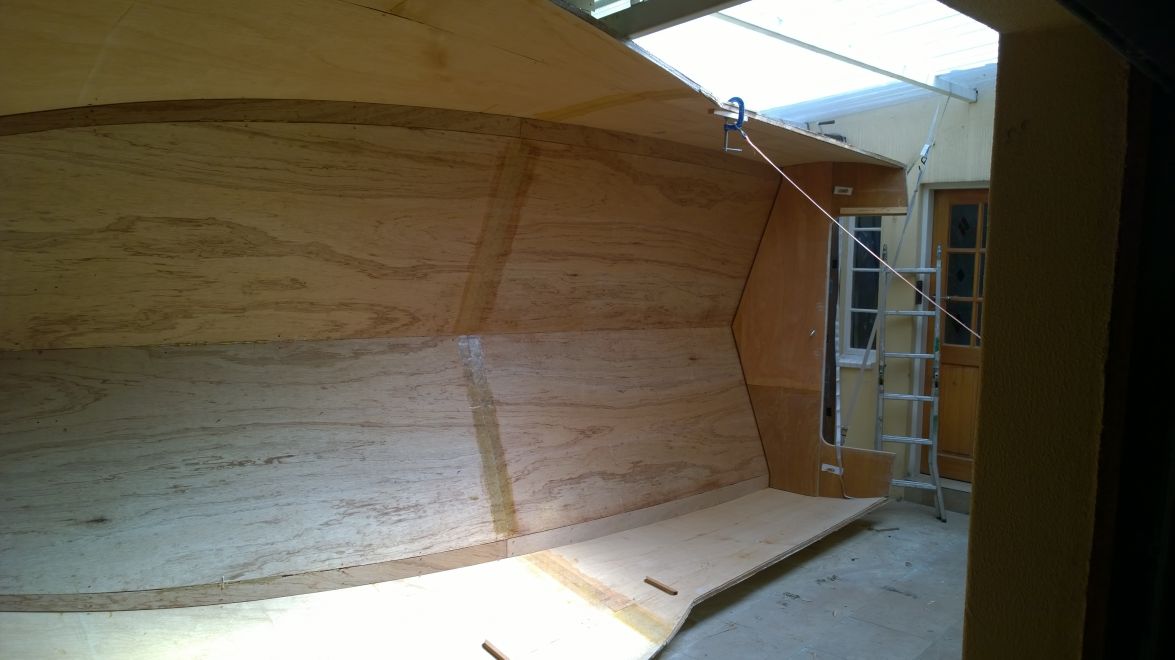
I started hanging the upper side panels using the transom as a start point and not tying the stitches too tight. I reached the bow and saw that something was not right. I checked the long panel length first, then the strongback length. I was not a happy camper. I then checked mould 0(the flair mould) and saw that I screwed up the height of frame 0
. I used the sole height as frame height. I pulled it out and remedied the problem(luckily an easy fix), fitted the bow mould and mounted it back on the jig. All was good.
Frame 0 re-measured

I used blocks with my stitches to help keep the panels aligned whilst spot welding. This worked for me. I love the shape of the hull.
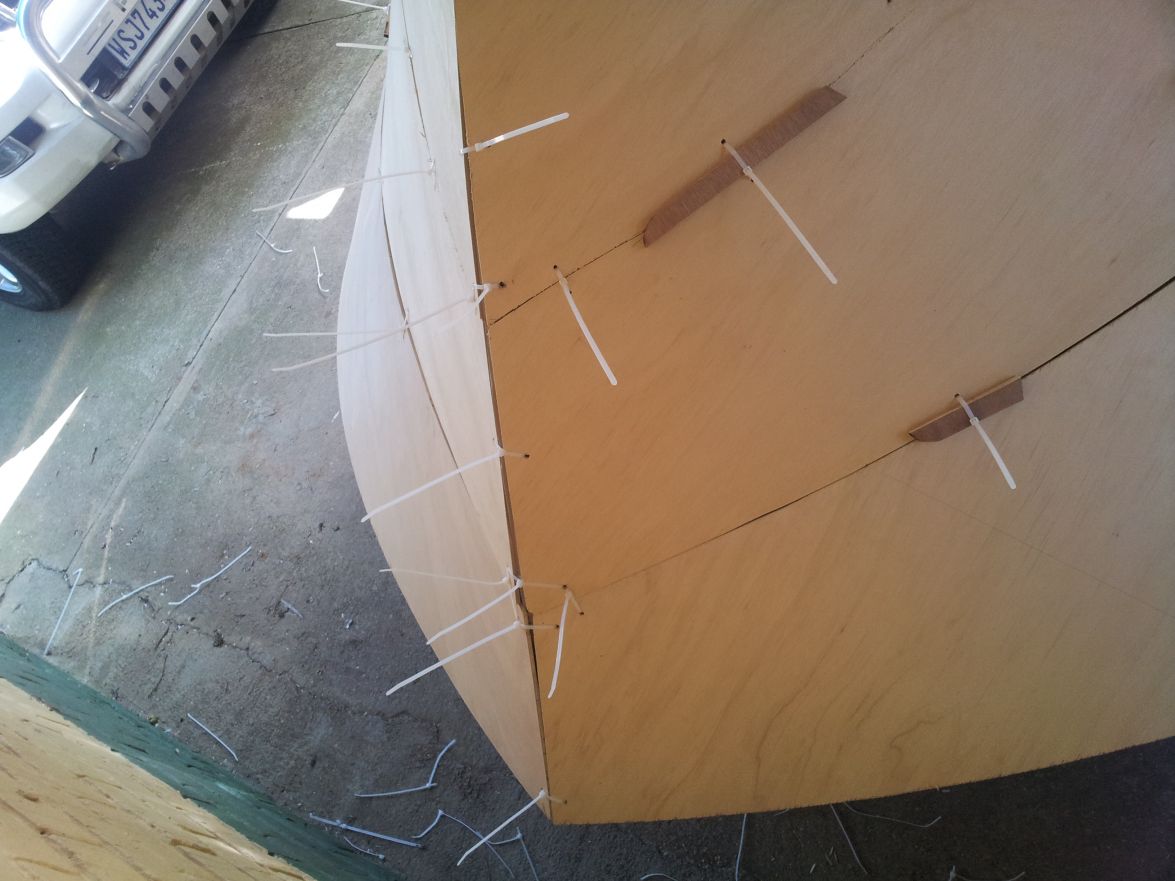
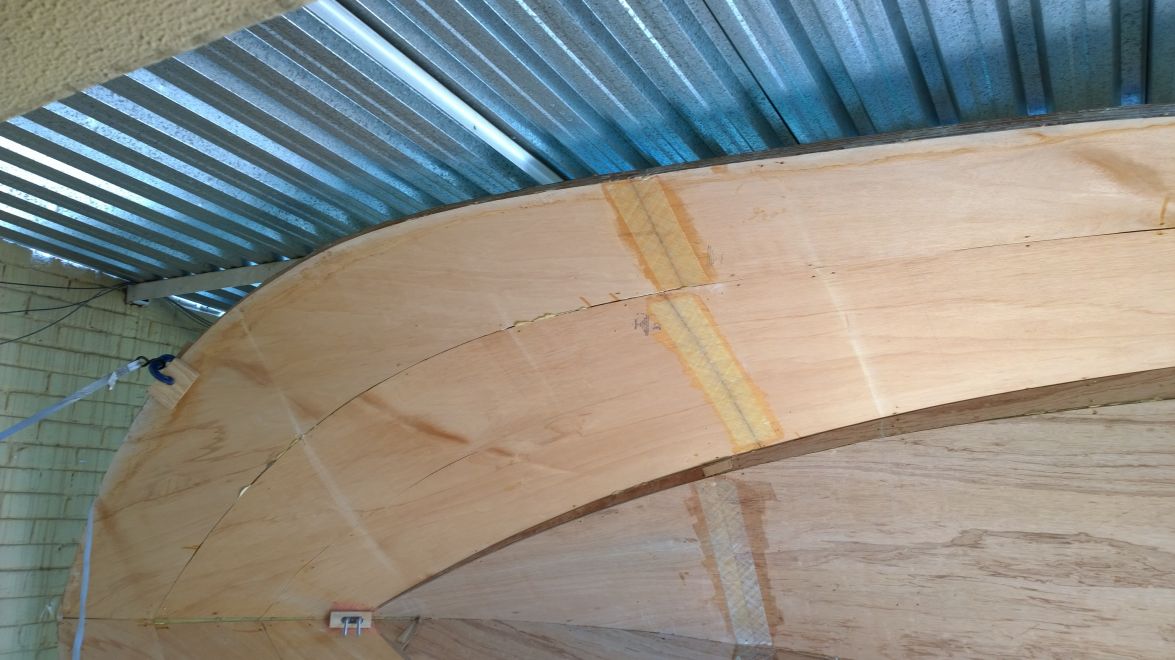
After the spot welds I pulled the stitches and started cleaning the welds to be as small as possible and still hold the hull together. I did some fairing with micro balloons around the flair and bow - some panels was a bit more stubborn than others.
Then I started the seem glassing on the chine
. I'm used to working with 100g and less woven. This tape is heavy and takes ages to wet through. I use a brush to put on the epoxy, then a squeegee to distribute and then the little roller to get out the air and seat the glass properly. I then worked the area with the squeegee again to try and get off excess epoxy. These seems will have to be sanded and cleaned before I move on to the wide cloth.

Re: CS23 - Dad's dream
Posted: Sun Jun 23, 2013 9:57 am
by antoniekruger
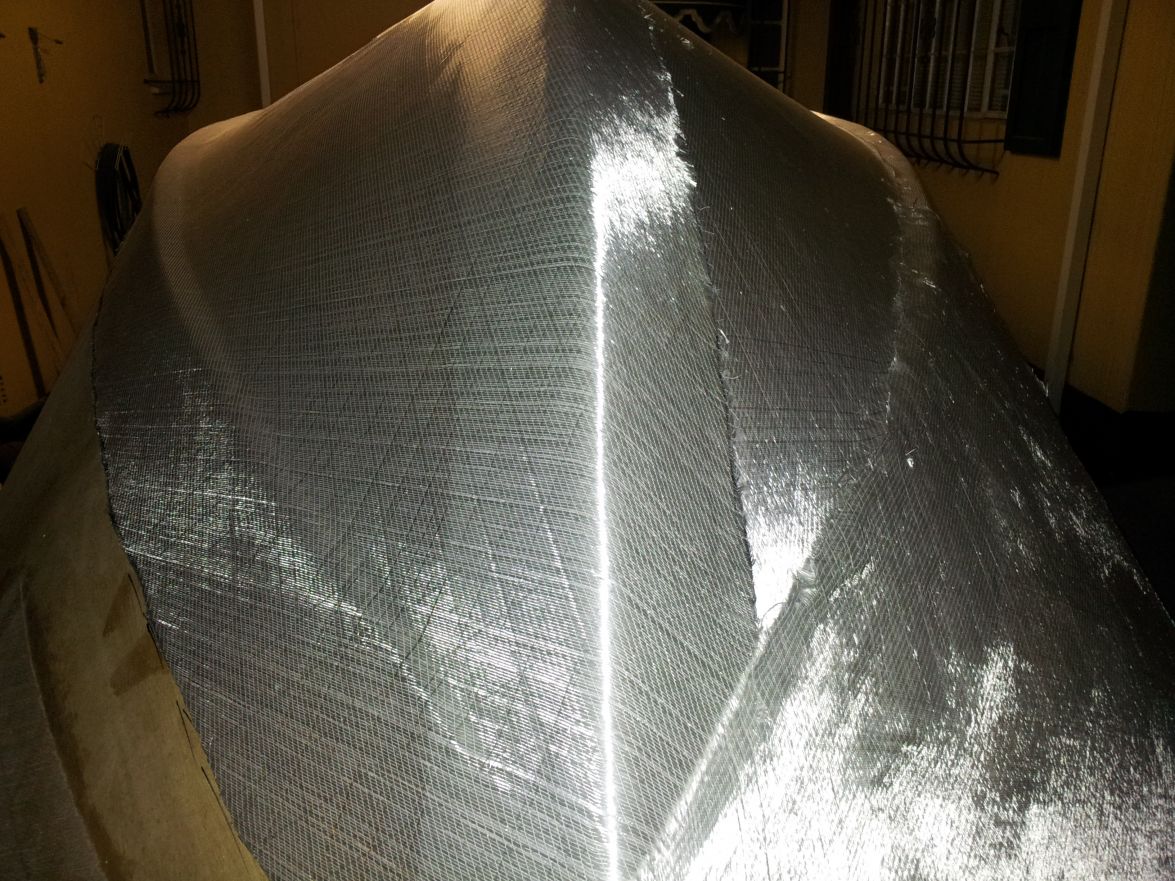
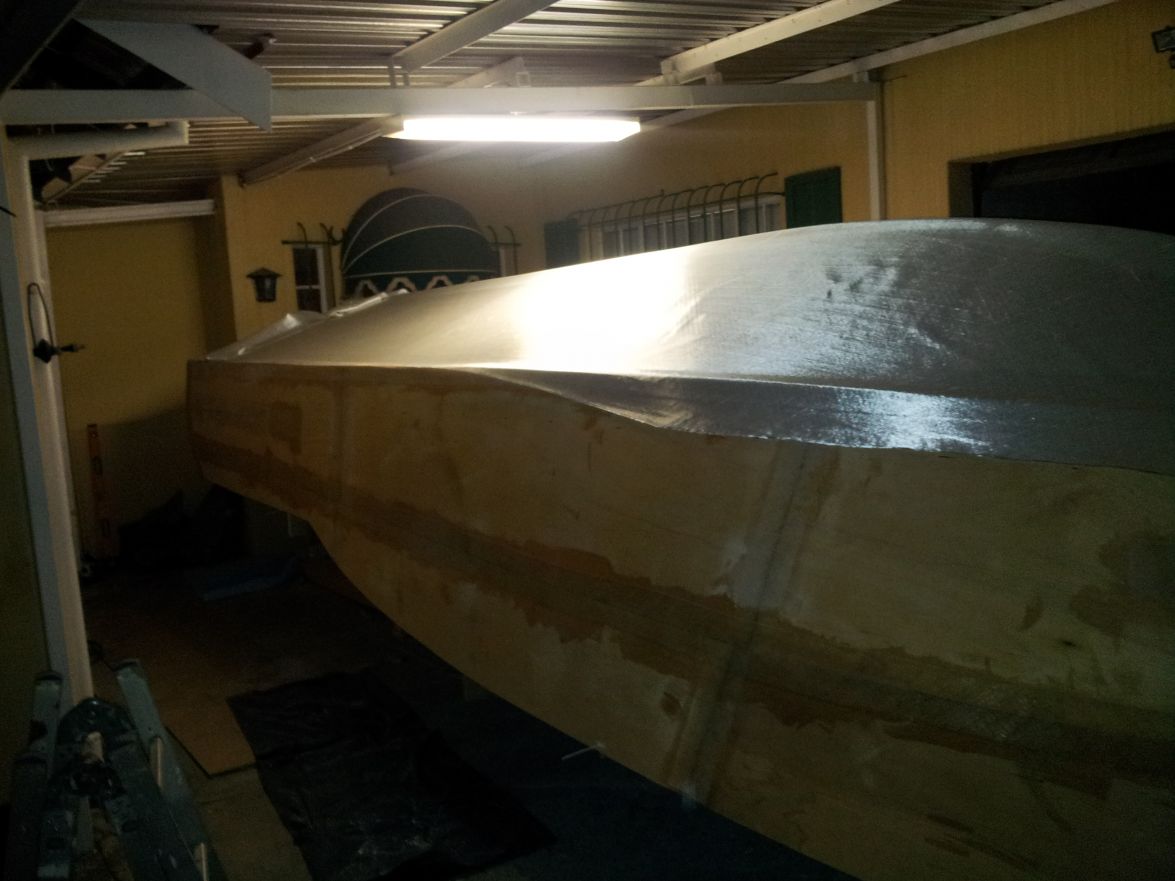
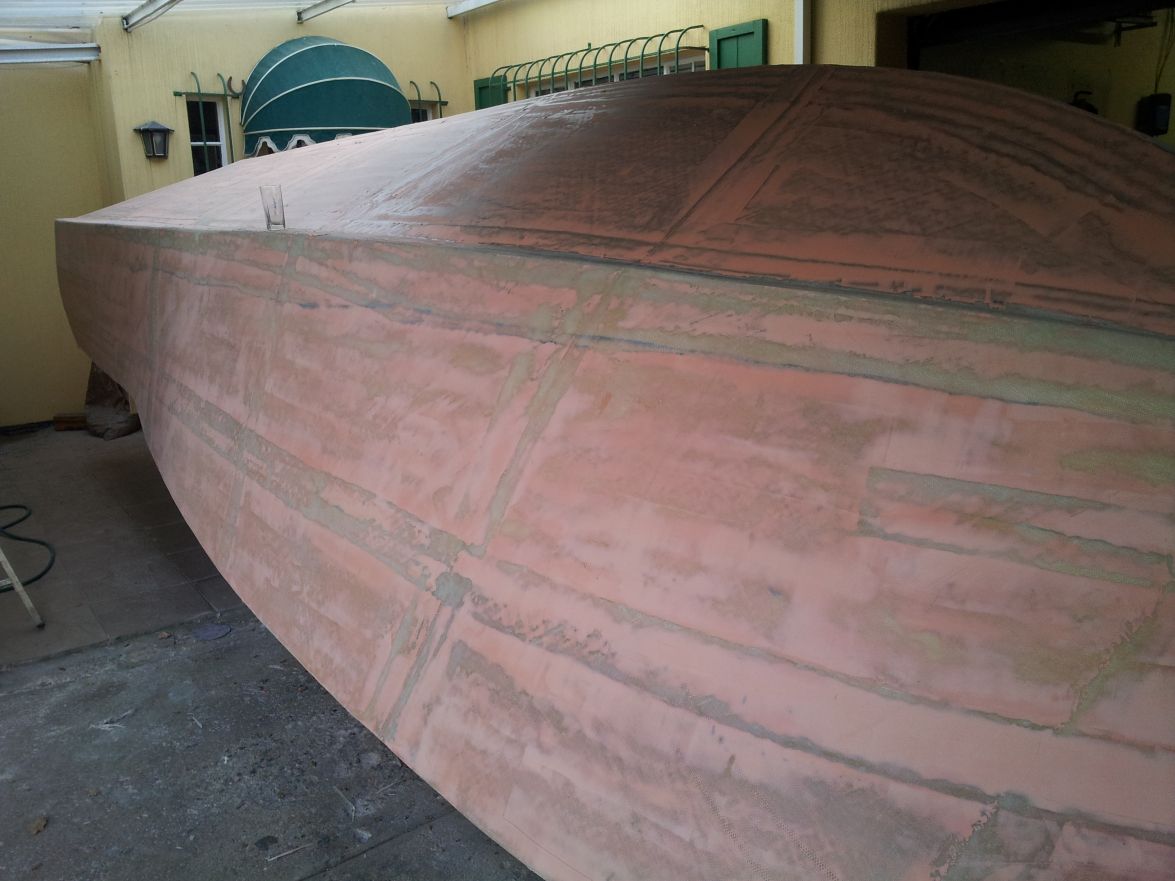
A quick update:
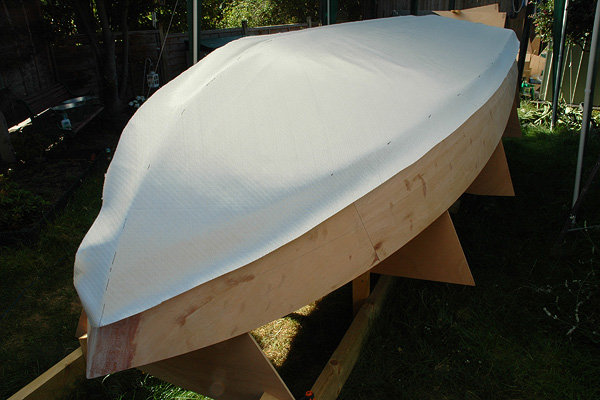
OK, so I've glassed the hull on the outside. I started around 10am in the morning and only finished around 8pm. My right arm went into cramps a few times(Squeegee)
, but a Bells sorted that out after 8
. She is huge to do on your own. This was the layup of the first layer.
After my jigsaw deserted, I had 2 more desertions(old tools giving up. I'll have them repaired for little carpentry jobs.). I went out and bought 2 Bosch pro orbital sanders. The 150mm and 125mm for smaller spots. My shop vac arrived as well and it makes a huge difference having the vac on the sanders. My word, they work great. They 150 brute comes with a hard box. Very nice.
Anyway - I was very busy laminating that some areas were already gelling and hardening. By the time I reached them with the peelply, it was too late.
. I managed to get some peel ply down on the layup. The rest I cleaned off with a quick sand for the second layer of biax.
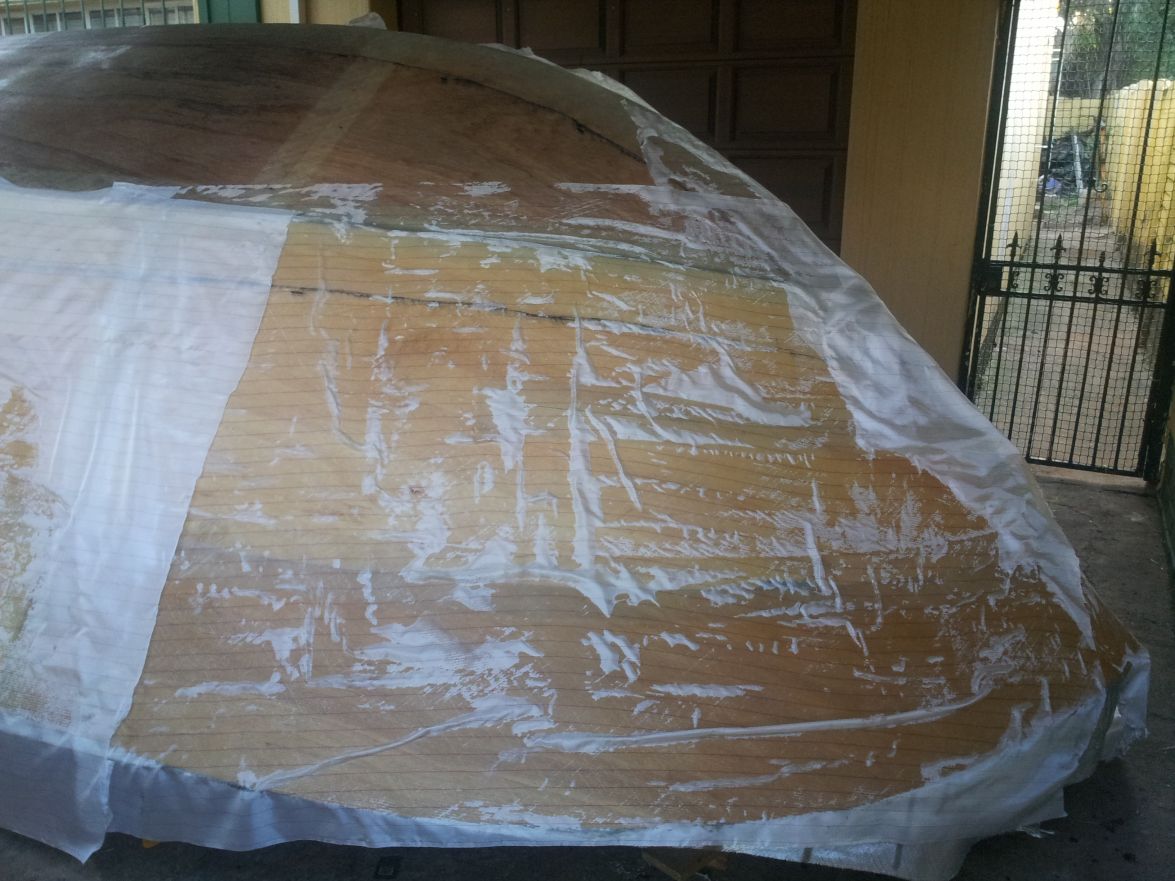
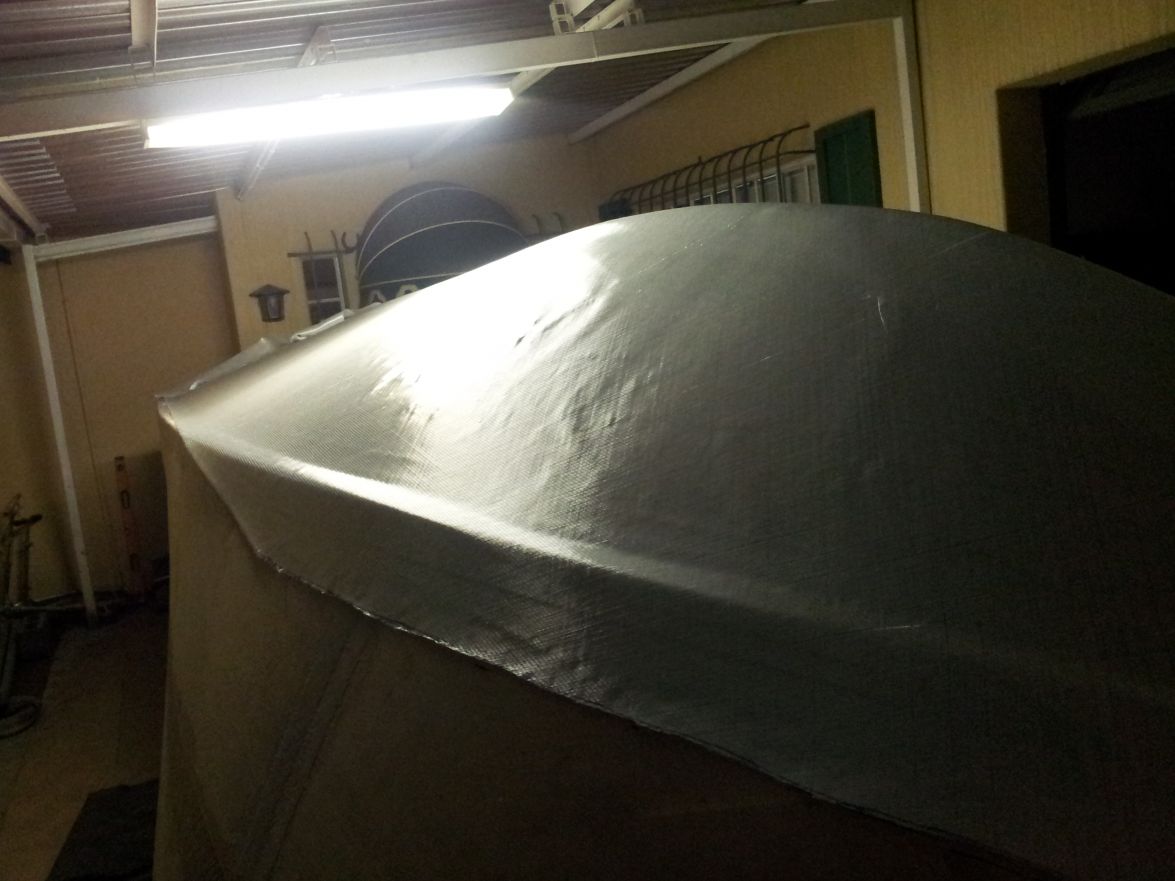
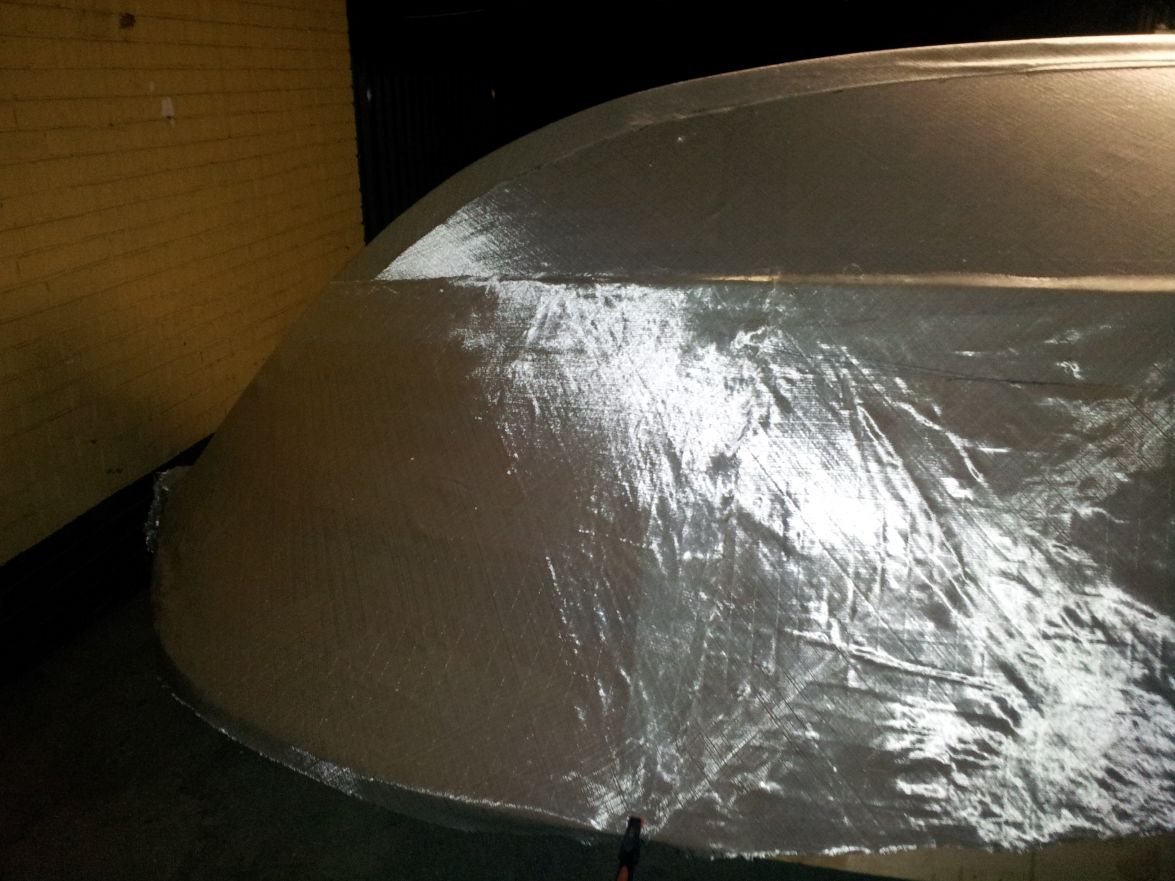
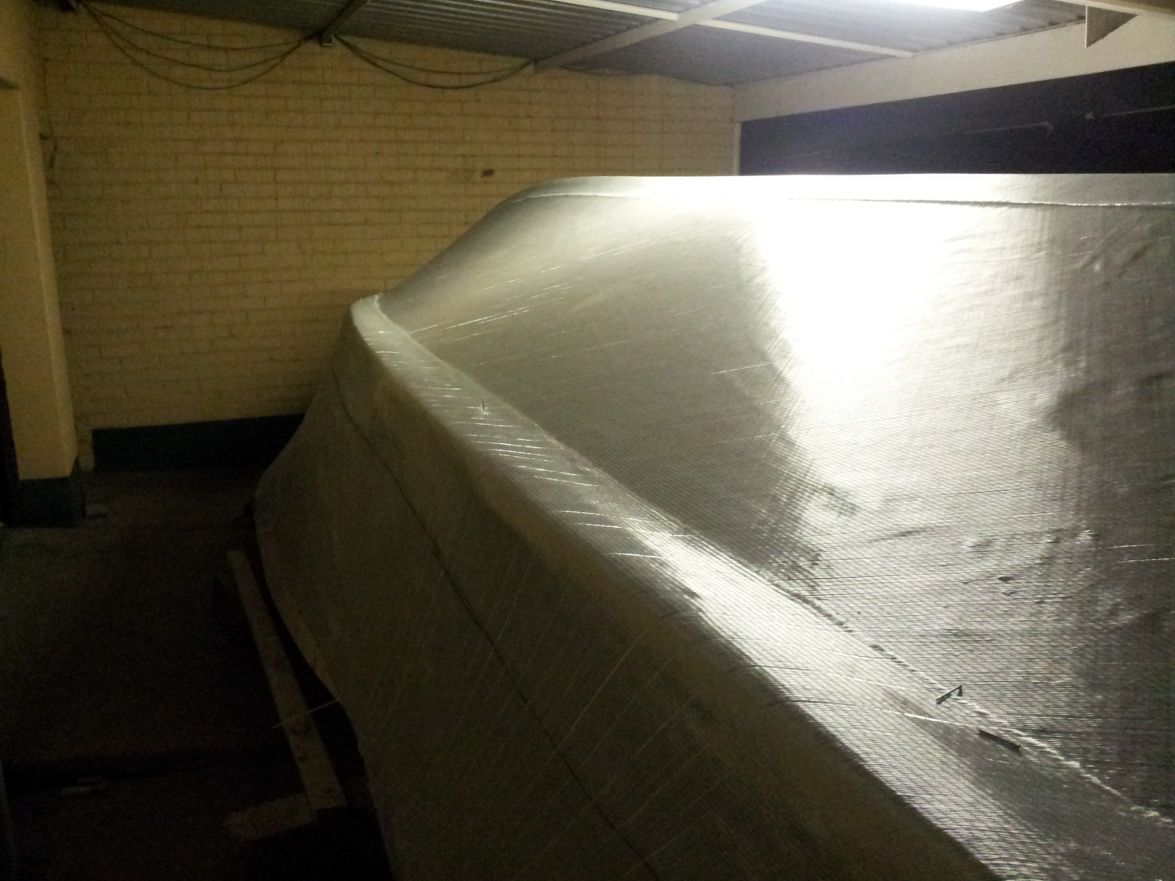
The second layer of biax cloth went on the bottom without event. Its easier to place since youre nor working on a vertical plane. I found that rolling on the resin and then using a squeegee to work it through gave me the best results.
I had a discussion with my fibre supplier about using a 280g carbon fibre from the keel to the chine (whole bottom) as a final layer instead of fairing that part. Firstly, its expensive and then the strakes is an issue as well. What he did suggest is that I use a 300g woven as a final over the whole boat. It will add around 10 to 12 extra kilogram, but the benefits would be a better abrasion resistance in woven than biax. Apparently it is possible, when the outside layer is penetrated, that a single fibre in the biax can be lifted and cause a peel-off. Made sense. The second reason was that it provides a bit of sacrificial layer during the fairing process. If you sand into the glass, you should not get down to the biax. So, I layed another 300g over the whole boat...except the transom. I had enough time to peelply this layer and was happy with the results.
I did a bit of cleaning off before I started with the fairing: First the left hand side. This is taking quite some time, but the results are looking good.
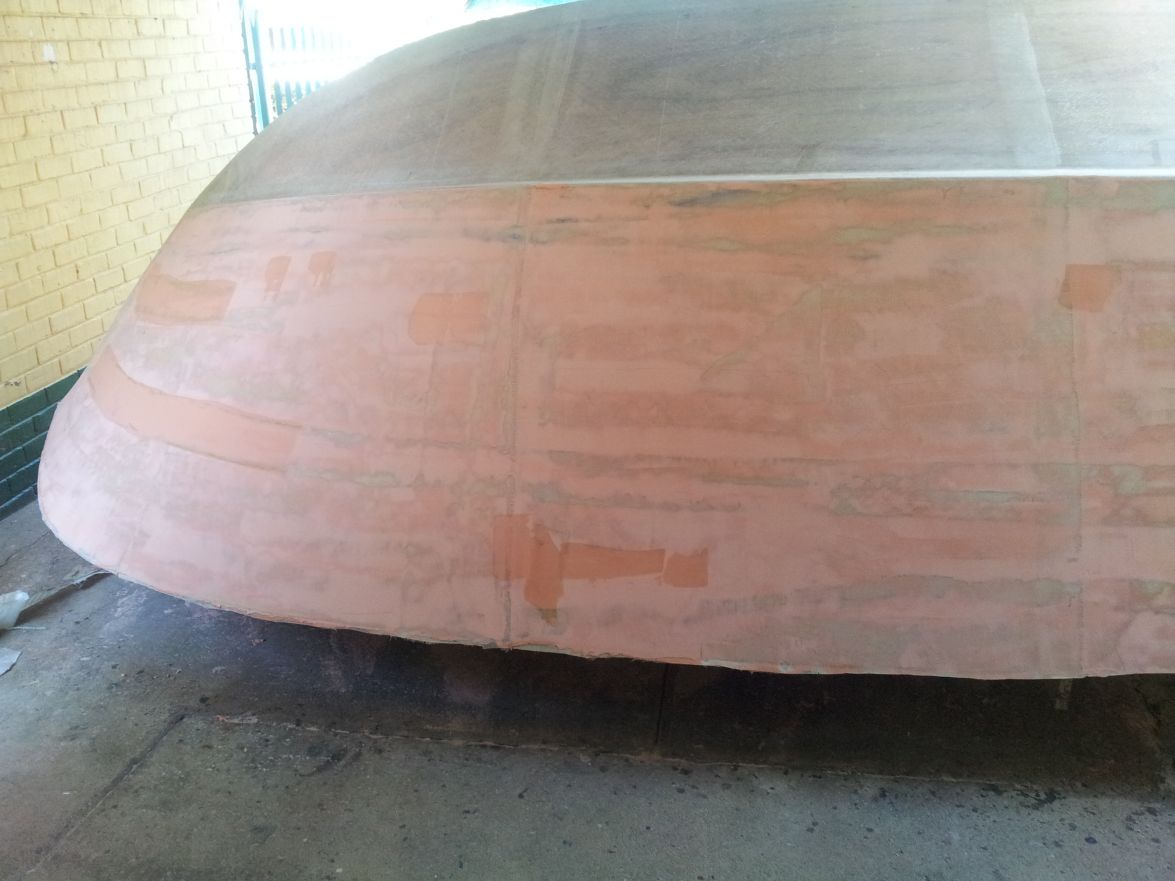
I started with run 1 on the right hand side:
Ok, so it is still a lot of fairing to get the flair smooth and the rest to my liking. I have a small recess where I joined to long panels on the bend towards the bow. If I fill it with fairing compound the layer would be around 3 to 5mm thick. Is this acceptable?
BTW - The hardener of the fairing compound smells like someone peed in it. Is this right?
Ammonia, I suppose.
Cheers, Antonie
Re: CS23 - Dad's dream
Posted: Sun Jun 23, 2013 10:21 am
by topwater
That's a whole lotta boat to do in one outing, great job
I also notice the ammonia smell when I open
the hardener for system 3 easy fillet, never had any problems.
Re: CS23 - Dad's dream
Posted: Sun Jun 23, 2013 12:04 pm
by Cracker Larry
Wow, that's a lot of boat for one man
Nice work! You must be younger than me
Re: CS23 - Dad's dream
Posted: Thu Jul 04, 2013 2:44 pm
by antoniekruger
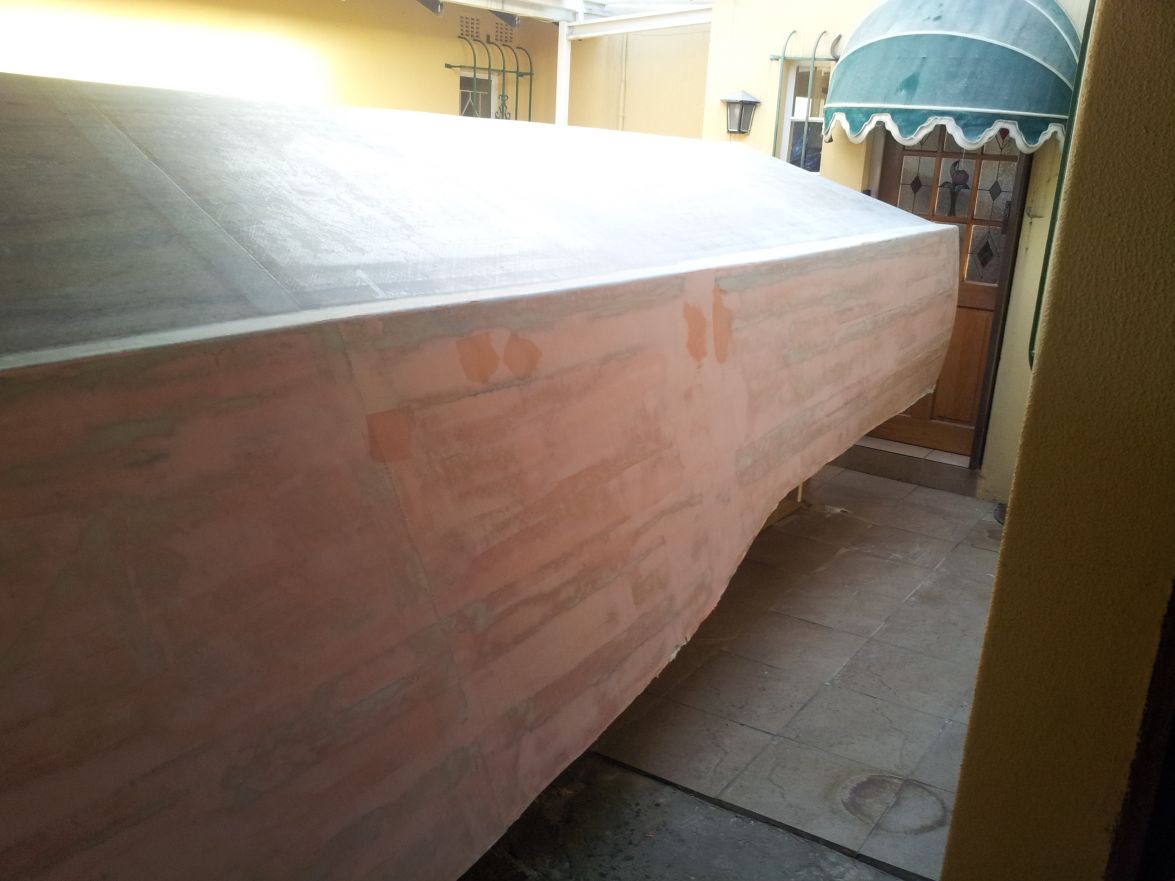
Hi, I've been sanding and sanding and sanding, and still s(t)anding.
I've done 2 rounds on the sides of the hull. I think I'm close to where I can use a high build primer to finish off.
The bottom is another story. I started the first round of fairing compound on the bottom after knocking the tops of my woven top layer. It went on well - this is a huge area. The sides were OK, but I have to get onto the boat to work on the bottom - fell off twice already - don't tell anyone
I've decided to do the fairing before gluing on the strakes or skeg. I think fairing a larger area gives more continuity and better results. Once I have the position of the strakes, I'll sand a slot into the fair onto exposed glass. I've been at this now for 2 weeks and I think I'll be working on the bottom for another 2 weeks. She is big.....Cant wait to flip her over.
Some boat porn:
Side sanded - bottom puttied.
My modified torture board - not sure it works better. The heavier sander side takes its toll....

Bottom sanded and washed
I have a 2 to 3mm recess behind one of the joints on the bottom. Its about 200mm wide. Its bugging me and I want to fill it with fairing compound. Its about 200long by 400mm wide. Is this too a large area to fill with fairing compound. I think I should rather lay a block of biax cloth in the deepest part and tie in the edges with fairing compound.
Cheers,
Antonie
Re: CS23 - Dad's dream
Posted: Thu Jul 04, 2013 4:58 pm
by AtTheBrink
Can you translate those measurements into inches?
Re: CS23 - Dad's dream
Posted: Thu Jul 04, 2013 8:57 pm
by Cracker Larry
Its about 200mm wide. Its bugging me and I want to fill it with fairing compound. Its about 200long by 400mm wide. Is this too a large area to fill with fairing compound.
Yes, that's too large a gap for fairing compound. Fill that with a piece of wood and glue, or a structural filler.
Re: CS23 - Dad's dream
Posted: Fri Jul 05, 2013 2:44 am
by JayJayMuller
Re: CS23 - Dad's dream
Posted: Sat Jul 06, 2013 7:10 am
by antoniekruger
Hi,
Here's the extent of my the recess.
In section:
In plan:

OK, assuming that one layer of 450g biax is laid 1mm thick, I would build the recess up with 3 layers of biax, laying up a layer at a time and checking the extent of the next layer needed. Once done, I'll smooth out the area with fairing compound. I'll clean off the current fairing compound first. I might even go with only 2 layups and see if its not good enough. I need to figure out how this happened. A cause might be that there are 2 glass joints on top of each other(the joining tape of the long panels and the 300g final layer) next to the recess.
Larry, its not deep enough for wood insert, but the line of thought is in the same direction, thanks.
The rest is looking OK. The chines also need some attention and I need to finalise the sharpening of the edges of the last 2.5m of the hull. The mix I'm looking at for this is my resin thickened with cabocil(to make sure it does not run away) mixed with chopped(6mm) fibre. I found that when I mix the chopped fibre with the resin it breaks(separates) into much thinner filaments and becomes easy to work with.
Re: CS23 - Dad's dream
Posted: Sat Jul 06, 2013 8:44 am
by Cracker Larry
Now I see what you've got. Yes, I'd lay a couple of layers of cloth in it, good plan.
Re: CS23 - Dad's dream
Posted: Sat Jul 06, 2013 8:56 am
by antoniekruger
AtTheBrink wrote:Can you translate those measurements into inches?
Mike, 3mm = 0.11811 inches.
Im not sure that helps....
Thanks, Larry.
Re: CS23 - Dad's dream
Posted: Mon Jul 15, 2013 12:18 pm
by antoniekruger
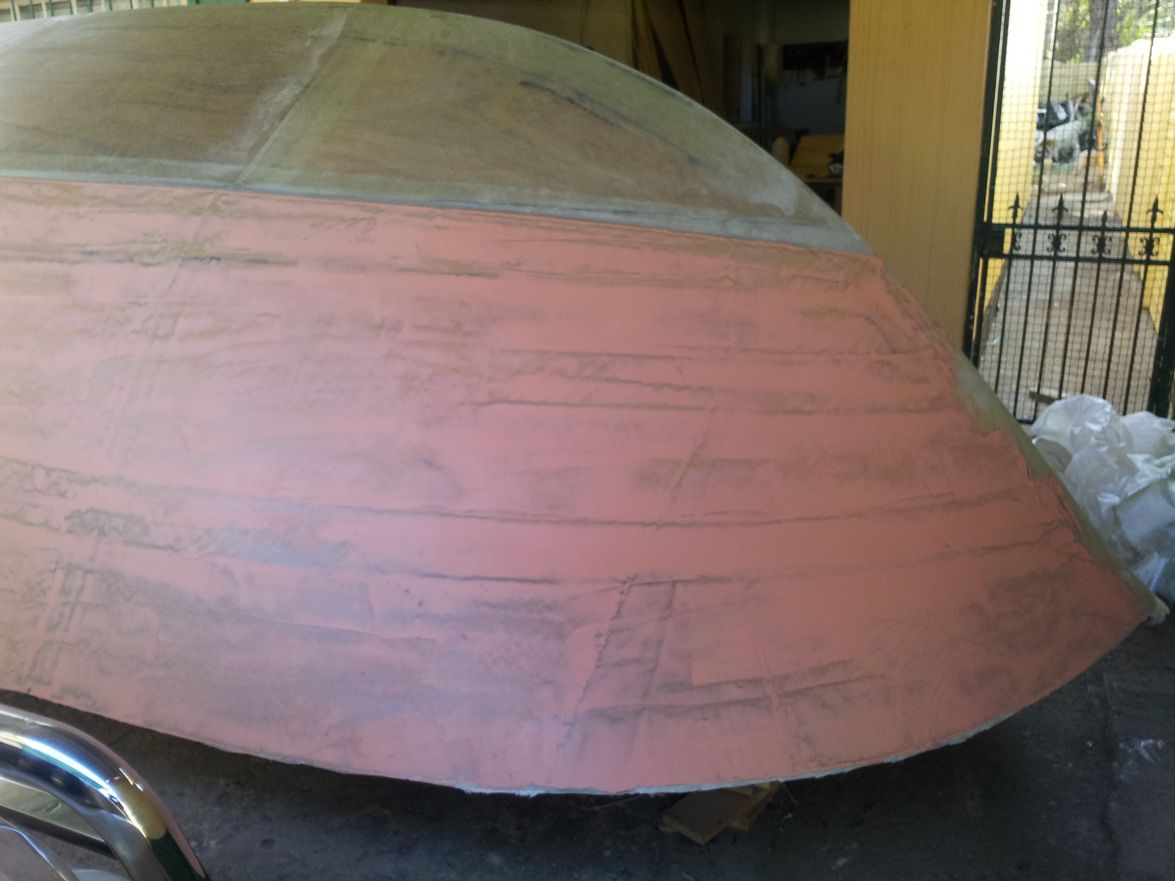
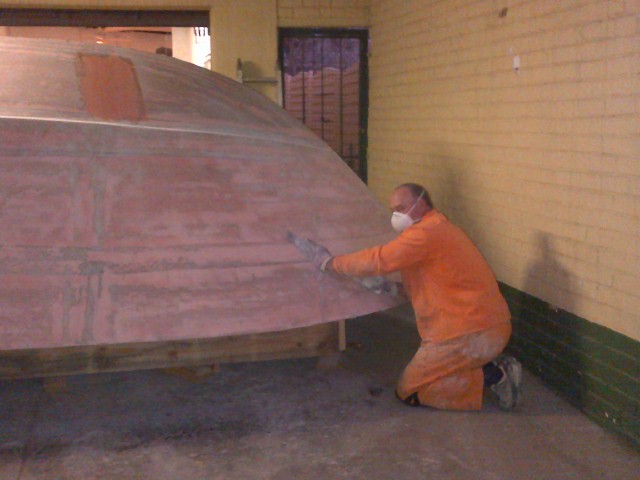
Still at it. This is the right side - round 2 in fairing. The shape of the flair is getting rounder and smoother.
I sharpened up the chine and transom edges. This gives a better idea where its still lumpy. Sorting those. Every round things get better, smoother and looks better to the eye. I only needed 3 fermented German beverages to relax my shoulders after the last round.
An idea of the scale of my boat - I'm 1.86m tall(as a reference)
Re: CS23 - Dad's dream
Posted: Mon Jul 15, 2013 12:41 pm
by Cracker Larry
Makes my back hurt just to look at it! Looks real good though
Re: CS23 - Dad's dream
Posted: Mon May 05, 2014 2:05 pm
by antoniekruger
Yeah, its been a while, but here's some progress pics:
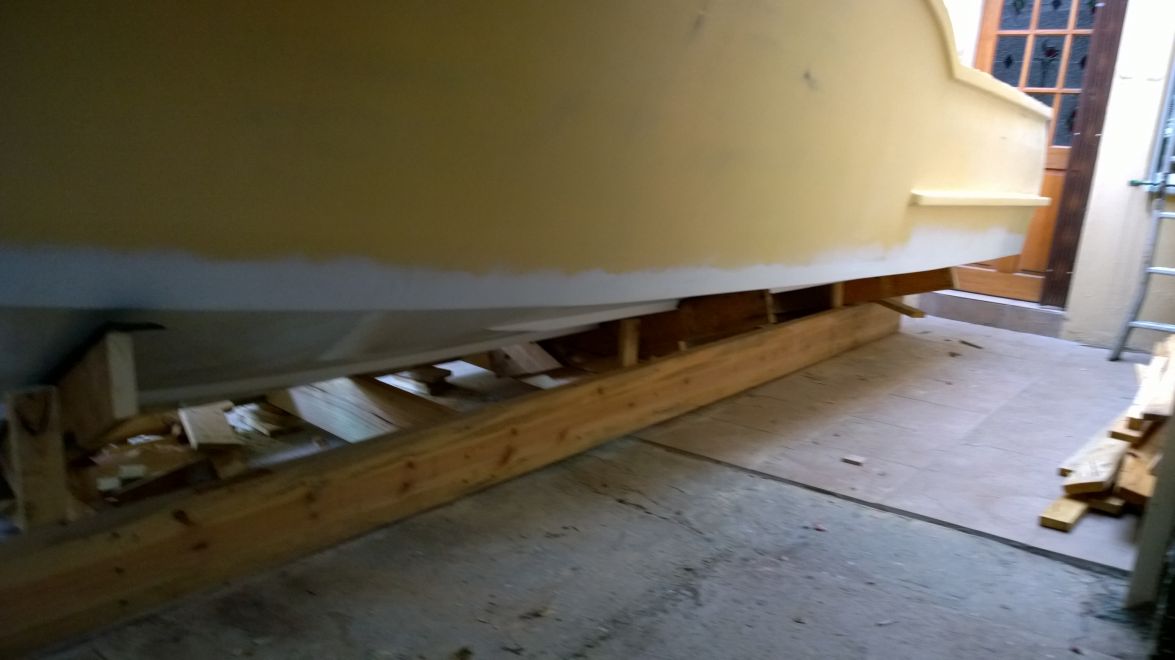
I've been finishing and priming for some time now and reached the point that I do not think that I can get it better, so, I gave the bottom the final 3 layers of paint and started planning the flip.
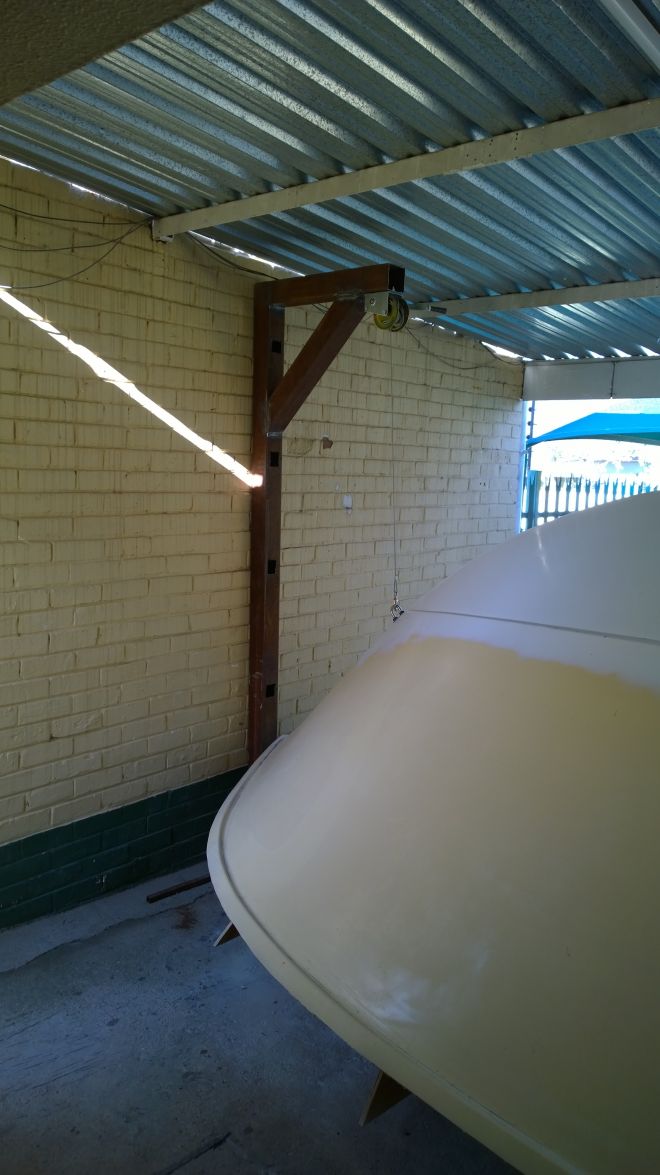
In true tradition, as many of you, I'm have difficulty in asking for help regarding my personal projects so I planned the flip to be a solo project...to loud and persistent protest.
I had to decide whether to flip her where she was or drag to the lawn and roll her there. My initial planning was to flip her in-situ and the initial measurements showed that she would fit without the rub rail. I fitted the rub rail, so I had an extra 50mm or so to fit in the rotation. The hull is not rigid so I expected to be able to 'squeeze' the 50mm through. I built 2 steel arms(mini cranes) with hand winches to hold the hull at the right height and be able to adjust conveniently.
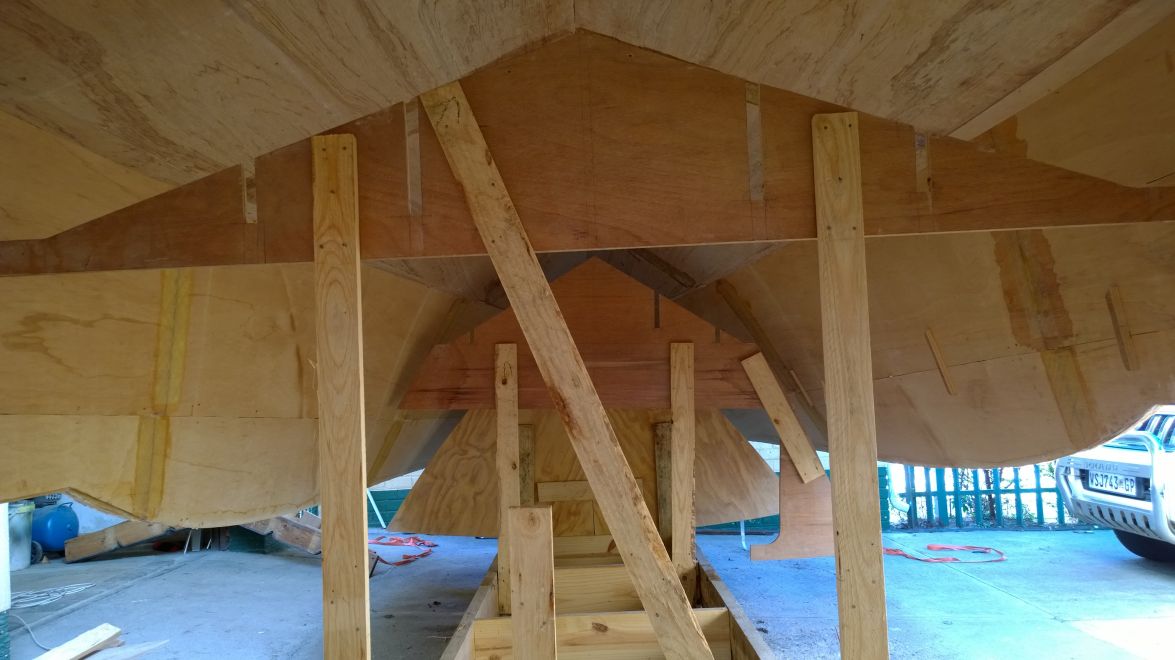
I fitted the new cradle whilst she was upside-down. I placed them in the same positions as the frames as not to have to modify the strongback:

The hull came free from the moulds/frames without much ceremony. I lifted the hull and proceeded undoing the stringers and frames:
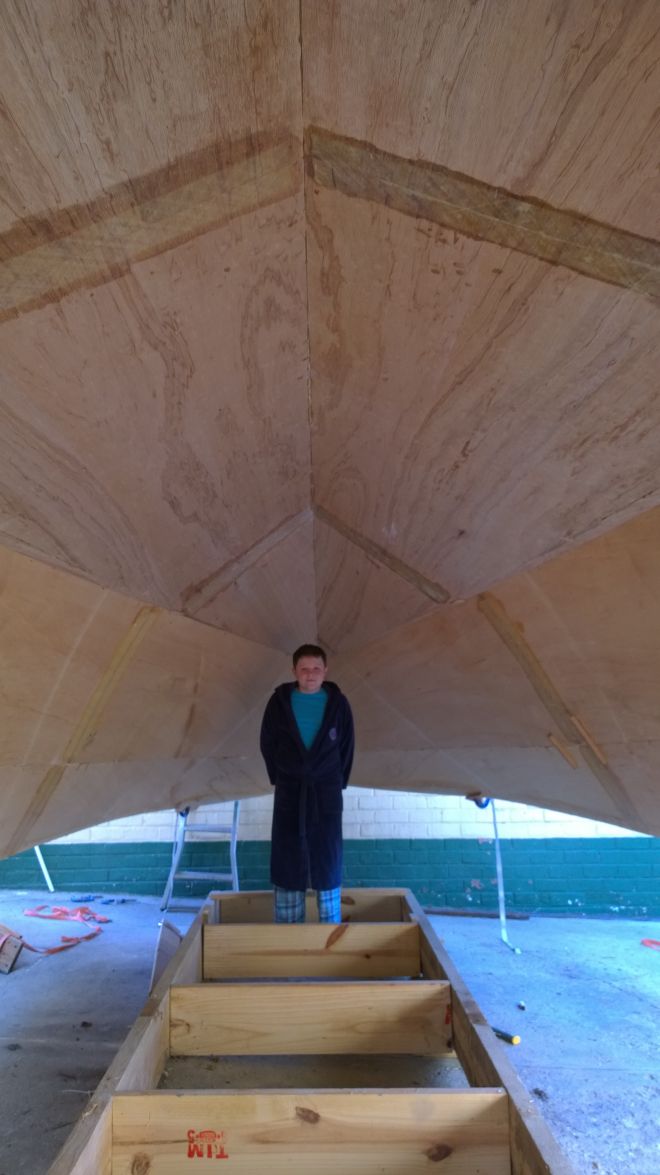
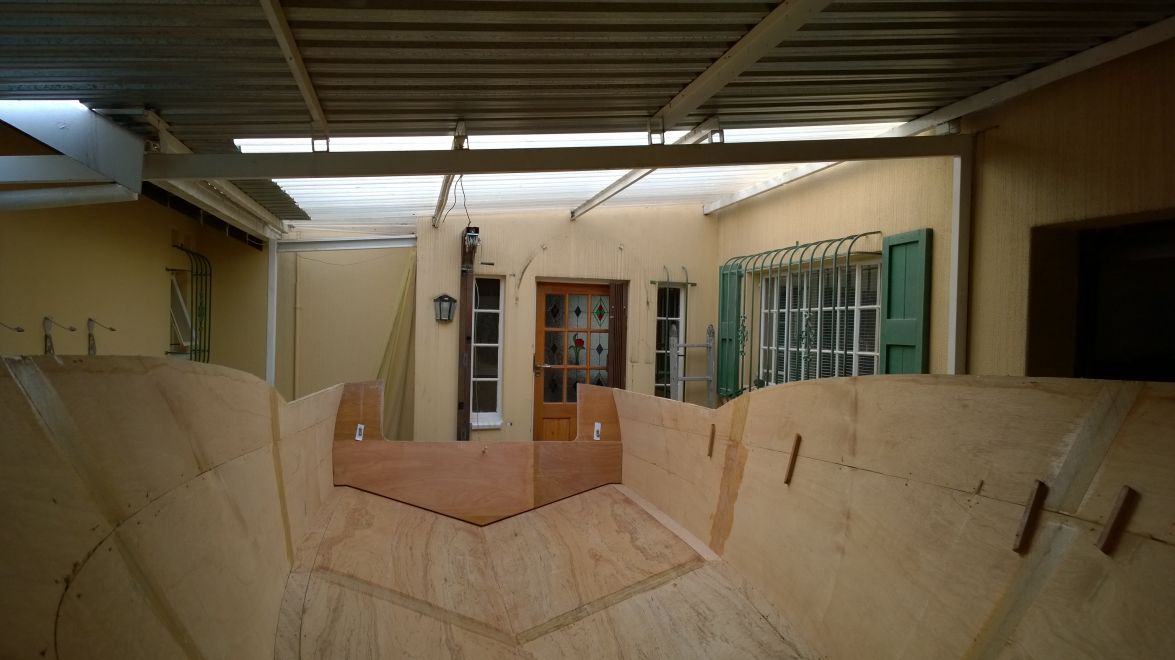
After all were out, I had an inspection from my son....yes, in his pj's(school break) - this brings home the scale.
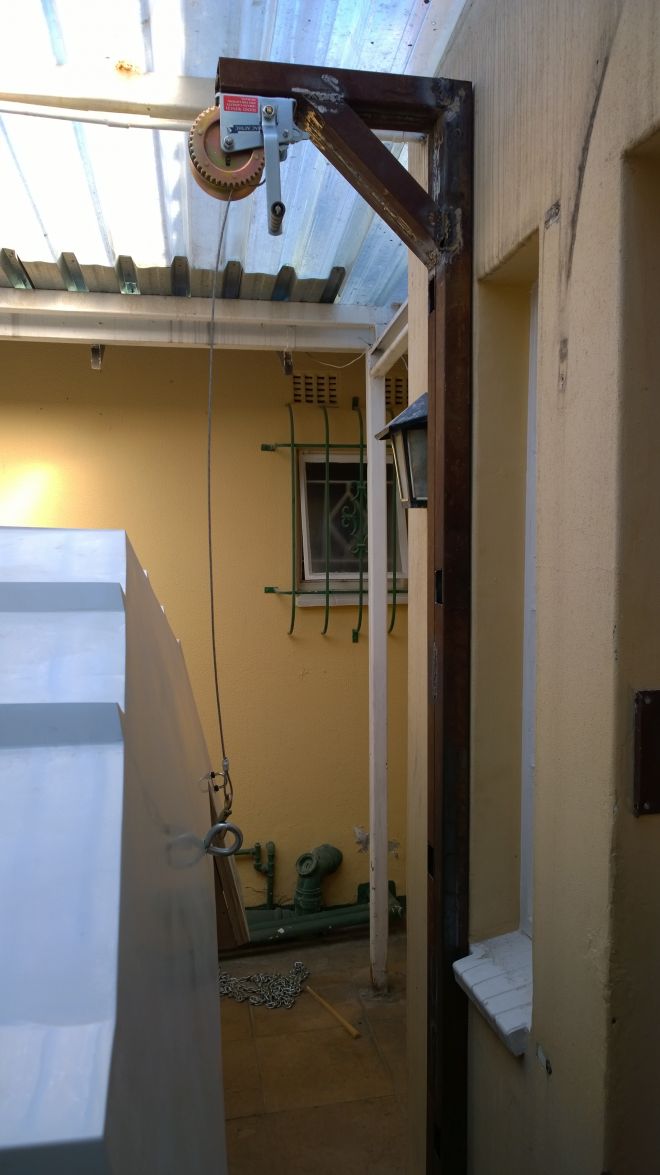
I started turning the hull using cargo straps and ratchets and struck the light fitting halfway - this was very tight. I almost became nervous... almost.
I tried to get by, by lifting the front a little and lowering the back a lot, but the light fitting was in the middle of the boat - the rotation point - duh, so I had to remove it and it went smooth from there - just seemed very tight and I had to adjust the height continuously to rotate without contact(much contact):
She went over - I had to lift her quite high to get the strongback back under and have enough space to get the cradle mounted back:
After lowering her onto the new cradle, I aligned and levelled her with the winches. All seem to be OK
A long day, but awesome. Cant wait for the next part.
Antonie
Re: CS23 - Dad's dream
Posted: Mon May 05, 2014 2:32 pm
by pee wee
. . . and perseverance pays off once again! Congratulations on the flip, looking good.
Re: CS23 - Dad's dream
Posted: Mon May 05, 2014 3:20 pm
by peter-curacao
Congratulations on the flip, she looks very nice!
Re: CS23 - Dad's dream
Posted: Mon May 05, 2014 3:23 pm
by Cracker Larry
Tight flip

Good work
Re: CS23 - Dad's dream
Posted: Tue May 06, 2014 11:55 am
by antoniekruger
Hi Fellas, thanks for the kind words.
Re: CS23 - Dad's dream
Posted: Wed May 07, 2014 9:49 am
by tech_support
Very nice flip job

Re: CS23 - Dad's dream
Posted: Sat May 31, 2014 12:20 pm
by antoniekruger
Hi Guys,
I've made some progress.
Cleaning the inner hull, fillets and filling the seams and taping them:
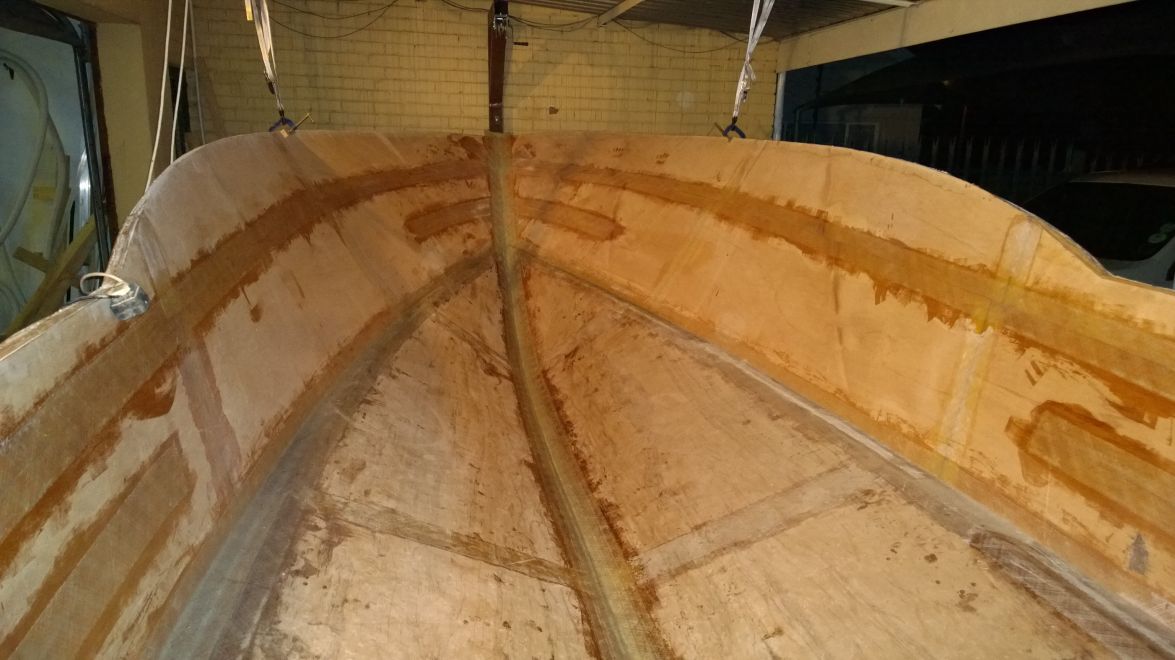
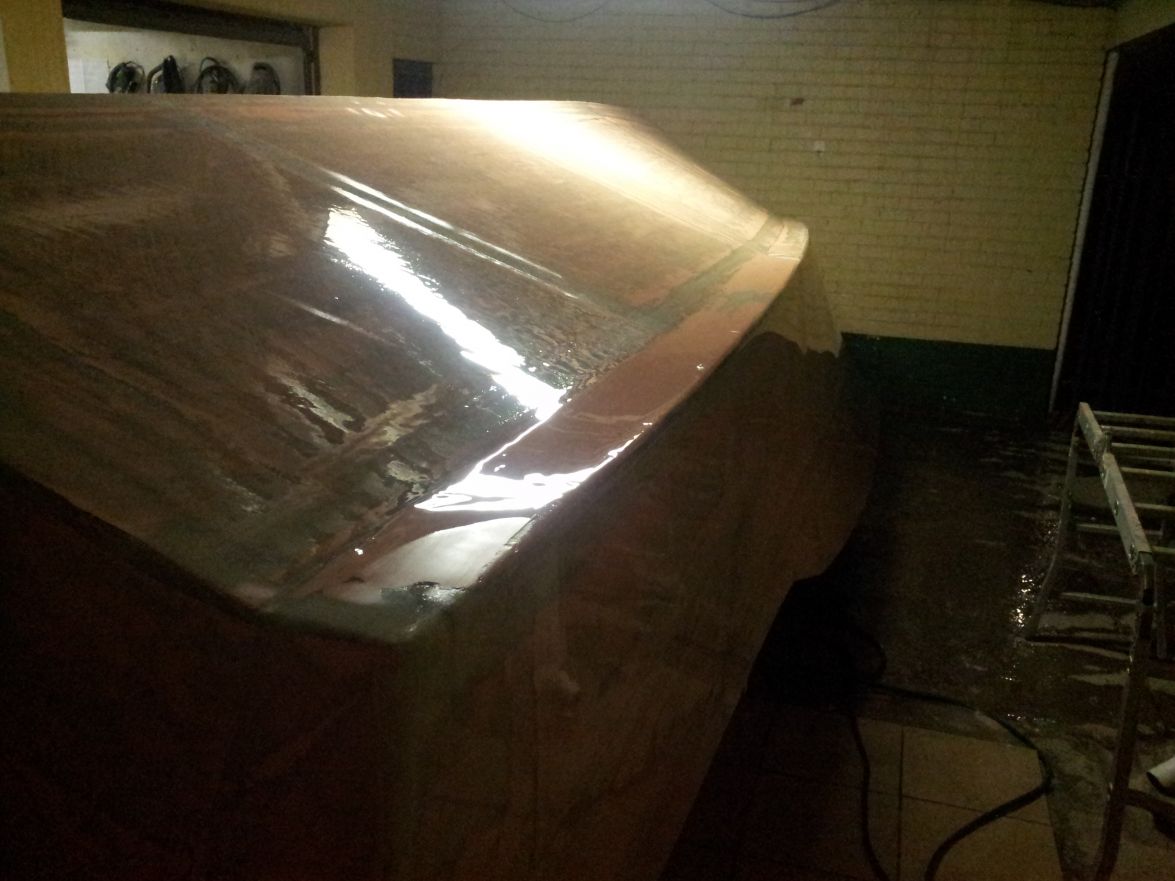
Then the first layer all through:
I started the second layer on the bottom this morning. I cleaned off the first layer since I was not able to place wet on wet. Then measured the overlap and got stuck in. I'm using a new epoxy since my usual brand have been discontinued. The mix ratio is higher....there is something bugging me. Will show later:
The new epoxy have good structural characteristics - better than my usual mix - This new stuff also have a longer pot life...with a factor of 2 to 3 and a much longer gel time. It has the same viscosity as the old epoxy which is a low number - quite runny and less so at lower temperatures. Here's my issue - when I wet out the cloth(biax), the process does not take longer than the old brand, but the curing time is much, much longer. The pic below shows my concern - The long curing time allows the epoxy to migrate much longer - this shows how the epoxy is collecting on the chine and white streaks forming in the cloth:
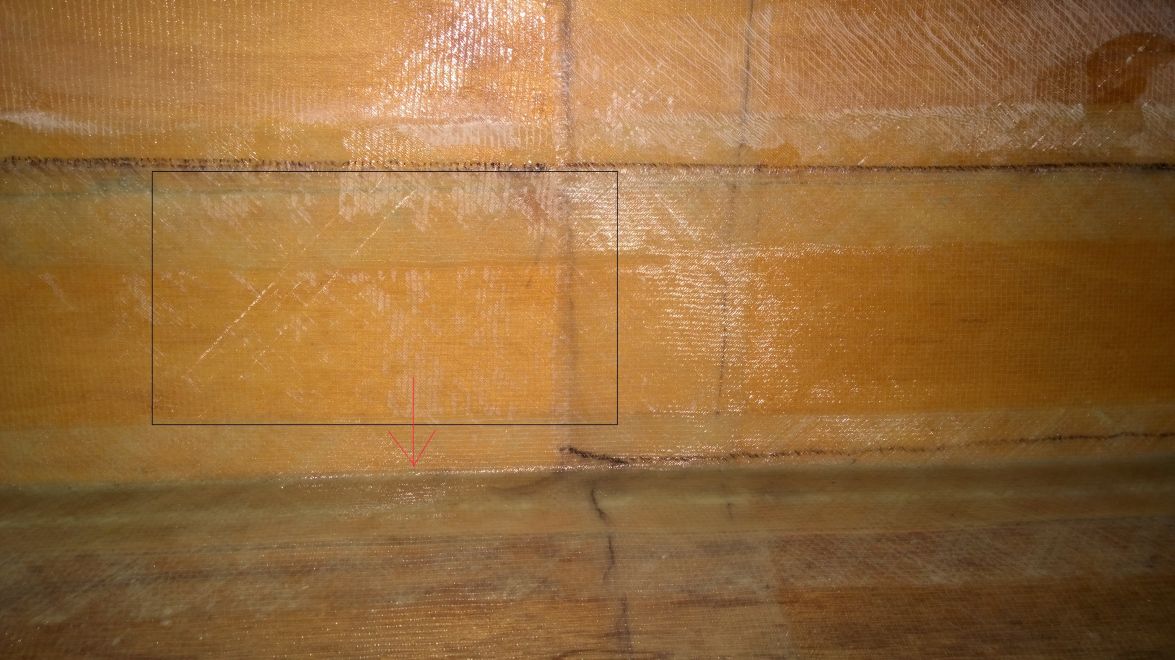
I worked the cloth well with a squeegee, so I'm pretty sure the cloth was saturated but not excessively so. I rolled the area again after I saw this, but the cloth was seated and did not seem to have any change. This is only on the vertical faces....obviously. Do you guys think that this is a problem.
Thanks,
Antonie
Re: CS23 - Dad's dream
Posted: Sun Jun 01, 2014 1:53 pm
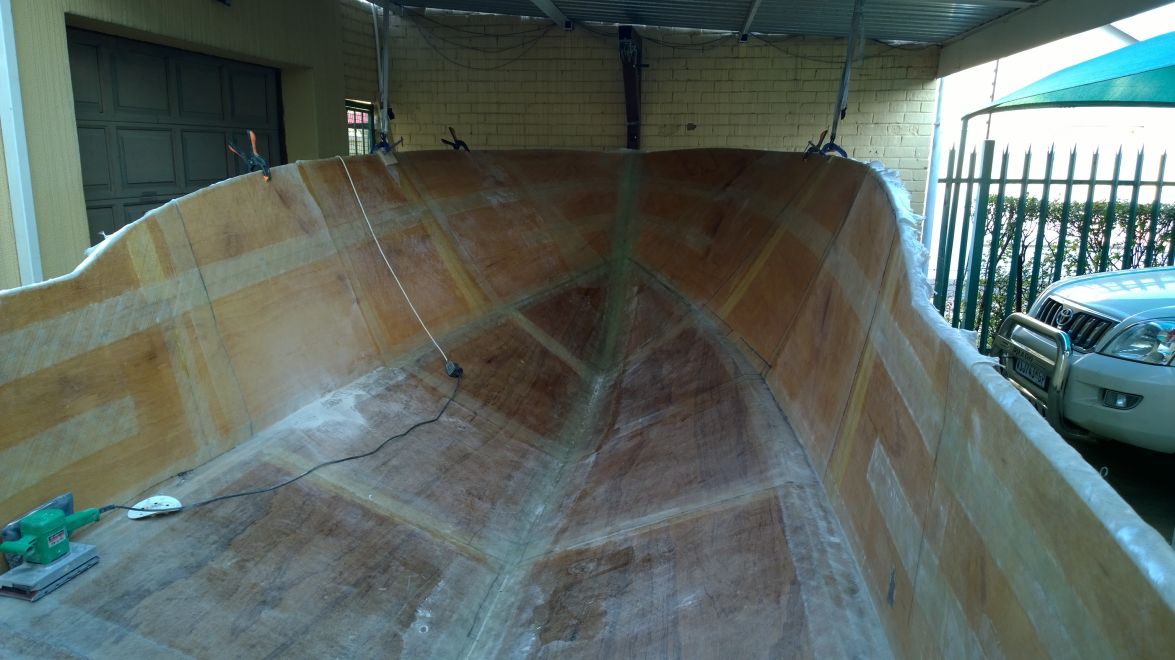
by antoniekruger
Hi,
Last of the big glass on the hull went in today
- will post a completed pic tomorrow with daylight.
This was this morning after measuring the long length of cloth and checking the overlap. The upside of a slow curing epoxy is that I was able to catch the 'wet' from yesterday's layup.
Working up in the bow is a pain for a big fella like me
, but it's done.
I cleaned off the ''old' glass and smoothed some odd patches from yesterday and it was game-on.
After this has cured, I'll re-level the boat and line-up the stringers for taping. I've been pondering deck options - there are 3 available for the CS23. I bought the plans with a jump cabin in mind, but consulting with the family it seems like I'll be doing an open deck. Lots and lots of space for us 3. I'll probably look at a canvas splash cover over the casting deck for bigger sea....that's still a way off.
Tanks and breather/filler caps are ordered :

Candidate motor identified :
This guy :
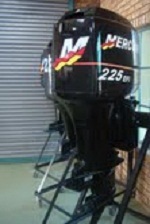
or this one:

- I have not committed to this yet.
-Hydraulic steering ordered - supplier waiting for hydraulic tube length measure before delivery. I have seen a steering wheel that I like - will collect that soon.
Trailer is an issue - we have new legislation around home build trailers - I'll have to rethink that plan.
Ticking over slowly, but surely.
Re: CS23 - Dad's dream
Posted: Sun Jun 01, 2014 2:33 pm
by Walkers Run
Looking great. Very clean work
Re: CS23 - Dad's dream
Posted: Sun Jun 01, 2014 4:21 pm
by Wouter
Hi Antonie,
Your boat is looking good, I can see you spent some good hrs on it this weekend! Great Work.
Are you now using the Ampreg21..? With all my research I have come up with two options, an epoxy from Ivory 340LV Its a low viscosity epoxy and I think more suited for sealing panels vs wetting out fiberglass. The other option is the Ampreg21, both are priced similarly, so no financial difference. I might just get some of both and use the 340LV to seal the panels and use the Ampreg21 for the wetting of the glass...? Still undecided.

I like that fuel filler cap!! Where do you get your accessories from? I'm thinking of getting a few things now to make it easier later on, the bow eye, draining plug etc.
Keep on building!!
Regards,
Re: CS23 - Dad's dream
Posted: Sun Jun 01, 2014 4:23 pm
by Wouter
One more question: are you having custom fuel tanks made..?
Re: CS23 - Dad's dream
Posted: Mon Jun 02, 2014 9:28 am
by antoniekruger
@Wouter
I like that fuel filler cap!! Where do you get your accessories from? I'm thinking of getting a few things now to make it easier later on, the bow eye, draining plug etc.
I get my hardware and fitting from Commercial Marine - The chap's name is Joseph Deetlefts.
email :
Boksburg@commercialmarine.co.za phone: +27 11 823 3184
They have a good variety and have good experience and advice - very helpful.
One more question: are you having custom fuel tanks made..?
Nope, they are a standard size from :
http://www.sinvacplastics.co.za. The only spec they need is where you want the spinwelds for the inlet and other fittings. They do not carry stock of these so when you order they manufacture the tanks.
Are you now using the Ampreg21..?
My intention is to move to Ampreg21 once my stockpile of SP106 runs out. Here is the thing - I walked into AMT shop a while back and they had the ''specials'' table out. On this table was a batch of epoxy nearing its sell by date, so they could not move the stock in time and packed it out for sale. I had a good look at the specs of the epoxy and it seemed very close to SP106 - even better on the mechanical characteristics. My argument was that I would glass out the interior of the hull with this :
http://www.amtcomposites.co.za/products ... m-20152014
The hull is done and I have about 8kg left. I'll manage the stringers and frames with that. I'll add a bit of cabocil to try and slow the vertical migration....I'm sure this is just my imagination but will do anyway.
I used a product called PRIME LV to prime my frames and stringers :
http://www.amtcomposites.co.za/products ... ion-system.
Antonie
Re: CS23 - Dad's dream
Posted: Sat Jun 07, 2014 12:30 pm
by antoniekruger
Hi,
I've cleaned out the hull - cleaning the second layer of biax that the stringers and bottom frames will sit on. A question about this - do I have to fillet and tape down the stringers first or can I assemble the inner frame(stringers and frames) and tape it compartment by compartment?
Thanks,
Antonie
Re: CS23 - Dad's dream
Posted: Sat Jun 07, 2014 1:21 pm
by Cracker Larry
I would fillet and tape the stringers full length before installing the frames.
Re: CS23 - Dad's dream
Posted: Sat Jun 07, 2014 1:24 pm
by AtTheBrink
I would fillet and tape the full length of the stringers. I believe that is what my plans called for and it will give you the best strength. Your stringers are the backbone of your boat. You don't want any weak areas. Tape in the full length of your stringers then put your frames in.
Re: CS23 - Dad's dream
Posted: Sat Jun 07, 2014 2:06 pm
by antoniekruger
Thanks guys, consensus - stringers full length it will be.
Re: CS23 - Dad's dream
Posted: Sat Jun 07, 2014 2:37 pm
by jacquesmm
Consensus is nice but you should ask the designer.
Technical questions are answered in the technical section. The title of this section clearly says "non technical" and I do not always see the messages here.
Quickly looking at the last two pages of this thread, I see some problems.
1. The stringers MUST be taped full length. It is not an option or choice, they must be taped full length.
2. I see a picture of the inside fiberglass, the wide fabric on the starboard side. The fabric MUST overlap the keel and the chine. In that picture, it does not. All fiberglass pieces must overlap by about 6". This is clearly shown on the plans and in all the tutorials.
The only exception would be if what I see is a finishing layer added on top of all the layers I specify.
Again, this is essential, it is not an option. I have see production boats fail (hull cracks) because the workers did not overlap there. It is not too late. Wherever you skipped the overlap, you must run long piece of fabric, let's say 12" wide that overlaps the keel and the side fiberglass.
3. Did you work that way in the outside too? Did you skip the overlap?
Sorry but it is important. It is my job to make certain that the boats are well built.
Please post in the technical section to discuss that.
Re: CS23 - Dad's dream
Posted: Sat Jun 07, 2014 2:51 pm
by jacquesmm
I read the whole thread.
I see many technical questions that I never read because I don't keep track of this forum section. Fortunately Joel and some others gave the correct answers but it seems that everybody missed the overlap problem.
In one post, on page 3, there are pictures from another builder that show how to fiberglass properly, with a wide overlap at the chine and keel.
I know that the 50" fabric is not wide enough to cover the CS23 panels all over but then you use 2 layers.
This is the exact problem that initiate a recall of 80 boats by a major manufacturer. The workers took a short cut: ended the 50" glass just at the chine and keel, omitted the overlap and the hulls flexed.
It's too late for the outside. Fortunately, my designs are overbuilt and we can fix it from inisde by adding some fabric at the keel and chine. And maybe at the bow and transom if you did not overlap there.
I am not in the office right now. Tuesday, I leave for vacation but let's discuss this on Monday in the correct forum:
http://forums.bateau2.com/viewforum.php?f=2
Start by telling me where you overlapped and where you did not.
Re: CS23 - Dad's dream
Posted: Sat Jun 07, 2014 5:32 pm
by wegcagle
Jacques,
On page 4 of this thread, he posted a bunch of pictures showing the outside fiberglassing. It appears to me (but I also missed the overlap problem on the inside
) that he has overlapped at the keel. It's hard to tell if he was able to overlap at the chines, but I am sure Antoine will let you know that as well.
Will
Re: CS23 - Dad's dream
Posted: Sat Jun 07, 2014 6:56 pm
by jacquesmm
Yes, it looks like he overlapped at the keel, that is good. He also overlapped at the chine but only form the bow to about 2 or 3 meters.
I also read that he added woven. I wonder if he overlapped with that. Let's wait, he'll tell us where he overlapped.
Re: CS23 - Dad's dream
Posted: Sun Jun 08, 2014 3:06 am
by antoniekruger
Morning fellas - waking up in Jo'burg with -2 degrees outside and a predicted 8 max. I suppose it will be an inside day today. I saw your comments, thanks for those:
Consensus is nice but you should ask the designer.
Technical questions are answered in the technical section. The title of this section clearly says "non technical" and I do not always see the messages here.
Quickly looking at the last two pages of this thread, I see some problems.
1. The stringers MUST be taped full length. It is not an option or choice, they must be taped full length.
Yip, thanks and noted - will do so.
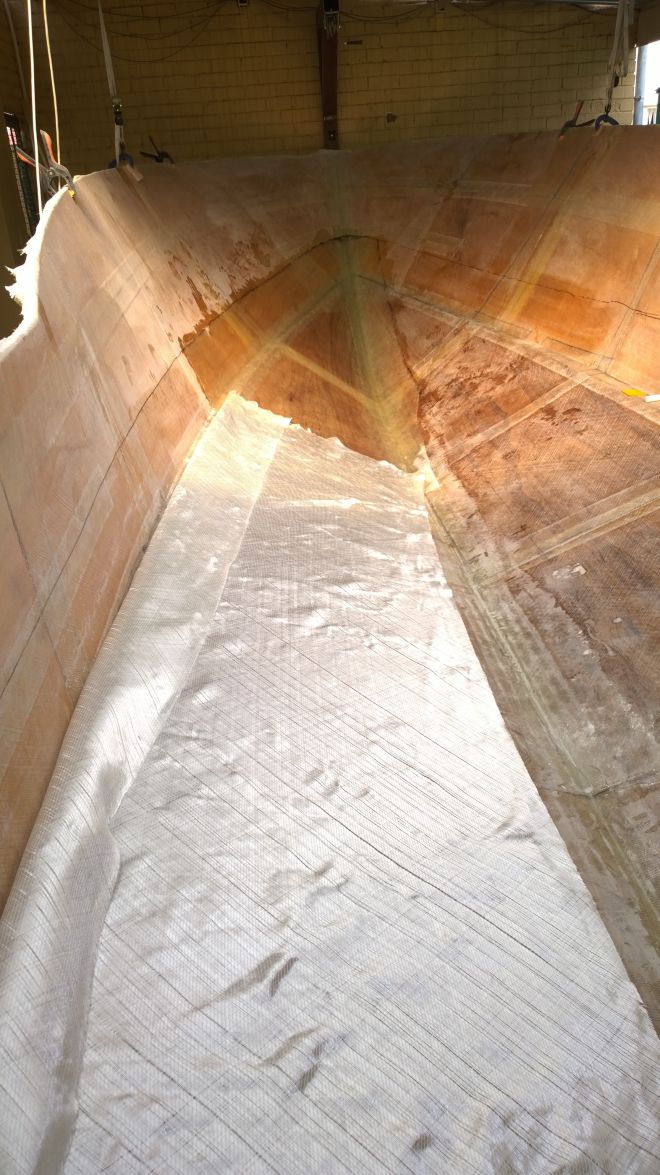
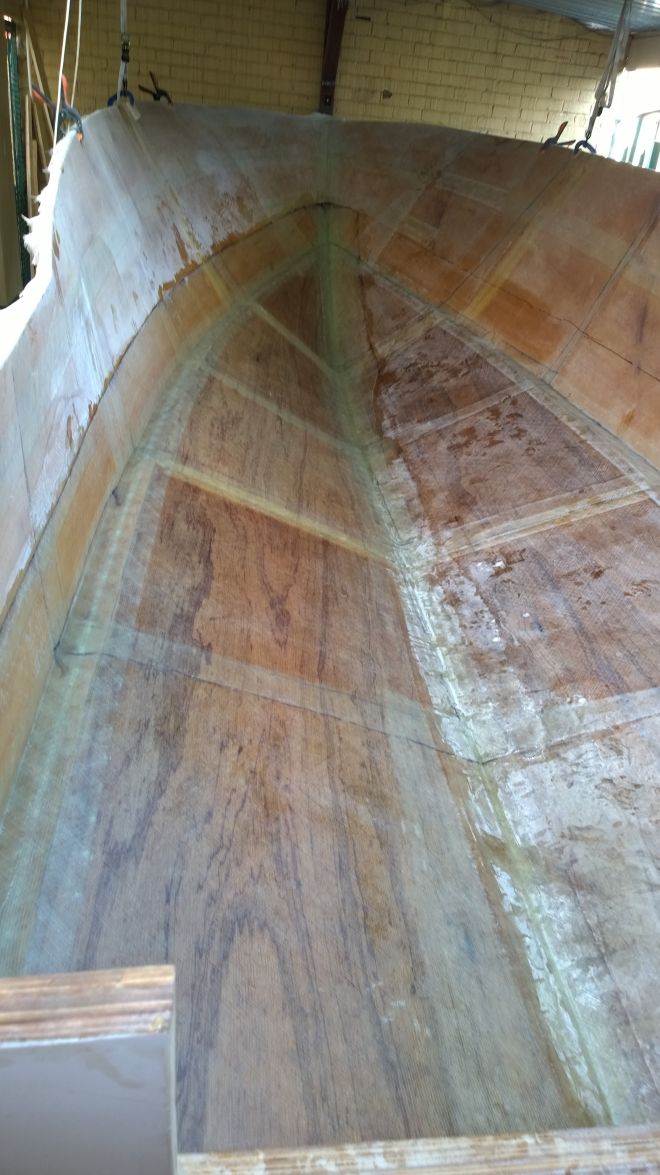
2. I see a picture of the inside fiberglass, the wide fabric on the starboard side. The fabric MUST overlap the keel and the chine. In that picture, it does not. All fiberglass pieces must overlap by about 6". This is clearly shown on the plans and in all the tutorials.
The only exception would be if what I see is a finishing layer added on top of all the layers I specify.
Again, this is essential, it is not an option. I have see production boats fail (hull cracks) because the workers did not overlap there. It is not too late. Wherever you skipped the overlap, you must run long piece of fabric, let's say 12" wide that overlaps the keel and the side fiberglass.
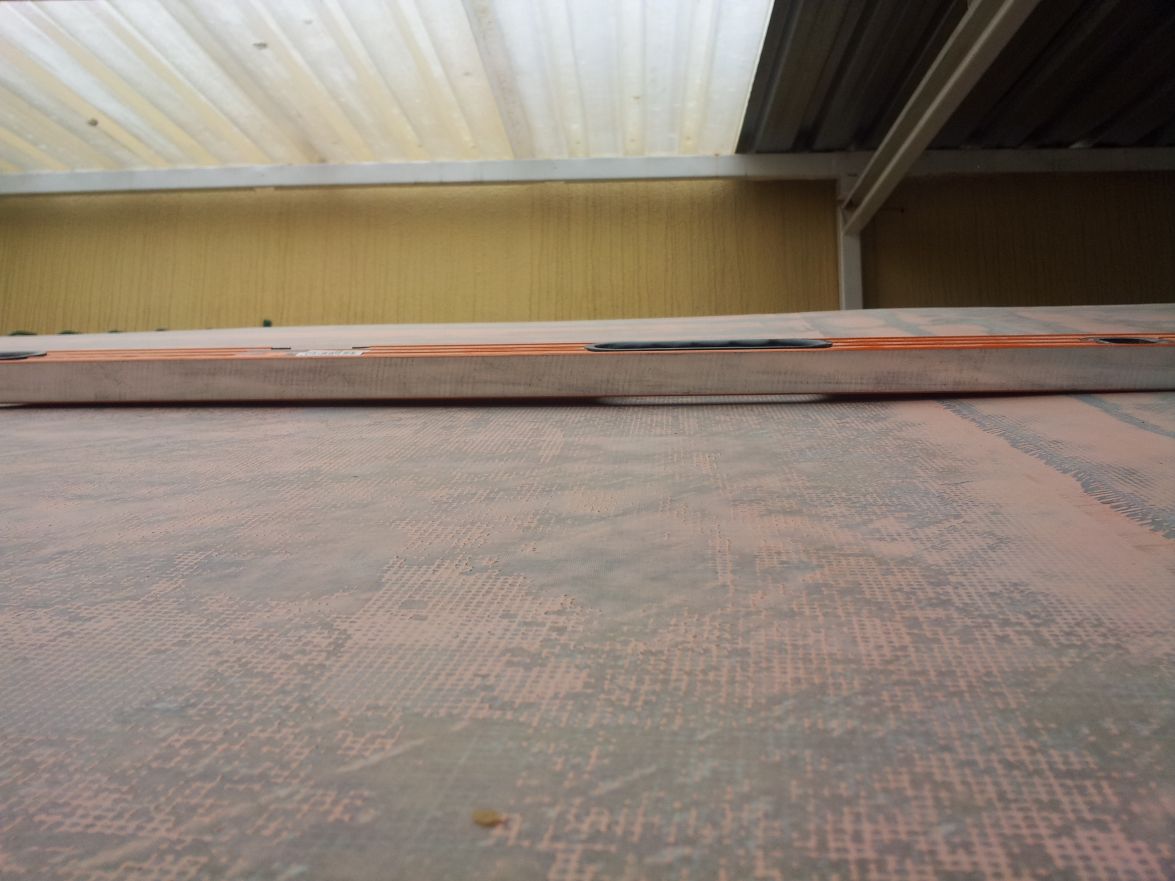
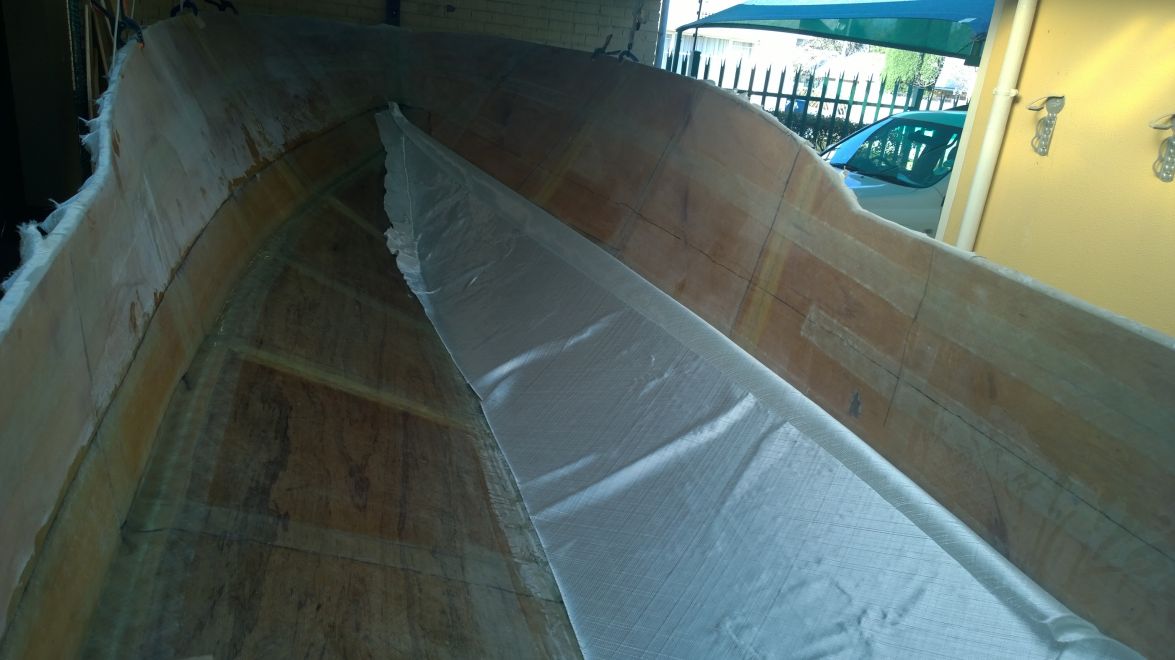
My first layer layer went in width wise - from rubrail, through the hull to rubrail. The next strip would overlap about 150mm onto the previous. My second layer biax went in over the length and since the cloth is not wide enough to overlap at the keel I decided to start at the chine overlap and lay an extra length down the keel to join the 2 sheets - You can see the line above the chine up to where the second layer was taken:

The overlap was done differently on the bottom - All was done in length. The second layer was started from the keel overlap (200mm overlap) to the chine overlap- The overlap went over the chine by at least 200mm. The second layer over the bottom was done identical to this after I cleaned off the mess that the peelply left...well, me and the peelply. The 300 woven (Cover/sacrificial layer) was done from rubrail to rubrail over the hull in width sections with 150mm overlap to get a different orientation on the strands of the biax.
This was the first layer layup on the bottom - the overlaps marked and cut:
The cloth showing at the back as being not wide enough:
The additional piece to get the correct overlap was added on the keel on the inside and the chine on the outside as not to repeat a 'joining' piece on the same line.
I was toying with the idea of laying another width of cloth around the bow from frame C - starboard - around the bow back to C - port - since I'm going for the open deck option. Do you think I should lay a full width all the way down the keel from bow to transom? I will be taking my family on the boat, so any addition to structural security is no effort, but I'm sure I followed the building instructions.
Thanks for keeping an eye,
Antonie
Re: CS23 - Dad's dream
Posted: Mon Jun 09, 2014 11:49 am
by antoniekruger
All clear from Jacques, so on with the stringers.....heeeeehhaaaaa
http://forums.bateau2.com/viewtopic.php?f=2&t=58942
Re: CS23 - Dad's dream
Posted: Mon Jun 09, 2014 1:28 pm
by mindunderwater
I think the sigh of relief from me is shared by many
Good news, indeed... If I had to re-do all that beautiful outer hull work I'd probably run away, screaming...
Re: CS23 - Dad's dream
Posted: Mon Jun 09, 2014 1:30 pm
by Cracker Larry
Whew
If I had to re-do all that beautiful outer hull work I'd probably run away, screaming...
Re: CS23 - Dad's dream
Posted: Wed Jul 30, 2014 9:37 am
by Wouter
Hi Antonie,
How's the build coming along..?
Re: CS23 - Dad's dream
Posted: Wed Jul 30, 2014 11:04 am
by antoniekruger
Hi Wouter,
Not much to tell. I've been down with pneumonia and my garage and boat is off limits until the temperatures lift. If I stroll to the garage I get the look...yeah, that look. I've been keeping myself busy with the planning of my CNC router build and getting parts together off eBay and worked on some drones in my study...which has been grounded. So, sorry, nothing to show.
I hope youre having better luck.
Antonie
Re: CS23 - Dad's dream
Posted: Mon Aug 18, 2014 8:22 am
by antoniekruger
What a truly odd and bizarre month.
The temperatures are rising and I managed to evict the ice bears from my workshop
The boat have been standing on the strongback whilst I placed under orders. I've been testing the water by sneaking to the workshop and have not experienced resistance, so it seems like its game on again.
Firstly, the old trusty Prado gave me a scare with an high motor temp. She has 300000km so I decided to replace her with a Ford Ranger that will be able to manage the boat on the tow. Sorry, no pics - will post next round.
A dear colleague passed, 4 months after being diagnosed with colon cancer - Graeme, a true giant among men.
My handyman, Ben's wife gave birth to a little girl.
I managed to buy my boat's motor. Settled on a pre-loved Mercury 225 EFI V6. The guys are running her in for me. I'll pick her up within the next week or so - crated.
The 2x100l tanks arrived with filler caps and breathers. The tank pickups arrived as well.
Also managed to find a trailer - a solid double axle, braked trailer - keep in mind that I need to tow my boat 650km to the nearest coast
need to work on that. In my home language we have a saying : "Nie oor die hondjie nie, maar oor die halsbandtjie". This translates to - not about the dog, but about the collar - The trailer I bought has a 28" cabin cruiser on it. She has been neglected, but I think the next project just came along - polyester, though. Wanted to do a houseboat next, but this will do just fine.
I dusted the workshop, lined up the stringers and cleaned them off with a quick sand. Marked up the lines in the boat. My transom needs a layer of glass on the inside before I mount the stringers. Will start tonight. Must admit that the smell of a batch of fresh epoxy is good.
Antonie
Re: CS23 - Dad's dream
Posted: Mon Aug 18, 2014 9:22 am
by Cracker Larry
Welcome back to work
Sorry to hear about your friend
A dear colleague passed, 4 months after being diagnosed with colon cancer - Graeme, a true giant among men.
My handyman, Ben's wife gave birth to a little girl.
That reminds me of a song...
https://www.youtube.com/watch?v=KhJUFdWPmLY
Re: CS23 - Dad's dream
Posted: Mon Aug 18, 2014 9:32 am
by Wouter
Hi Antonie,
Sounds like you got a lot of things sorted now. Enjoy getting back to your build.
Looking forward to seeing some pics of all the goodies!
Regards.
Re: CS23 - Dad's dream
Posted: Wed Aug 27, 2014 1:25 pm
by antoniekruger
Hi Guys, went to pick up my trailer yesterday after sorting owners and licencing docs. I found the trailer in a town called Witbank from the dealer that sold me the motor. The deal was that I take the trailer with the boat that is on it. So be it. The price was right and the trailer is GOOOOOD. The idea was to strip the stuff I need, cut up the hull and dump it. I only realised what I bought after hooking it onto my new truck

I towed her home..around 120km from Witbank to Benoni where I live. I did not know what state the wheel bearing were in, so it was a slow 2 hr trip. She is a 28 foot cabin cruiser, not a 25 footer as expected. The transom was modified with a bracket to hold 2 outboards instead of the 2 inboards. Its a Coronet 25 foot cabin cruiser. She has been neglected and stripped. Strangely, everything that was taken off and stripped was in the boat, from the windlass, stainless tanks(one 800l tank and 2x200l tanks) rod holders, bilge pumps ect. The government at home was miffed since I could not fit the boat on the front lawn and had to keep her in the driveway until I can move her out of the way.
I think once Dad's dream is done, I'll get stuck into this old girl. She is a thing of beauty....not all the Krugers think this, but maybe she'll grow on them. Goodness, she's big - like a CX25 with a bracket
So, I'll have to find a home for her whilst I finish Dad's dream.
Re: CS23 - Dad's dream
Posted: Sat Oct 04, 2014 5:53 am
by MartinK
Hey Bud. LK here from sealine. Did you find place to store the Coronet? Although I'm pretty far away (Louis Trichardt) I do have 13Ha of unused space if you're in a pickle.
Build is looking good btw.
Re: CS23 - Dad's dream
Posted: Sat Oct 04, 2014 6:08 am
by antoniekruger
Hi LK, thanks - I'm a little behind in posting progress, but ticking over slowly. I'll update tomorrow. I need to sort my pics first.
Yip, I found a spot for my Coronet, thanks. I'll be moving her early next week.
Thanks again for the offer.
Antonie
Re: CS23 - Dad's dream
Posted: Sun Oct 19, 2014 7:02 am
by Wouter
Hi Antonie,
Have you made any decisions on what you are going to do on the bottom of your boat, graphite epoxy or paint..?
Regards.
Re: CS23 - Dad's dream
Posted: Sun Oct 19, 2014 8:20 am
by antoniekruger
Hi Wouter,
I've painted her 2K - Toyota white on the bottom. 3 prime coats and 3 finals. I tried to get graphite without luck. The yacht paints are very pricey - not within my budget - more expensive than 2K with a factor of 10+...eina. The carbon was very tempting but did not happen.
I'm fitting a stainless keel strip. I shaped a little skeg down the keel with epoxy putty to mount the stainless strip on. from the chine I'll be painting blue to the deck. From there white onto the sole.
I saw a chap from Durban stating that he regrets not doing graphite. Maybe worth investigating again:)
Re: CS23 - Dad's dream
Posted: Sun Oct 19, 2014 9:39 am
by Wouter
Thanx for the feedback Antonie,
Yes, I read Bassmunn wasn't to happy with the 2K after a few seasons of use. I Also used 2K on a friend's restoration project and it too is starting to show some ware, given it 's around 3 years ago that i painted that boat so maybe not that bad..?
I agree the marine paints are just crazy expensive here, add that I have to import and transport it, it just doesn't fall into my budget too.
2K is readily available here, but I'm having second thoughts.
I did find a chap on e-bay willing to send me some graphite powder, so maybe get a little and test it 1st..? Thinking this should be my 1st step. Also need to do some calculations to see if it's going to be fees-able. But the order will take anything from 6-8 weeks to get here.
Furthermore I do have some alternatives to consider:
1. ACP (Aircraft Grade paint) It's about 3x the price of 2k, but I'm having problems finding a supplier willing to export and send to me.
2. Flowcoat. I don't seem to find anyone who's used it before, wondering if it is even an option. I have used it before on some foils for a sailboat and it came out pretty good. Rolled it on with a roller, sanded it smooth and covered it with a UV clear coat. Although the foils were fairly small, so not sure it will work to cover the entire boat. Any thoughts on flowcoat..?
Thanx for your input and help!
Regards,
Re: CS23 - Dad's dream
Posted: Sun Oct 19, 2014 12:41 pm
by antoniekruger
Hi Wouter,
If you want to go ACP - I'm 10 minutes from the airport and vendors. If you find someone to supply, I'll ship it to you, no problem.
Cheers,
Antonie
Re: CS23 - Dad's dream
Posted: Thu Nov 06, 2014 9:36 am
by Wouter
Hi Antonie,
Thanx for the offer!!
Shipping anything here is a bit tricky with the import Vat etc. Especially as I don't need to pay VAT on that side and most suppliers think I'm trying a scheme when I ask for a zero rated Vat invoice. Guess they are just not up to date with current import/export structures. Most chemicals/paints are also seen as dangerous materials to ship,so need special permits, which should be supplied by the supplier, again they seem to be either to lazy to get them or not well informed.
So, I have decided to go the 2K route. It's easily available here and a lot less hassle! Plus I have a buddy in the automotive industry with lots of spray painting experience who volunteered to help out!! Bonus!!
I'm on my way to Jhb/Pta this weekend, a quick visit to the parents and then down to CT for the Volvo in port race next week.
If I do happen to find some spare time, I'll let you know and possibly swing by to meet and have a look at your boat!
Re: CS23 - Dad's dream
Posted: Thu Nov 06, 2014 11:58 am
by antoniekruger
Hi Wouter, I'm in Swakop for a while. We're on Rossing helping them with their tailings facility. In the desert...its hot, my word. Not much building happening. Paying the bills priority for a while. I'll get stuck into the build over the December break.
Next time, mate.
Re: CS23 - Dad's dream
Posted: Sun Jul 12, 2015 6:09 pm
by Wouter
Hi Antonie,
What's up..? You've been quiet for a while now, any progress on your boat..?
Hope all is well!
Regards
Re: CS23 - Dad's dream
Posted: Mon Jul 13, 2015 4:58 am
by antoniekruger
Hi Wouter,
Yip, things have been slow on the boat build side - hectic time at work. Not a lot of contracts, but beating down doors and trying to convince the mines to release work. Everybody is holding on very tight at this stage.
Also managed to build a few mapping drones in this time and started stripping out my 'other' project - that restoration job on my new boat's trailer - a nice dilemma.
Here is what I have achieved over the last 6 months.
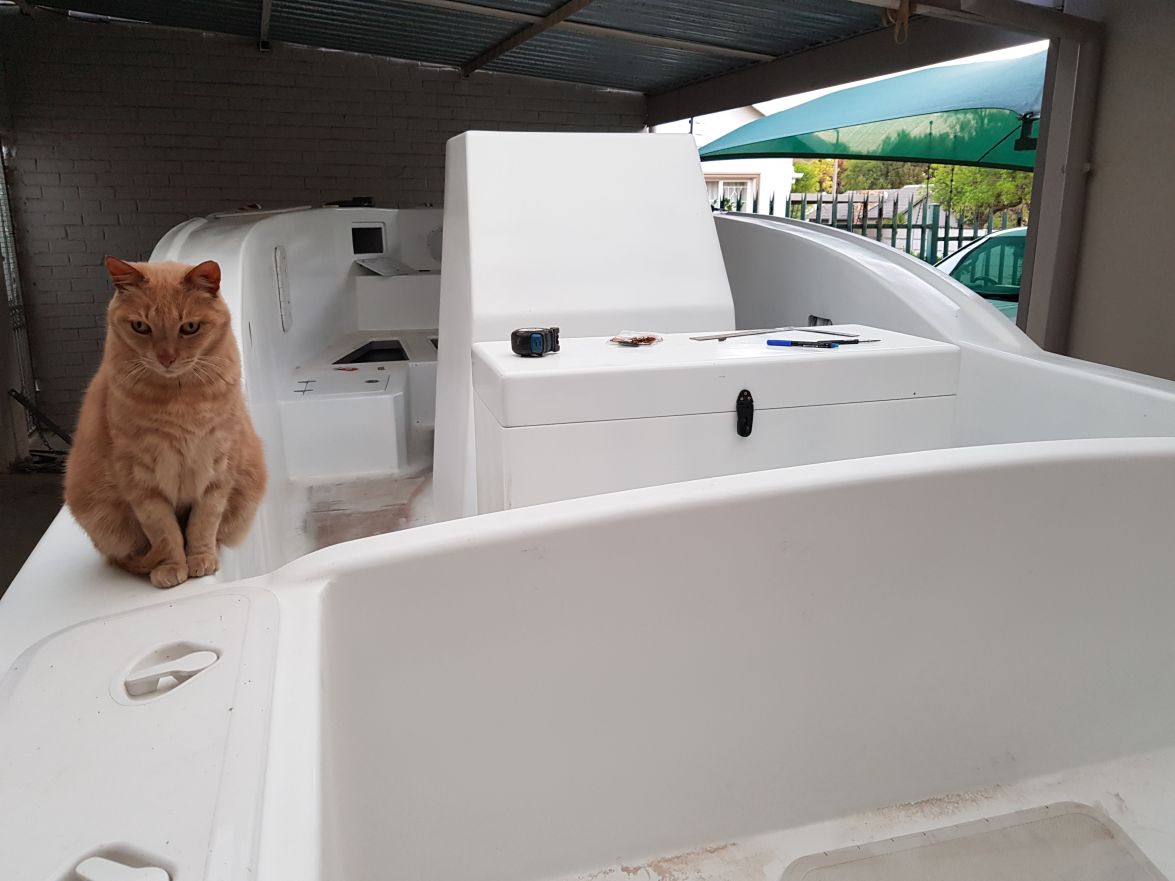
Stringers in and the cleats going in:
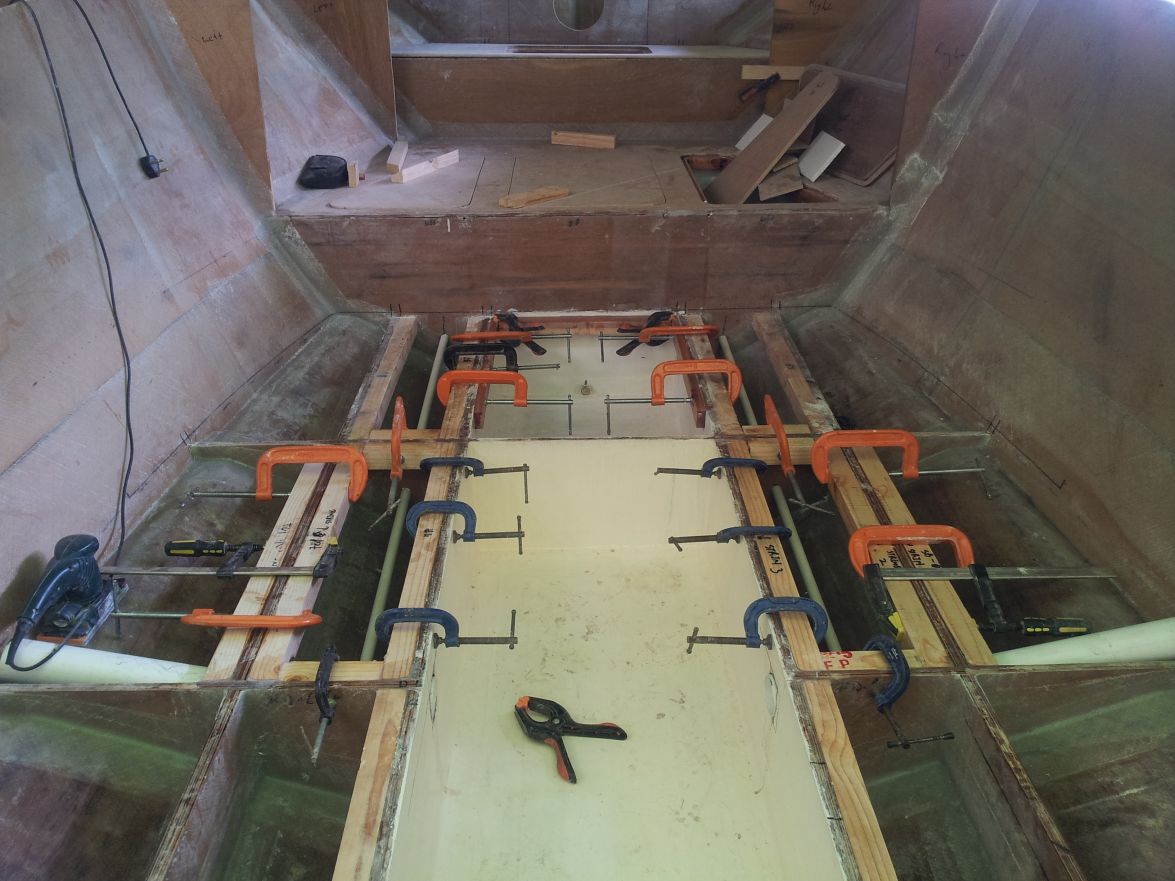
The void between frame C and D will house the fresh water tank. I've chased the lines for a outlet valve and inlet to be next to station C.
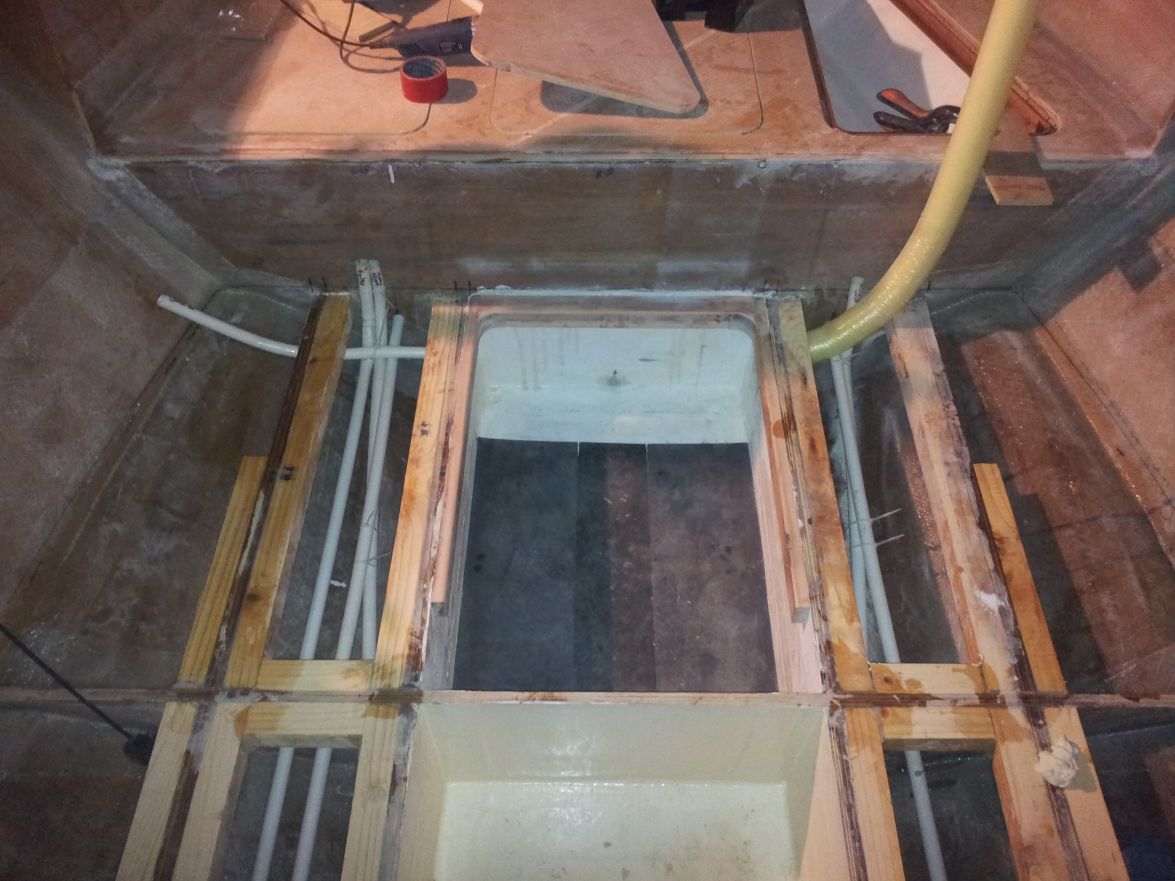
I've installed the casting deck and cut the hatches....well, not in that order. I added a bench/seat right up against the anchor hold.
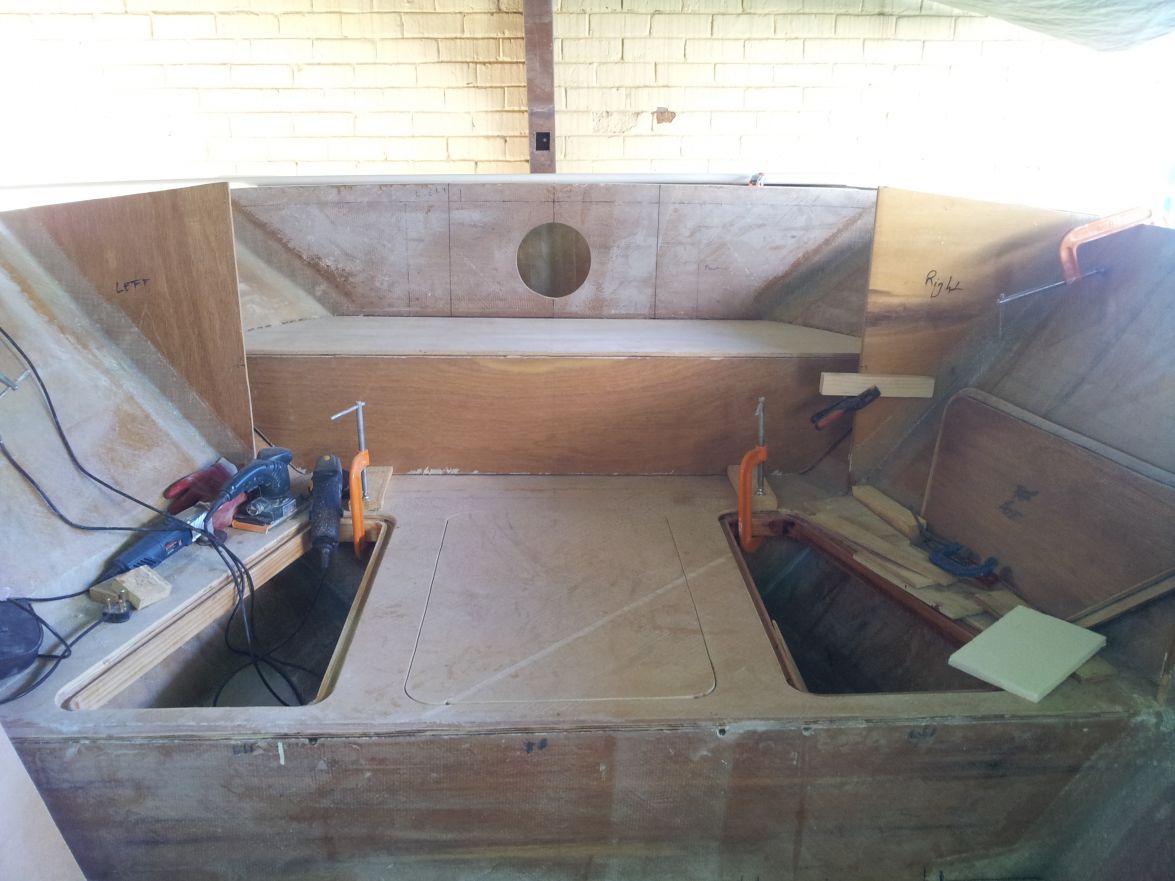
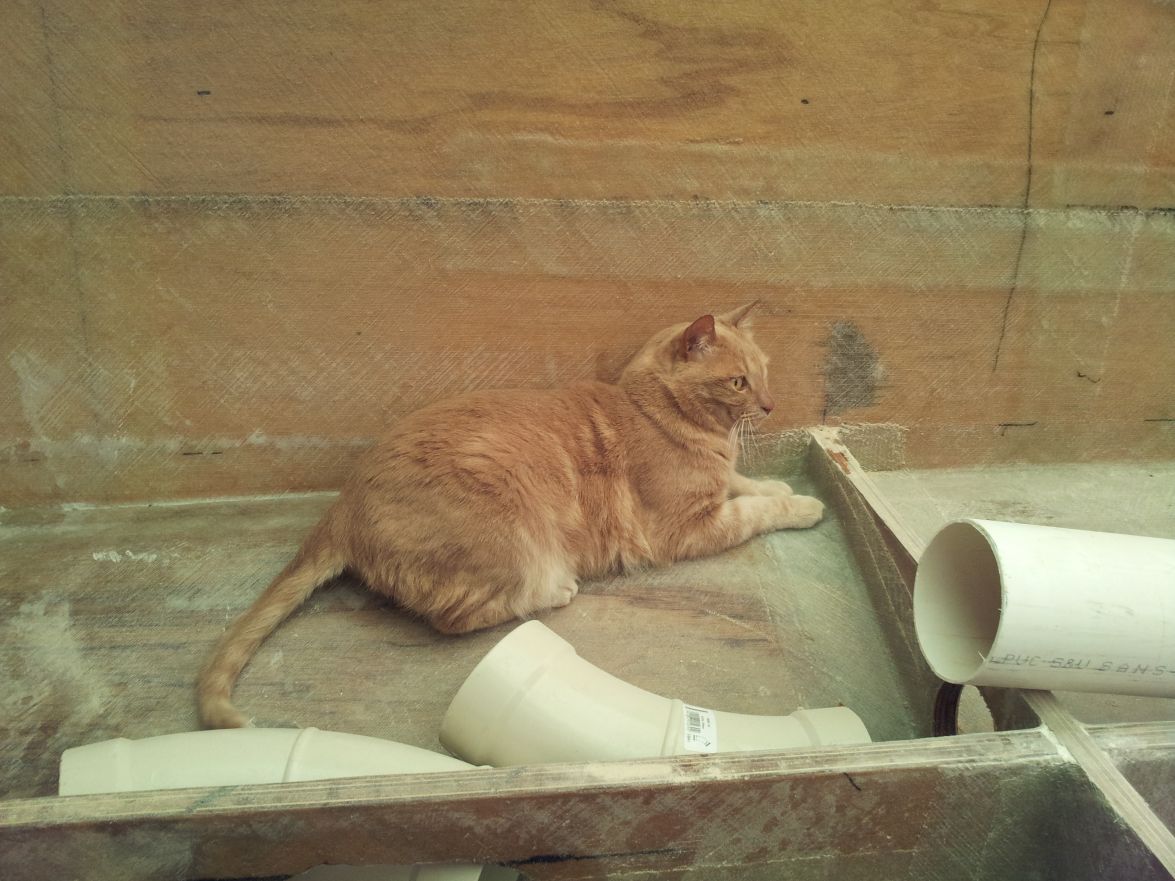
My QA officer seems happy with the work.
Things are very slow now. I do the gluing parts, but can not finish since the epoxy gums the paper. The temps have been very low for the last month or so. Not higher that 14C where the boat stands.
The plan is to have the deck in by September. The console is also under construction. I have a little voice that nags me not to mount the plastic petrol tanks. I'll get in a local pro to have a look and advise on the path forward. If it is not to be, I'll make the bottom of the lean post a tank farm for the portables. I can fit 4x25l in there.
Cheers
Antonie
Re: CS23 - Dad's dream
Posted: Mon Oct 08, 2018 8:44 am
by antoniekruger
Hi Fellas,
It has been a while but rather late than never.
The project has been creeping along slowly and I'd put in the hours as I could. Eventually I was given a 4 weeks deadline since we booked a getaway and we need the boat. My 6m duck has been sold.......
Some pre-splash pics as a teaser......
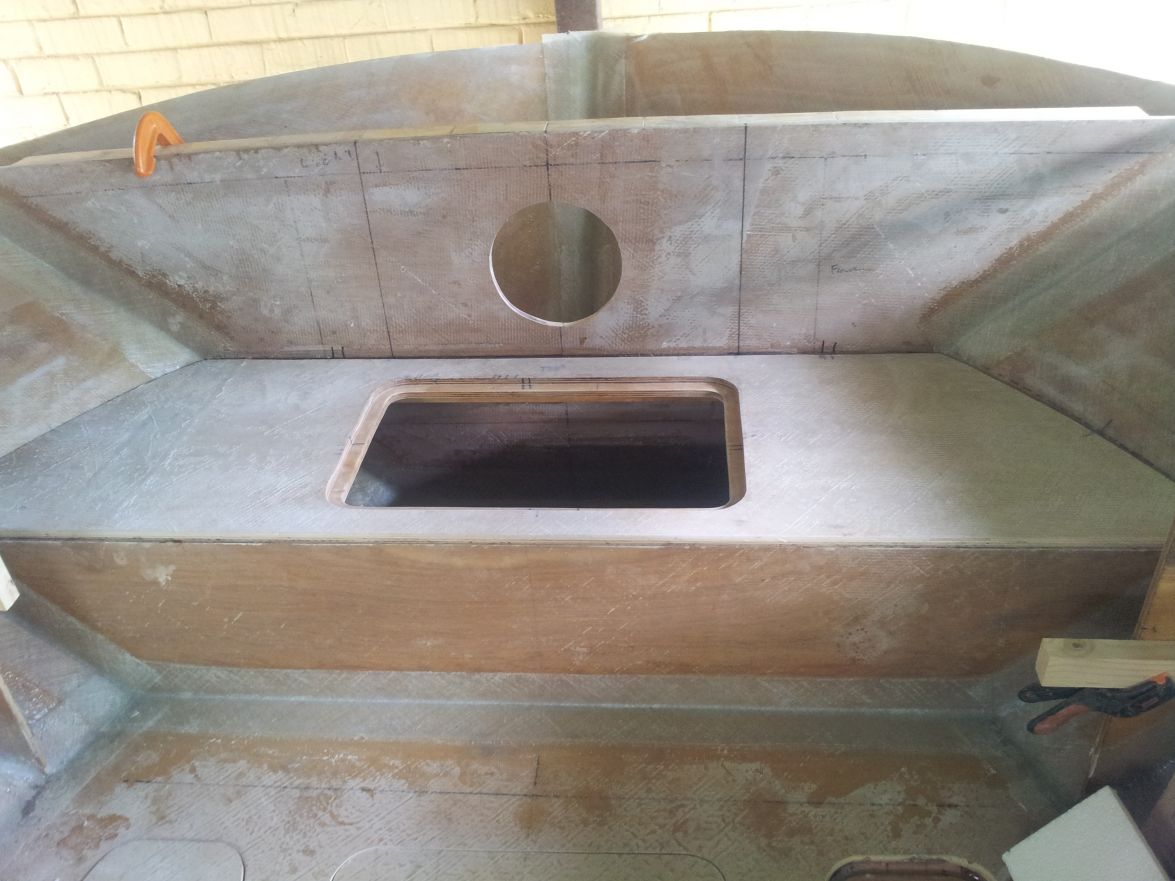
The inside fairing process - quickfair, sand, quickfair, sand etc.
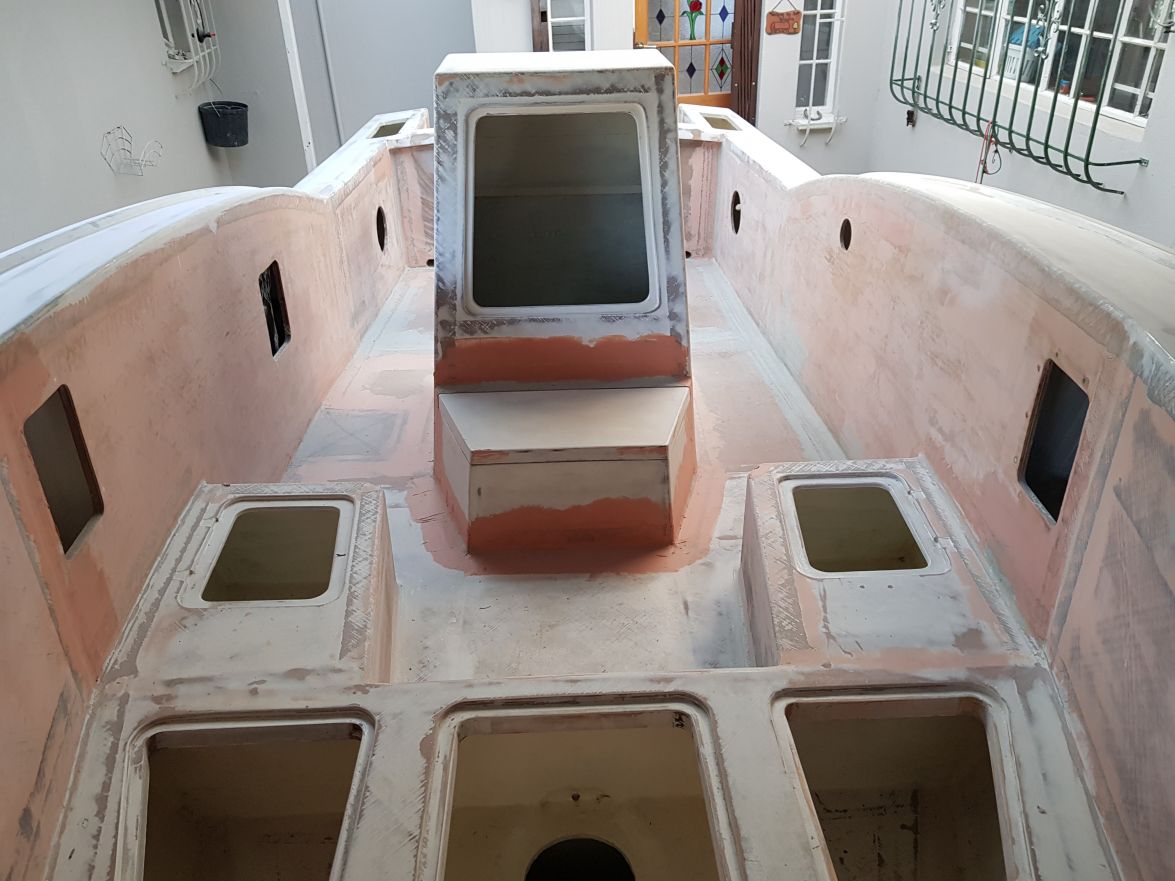
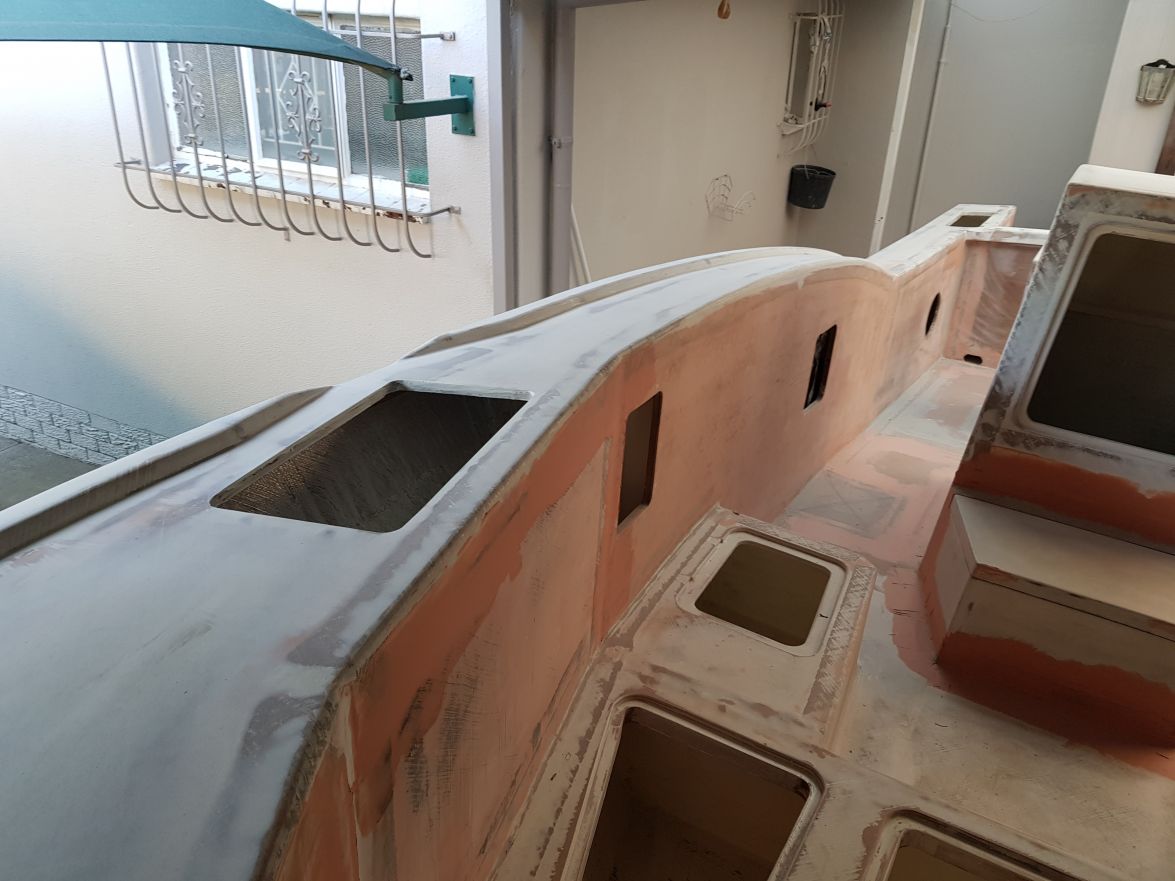
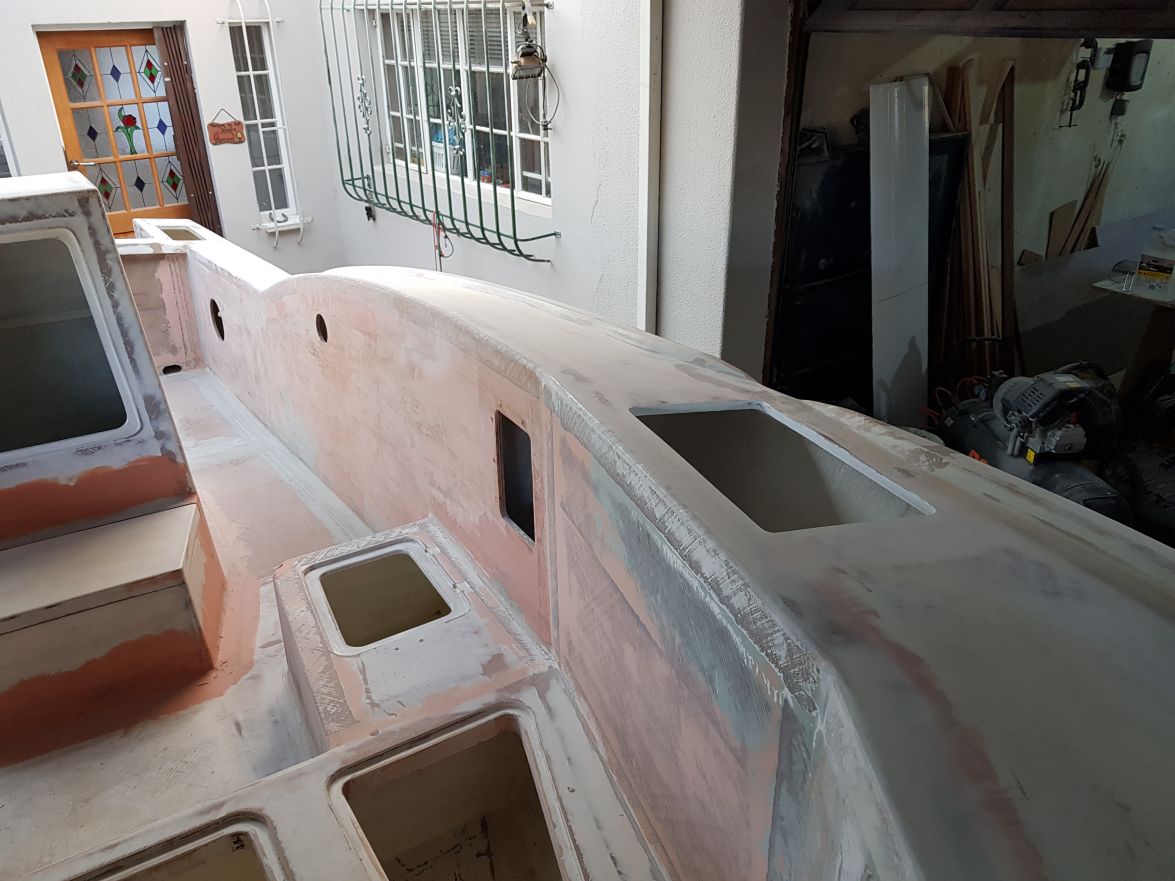
First topcoat after cleaning, priming (3 coats) and then sanding and cleaning again.

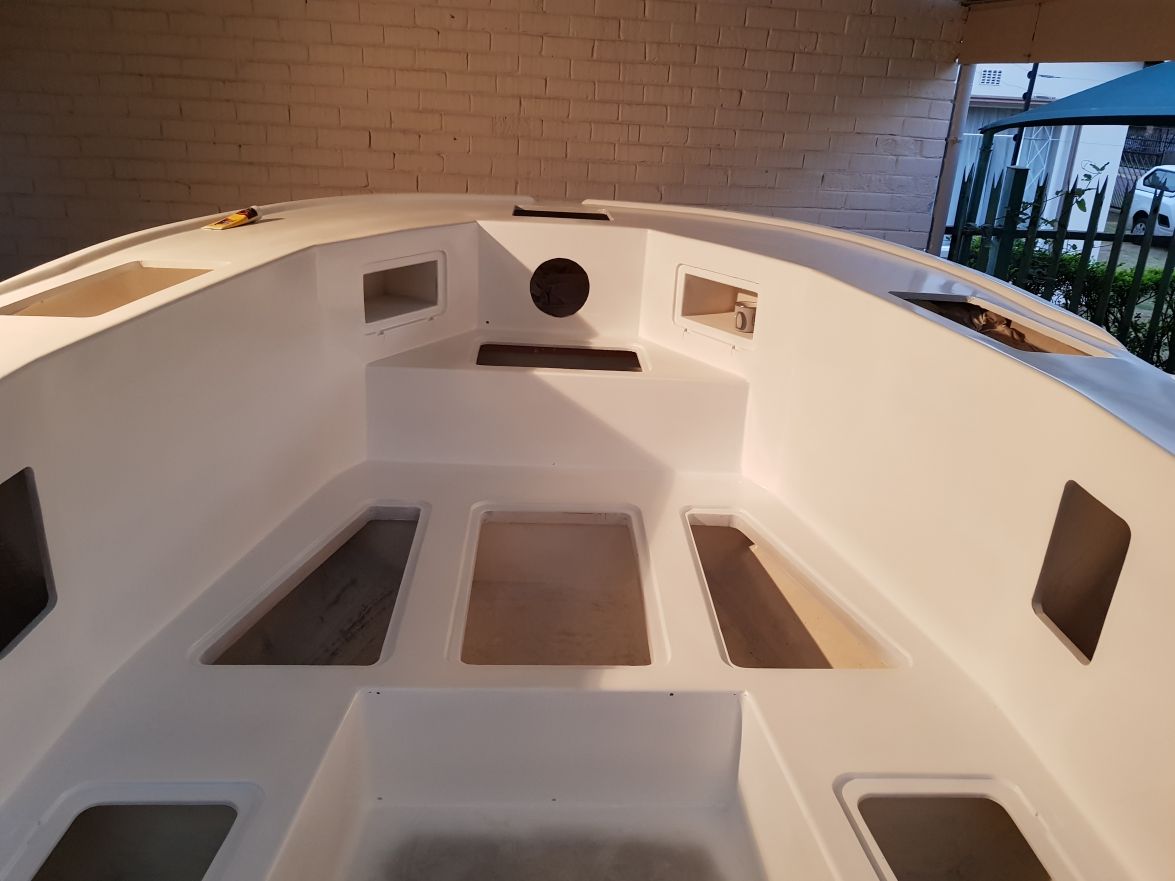
Hatches fit and hinge fit check after spray:
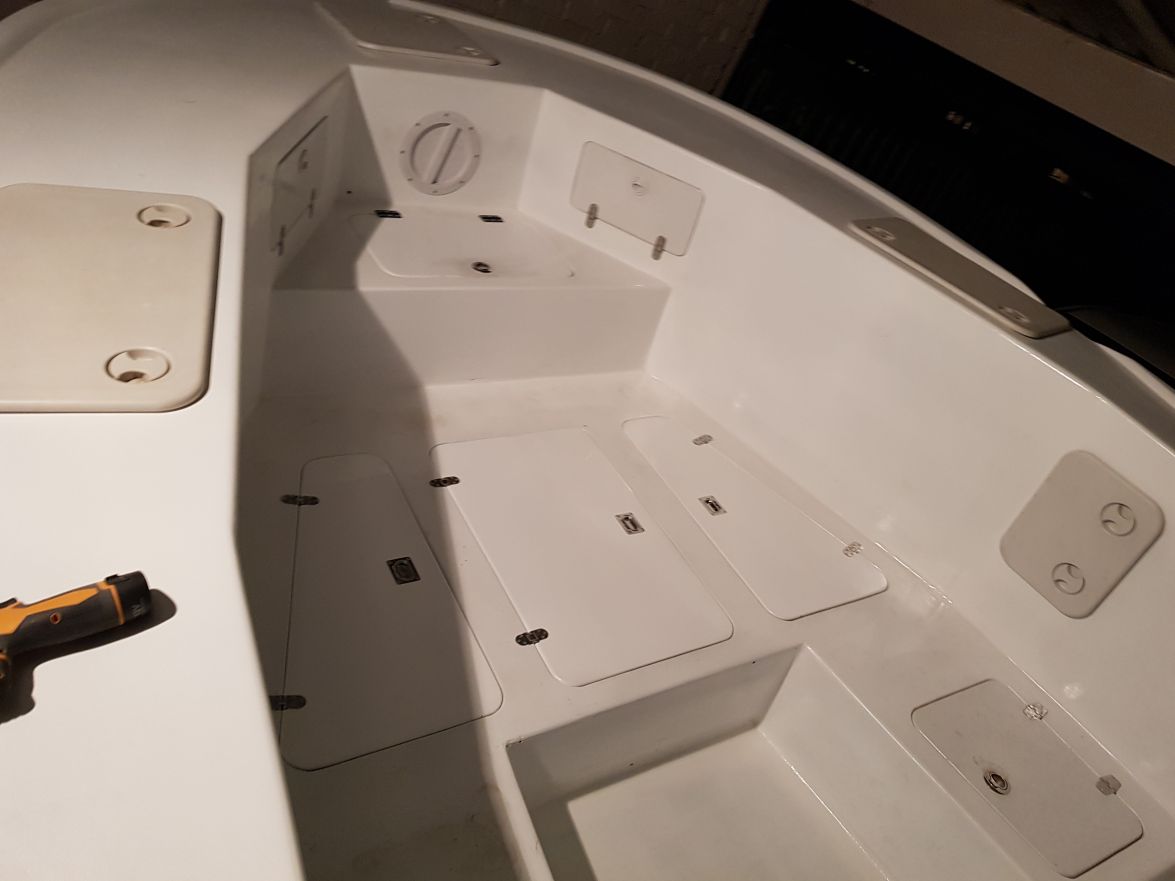
QA seems happy
I moved the boat out of the building bay (covered parking/patio) on 2 trolleys - had some interesting experiences here - this boat is heavy to handle alone.
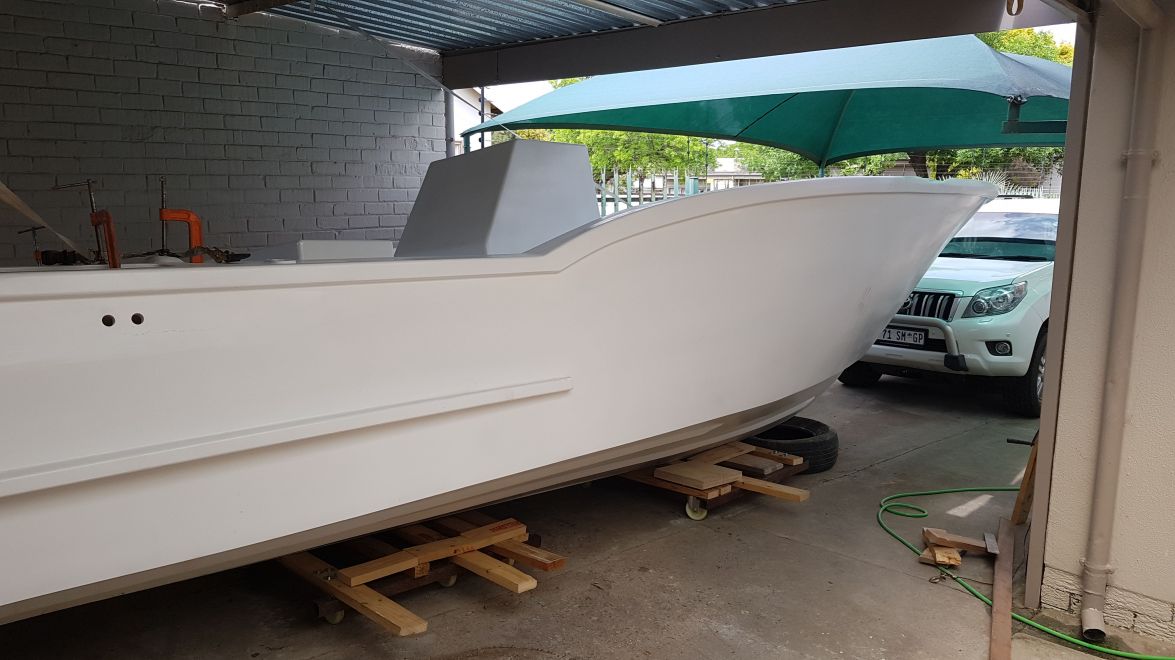
Now she is on the trailer and off to have the engine fitted, sea worthy certified and licensed. Should be out and ready for testing next Tuesday. Cant wait.
Cheers
Re: CS23 - Dad's dream
Posted: Mon Oct 08, 2018 9:26 am
by fallguy1000
Male sure we get those launch pics!
Did you build all those hatches?
Re: CS23 - Dad's dream
Posted: Mon Oct 08, 2018 9:26 am
by OrangeQuest
Wow! Great looking big boat! Hope you have a successful splash day!!
Re: CS23 - Dad's dream
Posted: Mon Oct 08, 2018 9:40 am
by antoniekruger
fallguy1000 wrote: ↑Mon Oct 08, 2018 9:26 am
Did you build all those hatches?
HI, no. Only the flush ones on the casting deck where there will be bare foot traffic. I've recessed them for comfort - still have to paint them with non slip, but out of time for this cycle. Will tackle that over December break with all the other little 'rushed' items.
The others are commercial plastic(I think) hatches. Not spoil t for choice in my nick of the woods, but had enough to make it presentable.
Re: CS23 - Dad's dream
Posted: Mon Oct 08, 2018 11:19 am
by narfi
Looks great!
Cant wait to see your launch pictures
Re: CS23 - Dad's dream
Posted: Mon Oct 08, 2018 11:45 am
by Eric1
That's a beautiful build! I look forward to your splash!!
Re: CS23 - Dad's dream
Posted: Mon Oct 08, 2018 3:37 pm
by danieloldhouse
Hat off to you Antony, very nice build! Please post more pics

Re: CS23 - Dad's dream
Posted: Mon Oct 08, 2018 3:40 pm
by Jeff
Beautiful build!!! Jeff