Page 1 of 1
HC14, Jefferson State
Posted: Thu Nov 14, 2013 12:01 am
by Vanagod
This is my first post on my first boat build. I just received the basic building blocks to build a Hiawatha 14 canoe. My first task, try to post pictures because we all like boat porn with lots-o-pictures.
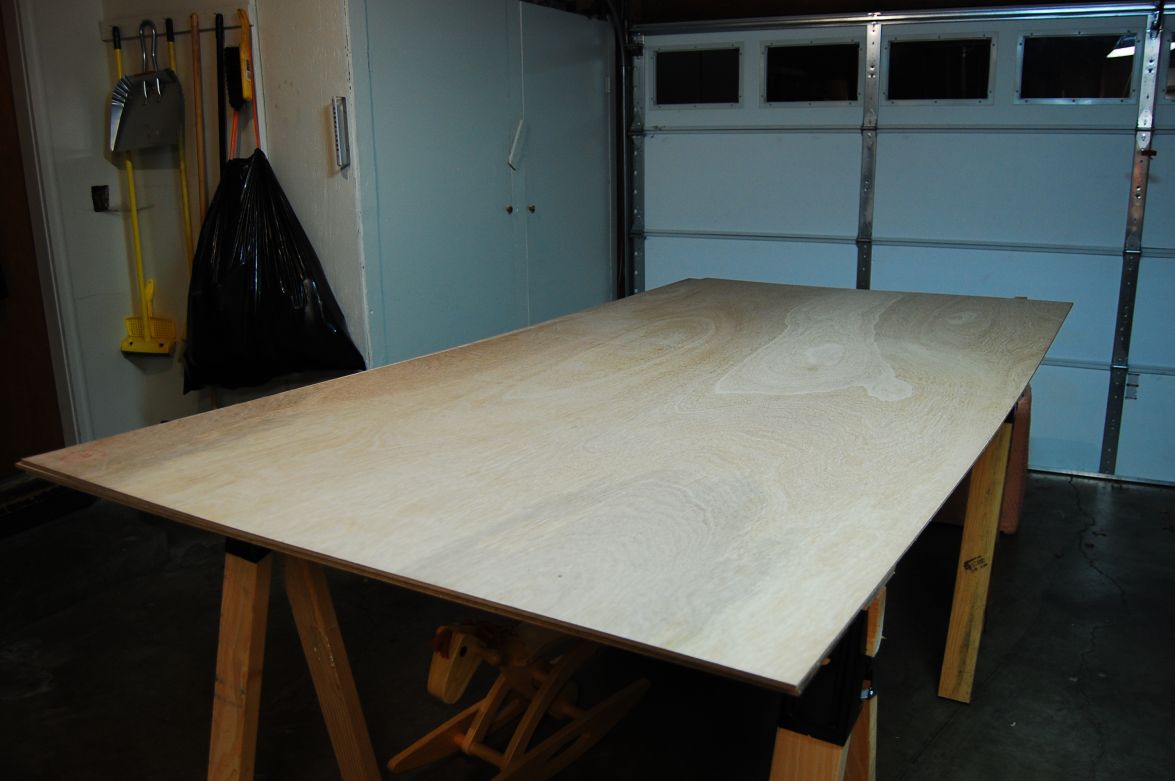
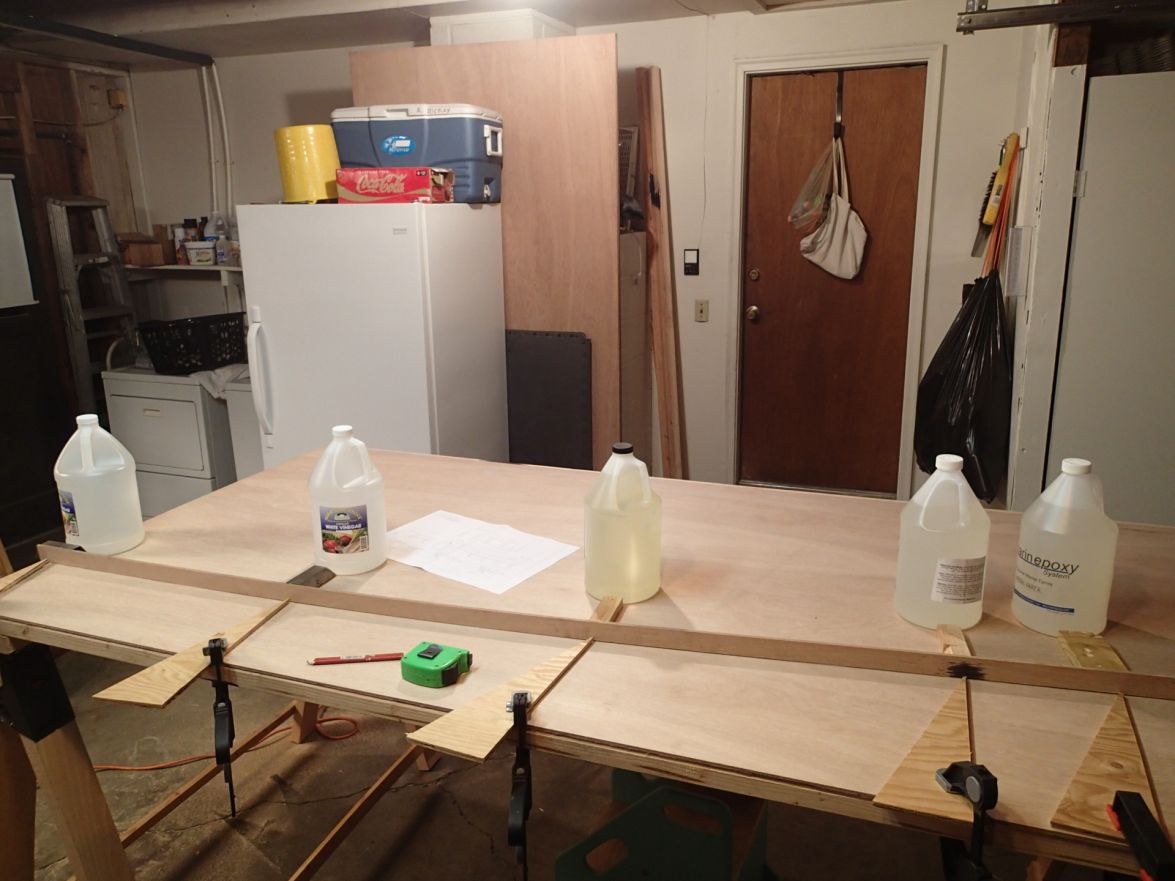
Here are 4 sheets of the 1/4" BS1088 Okoume I got from a local supplier in Medford. I bought 4 (the plans call for 3) in case I made any mistakes, and also so I would have extra for seats, breasthooks, and future builds (of course).
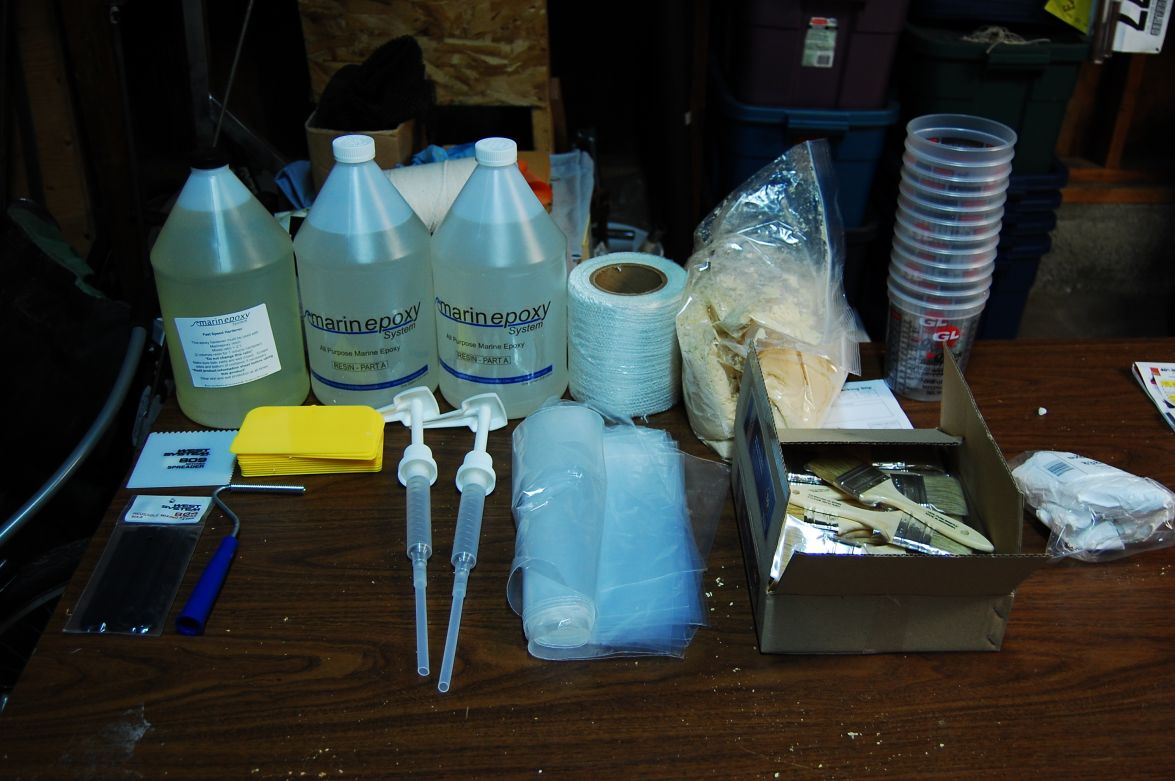
Here is the epoxy and other goodies picked up from our gracious hosts at Bateau. Again, extra epoxy for first timer mistakes and for future builds.
Any suggestions on ideal diameter of PVC pipe for drawing our lines on the plywood? Does anything else as readily available work as well or better?
Any suggestions on the best way to cut this wood (using circular saw)? It is so thin it bows between the saw horses more than I expected. What I am thinking of doing is getting a sheet of 1" beaver barf (whatever you call that stuff that is sawdust and glue) and doing my cutting on that on the floor. Sound good?
This weekend I will make my last purchases and plan on starting to cut wood.
Re: HC14, Jefferson State
Posted: Thu Nov 14, 2013 7:22 am
by tcason
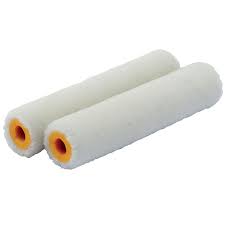
I am also a first time builder and have found the 4" cigar foam roller below is your best friend - it applies light coats of epoxy and spreads it EVEN to avoid runs. The rounded end works great to help with rounding the fillets. Trust me it will really help not over applying epoxy - A Cracker Larry copycat
Paint roller cover 4" Cigar Style 2 pack epoxy compatible at Baetean website
http://boatbuildercentral.com/proddetai ... _4in_cigar
Second best friend - quality sandpaper and good sander - I like Klingspor heavey duty pape
http://www.woodworkingshop.com/r 60 grit and Porter Cable sander link to sander
http://www.cpooutlets.com/factory-recon ... lishers--9
Good Luck and have fun
Re: HC14, Jefferson State
Posted: Thu Nov 14, 2013 7:41 am
by Cracker Larry
A thin wood batten is the best thing for laying out the curves, a lot better than pipe.
Put a couple of 2X4s across the saw horses, then put the ply on the 2X4s to keep it from sagging. I use a circular saw with the blade set about 1/8" deeper than the ply thickness to cut the curves.
Re: HC14, Jefferson State
Posted: Thu Nov 14, 2013 10:54 am
by Vanagod
Is there anything special to the Bateau foam rollers, or can I get equivalent at my local hardware store and do just fine with that? I already have a brand new Milwaukee random orbit sander I got just for this project, so we'll see how that works for me.
It looks like my first cut will be that batten you mentioned Cracker. I also like your idea of using those plywood triangles w/clamps instead of nails to locate the batten.
Re: HC14, Jefferson State
Posted: Thu Nov 14, 2013 11:43 am
by pee wee
Not all those foam rollers are compatible with epoxy, some start to disintegrate. Test any unknown product where it won't matter. There are some at Harbor Freight that will work, too. There are also some yellow foam rollers available here and from West that fit a regular diameter roller frame and don't soak up as much epoxy as the cigar shaped rollers.
Re: HC14, Jefferson State
Posted: Thu Nov 14, 2013 12:31 pm
by Vanagod
I saw what they had at Harbor Freight (we have one local), and I was uncertain to how much it might absorb. Pee Wee, when you mention West, are you referring to a distributor or a manufacturer? I've heard them mentioned before but never looked into what 'West' was.
Re: HC14, Jefferson State
Posted: Thu Nov 14, 2013 1:09 pm
by Cracker Larry
He is referring to rollers made by West Systems Epoxies, not to West Marine which is a marine supply company. They are a short nap yellow foam made for epoxy but I don't find them to last any longer than the ones I buy at Lowes for less. I prefer the 4" white foam rollers labeled Cabinet and Door Rollers, made by Whizz.
http://www.lowes.com/pd_119118-64900-94 ... Info=WHIZZ
Re: HC14, Jefferson State
Posted: Thu Nov 14, 2013 7:14 pm
by Vanagod
Sounds good to me. Do you mix in a standard roller-pan (tray?) too? If you cannot tell, I would rather spend an extra $10 than an extra 2 hours of frustration.
Hi-ho, hi-ho, its off to Lowes I go
To buy roll-ers
and two-by-fours
Hi-ho, hi-ho, hi-ho, hi-ho
Re: HC14, Jefferson State
Posted: Thu Nov 14, 2013 8:18 pm
by peter-curacao
Don't listen to this to much best thing to do is get your own feeling to it, but I personally don't like the foam rollers to much, I like the short haired rollers mostly labeled as 2 component rollers, something like this.
They never start to disintegrate and you can actually put a lot of pressure on those, squeezing more epoxy out of the glass moving it to where it is needed, this also gives you a better glass/ epoxy ratio, also air pockets are easily squeezed out with rollers like this, so less need for those specialized rollers
( you still need them believe me)like this

Mix in a mixing cup, roll in the wood with epoxy, putt the glass on, mix another batch epoxy (a lot of them

) and dump this on the glass, use a squeeze to spread this over, but more important into the glass, after that use the roller I showed, again this is the way I like to do it, and for me in the climate I lived in worked best, so it's just a suggestion, again you got to get your own feeling to it
Re: HC14, Jefferson State
Posted: Thu Nov 14, 2013 10:01 pm
by Cracker Larry
I've got 2 of those and almost never use them except for thin cloth, but like Peter said, you have to develop your own feel for what works best for you.. By the time you figure it out with a little boat like a HC14, you'll be ready to build a bigger boat

Re: HC14, Jefferson State
Posted: Thu Nov 14, 2013 10:56 pm
by Vanagod
That is half the point behind this canoe, figure out what works for me. I've been dreaming of a ST21 since Spookalo (sp?) brought it up around 2006 when he was still building his Nina. Probably one or two builds between this canoe and the ST21 though. I did buy one of those lamination rollers, FWIW.
Thanks for all of the advice.
Re: HC14, Jefferson State
Posted: Fri Nov 15, 2013 3:04 am
by dbcrx
I'm with peter on the rollers. I hate the foam ones - short hair all the time for me. The only down side to them is they can leave bits of fluff behind. Not too important but if you want a nice clear finish or are painting with them then just roll them up and down some tape first.
I don't necessarily agree with the consolidating rollers though. For big jobs where you are laying multiple layers of glass, yes they are essential. But for a small job with just one layer like a canoe, those hair rollers will push out any air and the consolidating roller won't really make any difference.
Re: HC14, Jefferson State
Posted: Sat Nov 16, 2013 11:11 pm
by Vanagod
Do you all have any suggestion for cleaning out foam or nap rollers? I heard that white vinegar works on uncured resin, but I'm not sure to the best process.
I ended up buying both 3/8" nap rollers and foam rollers at Lowes, I'll try both and see which I like most. I like that the foam rollers are available for less and in 10 packs if I have to treat them as disposable.
For my [line scribing] batten I plan on using some 1/8" x 1.25" steel flat bar I have in the garage. It is plenty flexy. Please speak up if you think a strip of 1/4" ply would be better.
Re: HC14, Jefferson State
Posted: Sun Nov 17, 2013 4:22 am
by dbcrx
Vanagod wrote:Do you all have any suggestion for cleaning out foam or nap rollers?
Yes, throw them away and use a new one. I've never successfully clean epoxy from a roller or brush. It cures too hard so even the smallest amount that doesn't clean out will make it stiff.
Steel bar should work for marking out the curves. You just need something that will bend to the curve without bring too flexible that you can push lumps into the curve.
Re: HC14, Jefferson State
Posted: Thu Nov 21, 2013 11:51 pm
by Vanagod
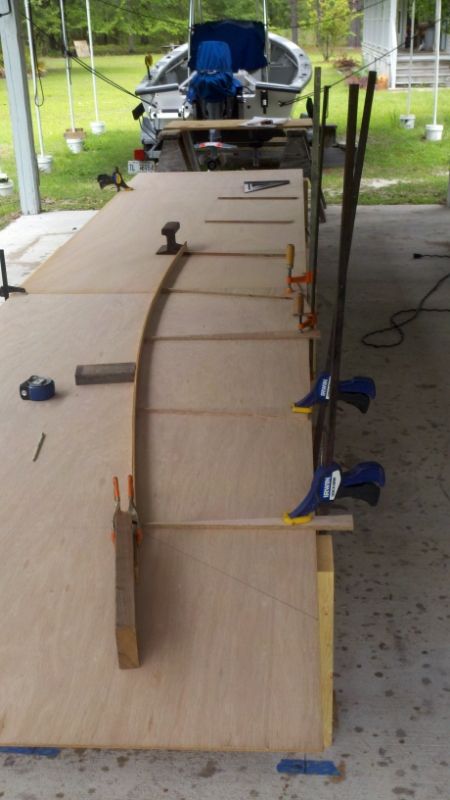
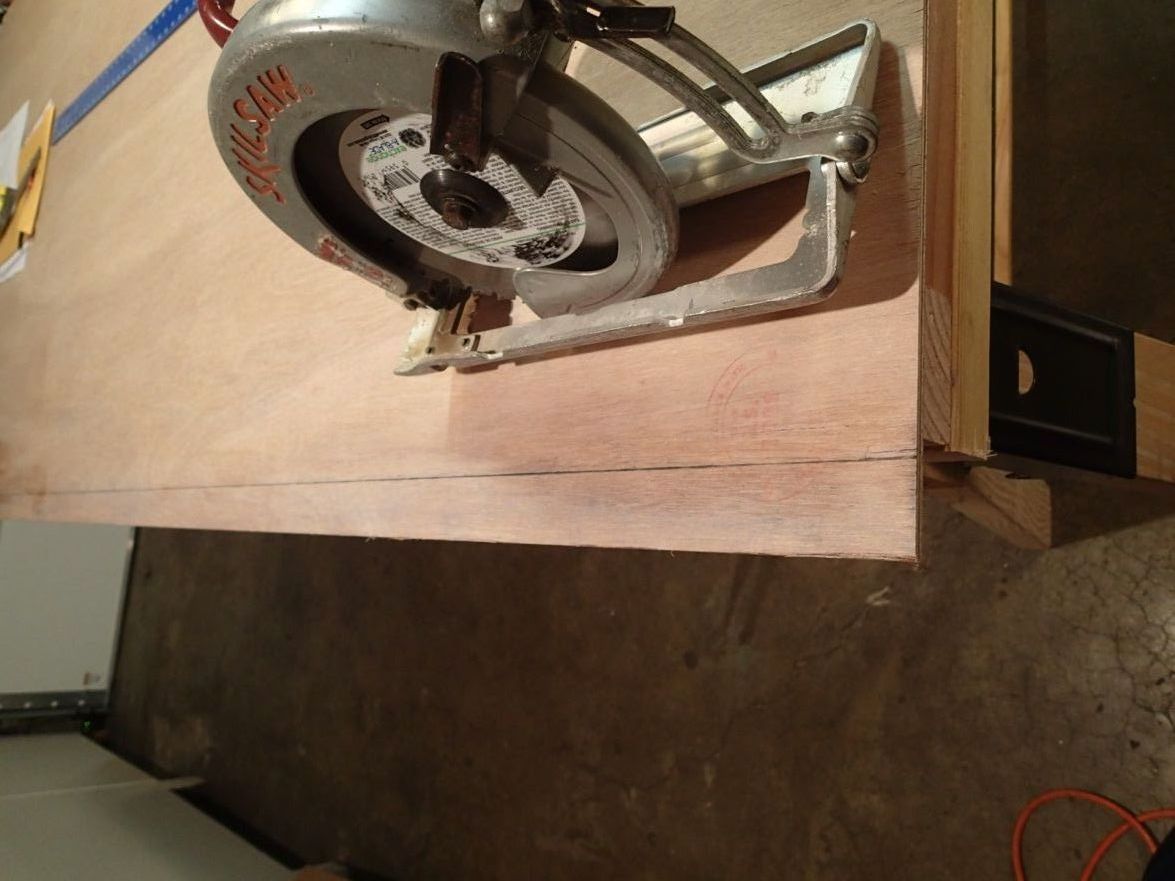
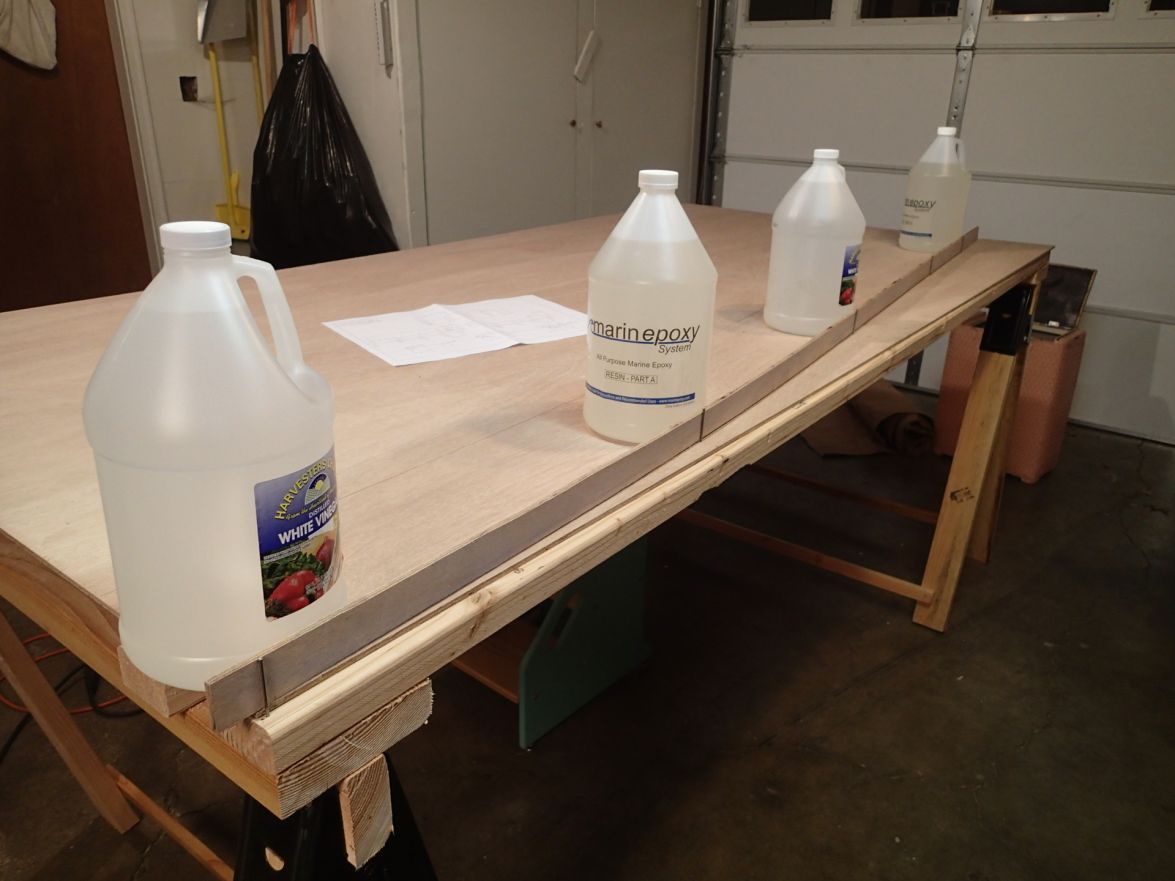
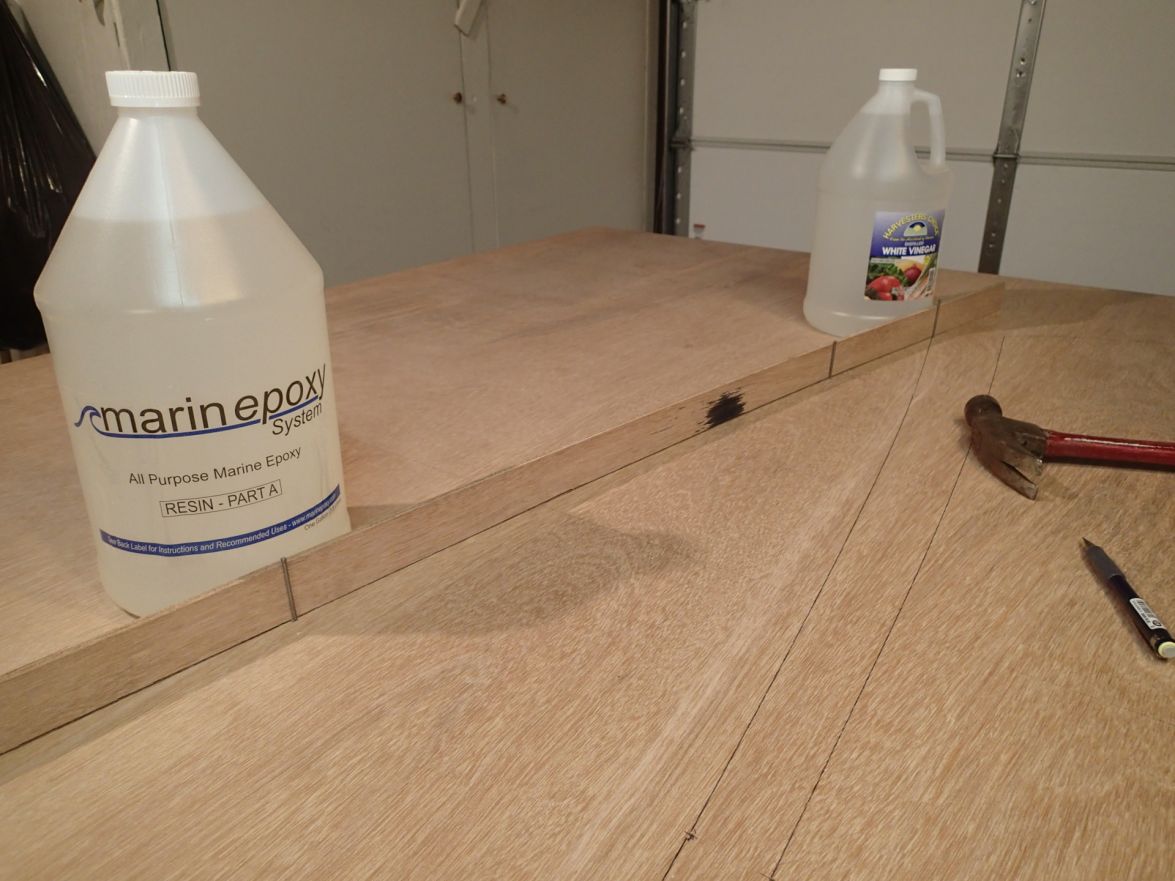
Well, last night I made first saw dust from that beautiful ply wood I am using. First was making a batten for drawing my curves. At first I was planning on using some 1/8" flat bar (steel) I had laying around, but then I realized that it had some weird bends in it, so I decided to sacrifice 1.5" of my plywood instead. Here is my batten marked out before my first cut:
Now is my new batten in action. I saw Cracker Larry using this method for locating a batten, clamped triangles. My biggest complaint with this method was that the triangles were so thin that the batten got shoved over easily.
I then had to draw a 1" camber on a 9" baseline. This curve was too tight for my plywood batten. I tried a few items in my garage and settled on some 1/16" welding rod. I had to ditch the clamps and triangle method for nails since the rod kept pushing under the triangles.
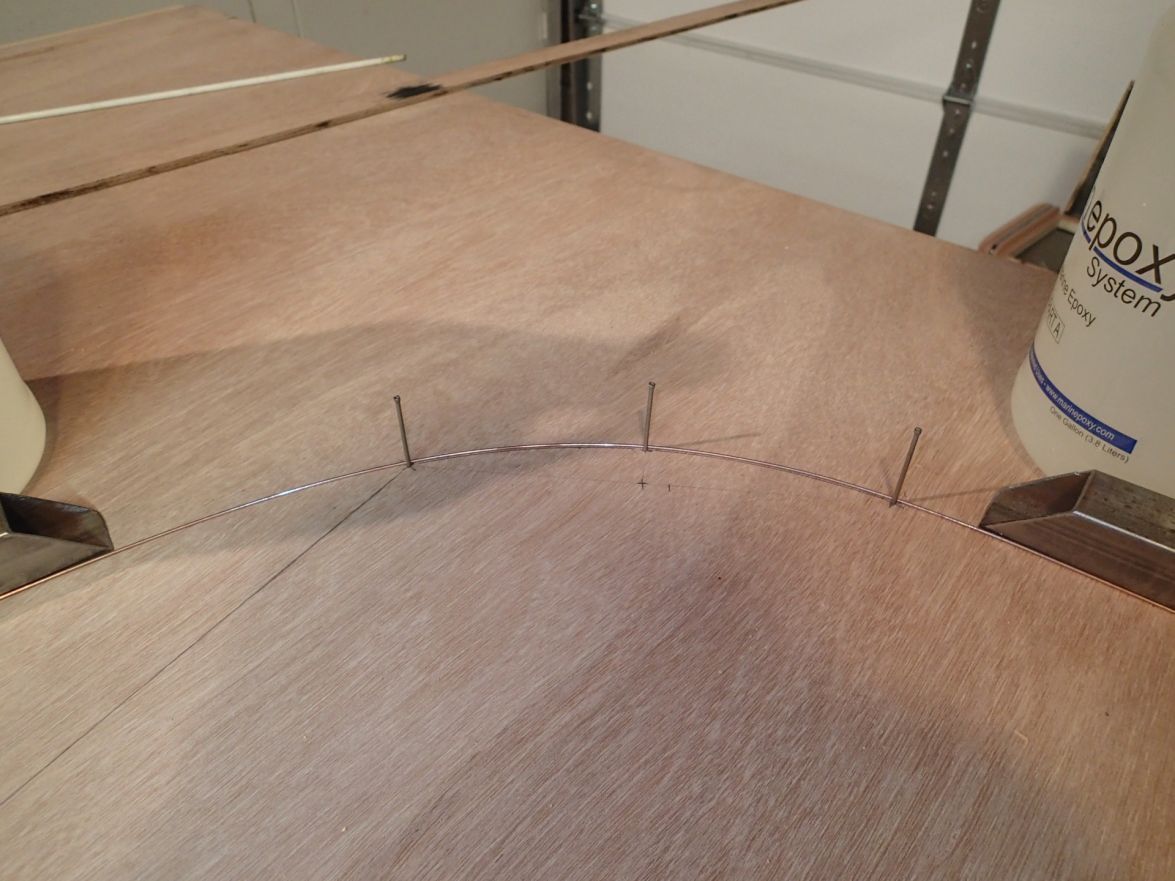
I finally drew my last curve using my plywood batten and nails. I think I'll use this method until I find a reason to not.

I used my worm drive circular saw for the long cuts and a jig saw on the camber. Here is my first panel.
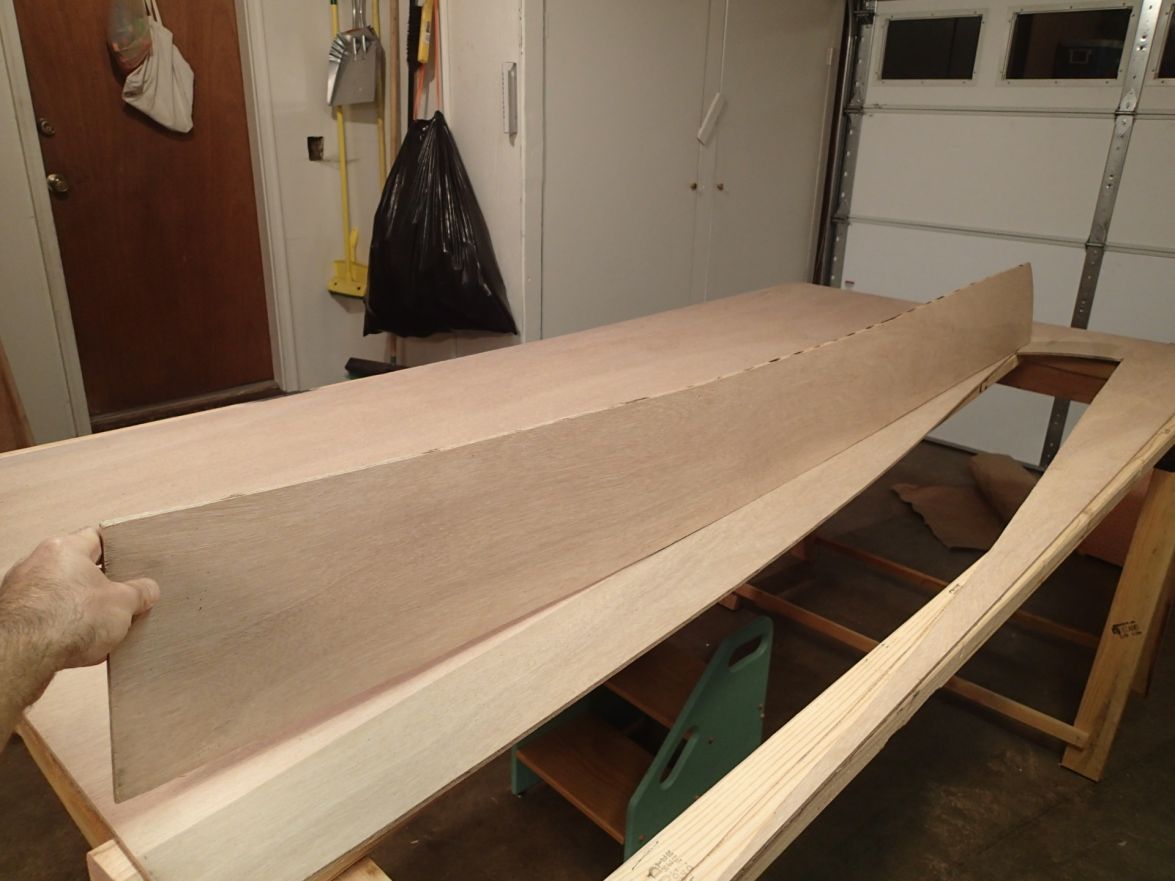
Now to copy this panel three times and I can move onto the next.
Re: HC14, Jefferson State
Posted: Fri Nov 22, 2013 9:06 am
by jacquesmm
Nice and pretty but such precision is not necessary. Do it only if you enjoy the process.
Re: HC14, Jefferson State
Posted: Fri Nov 22, 2013 11:18 am
by Vanagod
What is too precise, my methods or my documentation?
*chuckles*

My nature is to start too precise if I don't know what I am doing. Once I get a feel for what corners can be cut, I will start cutting them (pun not intended, but it works).
Re: HC14, Jefferson State
Posted: Fri Nov 22, 2013 11:47 am
by jacquesmm
It's very nice work but I don't want to scare away potential builders who have less skills.

Re: HC14, Jefferson State
Posted: Sun Nov 24, 2013 1:27 am
by Vanagod
On my last progress update I had finished cutting out my first panel of ten on this project. I enlisted some help on tracing/copying my first panel.
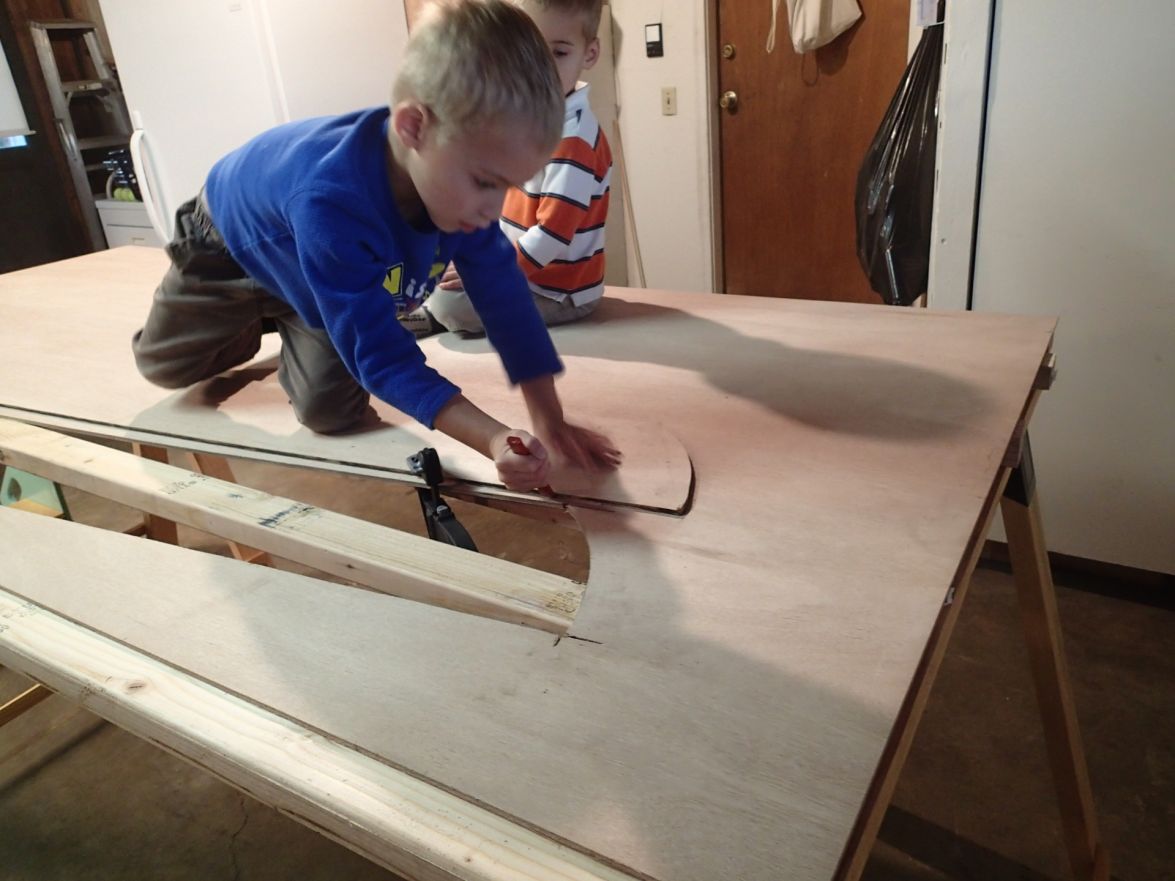
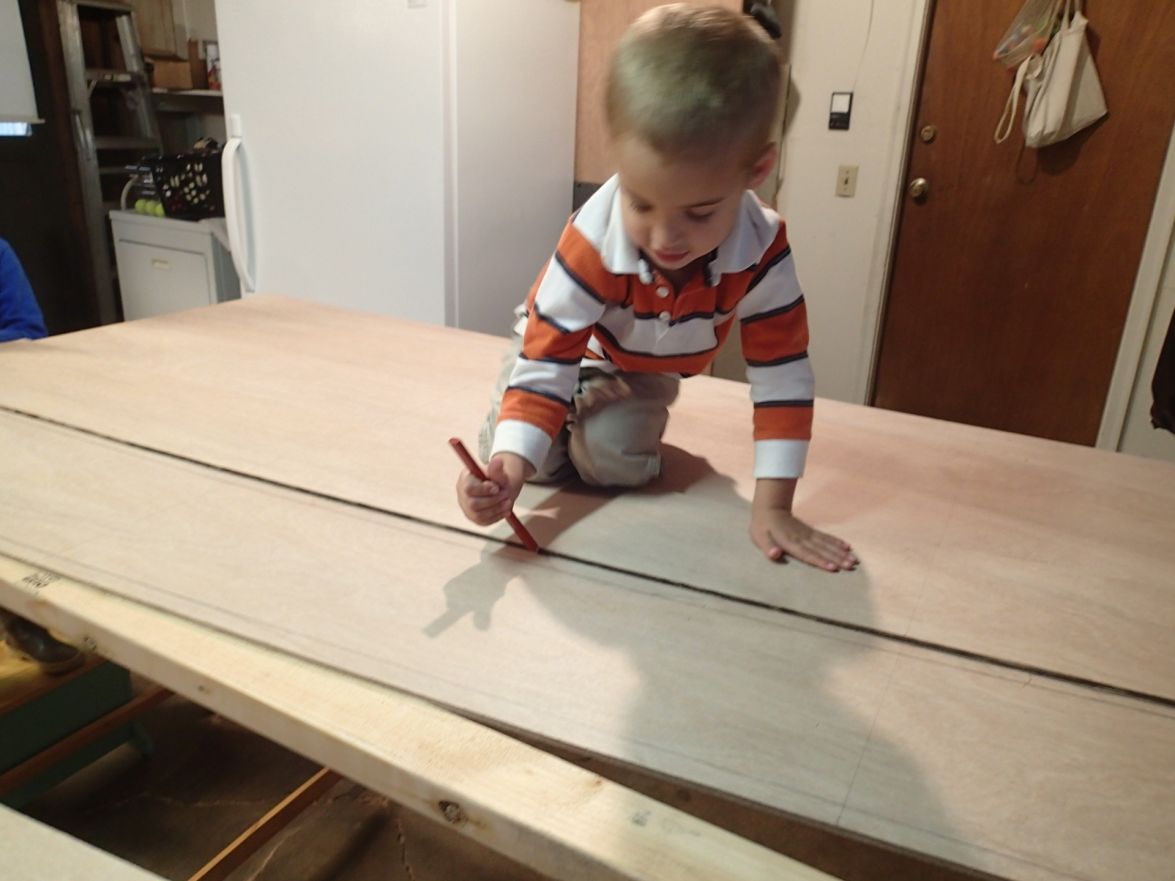
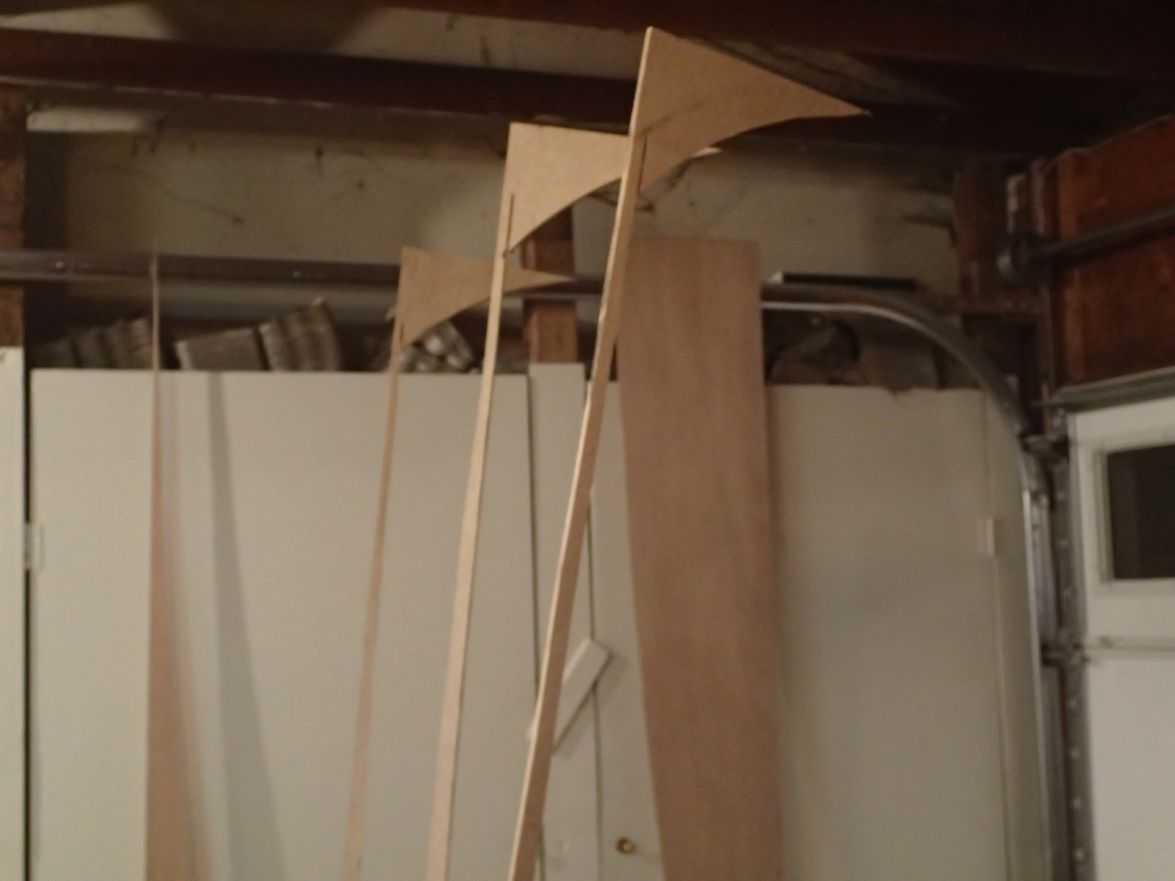
After my oldest traced out his panel, I realized that it was a little crowded up there [on the wood], so for the last two tracings I limited it to one boy at a time. My oldest got to do two and my middle got to do one. After cutting, my boys asked me why I made flags and what they would be used for. It turned out that the remnants did look like flags.
Then my helpers volunteered to help clean up...I didn't even have to ask!!

I finished out this evening drawing out the top panel and the bottom panel. I bought a new .9mm mechanical pencil to use instead of the contractors pencil I had been using. Talk about a much nicer experience.
Looking a the nesting in the plans I realized that there was a bit of space of "wasted wood" and that I could fit an extra top panel on this sheet with a little jiggering. So I offset the dimensions on the bottom plate to skooch it closer to the top panel. All of the symmetrical parts in this boat makes things go easily. There are only 3 unique panels, everything else just needs trace/copied.
Next step, finish cutting out all of my panels and rub rails. Then clear the garage so I can put winter tires on our family hauler.
Re: HC14, Jefferson State
Posted: Fri Jan 03, 2014 1:01 am
by Vanagod
A bit has happened since my last post. I got all of my wood cut out, with lots left over for breasthooks, seats and other goodies for later. Here is my stack of un-glued wood.
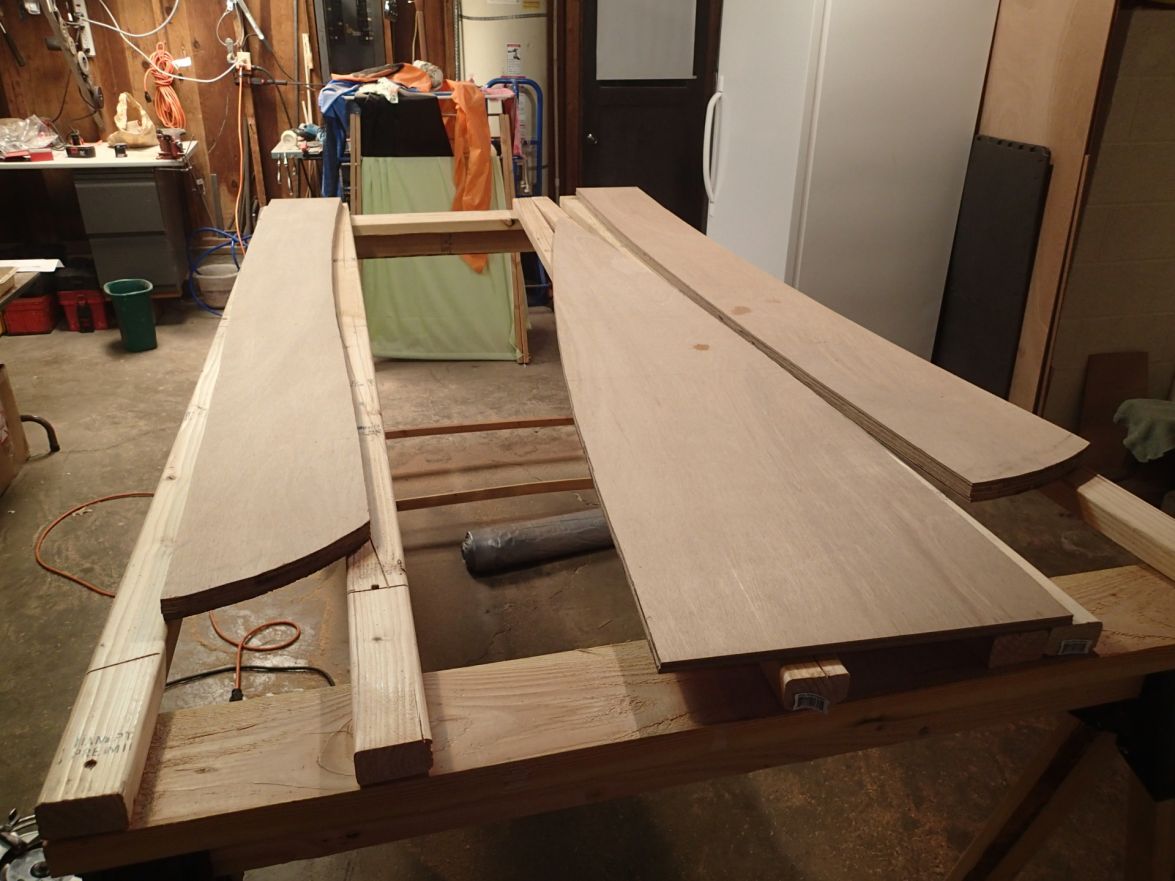
Then, I started glueing. I did the bottom panel first, and coated the whole thing since I had so much epoxy left over, and I was jumping the gun since I didn't fully read the instructions. Then I realized that I should probably epoxy-paint everything after the boat is assembled. So the chine panels and top panels are only epoxied at the splices.

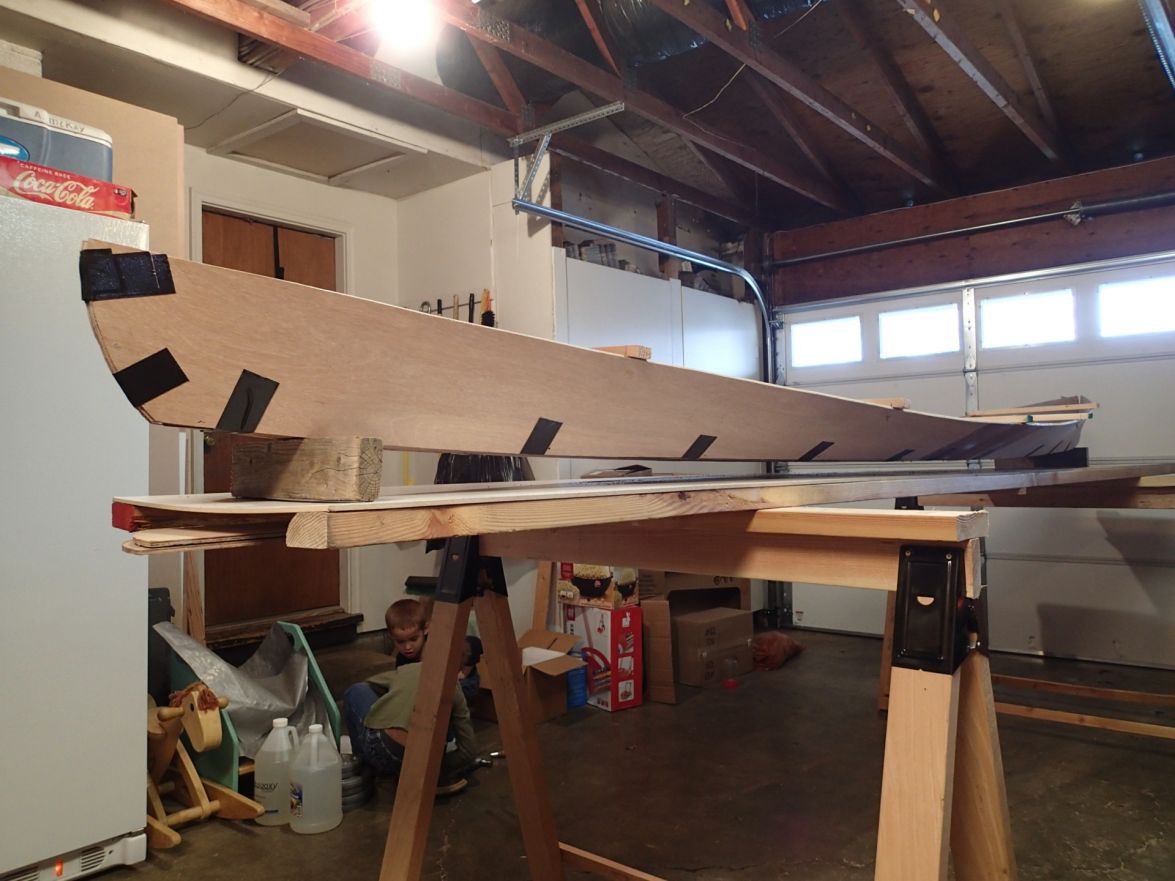
Note how the ends are overhanging my 8 foot table. When these were spliced, they were supported by two 8 foot boards each, not a table. Not a good idea. I think that led to my problems later. When I was doing my splices, I had the boards weighed down, but not directly over the splice, so they did not cure fair to each other. Then I went to stitch the chine panels to the bottom panel, just to find that the splices were far from fair, and might even be weak. The below thread covered that debacle. At least it didn't cost me too many hours.
http://forums.bateau2.com/viewtopic.php?f=1&t=58306
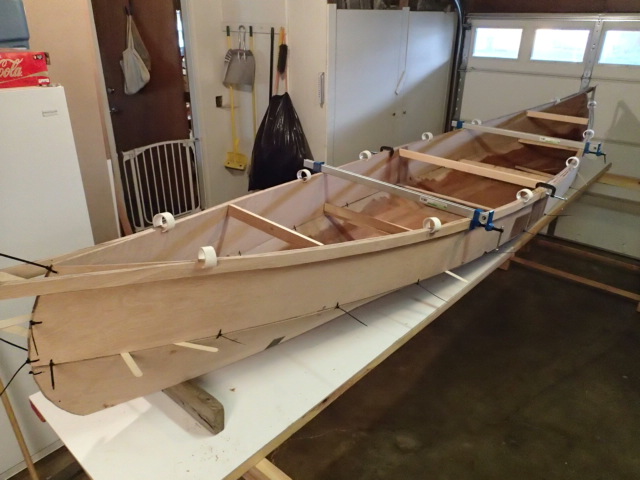
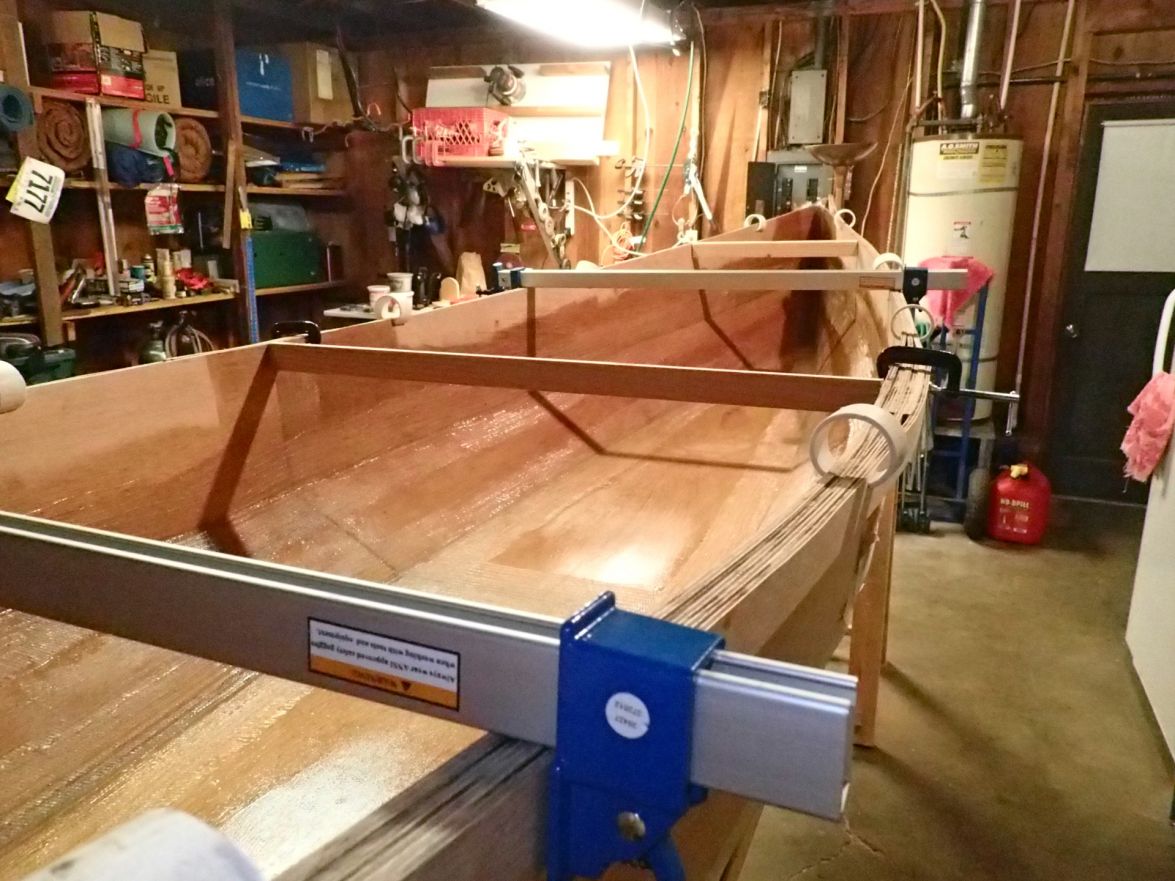
Well, I respliced the chine panels (I haven't inspected the top panels yet), clamping them with some weights, a piece of scrap plywood and a scrap of tarp to separate the plywood from the curing epoxy. Sorry, no pictures. I restitched the panels (went much faster this time) and installed the spreaders. Much fairer this time. I also built a 14' table to support the whole thing. The table was about $30 of materials. Two 2"x4"x14' boards and a sheet of '1/4" Melamine'. Its nice having a table that epoxy doesn't stick to.
Installing the spreaders.
And laying the tape before the fillets are made.

This weekend I plan on filleting and glassing both chines on the interior. I'll probably let the garage get cool to give me a little more pot life and then crank up the propane heater to encourage curing once the glass is laid. It sure is encouraging to see this come together...little by little.
Re: HC14, Jefferson State
Posted: Fri Jan 03, 2014 7:23 pm
by Vanagod
Question:
How far into the bows should I run the chine glass?

Re: HC14, Jefferson State
Posted: Sat Jan 04, 2014 11:52 am
by jacquesmm
Overlap all panel seams by at least 2", 4 or 6 is better.
Re: HC14, Jefferson State
Posted: Sun Jan 05, 2014 1:16 am
by Vanagod
While filleting today, I was fighting two issues and I was wondering how you all attack them:
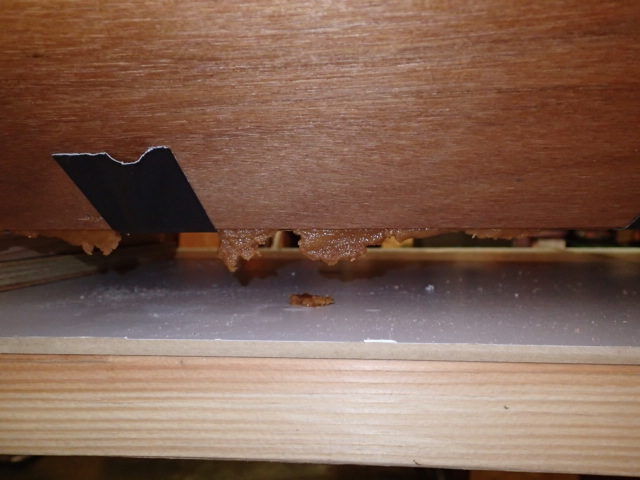
1. When there are 1/4" gaps, how do you keep the putty from sagging out of the fillet?
2. When scraping the fillet into place, I am pushing a large amount of putty through the gaps and to the table below. Do you all just live with this, or is there an easy solution other than duct-taping 100% of the seams?
I finished filleting and taping the inside of the bottom panel to the chine panels today. Pictures will be posted tomorrow. It looks all right, and I only see a couple small air pockets between the glass and fillet. I can post pictures of those too, see if you all think I should grind, fill and reglass; but I am tempted to pretend they aren't there since this is not a high performance planing hull.
I tried using Gorilla tape for stitches (tape then remove zip ties) to hold everything together for filleting, and it worked OK, but there was too much force in the bows and I had to revert to zip ties there.
I am definitely glad I am starting with a canoe before I go on to bigger and greater things.
Re: HC14, Jefferson State
Posted: Sun Jan 05, 2014 8:56 pm
by Vanagod
Now I have the top panels stitched on...well sort of. Getting the top panels lines up with the chine panels is proving tricky. Then again, I am not sure how well they are supposed to be aligned. Right now I am thinking of using some 1x2 that I have sitting around in the shop to precisely spread the top panels at their top and bottom edges.
Re: HC14, Jefferson State
Posted: Mon Jan 06, 2014 5:56 pm
by wadestep
Vanagod wrote:While filleting today, I was fighting two issues and I was wondering how you all attack them:
1. When there are 1/4" gaps, how do you keep the putty from sagging out of the fillet?
2. When scraping the fillet into place, I am pushing a large amount of putty through the gaps and to the table below. Do you all just live with this, or is there an easy solution other than duct-taping 100% of the seams?
I am definitely glad I am starting with a canoe before I go on to bigger and greater things.
1) Duct tape
2) Duct tape
that's the short answers. actually, for 2) if more than just a few drops are getting out, then I duct tape the gaps. However, If possible in the construction sequence, I prefer to tape the inside joints first, so I can later go back with a grinder on the outside joints. It's hard to get the grinder to smooth out the inside joints due to the angle. For 1), there's nothing quite as helpful as duct tape.
wade
Re: HC14, Jefferson State
Posted: Mon Jan 06, 2014 6:36 pm
by Vanagod
I'm going to try out masking tape instead of duct tape, and don't use Gorilla tape, it tears the wood up.

I'll try to get the latest pictures up tonight. It looks like a canoe now.
Re: HC14, Jefferson State
Posted: Mon Jan 06, 2014 7:43 pm
by Dienster
Vanagod wrote:I'm going to try out masking tape instead of duct tape, and don't use Gorilla tape, it tears the wood up.
I'll try to get the latest pictures up tonight. It looks like a canoe now.
I used painters masking tape, the blue stuff, but it probably wasn't any better than regular masking tape.
Good luck. I tried to get away without it and it worked where I had tight gaps ~1/16-1/8 but any larger it sagged.
Re: HC14, Jefferson State
Posted: Tue Jan 07, 2014 12:10 am
by Vanagod
And the pictures I promised, finally. I decided to use tape for stitches and cut out the zip ties so that I could have a clean path to fillet down. I found that the Gorilla tape did not hold on the bows to well, but every where else it did OK. In the future I will likely zip tie, then masking tape the whole length of the seam. If the tape is not strong enough, I will putty spot weld. Sagging is annoying. Here is my gorilla tape job.
After that, it was time to fillet, and fight the sagging putty.
The close side in this picture is already taped on the inside, and I am laying down the tape on the other side.
Here both chines are taped. Now to let the epoxy cure.
I don't know is it is this way with medium or slow hardener, but with the fast hardener, once it starts to 'kick', and I can feel it warm up, just set it aside and start a new batch. I read somebody's post in the past that if you feel it start to kick, pour it out fast and spread it around so cool it off and slow the reaction. I could not spread it out hardly at all, so I have runs that will need sanded down later.
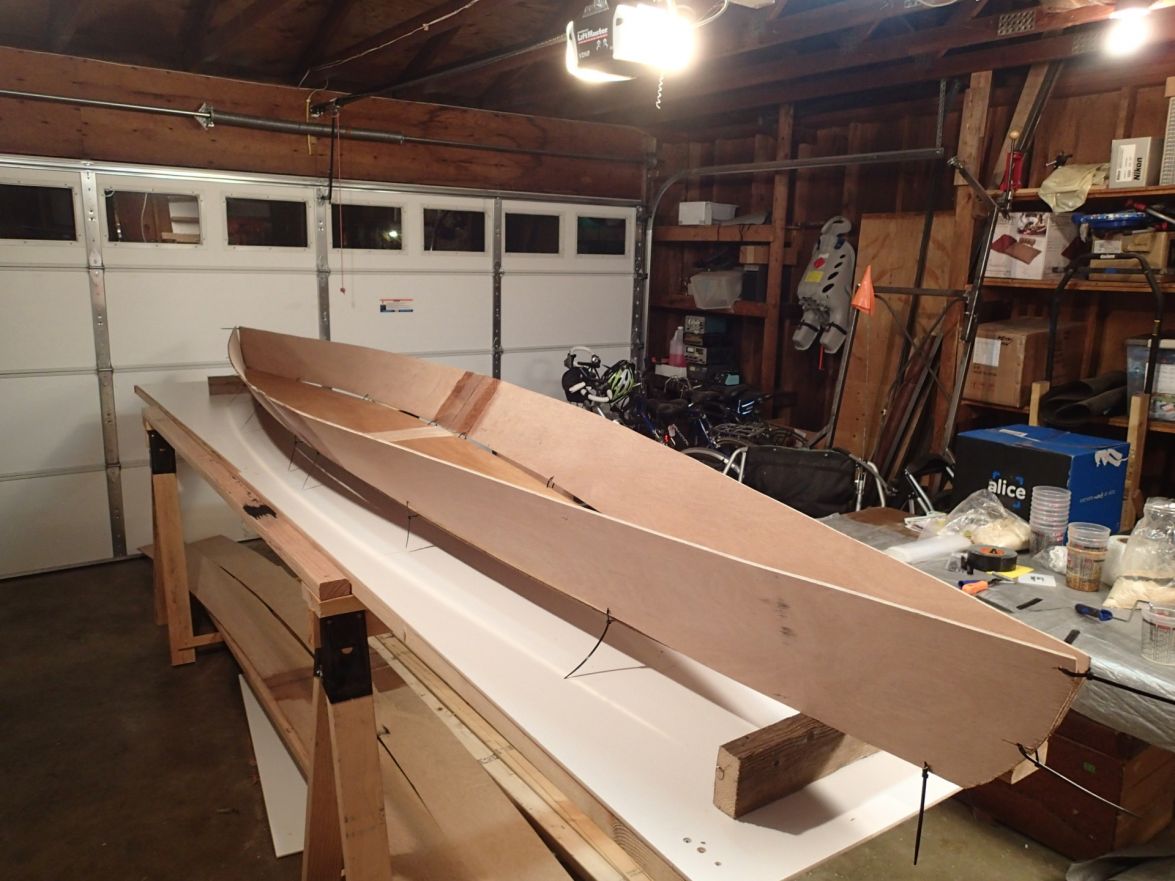
Finally, I stitched on the top panels. They still need some fine positioning work, but by golly, it looks canoe-ish.
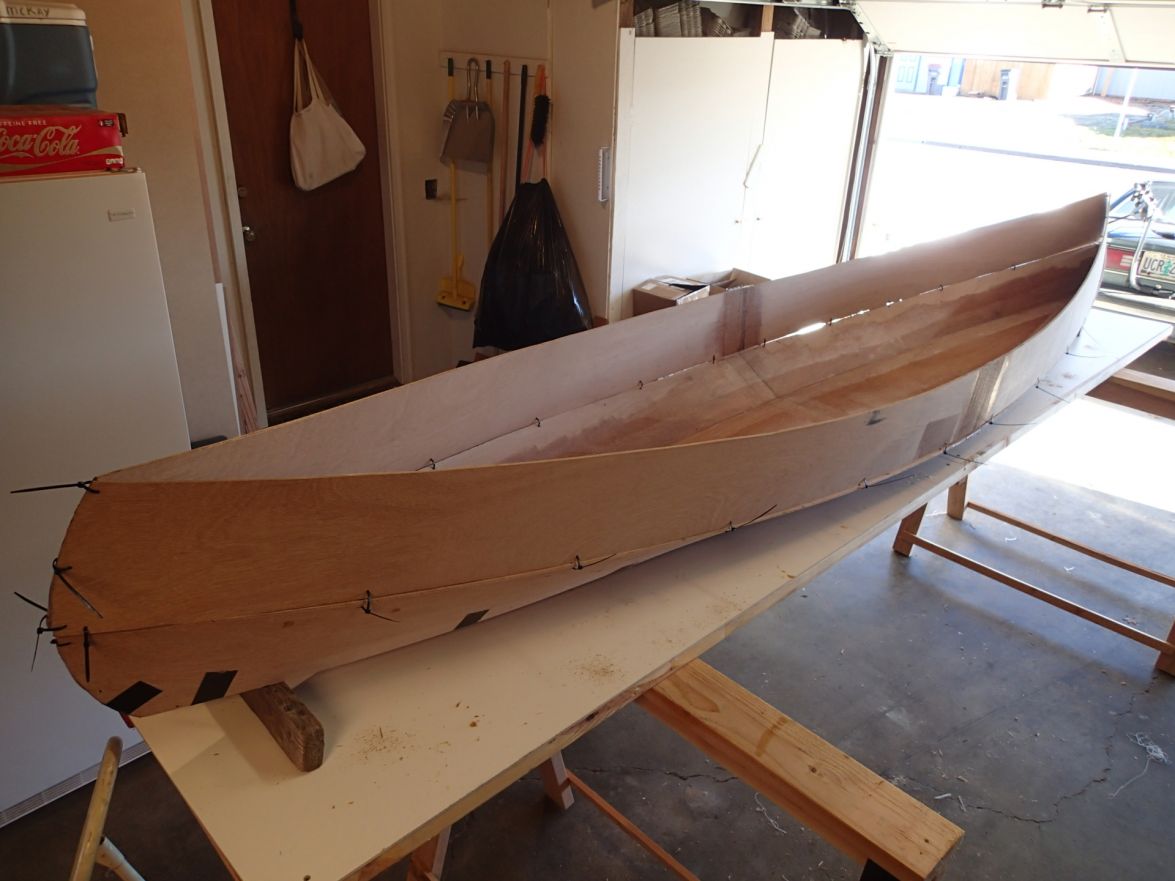
My plan for the next few nights is to get the top panels positioned well, and then attack the upper chines and the bows this weekend.
I wonder if I did this again, if I could stitch all of the panels together without glassing, and then do all of the inside glass work in one day. Not sure it would be worth it unless I was doing a production line.
Re: HC14, Jefferson State
Posted: Tue Jan 07, 2014 8:47 am
by pee wee
Vanagod wrote:
I don't know is it is this way with medium or slow hardener, but with the fast hardener, once it starts to 'kick', and I can feel it warm up, just set it aside and start a new batch. I read somebody's post in the past that if you feel it start to kick, pour it out fast and spread it around so cool it off and slow the reaction.
I agree that once the epoxy starts to kick you can't do much with it. I have heard and practice the advice to get it out of the mixing pot as soon as it is mixed and that gives me more time to work. I find that if you add fillers to the mix it will kick faster, too. I use disposable paint tray liners, but I've seen a number of things used to receive the mixed epoxy- packing tape on cardboard will work (for thick mixes). Spread it out to keep it cool, and you will get more working time. This applies to all the hardener speeds.
Re: HC14, Jefferson State
Posted: Mon Feb 17, 2014 12:31 am
by Vanagod
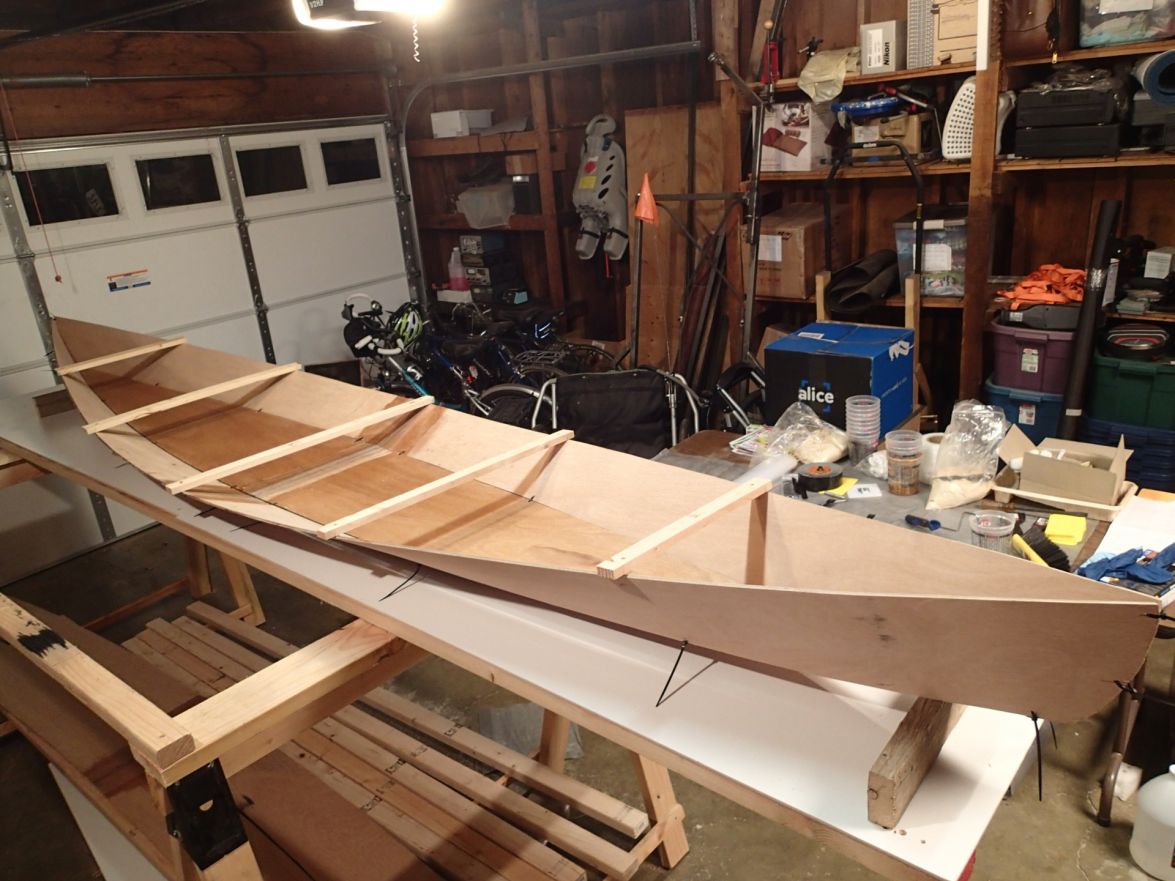
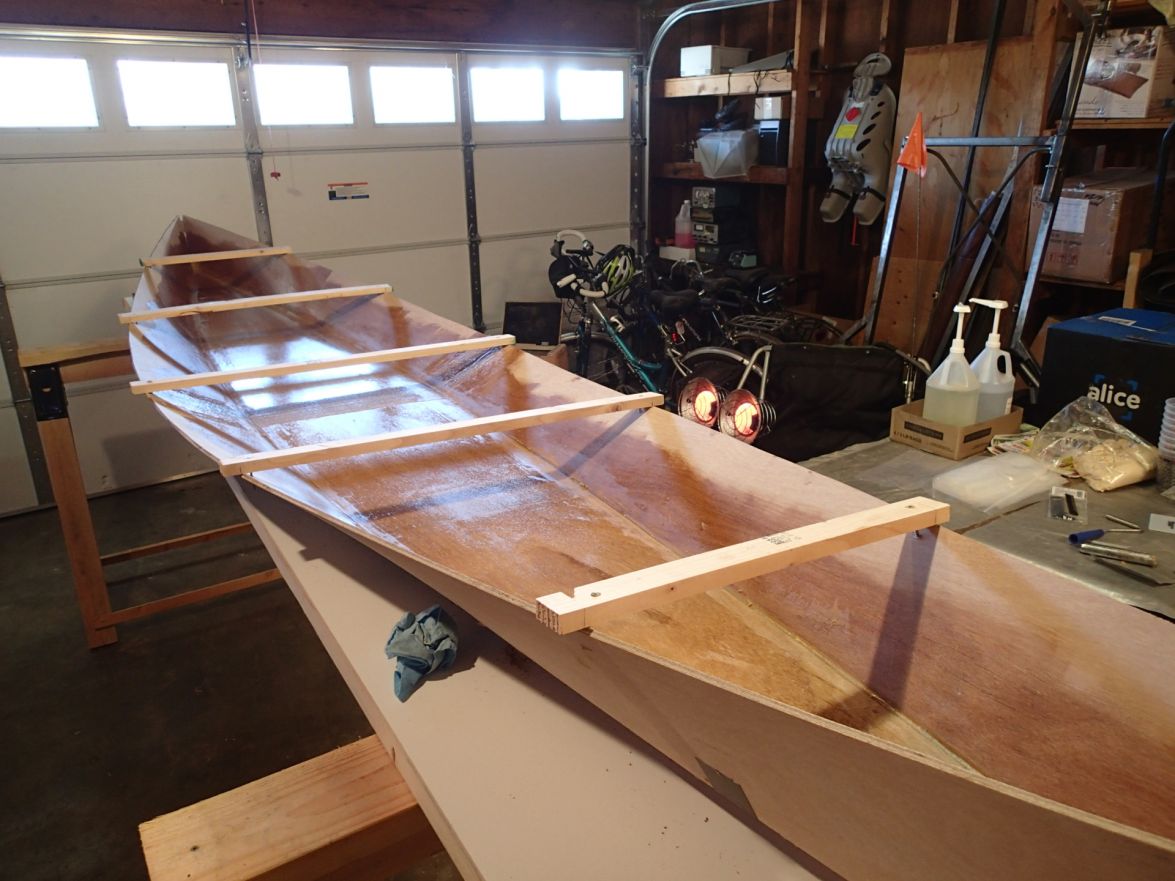
It has been a while since I last updated, but I have been making some good progress. Where we last left off I had just started stitching the top panels on. Below is it stitched with tongue depressors for setting the gap.
Then I tack welded it together.

And masking taped the chine so that I wouldn't get putty sag like I did before.
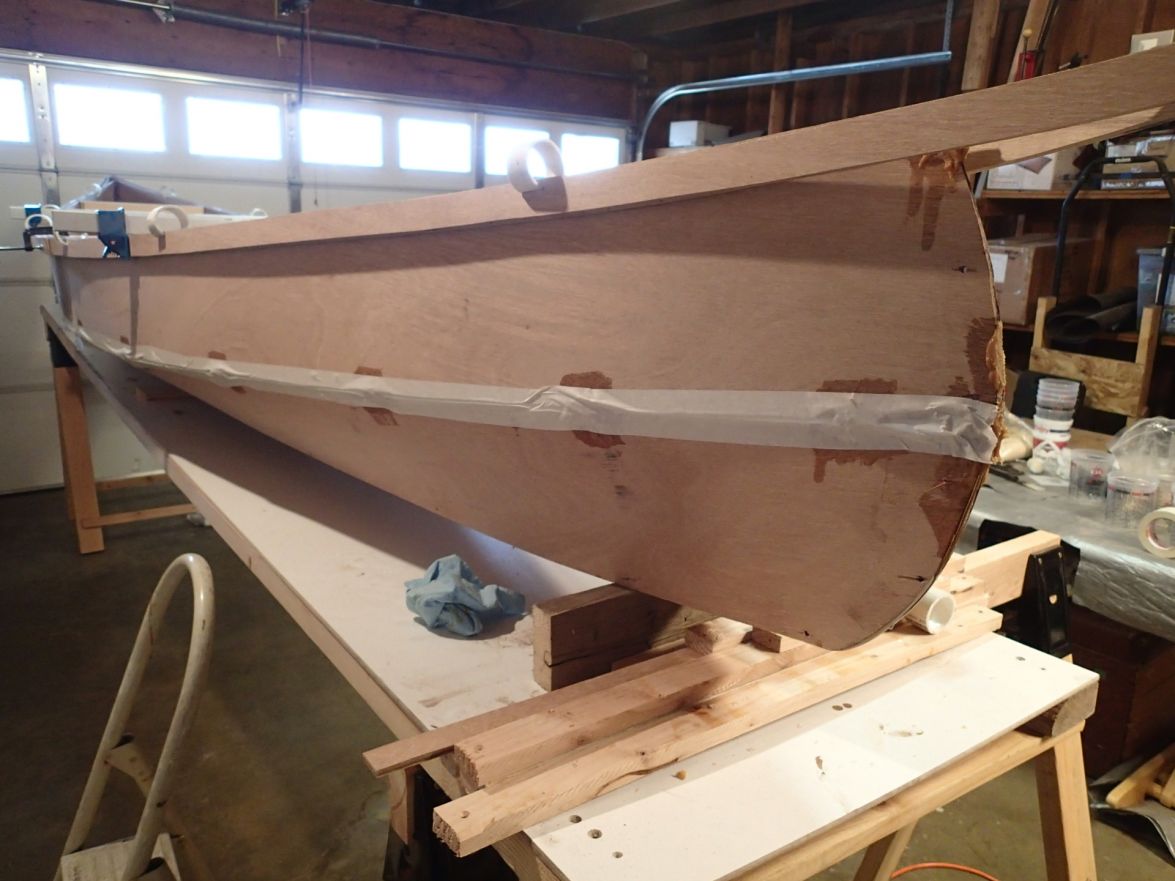
Here is one of my inside bow fillets. This is one of those marathon wet-on-wet days where you have to ignore other things to get the job done. I used some 1.125" or 1.25" OD bicycle frame tube I had laying around in the shop for shaping the bow chine. I think I will buy some PVC pipe of proper OD next time.

With much help from my wife, we finished glassing the inside chines in one day. It took me until my 3rd chine to get the hang of quickly filleting with the corner of my squeegee (obtained from Boat Builder Central). Again, I am glad I am making this canoe before tackling a bigger, more expensive project.
You will see the rub rails already clamped on. I was having issues with the spreaders at station B putting a reverse bend in the wood. I had to clamp all three battens layers on in order to flatten out the curve and make it look nice. I ended up cutting my rub rail battens on a curve instead of torturing a straight batten. I tried torturing a 1.5" straight batten, but it was not fun. Not fun to the point I went through the effort of calculating my own offsets. I took the offsets from the top panel's top edge from the plans, drew that curve, extended it from both ends, and then offset it by 1.5". I can give the numbers to anybody that cares, I still have them.
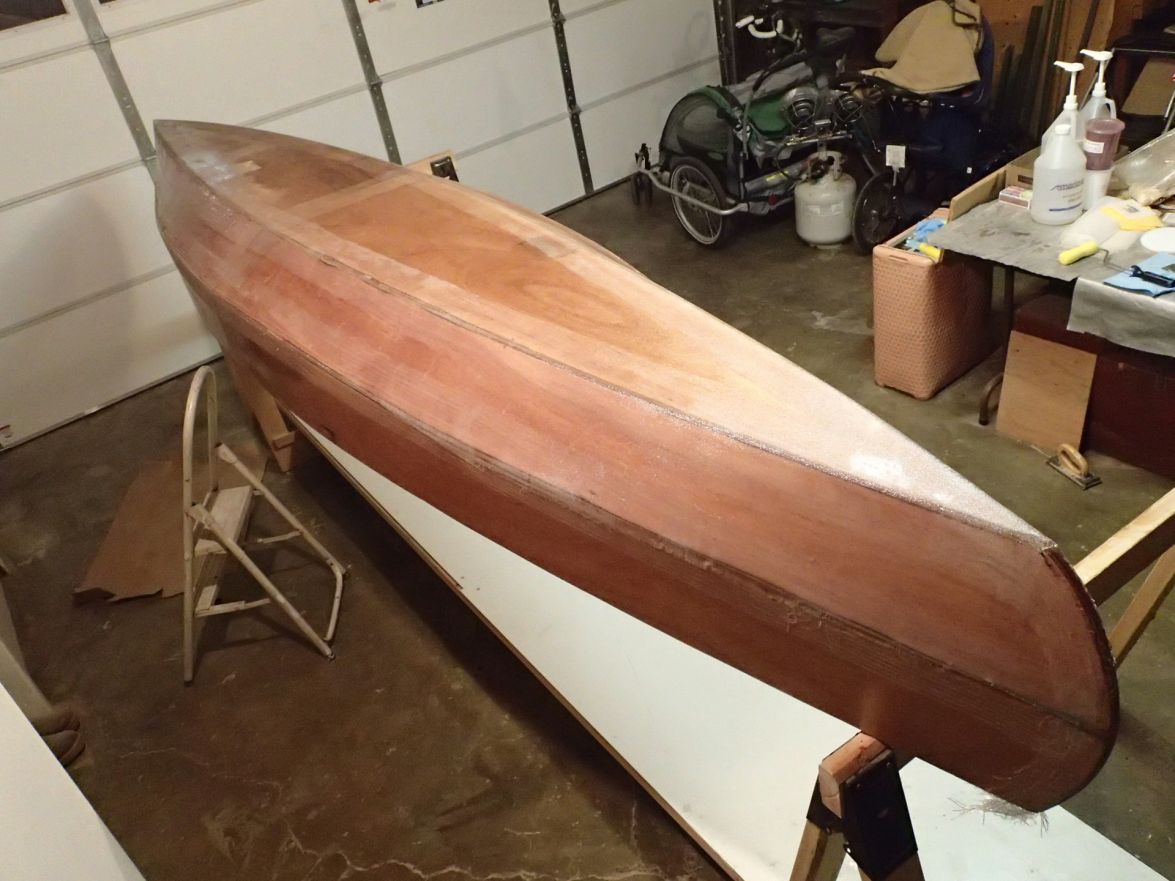
Next step, Prepare for the outside glass work. Here is my oldest son removing the masking tape.
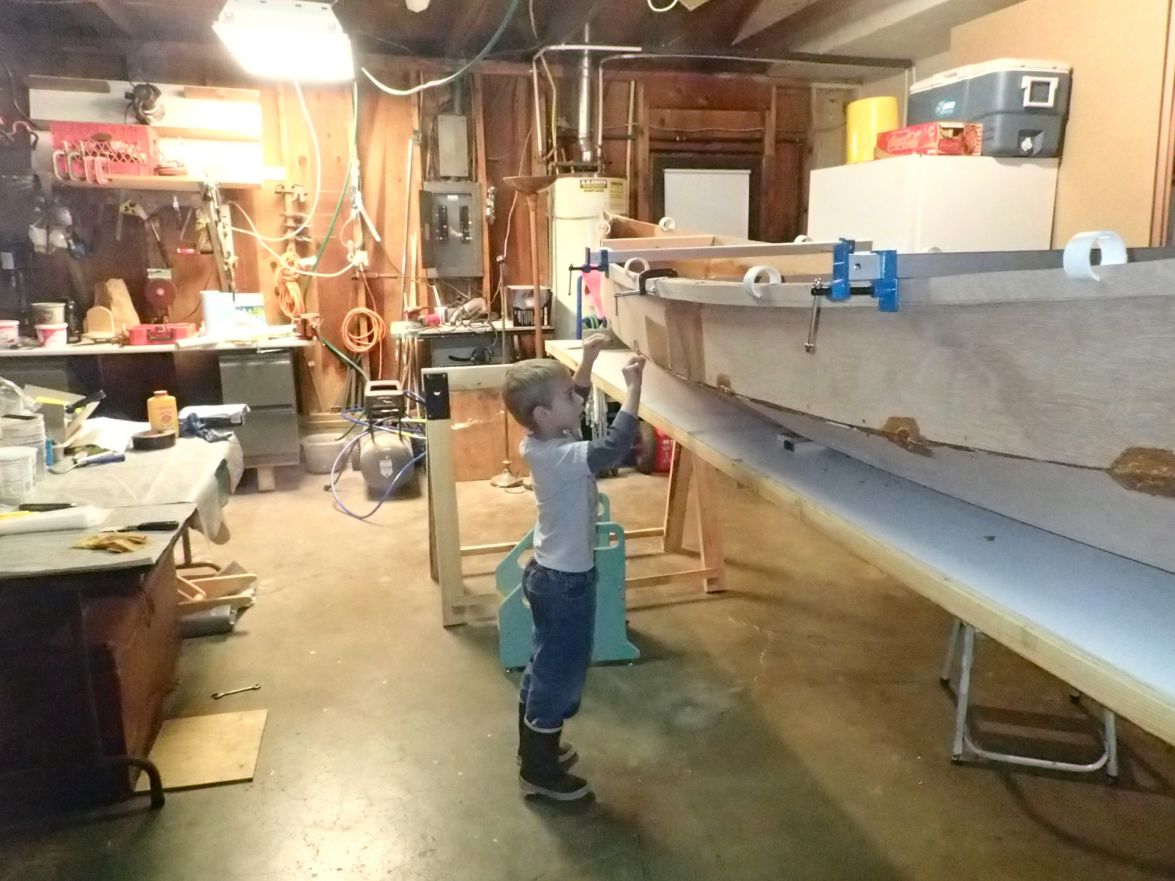
And the canoe with the masking tape removed.
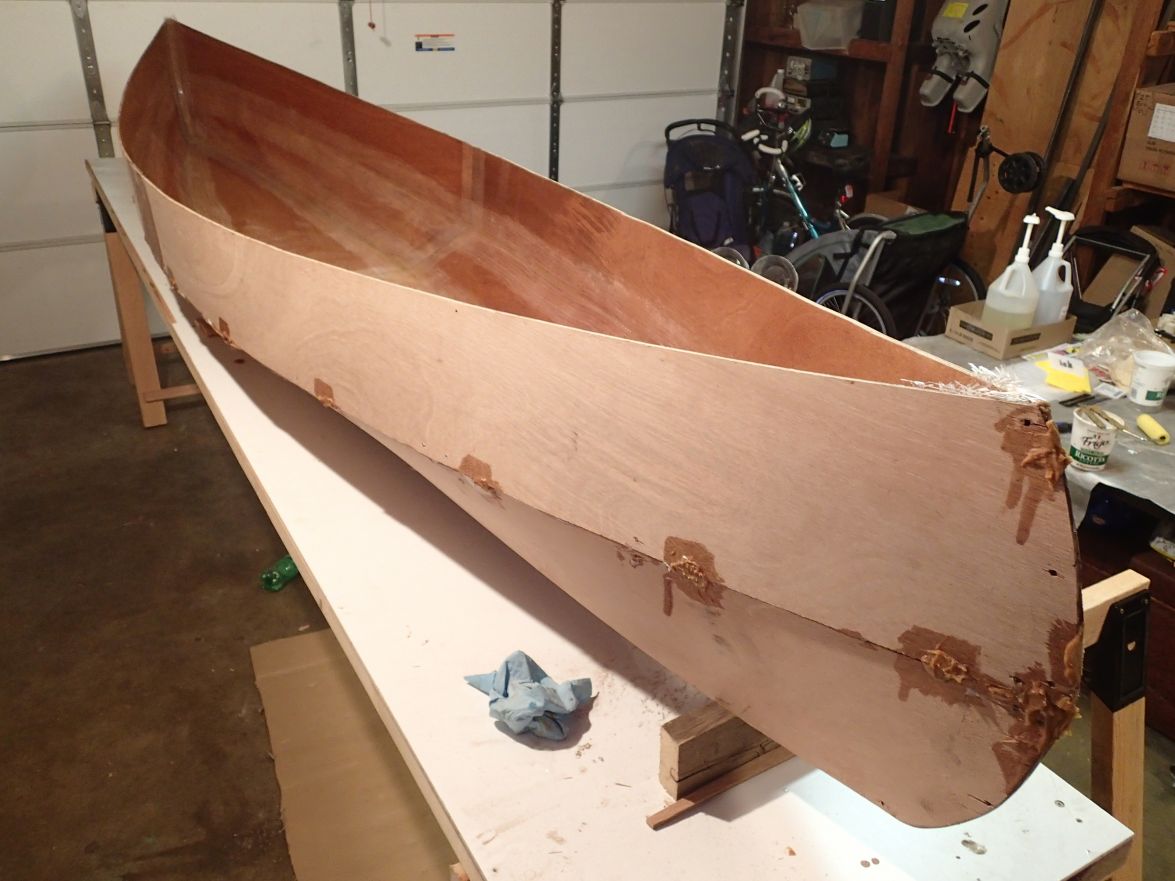
I then filled in the outsides of the chines with more putty and sanded the excess (and tack welds) off with a hand held disk sander. It was much faster than my random orbit sander. I then faired in with my random orbit sander. That made a lot of dust in the shop.
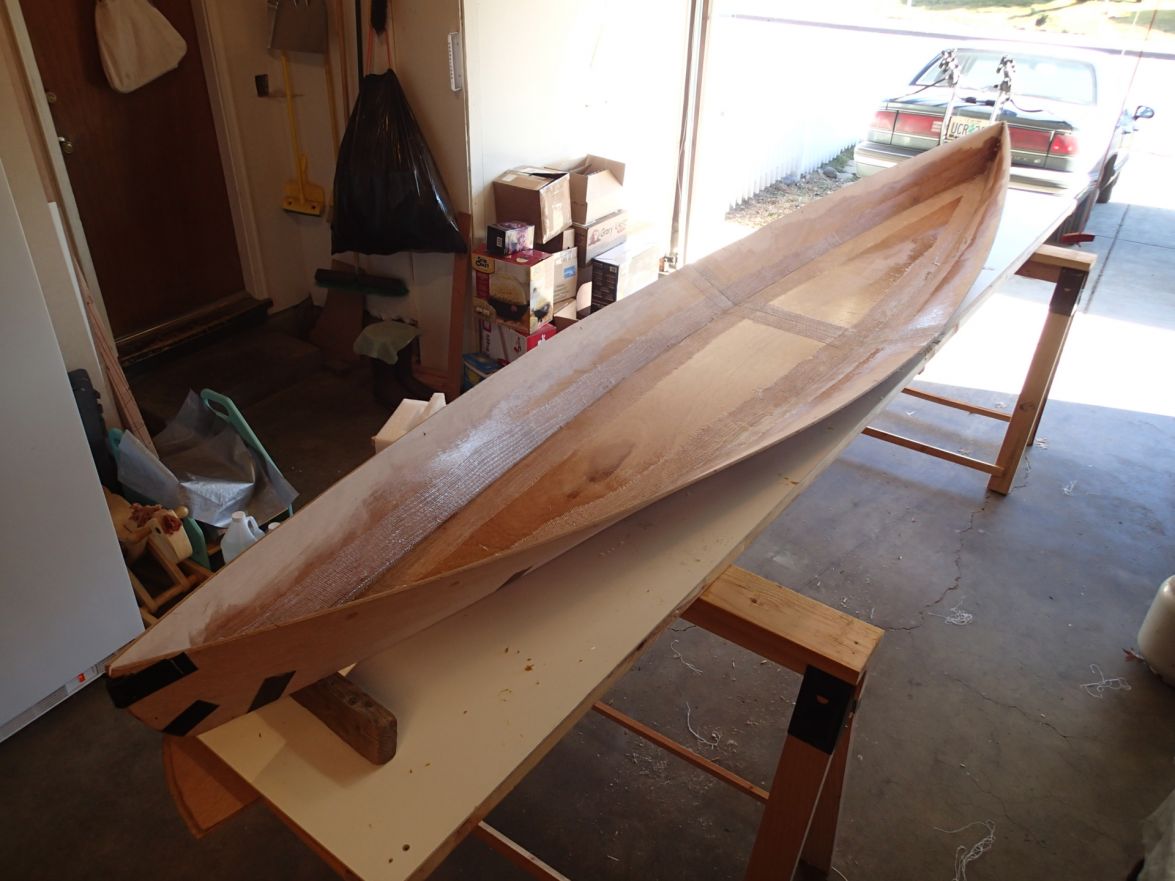
Here are my older two boys helping epoxy prime the outside of the canoe before we lay down the glass.
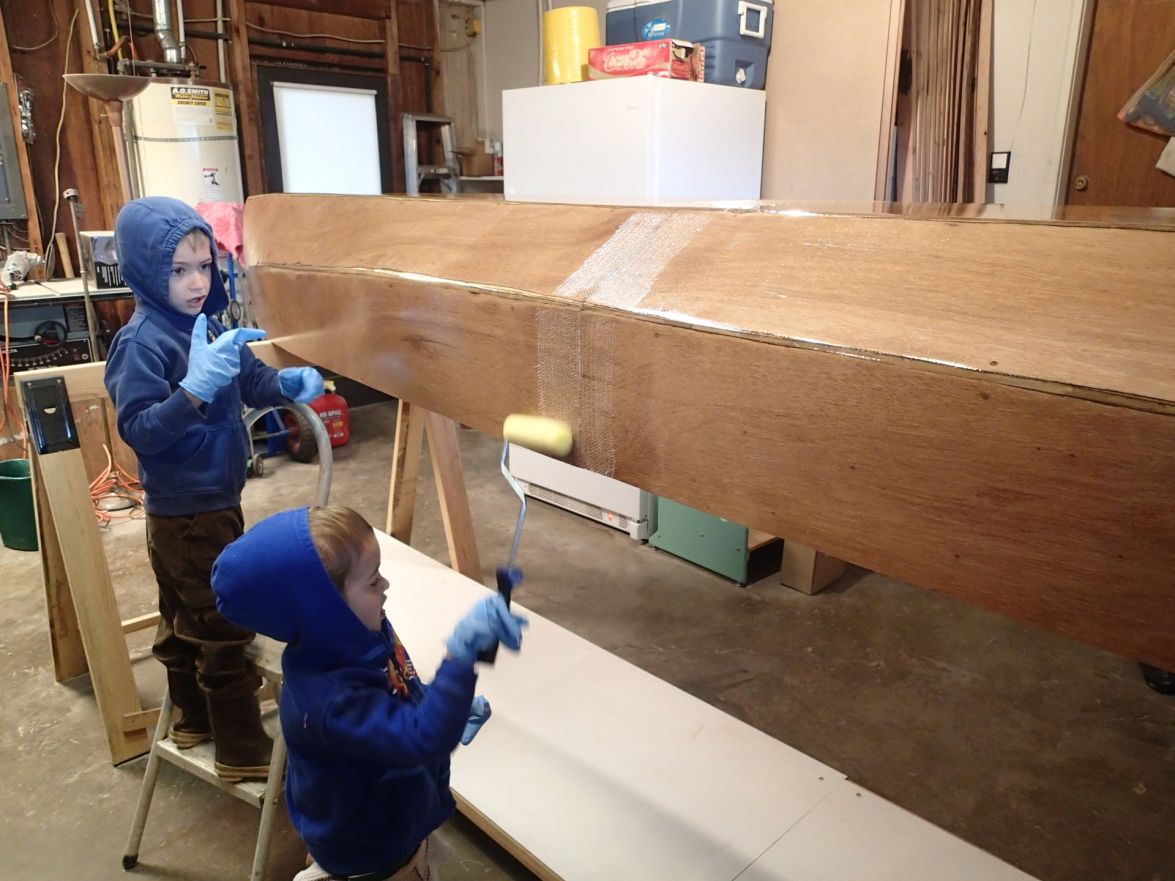
And her completely primed. Such a shame that I have to mar that beautiful bright finish with glass. Oh well.
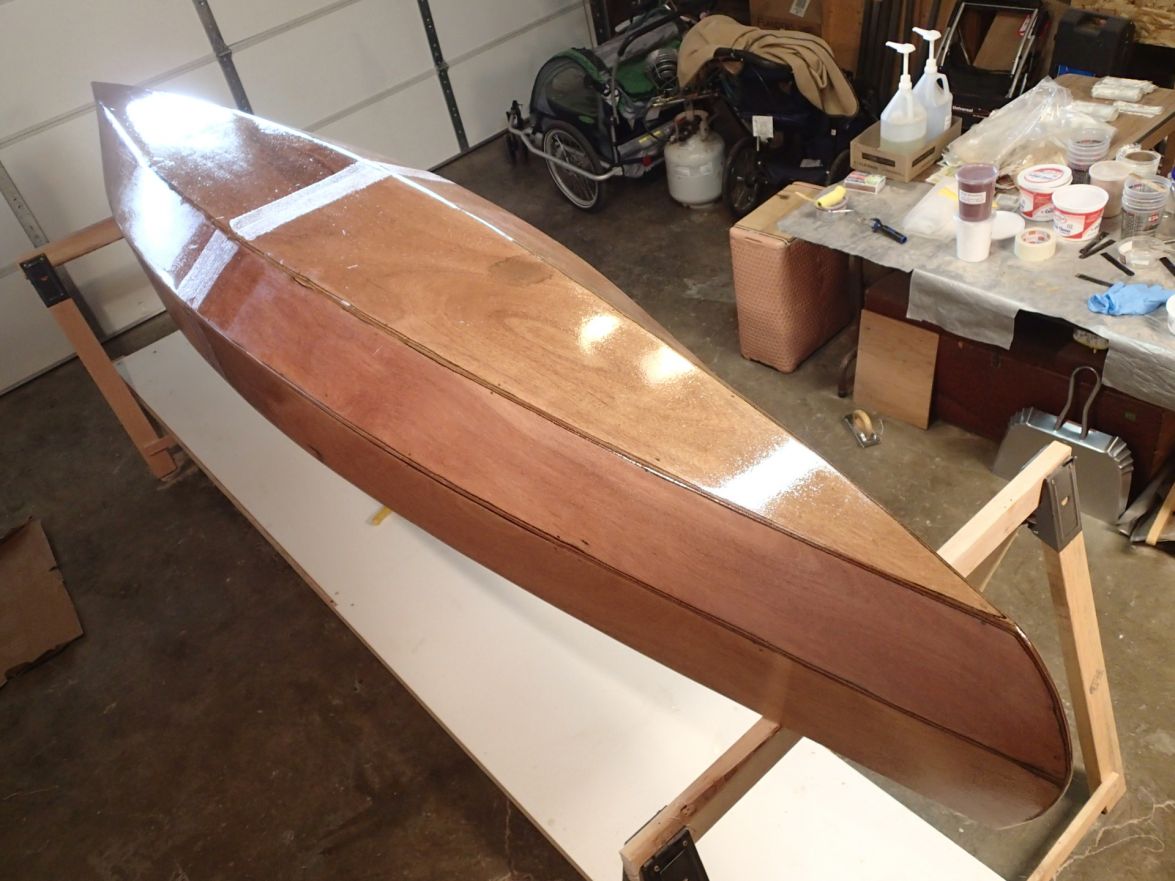
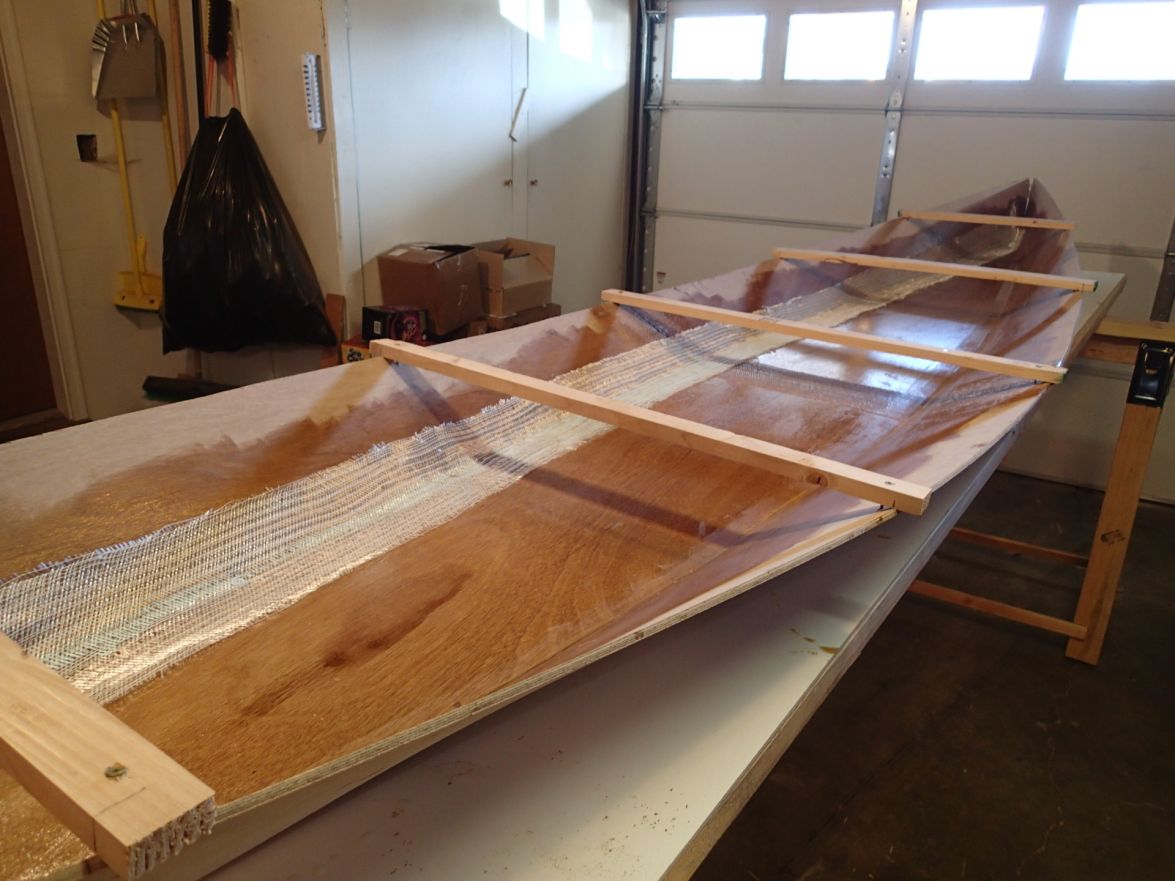
Here the chines are done being glassed. The bow glass is laid out. One problem I have when laying out glass tape on complex curves like that is that the individual longitudinal threads buckle up and will not lay down. I guess I will have to fair that out later.
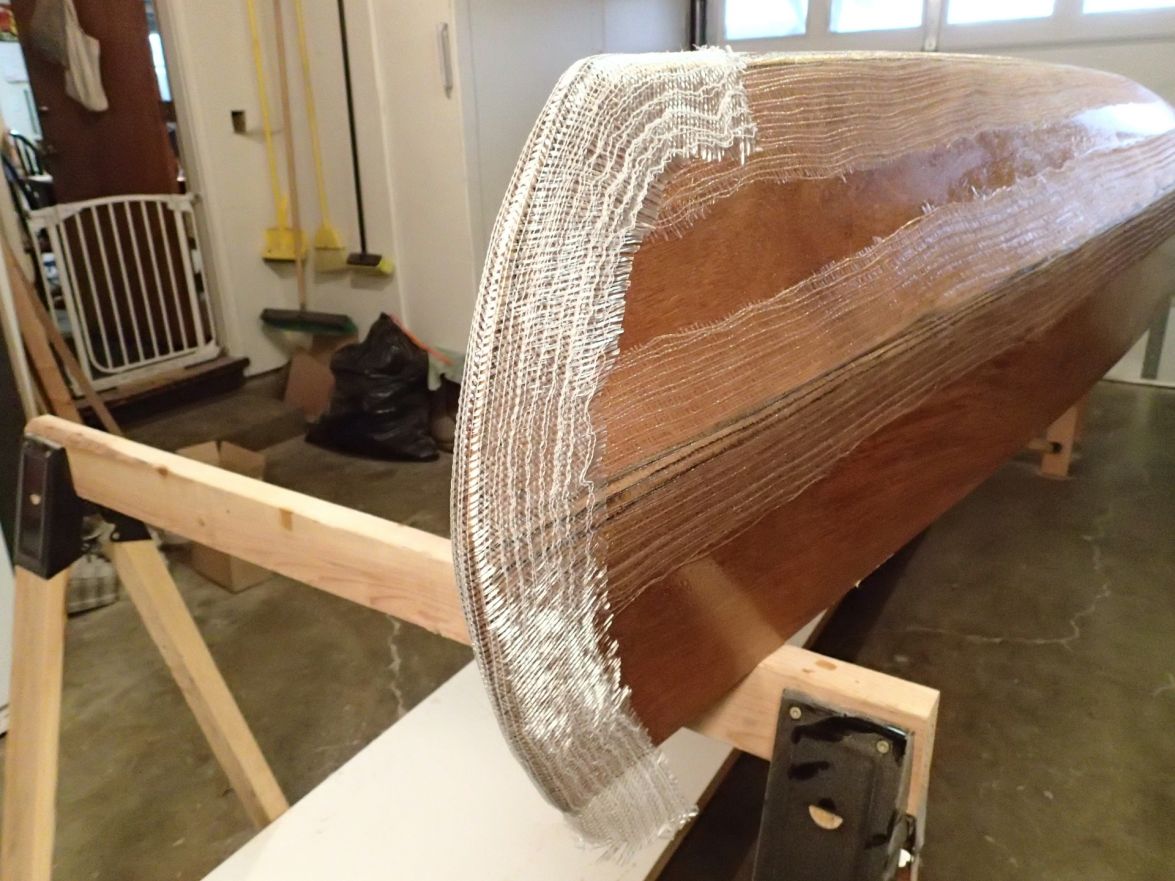
These next three pictures of all of the outside glass work being completed. I laid down some 6oz glass for abrasion protection. So yesterday yielded two bows, four chines and one sheet of woven fabric. And I had to open my second gallon of resin.
The woven glass was a bear, and if it were structural I would have to redo some of it probably. Since it is only for abrasion, I will live with it, and fair out/sand out the flaws. My two big mistakes with it were:
*Laying it down when all of the rest of the epoxy was still very sticky wet. I should have left it to cure to green tacky so I could move it around easier and push out the bubbles dry.

*Cutting it to shape before laying it down. The edges started to fray horribly as they stuck to the wet epoxy.

SO...I have some 1/4" - 1/2" air bubbles between the woven and the tape (which is bubble free) on a couple places of the chine, and I have some puckers that are filled with epoxy that will end up getting sanded off in the fairing process, leaving no glass in those little areas. If anybody sees a problem with this course of action, please speak up!

Next steps:
1) Make the seats, I think 3 benches would be good.
2) Put in the breast hooks and put some foam in the bows. Bolt a cleat to both breast hooks.
3) Attach the rub rails.
4) Fair, fair, fair
5) Paint
6) Splash
Good news is that I can cut corners on 4 and 5 if I want to get to 6 faster, but I do want a beautiful vessel, at least on the outside. How much to fair the inside I wonder...
Re: HC14, Jefferson State
Posted: Fri Jul 04, 2014 12:28 am
by Vanagod
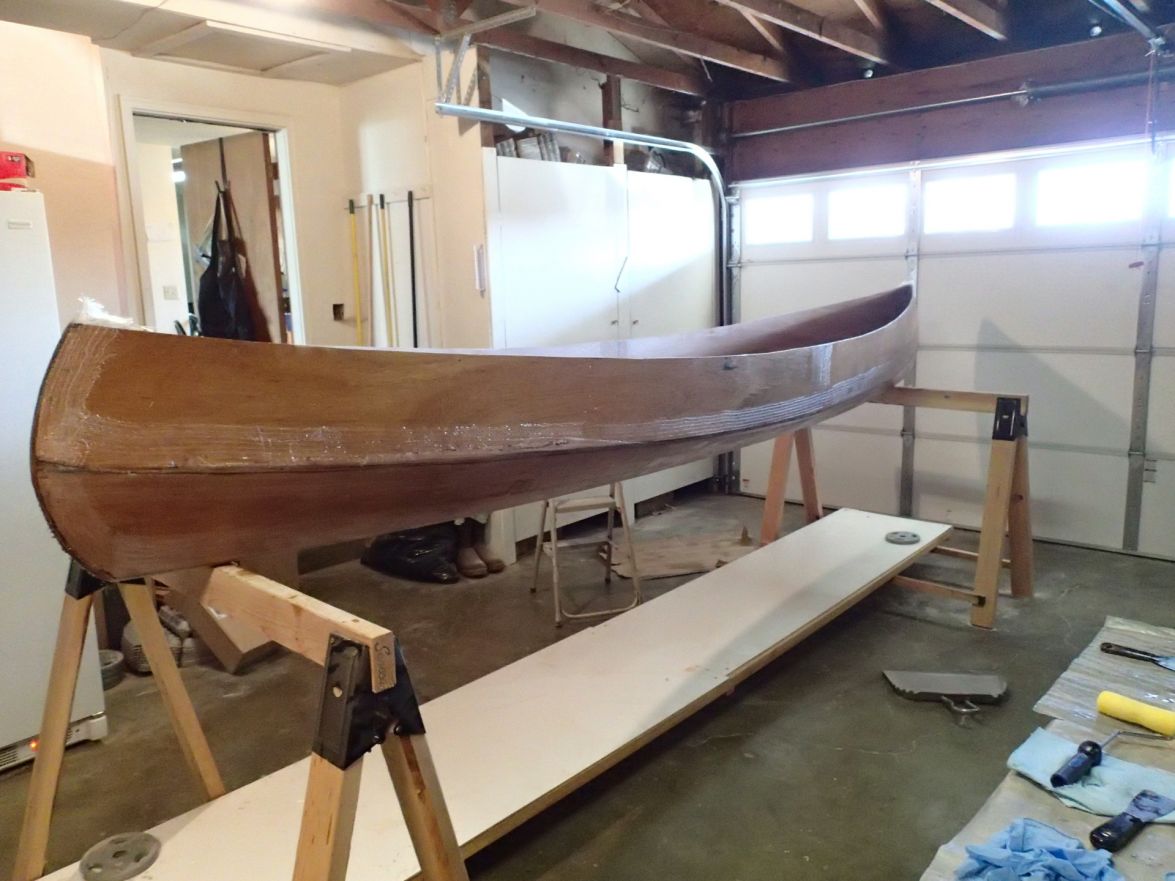
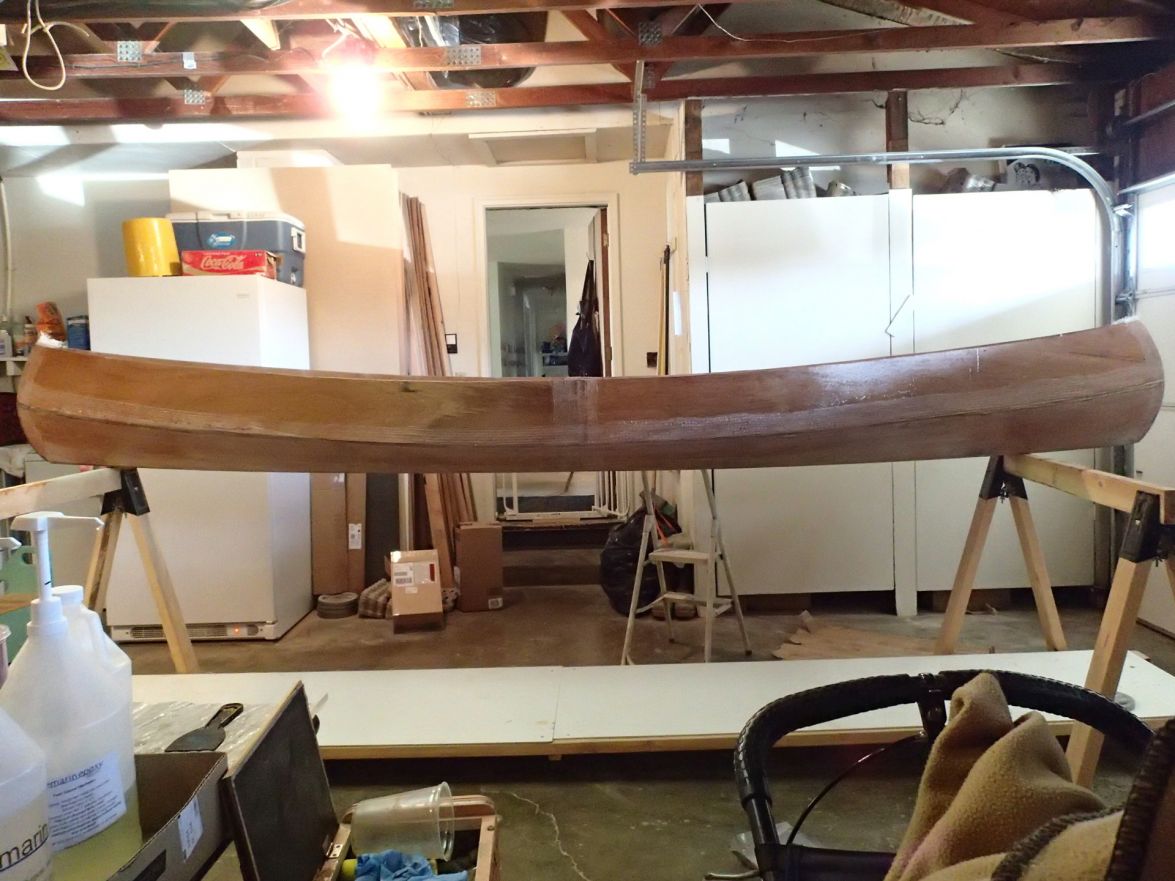
Wow, it has been a long time since I last posted...and a lot of progress too. I guess I enjoy building and spending extra time with my wifey as opposed to posting on the forums. There are a fiar number of updated pictures in my gallery though. Anyways, I have completed fairing the outside of the hull!!

Next steps: router-fillet the rub rail and fair the rub-rail and the inside of the boat. I think I just might have her done by the end of summer.
Re: HC14, Jefferson State
Posted: Sat Jul 19, 2014 10:29 pm
by Gentalben
I have just started building my canoe and your photos and detailed reports on your progress have been very helpful. I would very much like to have the off sets for the rub rail if you still have them.
Re: HC14, Jefferson State
Posted: Sun Jul 20, 2014 10:57 pm
by Vanagod
Are you building a HC14 also? I just got back from 9 days of camping, but I will try to get you the offsets and my recommendation ins the next few days (posted to this thread).
Re: HC14, Jefferson State
Posted: Tue Jul 22, 2014 9:04 pm
by Gentalben
Yes I'm building the HC 14 I just finished cutting out all the parts and am getting ready to butt glue the joints. I noticed that you did not use the molds just spreaders. Did you try the molds?
Re: HC14, Jefferson State
Posted: Sun Jul 27, 2014 2:31 am
by Vanagod
I used spreaders so that I could run the tape down the (chine) seams in one continuous length. While maybe possible with frames, I wasn't sure how, so spreaders just seemed easier.
Re: HC14, Jefferson State
Posted: Wed Jul 30, 2014 3:12 pm
by Gentalben
I didn't think about that and didnt read your post untill I already had done it in 2 stages oops. It's still ok just a little more fairing where the joints overlap

Re: HC14, Jefferson State
Posted: Tue Oct 28, 2014 11:56 pm
by Vanagod
She's splashed. Check out the launch forum. Also, look over my gallery. I posted many more pictures of the build and my lovely family that helped.