Page 1 of 1
TJ's V10
Posted: Sat Jun 21, 2014 7:25 pm
by terrulian
I’ve been dreaming of building a boat for decades but could never justify it. I wanted to build one for an extended cruise that I did awhile back but was unable to convince myself that a hard dingy was a more practical choice for a tender than an inflatable. I’ve already got a tender for my little Catalina 22, a fold-a-boat which is not a good rowboat but is very light and stores easily. So, no reason to have another small boat.
And then one day I had an epiphany: I don’t need a reason.
I’ve been lurking on this forum for over a year and it’s been mighty entertaining. The mix of craftsmanship, artistry, and cleverness of you guys is inspiring and intimidating.
I’ve begun building a V10. It’s a very pretty boat and it’s the biggest one I think I can fit into my van. I’ve also got a very small workspace—10’X12’—and I built a mockup out of PVC to see if it would work. Things have gone smoothly so far until a day or two ago when I got anxious to start assembling the boat. It was a little more of a wrestling match than I had anticipated. I was trying to screw the frames in rather than just zip-tying them. OK, I have to bend this around here and hold it just so while I screw this in here and…boiiiing!!! Try again…Twang!!! So I gave up and will find a new approach. I’m in no hurry to get the project finished, since then I’ll have to row, which is a lot like exercise.
Re: Yet another new V10
Posted: Sat Jun 21, 2014 7:39 pm
by terrulian
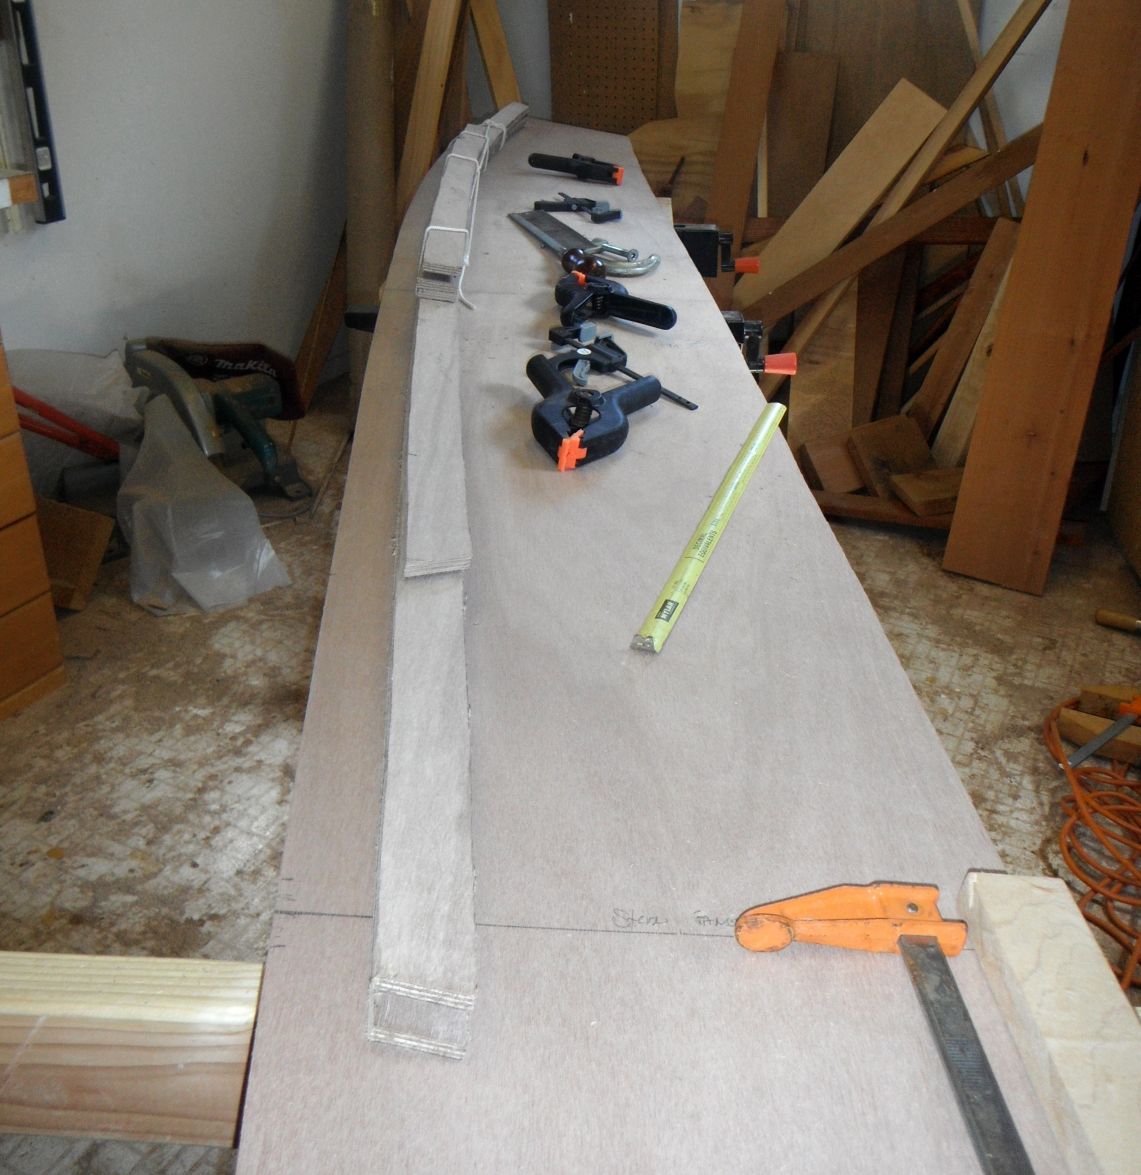
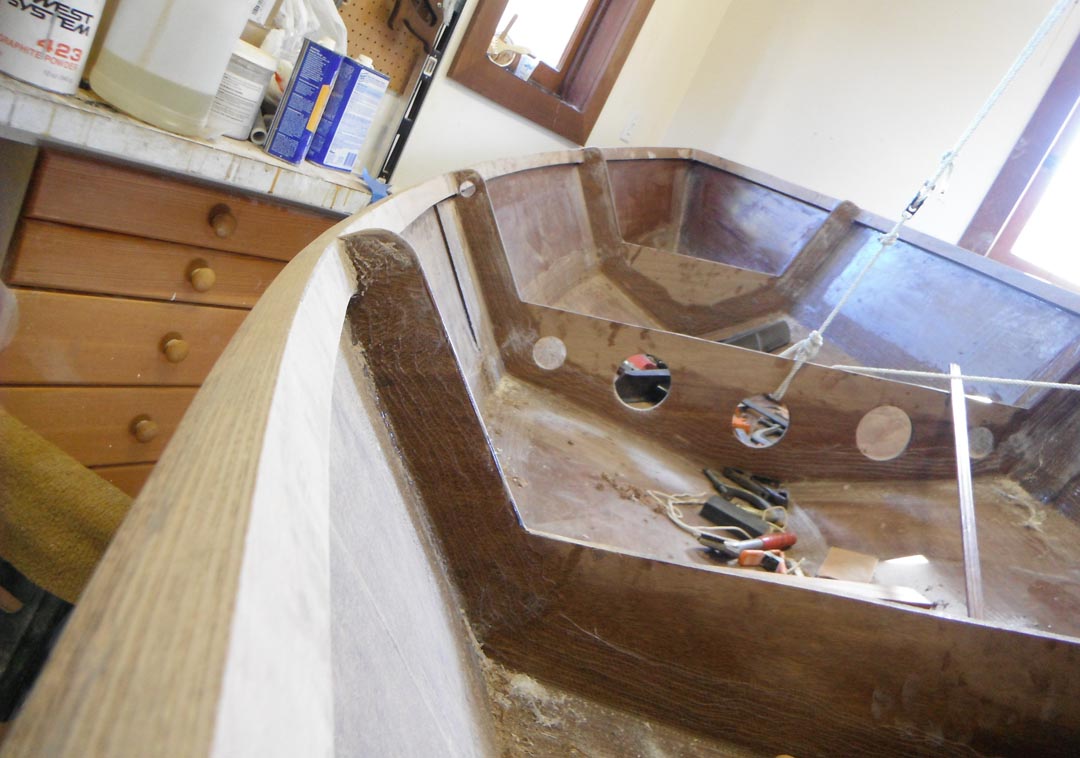
To keep it narrow so it would fit in the van doors, Jacques advised me to swap the rub rail for a sheer clamp or inwale, so I’ve notched the frames accordingly. I’ve also built the pieces in advance as he recommended, using the sides as a guide.
Re: Yet another new V10
Posted: Sat Jun 21, 2014 7:43 pm
by terrulian
I got the frames in with little problem using zip ties. You'll see I've already rolled on some epoxy. I did this while everything was flat to avoid any chance of sag although I put it on thin. I left the edges clear to be wet out when I put on the tape, to achieve a better bond. This was probably unnecessary but it didn't take much time.
Re: TJ's new V10
Posted: Sat Jun 21, 2014 7:47 pm
by terrulian
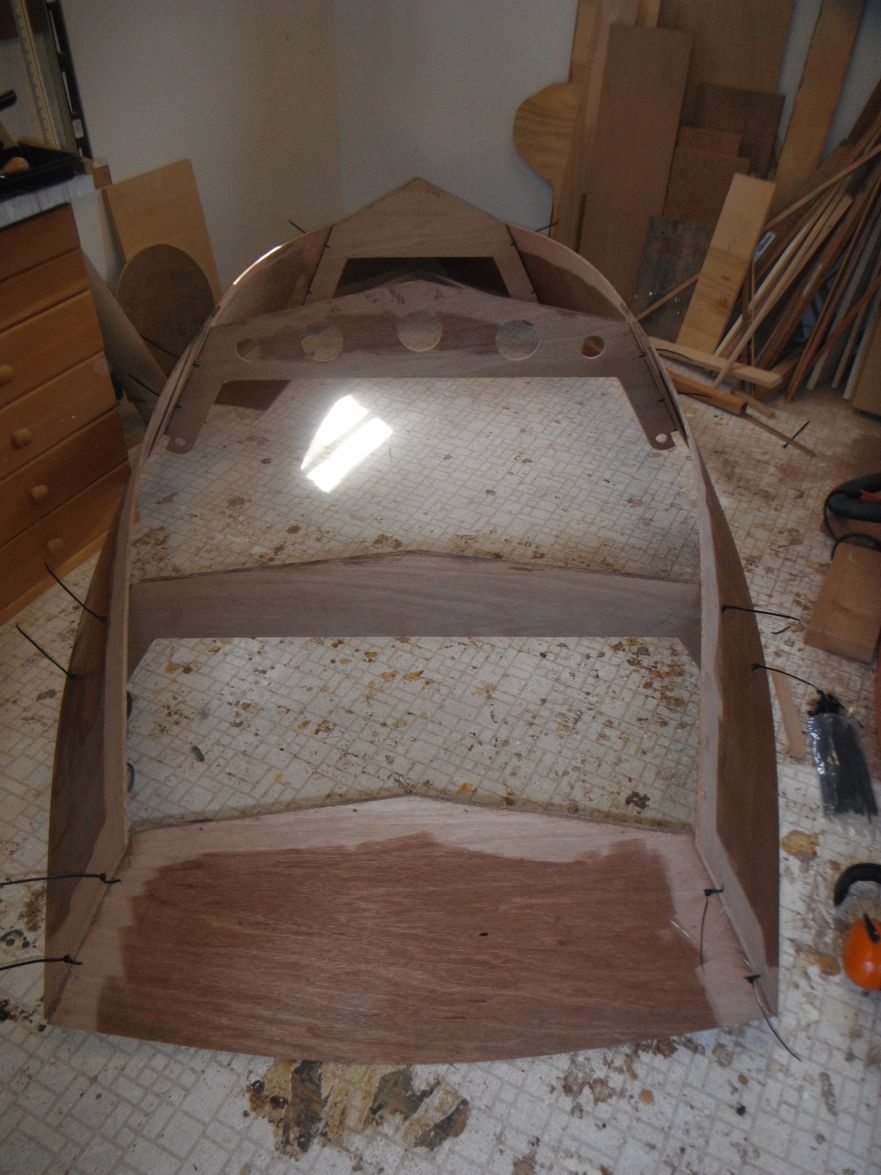
Loosely stitched together. This was pretty easy, as was everything so far.
Re: TJ's new V10
Posted: Sat Jun 21, 2014 7:49 pm
by terrulian
Tightened up pretty close.
Re: TJ's new V10
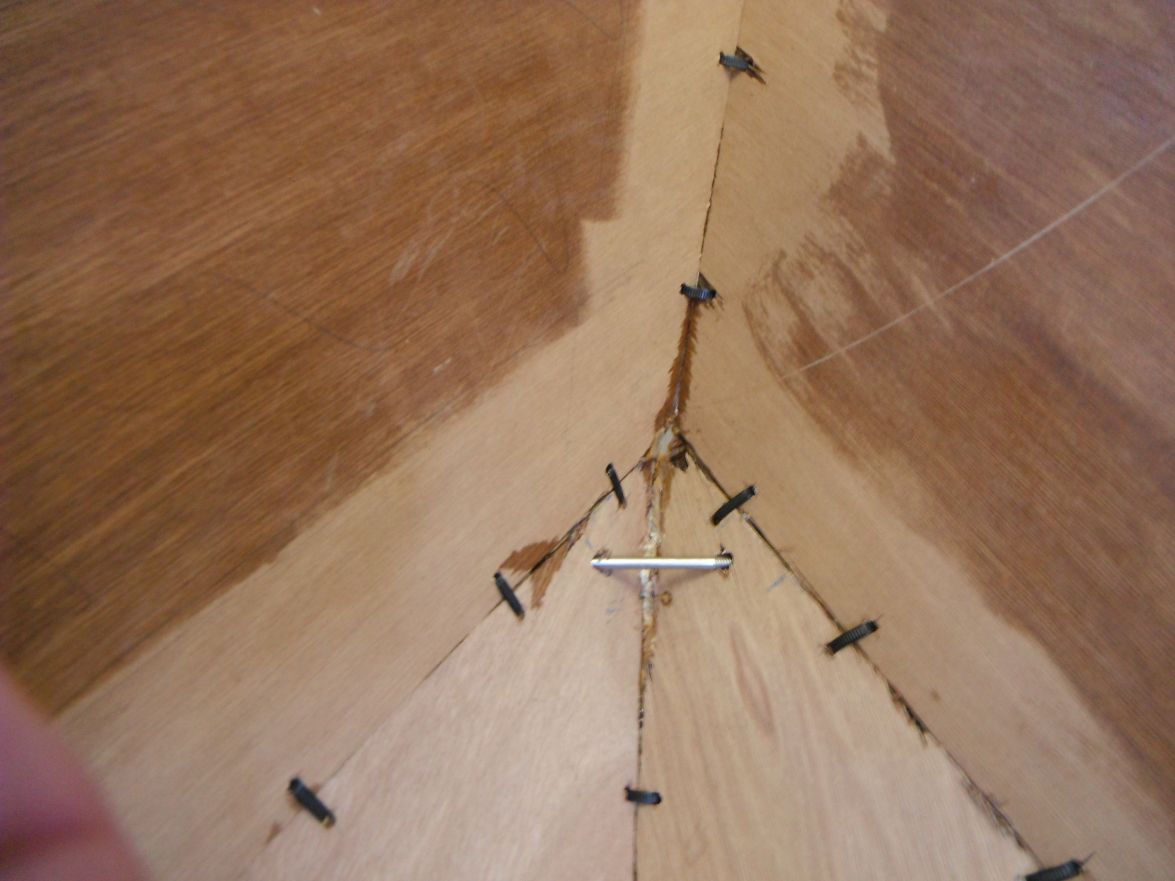
Posted: Sat Jun 21, 2014 7:55 pm
by terrulian
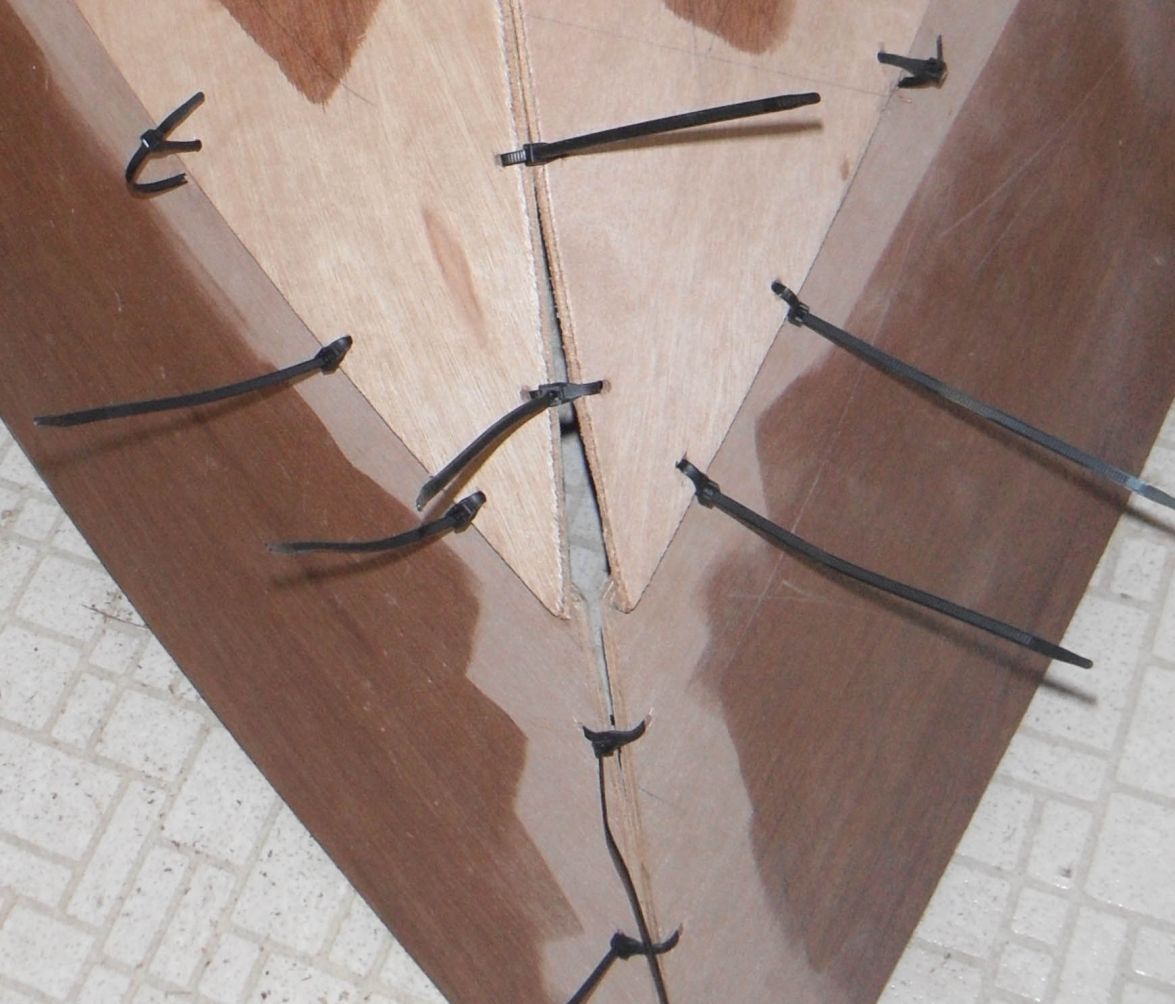
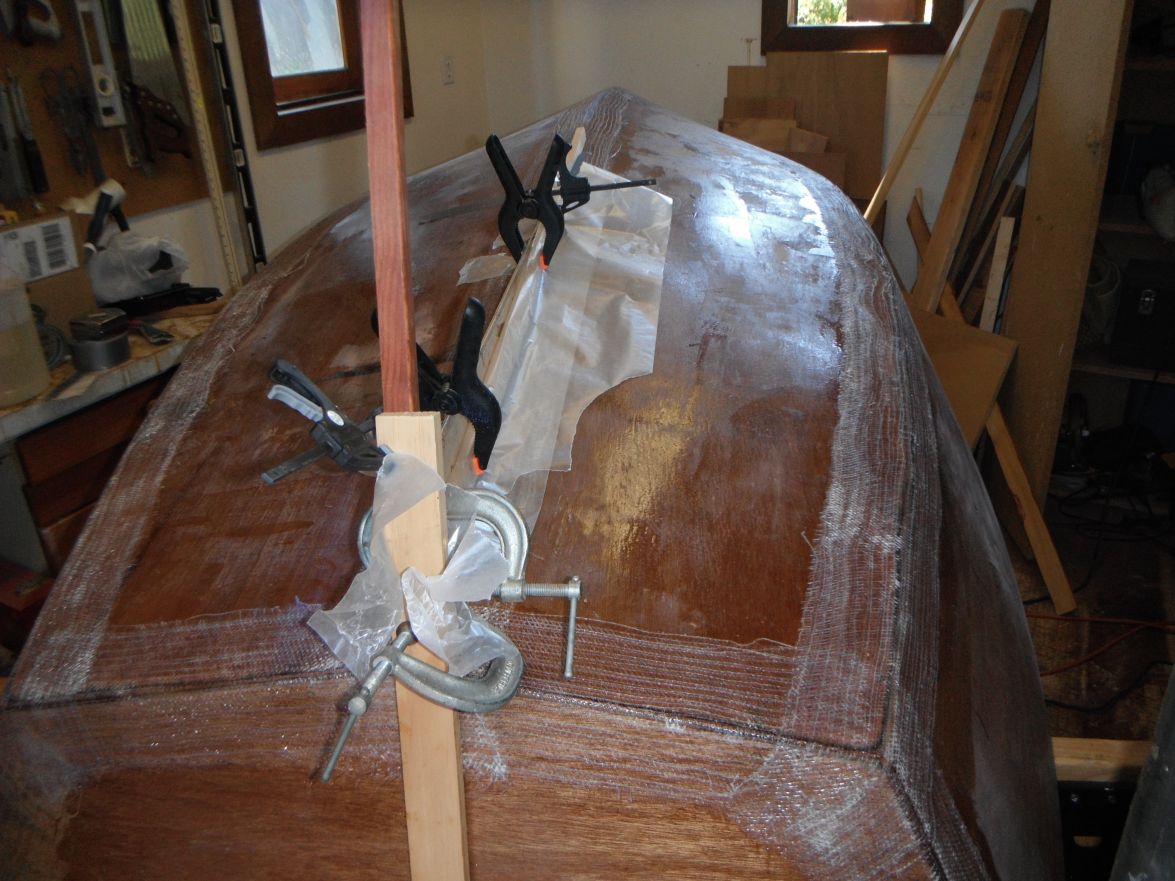
The dreaded bow knuckle. I'll get it sorted out with gk108's tip, or so I would like to believe.
Re: TJ's V10
Posted: Sun Jun 22, 2014 8:23 am
by justin_dwyer
Looks great Tony. That'll be a great little boat!!

Re: TJ's V10
Posted: Sun Jun 22, 2014 10:25 pm
by Biker B.O.B.
Closing that bow was the hardest part of building my V12, which was my first boat. Stick with it. It will also help that you are patient.
Re: TJ's V10
Posted: Fri Jun 27, 2014 9:15 pm
by terrulian
Thanks, guys.
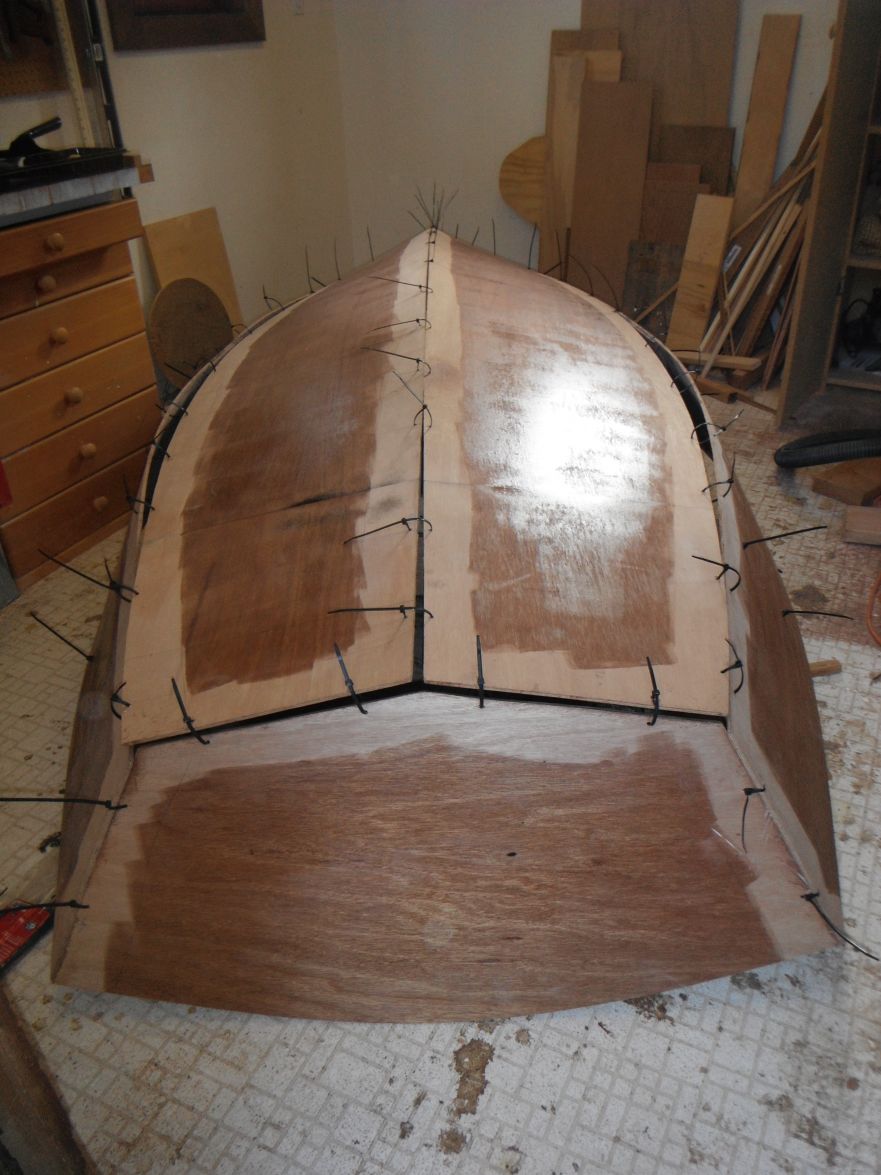
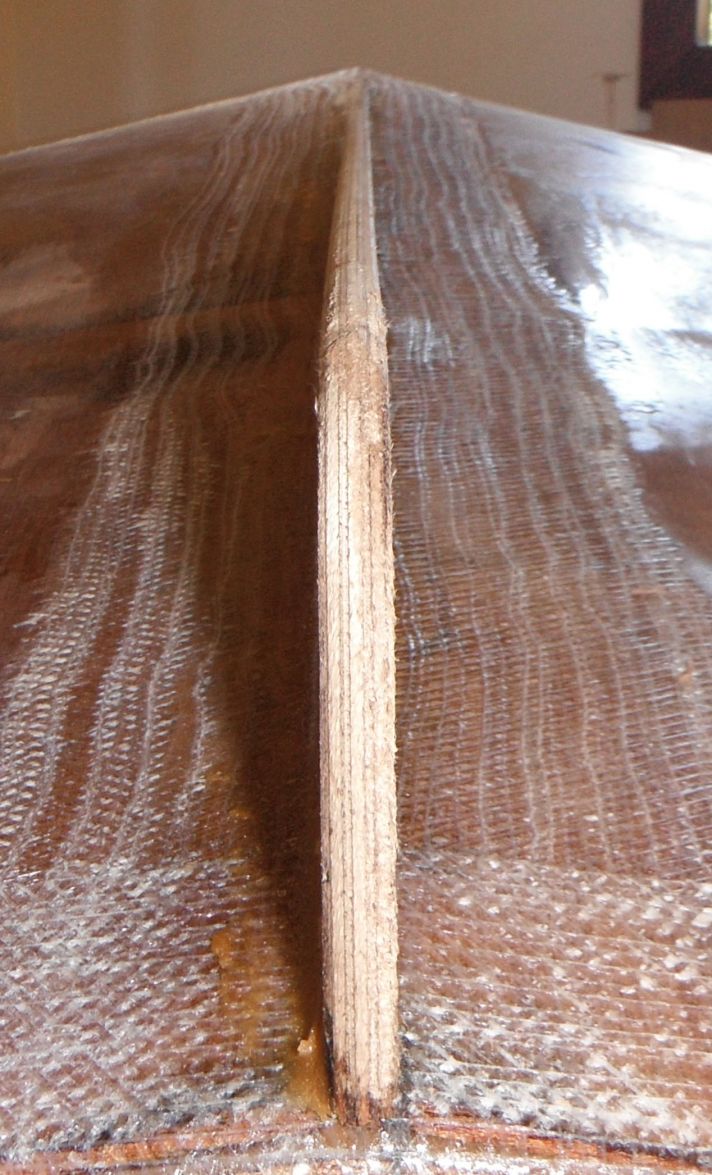
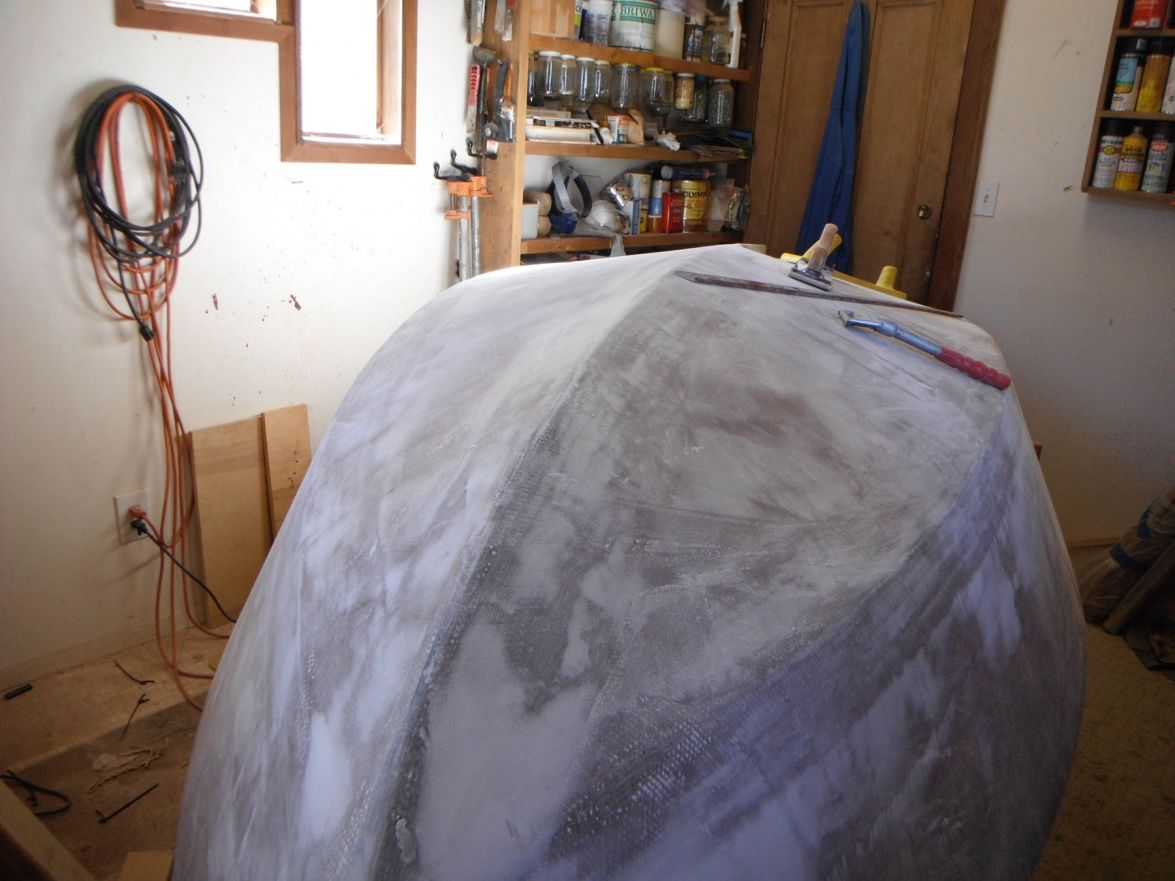
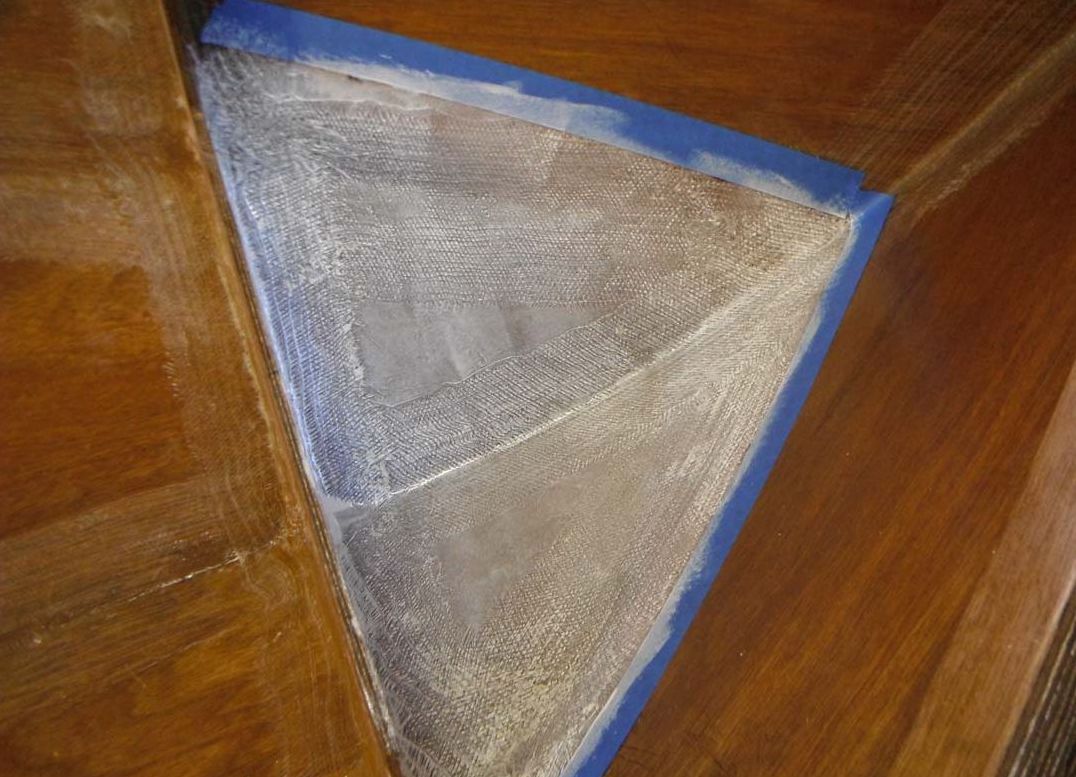
While sorting out the bow I'm contemplating another problem. I made the butt blocks 10" wide, which I thought I saw somewhere. Then Cracker Larry said they should only be 6". I don't think the dimensions are in the plans but I could have missed them. Anyway, I've now got a flat spot in the hull where the butt block is. The photo shows the worst spot, which is out of fair by about 1/8":
I've thought of three possibilities: 1) disassemble the boat and take a router to reduce the width of the blocks, then re-assemble. But while I imagine this will somewhat ameliorate the problem, I don't know how much. 2) Just goop it up and fair it out perhaps with a little glass to add bulk. I'm not pleased with that idea but the other alternative isn't that appealing either. 3) forget it.
Any thoughts?
Re: TJ's V10
Posted: Fri Jun 27, 2014 9:33 pm
by terrulian
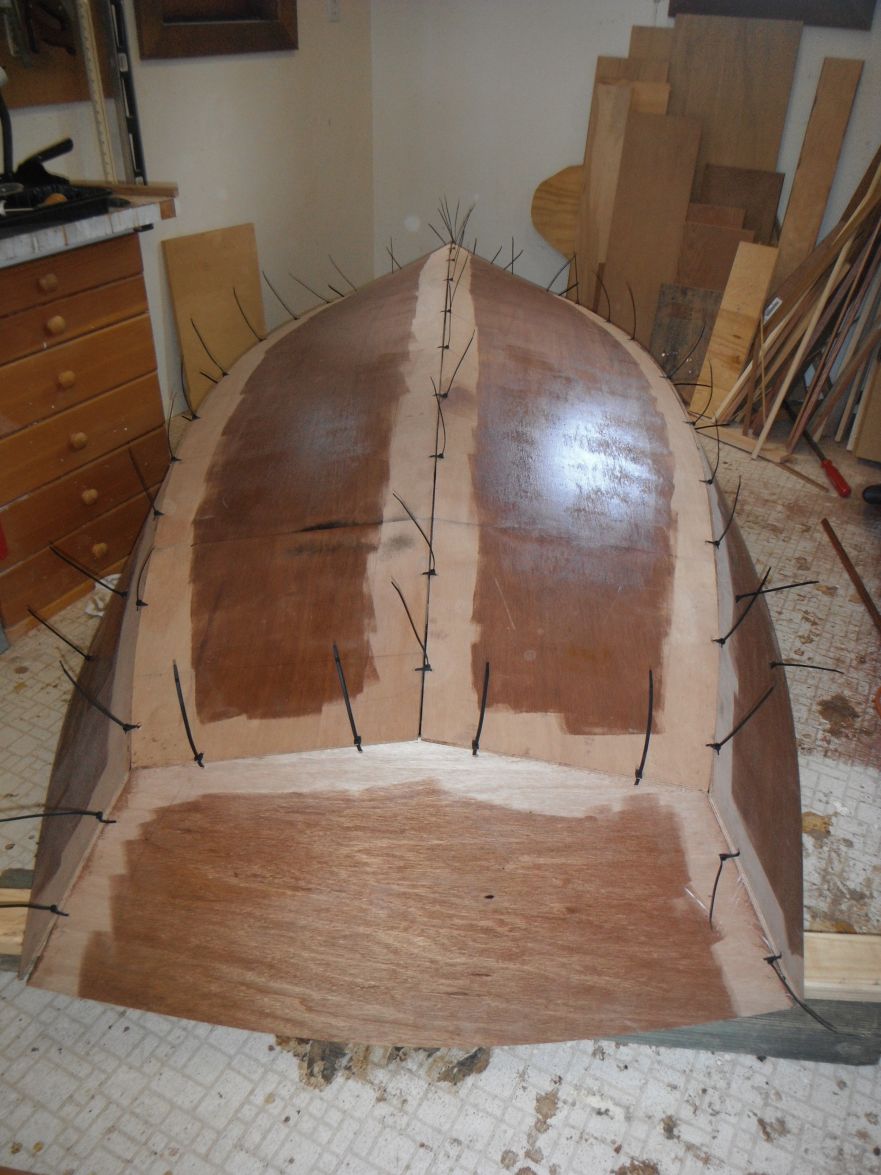
So here's my bow solution. Frankenboat. It's pretty ugly for now and needs a bit of tweaking but brute force was what was required. I think someone else on the forum did this, which is where I got the idea.
Re: TJ's V10
Posted: Fri Jun 27, 2014 10:17 pm
by Cracker Larry
Whatever it takes

Re: TJ's V10
Posted: Mon Jun 30, 2014 8:47 am
by tech_support
that will work just fine!
Re: TJ's V10
Posted: Mon Jun 30, 2014 2:29 pm
by Doc_Dyer
.
…
….
….
just keep in mind the forces that are there when you remove the ties and franken bolt

doooh

Re: TJ's V10
Posted: Mon Jun 30, 2014 3:40 pm
by terrulian
Yikes!!
I'm assuming that's what happened to you?
It has occurred to me that I might put two or three strategically placed pieces of glass tape on the stem and turn of the bilge in the center, after goop but before pulling the bolt and ties, to reduce the possibility of this happening. Your picture is a cautionary tale, for sure. There is quite a bit of force on that bolt. I don't think it will add all that much to the fairing process.
Re: TJ's V10
Posted: Tue Jul 01, 2014 11:31 am
by Doc_Dyer
Re: TJ's V10
Posted: Tue Jul 01, 2014 4:09 pm
by terrulian
Oh, yeah, been through it many times and am grateful for the pictures. I mistakenly gave gk108 credit for your bow solution...it was you who did the screws. But is that the one that sproinged open when you undid the ties? I'm not remembering which one of you guys came up with the frankenbolt, although I don't think he called it that.
I'm hoping to tidy things up this weekend and perhaps apply the goop and a couple of little pieces of glass tape at the bow. I need to shave down two of the frames just a bit as particularly the stern one stands proud of the gunwale about 1/4" when it is firmly sitting on the butt blocks.
Re: TJ's V10
Posted: Fri Jul 04, 2014 7:58 pm
by terrulian
Spent the day fine tuning the hull and frames. The instructions say you're supposed to put the frames and sides together and then lay the pieces for the bottom on that and trace the outline. Because the bow bends in about sixteen dimensions, I found this beyond my talents so I just cut the pieces according to the patterns. I was being careful; nonetheless they were off just a smidge but a little detailing took care of that.
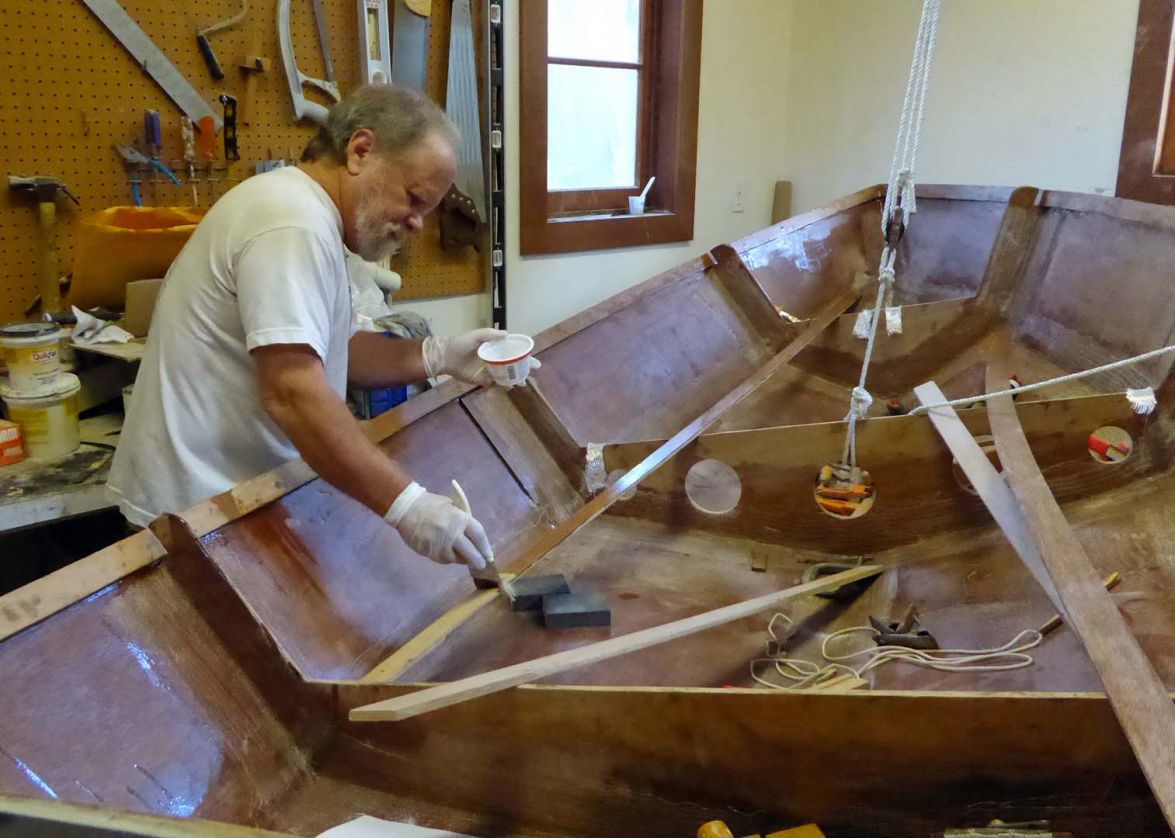
I reworked the bow bolt several times and since the last time was not as good as the next to last time, I figured I'd quit fussing rather than make things worse. I put some goop and glass on the bow to prevent it from pulling apart when I remove the bolt. I'd upload a picture but it's too ugly to look at for now. I don't want to offend your sensitivities. That whole process involved a bit more butchery than I would have liked but the hope is that in the end all will work out. When that kicks I will flip the boat and create the goop welds on the inside, as directed. At that point I am tempted to remove the frames to work on the fillets and taping so I don't have to do it in sections. We'll see. I could do the welds on the outside, but am concerned that the goop will sag into the inside seams. It is more difficult to sand there than fair the outside seams, so I figure that doing the welds on the inside will create less work.
Re: TJ's V10
Posted: Sat Jul 05, 2014 8:07 am
by topwater
Buy yourself some good quality duct tape and tape all the inside seams . Glue up all the seams on the outside then pull
the tape. Worked well for me .
Re: TJ's V10
Posted: Sat Jul 05, 2014 8:26 am
by terrulian
Thanks! I had been considering that but apparently some folks have had issues with the residue from the tape. Did you clean the surface with something after removing it? I'm fond of the idea for a few reasons otherwise.
Re: TJ's V10
Posted: Sun Jul 06, 2014 7:38 am
by topwater
Just wipe with acetone , you are going to be sanding the in side and putting down tape any way .
Re: TJ's V10
Posted: Sun Jul 06, 2014 7:31 pm
by terrulian
Outside goop currently kicking, and I will do as you suggest when the duct tape is removed.
Re: TJ's V10
Posted: Sun Jul 06, 2014 9:40 pm
by terrulian
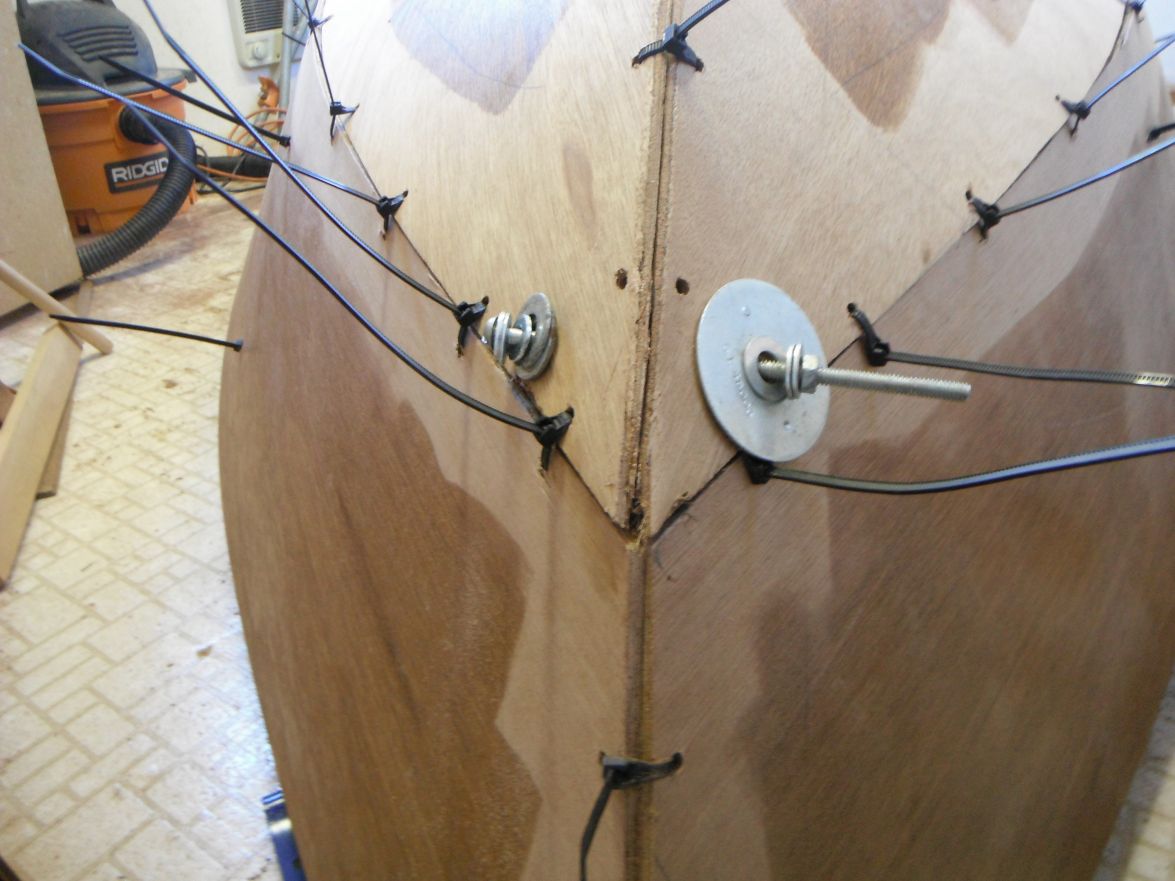
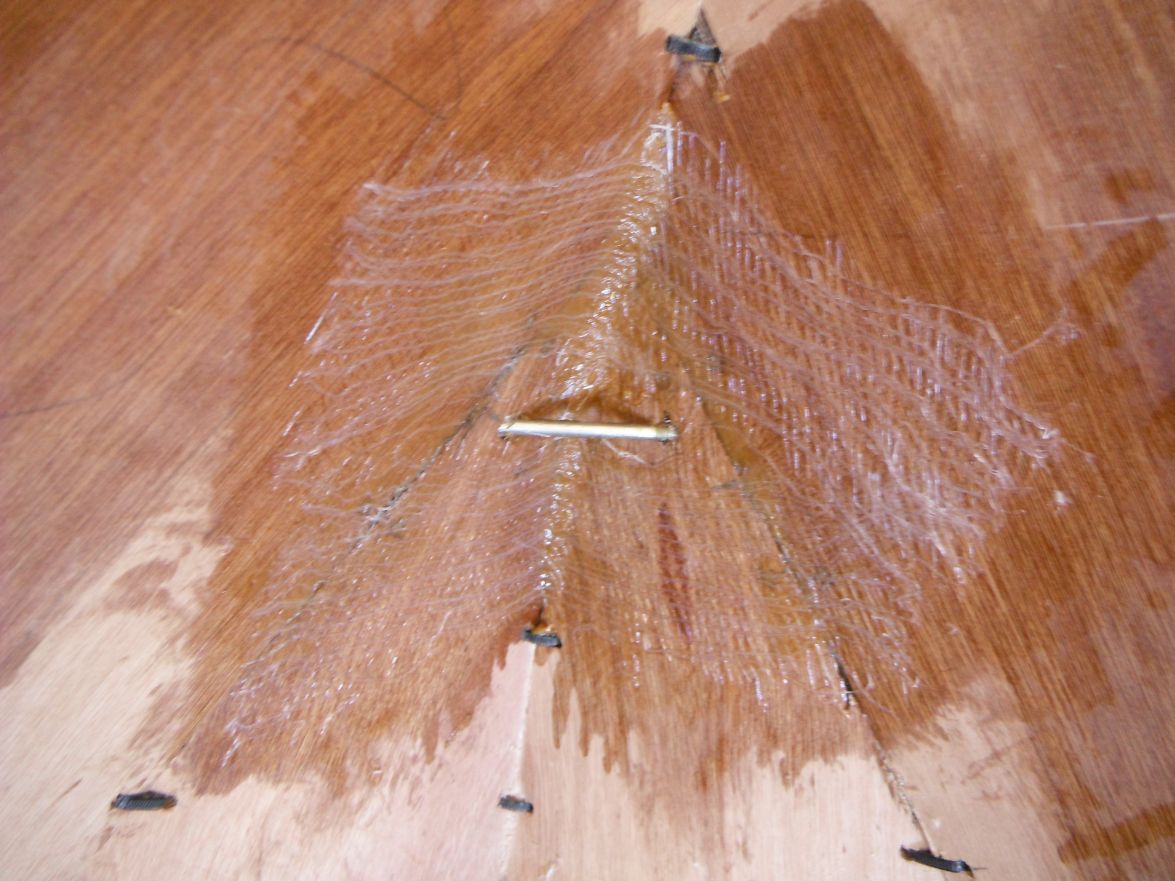
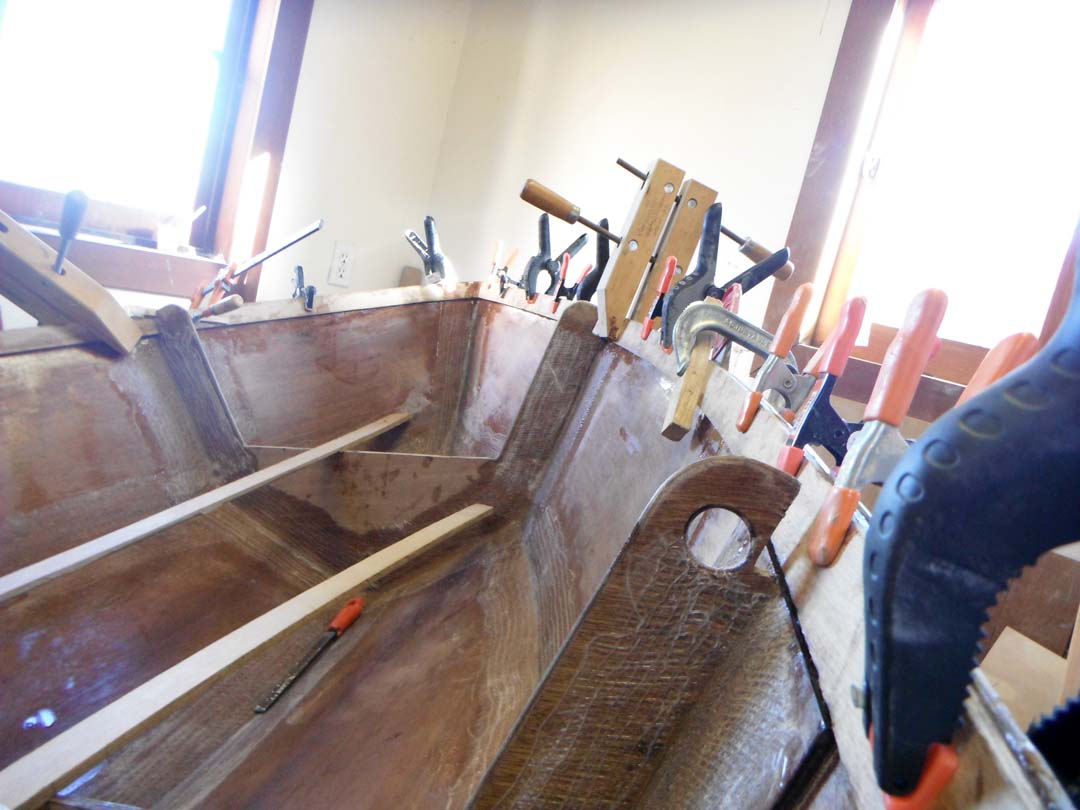
OK, I've decided that you folks have are tough enough to stomach these photos of the bow. First one is the frankenbolt from the inside:
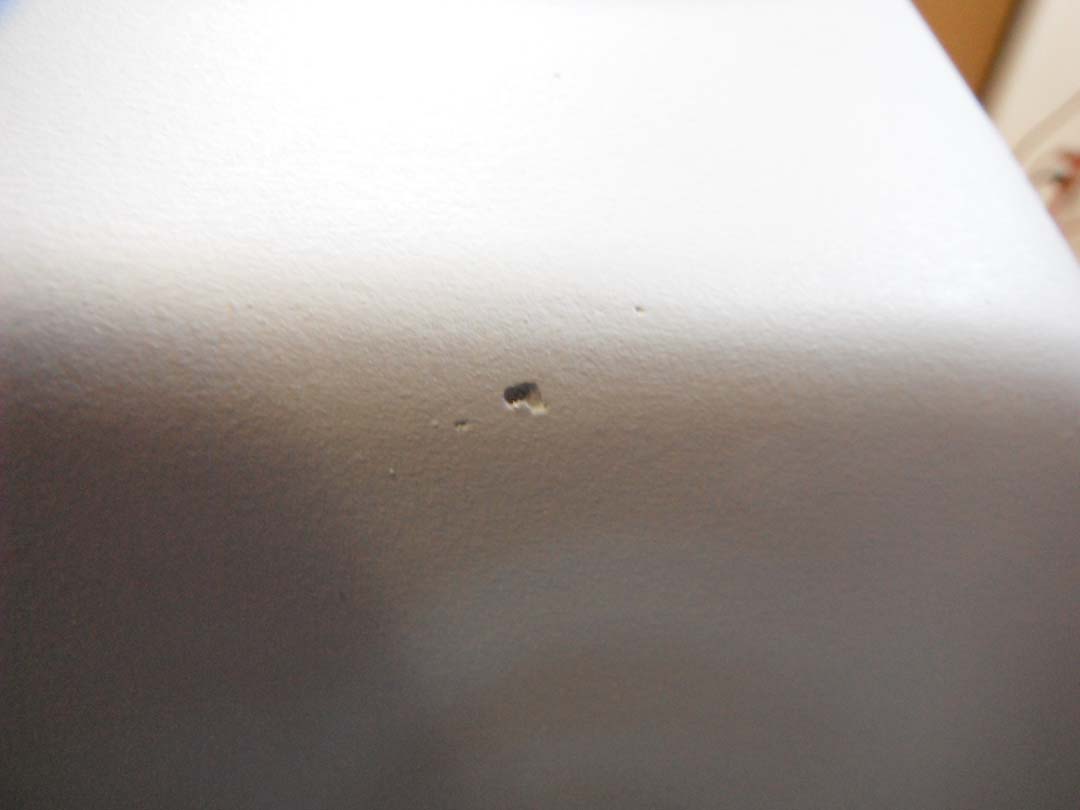
Then, the bow looking aft (oops--some kind of hole there. Is that bad?):
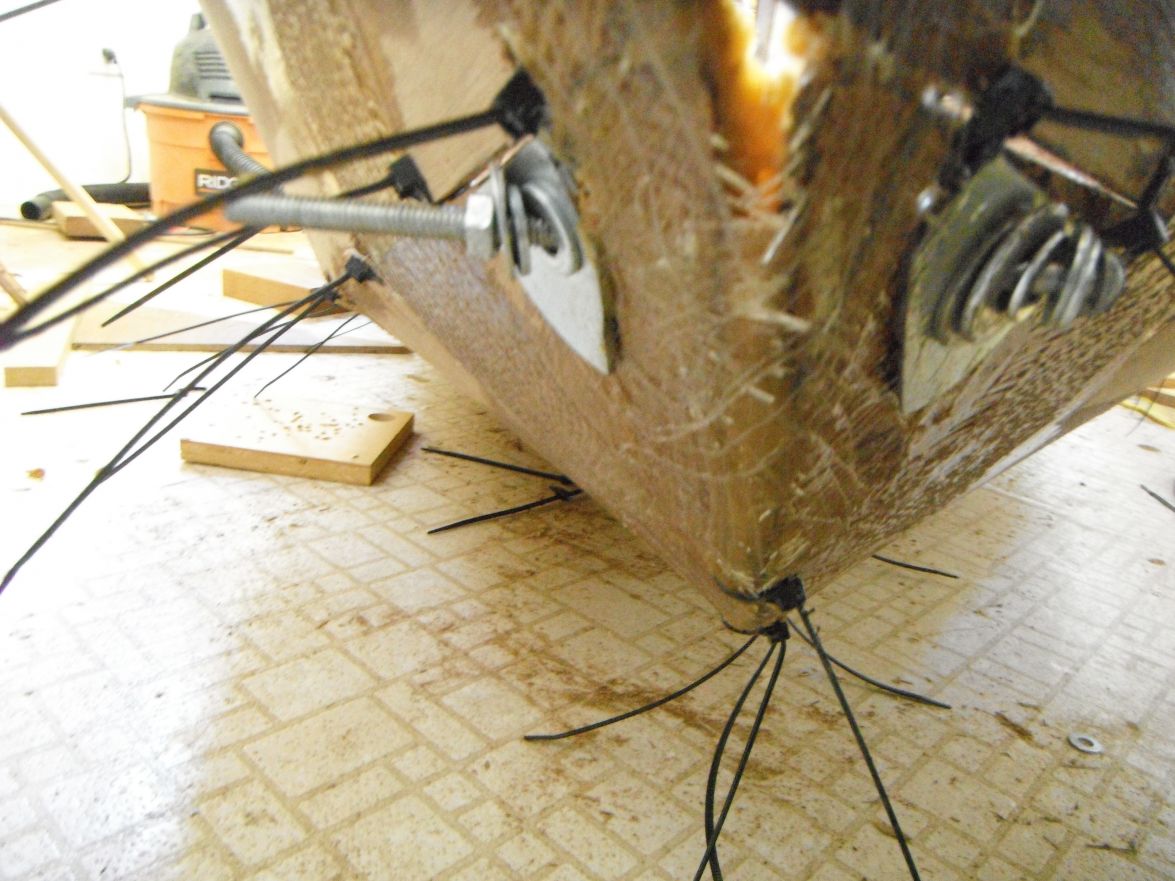
And finally, the bow from port:

I slapped a little glass on so the boat doesn't explode when I release the bolt and ties. I think I may put in the fillet and tape on the inside as well, after I remove the ties but before I take out the bolt.
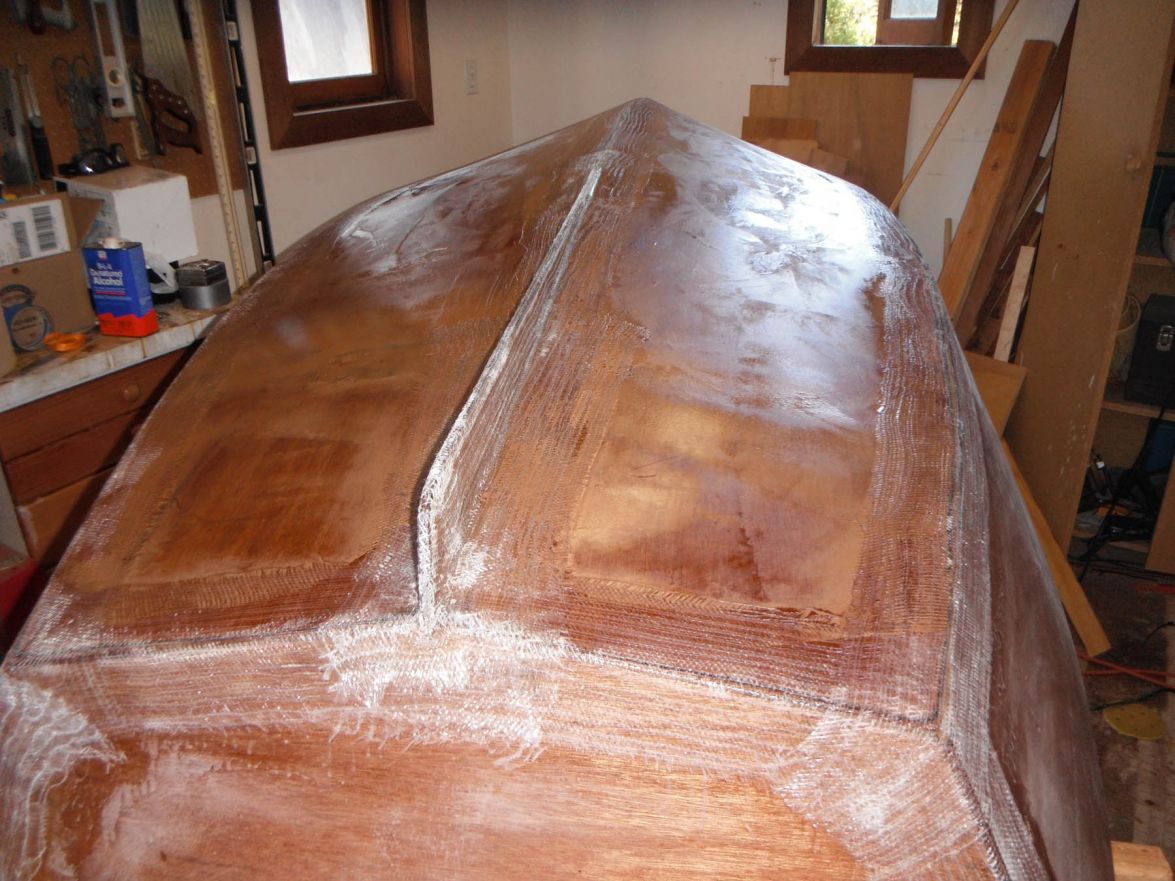
Now you see what I mean by hard to stomach. Nevertheless, I'm pretty satisfied with the curve between the bottom and stem at the knuckle. It came out pretty fair. Also, I'm convinced I got about as much deadrise here as I could, meaning we will have a fine entry. I know it's ugly, but I think the ultimate shape is satisfactory and the rest is makeup and powder.
Re: TJ's V10
Posted: Mon Jul 07, 2014 1:43 pm
by Corvidae
Did you sand off the broken epoxy stitches in that pic of frankenbolt? Or is that prior to the split? I ask because I thought that's where the initial epoxy goes before removing the ties.
Re: TJ's V10
Posted: Mon Jul 07, 2014 3:48 pm
by terrulian
The "broken epoxy stitches" you are referring to are not really broken. They are the un-seamed edges of the glass tape provided by the Bateau folks, who have gone away from supplying the seamed type because, I assume, the seam creates more work in the fairing process. I have applied the glass in advance of doing the actual tape-up of the seams, which will follow once all the ties have been removed, in the interest of ensuring that no explosions result. Cranking down on that bolt took quite a bit of torque, all of which is hiding in the wood waiting to pounce.
The picture you see doesn't show anything that is the result of any tearing or breakage; everything is still being held together with the bolt and zip ties. As the picture is a fairly extreme close-up, the holes appear much worse than they are and will be attended to once the bolt and ties are removed. All the glass and epoxy you see was applied to a fresh plywood surface.
I'm just guessing that you assumed that this mess was the result of my botched-up job that broke apart, but, unfortunately, it is just a view of my normal level of craftsmanship. Unless it does actually break apart with the removal of the bolt, I have faith it will all work out in the end and be as pretty as Jessica Alba.
Re: TJ's V10
Posted: Mon Jul 07, 2014 4:45 pm
by Corvidae
I just realized I was looking Doc_dyers picture thinking it was yours. And then you posted your pic from the inside and it was magically clean wood. And now I realize we're waiting to see what happens when frankenbolt gets removed, and hoping we don't get a new version of Docs pic. It looks like you've got that sorted pretty well though.
Re: TJ's V10
Posted: Mon Jul 07, 2014 5:43 pm
by Knottybuoyz
It happens on the bigger boats too!

Went off like a bomb when I clipped one too many wire ties! Had to go change my shorts!
Re: TJ's V10
Posted: Mon Jul 07, 2014 6:01 pm
by terrulian
Yikes!
Yep, I'll be holding my breath when the bolt comes out. But glass is amazingly strong and I've decided to definitely put a band-aid of cloth on the inside, too, before I release the bolt...hoping that works.
Re: TJ's V10
Posted: Mon Jul 07, 2014 6:19 pm
by Cracker Larry
Put some spot welds of glue on the inside between the stitches. Add a piece of tape if you're scared, but epoxy glue is as strong as a bolt if you have a little surface area to glue to.
Re: TJ's V10
Posted: Mon Jul 07, 2014 6:50 pm
by terrulian
Yep, will do.
Re: TJ's V10
Posted: Wed Jul 09, 2014 7:49 pm
by terrulian
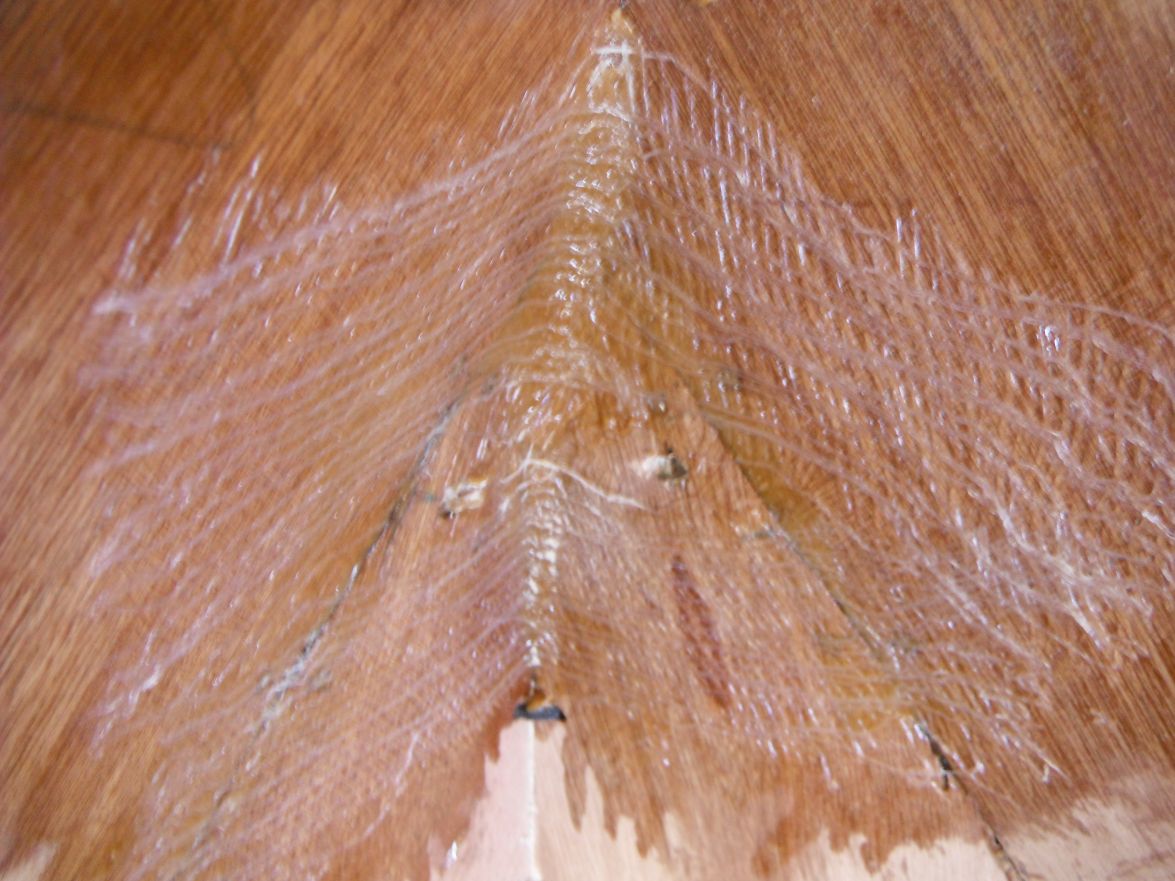
Here's the band-aid I put in, in an excess of caution:
I let it kick for a day and then pulled out the bolt, with very little trepidation. Nothing even creaked, so we're solid.
Actually, belay that. Let's wait for a day before we pop the cork.
Re: TJ's V10
Posted: Fri Jul 11, 2014 4:30 pm
by terrulian
Yup. No problem. Cracker Larry is made of braver stuff but anyway the scaredy-cat method worked.
Now tape up the interior, then flip and attend to that mess on the bow before taping the exterior.
Re: TJ's V10
Posted: Fri Jul 11, 2014 9:03 pm
by Cracker Larry
Cracker Larry is made of braver stuff but anyway the scaredy-cat method worked.
No braver, just been there and done that and know the strength of epoxy and tape

It's a lot stronger than a bolt and cable ties.
Re: TJ's V10
Posted: Sun Jul 13, 2014 10:35 am
by terrulian
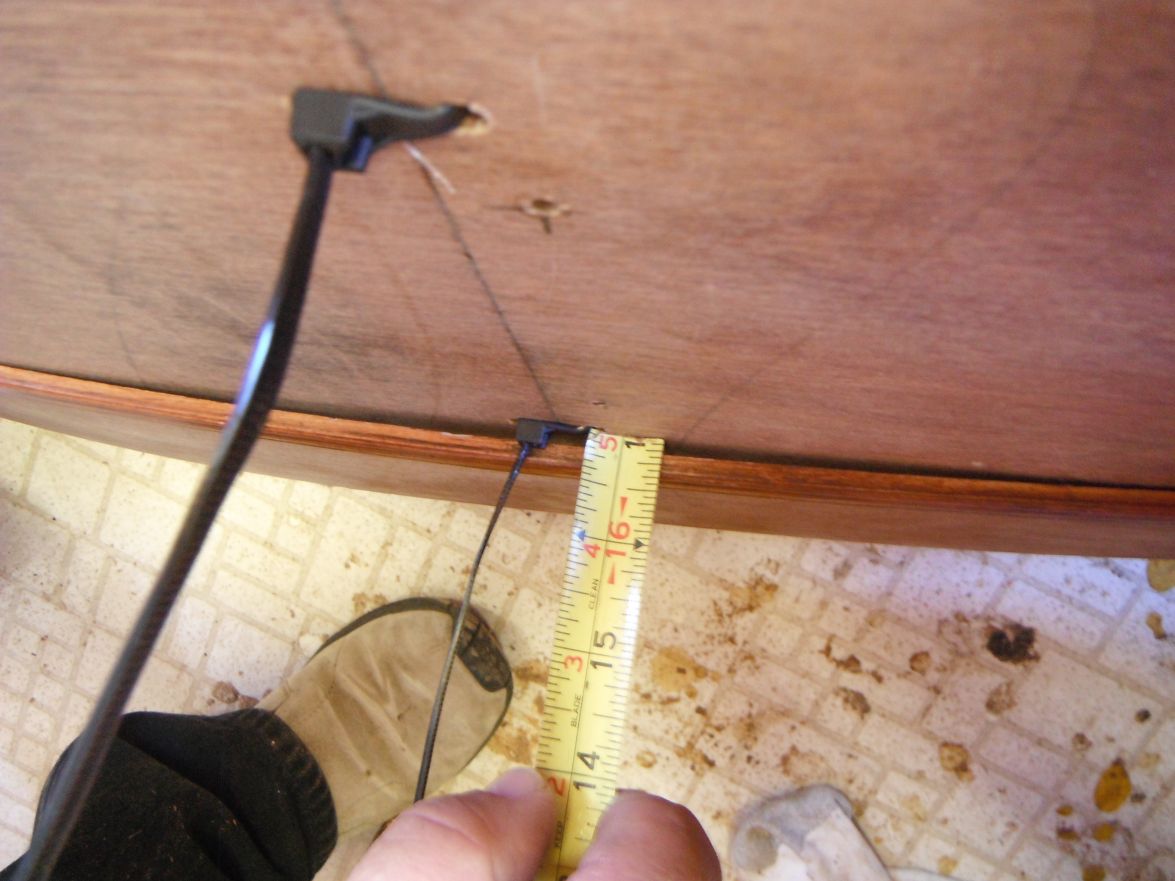
I ran into a little puzzle. The beam on the V10 is 4'6". I want to transport it in a Ford E250, and the entry at the back doors is 4'6-1/2" giving a clearance of .5". But as this will at times be used as a tender, I want to have a rub rail of rope or rubber to avoid dinging up my topsides, so I needed a little more clearance to accommodate that. (Even with fenders there will be times the dinghy contacts the hull, at least with my level of seamanship.) Jacques suggested replacing the designed rub rail with a sheer clamp, which would subtract 1.5" from the beam, just what was needed. Theoretically, problem solved. But for whatever reason, once the boat was assembled the beam measured about 4'5-3/4" which meant that adding the rubber rail was going to make it wider than what I needed to fit in the van by about 1/2-3/4" without any clearance.
So I'm solving this at the risk of being drummed out of the corps. I shaved the widest frame by about, say, 1/4" on each side. I really hated to do that but on the other hand I didn't like the idea of spending another $500 plus on a rack and some kind of system to get it on top of the van, which is a long ways up. It's still tight and I really won't know if it fits in the doors until I try it.
The appearance of the sheer, which to my eye is perfect as designed, seems to be very little affected, but it is hard to tell and there may be a subliminal aesthetic cost. I'm hoping I don't get too many demerits for this blasphemy.
Otherwise, the inside is taped and, so far, things are moving along with no major train wrecks.
Re: TJ's V10
Posted: Sun Jul 13, 2014 11:32 am
by Noles309
Would you be able to tilt it on angle a bit just to get the widest part through the door?
Re: TJ's V10
Posted: Sun Jul 13, 2014 11:46 am
by terrulian
There is a bed in the back of the van so there's a limit on how much I can tilt it. But of course this may be necessary and I am hoping it will accommodate the boat. I'd like to think it will. I've tried every measurement and even thought of making a mock-up in cardboard but haven't done that yet.
Re: TJ's V10
Posted: Sun Jul 20, 2014 11:04 am
by terrulian
I've been delayed awhile because after a race that we always lose, we found a bit of water trickling into our little Catalina 22. I'm not an expert, but it occurred to me that over a period of time, water entering the boat from the bottom up may create a....problem. So we had to pull the boat out and, hopefully, resolve the issue.
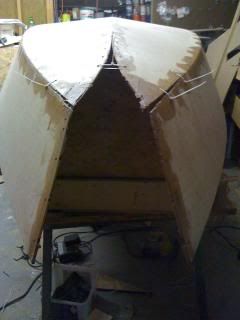
Anyway, I got the interior taped and the frames in and am anxious to turn it over and see what kind of mess I'm presented with where the goop escaped the seams. Not worried, though.
I was quite amused to find a post from Jacques in response to some impressive photos of a builder's project. He said that the sort of precision displayed was not really required (in other words, while nice, was overkill), and Jacques didn't want to intimidate potential customers by giving the impression that this level of skill was necessary...and I'm thinking, NO PROBLEM, Jacques, I've got you covered. Anyway, although I've never built a boat I've done a bit of work with epoxy and glass and goop and know that it is ludicrously forgiving (except for the
truly boneheaded mistakes that await me) and so I hope to provide proof that even an idiot like me can be successful.
The perspective on the picture below makes the stern look way wider than it is and the boat looks a little cockeyed. Not sure why that is; I'm no better photographer than boatbuilder. But the diagonals are true, the stem is straight, and the lines are correct and very pleasing in person. You'll just have to trust me on this.

Re: TJ's V10
Posted: Sun Jul 20, 2014 9:38 pm
by selever
Jacques didn't want to intimidate potential customers by giving the impression that this level of skill was necessary...and I'm thinking, NO PROBLEM, Jacques, I've got you covered.
Haha! Well -- it looks nice so far!
Re: TJ's V10
Posted: Sun Jul 27, 2014 3:48 pm
by terrulian
Got the outside seams taped and today I glued on the skeg. Since it gets so skinny at the forward end I wanted to ensure it would be straight, so I clamped a 1x1 to it while the goop kicks. The vertical board keeps it upright and centered. Waiting to see if this worked.
Re: TJ's V10
Posted: Sat Aug 02, 2014 2:50 pm
by terrulian
It came out straight enough. Again, it's a little straighter than it looks because of foreshortening or some other optical distortion that is above my pay grade. A straightedge confirms it.
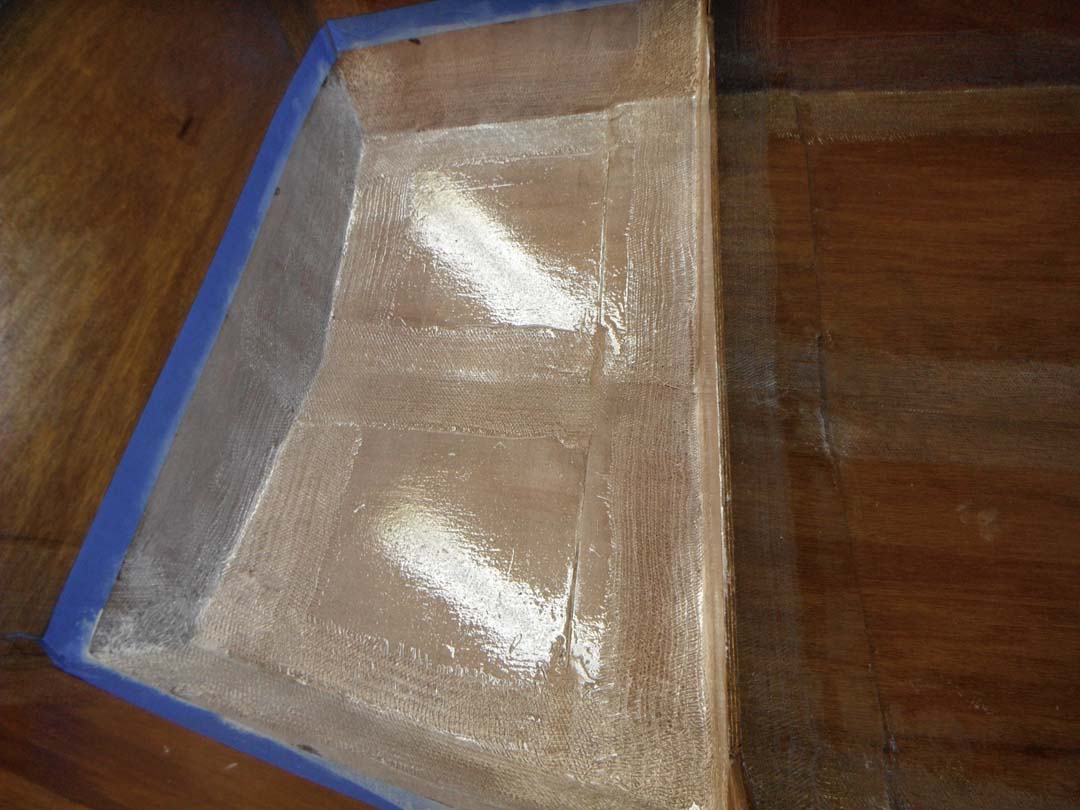
Here it is glassed in with a bit of goop on the bottom to fair things just a pinch, which I'll sand and then put down a layer of glass over the whole bottom.
Re: TJ's V10
Posted: Sat Aug 02, 2014 4:09 pm
by ks8
Nice. Looks mighty strong.
Re: TJ's V10
Posted: Sat Aug 02, 2014 5:00 pm
by terrulian
Awfully nice of you to comment on this little project, given the daunting projects you guys are into.
Re: TJ's V10
Posted: Tue Aug 05, 2014 1:48 pm
by terrulian
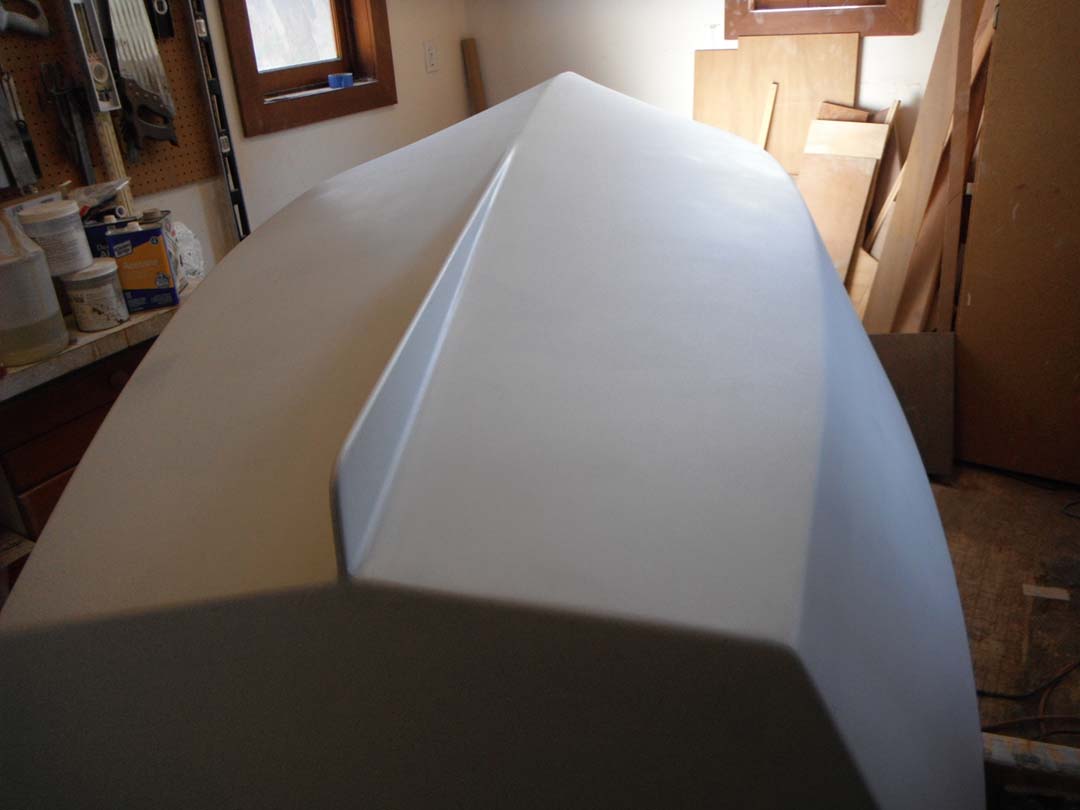
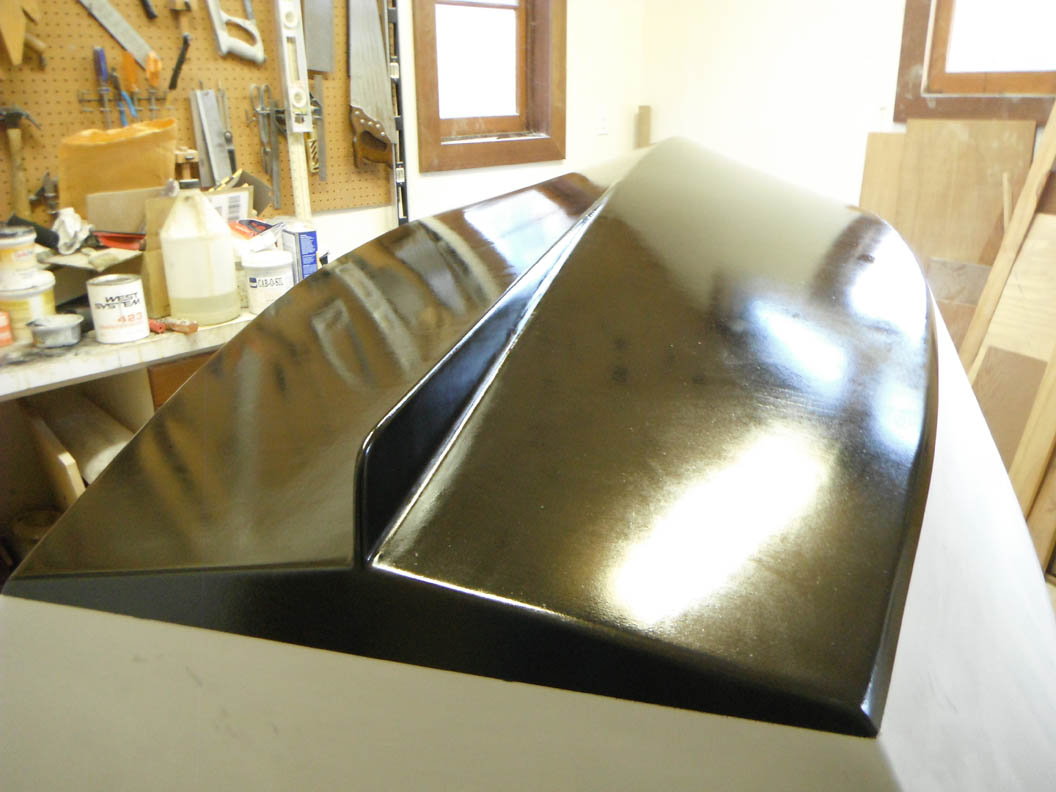
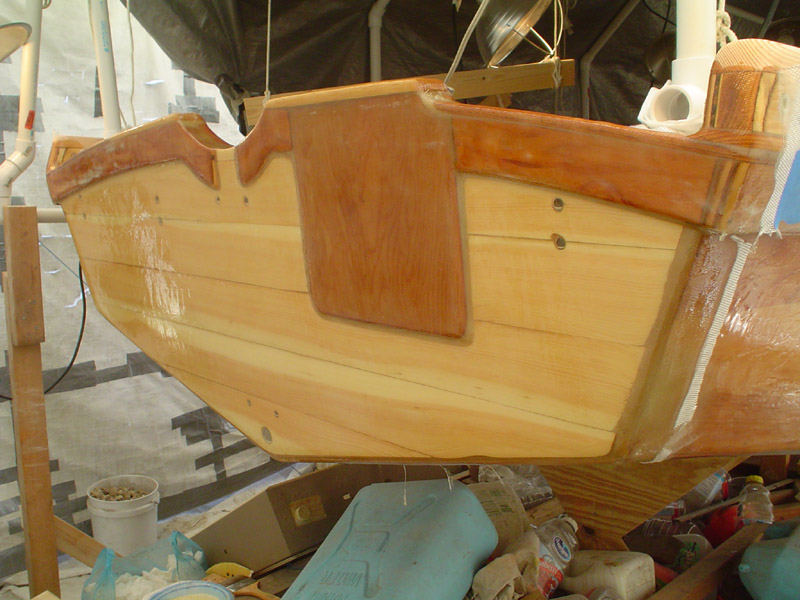
Here's the current state of the bow. All the forces applied in wrenching the bottom pieces together resulted in just a little concavity on this side so I've filled it with epoxy thickened with milled glass. The bow will definitely need a bit of fairing to achieve semi-perfect symmetry. Jacques' drawings show just the slightest hint of the bump at the knuckle, almost subliminal, and that's the way the pieces go together, or so it seemed to me.
Next step is a layer of glass on on the bottom.
Re: TJ's V10
Posted: Thu Aug 07, 2014 2:22 pm
by terrulian
Goop is devious stuff.
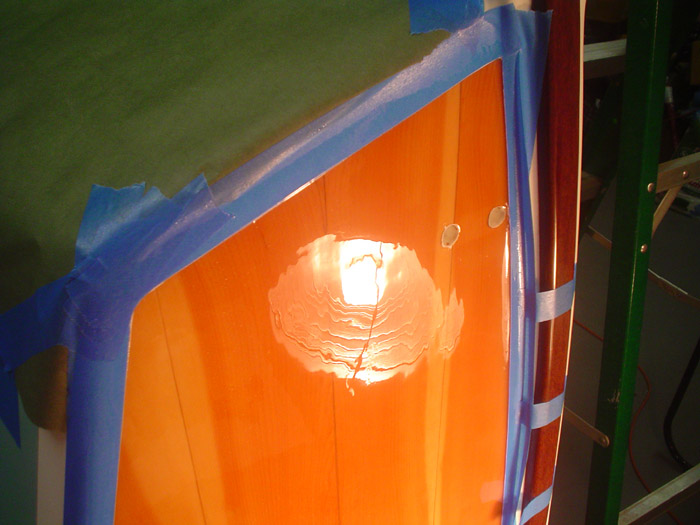
I crawled underneath the upturned boat yesterday because I missed seeing it, and saw this:
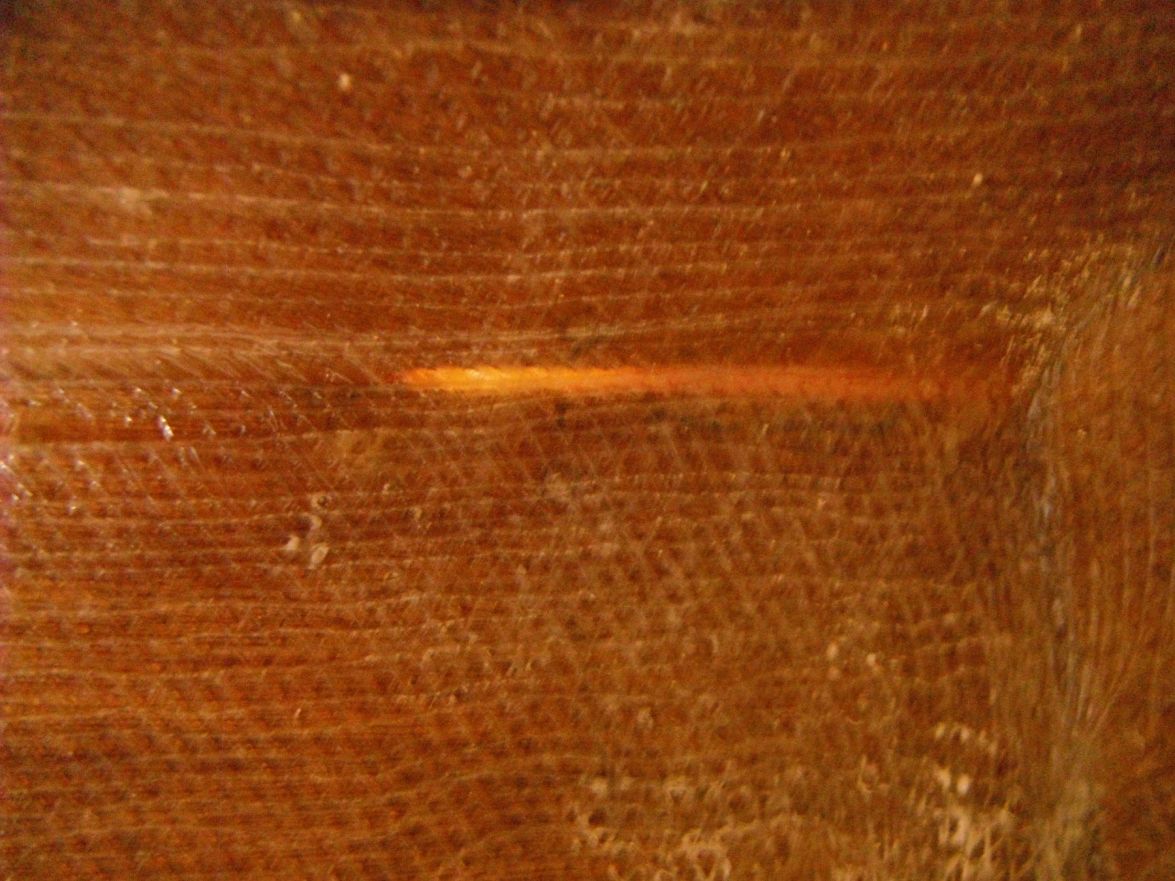
What this is a light coming through one of the seams, which have glass on both sides...so what I think happened is that when I filleted and taped the inside, which I did first, the epoxy/wood flour sagged into the duct tape below before it kicked, even though it was a fairly stiff mix and I'd waited an hour for it to begin to kick before glassing. Perhaps because the tape wasn't secured well enough at that point, it had room to ooze out a bit to the side, leaving this void which shows up as translucence. When I rounded over the outside edge before glassing it, I couldn't see how thin it was. If I had actually sanded completely through the goop I would have discovered this void. Maybe it is no big deal, but I think I'll drill a couple of small holes and insert some more epoxy thickened with wood flour in a syringe to fill it up. Think that will do it? Or should I just start the build all over again from the beginning?

I'm not too concerned since there is one layer of glass on the inside and there will be two on the outside of this seam...but maybe I should be.

Re: TJ's V10
Posted: Thu Aug 07, 2014 4:22 pm
by ks8
Drill into it from the inside, not the outside. No matter what you may need to do to fix it, it will fair more easily if you work from the inside, keeping that outer tape skin intact.
Maybe, best case, it is not a void anymore, but clear epoxy, from the taping, filling in the gap. If it is only in a few spotty places, and epoxy instead of air, then since it is a v10, and not a Mangusta, you might not have to do much at all other than a quick drill and refill to make sure it was solid clear epoxy and not air.
But confirm whatever your plans are with Jacques.

And maybe take a single picture of the entire hull, and then put little circles on the picture where all the very translucent areas are. This will give a better idea of how numerous, and where.
No need to chainsaw and burn it and start marking fresh sheets.
Re: TJ's V10
Posted: Thu Aug 07, 2014 5:07 pm
by terrulian
Thanks so much for the sage advice. I'll take some pictures with strong light to see if there are any other spots. It is certainly possible that, as you say, it is clear epoxy because now that I think about it, I put the duct tape on before I wet out the area with a chip brush, at which point the boat was right side up. It is not out of the question that the epoxy would pool a little in the crevices before I even started on the filleting. Still, I would have thought the fillet would make it opaque. Anyway, I'll take some more pictures, consult Jacques, and go from there.
Re: TJ's V10
Posted: Thu Aug 07, 2014 5:59 pm
by Cracker Larry
I don't think it will be an issue at all, but like KS said, run a small drill bit from the inside and see if it is solid or a void. If it's a void just fill it from the inside with thickened epoxy and move on.
Re: TJ's V10
Posted: Thu Aug 07, 2014 7:04 pm
by terrulian
Thanks, CL. Gonna drill into it right now.
At least you can't see through the plywood part. That may be a little more troubling.
Re: TJ's V10
Posted: Thu Aug 07, 2014 7:36 pm
by terrulian
Well, this appears to have been a tempest in a teapot, and that's being unfair to teapots. I drilled a couple of holes and couldn't find a void...I'll patch them later when I've got some extra epoxy.
Thanks for your kind indulgence, gentlemen.
Re: TJ's V10
Posted: Thu Aug 07, 2014 9:40 pm
by Cracker Larry
Good fiberglass lamination will pass light. I've seen solid glass hulls 3/4 thick that you could see the sun shine through. That little thing isn't a problem.
Re: TJ's V10
Posted: Mon Aug 11, 2014 12:19 pm
by terrulian
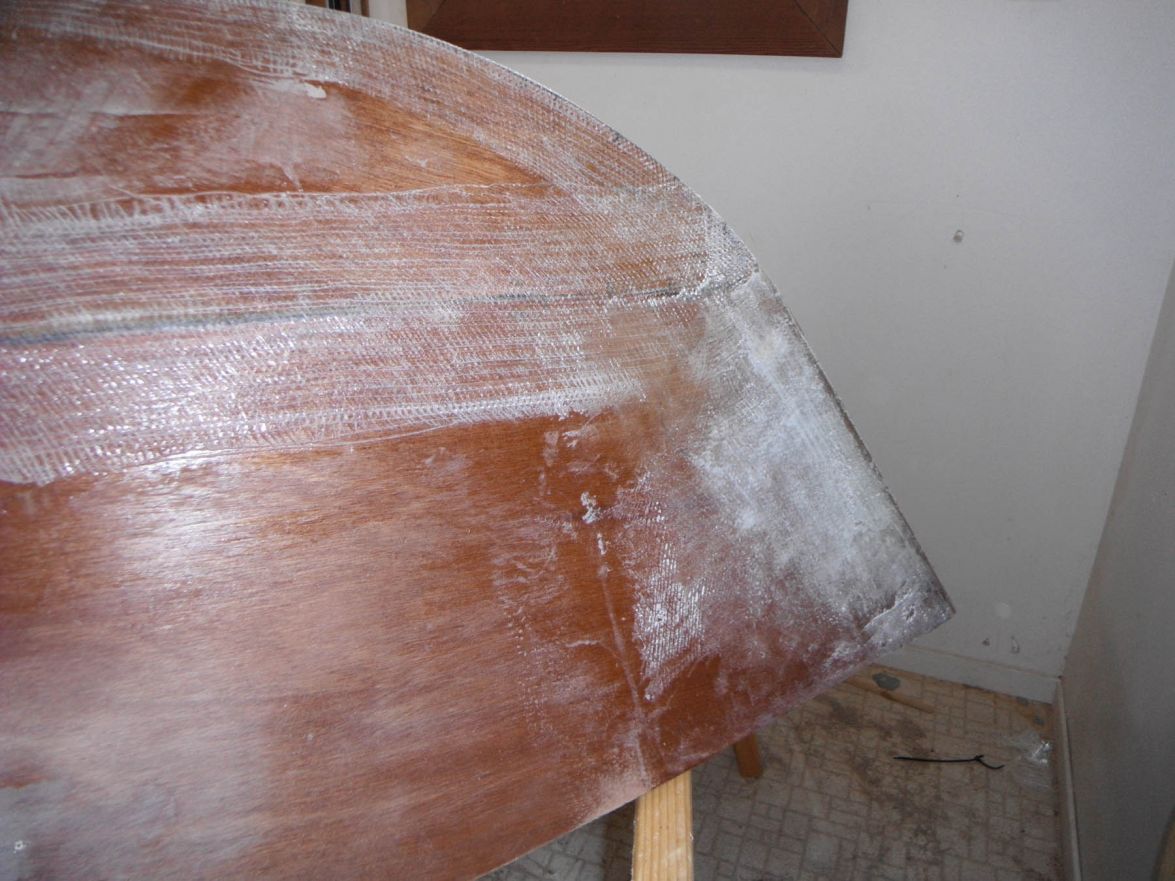
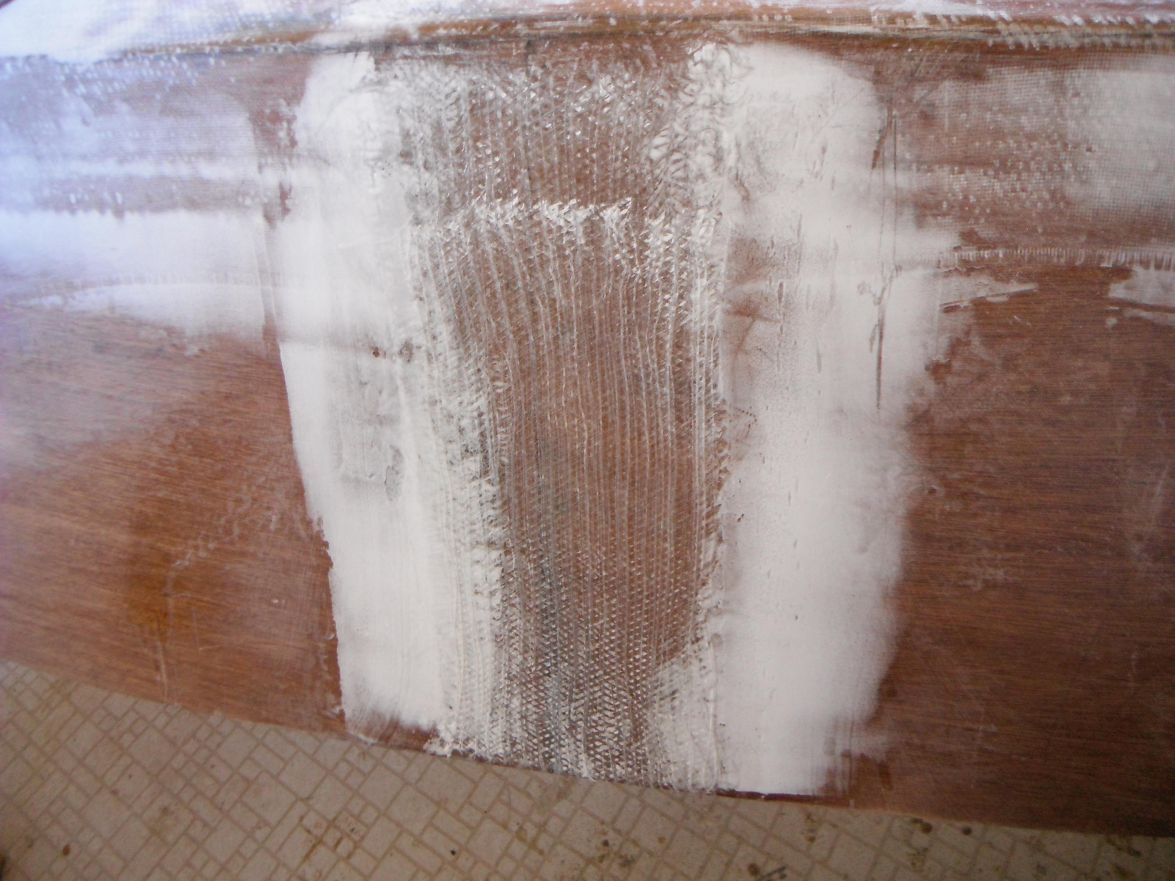
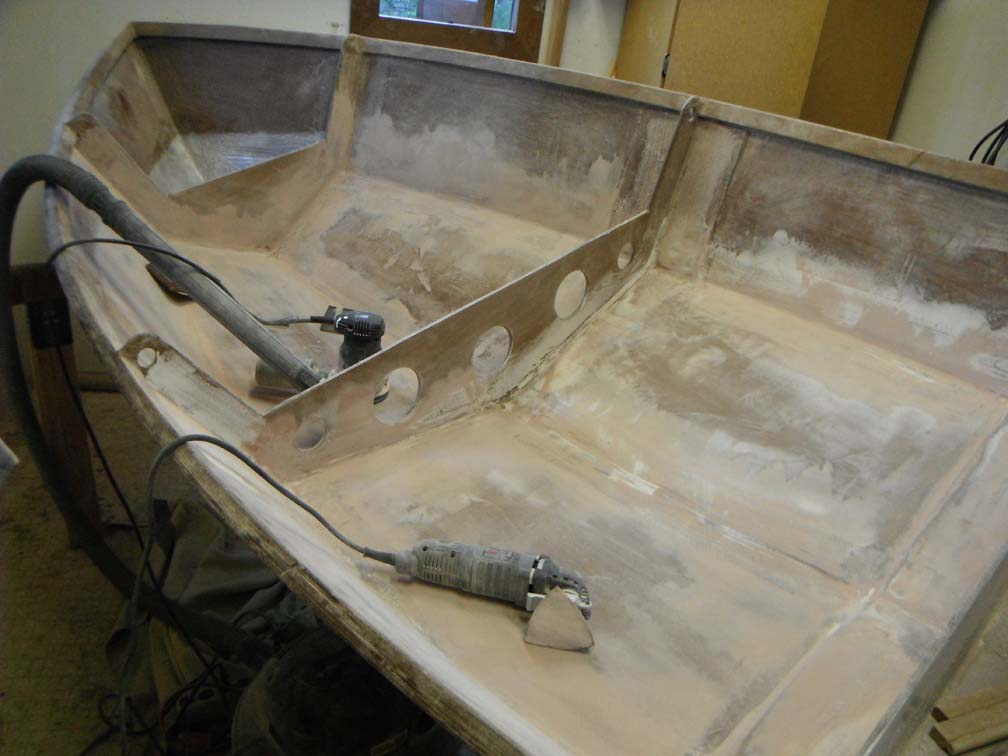
I laid the glass over the whole bottom and up about 6" on the sides.
It looked nice but the next day I was disappointed to find 3 or 4 small bubbles. I ground them out and patched them, but what looked pristine now appears like old jeans. I don't mind the extra time so much but was a little embarrassed at the sloppiness, when I thought I had been very careful with the glass. Oddly enough, the bow, where I thought there might be problems, came out fine. Just a little more time fairing. No big deal.
Re: TJ's V10
Posted: Mon Aug 11, 2014 12:30 pm
by jacquesmm
I missed this because ti was in the "non-technical" section.
It is fine to see light through glass and resin, not a problem. Air pockets can be a problem but not the kind of tiny little bubbles that require a magnifier to find. We are talking about real bubbles, not little spots here and there.
Re: TJ's V10
Posted: Mon Aug 11, 2014 12:32 pm
by ks8
That's right.
No big deal.
Re: TJ's V10
Posted: Mon Aug 11, 2014 2:26 pm
by terrulian
Thanks for the reassurance, guys.
I re-read my post on this bubble issue and found the word "pristine" and had to laugh. No pristine here. Wrong number.
Re: TJ's V10
Posted: Tue Aug 12, 2014 9:03 am
by terrulian
BTW, when I laid the glass on the bottom I thought I'd be smart and use Mylar as "poor man's ply" and it didn't turn out so swell. I've used it before in projects the size of a hatch and it worked fine but for some reason all that happened was that after putting down the plastic I used a laminate roller to press it into the glass/epoxy and I ended up just chasing a bunch of bubbles around, like herding cats. I had pre-cut the Mylar and had it so it would lay down flat, or so I thought. I did it for awhile and then started to get paranoid about the epoxy going off before I had eliminated the bubbles...so I peeled it off and just used plastic spreaders and a chip brush to tame the glass, which worked fine. Clearly, a little above my skill level.
Anyway, 5-mil Mylar isn't really all that cheap so real peel ply may have been more appropriate...but I had no experience with it and was chicken.
Re: TJ's V10
Posted: Tue Aug 19, 2014 12:04 pm
by terrulian
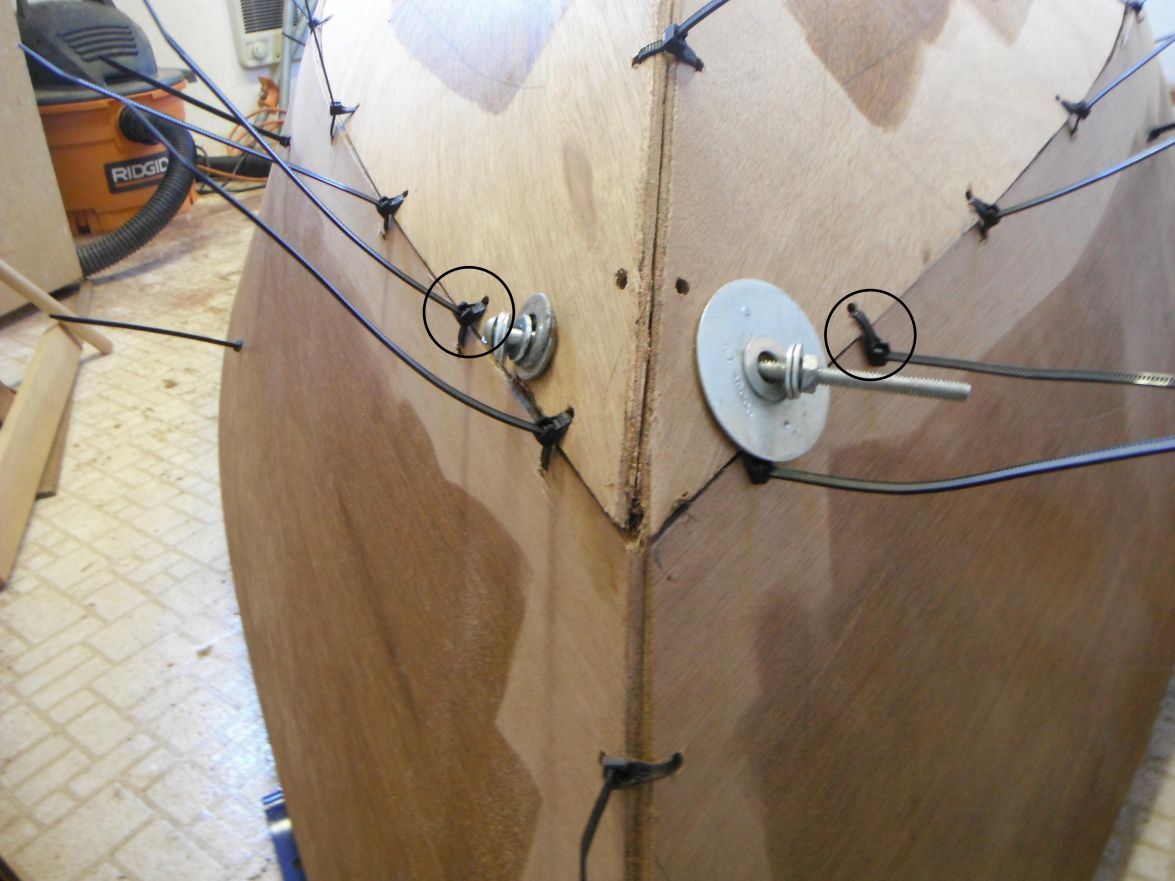
Fairing the hull has been proceeding; nothing particularly interesting about that. But perhaps this may be of value:
When I used the "frankenbolt" method to pull the bottom pieces together at the bow, I had already tightened the zip ties as tight as I could and then concentrated on the bolt. What I think I should have done is tighten the bolt and only then bring in the zip ties, particularly the ones circled. A very slight amount of concavity was produced, I believe, when the ties pulled the sides inboard. I wasn't paying attention to this at the time. It's very minor and I'm fairing it out, but should anyone else use this method...
Re: TJ's V10
Posted: Tue Aug 19, 2014 12:09 pm
by terrulian
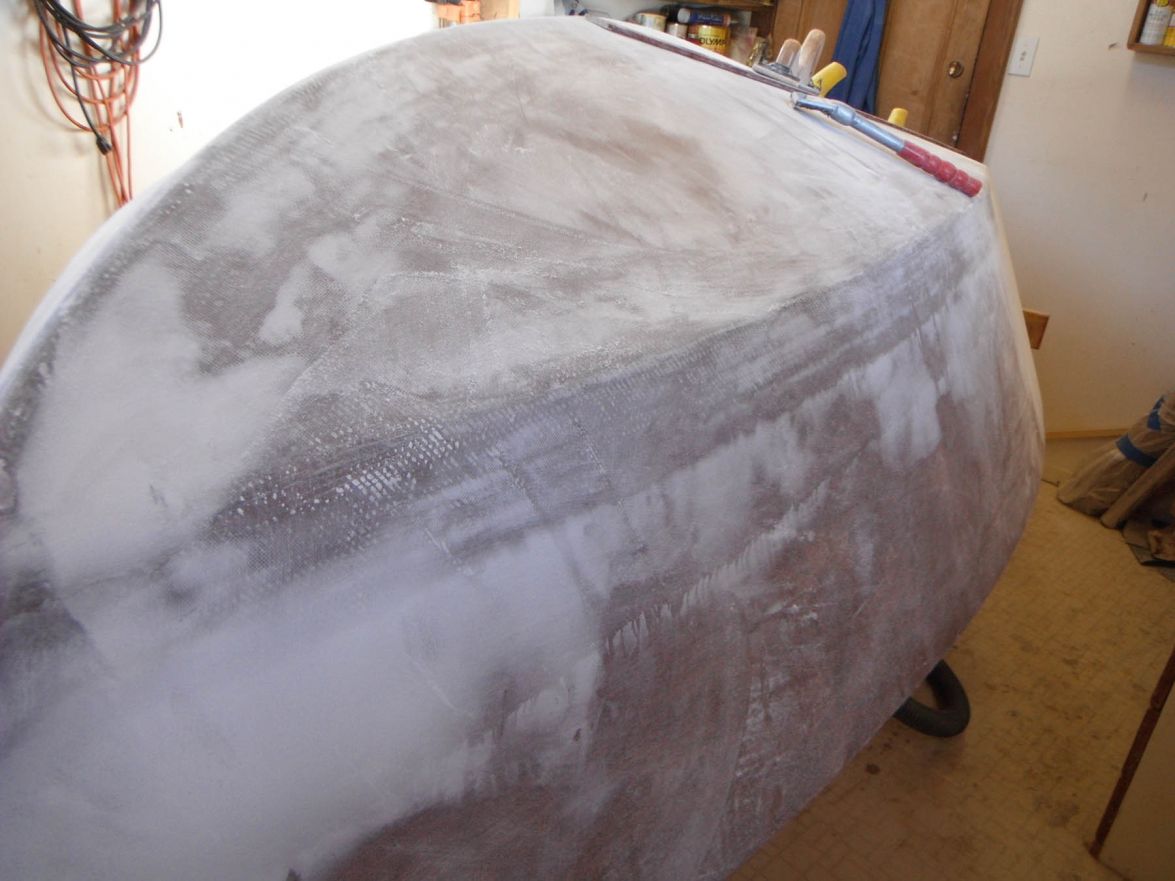
Another issue that was not so smart and is requiring additional fairing is that I mistakenly used butt blocks that were 10" wide. I know, don't yell at me. This created flat spots at the middle frame. They would bother me so I am building them up with glass and goop. This will add a tiny bit of weight but I'm going to have to live with that. In my next life there won't be any mistakes.
Re: TJ's V10
Posted: Wed Aug 20, 2014 11:02 am
by ks8
That's what the first boat is for.

The way plywood bends as a developed plate sometimes gets interesting. Some of it is normal, some not. It depends on how the tie wraps are tightened. Some shapes should form naturally, with very little force needed. If one tries to force the shaping on those areas, it will need more fairing. Generally these designs take shape naturally as the panels bend *fairly*, but there are some exceptions, typically at the bow. It is easy enough to post a picture and ask, to make sure.
The bow is looking good from here, and the butt block seam will be fine. Depending on what you are aiming for, the fairing will be simple and quick, or simple and not so quick. Forget trying to make that seam disappear with an RO. The long board will be the tool of choice to fair that best.
Re: TJ's V10
Posted: Wed Aug 20, 2014 11:25 am
by terrulian
Thanks, I appreciate it.
Yep, the longboard will be the tool of choice. I'd never be able to do it with the RO, and besides, I rather enjoy hand tools. It may be a mental problem.
Re: TJ's V10
Posted: Wed Aug 20, 2014 11:29 am
by ks8
When low tech is the best solution -- that's no mental problem.
Re: TJ's V10
Posted: Tue Aug 26, 2014 9:22 pm
by terrulian
So here we go. I found that yellow thing at Harbor Freight. It's a very bendy longboard, to go with the stiffer one.
I've got a question for you guys. My temptation is to get the hull pretty smooth just by look and feel and then roll on a coat or two of epoxy over the microballoons/epoxy and then a coat or two of S3 primer, just to see where I'm at. At that point I figured I'd start with the QuickFair. Is that the right order?
Re: TJ's V10
Posted: Wed Aug 27, 2014 8:25 am
by Cracker Larry
Quick Fair before primer. I usually put on 2 or 3 rounds of fairing, then sand and prime. The primer will show spots that may need a little more fairing, but do most of it before priming.
Re: TJ's V10
Posted: Wed Aug 27, 2014 9:08 am
by terrulian
Thanks, Cracker Larry (or may I call you CL?), will do. You seem to use the water method to locate problem areas, while I think Jacques and others do it with a guide coat over the primer...or are these different steps in the process?
Also, at what point do I want to just coat the entire boat with clear epoxy for waterproofing? At first there was a coat on the whole boat, but at various places at the edges of fairing, this has been sanded off.
Re: TJ's V10
Posted: Tue Sep 09, 2014 8:57 pm
by terrulian
I've been doing a lot of fairing and sanding but compared to knottybuoyz flip and Shine's new boat and Cracker Larry's details and many others, I don't have much in the way of entertainment to offer. The boat has three coats of S3 on it and all looks pretty good. For the most part I had anticipated the problem areas and they are minor but I was anxious to put on a solid color to see where I'm at so I jumped the gun and applied the primer. I'm trying graphite powder for a guide coat and then will apply Quick Fair.
But I did come up with one thing: The only truly worrisome bit is the bow knuckle. Nobody will ever notice but me but I'll know. I put a contour gauge on it and the bow is about 1/16" out of symmetry for the 1st couple of inches. I would have done this when I was wrenching together the plywood but you couldn't put the gauge on it with the bolt there and you couldn't hold it together without the bolt so it was a Catch-22 at least for my intellect. But I thought of an excellent solution which has calmed me down. I have to put a bow eye somewhere, so I'll just put it right there.
Re: TJ's V10
Posted: Sun Sep 21, 2014 5:13 pm
by terrulian
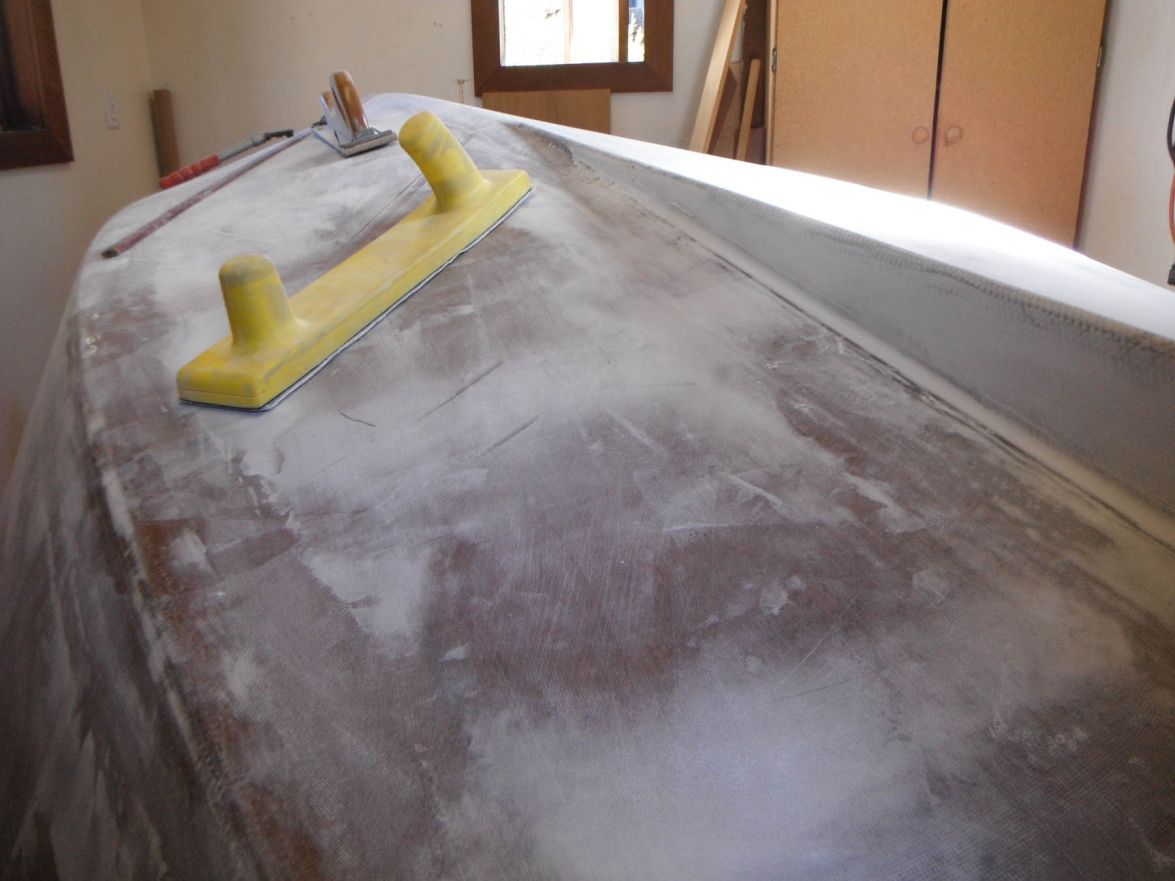
Sanding is my life now. After a bunch of fairing I put on 3 coats of S3, then a guide coat of graphite, sanded it down, filled the low spots and then sanded and then filled some more and sanded some more etc. and just put on another 3 coats of S3 since in a lot of places there was little left. All hand sanded, don't trust the RO.
That doesn't look TOO bad, but then closer in you see
And that's one of a dozen. So we'll see if I can get these settled today. I've decided I'm done shaping so if the boat needs any more of that I'm going to send Cracker Larry a plane ticket and a retainer
Only kidding. I'm not a millionaire. But I think I can conquer these little buggers by myself...although there's no guarantee. I'd swear I've already filled a few of these more than once

Hey, no one answered my question about heating the epoxy/graphite in the microwave to make it mix better.
Re: TJ's V10
Posted: Sun Sep 21, 2014 7:54 pm
by ks8
Looks like a boat!
Play dentist...scratch up in those *cavities* with a needle file, and then fill 'em with a very small batch of epoxy and filler blend. Then when cured and sanded fair, top with a coat or two of primer. That looks a little too big to try to fill with just more primer.
I would NOT try the microwave thing. First, a microwave cooks by exciting water molecules, and we hope there are not any of those in the epoxy.
And if it did heat the epoxy for some other reason, the result could be a real mess, in many ways which I'd rather not find out by experimentation.
Next, heated epoxy is going to go off much quicker.... much quicker, if you heat it some other safe and predictable way. Normal room temperature is the temperature to use it at, usually. So --- use the microwave -- only for food, as per its designed purpose.
Re: TJ's V10
Posted: Sun Sep 21, 2014 8:24 pm
by terrulian
Thanks, ks8 for the sage advice.
Already filled the holes with Quick Fair. But I didn't think of getting in there with a small tool first. Hope it sticks! You're right, too big for primer. More sanding to follow.
Yes, the microwave thing sounded sketchy. I thought I'd seen it on a forum but anyway it was in regard to CL's recommendation that the graphite mixed better with epoxy when the temperature was hot. [To be clear, HE didn't mention that particular idea.] I'll do it at room temp, even though we don't get the kind of ambient temperatures in the SF Bay Area that he sees in the southeast...which is just as well
Re: TJ's V10
Posted: Sun Sep 21, 2014 10:00 pm
by ks8
I've had to heat up resin to dissolve crystals that had formed in it. I found a plastic trash can in which the gallon jug of epoxy barely fit. Then I heated a little water near boiling and poured it into the trash can. I watched that the trash can didn't melt, then when the water had cooled a little, but was still plenty hot, I floated the gallon jug of epoxy resin in it, with the cap loosened. Because the jug barely fit in the trash can, it would not tip over and get water in the epoxy jug. The cap was loosened but left on, to minimize any moisture from hot water steam getting into the jug. Then I watched crystals dissolve away after swapping in fresh hot water a few times. This warm jug bath can get the epoxy HOT. If you try to mix it at that temperature, you won't have much working time, and if you don't pour out the blended resin and hardener quickly into a pan type of container, instead of the mixing cup, it may boil and then setup as a smoking blob. Don't ask how I know. Remember, the epoxy curing reaction produces its own heat (exothermic), as long as it is at a minimum working temperature for the reaction to take place. The smoke from crazy hot curing epoxy is very bad stuff. If this happens, don't breathe it, and get it out of the work area, since the batch has become useless for boat building.
So then, the thing to do, if you want to try heating the resin to make it a little thinner for blending in the graphite, is to be careful, don't heat it too much, have a large surface area pan type container ready in which to pour in the mixed blend (so it can cool by greater surface area exposed to air), and work quickly out of that low and wide container. It is very doable, when thought out and done the right way. I've done it for some filler blends, and I've also chilled hardener in the fridge to get more work time, but it can be a pain to mix chilled hardener.
edit - you could heat up the water that you will use for the epoxy bath, in the microwave, but not the epoxy itself in the microwave.
Re: TJ's V10
Posted: Sun Sep 21, 2014 11:22 pm
by terrulian
Thanks very much for sharing the results of your science experiments!
Having heard that rundown, I think what I will do is skip the heating and mix the epoxy/resin using CL's directions absent the Georgia temperatures, and see how it goes. I'm actually at least as worried about the roller disintegrating as I am about the mixture, and I've also had this thought: so maybe it doesn't turn out perfect, and the result will be that the other imperfections in my preparations will be masked by the unevenness of the epoxy coat. One can always hope.
Re: TJ's V10
Posted: Sun Sep 21, 2014 11:50 pm
by ks8
Sure looks good so far
Re: TJ's V10
Posted: Tue Sep 23, 2014 12:59 pm
by terrulian
A bit frustrated. As I mentioned, I filled the holes with Quick Fair after wiping with acetone. For almost all of them, this did the trick. But this area is giving me fits. I'm sure I've filled it three times at the very least, and yet sanding it yields the result you see below, so the Quick Fair is not adhering. There are a dozen little divots that refuse to be filled. I am a little skittish about doing what ks8 suggests, even though his experience in these things leads me to believe that his is the only solution. The reason I'm reluctant is that these are obviously voids between the weave, and I'm worried about filing or grinding them out of a concern for weakening the glass. They are so small that it will be very hard, without a magnifying glass, to see what I'm doing well enough to be careful, and even at that, without the hands of surgeon, I may screw it up. Should I try something other than acetone? I know lacquer thinner and alcohol have been used, but not for this particular application. Maybe what I need is just a stiff wire brush?

Re: TJ's V10
Posted: Tue Sep 23, 2014 1:35 pm
by tech_support
I do not understand why QF will not fill them

I have never bothered to try and clean out the tiny crevasses, they just fill with QF, then get sanded.
Those are so small I might just let the primer fill them in.
A trick to filling the last teeny tiny bits; After you roll on a coat of primer, go back with what is left over and put it on thosr spots THICK. You can even trim most of the bristles off a 1" brush and "dab" a "blob" of primer on them
Re: TJ's V10
Posted: Tue Sep 23, 2014 2:16 pm
by terrulian
Yeah, it's weird. It's not like there is a general adhesion problem that I'm seeing all over the place. I'm afraid as small as they are, they will not be quite filled by S3 but I'll try your method. I'd like to just forget them and live with it but I haven't reached that point yet. I think what I'll do is use a wire brush, then some cleaner other than acetone, like alcohol, then perhaps either primer or Quick Fair and see what I can get to stick. My last experiment was just clear epoxy, and that didn't work either!!
Re: TJ's V10
Posted: Sat Sep 27, 2014 2:53 pm
by terrulian
Well, after a few more tries at this I finally resorted to ks8's solution which I had been avoiding. I dug out the residue, which looks to be either primer or epoxy/microballoons, with an awl, cleaned with a wire brush and then acetone, and re-applied the Quick Fair. That seems to have done it. However, on the resins, fiberglass and paint forum I see a question which bothers me and is not yet answered: how long to wait for S3 to cure before filling with Quick Fair? CL said he waits 5 days before painting on top of the S3, and I am in serious trouble if that same 5 days applies to Quick Fair. I'm wondering if this is perhaps the reason I'm getting these voids. It would really slow down the process, however, if I had to wait 5 days after priming (which is when stuff like this shows up) and filling with Quick Fair. Not only that, the worse problem is that I have not given the S3 anywhere near this amount of time before applying the Quick Fair, and am worrying that all that fairing is not going to adhere. In feathering out the Quick Fair, you're going to end up with areas where the QF is on top of the primer.
Re: TJ's V10
Posted: Sat Sep 27, 2014 3:40 pm
by ks8
A speculation....
The S3 primer is water based. The areas where you had some difficulty, were *hollows*, small ones, the size of the weave. It is possible that if there was any moisture or uncured residue of some sort, that had not yet completely evaporated or otherwise vanished, it might have remained a little more concentrated in those few small little hollows. I'm guessing.
What were the temperatures during the cure? Did you thoroughly sand and wipe down all the primer before the quick fair? If those little *wells* between the weave were deep enough, they might not have been, technically, sanded or wiped down at all, if you follow my meaning. And if that is the case, then that *raises* the confidence in the surface cure and prep over the rest of the primer surface elsewhere. Let's hope this is the case.
I have learned, when it comes to adhesion -- when in doubt, be double sure that the surface is definitely wiped down, scratched up at least minimally (for good secondary mechanical bond adhesion tooth), vacuumed and wiped again and dried.
When close to glass tape fibers, this doesn't mean you do fatal damage to the structure by slightly scratching or even cutting a few of the upper fibers, and, you can get some minor scratching up in the area without necessarily damaging the fibers. As Jacques has said elsewhere, he designs in some reserve strength. In other words, since each strand of glass is made up of many fibers, cutting a few in the scratching up process is still going to leave you with sufficient strength. And, this is a V10, not an 80 mph planing hull. Your questions and concerns are good ones. The problem areas you show are very small for that boat, and appear to be insignificant. When in doubt, I put one more layer of glass tape over the top, sometimes cheap and thin, and then have no worries while even sanding right through that entire sacrificial top layer. Everyone develops their own little techniques to have a confident strong worry free building experience.
I'm not a professional engineer. I'm not present at your site to see it up close for myself. I wasn't there watching your prep and mixing. I'm just a fellow builder. ANd as such, I suspect you will not have quick fair falling off everywhere, especially if you are not seeing any problems at all in any *non-glass-weave-texture* areas. Epoxy is a very aggressive adhesive. I'm thinking the quick fair might not like moisture contamination when being applied, and those little weave wells are candidates for holding impurities like moisture. That's why I sometimes take a needle file to them, just to be sure they are cleaned out and scratched up a bit, and cleaned out again. Its a particular potential issue with strong weave texture showing after applying a water based primer, if there is any rush on the primer cure, but, usually, before such primer, there is no longer any deep dramatic weave texture. Most of that is already filled in *fairly* well (pun intended
). Fix those spots up, and I think you'll be fine. Let us know your next step.
Re: TJ's V10
Posted: Sat Sep 27, 2014 3:52 pm
by Cracker Larry
Maybe what I need is just a stiff wire brush?
That's what I was going to suggest. It seems like there are always 1 or 2 spots that drive me crazy, just like that one
Make sure the acetone you are using is not a recycled product, they can have contaminates. Or try denatured alcohol or lacquer thinner instead. Lacquer thinner probably gives the cleanest surface.
Re: TJ's V10
Posted: Sat Sep 27, 2014 4:29 pm
by terrulian
Thank you both
very much for your swift and clear responses.
S3 and Quick Fair are new products for me, so I'm not as confident about using them as I am with epoxy/microballoons/silica. Especially weird to me is that S3 is water-based, and to my chemically untrained mind
, that is just not what I associate with epoxy, so without the experience you two have, I'm tentative in my understanding of it. Neither of you mentioned a 5-day wait after primer before Quick Fair, so I assume this did not set off alarms with you?
I am pretty danged sure I carefully sanded and cleaned these areas with acetone. There may be some contamination I suppose in the acetone, but since the entire hull has been similarly treated, this seems unlikely to be the issue. I can't imagine I blithely applied Quick Fair without doing these things, but I can imagine I missed a spot or two...although I'm pretty careful. But I believe the stuff that didn't adhere, now that I've dug it out, was neither the primer nor the Quick Fair but the coat of epoxy and microballoons that I used as my first step.
ks8 is correct that every occurrence is in the voids between the weaves. Also, I'm not very concerned about strength because in each of these areas, this is the second layer of glass, applied as recommended to resist abrasion on the bottom, not the original taping, which is underneath and has been untouched. So my concerns are aesthetic, but on the other hand, I put a bit of time into this and I'd hate to end up with glaring faults.
Also, CL, thanks for the reassurance that even you have a spot now and again that is a problem child
.
Re: TJ's V10
Posted: Sat Sep 27, 2014 7:08 pm
by ks8
Neither of you mentioned a 5-day wait after primer before Quick Fair, so I assume this did not set off alarms with you?
Careful with assume... it is not always possible to speak to every little detail that one sees.
I have a fresh gallon of S3 Yacht Primer here, but haven't used it yet. In the past I have used WR-155, their previous primer product, also water based. I realize some users have painted over it after just a few days cure, or less. But I prefer to give it at least a week. The outside of the hull had months of cure before I painted it, but then, I did move over 500 miles, with it on a trailer, and had to resettle abit.
I suppose if you live in the arizona desert, it may cure faster. I think the application notes say a week, but then, I haven't read those in awhile. I'm about to open the yacht primer, and actually finish painting my seats(!), so it is time to download the application notes for it from System Three. You might do the same. They may inspire some more good questions, from us all.
Then we can post some answers and recommendations as we encounter and develop them.
Re: TJ's V10
Posted: Sat Sep 27, 2014 10:57 pm
by terrulian
Here's the quote from the downloaded instructions:
http://www.systemthree.com/reslibrary/l ... rature.pdf
Yacht Primer dries by evaporation and then cures in a temperature dependent
resin/hardener curing reaction. It may be recoated with
additional primer after it is dry to the touch but it should not be topcoated
until after it cures. Curing takes about a day in warm temperatures and
longer in cool weather. Test for cure by wetting a finger and rubbing it
on the primer. If your fingertip picks up some primer then it is not cured.
The film will not be water-resistant until it is cured. Rain or moisture
from dew or condensation can damage the film.
However, this is addressing the issue of a topcoat. I'm not sure this applies to Quick Fair.
In any case, even though I didn't do the wet finger test, the Quick Fair I applied was done at least a day later with temperatures in the 70s. I'm crossing my fingers this is sufficient. Also, my problems don't seem to have stemmed from the S3 not adhering, but the original epoxy/microballoon goop. I have not seen any areas where the S3 didn't seem to work as expected and it has been subjected to quite a bit of sanding.
Re: TJ's V10
Posted: Mon Sep 29, 2014 12:41 pm
by ks8
If the primer had problem adhering to the tape laminate, or the microballons before the primer had the problem adhereing, then that would be a different issue, possible a blush issue, which would have same solution, ie, better cleaning out and slight scratching up of the weave hollows.
As to one day being sufficient of a cure for the primer, like I said... Maybe if you live in a hot and dry climate. But I still feel much more comfortable with a week. Let's just call it a personal minimum with a water base primer, particularly if fairing will be done 'over' the water base primer. I would also, as a personal rule, leave a bit more toothy surface in any primed areas that will be further faired.
Fixit up and press on.
Re: TJ's V10
Posted: Mon Sep 29, 2014 2:38 pm
by terrulian
Thanks.
Still working on it, I'm afraid. I am down to one small area that has resisted my efforts so far. I do believe you're right that it must be a blush issue. I must have missed a spot, as the rest of the boat is fine. So today I will have to do some more aggressive grinding with a sort of foam wheel I have selected for the job, together with a little dentistry. A little frustrating to be not moving forward, but it is penny-ante stuff compared with some issues many on this forum have faced. I'll let you know what works.
As to waiting a week, considering that I have generally not had this problem, and have had so many rounds of fairing followed by a primer coat that revealed more holidays, that it would be a very long process.
Re: TJ's V10
Posted: Tue Sep 30, 2014 12:21 pm
by ks8
Take another look at Joel's post at the top of this page (oops - the previous page
) ... About putting a big blob of primer on such areas. I've done that on some very stubborn pinholes on the seat tops and it did the job.
It will mean doing a careful job of fairing the blob back down, right on that chine. I think most of us end up finishing off the final prep of the chines with a careful light touch by hand and small sanding block or sanding sponge. Its one of those fun detail areas, that is rewarding when finished, something I suspect only the builder sees and appreciates.
Re: TJ's V10
Posted: Tue Sep 30, 2014 2:46 pm
by terrulian
Thanks. I've done all of the above. I haven't done any machine sanding to date, and have used the sponges lightly on the chines. I tried Joel's suggestion but the primer also came free when challenged, so like I said I did a bit of grinding away of all fillers and primer, and picking away with an awl, trying to not compromise the glass, then washed it with water, let it dry, washed it down with acetone, and applied Quick Fair. I'm waiting for it to cure completely and then we'll give it another sanding and see what happens. I can't remember having so much trouble getting epoxy to stick. Usually it will adhere to anything that's not specifically engineered to repulse it, like mylar, whether you like it or not. I'll figure it out somehow.
The chine, in the end, will not be as nice as it could have been. I had to fill out the sides with glass to fair them, as I had mistakenly used butt blocks that were too wide and created a flat spot.
That was sorted with extra glass and fairing, but the difficult part was at the chine, since you have the bottom, which was cut correctly but then stitched to the overly flattened side. So the area of the chine directly below the widened boat doesn't have quite the fairness I would like. If I did it over I think I could get it right.

I can't believe anyone could notice it, however, unless I pointed it out and even then I'd have to demonstrate what I was talking about. I don't even think I could get it to show up in a photo. Maybe I'll try. But
I know it's there. What is going to happen, though, is that the line between the black graphite/epoxy and the topside paint, which I think is going to be a sort of dark blue, should be a fair line about 1" up from the chine and my fantasy is that this transition will trick the eye into believing that all is just dandy. Could be wishful thinking.
Re: TJ's V10
Posted: Tue Sep 30, 2014 3:34 pm
by terrulian
BTW, I've thought of a new way to consider my failures. Despite the time I've spent tracking down and eliminating glitches, I still know that in the cold light of day I'm going to see some things that have managed to escape my best efforts. I've decided they have earned my grudging respect, and I shall call them "survivors."
Re: TJ's V10
Posted: Tue Sep 30, 2014 5:15 pm
by Cracker Larry
I still know that in the cold light of day I'm going to see some things that have managed to escape my best efforts. I've decided they have earned my grudging respect, and I shall call them "survivors."
Me and you both
Re: TJ's V10
Posted: Fri Oct 03, 2014 3:37 pm
by terrulian
I think I’m almost there with this fairing business. I ordered my wife, or perhaps it was pleaded with her, to come out to the shop and give me the benefit of her opinion on whether certain little glitches were worthy of further attention. I had to point them out of course, as her unprofessional glance would never have discovered them. She snickered and said it was “cute” that I thought they were important enough to consider. “Cute” is not exactly the adjective a manly boatbuilder is looking for. She said, “Let them live, they’re like birthmarks,” at which she rolled up her sleeve and pointed to a dark mark on her forearm. I said, “Wait a minute, did you disclose that before we were married?” This boatbuilding business can be hell on relationships.
Re: TJ's V10
Posted: Sat Oct 04, 2014 11:22 am
by ks8
Re: TJ's V10
Posted: Wed Oct 08, 2014 10:10 am
by terrulian
It's OK, my wife hasn't paid any attention to what I say for years, and she seems pretty happy with that arrangement.
Re: TJ's V10
Posted: Wed Oct 08, 2014 10:35 am
by Cracker Larry
Sounds like Mrs. Cracker and I
I enjoy your sense of humor
Re: TJ's V10
Posted: Sat Oct 18, 2014 10:16 am
by terrulian
Tiny divots finally resolved. So on to the result of the epoxy/graphite coat.
I discussed my problems with it on the resins, fiberglass, and paint forum. Like many others except for you experts I had difficulty getting a satisfactory result for reasons it will take a couple more boats to figure out but anyway there are four coats on and it isn't going anywhere. I'm sure it will serve its purpose.
I have finally flipped the boat and also have rigged a three-part purchase to lift it when required. Nothing compared to knottybuoys engineering, but anyway I ordered a fish scale which I plan to use to weigh the boat. Problem is I couldn't find a cheap one that exceeded 110 pounds in capacity. But supposedly the target weight for this boat is 85 pounds...hmmm. Don't think I'll make that

.
Re: TJ's V10
Posted: Sat Oct 18, 2014 10:35 am
by Cracker Larry
That looks great Tony. After you flip it nobody will see it anyway. It takes a lot of practice to get a good finish with graphite and the gods have to co-operate too. It took me 7 boats of practice
Re: TJ's V10
Posted: Sat Oct 18, 2014 11:06 am
by ks8
Looks plenty slick.
The first few scratches will make it go faster.... while on the trailer.
There are ways to weigh it with a scale that doesn't quite go high enough, using a fulcrum. Or put it on several bathroom scales and add them up. Just put a board on the scale tops first, so the contact point weight is distributed over a larger area on the scale top, so you don't dent it. Yep... done that.
Re: TJ's V10
Posted: Sat Oct 18, 2014 1:29 pm
by Cracker Larry
It's like weighing an airplane, one wheel at a time.
Re: TJ's V10
Posted: Sat Oct 18, 2014 1:50 pm
by Walkers Run
ks8 wrote:Looks plenty slick.
The first few scratches will make it go faster.... while on the trailer.
I just got that
Re: TJ's V10
Posted: Sat Oct 18, 2014 2:29 pm
by ks8
Walkers Run wrote:ks8 wrote:Looks plenty slick.
The first few scratches will make it go faster.... while on the trailer.
I just got that
I too shall have a happy retirement.
[as I finally get all the jokes that went over my head throughout life
yes, I get strange looks when after sitting in a waiting room for half an hour, I break into a laugh for a few seconds. This why I always bring something to read. People think its something funny I read. I need to remember to hold the book rightside up. ]
Re: TJ's V10
Posted: Sat Oct 18, 2014 9:22 pm
by terrulian
Thanks, guys...
Got the scale and it looks like right now it weighs 75 pounds, and this is before seats, knees, fairing the inside, and paint. So a bit on the heavy side but I have an extra layer of glass on the bottom and glassed the skeg which was not required. Plus, tons of fairing, although I think I'm one of those guys who, like Jacques says, sands 90% of it off. It is what it is and on we go.
Re: TJ's V10
Posted: Sun Oct 19, 2014 1:29 pm
by ks8
Heavy?
You're doing well.
Re: TJ's V10
Posted: Tue Oct 21, 2014 8:29 pm
by terrulian
All right, on with the dance.
This image is of interest only because 1) the bulkheads are notched to accommodate an inwale which I'm using instead of a rub rail to minimize the beam so I can (hopefully) get it in my van. Only the first layer of 3/8" meranti has been glued. 2) I followed Jacques' advice and cut the pieces for the inwale using the sides for a pattern while the boat was unassembled. This seems like it makes so much sense but I'm sure without his tip I wouldn't have thought of it. As a result, the pieces fit perfectly without any cursing.
Re: TJ's V10
Posted: Tue Oct 21, 2014 9:06 pm
by Cracker Larry
I followed Jacques' advice and cut the pieces for the inwale using the sides for a pattern while the boat was unassembled. This seems like it makes so much sense but I'm sure without his tip I wouldn't have thought of it. As a result, the pieces fit perfectly without any cursing.
That really is a LOT easier than trying to bend straight rub rail pieces to conform to the sides. You will certainly curse trying to bend straight pieces of rub rail on to these side panels. Like TJ, I'd recommend cutting them out together on the same curve.
Re: TJ's V10
Posted: Thu Oct 23, 2014 10:45 am
by terrulian
I'm in the middle of gluing in the inwale and it's definitely great to be moving forward.
But I will soon be presented with a crossroads.
I love the idea of leaving the seats, breasthook, and knees bright. However, I have always thought brightwork looks great if you have the money to pay someone to varnish your boat every year. I'm not interested in that job. But Rmarsh has kindly informed me that his very nice bright finish is two coats neat epoxy and two of varnish, which he says gives him years of life.
The problem with varnish is that, unlike paint, once it fails (which to me seems to be immediately

although it's probably a year) it is my experience that the entire surface must be sanded back to bare wood, or else you're left with obvious discoloration. I suppose the epoxy makes this unnecessary

but still, I'm wondering whether stains will remain. Unlike paint, you can't just sand out varnish and feather it in, or at least I can't without leaving a mark because I'm not, you know, a
professional. Bateau now has a new 3.5-oz cloth that is very transparent, so perhaps a layer of that, several coats of epoxy, and then varnish will result in a lasting finish? I think that would work, but:
This brings up another problem I need to sort out. Jacques calls for glassing in the seats on the V10. My understanding is that the glass must go on the top edge of the seats, not below. Applying glass underneath would be an awkward job especially in the forward and aft seats, which are enclosed
. I can't see how you can glass in the seats and fair them out without destroying the bright look of the seats, although I know others have achieved this. I've seen these beautiful photos but not the explanations:
So did they not glass in the seats, just glue them to the cleats--or do they have another magic method that I have yet to imagine? One possibility is using the 3.5 cloth and glassing it from the sides straight across the seats. That way you wouldn't have a margin where the glass ends, requiring fairing. But it would add weight, and I don't know if this glass would have the requisite structural strength to stiffen the boat. I am also not at all confident that I could cut and lay that glass out in a manner that would be easy on the eyes
. Fairing the sides of the boat won't be a problem since the fairing will be hidden under the paint.
Any ideas? There must be a string on this but I haven't found an answer to this specific question.
Re: TJ's V10
Posted: Thu Oct 23, 2014 11:15 am
by ks8
Are you going for a look that is acceptable to you and your friends and family, or, a showboat? If not quite a showboat, then a little bit of tape edge can be sand/feathered down enough, carefully. Bias is no good finished bright. The fibers and binding strings show. Some 4 oz is near invisible, even some 6 oz - depends on the batch. If you look close, you will see it, but from distance it looks good. My transom has glass on it. Now I don't remember if it was 4 or 6 oz. If you look close you can see it, but from a distance? This was a *good* roll of glass.
I checked. That is covered with 6 oz, filled and flowed carefully with neat epoxy.
Because I built a faux planked transom over the properly taped structural transom, the structural tape is completely hidden. I painted a narrow border anyway to conceal the little bit of faired edge of the faux transom. It added weight, yes. It turns heads, but more importantly.... I like it.
So, you could add a thin laminate (1/8 inch) over the official structure and go as bright as you please. I painted two or three coats of LPU over it. It looks the same as the day it dried, years later. It is not quite as nice as the picture of the final epoxy flowcoat, but that is because I messed up the clear LPU, a brand that is very temperamental, however, it still looks plenty good from a distance. Any problem is with the clear LPU, and not with seeing the glass. The LPU is protecting the epoxy beneath it. But it is a vertical surface. Horizontals take more of a beating from the sun. My boat is covered when not in use.
Yes, it changed color a little over time, drifting red orange, but that is as much the Doug Fir planking as it is the epoxy.
And I still like it.
BTW, if I had done this with my seat tops too, I would have used a small fillet and a thin painted edge again, to ease the hard spot that the laminate creates on the structural tape seam. Not that it would matter on a CV16....
Re: TJ's V10
Posted: Thu Oct 23, 2014 11:20 am
by Cracker Larry
On the GF18 I'm building I used 6 oz woven cloth for some areas that being bright finished, like the rub rails. The cloth almost completely disappears after it's wet out, sanded and wet out again. We will use EMC clear coat over the epoxy for UV protection.
Re: TJ's V10
Posted: Thu Oct 23, 2014 11:26 am
by terrulian
Thanks, CL...do you think the 6 ounce would be fine structurally? I can't imagine it wouldn't, considering I'm already gluing to the cleats.
Wow ks8, excellent work, as usual, and I'm afraid above my pay grade but perhaps that won't stop me. I'm not looking to impress anyone (least of all my wife) but just to see what I can do.
I hadn't thought of a layer of veneer over the structural glass. Brilliant! Although I'm doubtful I could pull that off. Maybe. So you think another approach is to use woven, say, 6-oz. for the structural tabbing, carefully sand the edges of the tape, and then several coats of neat epoxy? What did you use for topcoat? It sure looks great. You have a touch and considerable patience.
Re: TJ's V10
Posted: Thu Oct 23, 2014 11:41 am
by ks8
I added more to that post. Probably answering your questions.
Those pictures do not show the topcoat.... Mess. Maybe I'll take a couple of pictures today. Still looks good enough for me. But it would have been nice to look like the flowcoat of epoxy. As it is, I don't cringe from a bump or scrape now and then, like I might have. Good for the soul. As CL says, "It ain't nothing but a thing.".
Re: TJ's V10
Posted: Thu Oct 23, 2014 12:21 pm
by terrulian
I've sure got some pondering to do.
I've used LPU one time. Lotsa dough, especially for such a small area. I'll have to price it out. I'm just going to use Brightside on the boat as I can't justify the cost of LPU to myself at this point. Do you think any other clear finish would last?
Re: TJ's V10
Posted: Thu Oct 23, 2014 1:10 pm
by tcason
After research I decided to use Epifanes varnish.
I put on two coats of epoxy over stained walnut wood and walnut ply (no glass) sanded between each coat of epoxy. I have built up three coats of varnish so far and the third coat really evened everything out.
My build is on hold but I hope to have five coats over the epoxt base, the depth is amazing, the epoxt base is worth 4 coats of varnish and better protection except UV.
see sales pitch below.......................................
Epifanes Clear Varnish, known around the world, is considered the ultimate in high gloss finish. This traditional marine varnish is based on tung oil, phenolic-modified alkyd resins and maximum U.V. absorbers. It has outstanding protection for all marine and household woods and can be applied to Interior and exterior woods above the waterline. It offers superior flow and durability. In addition, it has excellent flexibility and water resistance in all climate conditions.
Re: TJ's V10
Posted: Thu Oct 23, 2014 2:12 pm
by terrulian
Well, Epiphanes is a great varnish that I have used with some success. I have reverted to Cetol, though. Here's a sobering look at the field:
http://www.practical-sailor.com/issues/ ... 576-1.html
I still am reluctant to have any brightwork on a boat that's going to be stored outside and take some abuse, however much I love it...but haven't decided. I know it will look good for a year, but I am a personal friend of the guy who is going to maintain the boat, and he is a bit of an idiot. Sand and re-varnish yearly? I don't think so
. It doesn't sound like much, I guess, except that, like I say....he's a flake.
Re: TJ's V10
Posted: Sun Oct 26, 2014 3:32 pm
by terrulian
On the brightwork issue, I think I'm going to leave the center seat clear as well as the breasthook and knees. The gunwales would be nice but it's not my nature to show off plywood edges. The interior will be some sort of off-white, and there are many pictures on the forum of this kind of contrast and I like the look. Of course, this assumes that the assembly work can stand the light of day and doesn't require masking with tons of fairing, primer and paint. The bow and transom seats will have hatches which will be plastic and I for some reason I don't like the idea of besmirching the brightwork with a plastic hatch. So only the center seat. Then, I figure if the topcoat craps out after a year or two and I'm too lazy to sand and re-varnish, I'll just sand and paint, no harm done.
Coupla pitchurs:
The old man glues the inwales.
Inwales installed and planed. I think these will be covered with woven glass since they take a lot of abuse from banging oars and loading gear. So I'll have to round over the edges.
Re: TJ's V10
Posted: Sun Oct 26, 2014 7:19 pm
by Cracker Larry
Looks good. Is the block and tackle rigged to the frame (B?) there so you can pivot the boat to make it easier to reach? If so, I like that idea
Re: TJ's V10
Posted: Sun Oct 26, 2014 7:42 pm
by terrulian
Yep, that's what it's for. I put it there to weigh the boat but just left it since it isn't in the way and is handy.
Re: TJ's V10
Posted: Sun Oct 26, 2014 11:56 pm
by timbamford
Nice work TJ. Out of interest, how much did it weigh when you weighed it? Build is looking great! Thanks, Tim
Re: TJ's V10
Posted: Mon Oct 27, 2014 8:26 am
by terrulian
It was 75 pounds when I weighed it, before seats, knees, breasthook, inwales, inside fairing, and interior and topsides paint. Jacques says the target weight is 85 pounds so obviously I'm not going to make that
. I put another layer of woven cloth on the bottom and 6" above the chines, and also glassed in the skeg. These, I presume, are not part of the design weight. I also did a reasonable amount of fairing and there are three coats of S3 and four coats of epoxy/graphite on the bottom. I don't think I used an excessive amount of epoxy laying up the glass but then I'm sure I'm not on the Cracker Larry or Jacques level. In fact, probably not on any level
. I will definitely weigh again when I'm done and post the findings.
Re: TJ's V10
Posted: Mon Oct 27, 2014 8:35 am
by Cracker Larry
I've never built one that met designed weight either
I think only Jacques can do that.
Re: TJ's V10
Posted: Mon Oct 27, 2014 9:38 am
by terrulian
Jacques, in a remark that surely was meant out of kindness, also reports that he built a V10 in seven hours. I don't doubt this for a minute, but it is my little fantasy, perhaps completely unjustified, that it had a "work boat" finish
. Seven hours is about what it takes me to build a saw horse.
Re: TJ's V10
Posted: Mon Oct 27, 2014 9:44 am
by jacquesmm
Those weights are hull weight before fairing and painting.
I get them from my spreadsheet.
In the case of the V10 and other small dinghies, the plans do not show glass on the bottom. I owned several of those and they can last without glass on the bottom.
Yes, I did build a PK78 or D4 in 7 hours. That was 7 work hours, not 7 hours in a row and it was for a hull ready to fair and paint.
fairing and painting double or triple the labor.
Once, I did build a D12 in one week-end working about 10 hours. I launched the boat without any major sanding and painting and was fishing from it.
Re: TJ's V10
Posted: Mon Oct 27, 2014 10:03 am
by terrulian
I don't doubt it...but bear in mind, you know what you are doing.
Also, I'm pretty sure the plans and process exist in your head, instead of on a website or piece of paper you need to consult and ponder and turn upside down and sideways, then go to the forum, ask questions, wait for you or ks8 or Larry--and others (all of whom are extraordinarily kind and generous) to weigh in, then scratch your head some more, then try it again with only a slight improvement in your confidence...all of which are, by the way, fantastically entertaining and I'm not kidding. So in one sense, I'm having more fun doing it the slow dumb way
.
But the main thing for me is that, as I said in the very beginning, I'm not in any hurry at all. I'm having such a good time working on the boat that, unlike most of the other builders, I really can't imagine I'll have more fun using it than building it. It'll be a job getting it down to the shore, whereas now I just walk out to my shop. And rowing is almost exactly like exercise...not my favorite thing
. I just don't really know what I'm going to do with myself when I get her done. At first, my main goal will be thinking up ways of going on excursions that get me in some kind of trouble...but that can't last forever.
Re: TJ's V10
Posted: Mon Oct 27, 2014 10:27 am
by jacquesmm
Yes, I know the plans and don't have to refer to them very often, that speeds up things.
Plus, I am not very meticulous. Many of our builders work much better than I do but the main point you made is that one should enjoy the process. In that case, a few hours more or less do not matter.
Look at KS8 for example, there is no doubt that he enjoys building as much as using the boat.
Re: TJ's V10
Posted: Wed Oct 29, 2014 11:13 am
by terrulian
A little tinted epoxy under the foreward and after seats. The color is just to make it easier to see inside the hatches once the seats are glued in. No attempt to make it nice; in fact I like being able to observe what the boat looked like before fairing! I'm not going to waste any more epoxy with a second coat to get better coverage.
Re: TJ's V10
Posted: Wed Oct 29, 2014 12:42 pm
by ks8
You've got me staring at my V12 plans again....
Re: TJ's V10
Posted: Wed Oct 29, 2014 1:52 pm
by timbamford
Looking good TJ! Thanks for the info re the weight. I'm the same as you - although I really enjoy using my FL12, I love the building process. Cheers, tim
Re: TJ's V10
Posted: Wed Oct 29, 2014 2:57 pm
by terrulian
timbamford: Yah, I'm pretty concerned I won't give a groat about rowing...so don't be surprised if I go slower and slower on the build, just to prolong the fun and postpone the work...
ks8: Didn't you already build a boat like this?
Re: TJ's V10
Posted: Wed Oct 29, 2014 10:25 pm
by ks8
I built (am still tweaking) a CV16 swiss army knife, as my learning curve boat, but I also have V12, D5, and some of my own plans to consider. I like the lines of the V10 and V12, so I enjoy watching your build particularly because its a V10.
Re: TJ's V10
Posted: Wed Oct 29, 2014 11:05 pm
by Cracker Larry
I built (am still tweaking) a CV16 swiss army knife,
That reminds me of an old friend who wrote and sung this...a long time ago. We are both old now.. Life is like a Swiss army knife. Got to be flexible and versatile
https://www.youtube.com/watch?v=lwB1eOIYxM4
Re: TJ's V10
Posted: Thu Oct 30, 2014 9:50 am
by terrulian
An old friend of Jimmy Buffett....I'm impressed!
But on the other hand, ummmm...you better skip my chapter on Junior Walker
.
Don't want to do nuthin' to upset you. Just rip it out now before you are tempted...oh, I guess that's not possible with a Kindle. Just promise not to read it. It's called "Parrot Talk". I knew that was going to get me in trouble some day.
Just try not to hate me.
Here's the backstory: A couple of decades ago when Buffett was at his peak, I liked all his tunes. But then I noticed that every single sailing gathering had to play nothing but Buffett and you could hear him walking down the marina. There was no escape. So naturally, I rebelled. Around that time I crewed to Hawaii on the boat of one of my best sailing buddies. Since he knew that I had developed a distaste for Buffett, he of course played it nonstop to Hawaii for 2 1/2 weeks. That was the captain's prerogative and I don't like to be ungrateful crew. But the die was cast, so when I wrote that chapter it was specifically meant for him. Insulting other people was what I would call "collateral damage." By the way, none of this ever had any effect on our friendship, and I'm sure he'd say the same.
I know I'm in deep doo-doo here with you guys from the southeast
.
Re: TJ's V10
Posted: Thu Nov 06, 2014 11:43 am
by terrulian
So I was kinda worried about running out of epoxy because I have 1/2 gallon left and a ways to go. It appears that I am one of those who sands off 90% of the fairing I put on, since I am inept at the original application. Anyway, I had some old West System epoxy but the hardener had turned amber. Asking around I heard this wasn't a problem and Joel said it was OK to mix brands as long as I made sure the previous coat was cured, sanded, and cleaned. That's why you see different colors in the fairing; different epoxies with microballoons. BUT one thing I sorta forgot is that I have slow-cure MarinEpoxy and had gotten used to that nice, forgiving rhythm, whereas my West System was fast cure
. But anyway, after a bit of frantic application I got it on.
A bit hard on the back doing the sanding but it's getting done. I'm using power tools on the inside for the most part because there's little room for the longboard. I'm not surprised that I don't enjoy this as much as the outside which was all by hand but it's faster. However, there are many nooks and crannies on the inside and I don't have my techniques well-honed for that kind of thing. Where skill is lacking, much patience is required
.
Re: TJ's V10
Posted: Thu Nov 06, 2014 11:57 am
by pee wee
Looks like you're getting it done, nice progress.
Working neatly saves time, too.
Re: TJ's V10
Posted: Sun Nov 09, 2014 9:11 pm
by justin_dwyer
Looking great!!
Re: TJ's V10
Posted: Mon Dec 01, 2014 10:13 am
by terrulian
I haven't posted any updates for awhile because despite hours of trying
I cannot compose a post that makes sanding interesting. So for a month or six weeks I've been putting fairing compound on the inside and sanding it off in a manner reminiscent of Sisyphus pushing his rock up the hill only to have it roll back down again.

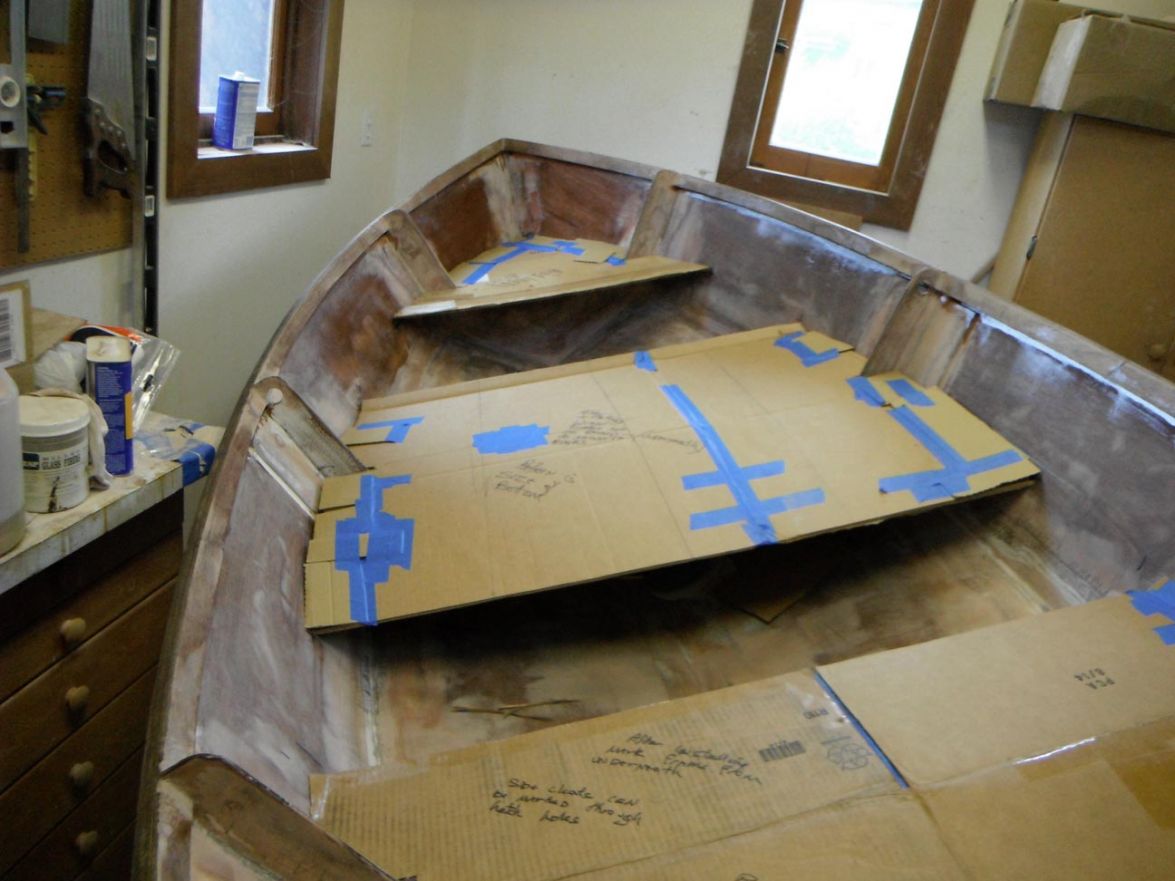
One thing I will say about gooping and sanding, though, is that it is pleasantly mindless and doesn't involve any of that tiresome and cursed thinking. So it was with mixed feelings that I came out to the boat one day and noticed that the fairing was probably done enough for now, and it was time to move along. This meant I had to contemplate and plan my next step, which consumed a fretful week of time. I've now progressed to considering installing the cleats and seats. I made patterns even though I think somewhere along the line I read it wasn't necessary but I think that must have been written by one of the smart guys. I don't for a minute trust myself with that next sheet of plywood, because these are the first cuts I'm going to make that aren't guided by the measurements of Jacques, in whose wisdom I put my trust. So here we are. The curved cutouts will be traced on the wood; I don't need them on the patterns.
Re: TJ's V10
Posted: Mon Dec 01, 2014 11:44 am
by jacquesmm
At that stage, it is safe to use cardboard patterns.
The plans dimensions are accurate but . . .
It's not easy to reproduce exactly the curves I show,
I can't guarantee that all plywood will bend the same way,
The corners are filled with tape and fillets, you must round them,
Small mistakes may creep in.
In other words, what you do is correct.
Re: TJ's V10
Posted: Mon Dec 01, 2014 12:03 pm
by terrulian
Understood, Jacques. Wish me luck
. I need it more than some builders.
Re: TJ's V10
Posted: Mon Dec 01, 2014 12:45 pm
by ks8
terrulian wrote:... I've been putting fairing compound on the inside and sanding it off in a manner reminiscent of Sisyphus pushing his rock up the hill only to have it roll back down again.
Certainly more gender appropriate than the Daughters of Danaus. Also, because the imagery of an eternity of leaking water isn't the most positive for building a boat.
Re: TJ's V10
Posted: Mon Dec 01, 2014 3:57 pm
by terrulian
I admit I had to Google the daughters myth...
But yes, maybe we best stay away from a water problem, like bailing. Hope I don't have to do that because of some miscue on the construction!!
Re: TJ's V10
Posted: Mon Dec 01, 2014 5:47 pm
by ks8
Of course, the water problem was minor
, considering forty-nine of them all murdered their husbands on their wedding nights...
[When it comes to Greek classics, I prefer C.S. Lewis' re-invention of Cupid and Psyche, in
*Till We Have faces*.
... but no boats there. Too bad. But a ship is mentioned in chapter five... if that counts? ]
Re: TJ's V10
Posted: Mon Dec 01, 2014 7:42 pm
by terrulian
Good on you for being a scholar of the classics.
If I've read CS Lewis it was many decades ago.
For sailing yarns it is hard to beat the Odyssey. Have you heard of a book by Tim Severin called The Ulysses Voyage?
I highly recommend it to sailors and boatbuilders. Severin reproduces a bronze-age galley using bronze-age methods and uses it to recreate Odysseus' trip home from Troy. He makes a very strong case.
http://www.amazon.com/Ulysses-Voyage-Se ... ses+voyage
Re: TJ's V10
Posted: Tue Dec 02, 2014 1:05 pm
by ks8
I'm hoping Severin, and you, will never have to whittle a huge wooden stake .... and.... beware the Siren song. Next thing you know.... ten years have gone by, and poor Penelope has had to put up with all those *boisterous men*.
Greek classics scholar? Hardly. Had my required reading like so many others, and with age, appreciation of some things grows. Doesn't mean I agree with them, but I can see better now why they stand the test of time, whether or not they should.
It may just be that now and then, mankind needs some extreme and bizarre warnings, because mankind has fits of being extreme and bizarre, moreso lately -- but there are better encouragements, and more effective warnings, no doubt.
Still, impressive to shoot an arrow through a dozen axe handles.... as the *revealing*, just before handily dispatching the *boisterous men* -- to the underworld.
Re: TJ's V10
Posted: Tue Dec 02, 2014 2:16 pm
by terrulian
I thought little of it when I was first required to read it, but in my mature years, the Odyssey has become my favorite book. We were able to cross Odysseus' wake off Cape Sounion, and berthed at Frikes on Ithaka for awhile to explore the Island. I didn't take the photo below but this is where we were.

Re: TJ's V10
Posted: Tue Dec 02, 2014 2:43 pm
by ks8
nice
Re: TJ's V10
Posted: Sun Dec 07, 2014 6:09 pm
by terrulian
Finally a bit of photographic evidence of progress.
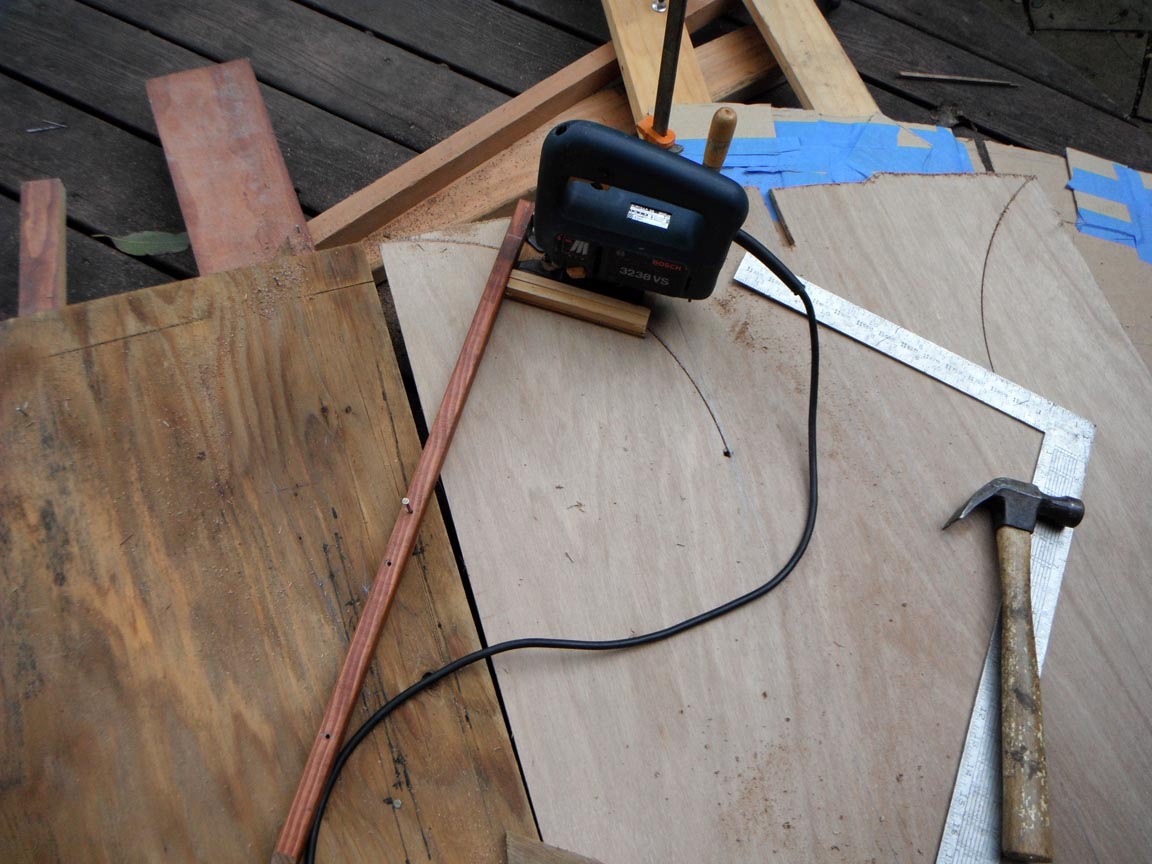
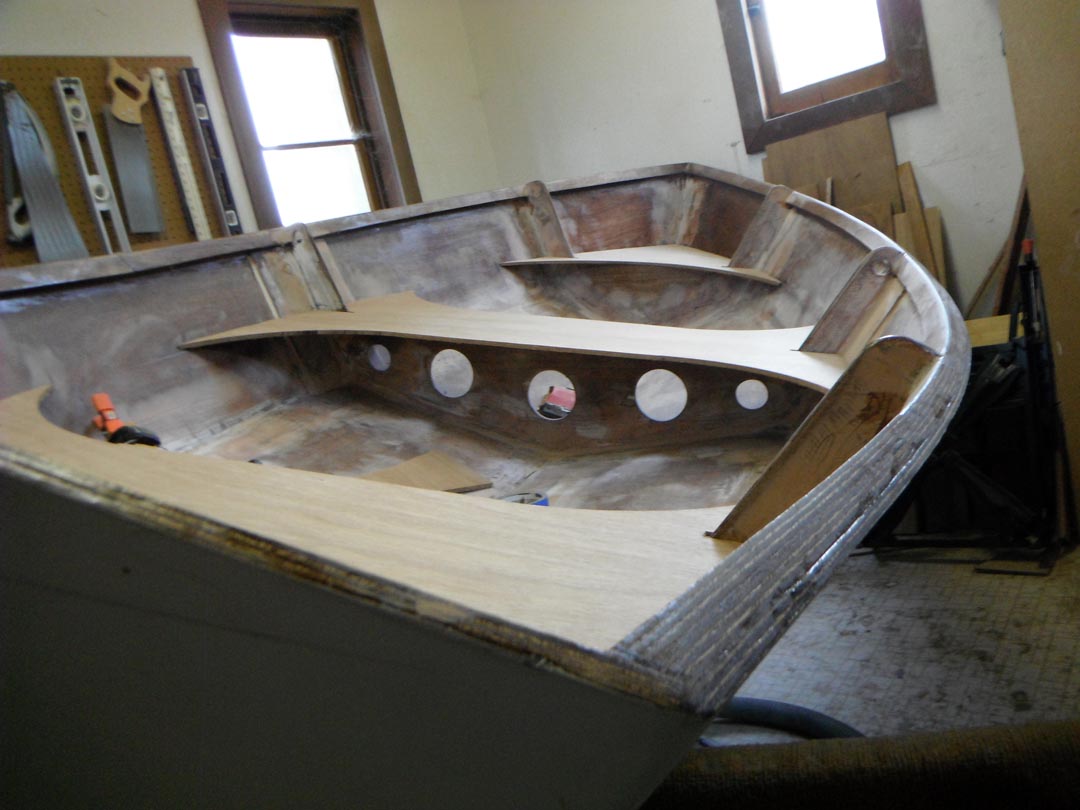
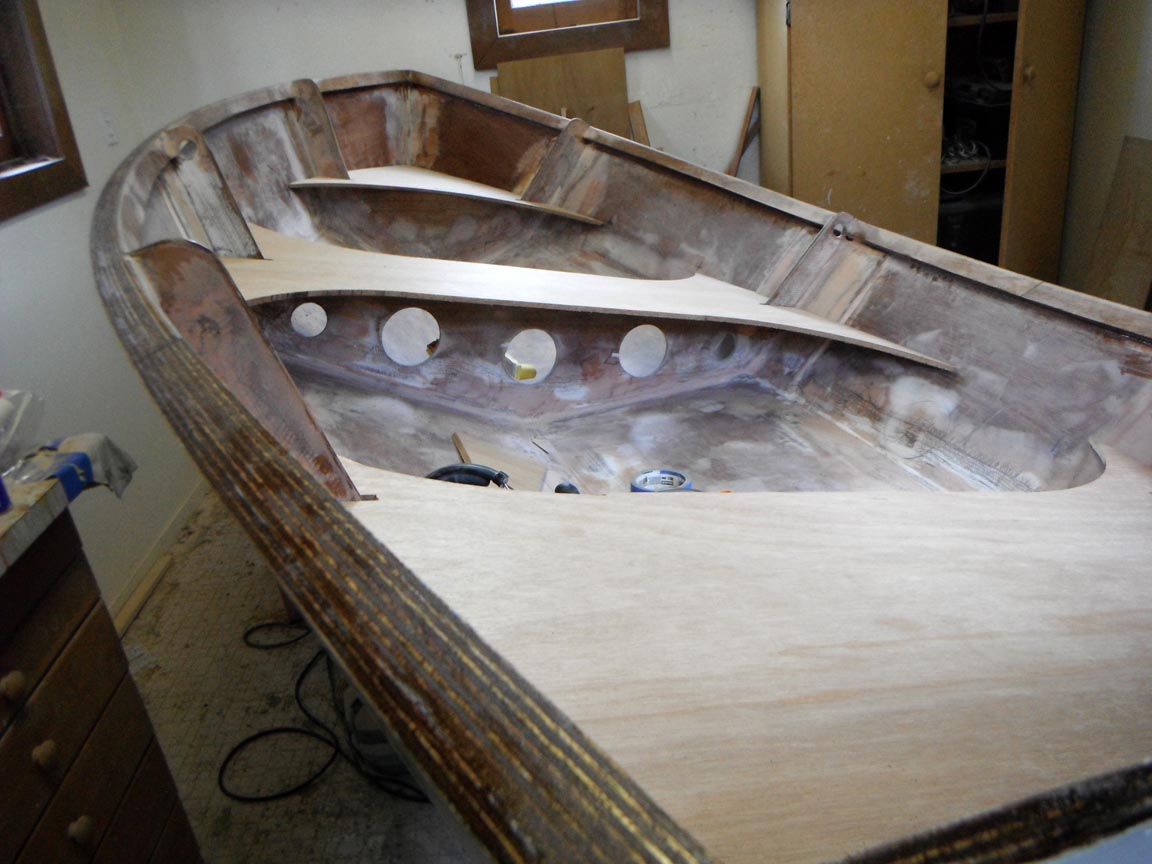
I certainly didn't trust myself to cut those radii, or -esses, or, you know, curves, freehand, so I made a little radius jig for the sabre saw. Everything seems to have come out OK, but there's a bit of cleaning up to do and the bow and stern seats will need holes for deck plates.
Re: TJ's V10
Posted: Sun Dec 07, 2014 8:15 pm
by Corvidae
Wishing I had thought of using a jig for those curves now. I did mine free hand, then rasped them into a cleaner shape. It worked, but a jig would have been cleaner.
Re: TJ's V10
Posted: Mon Dec 08, 2014 3:01 pm
by terrulian
Well, it was kind of a hassle, at least the way I do things. Cutting each radius required a different setup, even the ones with the same dimensions, because the jig only went in one direction and the cuts are on different corners.
Here's something I found amazing, given my level of craftsmanship. Many of the builders are using strongbacks, and the frames can be setup perfectly square before the hull is attached. But the V10 is built without that assurance of squareness. I zip-tied everything, including the attachment of the frames to the hull, which I tried to match to layout lines on the hull so they were properly placed. I didn't imagine that this was a particularly accurate way of assembly, especially in my hands. But lo and behold, when I cut the seats and put them in for a dry fit, they are just as square as can be. The stern seat and center seat are level with each other as you can see in the photo, and both are square to the frames. The only way I can figure out how this happened is that Jacques designed the plans in a way that would outsmart an idiot--in other words, be literally fool-proof! I'm sure luck played a significant role, too.
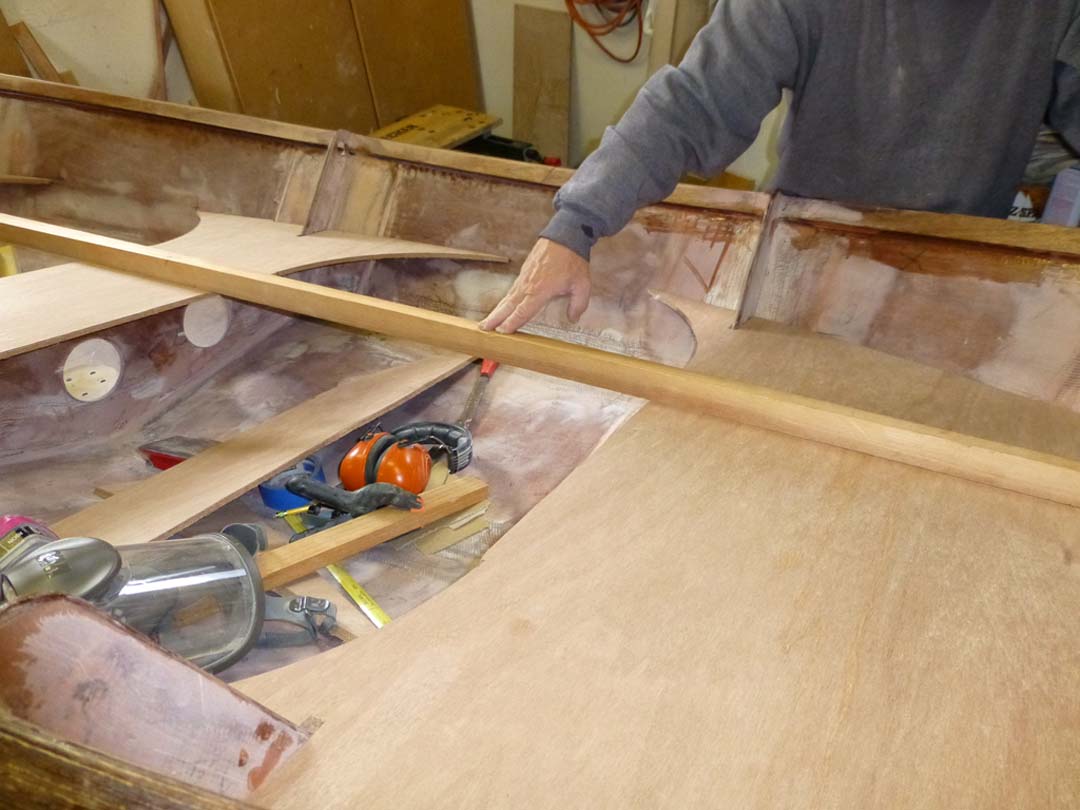
Re: TJ's V10
Posted: Wed Dec 10, 2014 7:58 am
by ks8
Re: TJ's V10
Posted: Fri Dec 12, 2014 9:04 pm
by Cracker Larry
Tony, I started your book last night and read a couple of chapters. Enjoying it so far. Mrs. Cracker finished it already and said she liked it too
Re: TJ's V10
Posted: Sat Dec 13, 2014 11:10 am
by ks8
When Amazon straightens out my account (
), I'll be ordering it too. Or New Years, I'll find it elsewhere.
Re: TJ's V10
Posted: Sat Dec 13, 2014 1:03 pm
by terrulian
Thanks very much, Larry. It really means something coming from boat people...or is that the wrong term???
Did you examine the storage diagram?
Re: TJ's V10
Posted: Sun Dec 21, 2014 1:33 pm
by terrulian
OK, a little more progress.
I cut holes in the bow and stern seats for hatches. The stern ones are large to accommodate fenders and with the holes cut the seat was just a tiny bit springy so I added some mat and a strip of 3/8" meranti. I'm pretty sure this is overkill and it added some weight but it is now stiff as the proverbial board in case a sumo wrestler jumps down into the dinghy. This view shows the seat upside down. Kinda looks like a two-seater outhouse. Jacques'drawing shows a cleat on the forward side of the aft frame as well as the after side, but I am skipping the one in front except for the parts below the triangular bits in front of the frame. I like the cleaner look and am pretty sure the seat will be well supported without it. A rare case where I'm not following the plans.
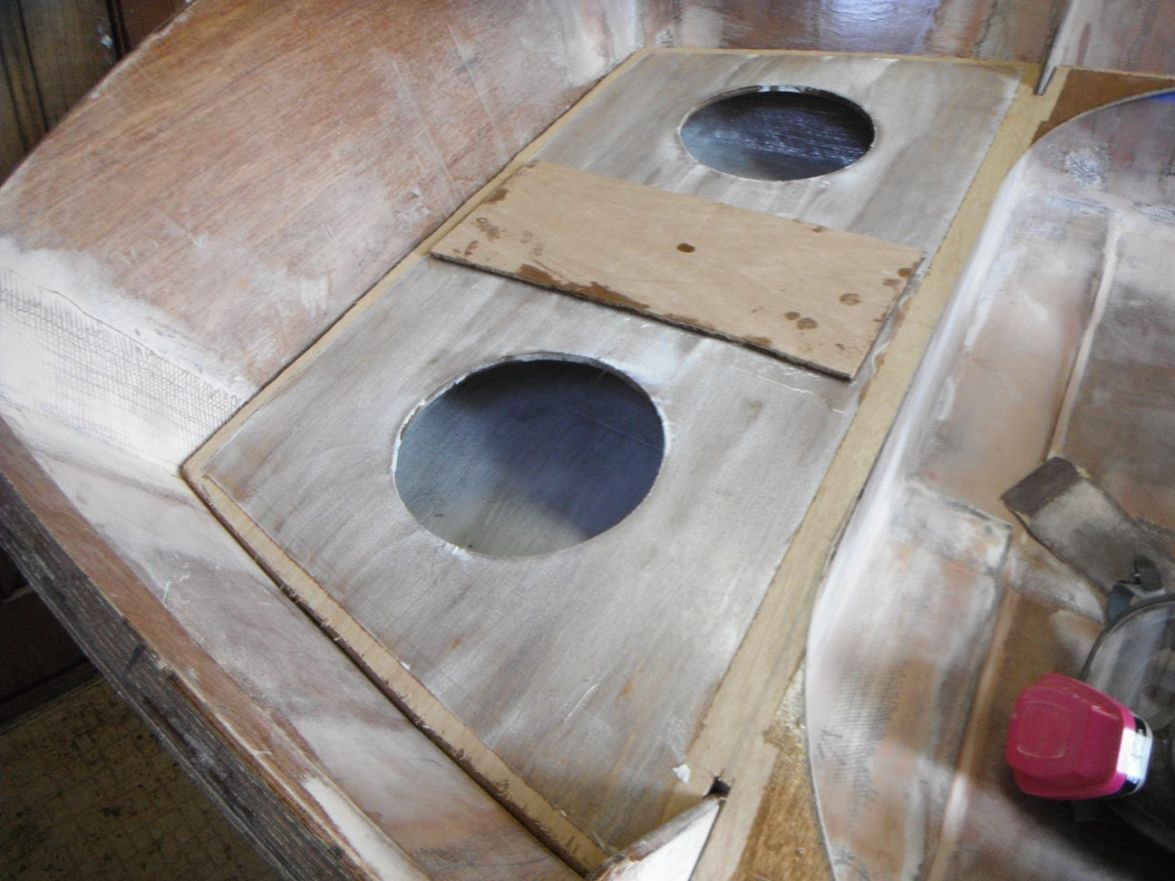
Here's the bow seat, also upside down. Both it and the stern seat have a coat of epoxy with pigment. I've got plenty so I thought having it on the underside of the seat may increase visibility a very modest amount because of reflection. I know this is theoretically possible according to quantum theory. You'll also notice a border around the edge of the seats. I taped this area off before the epoxy coat so that when the seats are glued to the cleats I'll get a firmer bond.
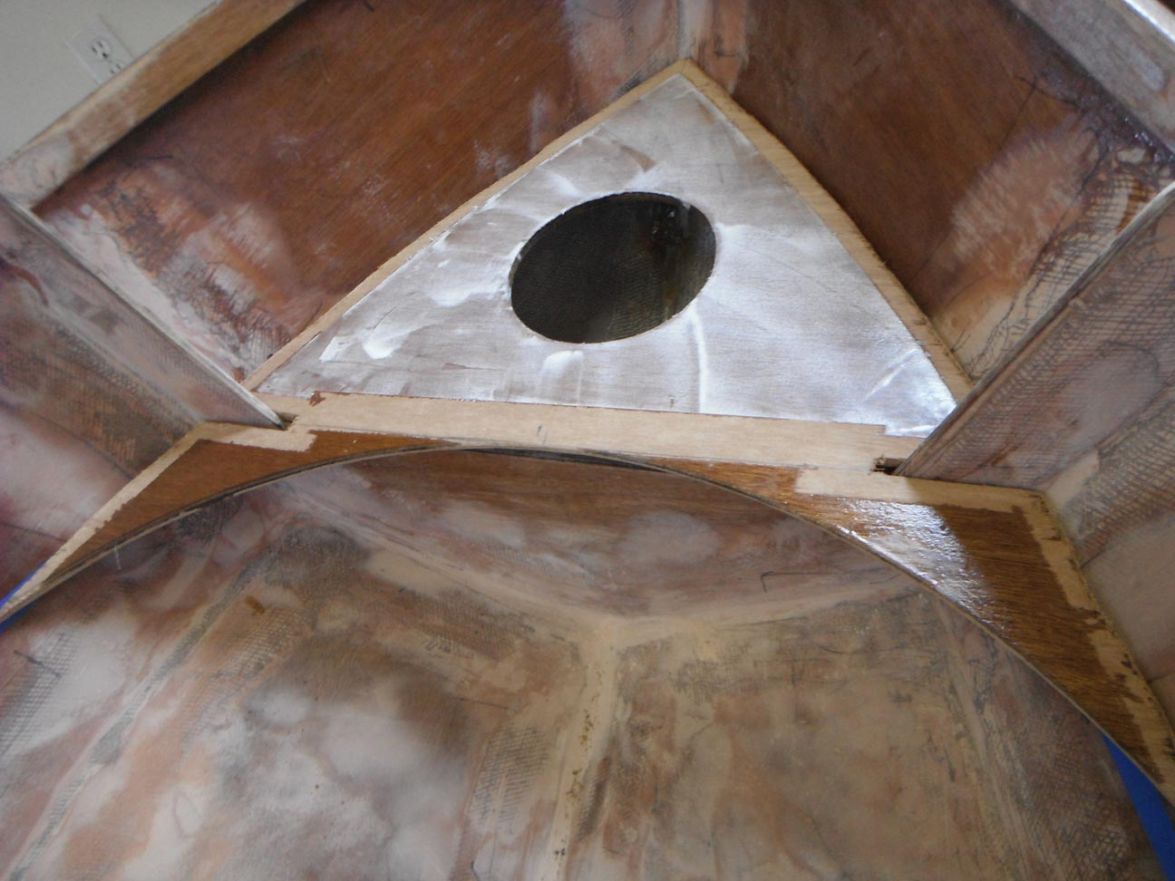
Below are cleats getting a coat or two of epoxy before attachment.
Here you see that port and starboard at seat level I have a line of 1" masking tape. I'm going to fair and prime up to this line, since after the seats are in this will be, um, uncomfortable. Being uncomfortable means I know I'll do a sloppier job so I'm going to get as much of this done as I can before the seats are permanently affixed. I'm not fairing above the seat level since they will all get attached to the hull with epoxy and woven cloth, and this will require that this area gets faired after the seats are in.
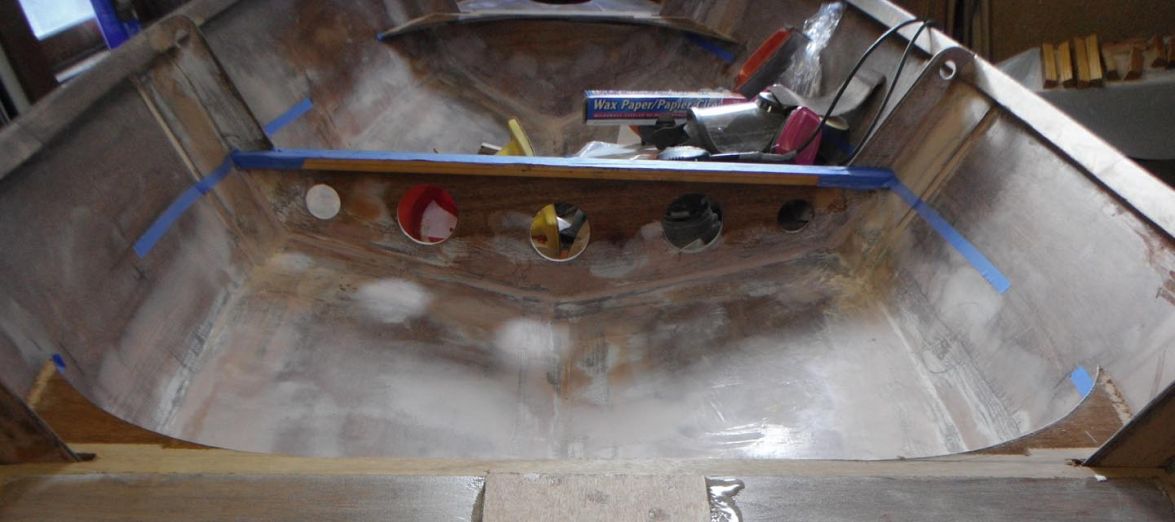
Finally, a shipment of stuff for the topcoat. It's getting exciting, but this is a month away or more.
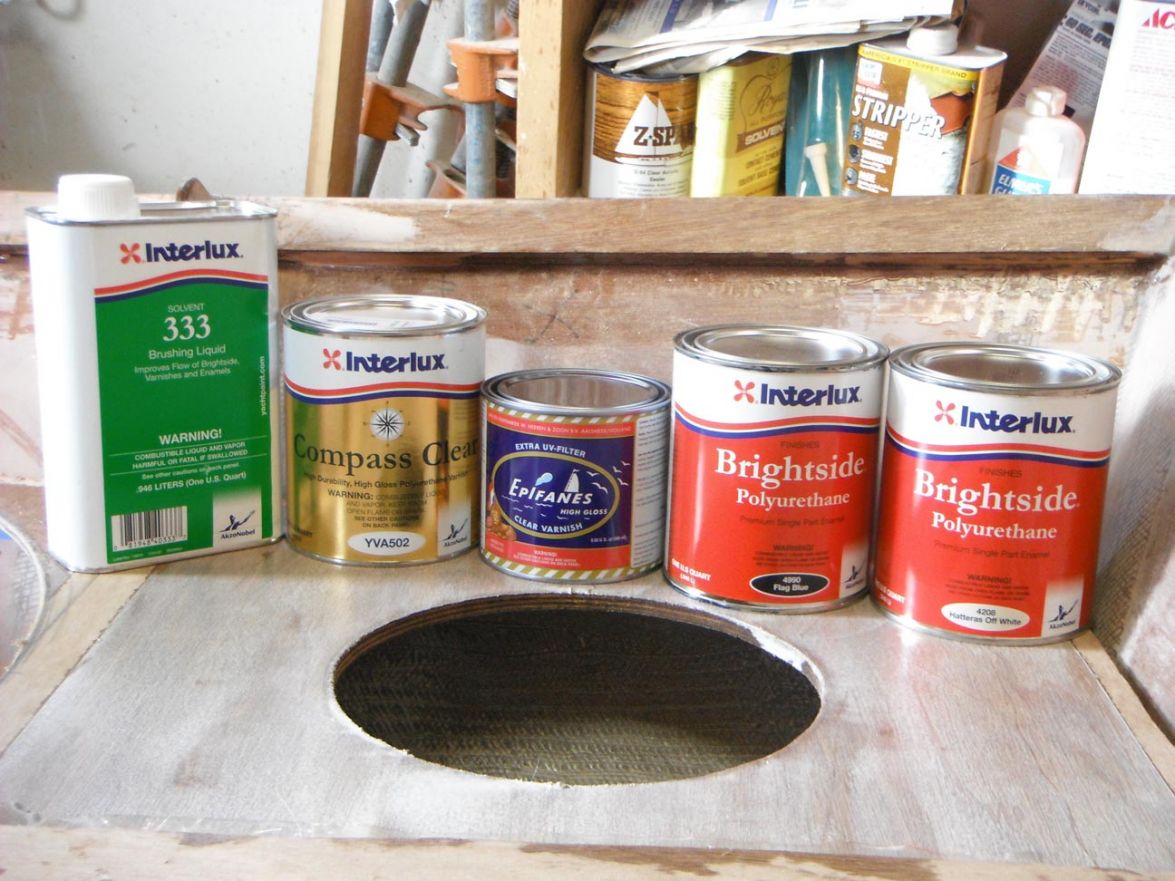
Re: TJ's V10
Posted: Sun Dec 21, 2014 9:15 pm
by ks8
I am very glad I made my lockers white. It helps at night, to maximize even a small flashlight. Maybe you will see what I mean soon.
Of course, we will need a picture of the jumping Sumo wrestler, when in the boat, out on the water.
Re: TJ's V10
Posted: Mon Dec 22, 2014 9:34 am
by tcason
Tony - finished your book it was great - passed it on to my 83 year old DAD and told him to plan on a 2017 trip!
I see you are using flag blue also - my choice also - anxious to see how that color goes for you.
We close on house in late December with workshop and dock on the C Bay so I can get back to my build after about a year off while we were between houses. I also stiffen seats etc for jumping off docks into boat.
Re: TJ's V10
Posted: Mon Dec 22, 2014 10:41 am
by terrulian
Thanks for the kind words on the book, tcason.
I put a lot of thought into the color scheme but I have very little talent in this area so I'm going to just cross my fingers. I'll certainly post pictures.
Re: TJ's V10
Posted: Mon Dec 22, 2014 12:01 pm
by ks8
tcason wrote:... I also stiffen seats etc for jumping off docks into boat.
Are you Tony's *Sumo wrestler*?
Re: TJ's V10
Posted: Tue Dec 23, 2014 7:37 am
by terrulian
tcason...
As I said, I think I went too far on the stiffening. If I did it again I would use 1/4" plywood instead of 3/8" and about 1/2 as wide. The mat is probably a good idea but I bet I could have done fine without it. Anyway, there was never a concern that the seat would fail structurally, just that the bending may result over time in the partial release of the silicone used to seal the hatches. I'm sure Jacques could figure the stresses and strengths out mathematically but all I can do is add and subtract with moderate reliability. I'm not going to do anything to stiffen the bow seat because both the hole and seat are smaller and it's very stiff as it is, nor the center seat which has no hole.
Re: TJ's V10
Posted: Thu Dec 25, 2014 1:10 pm
by terrulian
Merry Christmas, everyone. I couldn't help but notice that Jacques was working on Christmas day!
I put three coats of S3 primer on the part of the interior below the middle seat.

This is bitter sweet since it reveals stuff like this:


I'll be addressing these with Quick Fair. On the outside of the boat, this required a few runs at it and more coats of primer with the result that I used a lot of primer. Not sure how to get around this.
Anyway, look what I got for Christmas
I wanted the oarlocks to live on the oars and am going to try oval instead of round. It'll be quite a while before I know if I made a good choice. If not, it will be a bit of a pain to change them since I'll have to remove the leathers and buttons.
Re: TJ's V10
Posted: Thu Dec 25, 2014 11:22 pm
by Cracker Larry
A little Quick Fair smeared in with your finger will fix those pin holes. They always show up after primer.
I like my oar locks attached to the oar too. Those look good.
Merry Christmas!
Re: TJ's V10
Posted: Mon Dec 29, 2014 11:25 am
by terrulian
Yesterday was a day of discouragements. The kind of day where you do a lot of talking to yourself. For example, out loud I may be heard to say at a volume that in retrospect I hope cannot be overheard by neighbors, “Johnson, you are a $%~!*#@ IDIOT!!” I have to use the cursing from cartoons, it’s so bad. It seems none of you esteemed and temperate gentlemen have such days, or if you ever do, you are too mannerly and well-bred to speak of them.
First off, after applying 3 coats of the S3 and looking at matters with a strong light, I found the results to be considerably more horrifying than my wishful thinking had pictured. There will be lots of sanding, Quick Fair, and more coats of primer.
Secondly, there is an ongoing issue with the bow eye. I had become a little overconfident because when I first eyeballed and drilled the two holes for the u-bolt, which must be exactly parallel for it to fit, I lucked out. I mean, you know, no big deal, just drill a couple of holes. But after proceeding to the next step, drilling with a larger bit, filling with epoxy, and then re-drilling for the correct size, I was all over the place. “Oh, I’ll just hog that out a little,” I say to myself. Well, the hogging turned into aggressive drilling and before long I had holes the size of Duluth. I’d say Houston, but I don’t want you to get the impression I am exaggerating. So what I did was go get a piece of metal rod, cut it in half, and drill out a 2x4 with holes that were parallel. Then I stuck the rods in and clamped them to a square upright board measured in the middle of the boat. But this by itself won’t do because the epoxy will just drip out if you put these all the way through the hull. Don't ask me how I know this. So I put some tape on the outside, then some epoxy in the holes, let it kick, and then drilled down to about ¼” from the outside of the hull with an oversized drill, to create a plug. Then I put my jig in place and coated the rods with releaser. Next, with a syringe, I tried to get epoxy around the rods. If there is any dumber, more cumbersome, Rube Goldberg way of achieving this process, I haven’t thought of it yet, but when I do you can be sure I’ll be using it. What we need here is an emoti for banging your head against the wall. I'll let you know how it comes out.
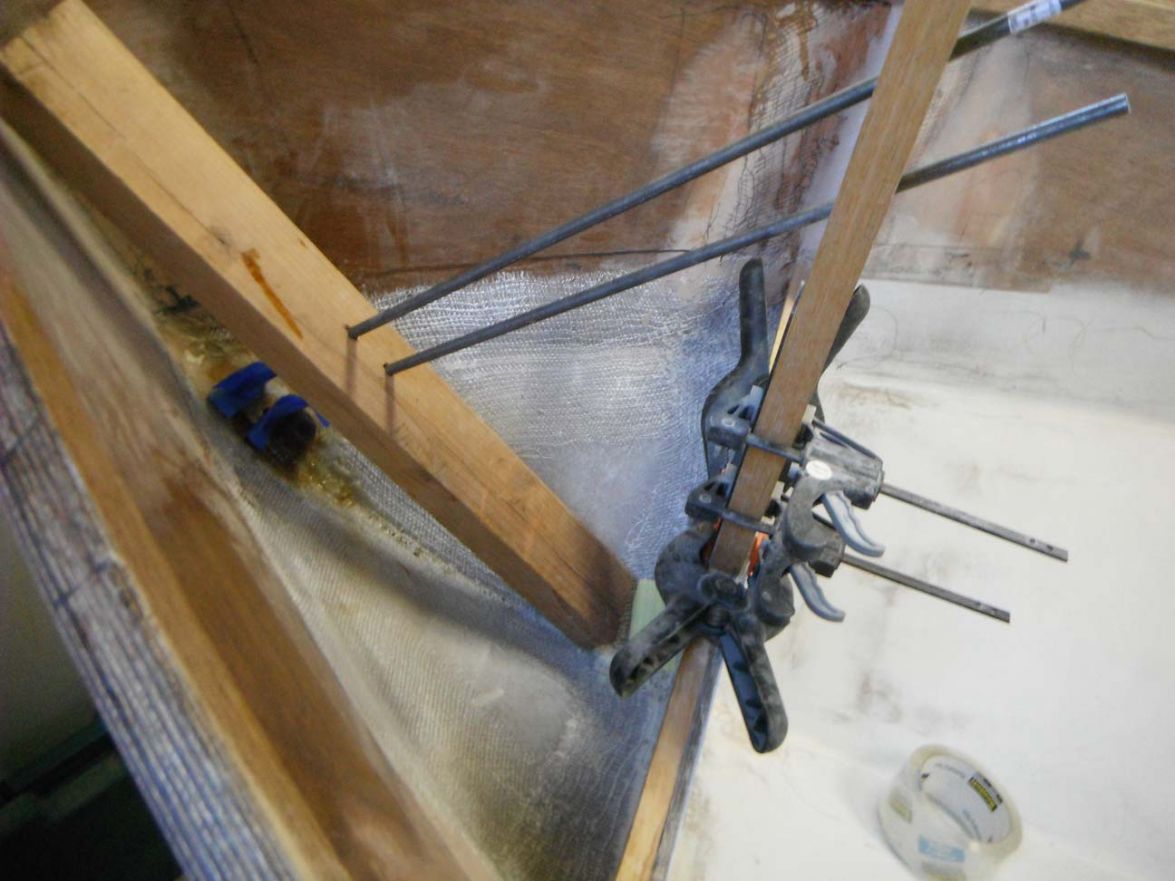
Re: TJ's V10
Posted: Mon Dec 29, 2014 12:33 pm
by Cracker Larry
It seems none of you esteemed and temperate gentlemen have such days, or if you ever do, you are too mannerly and well-bred to speak of them.
Tony, you crack me up
Trust me, we all have days like that
I had one yesterday too. My beautifully glassed trolling motor battery compartment didn't allow enough clearance to install the batteries with them in the boxes. I cut down both boxes and tried again. No go, 3/8" too tight
These are group 27 (heavy!) deep cycles under the foredeck. Beat my arms to death. Pulled them back out for a 3rd. time. Had to cut off flush one of the glassed in securing cleats, under the dang deck, that was fun, then re-epoxy the raw edges, then re-install the big azz batteries for the 4th time, then make a new hold down bracket out of Starboard and install that. And I won't even mention the on-board dual bank charger that weighs a ton and is also mounted under the deck on Starboard mounting pads. More than one bad word left my mouth, but luckily I don't have any close neighbors
Most things on this boat I have done at least twice. I've screamed, cussed and cried, but never quit. It's easy to get frustrated and half azz a quick fix, but better to keep perspective and do it right, again. We learn something from every mistake.
I made a jig very similar to yours for drilling the bow and transom eyes. That is the only way to keep the bolt holes parallel. I learned this the same way you did, several boats back
Now I always use a drilling jig for those. But I'll screw up something else, probably before the day is over. Or find something that I screwed up on previously that is keeping something else from fitting today. Like I recently was installing the trim tab pump, and found that there wasn't enough clearance with the fuel filter housing and shut-off valve, so had to relocate the fuel filter, and the shut off valve, but the trim relay was in the way of that, so had to relocate it too....rod holders interfering with bait tank pumps and outlet, got to move one or the other...and so it goes
Build on.
Re: TJ's V10
Posted: Mon Dec 29, 2014 12:44 pm
by terrulian
It's a sorry thing to have to take solace in the misery of others, but I'm grateful for it and I'm sure solace is what you intended. Your difficulties certainly put mine in perspective. Believe me, every time I screw up something simple, I think of you and others whose projects are infinitely more complex and challenging, and somehow you get through it. Not an exaggeration to say it's an inspiration to the rest of us.
Re: TJ's V10
Posted: Mon Dec 29, 2014 1:06 pm
by Cracker Larry
It's a sorry thing to have to take solace in the misery of others,
Not true. Misery loves company
And a big crooked hole isn't misery, it's just a nuisance you can fix. Nothing but a thing. Finding out your wife has cancer, or your son has been in a bad accident is misery. Perspective is everything
I think of you and others whose projects are infinitely more complex and challenging, and somehow you get through it.
You sailed around the frigging world

That's quite a complex challenge
You'll get this boat built, right.
Re: TJ's V10
Posted: Mon Dec 29, 2014 2:12 pm
by terrulian
It's very similar in a way, as I'm sure you know. Day after day you're attempting things you've never had to do before, like jury rigging an antenna, and you just figure it out, as they say, one day at a time. Only thing is, sometimes you're somewhere they don't speak your language.
For some reason, though, when things piled up and looked insurmountable, neither of us ever felt like quitting, even for a minute. Never entered our minds.
Re: TJ's V10
Posted: Wed Dec 31, 2014 5:24 pm
by terrulian
Got the cleats for the stern seat in. Since I cut the two big holes for hatches, all I had to do was put the seat in place, square it up, goop up the middle of the cleats with epoxy and hot glue on the ends, then reach in and put them right up against the hull and bottom of the seat.
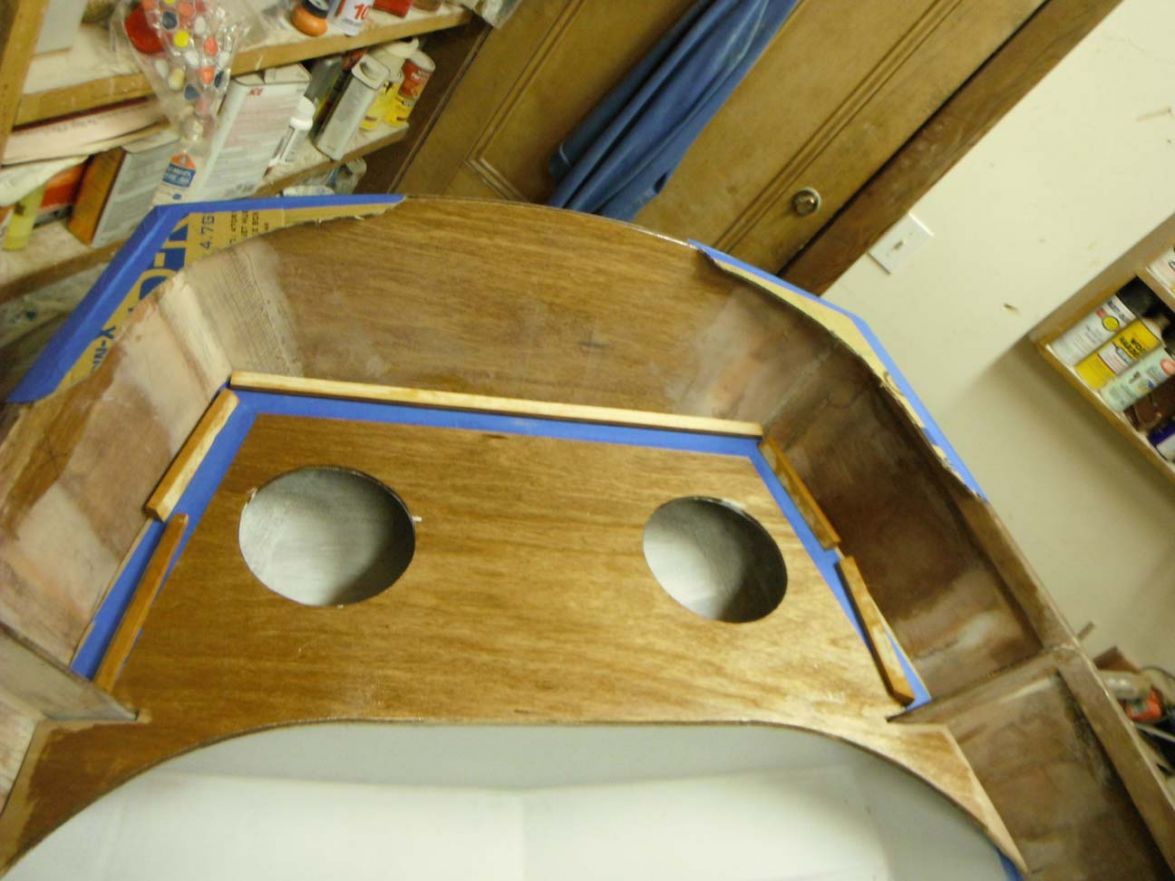
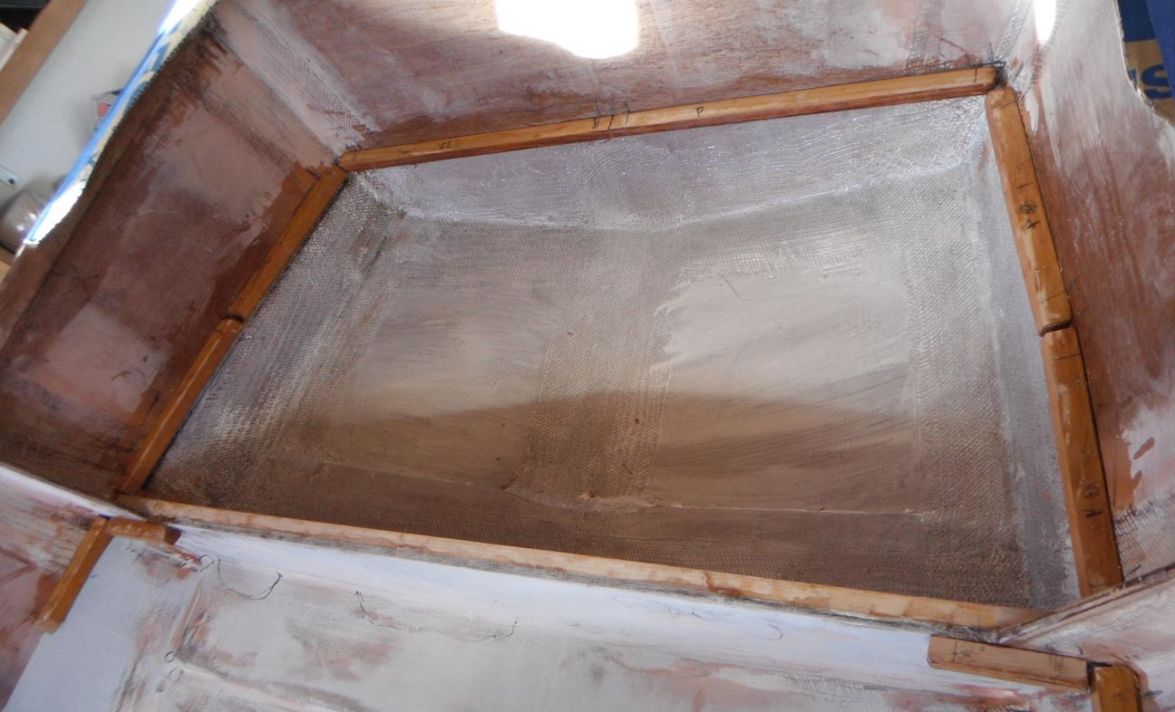
The result is the cleats are perfectly placed...BUT, since I couldn't see what I was doing, I was a little shy on applying the epoxy/wood floor mix, so they are not affixed with as much surface area as I'd like. I was worried I was going to accidentally attach the seat bottom, which I'm not ready for as yet. However, when I do finally glue the seat tops in, I'll put enough goop in to make up for that. In addition, the seats will be glassed in. So I don't think I'm going to fret about it. The bow and center seats will get a more liberal amount of what I'll call bondage. By the way, one of the builders was talking about pigment in epoxy not being a good topcoat. Here's where I have it, under the seats.
Re: TJ's V10
Posted: Wed Dec 31, 2014 8:03 pm
by gtcoupe
I like the hot glue trick. Might try something like that with a couple little dabs of construction adhesive.
Re: TJ's V10
Posted: Thu Jan 01, 2015 11:28 am
by terrulian
So yesterday I glued in the cleats on the bow seat and had questionable results for a completely different reason. I used plenty of goop, and reached in the hatch hole to put the cleats right under the seat. But when I took the seat off to have a look at my genius work, it turned out that since I couldn't see, I had nudged one of the cleats completely out of the way when placing another one. Luckily, it was removable, so I stuck it in again, this time with the seat removed, and just using the layout line. This turned out to be not nearly as accurate as shoving the cleat in there firmly against the seat as I had done on the stern. But I let it kick and the only downside is that the errant cleat is a little low, so I'll be using a lot of wood flour/epoxy to fill the space when I actually glue the seat in. My technique is, you might say, a work in progress.
Going on our traditional January 1st hike, about 8 miles round trip out Bear Valley in Point Reyes to Arch Rock overlooking the Pacific, to welcome in the New Year. Best wishes to you all.
Re: TJ's V10
Posted: Thu Jan 01, 2015 1:55 pm
by ks8
Except for the extreme obssessive compulsive fanatic who insists on building an entire boat in one big mix and cure of epoxy so that no secondary bonds are needed at all, and all the epoxy and seams are one huge intertwined polymerised molecule...
you are going to have secondary, i.e. *mechanical* epoxy bonds. As soon as that is accepted, all sorts of other techniques come to mind, to make the build much less stressful.
For instance, bonding support cleats to hull sides. If you look at my stern seat hull cleat, it may look like a perfect and gap free bond. But it wasn't!
The goop ran before it set, and caused some gaps and craters.
starboard stern hull seat support cleat
I sanded and filed after the cure, to get *tooth* for the mechanical bond, and then filled and smoothed it long before actually bonding the seat on. The idea is that, for me, the seat top bond was going to be a little more hectic, getting my finger under there through the hatch, to smooth the fillet. So, I didn't want to put oceanic amounts of goop on there just to fill the gaps. Nope. Made it nice and smooth and level first, after the initial attachment bond had cured. Did the same with a cleat that insisted to cure * a little low*. I build it up before the seat top bond, so there was less insanity with dry spot and lava flows during the actual seat top bond.
It mostly worked as planned.
I also had green masking paper taped in the compartment before the final *top on*, so that the worst free blobs, if any, could be easily pulled out after the cure. Next build I'll have plastic wrap under the masking paper locker liner, in case an unusually wet blob soaks into and through the paper, so it doesn't glue the paper to the boat.
When it was time for the *seat on*, I only had to think about enough goop to ooze enough to make a small fillet, and no need to fill any large gaps or valleys by then.
The *seat on* final goop scoopin'.
It all worked out nicely....
Inside job.
Practice makes... habitual. And there are some habits that are very good to have. We should make up another word for the bad ones, and stop giving *habit* a bad rap. I had a few hull cleats worth of practice. The mid cleats are two strips laminated to lock in the curve, before bonding into the boat. Still had to fudge them too after they were all stucked in *mostly* where they belonged.
Practice.
Enjoy the big moment more with some careful planning and rehearsing. This theater of life doesn't always allow it, but its plenty possible right now.
Re: TJ's V10
Posted: Fri Jan 02, 2015 9:20 am
by terrulian
Thanks, ks8.
Unlike you, I am not going to go for a nicely faired interior to the bow and stern lockers. I do remember many years ago, on my big boat, constructing some very nice removable stitch-and-glue mahogany plywood bins that fit under seats in the saloon. This way I had access to the interior of the hull if I needed to for...um, a hole in the hull??? That would never happen??
It was always nice to open the locker and see a very well finished interior. But here, I'm not going to do that. Fairing the interiors would add weight, take time and materials, and additionally, hide the construction of the boat. I think it will be cool to be able to show anyone that is curious (I imagine this number may not add up to any more than a fraction of one human being) what the construction of the boat looks like before it is covered in goop and paint. Considering that these particular lockers will be used for stuff that gets dirty like lines and fenders and maybe a small anchor, I don't want to indulge their narcissistic desire to be irrelevantly pretty. Beckson, who makes the deck plates, also makes a storage bag insert to stow stuff like keys and wallet, etc., so this will suffice for the clean stuff.
http://www.westmarine.com/buy/beckson-m ... 26_002_500
As for getting the seat tops down without creating a complete mess inside, I think I'll do a version of your use of plastic and/or masking paper to avoid blobs on the interior when I glue them in place. Even though I'm not going to make them nicer, no reason to make them worser!! Also, with regard to the space that I inadvertently created because of the bow cleats that had to be mounted to a line and are 1/8" or so lower than they should be, I think I'll put a pile of goop on top of the low spots on the cleats, and then put packing tape on the bottom of the seat edges in those areas, put the seat in place and smash it down, reach in and do my best to clear the stuff that has oozed out, and after the goop is green, take out the seat top. This should give me a perfect ledge like I achieved in the stern. Actually, perhaps the use of the term "perfect" is not suitable here
. That way, it'll be less of a mess when I actually glue the seats down.
Re: TJ's V10
Posted: Fri Jan 02, 2015 9:47 am
by pee wee
I like the idea of making the inside of compartments smooth, although not necessarily perfectly fair. It helps a lot when cleaning to be able to sponge out an area without shredding the sponge, and it's nice to not have big dirt traps.
Re: TJ's V10
Posted: Fri Jan 02, 2015 11:08 am
by terrulian
That's a very good point, pee wee. I'll take it into consideration for sure. I think I've eliminated actual sharp spots that would tear anything but I'll double check. However, I'm not going to get rid of dirt traps because that would mean filling the weave. It's a dinghy, it'll be art on the day it's launched but get trashed starting that day or the next one, and I don't have a good record of cleaning out lockers anyway unless they are holding stuff like food or clothes.
Re: TJ's V10
Posted: Fri Jan 02, 2015 3:34 pm
by ks8
Sounds like you're no stranger to such projects.
Plenty of spare packing tape around the edge too, so the seat doesn't get glued down before you want it to. Sometimes in that kind of operation, the goop can ooze up and around the packing taped edge and still lock the top in. I had to use a mallet to pop some things off the packing tape. The epoxy didn't want to let go even of the packing tape.
But the persuader mallet did its persuading. Gentle taps, if there is room to swing it.
I imagine you know all that, but as I've said in the past, sometimes I include a few more details for the sake of any newbies reading these posts. When I began my build, the internet was still a barren wasteland when it came to good practical info and experience, at least regarding boat building questions (
). The pros out there kept everything secret, job security, consulting fees. (I'm not trying to put them out of a job). Professional consulting, for some projects, is worth every penny for such projects.
Those who were in support on several forums, would say only enough to technically be correct, I think, sometimes not realizing that new builders do not have the same background of experience to see how simple their answer is. My personality needs more, some substantial *why* questions answered (the eternal three year old
), so if things go unexpectedly, as they can so easily do, I have a broader background wisdom ready to fudge out a solution. So don't think I'm trying to tell you, Tony, every detail, as if you've never seen a boat before, and never mixed a batch of epoxy.
I'm still very inexperienced in things *boat and fishing*, but not like 10 years ago. My ignorance is an easier sell than my experienced wisdom, but at least I know it.
Re: TJ's V10
Posted: Fri Jan 02, 2015 4:01 pm
by terrulian
Even if I did the same job a week ago, I've been known to leave out a step, so a reminder, no matter how seemingly obvious, is always welcome
.
Re: TJ's V10
Posted: Tue Jan 06, 2015 11:37 am
by terrulian
I just found these at a local store for a dollar and a half. Amazon wants $5.78 plus shipping for them...but anyway, these are the best things I've found for creating different radii when doing fillets. Each corner has a different radius and I've found that very useful.
http://www.amazon.com/Fox-Run-Pot-Scrap ... d_sxp_f_pt
Re: TJ's V10
Posted: Tue Jan 06, 2015 8:25 pm
by terrulian
Here's a shot of the shop I'm building my little V10 in. I built it more than three decades ago with a skill saw, a hammer, a level, and a square. Maybe a mud knife and some string, too, I don't know.
The corners don't look plumb because of my special kind of stupid photography. Everything's straight, it's not going to tumble. We just got through a bunch of storms and I haven't picked up all the dreet from the trees yet. I'm going to get to it on Tuesday of some year or another. The thing under the blue tarp is the table saw that I had to evict to make room for the boat. It doesn't complain but I'm not sure what it will look like by the time it sits out all winter. So far, it runs fine.
It's heated and pretty cheery inside, but a mess. I'm not a tidy worker like some of y'all.
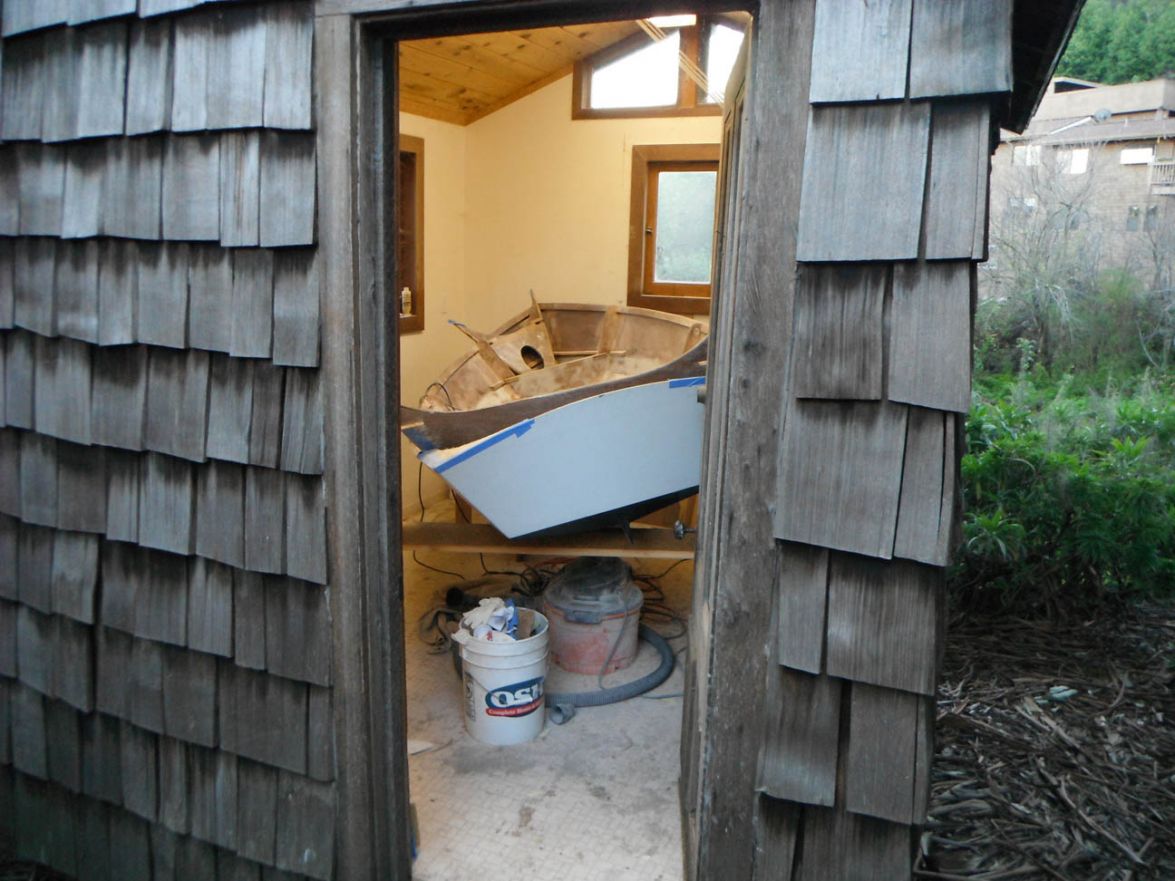
Re: TJ's V10
Posted: Wed Jan 07, 2015 4:32 pm
by ks8
Well now.... someone has to ask the question... right? How are you going to ..... ?
Re: TJ's V10
Posted: Wed Jan 07, 2015 4:56 pm
by pee wee
ks8 wrote:Well now.... someone has to ask the question... right? How are you going to ..... ?
Maybe the roof hinges up.
Re: TJ's V10
Posted: Wed Jan 07, 2015 6:47 pm
by terrulian
Hmmmm...never thought of that!
Re: TJ's V10
Posted: Wed Jan 07, 2015 7:00 pm
by Cracker Larry
Tony, I finished your book last night, it was a very good read. Enjoyed it a lot
That Mr. Shrode is a very versatile fellow. The fact that you still speak after 2 years on a boat says a lot
Re: TJ's V10
Posted: Wed Jan 07, 2015 7:15 pm
by terrulian
Thanks for the kind words, Larry.
Mr. Shrode, who is my partner on our Catalina 22 (but who is not helping to build my V10 which will be our tender), is still my favorite guy to sail with. He is every bit the man described in the book and more, in addition to being a humble soul. I can't say we never had a cross word but it was extremely rare and brief, and considering you're with another person 24 hours a day for 2 1/2 years in sometimes stressful and uncomfortable circumstances, that is kind of amazing. All credit for that is due to him. Just as amazing is that we both have wives understanding enough to put up with this kind of nonsense. When we were out there my wife, when asked, said "I'm not worried about him while he's gone. I'm worried about when he comes back."
Re: TJ's V10
Posted: Wed Jan 07, 2015 7:57 pm
by Cracker Larry
considering you're with another person 24 hours a day for 2 1/2 years in sometimes stressful and uncomfortable circumstances, that is kind of amazing. All credit for that is due to him
Bullshit. It takes both of you to pull that off.
Just as amazing is that we both have wives understanding enough to put up with this kind of nonsense.
I've got one of those too
Re: TJ's V10
Posted: Sun Jan 11, 2015 7:45 pm
by terrulian
I was going to put on a coat or two of S3 today but I found a couple of small areas that needed a tiny bit more QuikFair so I decided to make the knees while that kicked.
I cut the pieces to fit the corners by making cardboard patterns and then got out the radius jig to create the curves. The plans call for a 7" radius on the main curve but I used 12" and then 3" for the ends.
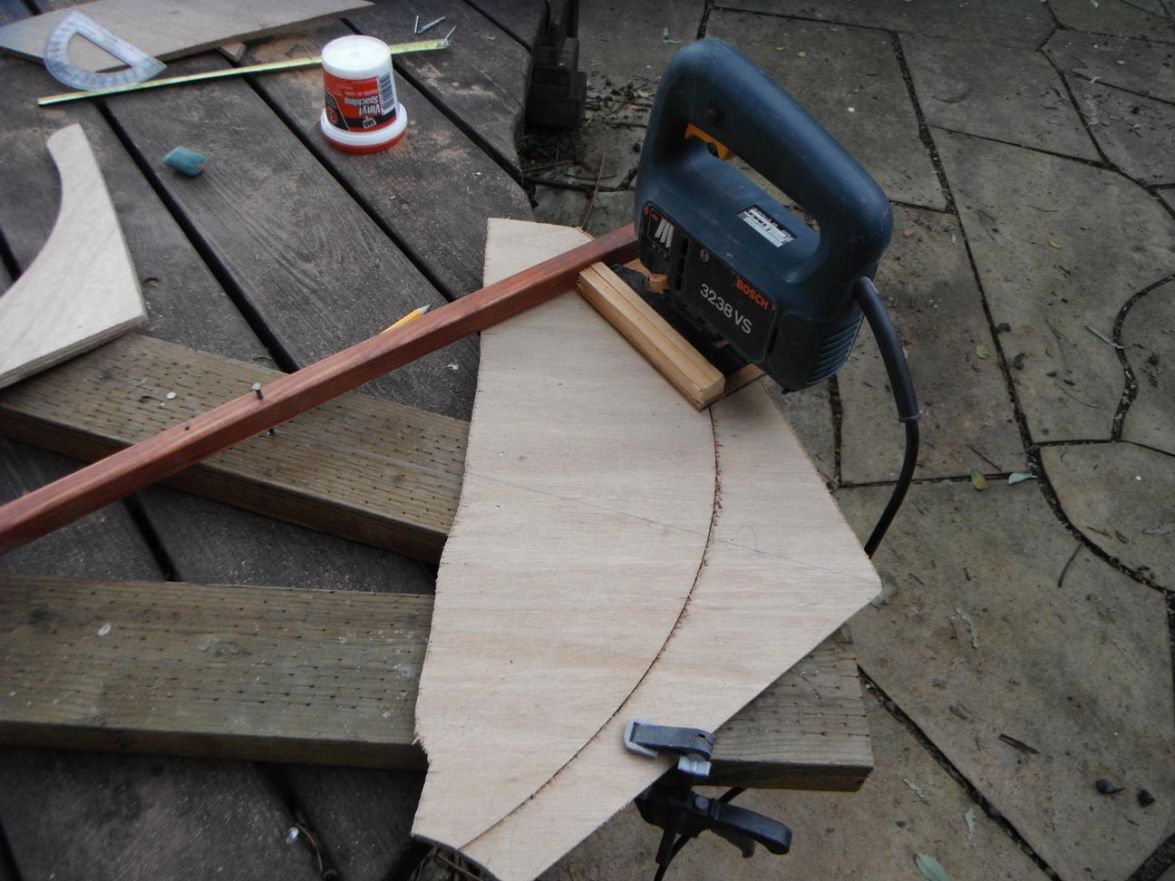
I wasn't sure whether to use a double thickness of 3/8" plywood so I just cut one layer, then used that as a pattern for a second. I used the router with a trimming bit to copy the curves and then rounded them over, but the square sides, after cutting, needed some planing to match the angle of the hull. After trying it with and without the second layer I'm going to use the full 3/4" inch thickness. I'm sure it is not necessary structurally and it adds a little weight but it looks and feels more substantial.
I haven't glued the halves together yet so I still have time to reconsider if someone on the forum can think of a reason I should stick with the one piece. It's all just dry fit for now.
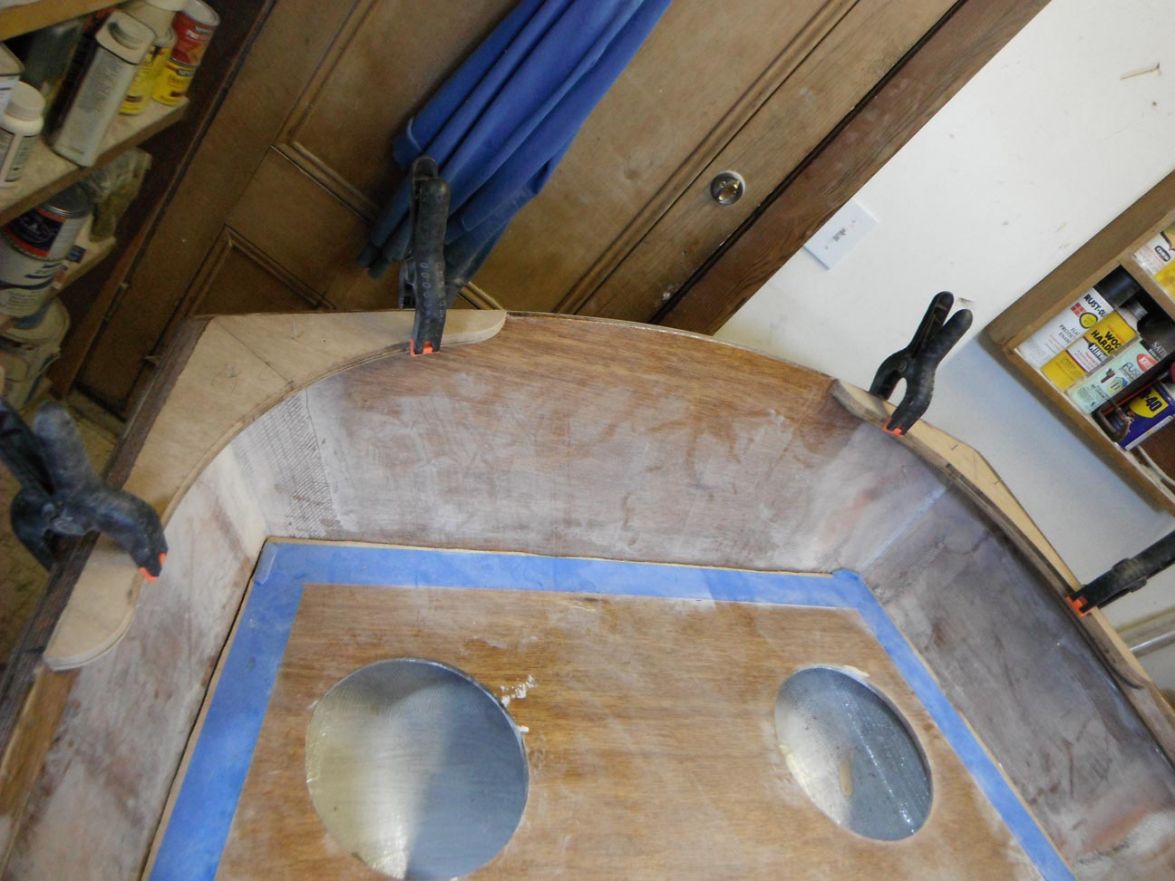
Re: TJ's V10
Posted: Sun Jan 11, 2015 9:04 pm
by gtcoupe
I presume that by going with a 12" radius you've marginally weakened the strength of the legs of the knees, and therefore doubling them may be a good idea. Then again, a few weeks ago I never thought the Seahawks were going to do very well in the post season!
Re: TJ's V10
Posted: Sun Jan 11, 2015 10:52 pm
by terrulian
I don't think the radius has weakened the strength of the knee. I could not make the knees look like the drawings in the plans using a 7" radius, which looks more just like a divot rather than a sweeping curve. That was my real reasoning. But your point is well taken. I've surveyed a lot of pictures of the boat, and builders are all over the place in regard to the shape of the knees.
Re: TJ's V10
Posted: Mon Jan 12, 2015 2:08 pm
by ks8
It feels strangely awkward (as it should) typing it in public, but.... I like the look of those knees.
Does your V12 blush?
I think what is most important with the knees is that - they need to at least do what they were engineered to do for the area in which they were engineered to do it, and, if modified, they have to not move a stress load to another area that was not designed for that stress load. And finally, if modified, they have to Not give an impression that a load can now be increased in an area where the modified knee is not really adequately compensating for the larger or relocated load, if the reserve strength margins of the original engineering are to remain unchanged.
As an example: if you want to hang a heavier engine on the transom, not greater HP, but just heavier (one that would not negatively affect the waterline trim with realistic ballast redistribution) and you therefore increase the scantlings for the knees, that does not mean that the larger knees alone will adequately support the heavier engine. The transom may also need to be partially or fully doubled. An engine pad may need to be added, or a full width clamping board. Additional glass may be needed under the knees. On a monocoque structure, any component of it is not really an individual component or *thought*, but begins to affect the entire area into which it is *welded in*, and into the surrounding areas too. It is not always that critical and complicated. Sometimes it is a very simple and uneventful thing, purely visual. But if a stress load will be increased or shifted appreciably, then the modification needs to have a correspondingly respectful amount of thoughtful attention given it.
Remember too that good engineering is not always consisting only of properly locating needed strength. Good engineering also can steer a failure to an intentional location and type of failure, if a failure does occur. I'd like to think that such is not a needful consideration here.
Its a V12. It is not a planing hull with a 70 HP hanging on the back of it. It is not towing a garbage barge with its transom ubolts. But if you (or someone else) hangs an oddly heavy low HP engine on the transom, then it is not a bad idea to mention the weight, and ask what transom mods might also be necessary.
Re: TJ's V10
Posted: Mon Jan 12, 2015 3:05 pm
by terrulian
ks8, I just love to hear you talk
.
As Jacques has said on a similar matter if not this exact one, as long as the dimensions on the plans are followed, variations on the aesthetic design will not affect strength. I think I've done that here. The knees are laid out to the numbers on the plans and only the main curvature has been altered. But even there, as I said above, this was done to emulate the drawings since I could not achieve the right look with the smaller radius. Some builders just leave it as a straight line, creating a triangle, and forego the curve. But I like the graceful look of the curve, which is echoed in the seats and breasthook.
PS, a V10, not V12. Wouldn't be able to fit that in my van!
Re: TJ's V10
Posted: Mon Jan 12, 2015 3:50 pm
by ks8
terrulian wrote:ks8, I just love to hear you talk
.
I accept the encouragement, soberly, with respect to personal dangers relevant to myself, far exceeding any presumptive speculations on the part of my critics.
Most
Sincerely
and respectfully composed
for your enjoyment,
Wilkins Micawber
Re: TJ's V10
Posted: Mon Jan 12, 2015 4:14 pm
by terrulian
A fine gentleman, indeed.
Re: TJ's V10
Posted: Mon Jan 12, 2015 6:59 pm
by Cracker Larry
Yes, he is
Re: TJ's V10
Posted: Mon Jan 12, 2015 7:49 pm
by ks8
Not that Micawber is my mentor....
I remember the day I bought my first copy of David Copperfield. On the back cover was a review of the book, and Dickens, in general. The reviewer basically spoke of the enduring entertainment readers get from Dickens' cartoonishly outlandish characters (to paraphrase). As I actually read the book, I began to struggle with whether or not I feel sorry, in a way, for that reviewer, imagining that the man simply must never *get out* and visit or befriend any real people. Of course, I don't know him personally, and that is rudely presumptuous of me to say, but the review itself does seem to reveal him to be an example of his own evaluation, maybe, a little bit.
I have met several (and enjoyed some of them) of Dicken's supposedly cartoonishly outlandish characters, in the real world. Of course they don't have the same names, but somehow it is very easy to a particular Dickens type character in them. Many of them very fine people indeed -- colorful? -- certainly, but no less genuine and true for the color.
I do hope, that if that reviewer is a fellow boat builder (I have absolutely no one specifically in mind), and reads this post, I hope he can understand that this post is not meant as an attack on him at all, but a hope, that surely by now, if he were to write that review over, it would be .... notably different.
If years and the universe itself are not devised so as to bring forth the *man intended* by the One who speaks us forth, then hope is indeed very hard to find, or even define. That doesn't mean that there aren't any others trying to do all they can to muck up that good work.
------------------------------------------------------------------
Little round planet
In a big universe
Sometimes it looks blessed
Sometimes it looks cursed
Depends on what you look at obviously
But even more it depends on the way that you see
excerpt from *Child of the Wind* by Bruce Cockburn
------------------------------------------------------------------
True, even T.S. Eliot said of Dickens, "Dickens excelled in character; in the creation of characters of greater intensity than human beings."
Yet it surprises me still to hear that from him. Maybe I'm just too intense myself? I see myself quite the opposite.
There. Now Dickens and Micawber and Eliot and Cockburn are immortalized on your V10 thread. Jimmy Buffet already has a home on some other threads.
Did I say, I like the look of those knees?
Re: TJ's V10
Posted: Thu Feb 05, 2015 8:50 pm
by terrulian
I see we were waxing poetic when last I posted about some progress. I actually know nothing of Cockburn having ceased listening to new music at the birth of disco. Elliot and Dickens are favorites and no one should go to his grave without reading at least Copperfield, which I believe was his favorite.
Been going slow, but progress has been made. Sometimes it takes me a week to convince myself that I really cannot accept the fairing and must do another round.
Anyway, got the oarlock sockets dry fitted today. Jacques says he prefers the other style that is screwed to the gunwale instead of installed in a hole bored straight through. I haven't heard his reason but I may have found out why. The hole being drilled is 11/16" and you don't want to just eyeball it. At first I thought I'd use a doweling jig but mine only goes up to 1/2". So I used a drill guide like this and, after screwing it to a piece of plywood, clamped the whole assembly to the inwale.
That seemed to work fine but it sure made me nervous. Here's the result:
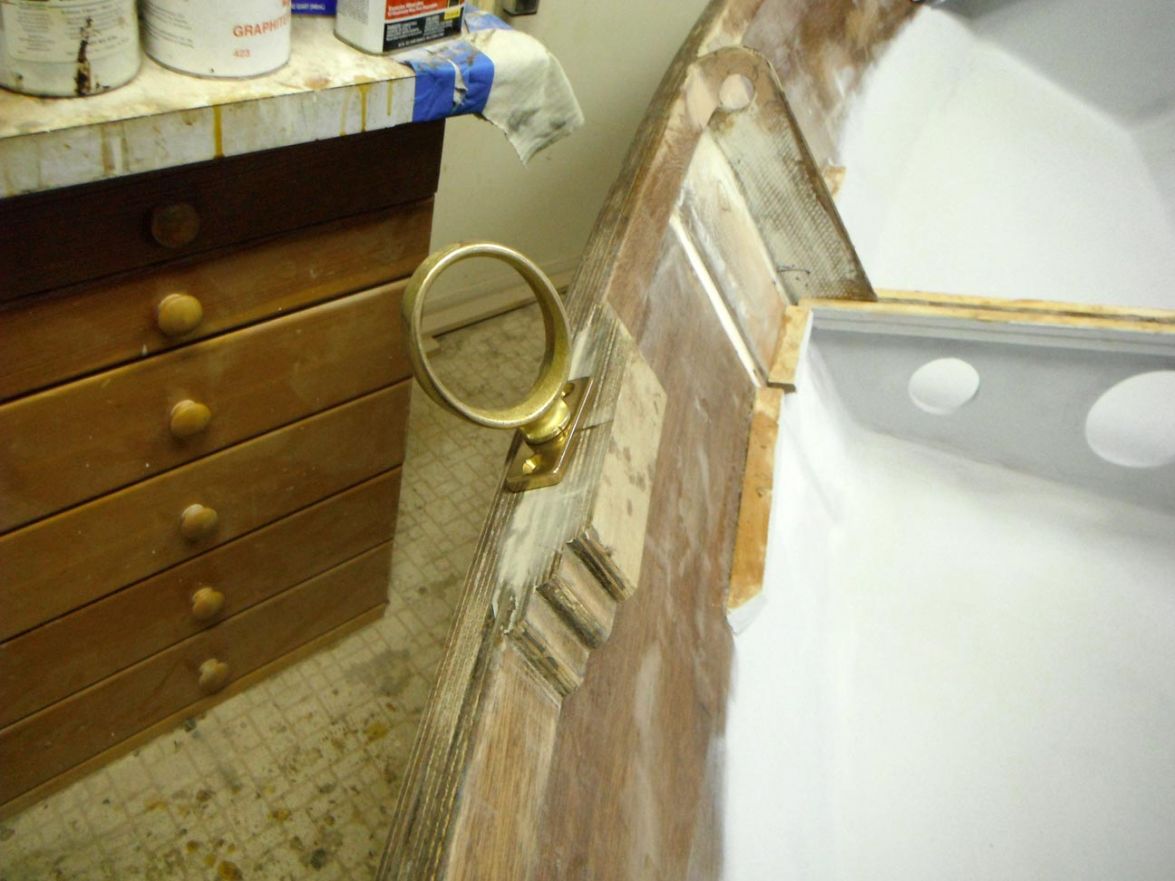
Jacques said he wasn't happy with the simple hole itself so I've devised a reinforcement plate to be glued underneath the oarlock pads with little braces. In the photo they're just held in place with double-sided tape:
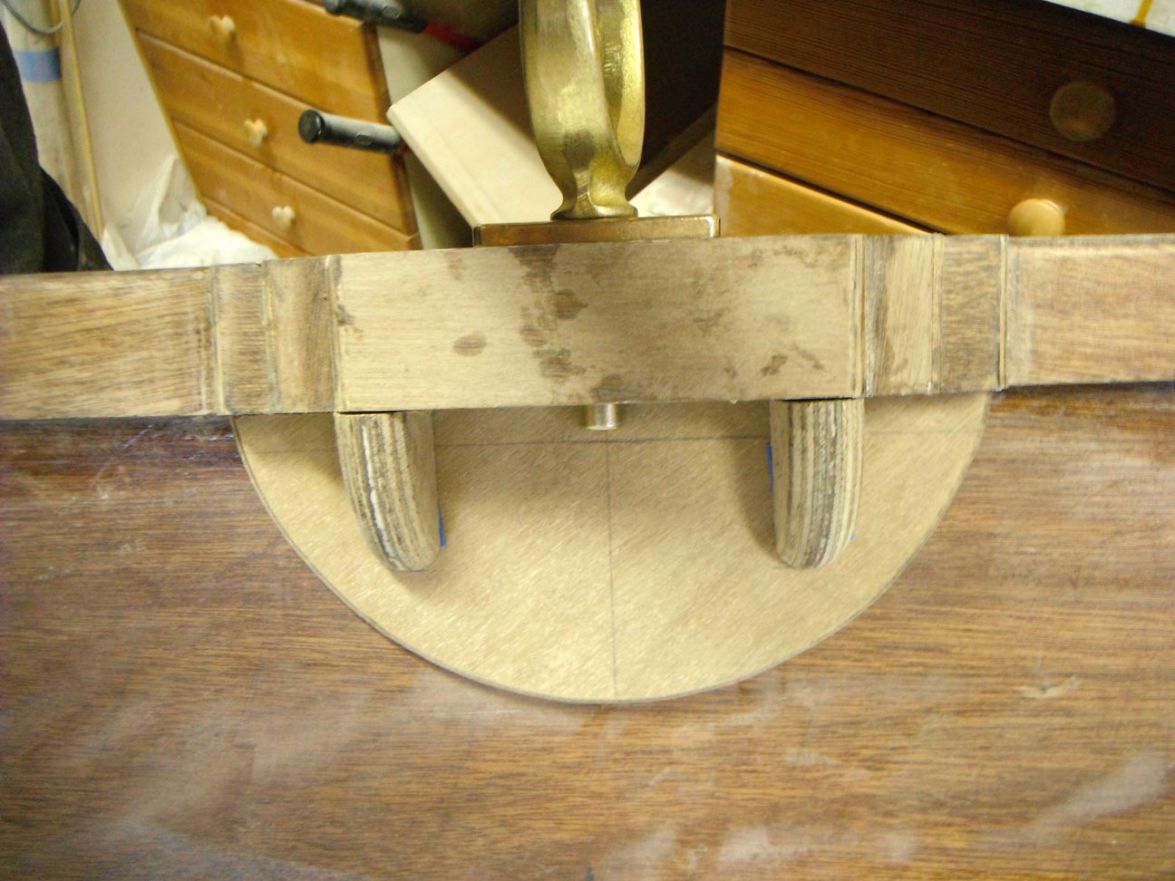
I think with enough epoxy this should stiffen things substantially and I hope sufficiently.
Re: TJ's V10
Posted: Thu Feb 05, 2015 9:30 pm
by gtcoupe
Nice work TJ. The word "classic" comes to mind. Being unimaginative and lazy, I'm using the ones Jacques likes. Serviceable, but definitely not as pretty.
Re: TJ's V10
Posted: Fri Feb 06, 2015 12:27 pm
by terrulian
Sometimes my wife will use the word "classic" to describe things I do, most often followed by "blunder."
Thanks, though...what kind of gtcoupe are we talking?
Re: TJ's V10
Posted: Fri Feb 06, 2015 1:01 pm
by gtcoupe
terrulian wrote:Sometimes my wife will use the word "classic" to describe things I do, most often followed by "blunder."
Thanks, though...what kind of gtcoupe are we talking?
The gtcoupe refers to a 65 mustang I commuted in and drag raced for about 12 years. Still kinda miss that car, but it eventually got too quick (read that uncontrollable) for street use.
Re: TJ's V10
Posted: Fri Feb 06, 2015 5:05 pm
by Cracker Larry
We use to have a 66 Mustang that was bad to the bone. It would run 100 mph in second gear and squeal the tires when you shifted to 3rd. Mrs. Cracker once flew from Miami to Savannah in it, 525 miles in 3 hours even
Wish I still had that car, but better I don't, or my son would have already killed himself in it.
Re: TJ's V10
Posted: Fri Feb 06, 2015 5:19 pm
by gtcoupe
Fun little cars. Mine did 11.0 in the quarter mile at 124 mph. I think a good driver could have hit mid 10's. No bueno on the street with that power though.
Re: TJ's V10
Posted: Fri Feb 06, 2015 9:04 pm
by ks8
Re: TJ's V10
Posted: Sat Feb 07, 2015 9:48 am
by terrulian
No, I still listen to music but don't keep up. I'm a fan of traditional country and traditional R&B and soul and what they used to call "beach music" down where some of you guys live. They pretty much quit making that stuff several decades ago, although there are exceptions. Therefore I never latched on to disco, punk, metal, or rap. I don't mind an occasional Shakira or Beyonce video, though.
In regard to cars: In 1969 I bought a brand new Ford van which took me through much of the middle part of my life and was the perfect vehicle to carry gear to gigs, or to travel. I nursed it along until 2004 when I took it to a yard to be scrapped. Cradle to the grave on that one. In the 1980s I had enough extra cash to buy a completely trashed MGB and promptly blew up the engine. I rebuilt the entire car starting with the crank (not the drive train, though) and suspension through the upholstery and body work. Amazingly, the Lucas electrical system only had one minor bad connection and henceforth never had a hiccup. In 2006 the car needed restoring again but I didn't want to undertake that so I started to price it out and came up with around $10,000, and realized that for that kind of money I'd still have a lousy heater/defroster, it would leak in the winter, and had no safety gear. I'm now old enough that I care about that sort of thing
...So I started driving cars and found out that even a regular old sedan, a modern one that is, was faster on its feet and better around curves than my dear old MG. So I drove the modern version, a Mazda MX-5, and it felt like I was hallucinating. I don't think life would be quite the same without a small roadster and I know I don't want to live that way, so I got one. I know some guys may think it's a pussy car, but I can scare myself in it
...of course, see above about being old
. Sorry for the long excursus from boat building...but this all started when I asked gtcoupe what the gtcoupe was.
Re: TJ's V10
Posted: Sat Feb 07, 2015 3:00 pm
by ks8
These are things of which some boat builders are made, making it relevant, with the *anything else* or *bilge* available to go more in depth. I'm not of the sort to label it completely irrelevant, or not deserving of any mention at all, on a build thread. Fairing fills hollows, and turns the peaks into dust. All part of the process. The metaphor works for me.
Alright, to bring it back to boats.... I don't need a harmonica to know if I'm ever going above the no wake speed limit in my CV16. But it sure feels mighty *on edge* when heeling in 15 knots or more wind.
Re: TJ's V10
Posted: Sun Feb 08, 2015 12:33 pm
by terrulian
Of all the issues which have impeded my progress (which is now put into perspective by the fact that Corvidae, who started after me and is building a larger and more complex version of the same boat, is already in the water
But hey, no pressure
) nothing has presented as many hurdles as smoothing the interior radius joints, the finish fillets where frames and seats meet the hull. I've asked this before and both Jacques and CL, than whom no more authoritative sources exist, have said something to the effect that you just take your Quick Fair, get a nice radius tool--which I have now a collection of--and after you get it laid down, put a coat of epoxy over it. They say
NO sanding is necessary. But I find that no matter how careful I am with the original application, there are little streaks, and glops at the end, that I cannot countenance. What I have in mind is achieving the sort of radius that would result from using a cove bit on a router. In fact, I have even fantasized about creating a jig for a router and doing exactly that, but you would need a bunch of jigs and they wouldn't work on curves and besides, that is flat out insane.
I called a contractor friend of mine who specializes in high-end offices, and his solution was: you ask around and find the guy who's been doing this exact job for decades, and then you pay him what he is worth.
After much work I end up with something I can live with, but only after not two or three, but six or seven, rounds of fairing. Since ks8 and Joel have now cautioned me to wait 3 days after applying S3 before attempting more Quick Fair, and because I always find the S3 reveals another holiday, this can literally take weeks. But OTOH, I'm not in a hurry and even though it is frustrating, fussing over these little details can also be satisfying when in the end it doesn't look bad. All suggestions are welcome, including those involving alcohol, drugs, or therapy.
Don't get me wrong, I'm still having fun and will see this through to the end--even if it occurs at the same instant my own end does.
Re: TJ's V10
Posted: Sun Feb 08, 2015 4:05 pm
by gtcoupe
Tony, I can tell you a little tale that may or may not help. I owned and operated an equipment rental business for 30 years. We sold equipment both new and used. One day one of my best and favorite customers came in to pick up an expensive new water pump he'd ordered. We had it assembled and all polished up for him on the showroom floor. He spent a few minutes inspecting it, then turned to me and asked if I had a big ball peen hammer. I grabbed a 24 oz and asked it this would do, having no idea why he wanted it. He said "perfect" and immediately caved in one corner of the gas tank on his brand new multi thousand dollar pump. Before I could even ask "why in the world..." he told me this was the best day of his working life. He finally got to damage a piece of his equipment before his employees could. Having dealt with customers beating the snot out of my equipment for years, I fully understood and now no longer worry too much about making things look cosmetically perfect. Life is much easier now.
Re: TJ's V10
Posted: Sun Feb 08, 2015 4:50 pm
by terrulian
Like my old friend Tim says, "Life is so much easier now that I have given up hope."
Re: TJ's V10
Posted: Mon Feb 09, 2015 1:57 pm
by Corvidae
I think something that might have helped me along is that I just used my thumb as my radius tool under the seats and other hidden spots. For the seat tops I did the same, then cleaned it up with a flapper like this one:
http://www.amazon.com/DEWALT-DAFE1D1210 ... B00413QCZE
It's not the most elegant of tools, but it gets the job done. The problem is that it's going to bounce around scratching everything nearby. So you have to either block it off with sacrificial cardboard, or be ready to fair and sand around what you're fairing and sanding.
The best method is lightly brushing some clear epoxy over the fillet, but that does take a little practice to get right. At least according to my repeated failures. That's what I initially tried to do under the rub rails on mine. In the end I put up a half inch tape wall and poured thickened epoxy down the channel with the boat upside down. It worked, but wasn't exactly something I could do inside the boat.
Re: TJ's V10
Posted: Mon Feb 09, 2015 2:31 pm
by terrulian
Thanks, Corvidae. What a cool idea. I ain't going there, though.
I've experimented with the flapper and every other sanding device I can get my hands on but in the end it just has taken a lot of time.
You also may lack a couple of my attributes: laziness and procrastination, amplified by a tendency to extensively cogitate on things before I bear down and do them wrong.
Re: TJ's V10
Posted: Mon Feb 09, 2015 6:32 pm
by ks8
Speed, with some things, comes with developed technique, which begins to show up right near the end of the first boat, and beginning the next one (I imagine). Getting it done well, and doing it quickly, are not necessarily going to coincide with the first boat, but it will get done.
I've gotten very quick cleaning things up with the Dremel drum, but it was very slow going at first -- awkward, afraid of gouging wood, etc. Now I know how to hold it just right, and zip right along cleaning up those ridges on either side of a fillet made with a rounded tongue depressor -- and actually getting them mostly dealt with before they cure, with the sliding of a sharp cornered plastic card.
What do you find easier for you already, compared to when you first looked at the plans?
Re: TJ's V10
Posted: Mon Feb 09, 2015 7:40 pm
by terrulian
Actually, working on the radiuses/radii is probably the only thing I've slowly improved on. The basic glassing had very few issues and the assembly of the boat was only challenging at the bow, where I could have taken an easier route but didn't want to. Fairing the wide areas is pretty straightforward and just takes a little time and patience.
Like you, I've learned I can do better with the original application of the Quick Fair to the radius, and clean it up pretty well as I do it. The angle you hold the tongue depressor or other tool gets varied, and being picky about how clean you get the associated ridges can help. I also use several different spreaders, but my favorite radius tool is either the regular old tongue depressor or something like this:

Then it's a matter of what sander to use. I've never achieved the "no sanding" result but I've now reduced the sanding and gotten a better feel for picking the right process...although some areas seem to get worse as often as they get better because they are possessed by demonic powers. Those are the ones that require lots of do-overs, cursing, and tool violence.
In addition to my multi-tool with the triangular pad, I also found this thing, which is a pad for the RO that sort of bends at the edges:
Although it doesn't help in every instance, it sometimes works great. But: it never works as well as you would assume from the photo.
Re: TJ's V10
Posted: Thu Feb 12, 2015 3:22 pm
by terrulian
Bow and stern seat are glued in. I'm having to re-make the little oarlock socket braces because somehow I glued them together not quite square
.
Weighed the boat today. With the center seat in but not glued, and the hatches and breasthook and knees lying in the boat, I was getting 110-112 lbs. More weight will be added when I glass the seats, which I've decided to do after reading other accounts, and of course the remaining fairing and paint. But I checked out the weight on the 10'-9" plastic Walker Bay boat, and it is 126. I still have a pretty good chance of coming in under that.
Re: TJ's V10
Posted: Mon Feb 16, 2015 1:38 pm
by terrulian
I glued in the stern seat and then created fillets and glassed over the top and about a couple inches up the hull. Glassing to the hull was per Jacques' instructions but the seat top was glassed after reading the experiences of other builders who thought this provided good protection against abrasion.
As I did on the outside of the hull without success, I thought I'd try using a layer of Mylar to try to achieve a mirror finish. I waited, say, an hour after applying the glass, and then put a sheet of Mylar on top of it and rolled it out with a laminate roller. This was quasi-successful.
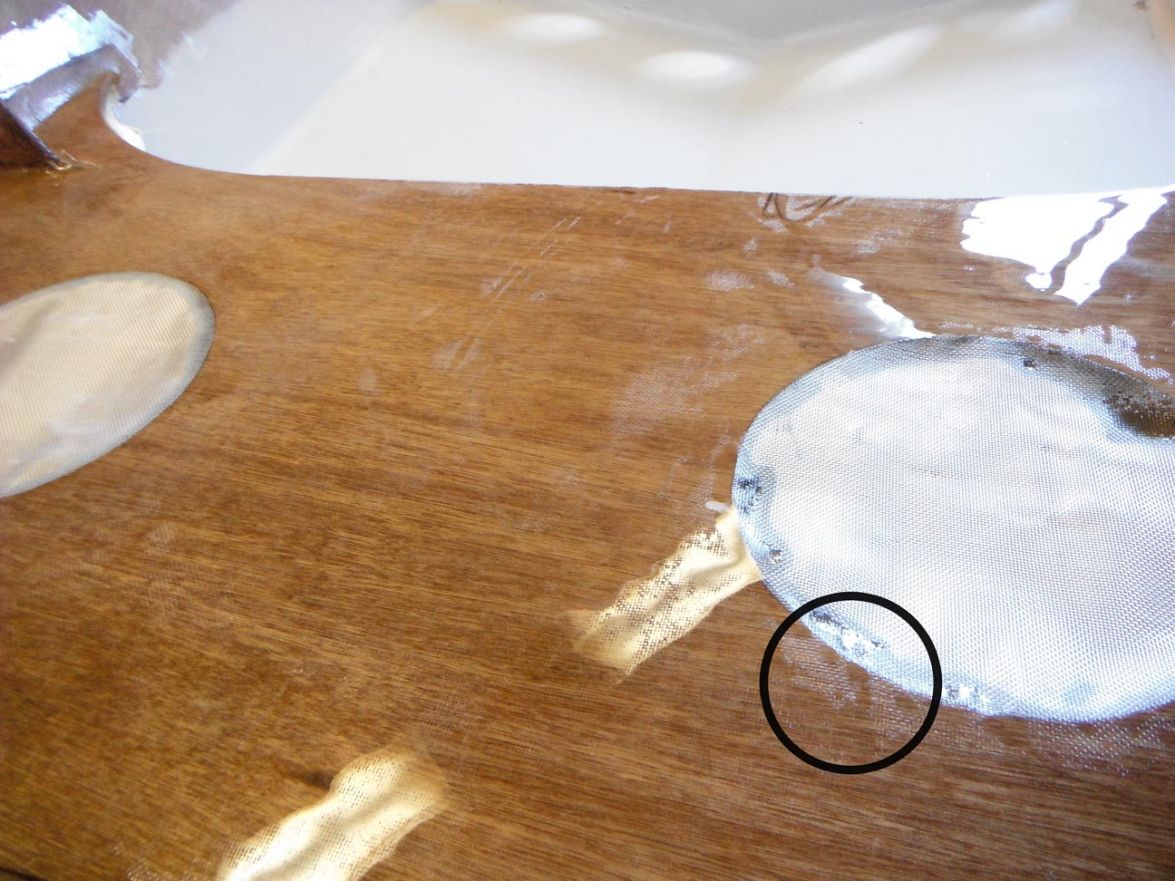
You can see that to a degree, a mirror-like finish did result. However, there were a few imperfections. Where you see the black circle, I think there wasn't sufficient resin between the Mylar and glass to fill the weave, though the glass was properly bonded to the wood beneath. In other areas, as you can see with the reflection of the window and overhead lights, there is a very reflective, smooth surface. The waviness of the reflection, however, is the result of the fact that even fairly heavy Mylar isn't rigid and so doesn't lie perfectly flat. I think what would work is putting down the Mylar, and then a piece of plywood to create a rigid, flat, backing for it, and then adding weights. I may try this but considering it takes cutting some plywood, I may not. Another thing that would help with the areas where the weave didn't quite get filled as in the circle in the photo would be to, again, while the resin was still tacky, put another light coat on which would fill the voids before putting down the Mylar. But the result, which would require only very minimal sanding with, say 220 just to create some tooth for the topcoat, might save a huge amount of fairing, filling, and sanding. On the other hand, maybe I'm just trying to reinvent the wheel and this is best dealt with in other ways.
Here's another view:
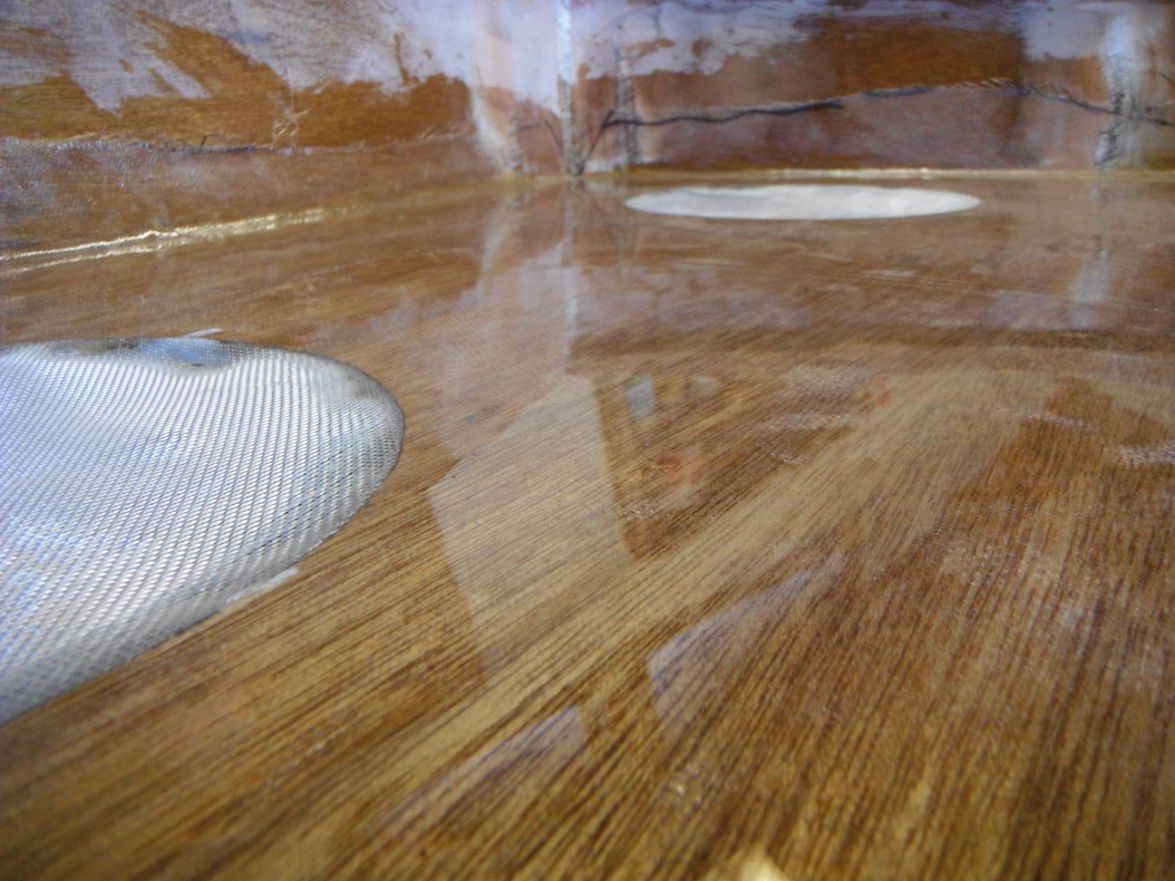
The whitish smudges you see in the foreground and middle of the picture are not failures of the process; they are reflections of the uneven fairing patches on the hull opposite, like the reflections of trees in still water.
Re: TJ's V10
Posted: Tue Feb 17, 2015 10:08 pm
by selever
That's quite fascinating, thanks for posting that.
Re: TJ's V10
Posted: Wed Feb 25, 2015 7:31 pm
by terrulian
Hey, guys, any ideas how to sand the area on the forward side of this frame? The angle is too acute to get in there with an RO or even a multi-tool triangular pad. One thing that's allowed me to reach some of it is a sanding pad on a drill turned backwards. Any other thoughts?

Re: TJ's V10
Posted: Wed Feb 25, 2015 7:47 pm
by ks8
by hand. maybe a small custom size and shaped piece of plywood as a minimal sanding block to wrap the sandpaper around. i made a few of those for just that sort of situation.
Re: TJ's V10
Posted: Wed Feb 25, 2015 9:12 pm
by terrulian
I was afraid you were going to say that. The problem is, particularly at the top and bottom, it is difficult to get enough movement on the paper to have an effect, even backing it with a dowel. I have two different dowel backing tools I've created for sanding, but I've tried it some in this area and it is very tedious while at the same time being unprofitable...perhaps that's a lame excuse
. Then there's the Dremel. I haven't tried that yet but I don't think my hand will be steady enough.
A possibility I may try is to use a piece of pvc pipe as a form with some releaser on it and just squish it in there on the goop to create a radius.
Another alternative is to create a very nicely made sign with an arrow that says "DON'T LOOK HERE."
Re: TJ's V10
Posted: Wed Feb 25, 2015 9:17 pm
by gtcoupe
Hey Tony, I got a couple dozen of those signs on my boat, wanna borrow one?
Re: TJ's V10
Posted: Wed Feb 25, 2015 9:19 pm
by Cracker Larry
by hand.
X2. Sometimes your hands are the best tools that you have. Just keep them clear of band saws. I've got a finger that will match any radius
Re: TJ's V10
Posted: Thu Feb 26, 2015 3:41 am
by gonandkarl
Hi,
My advice would be to buy something like this:
Black & Decker KA900E-QS Powerfeile 350W

I have such a grinding machine of a noname company ( 40 Euros ) and it has 2 different width ( 6 mm and 12 mm )
I use it quite often to get into tricky corners.
Greetings from Karl ( Austria )
Re: TJ's V10
Posted: Thu Feb 26, 2015 7:16 am
by peter-curacao
can't make much out of the pic
maybe a multi tool with the tip of a sanding pad accessory?

Re: TJ's V10
Posted: Thu Feb 26, 2015 9:15 am
by terrulian
Ahhh...gentlemen a little less infected by the Protestant work ethic!! KS and CL appear to believe that, without suffering, nothing of import can be achieved, and the more suffering, the better the result. I wish to get credit for using no power tools in fairing the outside of the hull, but since a longboard is of little use on the inside, I have sunk to the use of power tools. I can't say I'm the better man for it. But we all have our little trespasses.
I do have a multi-tool, Peter, but the design on mine doesn't allow for as much extension forward of the tool as that one. And I'm not sure even that one would get in there.
As for that other Black and Decker thing, a search provided only a link on the German Amazon page. It features 1 Schleifband, Cyclonic Action Staubfangbehälter, 13 mm Schleif-Arm, 3 Meter Kabel, all things I've lusted after for years. I found a translated version on Ebay for $60 but I don't know. It sure is different...but I can't see what the terminal radius is so I really can't say if it will work. Plus, screw it, I'm going to attempt to figure out another way. As I said, I may very well create a form with PVC.
And in the end, I will probably capitulate, admit defeat, and go with KS and CL, those old-school wizenheimers.
Re: TJ's V10
Posted: Thu Feb 26, 2015 9:24 am
by gonandkarl
Hallo Tony
The radius on such a powerfile I think it is called is veyr small. ( 12 mm or what you call in the US 1/2 an inch )
Here is another one from Amazon which shows a better picture. I think I bought mine only after having read about it in some bateau thread.
http://ecx.images-amazon.com/images/I/4 ... SX425_.jpg
Greetings from Karl ( Austria )
Re: TJ's V10
Posted: Thu Feb 26, 2015 9:29 am
by terrulian
Thanks, Karl...I'll give it some thought but only after trying my harebrained scheme
. But what else do I have to do with my time, anyway?
Re: TJ's V10
Posted: Thu Feb 26, 2015 1:36 pm
by terrulian
OK, I've been threatening to try this. Instead of doing actual work as proposed by KS and CL, I gooped up the area in question, put some mold release on a piece of pvc, and smashed it in there:
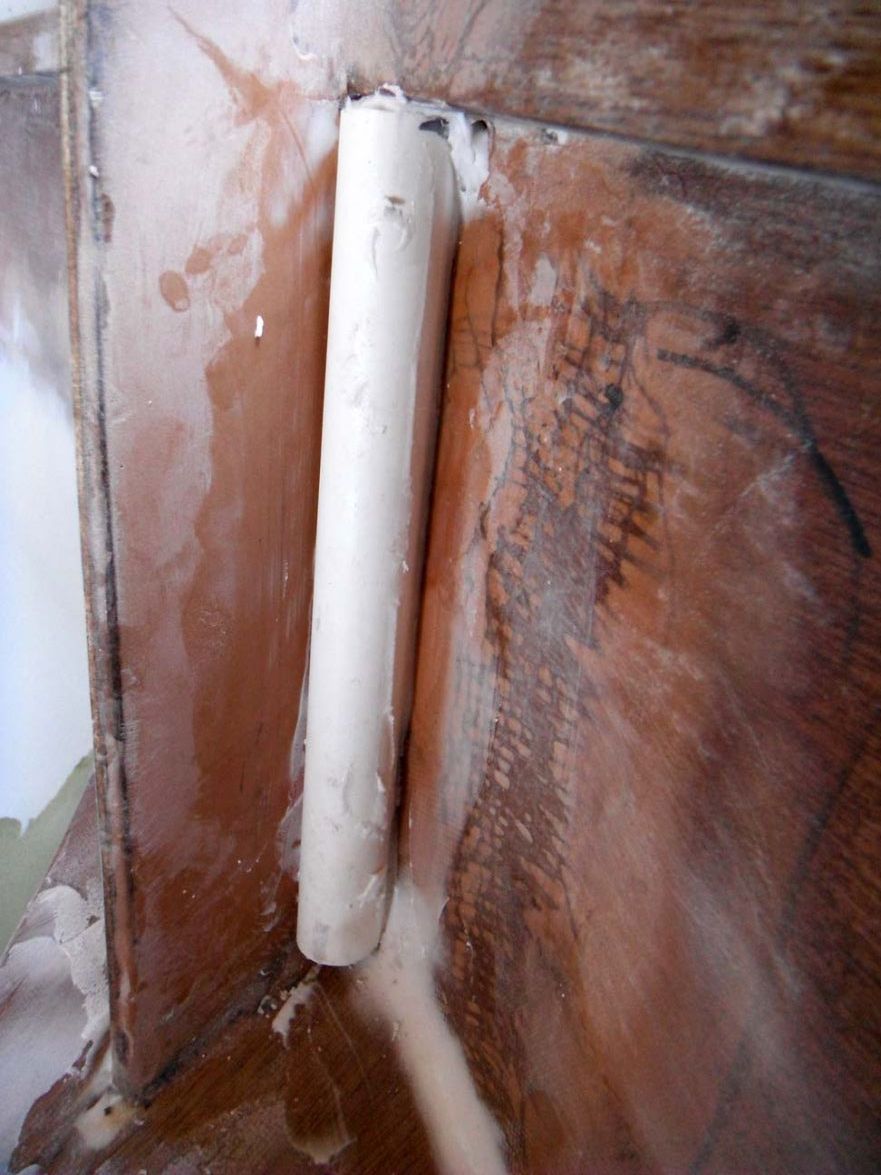
Then I cleaned up the excess with a pan scraper like this which has sharp enough edges to get in the slot between the hull and pvc:

We shall see. I'll report back.
Also, an update on the experiment from a couple of pages ago with ironing out some Mylar on top of the glass I laid on the stern seat: I did the bow seat without the Mylar approach, and comparing them, there is no doubt that the weave was considerably flattened and filled using the Mylar. Of course I didn't get the entire stern seat to be as flat and reflective as seen in the second shot, because as the first picture shows, there was some variation in how much this process filled in the weave. But overall, less sanding and fill was required with the Mylar. I think I'll try it again on the middle seat.
Re: TJ's V10
Posted: Thu Feb 26, 2015 1:59 pm
by gtcoupe
Lazy brilliance!
Re: TJ's V10
Posted: Thu Feb 26, 2015 2:01 pm
by terrulian
Let's hold off on the brilliance until we see the result
.
Re: TJ's V10
Posted: Thu Feb 26, 2015 3:13 pm
by peter-curacao
terrulian wrote:OK, I've been threatening to try this. Instead of doing actual work as proposed by KS and CL, I gooped up the area in question, put some mold release on a piece of pvc, and smashed it in there:
We shall see. I'll report back.
I already can tell you from my own experience that that will just work fine

Slightly bigger radius but same principle

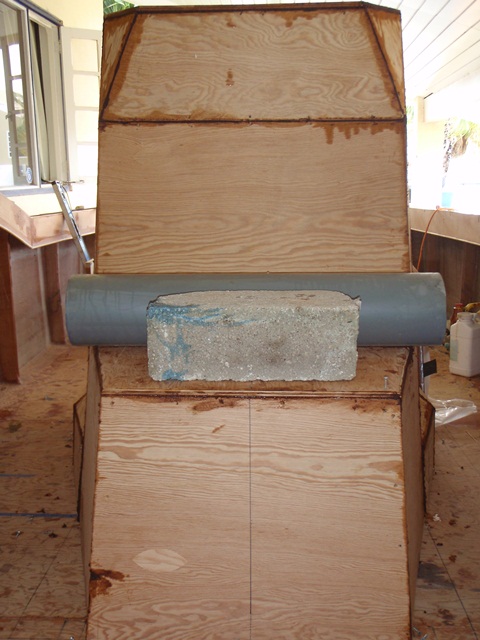
Re: TJ's V10
Posted: Thu Feb 26, 2015 4:01 pm
by terrulian
Yeah, but that's you!! I bet I can screw it up
We'll see, but I much appreciate the vote of confidence.
Re: TJ's V10
Posted: Thu Feb 26, 2015 5:16 pm
by ks8
oh.... for sanding the actual fillet.... Practice with the dremel makes it become a great tool. One can blast through such areas once there is a technique. Use fingers as a brace against the work area to steady the dremel, even resting part of the dremel body on the surface as a second steadying point.
Also, for the rough sanding of small radius filets.... I would save some partially worn 60 or 80 grit RO disks, (or cut sections of a belt sander belt) and fold them in half, and then use that *edge* of rounded sandpaper to get in there. The 60 and 80 grit disks (and belt sander belts) have a heavy weight backing, and one can get a nice shape to the bend to get right in there. Sometimes I would fold it over a very thin piece of plywood with a rounded edge, so the bent edge of the sandpaper would be a tight radius bend. Once again, you can really get material removed with it, and control it pretty well in the tight space. Then, of course, switch to 80, 120, and then its just about done. BUt the biggest material removal I do now is with the dremel and the large drum with rough grit. This is all assuming there is no glass tape over the filet yet. More on that later....
A little secret with the dremel for the corners where three filets meet:
Save the drum rings that have become half worn out (the cardboard backed rings that fit on the actual mandrel). When doing those corners, put on the worn drum ring, but only a little more than halfway onto the rubber drum. Tighten it up. Then on a piece of scrap, angle the dremel about 45 degrees vertical to some scrap and grind a bit with the tip of the drum *ring*. THis deforms the end of it in a somewhat rounded way. This can then be worked into those tight corners and get a pretty good shape where three filets meet in a corner, and it does it very quickly, in a more forgiving way that some rounded metal cutting bit. Even tighter radii with the smaller drum mandrel, same technique. Because the ring is already worn, it won't remove as much material as quickly, but it is still pretty quick, and makes it easy to get that final shape before the fairing stage. The structural filets don't need to be masterpieces. I had to learn that. They just need to be good *structurally*, distributing a load. Fairing goop in there will be much easier to shape and finalize the way you want it. And then there is still primer and paint to *nice it out*.
All that said, this has so far ignored the easiest method to get a smooth filet! If the filet is getting glass taped, simply work wet on wet! Shape the filet close with your tool of choice, and while it is still *wet*, I paint a layer of neat epoxy over it, and then lay the glass on it and shape the whole thing again with gloved finger or tool of choice, slightly shaping the glass *into* the wet filet. Once again, it is a technique thing. Then finish wetting out the glass. The hardest part then is getting that very corner (where three filets meet) shaped,and even that can be done mostly while everything is still *shapeable*.
It takes a little practice, but not much, and it is very easy once you get it to work the first time. This would be a great place for a video of it, but I haven't got one.
I did have some filets which, for whatever the reason, wet on wet wasn't a workable option. But I always aim at wet on wet now. And if it isn't practical, and the cured filet is *close enough*, then, just scratch it up enough for the next layer to adhere well, lay a little more filet goop in there, paint on some neat epoxy, and turn it into a wet on wet for the glassing of it. It won't be quite as shapeable as a completely wet on wet filet/glass job, but it will still save a lot of knuckle busting work in the tight areas. Let wet filet goop be what you shape, with the help of the glass you lay on it at the same time, instead of lots of sanding or grinding of a cured fillet that hasn't been taped when, but will need tape anyway.
This way, the only serious shaping of cured material will be shaping fairing compound, which is much easier to shape than cured structural filet goop.
Re: TJ's V10
Posted: Thu Feb 26, 2015 6:06 pm
by peter-curacao
terrulian wrote:Yeah, but that's you!! I bet I can screw it up
We'll see, but I much appreciate the vote of confidence.
In short, non of us are rocket scientists
(as far I know) you will just do fine and succeed!
trust me you will
Re: TJ's V10
Posted: Thu Feb 26, 2015 6:07 pm
by terrulian
Thanks, KS, I will try some of those very clever options.
As for the fillets under the glass, I always work wet on wet except for some very unusual situations, none of which come to mind. I rarely have difficulties with that.
My problem is getting a machine-like finish, like you would get with a cove bit, on the fillets that are faired
over the glass. Getting the fillet faired out with no vertical or horizontal imperfections has been my issue. This is particularly challenging in the corners as you mention, and also in situations where there is some curvature, so that a, say, 1/2" dowel needs to be pretty short to follow the curve...but then that very shortness makes it hard to establish a nice, smooth, path. The ones I have the least problem with are obtuse angles and ones with a reasonably long, straight run.
It's hard to tell from many of the pictures in the gallery just what level of perfection I'm seeing in these areas from other builders. I'm willing to spend time on it, since I really don't care how long it takes to finish my boat. Some days working on these things drives me crazy and on other days I can just putter away at it without any feelings at all of resentment, bitterness, ineptitude, self-loathing, incompetence, bleakness, depression, meaninglessness, despair, misery, pessimism, wretchedness, anguish, desperation, angst, worthlessness, self-pity, melancholy, or hopelessness
.
Re: TJ's V10
Posted: Thu Feb 26, 2015 9:59 pm
by selever
In short, non of us are rocket scientists (as far I know)
I can think of one who knows that your work ethics are to be envied!
Re: TJ's V10
Posted: Fri Feb 27, 2015 3:57 am
by gonandkarl
Hi,
I can think only of the late Bondo ( late for the Bateau forum ) who produced a quality you want.
Here is one of his examples:
https://mail.google.com/mail/?ui=2&ik=f ... nbn0hq0&zw
Greetings from Karl ( Austria )
Re: TJ's V10
Posted: Fri Feb 27, 2015 4:02 am
by gonandkarl
Hi,
I think this was a plunder and you cant see his picture
Karl
Re: TJ's V10
Posted: Fri Feb 27, 2015 4:24 am
by gonandkarl
Hi,
I try again:
Third time lucky
Greetings from Karl ( Austria )
Re: TJ's V10
Posted: Fri Feb 27, 2015 7:53 am
by terrulian
Karl, you are a true gentleman for tracking that down. The photo does reveal a high degree of finish. For example, look at the border on the sole, the triangle of neat finish on the frame near the window, the smooth interior curve on the cutout of the frame forward of the hatch, and, of course, my failing, the clean internal radii.
It is lamentable that Bondo saw fit to leave us. His was one of the many threads I followed with admiration, and you're right, he did excellent work. Too bad I can't pick his brain...but there are still many worthy ones to pick!
Thanks again.
Re: TJ's V10
Posted: Fri Feb 27, 2015 9:07 am
by jacquesmm
KS8 does the same kind of job. See his threads for some very fine fiberglass work.
Re: TJ's V10
Posted: Fri Feb 27, 2015 9:14 am
by terrulian
Yes, indeed. I surely didn't want to elevate Bondo above many other excellent craftsmen, who amaze me not only with their skill but equally, like yourself, with their generous help and encouragement. Without these examples I'd be in the dark about what is possible.
Re: TJ's V10
Posted: Fri Feb 27, 2015 11:15 am
by terrulian
OK, guys, here's a mystery I need help on:
The pvc experiment didn't go so well. I put in the cabosil-microballoon-epoxy goop, then coated a pvc pipe with mold release and jammed it in. This morning I went out to remove the pipe, and the goop had adhered to it!! I can't remember epoxy sticking to something coated with releaser. Luckily, it was still green so with some effort I was able to get the pipe out and the result is a bit of a mess:
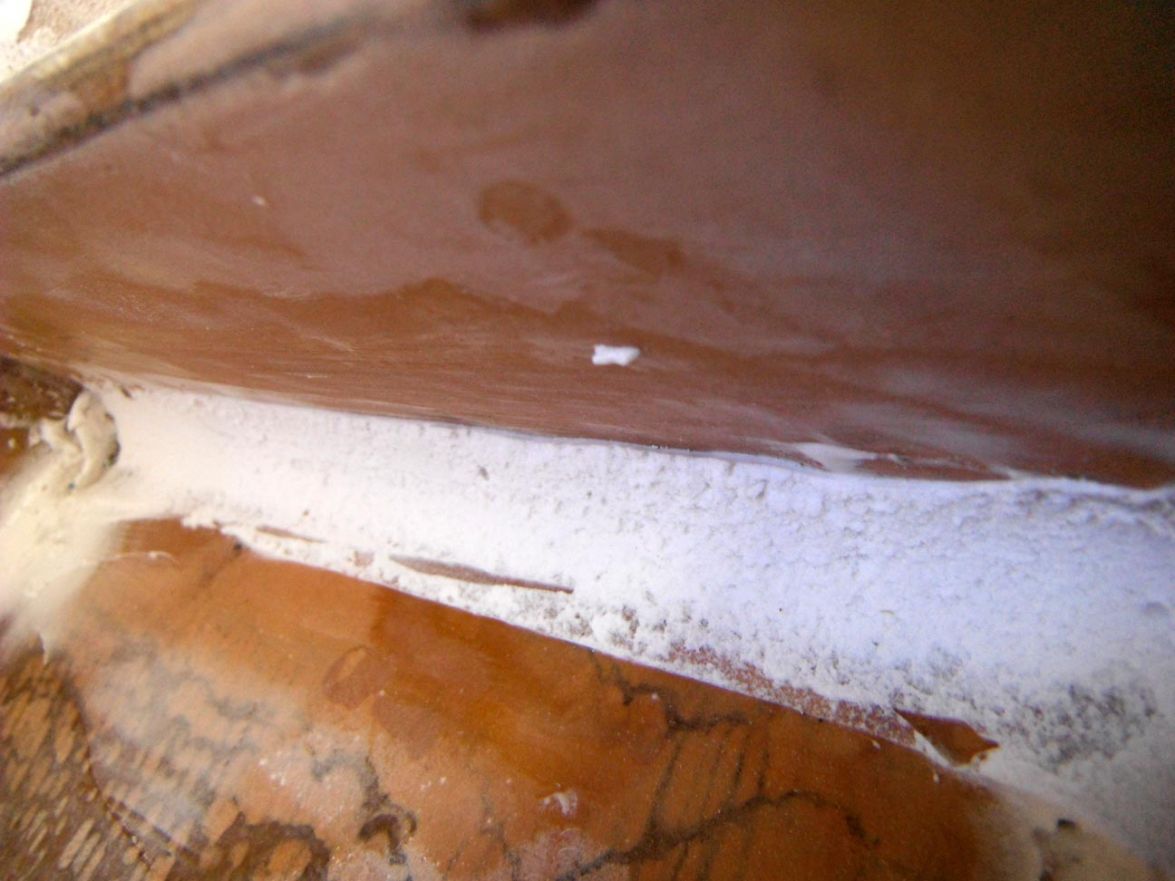
Any ideas what happened?
Re: TJ's V10
Posted: Fri Feb 27, 2015 11:18 am
by Cracker Larry
Yep, the epoxy stuck to the PVC
Wrap it in plastic packing tape, works better than anything.
Re: TJ's V10
Posted: Fri Feb 27, 2015 11:22 am
by terrulian
OK. I love the clarity of your analysis.
Packing tape it is. I think I'll do it right now while the goop is still green...will send more photos.
Re: TJ's V10
Posted: Fri Feb 27, 2015 12:00 pm
by Cracker Larry
OK. I love the clarity of your analysis.
No need to waste words. KS could explain it in 6 paragraphs when he's on his feed
Edit: Run the tape long ways down the pipe and not around, then orient the pipe to the joint so the seams in the tape are not in the epoxy. The thin lines of the tape edges would telegraph through and require more sanding.
Re: TJ's V10
Posted: Fri Feb 27, 2015 12:02 pm
by terrulian
OK, done.
BTW, CL, I cut myself yesterday. I like to think it was an unconscious attempt to emulate your rad badge of courage.
But of course, mine was much less dramatic, in keeping with my apprentice status. After laying some glass I cut the excess with a utility knife and forgot to ease it with sandpaper or a file. So I slashed my finger on the sharp edge of the glass in a minor way, but it bled profusely enough to get some blood on the boat. Every real boat needs some blood on it once in awhile, and since it can't be fish blood in my case, I used my own.
Re: TJ's V10
Posted: Sat Feb 28, 2015 10:53 am
by gonandkarl
Hallo,
Thank you for the link to your book, I have ordered it and being at the arse end of the world ( Austria ) the delivery will be between middle of March and middle of April. Now I have no excuse for not climbing into the boat and sand where frame A and D have to be installed even that reading about your circumnavigation would have been a nice alternative.
When I read that you cut yourself I felt that at least I am not the only clumsy one around fibreglass edges.
Think of it as part of the game or like my better half always says, I havent told you to build a boat.
( With her I assume malicious glee behind it. )
Greetings from Karl ( Austria )
Re: TJ's V10
Posted: Sat Feb 28, 2015 10:58 am
by terrulian
So look at this mess:
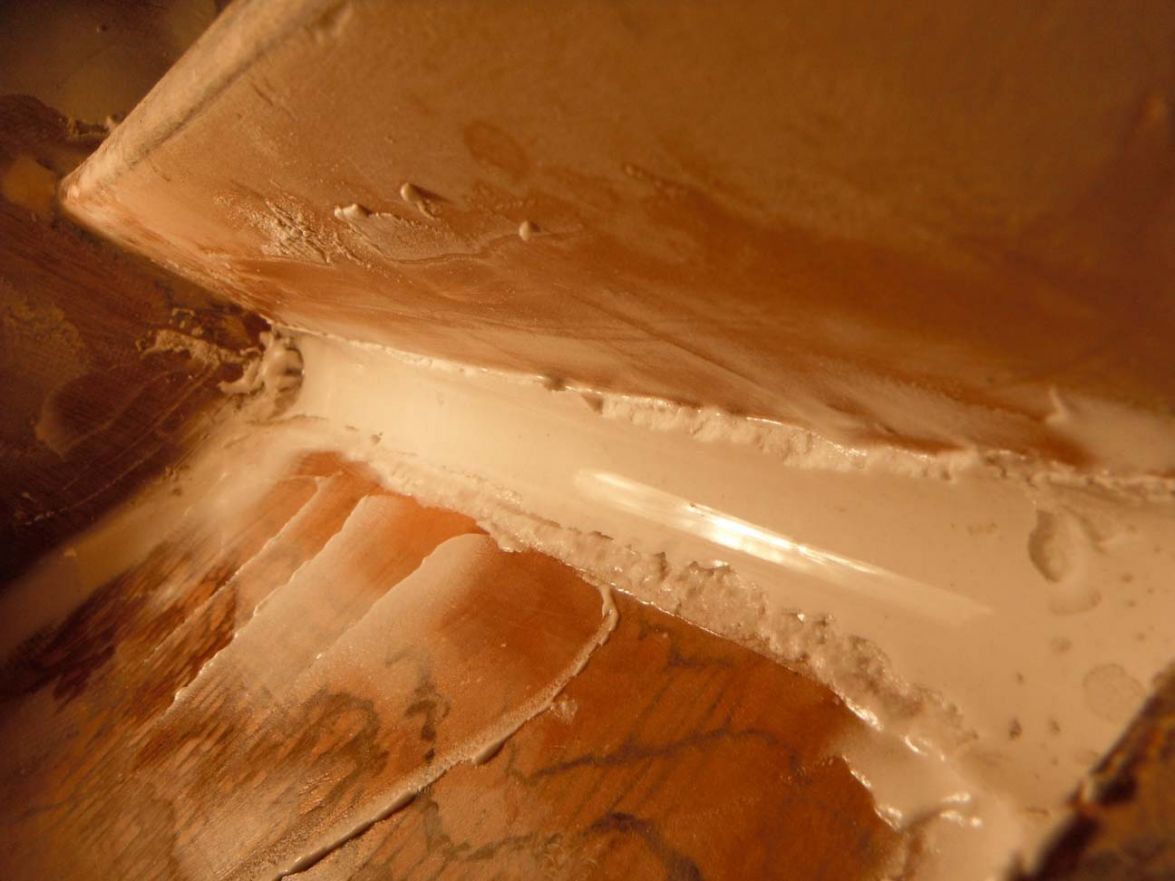
What happened is, sure, I created a very nice radius. However, since I had the problem yesterday with the goop sticking for some perverse reason to the pvc, I used packing tape as suggested by CL. Now, had I done this in the first place I think it would have been fine. But what I did was put the pipe with the tape on top of the mess I had already made so that the old mess was holding my brilliant mold away from the surfaces it was meant to be in contact with. So the result is I have a nice radius, but a ragged edge about, say, 1/8" proud of the panels the radius is supposed to connect.
This is now, of course, much worse than the situation before I had done anything!!

Should have thought that one through. A new puzzle to solve.
And to make matters worse, I had just been reviewing Walkers Run's flawless CS 25 build photos. Just to put my skills in perspective. Oh, woe is me!!
I'll report back when I sort this out in a couple of weeks.
BTW, one reason my build gets slow, aside from taking time to study the great philosopher Procrasticus, is that I get to a point where I have the fairing increasingly sorted (the above fiasco notwithstanding) and am working on small spots with slow hardener and microballoons. But due to cool temperatures, every little sanding/re-gooping cycle takes 2-3 days because I need to let the epoxy cook before I sand. And since some places are always stubborn, I may have to go through 4-5 times (not three like some people seem to think is normal) and this, with procrastination, other life issues like making a living, and chores, means that these periods can last a couple of weeks or more. Not that you care.
Re: TJ's V10
Posted: Sat Feb 28, 2015 11:04 am
by terrulian
I havent told you to build a boat.
Heard that one before.
Re: TJ's V10
Posted: Sat Feb 28, 2015 11:45 am
by Cracker Larry
Hallo,
Thank you for the link to your book, I have ordered it and being at the arse end of the world ( Austria ) the delivery will be between middle of March and middle of April
Don't they have Ebooks in Austria? Download it from Amazon.com to a Kindle, tablet or smart phone in seconds. It was a good read, I enjoyed it.
Saw that one coming
On some things there are no short cuts.
Re: TJ's V10
Posted: Sat Feb 28, 2015 11:56 am
by terrulian
Saw that one coming
On some things there are no short cuts.
And you tried to warn me. But I didn't get to this august age and station in life by paying attention to the wise advice of my betters. If I had paid attention, perhaps I'd actually have a station in life.
But really, despite my whining about you and KS adopting a "no pain, no gain" philosophy, I am not trying to avoid the pain. What I am trying to avoid is the "much pain, no gain" circumstance of laboring over these details and still ending up with something I can't look at without dismay. Clearly, no amount of hand sanding--at least the kind that I do--will result in a radius as smooth as the one molded by the pvc. If I can find away to make that work it will be nicer than what I could achieve by sanding.
There is also flexible pipe that might be used where there is a curve.
Re: TJ's V10
Posted: Sun Mar 01, 2015 1:16 pm
by Corvidae
Something I found in the later stages that helped with making clean seams (you know after I'd already made the mess). Tape off the area, do your best/worst on the fillet, then peel the tape after a couple hours before the slow hardener has time to really set. It works best if everything around the seam has a clean coat of epoxy on it, for the tape to stick to and release from. And unless you're going for a glossy finish on the first try, don't be afraid to hit almost cured epoxy with some heavy grit paper. It's a lot easier to shape, and a coat of runny epoxy will give it a smooth finish later. Personally, I found that 'first try glossy finish' was always ruined by some detail at the edges that made me sand it all away anyway.
Re: TJ's V10
Posted: Sun Mar 01, 2015 3:44 pm
by terrulian
From my limited experience, here's the problem: You've created a fillet and hopefully laid the glass wet on wet. Depending on how cured the fillet is, it still may be a bit malleable and so when you wet out the glass you may introduce the occasional wave or lump. But let's suppose you don't and that process goes smoothly. If you're laying biax, it's fairly rough stuff. So when everything kicks and you knock off the highest bumps and edges with a quick pass with a sander, you still don't have anything like a smooth surface, which is where fairing comes in. Now you're going to put in a fillet by running your tool of choice, let's say a tongue depressor, along the joint to apply the goop. But the tongue depressor is being guided against the rough, not-yet-faired surface of the biax. Therefore, it introduces a bumpiness in the radius. But let's say you wait to run your fairing radius until you've faired the surrounding biax and gotten it pretty flat. It is still difficult and takes a surgeon's skill (the kind that I've little doubt KS and CL and a bunch of other builders possess) to lay down that bead of fairing compound to perfection. On top of that, as you point out, at the ends you have glops because the tool has to be maneuvered away from the work.
I've done about 1/2 of the interior of the boat like that and for a newbie like me it takes many, many passes. I always say it's no big deal, fine as it is...but then I end up fussing away at it anyway because I know when you put on a glossy topcoat, even a job that seems perfect will be revealed to be less than that.
I was able to knock down the edges you see in the picture above and then apply goop to fair the space between the radius created by the pvc and the hull. This really doesn't look bad and is kicking now. When working with the slow epoxy it takes a couple of days depending on temperature before you can sand it but I have high hopes. And I know that #!*@$% radius is
smooth.
It will still need to be sanded, maybe with 220, but not shaped.
Re: TJ's V10
Posted: Tue Apr 07, 2015 12:30 pm
by terrulian
First, the reasonably good news. As stated above, the pipe mold worked pretty well, although I reluctantly admit that after trying every other alternative, I had to submit to the advice of KS and CL and actually do a bunch of hard work
. Here's a photo, which shows some sanding marks which look worse than they are; it's hard to get a proper photo because of everything being white. You can't feel them. The curve is very smooth.
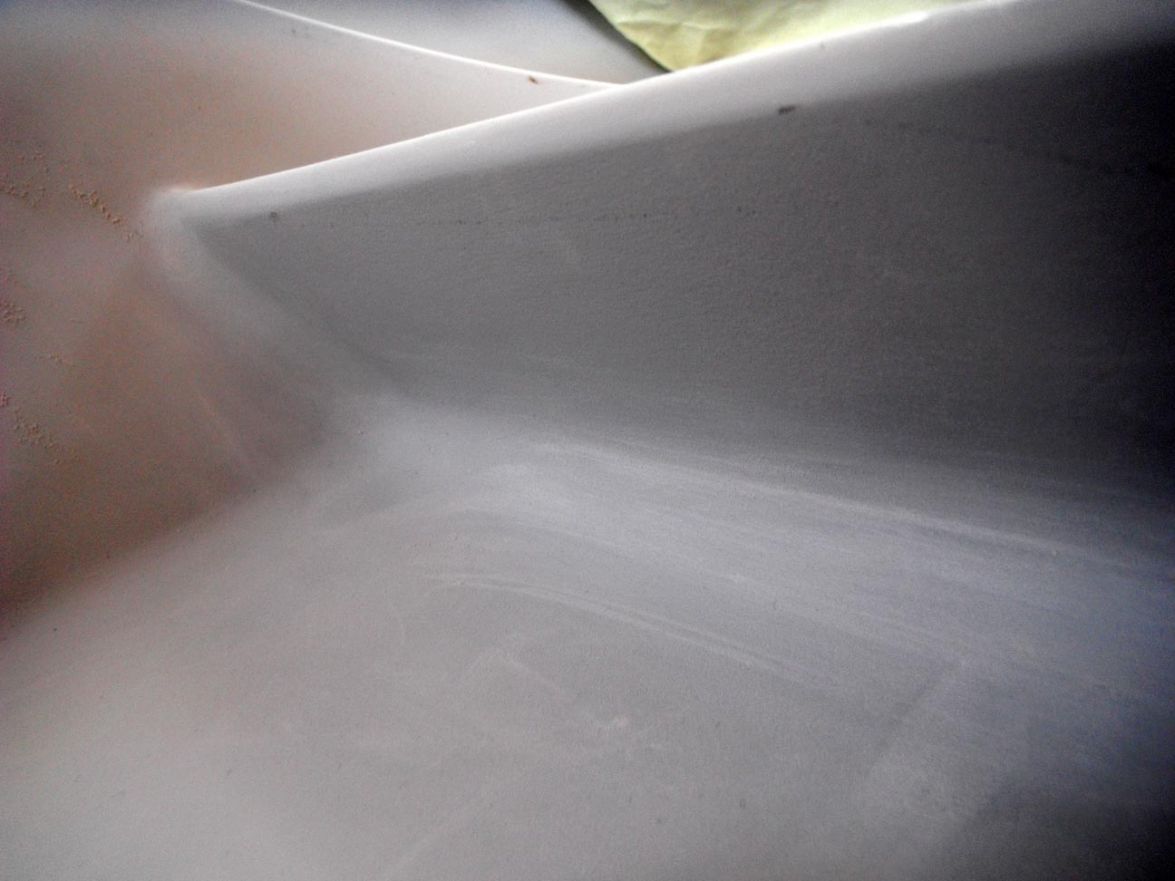
Re: TJ's V10
Posted: Tue Apr 07, 2015 1:02 pm
by terrulian
Now for the bad news. A very humiliating discovery in the old boat shed yesterday. I've spent the last month or more fairing the joints around the seats (I can sometimes spend only an hour or two a week because of a genetic condition related to sloth). I wanted to also make sure the middle frame and vicinity was sanded before I glued in the middle seat, which I have now done.
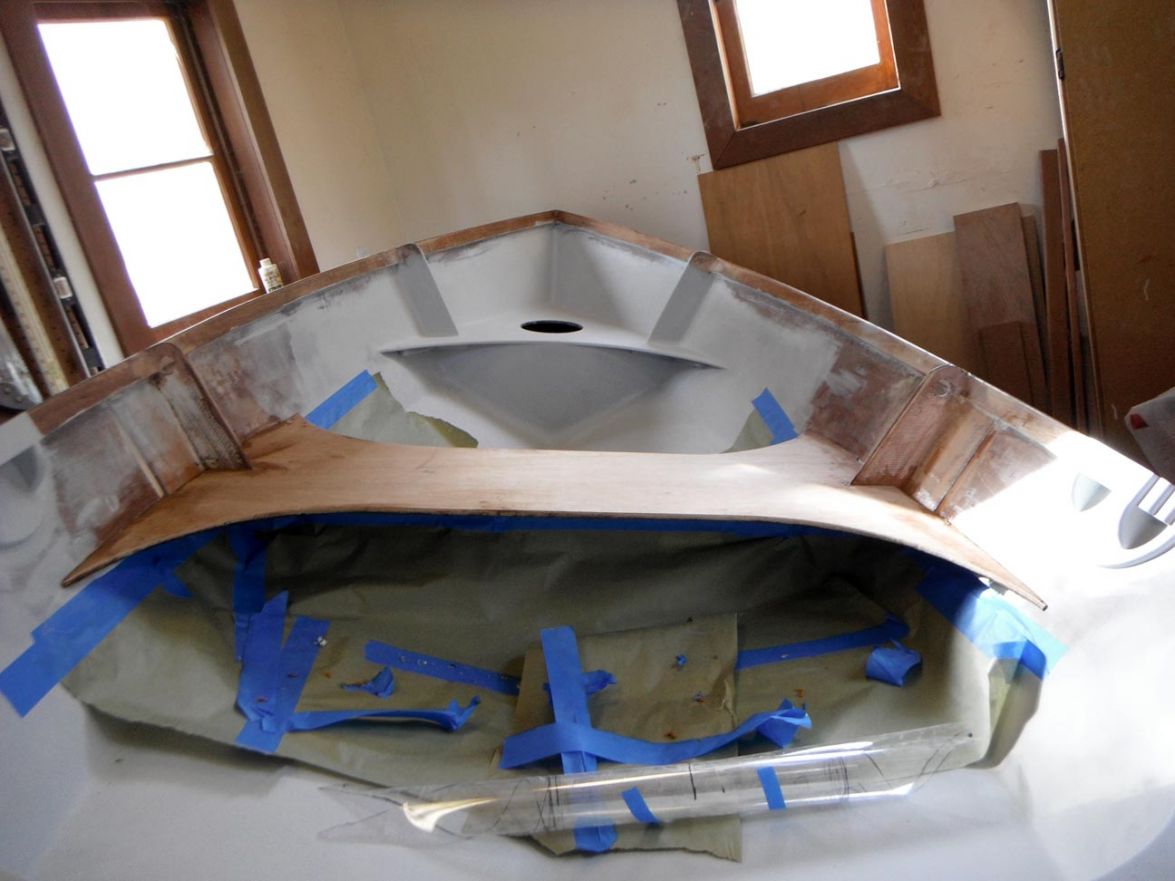
But in checking some measurements I found a shocking disparity in one dimension which really took the wind out of my sails. I had spent considerable time assuring that the bow seat was parallel to the two others, which are on a different plane, slightly lower.
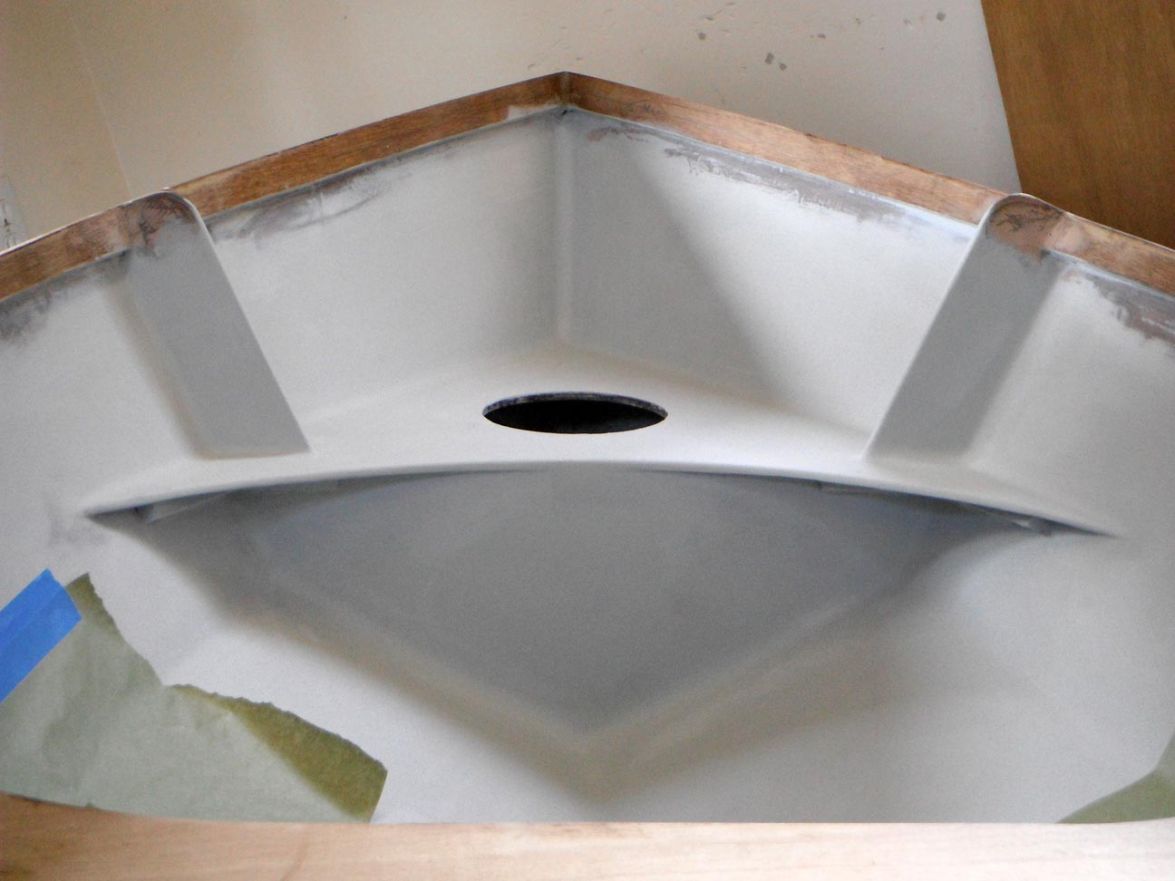
Now, perhaps you can't see anything wrong in the picture above. I had overlooked it even though I spent a lot of time in this area to fair it. But it turns out that the two distances indicated in the next photo are off by about 3/8"-7/16".

I cannot but feel horrified. It really isn't that obvious without a measurement but I can't unsee it and will always know it's there. I think this happened when, although I had dry-fitted the seat a dozen times, when I applied the goop on the cleats, put on the seat and put weights on it, it shifted or bent a bit. I didn't put weights on the little triangles just aft of the frames because the area was too small to hold the bricks I was using. It didn't occur to me that the weights would bend the 3/8" plywood, which it did on the portside aft of the frame. And even though I had put a straightedge on it several times in fitting it, now with the weights on top of the seat, I couldn't do that!! So this little area actually raised up and is now higher than the other side, which for some reason didn't bend.
It's pretty hard to conceptualize how it happened, but that's the best I can do.
Actually, it turns out that the design of the seats, with the very nice curves that attach to the sides, requires a high level of precision to be perfect--a level of precision, which, needless to say, I did not achieve. The curves of the seats (which are pretty fair as I cut them with a jig) join the sides at a very acute angle. This means that any slight variation in the shape of the sides, or any small discrepancy in the alignment of the seats relative to the centerline, even one degree, will result in a variation of the distance between the frames and the spot where the seats join the sides.
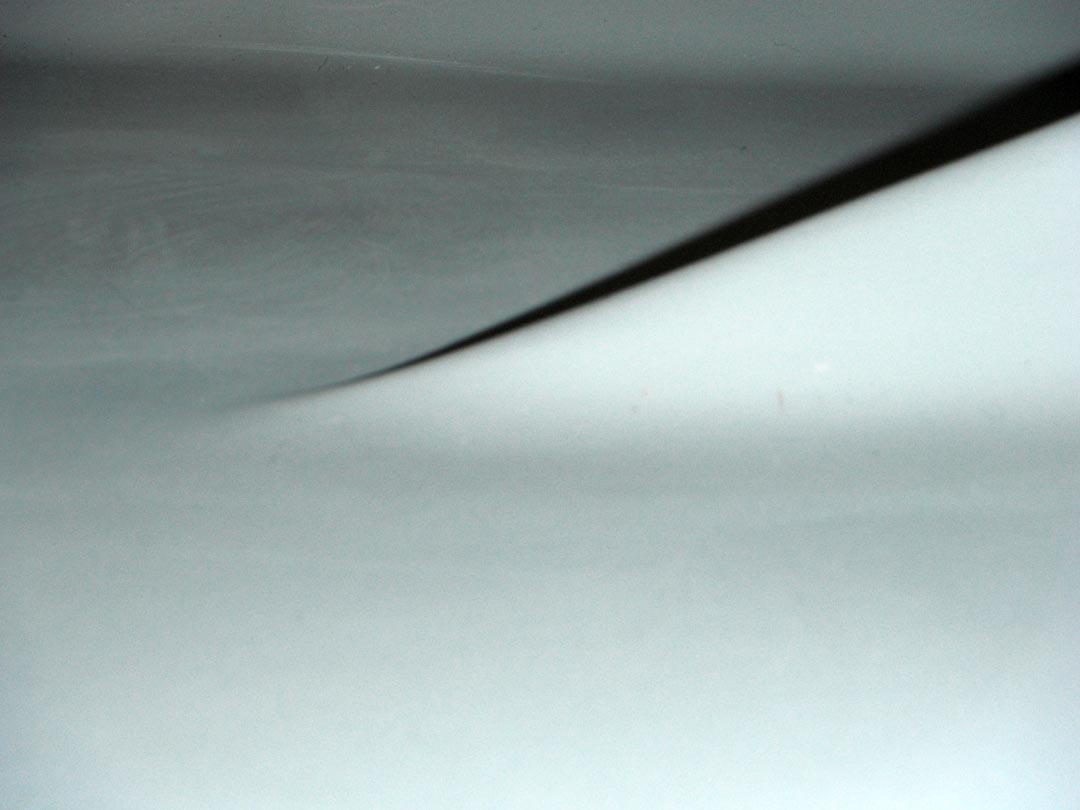

I have compared the distances port and starboard, both vertically and horizontally from this joint to the frames or the gunwale. They are not off by too much, the worst being 3/16" and most well under 1/8", but in woodworking that is like the distance between Chicago and Portland.
Re: TJ's V10
Posted: Tue Apr 07, 2015 1:13 pm
by terrulian
A footnote to the above: Many years ago I replaced the spars on my Ericson 39, and at the same time the platform that held the mast step. Something seemed off to me about the placement of the mast, so I figured out several very elaborate schemes to determine whether the mast had been stepped on the boat's centerline. (There are no keelbolts to use for alignment.) After a lot of repeated measuring and headscratching, I could not help but come to the conclusion that when it was originally built, the foot of the mast had been installed at the Ericson plant about 3" to starboard of where it should have been
. I was astounded that this had in no discernible way affected either the tuning of the rig or the performance of the boat!! Even the pros aren't perfect.
Re: TJ's V10
Posted: Tue Apr 07, 2015 1:54 pm
by pee wee
. . . then I'd say you were doing very professional work!
I try for perfection in my work and accept that it must fall short, but the end result benefits from the effort. Besides, I don't want to anger the gods by rivaling them. Your boat is looking great, don't beat yourself up.
Re: TJ's V10
Posted: Tue Apr 07, 2015 2:32 pm
by terrulian
I don't want to anger the gods by rivaling them.
I do agree with this and also that the perfect should not be the enemy of the good. In any case, I'm not toying with perfection, so I'm totally safe!
Re: TJ's V10
Posted: Tue Apr 07, 2015 2:48 pm
by gtcoupe
No sweat, you built drainage into the seat. That will be the driest seat in the boat!
Re: TJ's V10
Posted: Wed Apr 08, 2015 9:35 am
by terrulian
Thanks for the encouragement, everyone. In any case, I'll have to live with it.
Just to be clear, the seat as a whole is level; the same measurement forward of the frames is equal. I'm really puzzled how it happened, but the little triangle just aft of the port frame is bent slightly up.
I could have taken this to my grave and no one would have known the difference but me. Now you guys know.
Re: TJ's V10
Posted: Sat Apr 11, 2015 4:51 pm
by terrulian
Well, it hasn't been such a good week. After discovering the discrepancy outlined above, I was going to glass the top of the center seat. I had everything set and was wetting out the glass but the epoxy seemed to be acting just slightly odd. I came to the realization that I had made a mistake I have prided myself on never doing: mixing a bad batch of epoxy. I mixed it 3/1 instead of 2/1. I realized this in enough time to pull off the glass and wipe everything down with alcohol. After a day or two it had dried enough so that I could sand it back to a workable surface. So nothing was really lost but some glass, epoxy, and pride.
I did the middle seat like the stern, using Mylar and an adhesive roller to compress the epoxy and glass, with the result pictured below before any additional sanding or filling. You can see the Mylar just forward of the seat so this is just after it was removed. In the middle you can see the reflection of trees out the window.
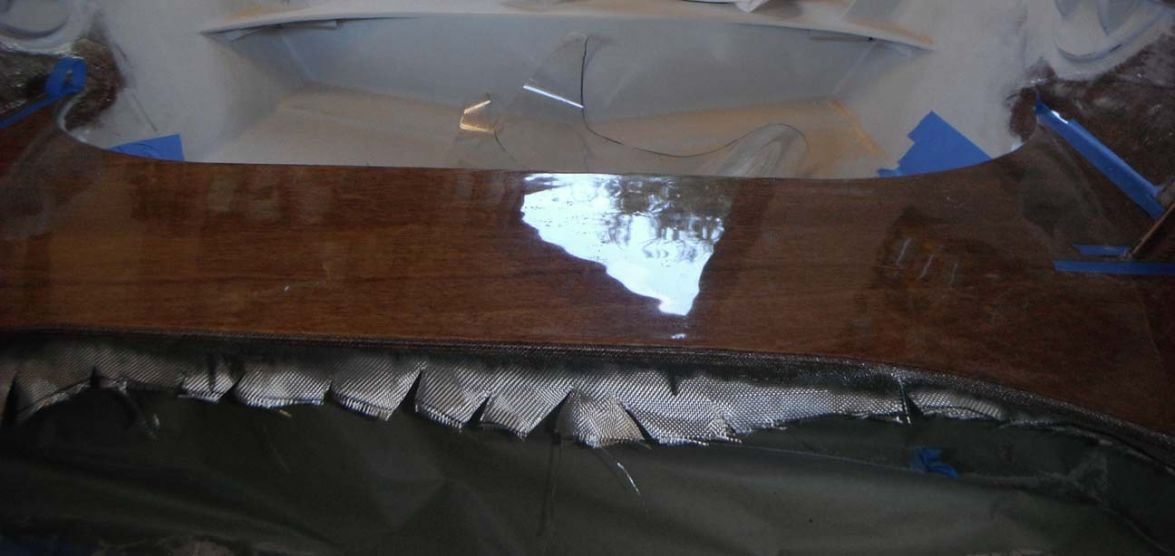
But I made another mistake: I have always used a sharpie to draw patterns on the glass for cutting, and this time was no different; but what I had never done before was to put glass over wood that was intended to be finished clear. All other glass I've laid in my life has either been painted or out of sight, out of mind. So I was a little careless with the sharpie, and after I removed the Mylar I noticed a place where I had inadvertently touched the fabric with the pen. It's only about 1/8" long, but there it is for all to see, right in the middle of the seat.
Just recently, pee wee tried to soften the blow of one of my previous mistakes by advising that too much perfection may anger the gods. I'm sure by now they must be well pleased with me.
Re: TJ's V10
Posted: Sun Apr 26, 2015 11:05 am
by terrulian
I ended up having to grind off the glass from the center seat because of some white residue, apparently from sanding, that created a bunch of white spots in the weave. The upside of this is I will be also losing the black sharpie mark that I inadvertently left in the glass.
Those tribulations are recorded here:
http://forums.bateau2.com/viewtopic.php?f=4&t=60098
Meanwhile, yesterday I reached a milestone. With the addition of the breasthook, the boat is now structurally complete. The only things that aren't on the boat now are one cleat and the oarlock sockets. However, I won't have to fabricate them. They're store-bought.

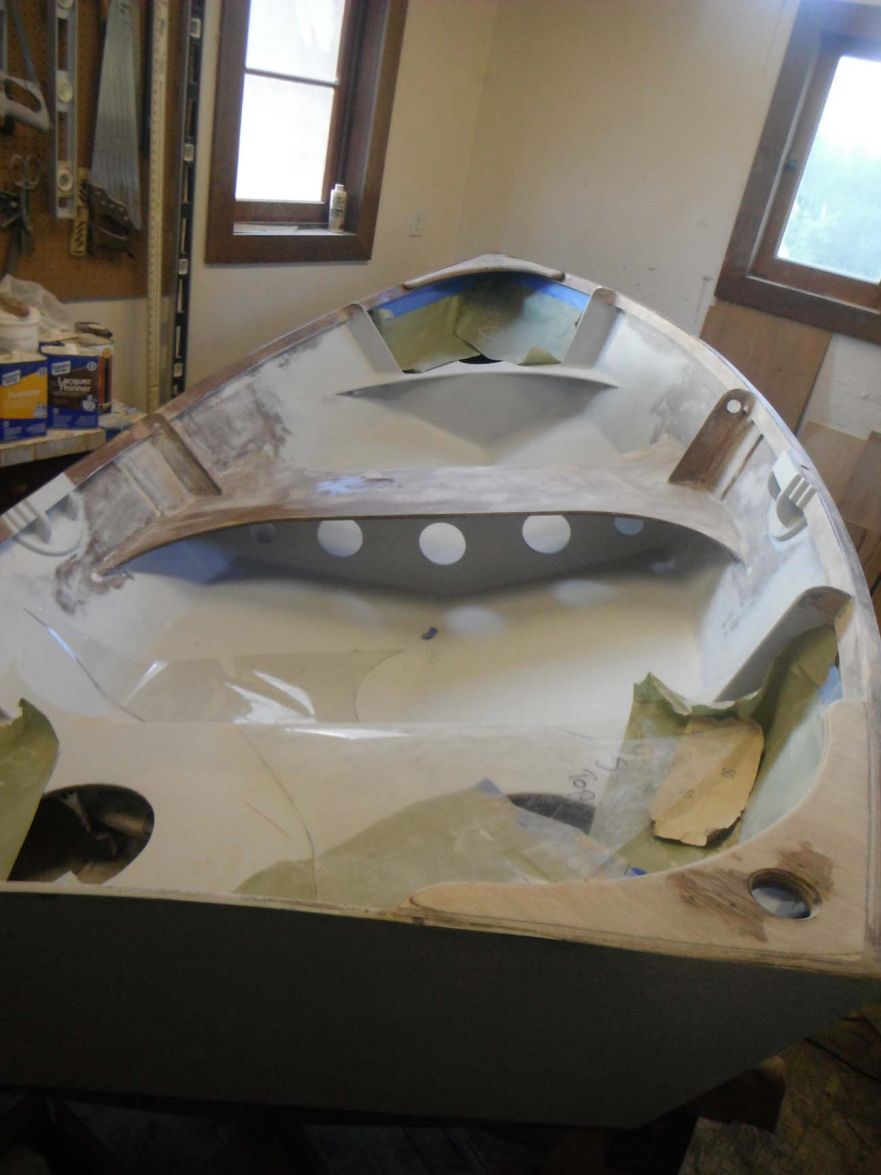
I elected to double the thickness of the breast hook and knees. They look substantial and graceful and also have a good feel. These areas will be used frequently when lifting the boat so it's nice to give them a robust character--which is becoming more and more relevant because, as I add these little refinements, the boat gains weight.
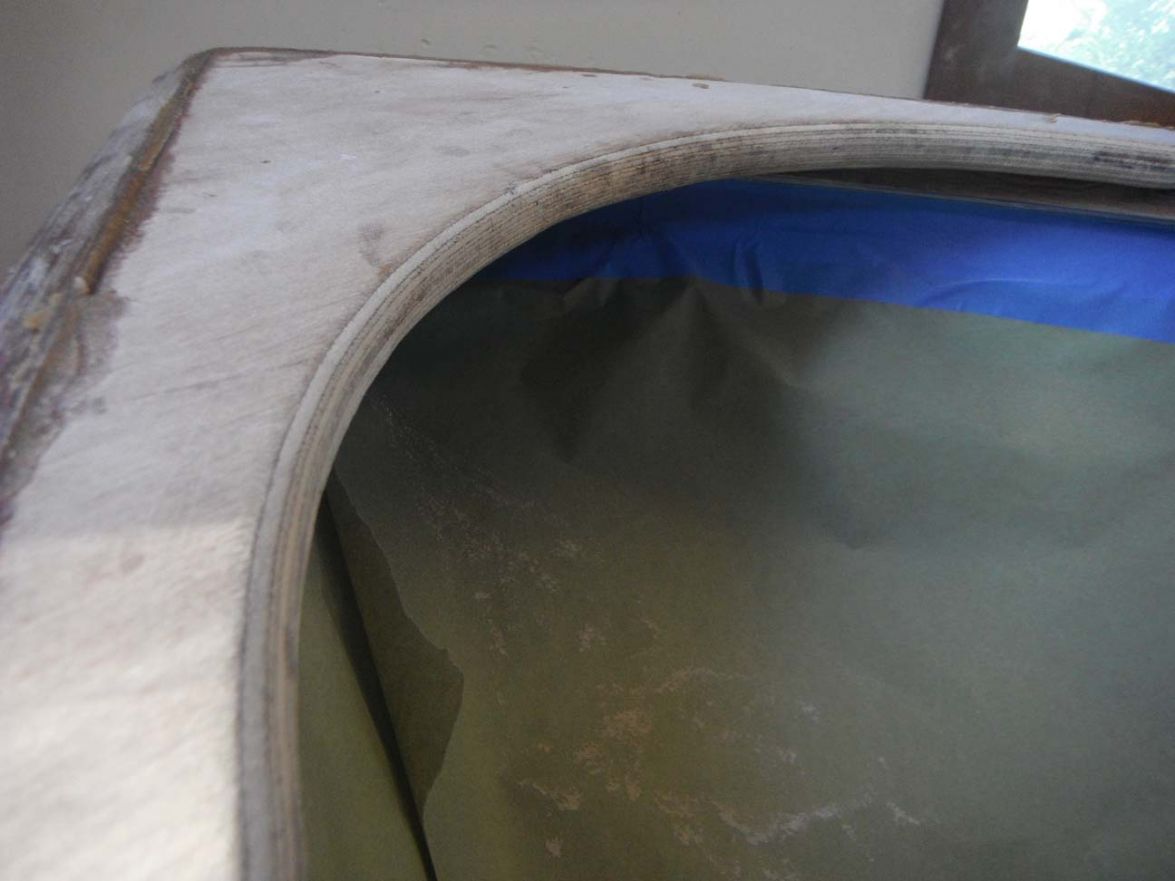
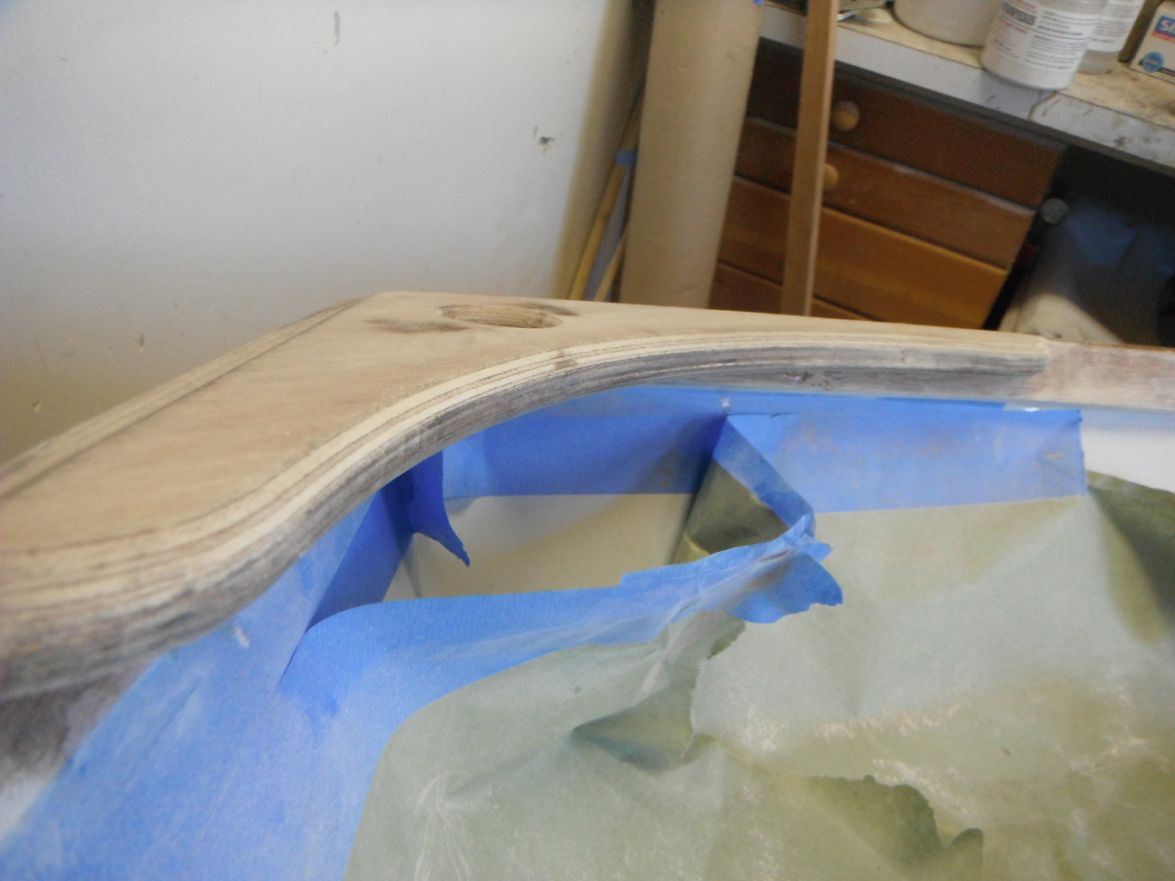
I will have to finish some more glassing, re-doing the center seat and covering the gunwales, breast hook, and knees with the light finish glass I ordered from BBC. I'm not looking forward to cleaning up the bits under these last three pieces and I don't think I'll try to achieve anything like perfection there.
Re: TJ's V10
Posted: Fri May 01, 2015 8:27 pm
by terrulian
Before I started building the boat in my small shop, I rigged a block and tackle from the roof beam [actually for you rigging nerds, this particular arrangement is called a luff tackle], anticipating that it might come in handy for maneuvering the boat or propping it at an angle. I haven't used it until now except to weigh the boat but as I was breaking my back and envying the flexibility of wrestlers, contortionists, and snakes, I remembered about the rig I set up, and voila:
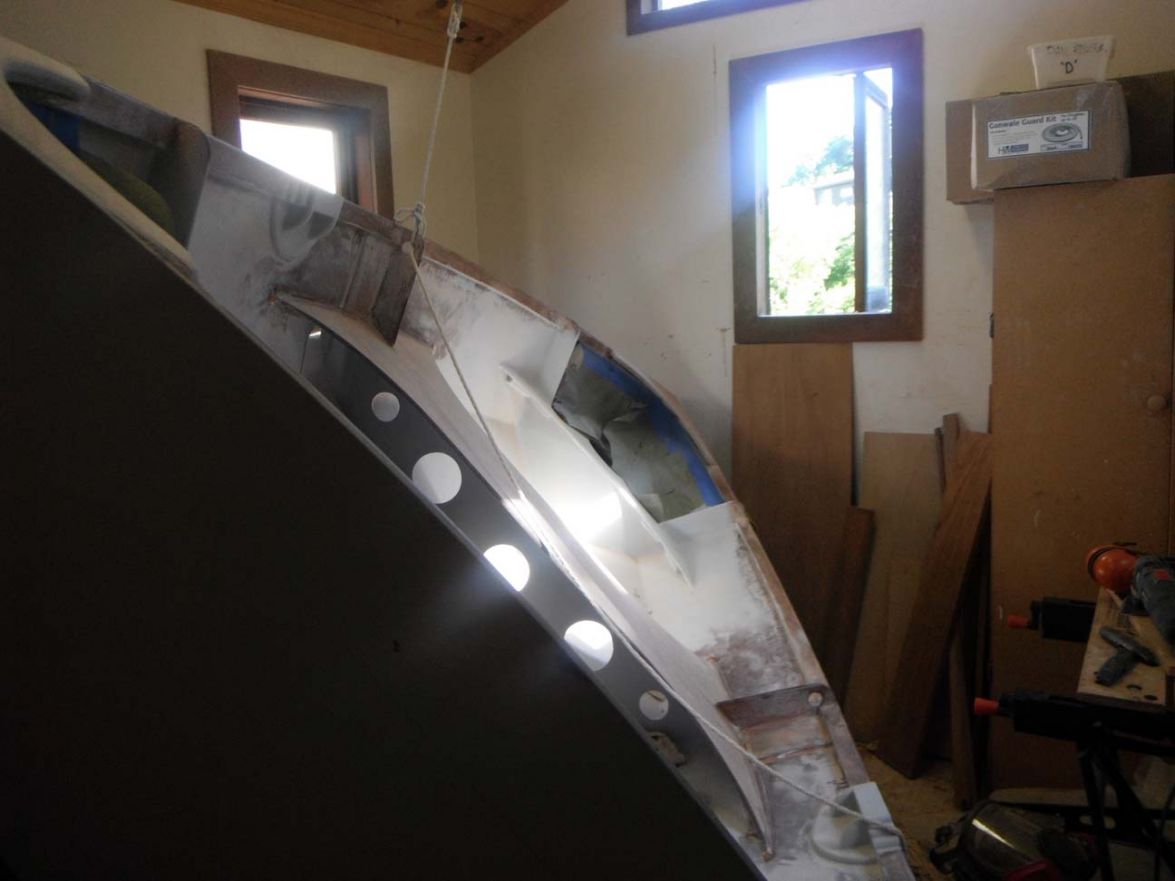
MUCH easier to get under the breasthook and knees now. It's funny how little things like this can amuse a fella.
Re: TJ's V10
Posted: Sat May 02, 2015 2:58 am
by gonandkarl
Hallo Tony,
I just finished reading your book and I really enjoyed it. In my thoughts whilst reading it I felt I am with you two sailors in a long gone time and the funny thing is that I was reading about places like Fidji, Australia just when my son sent me pictures from these places by email where he is on a world trip in the other direction ( by plane )over the last 5 months.
But coming to your latest post I learned something really useful which I did not consider sofar.
I am not looking forward to put my boat onto its side to mount the keelshoe and glass and finish the outside. I have provided 5 straps on each side of it high up on the wall where I can pull it up nicely strictly following Bondos setup of turning his boat never thinling of any other way. But what puzzled me once the boat is on its side I cannot remove the straps without supporting it properly from the bottom.
And now You came along with hanging it from the ceiling which is the perfect answer and lets me have only a slight support at the bottom just that it doesnt swing sideways whilst working on it. Behind my wooden ceiling I have got very strong crossbeams and they give me your block and tackle method and I can hang it at any angle.
One question I still have about the fairing of your corners which according to Larry you should use sellotape lenthwise along a
plastic pipe to get a nice finish behind it and be able to remove it easily. How easy was it to get a smooth transition from the round side to the straight side ? Did you achieve it with just careful sanding ?
Greetings from Karl ( Austria )
Re: TJ's V10
Posted: Sat May 02, 2015 10:33 am
by terrulian
Karl,
Thanks for the very kind words on the book. More photos can be found on the website which chronicles the whole voyage and was the basis for the book:
http://ussmaverick.net/
How easy was it to get a smooth transition from the round side to the straight side ? Did you achieve it with just careful sanding ?
I would add "tedious" to "careful," although it was not terrible and I'm confidant the result was far superior to what I would have achieved by simply sanding. The pipe covered with tape resulted in a perfect mold which was straight and clean so only the edges needed to be faired into the surrounding surfaces. I thought it would be harder than it was, but after all the radius of the pipe can be intersected at the part of the curve which is parallel to the surface you're fairing to, if that makes sense, so there is no awkward ridge between the pipe shape and the nearby surface.
I'm still puzzled by why the pvc pipe stuck even when covered by mold release but CL's advice on the tape worked perfectly.
Re: TJ's V10
Posted: Mon May 04, 2015 8:18 pm
by terrulian
If you're feeling a little down today, and think it would be nice to feel that at least you're way smarter than some people, I'm your guy. In thirty years of working with epoxy, admittedly as an amateur and a duffer at that, I had never mixed a bad batch until I was going to put some glass on the center seat. I cleaned up the bad mix and glass while it was still green, sanded it off, and put new glass and epoxy on the seat, only to discover little white specs as mentioned above after it kicked. Whether the bad batch or something else was the cause, I sanded all of the glass and epoxy off and was ready to start again for the third attempt. The boat was all masked, all the glass cut, and I was determined to get the proportions right. But I clearly have a mental block against this next step of the build. I poured some hardener into the mixing cup, and then decided it was a little too much so I carefully poured some back........INTO THE JUG OF RESIN!!!
I immediately recognized my error and for the next 45 minutes I was kept busy cussing myself out in words that even I found excessive.
But I thought: one thing I know about epoxy is you have to mix it. So what if I don't? Time for a
science experiment. I didn't move the contaminated resin, but let the little blob set up overnight in the 1/2 gallon jug and here's what I got looking down into the bottle:
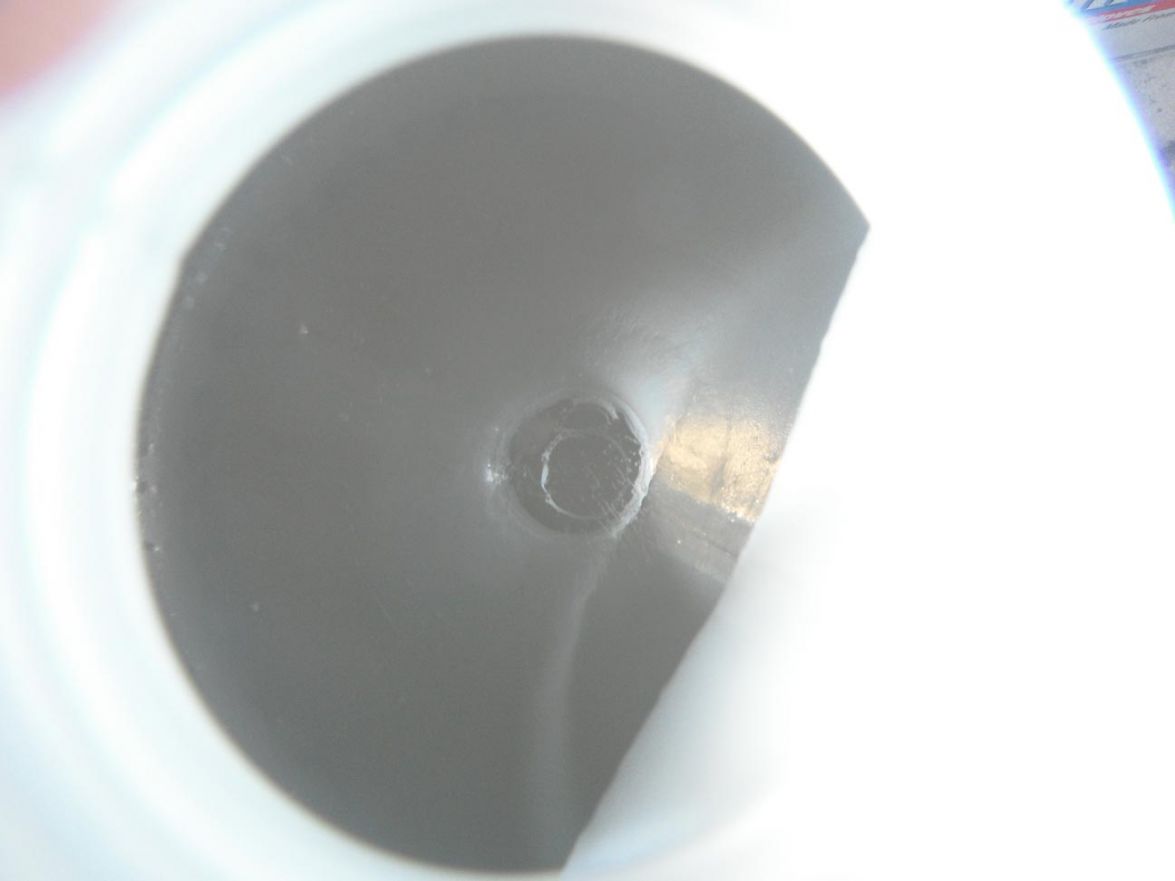
The round spot in the middle is the area where the hardener landed...it's actually floating. The white line next to it is just a reflection picked up by the camera.
Then I went out and bought a little net like you use in an aquarium, hoping to fish out the blob. Stuck it in the jug, and here's what came out:
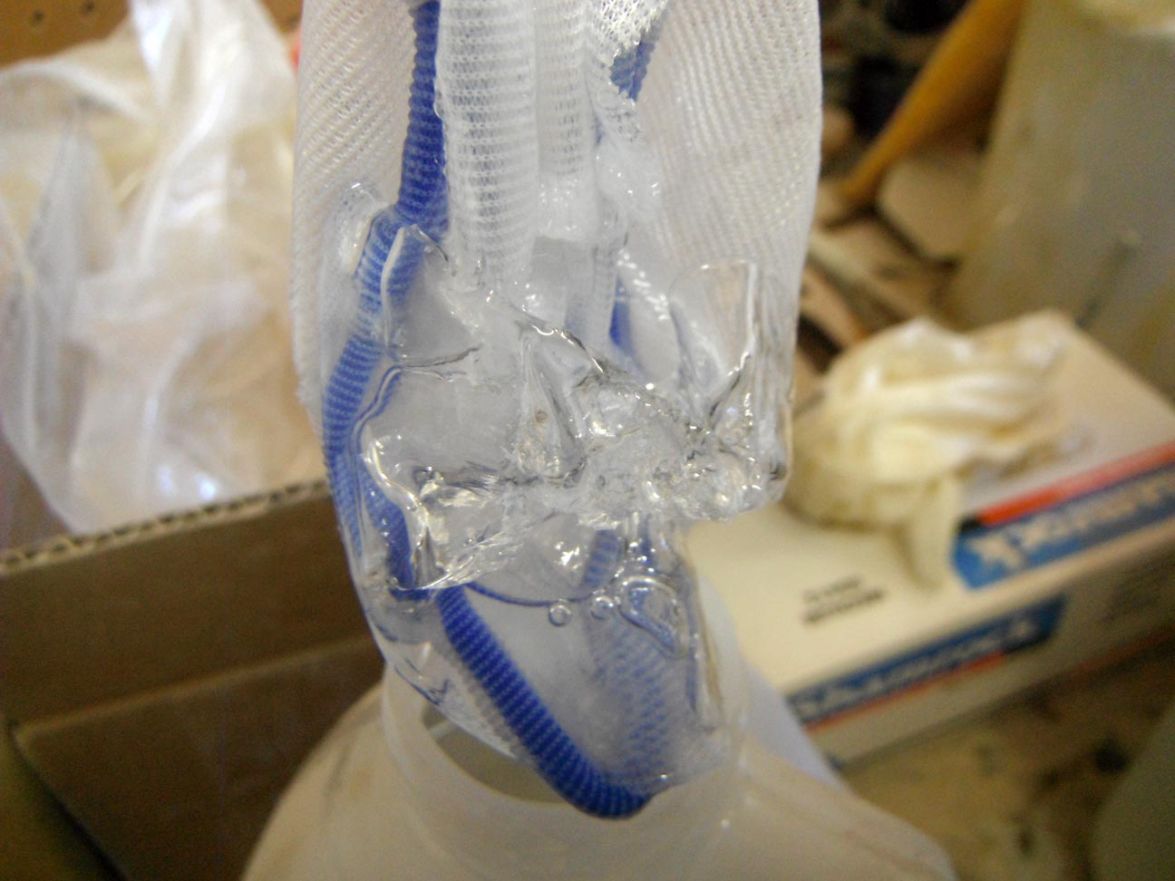
Here it is laid on a piece of plastic:
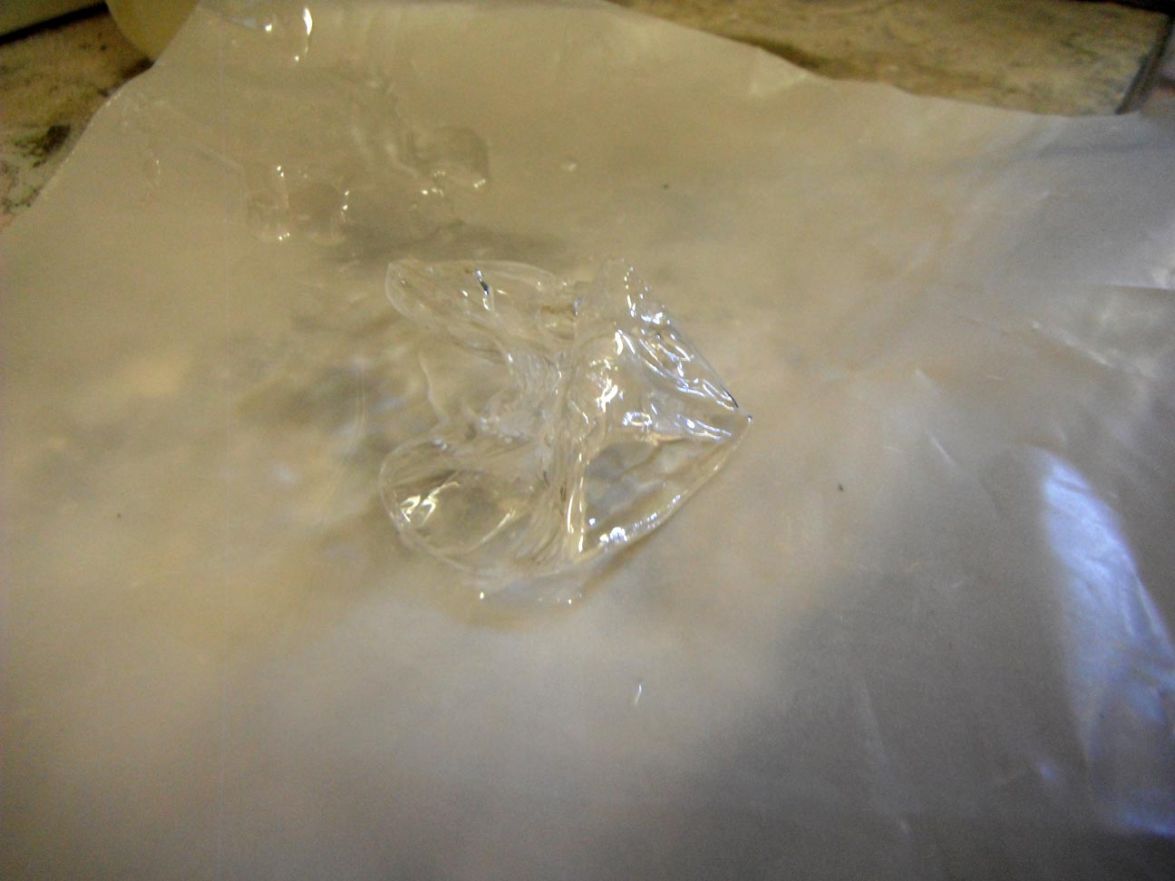
I hoped it would be hard but it is kind of rubbery and gelatinous, and although this is the bulk of it, I can't be sure there aren't some more bits in there.
I could go down and buy some more epoxy at Tap Plastics but I'd rather not change epoxies, or I could order another jug from BBC, but that would take a week.
So this is what I'm going to try. Tell me if I'm an idiot. Actually, that's established, so just tell me if this is a bad plan:
1) Do a test mixing some of the resin with hardener and if that hardens normally,
2) filter the resin through a tea strainer and continue on with my build, not telling a soul.
What do you think?
Re: TJ's V10
Posted: Mon May 04, 2015 10:46 pm
by Cracker Larry
The tide goes out and the tide comes in. We all make mistakes. I'd order more epoxy.
Re: TJ's V10
Posted: Tue May 05, 2015 9:26 am
by jacquesmm
That resin is spoiled, sorry. You need a new jug, sorry.
Re: TJ's V10
Posted: Tue May 05, 2015 10:33 am
by terrulian
OK, that's two big votes, whose opinions I would not dare to doubt. I will reluctantly capitulate to reality.
But what about using Tap Plastics' marine epoxy? They're, like, two minutes from my house. That way I can get on with it. I'd much rather stay with BBC but that coast-to-coast shipping will mean I'll lose the weekend.
Re: TJ's V10
Posted: Tue May 05, 2015 11:32 am
by jacquesmm
You can switch resin brands but only after a full cure.
The cure is not over once the resin is hard. Epoxy (all brands) will continue to cure for days. How long depends on the temperature. At around 75F, I would say that you need 3 to 4 days for a full cure.
At 60, a full week.
After the full cure, light sanding or scrubbing, wash off with a wet rag. I I prefer to avoid acetone.
Once clean, start over with the new resin.
If you want to switch back to MarinEpoxy, same procedure.
Re: TJ's V10
Posted: Tue May 05, 2015 11:41 am
by terrulian
Jacques, thanks very much for the quick reply. The area where I'll be applying it hasn't seen epoxy in days and all has been sanded and washed down with alcohol. I think I'll get some Tap stuff and go ahead with it. I sure regret the waste of that much epoxy...but it could be worse. I could have made a mistake with a chain saw.
I very much appreciate your willingness to be so helpful (you too, Larry!)
Re: TJ's V10
Posted: Tue May 05, 2015 4:09 pm
by terrulian
So, I applied some of that 3.5-oz. cloth from BBC, and as advertised, it is quite clear. It'll need a couple of coats of epoxy to hide the weave. I'm using the Tap Plastics marine epoxy which has a little amber to it, but isn't too dark.

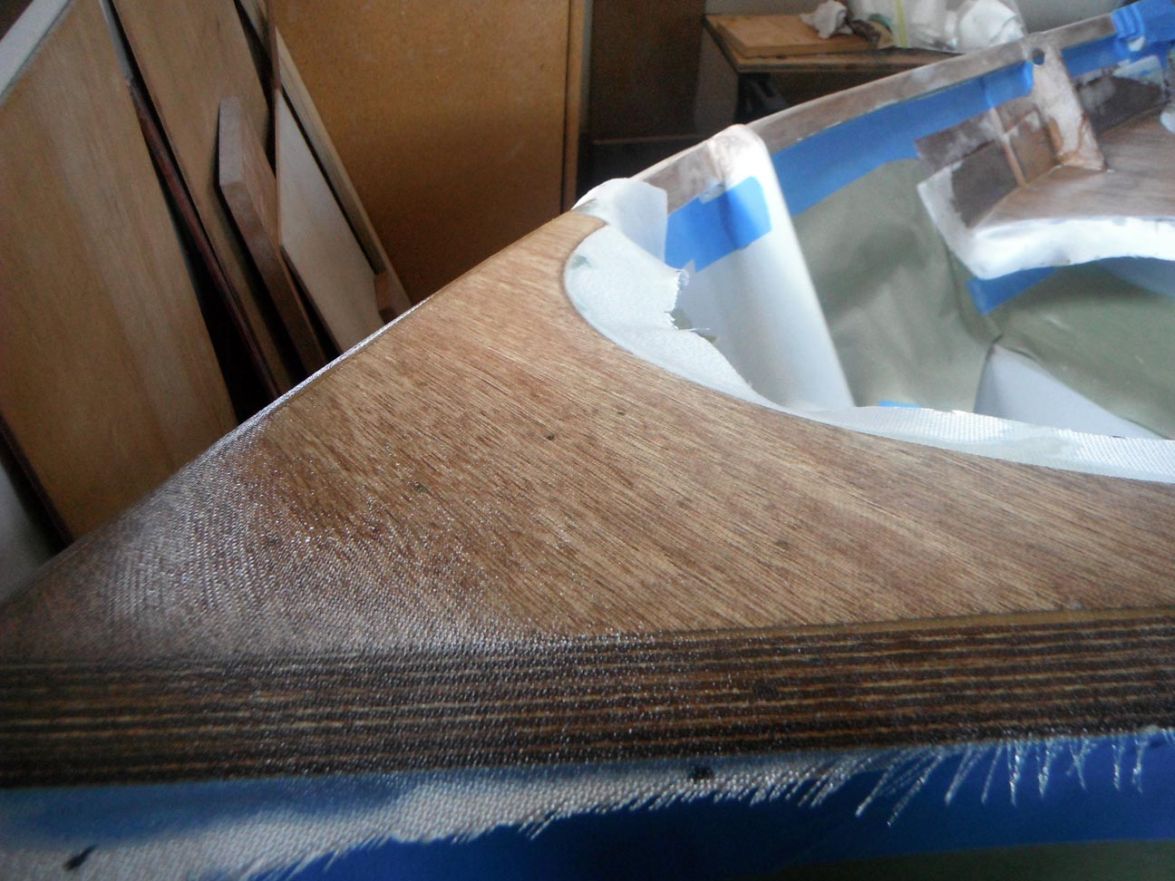
I could not get the glass to bend much, however. I think it's a little stiff even after cutting darts in the cloth because of the fine texture of the weave. So I wasn't able to bend it over the radiused edges as I was with the 6-oz. cloth I used the first time through. I'm sure you experts know how to do it. Too late for me, though. I'd like to glass the edges, particularly of the knees and breast hook, as these will see the most wear.
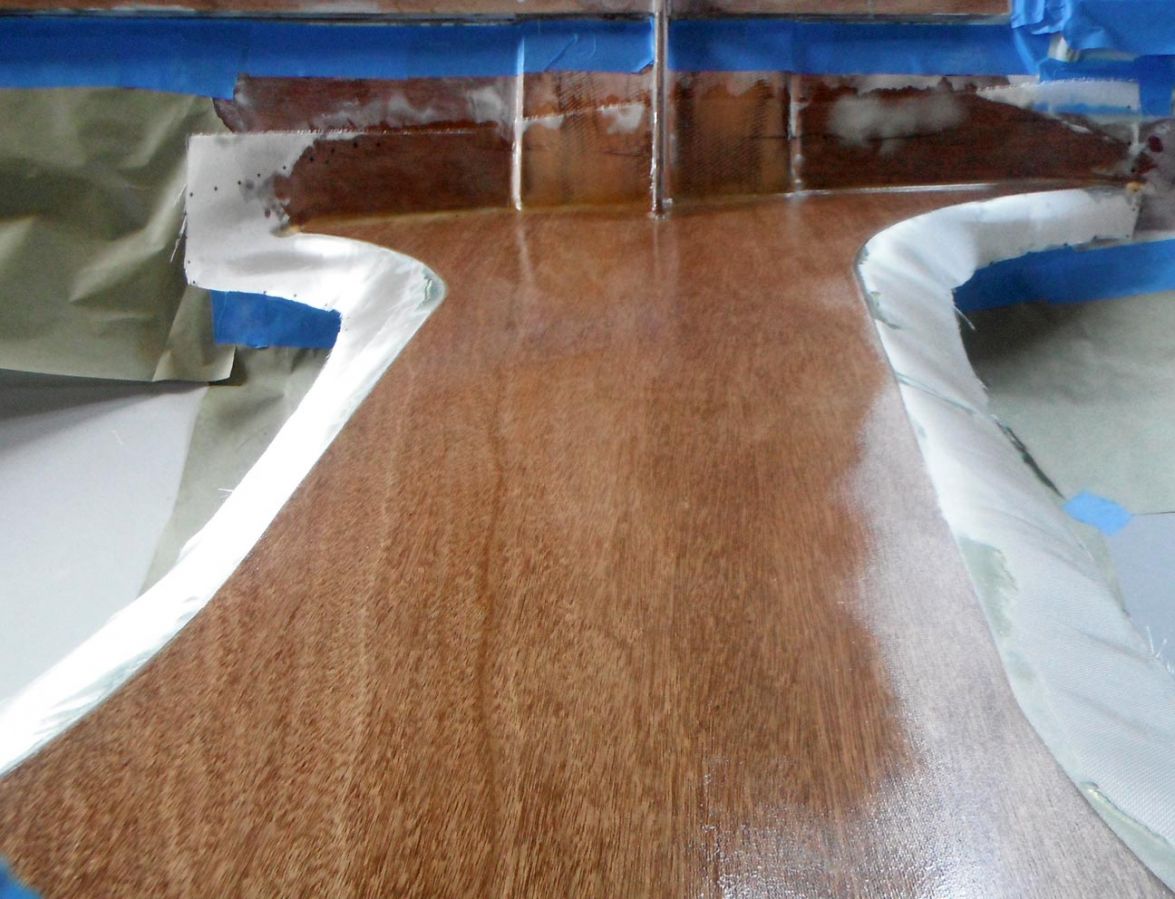
I may leave it, or I may try a strip of the 6-oz. on the edges. All of this is overkill and adds weight anyway, but because I had seen it done so nicely by other builders, I wanted to try it.
I hadn't planned to leave the knees and breasthook clear, just the seat, but the wife thought it would look nice. If I had planned to leave them clear I would have either used solid wood or would have been a lot more careful with the Meranti. If I can't get them to an acceptable appearance, I can always go back to painting them.
Re: TJ's V10
Posted: Wed May 06, 2015 5:40 pm
by terrulian
The 3.5-oz cloth is OK but I don't have the hang of it. This photo shows a crease where you see the circle. The fabric is so stiff that this crease, which is a result of folding for shipping, will not come out. It seems to me most cloth is very supple and when you wet it out it gets limp and conforms, within reason, to the surface it's on. But I tried a roller, squeegee, and brush, and couldn't get the crease to lie flat even when I put excess epoxy on. No big deal, there are no voids, so I'll just put on a couple more coats and sand it out. Just another one of those unexpected glitches
. I will be going back to the 6-oz on the gunnels, where I need to cover a 1/4" radius roundover. The light cloth is too stiff even to bend to a 3/8" roundover, as shown in the last post, so I'll also be re-doing the edges of the kness and breasthook with 6-oz.
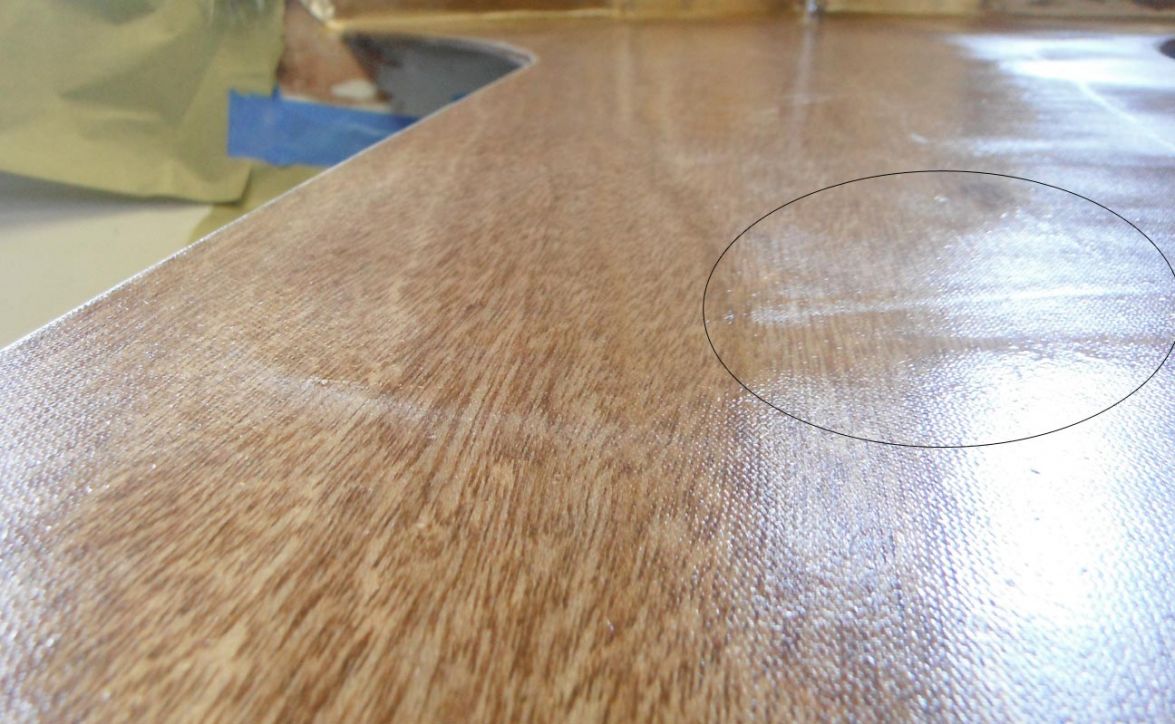
Re: TJ's V10
Posted: Wed May 06, 2015 6:14 pm
by jacquesmm
Small pieces of fabric are shipped folded, larger ones are shipped on a roll.
Somewhere on our web site, we have an option to ship small pieces on a roll for a small fee. If I remember well, it cost us $ 10.00 more to ship on a roll.
I will look at how we show that option but yes, the folding of small pieces can be a problem unless you unroll it and let is sit flat for several days.
Re: TJ's V10
Posted: Wed May 06, 2015 6:54 pm
by terrulian
Thanks, Jacques. It'll all work out.
Re: TJ's V10
Posted: Wed May 06, 2015 7:26 pm
by Cracker Larry
I've learned that if you take a warm iron and iron out those creases like a pair of jeans most will come out. Woven cloth gives me a fit too. It doesn't like corners or edges, biax is much friendlier, but won't go clear.
Re: TJ's V10
Posted: Thu May 07, 2015 12:56 am
by terrulian
This is another one of those errors from inexperience. Not having worked with it before, just other types of woven material, I just assumed it would flatten out when it was wet...but of course when it was wet, it was too late. I think and hope it will all come out with some work. I'll of course let you know.
Re: TJ's V10
Posted: Thu May 07, 2015 8:31 pm
by terrulian
I had no problem bending BBC 6-oz over a 1/4" radius on the gunnels with no voids.
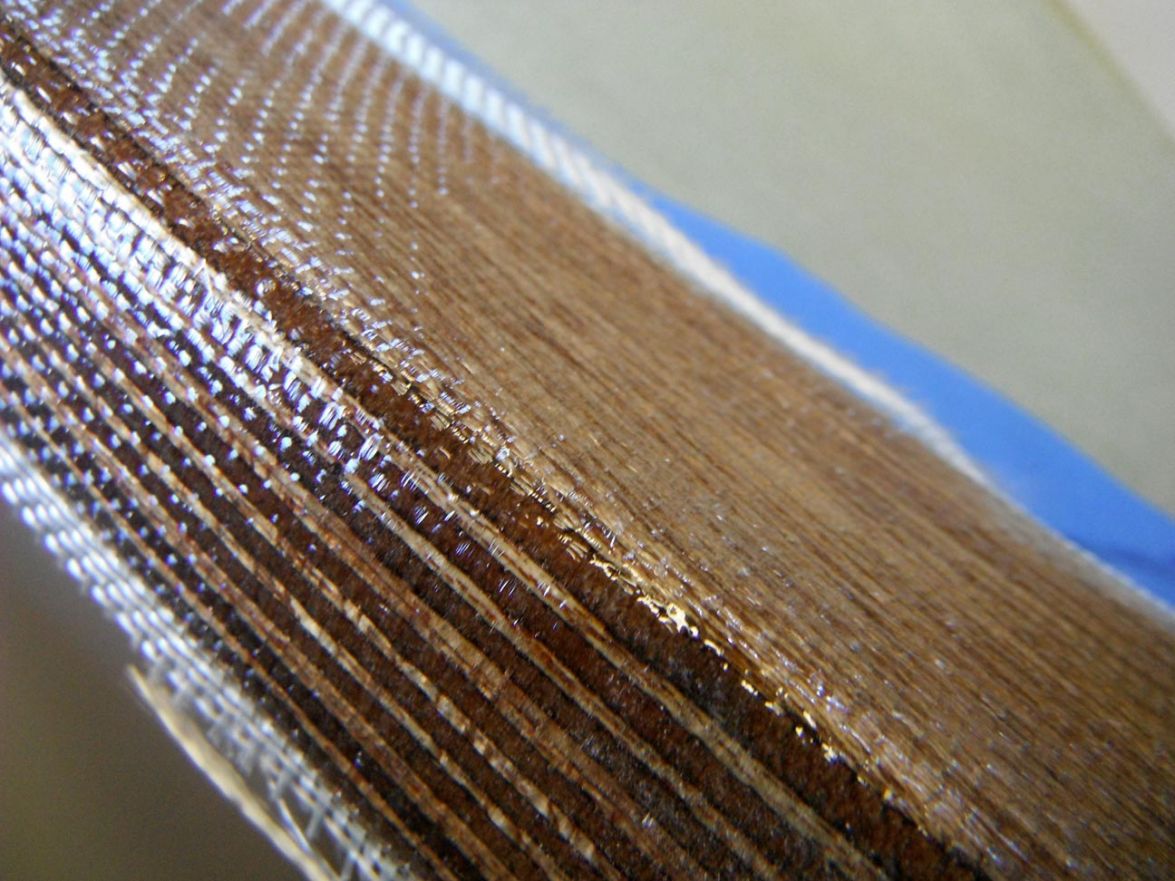
Re: TJ's V10
Posted: Fri May 08, 2015 12:59 am
by ks8
Glad it worked for you.
I've found that different batches of woven cloth are more or less friendly. The last batch I bought has been friendly, but the roll is getting low. I'm hoping the next batch will be at least as friendly. One batch was horrible, but that is now gone and good riddance.
Re: TJ's V10
Posted: Fri May 08, 2015 7:34 am
by terrulian
Very interesting, ks. That's kind of troubling. What can you depend on in this world, if not fiberglass?
Anyway, I'm about done glassing and I've got lots of this 6-oz. left so I'm good.
Re: TJ's V10
Posted: Fri May 08, 2015 2:52 pm
by ks8
terrulian wrote:What can you depend on in this world, if not fiberglass?
Now THAT'S a deep thought!
Re: TJ's V10
Posted: Fri May 15, 2015 8:04 pm
by terrulian
Glass and about 5-6 coats of epoxy on the breasthook, knees, gunwales, and middle seat. A bit of fairing left to do on the hull above the seat, which I will try to stretch out to at least two or three weeks, and then maybe I can screw up the paint and varnish. I'm trying to think of ways to prolong the process.
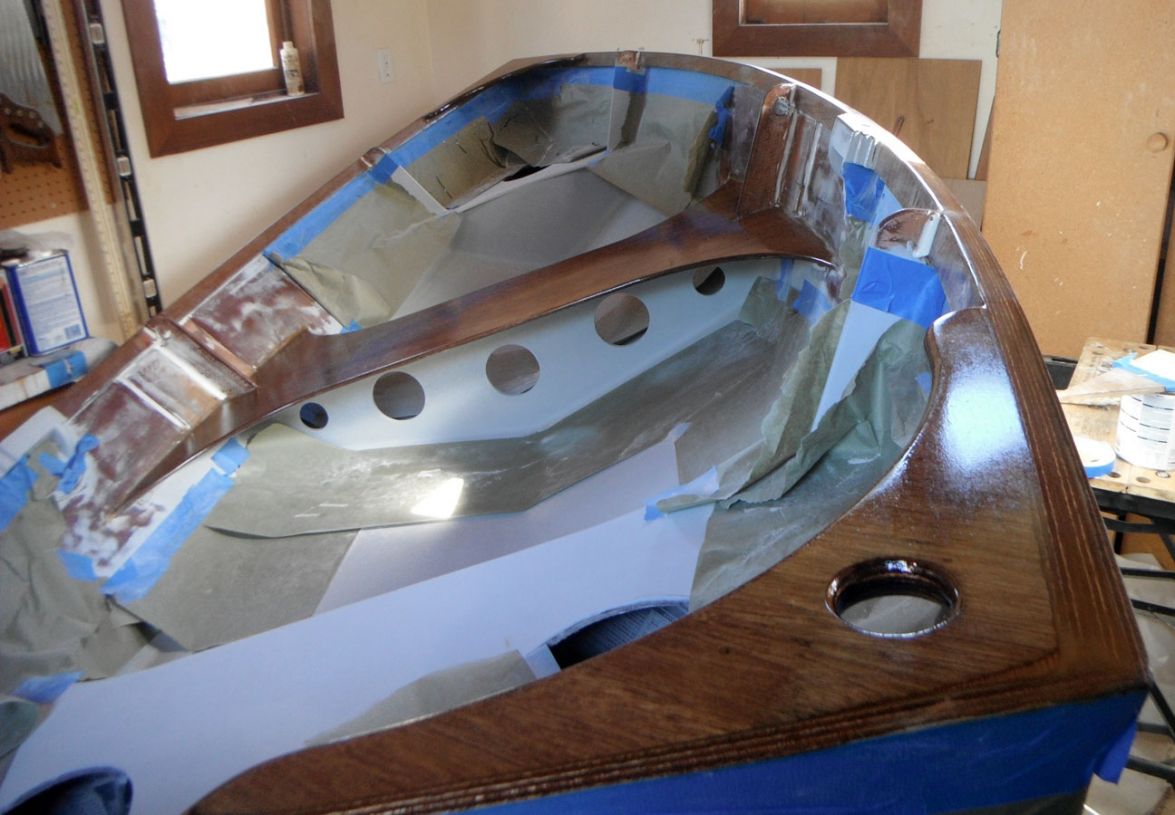
When I began building I wasn't going to have any wood showing but now I'm regretting that a little. Some fairing was done on the gunwales and they'll have to get painted. As I mentioned before, there are some bits on the knees at the corners where the sides meet the transom that aren't too nice but I think I can sort of hide them with a radius of paint, leaving the wood as an accent.
Re: TJ's V10
Posted: Fri May 15, 2015 9:43 pm
by Cracker Larry
Looks good from here
Re: TJ's V10
Posted: Sat May 16, 2015 2:23 am
by gonandkarl
Hi,
Your boat looks fantastic and one can see you put a lot of work into it. One thing I dont understand why you want to stretch the time to have a finished boat. You have proven to be an eccellent sailor. Are you a lousy rower and therfore scared to get the boat into the water ? Or is it that you also have a wife saying we dont need another boat once this one is finished ? Whatever the reason you can exhibit this boat anytime at any wooden boat show getting first prize should you finish it. I wont wish you speedy progress towards the last little bits of work to to, but rather an enjoyable time in doing it.
Greetings from Karl ( Austria )
Re: TJ's V10
Posted: Sat May 16, 2015 9:15 am
by terrulian
Thank you very much, Karl and Larry.
The main reason I don't want to finish the boat is that once I do, it will be sent off to live elsewhere, for example at a nearby launching area or, for part of the year, on a beach an hour from here where it will serve as a tender for my sailboat. I am very fond of the time I spend with it, and it's right outside my house so that I'm only 10 seconds away from doing a little work or seeing how things are coming. This will come to an end.
I plan some adventures in nearby waterways that are not accessible by sailboat. I have pretty much exhausted the exploration of San Francisco Bay, San Pablo Bay, the Sacramento River Delta, and California coastal waters under sail, having visited many areas scores of times, but this will allow access into some shallows and up a few creeks I can't get to with a keel boat or even a sailing dinghy.
I don't know how much I'll enjoy rowing but I hope I will. I've never had a proper rowboat, and although my little V10 is a bit short to fit the paradigm of that kind of boat, I've no doubt it will be much more suitable than what I've had before. I've ordered some nice oars and will be wrapping them with traditional leathers. Some builders have made their own but this seemed like a good thing to leave to a real shop. Even Larry leaves some things to the pros.
Re: TJ's V10
Posted: Mon May 18, 2015 6:07 pm
by Fred in Wisc
That's a right handsome little boat.
Re: TJ's V10
Posted: Mon May 18, 2015 7:22 pm
by gtcoupe
Beautiful work Tony. I think guys like you and Cracker keep the world in balance. There are plenty of guys like me who just get 'er done and dang the looks.
Re: TJ's V10
Posted: Mon May 18, 2015 7:26 pm
by terrulian
Fred--Jacques has drawn beautiful lines. It is a simple little boat with a lovely sheer. I'm doing my best not to screw it up.
Re: TJ's V10
Posted: Mon May 18, 2015 7:34 pm
by terrulian
Doug, thanks a lot but don't put me in the same class with CL, although I'm sure I could handle being in the same boat with him.
There are plenty of guys like me who just get 'er done and dang the looks.
That's me too, usually. But once in a while it's fun to see if you can polish things a bit...goes against my nature but sometimes, it's good to go against your natural habits.
Re: TJ's V10
Posted: Mon May 18, 2015 10:06 pm
by terrulian
Got some stuff today, kind of exciting.
First some spruce oars from Canada. Is their spruce better than ours?
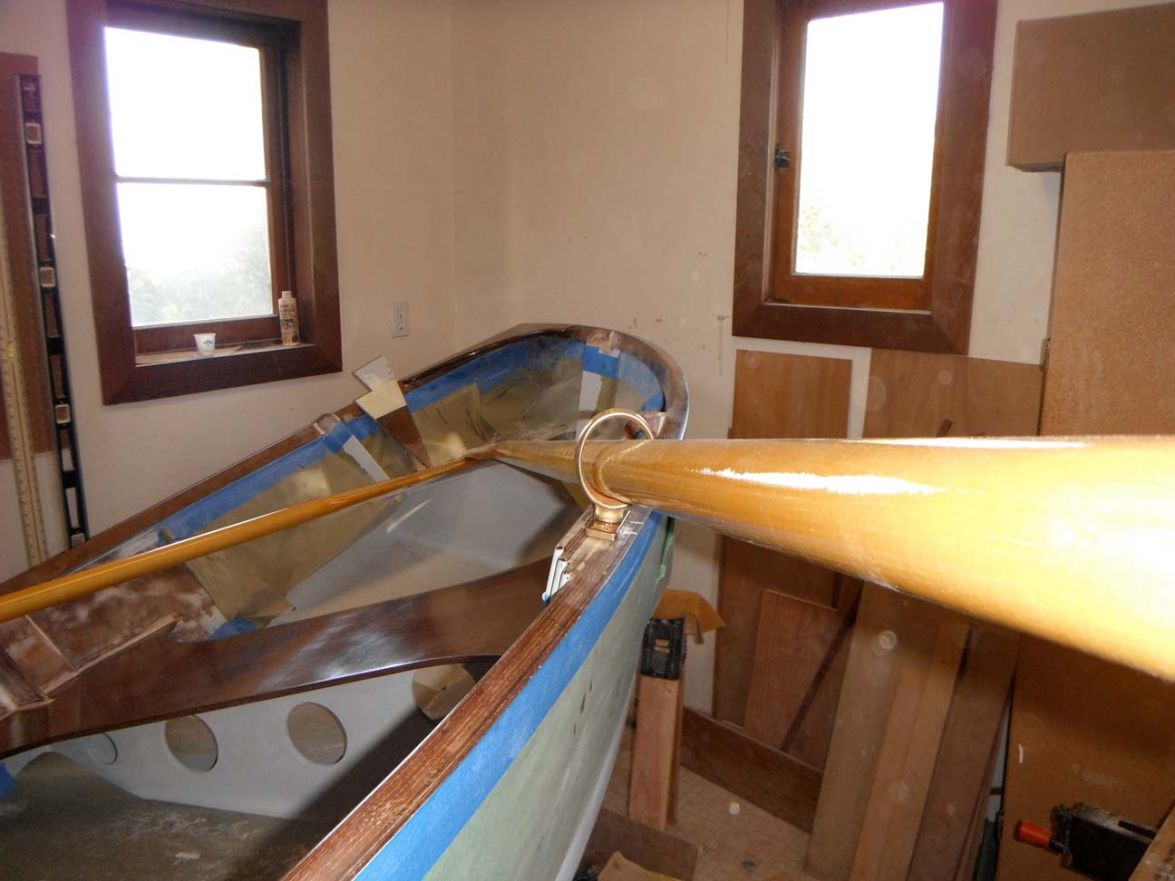
Next, I got a nice bow cleat online that was a bit expensive but couldn't find what I wanted in the immediate vicinity. It looks big here but it's only 4".
In the photo below, the black circle shows a not very neat joint between the breasthook and gunwale, the result of my changing plans in the middle of the build. The breasthook was supposed to get painted and this wouldn't have shown, but now I'm going to have to get creative to make it, um, kind of not so obvious. The red circle shows just a little very light orange peel from the last coat of epoxy. I don't know who it was, maybe KS, who said that what you have to do is just put thin coat after thin coat after coat on over the glass and eventually it starts to look OK. That's true, and this last coat, which has yet to be sanded, as well as the previous three or so of the six or seven total, was put on so thin that the roller was practically dry. This did make it lay down pretty good, though. Ready for some, say, 220 or 320 and then varnish.
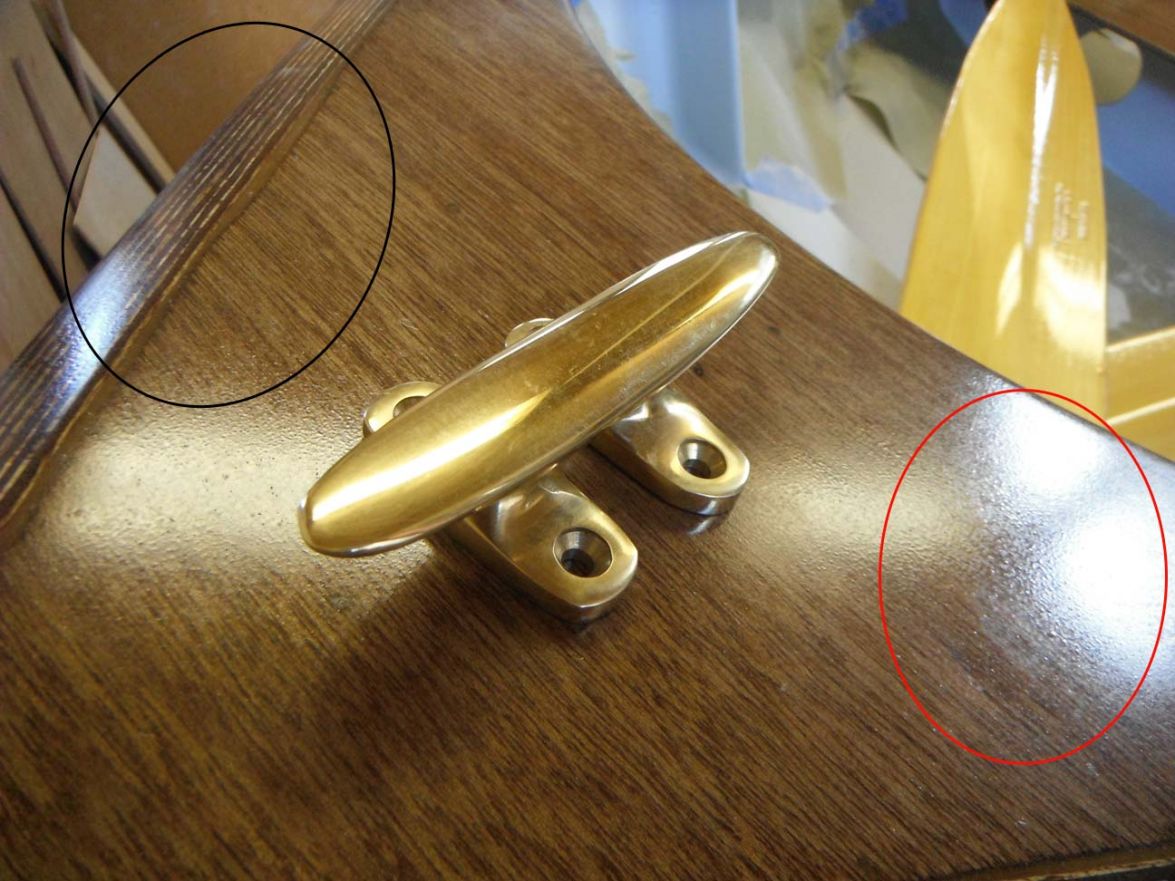
This last photo shows a scrap with a little of the Interlux Hatteras Off-White which is going to be the color of the interior and gunwales. I'm hoping that the combination of this color, the Meranti, the bronze, and the exterior Flag Blue will give the boat a very traditional look. But I'm pretty awful at guessing colors. I'd like to keep the gunwales clear but earlier methodologies, let's call them that, eliminate this as a viable option.
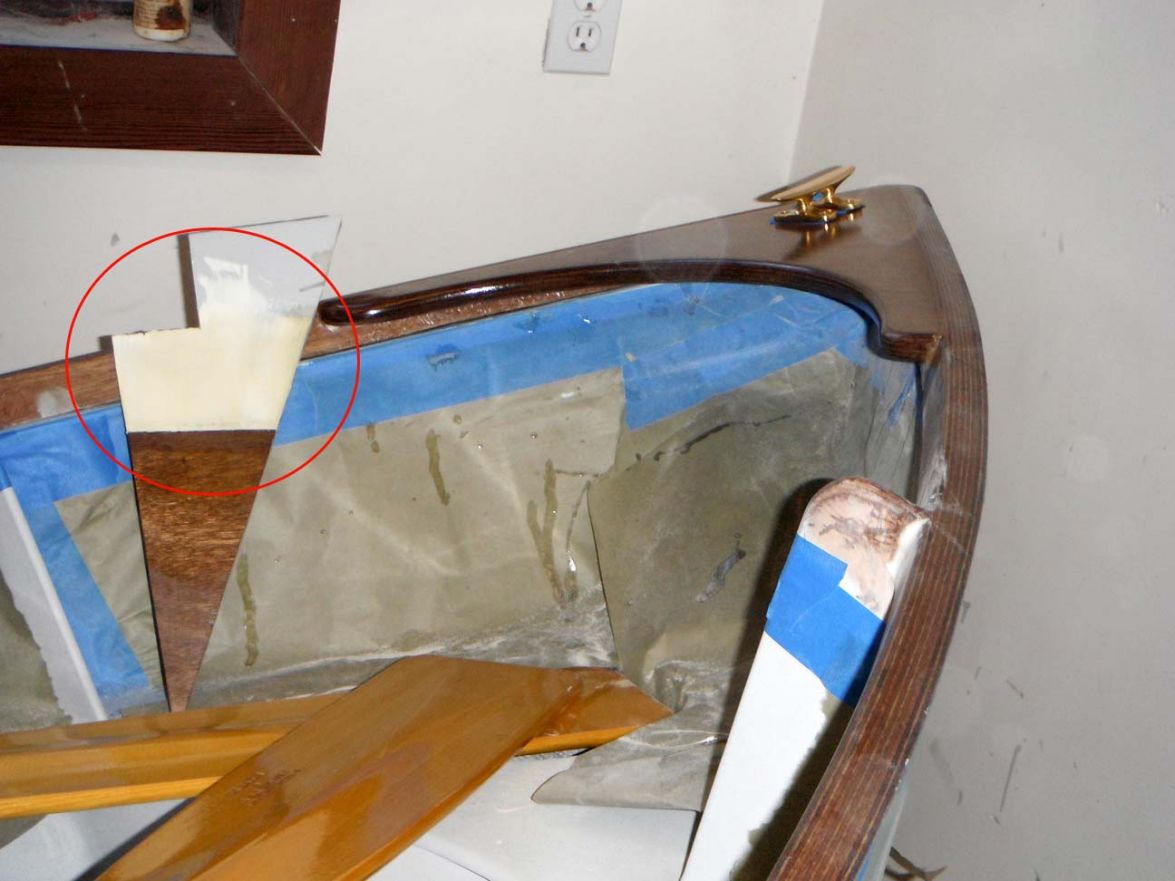
Re: TJ's V10
Posted: Tue May 19, 2015 10:11 am
by ks8
When using this as a tender, will it be kept on the beach, inverted?
When in the water, will it have a cover, or a bilge pump for rains?
I ask because even if the earlier methods had resulted in a museum-like gun'l appearance of all the end grains of the plywood, there still is a level of comfort of having a nice layer of primer and paint over the cut edges of plywood, even if already sealed with epoxy. Non-issue with mine because of the railcaps, but they have taken some hits. The dimensional doug fir stock has so far resisted any gunk when the seal was broken (quickly repaired
). If any dinghy is going to get any sort of hard use, I like the idea of some extra protection on top of the sheer, so the chance of water in those edges is minimal. For all I know (not much?) this just might be the difference between the boat lasting 100 years or 250 years, if otherwise maintained well.
Mine's been kept all sealed and no signs of any issues anywhere, with the cheap BCX after many years, but then it was a lot of work to thoroughly glass *everything*. [ I just say that in case anyone randomly browses this post. Cheap BCX for the structure of any boat that one wants to last, is NOT recommended. I proved it can still work with a small boat, but it will cost more and weigh more when done, and take much longer than using good wood. And the big box store plywood, these days, is unfortunately unpredictable for quality, as regards boat building. Use good plywood, from a good source (like here), meranti, okume, BS1088 or close.
]
She's looking good!
Re: TJ's V10
Posted: Tue May 19, 2015 11:00 am
by terrulian
When using this as a tender, will it be kept on the beach, inverted?
Yes, exactly. I have in mind that I will cover it with a tarp, at least at first before I get too lazy and the boat is trashed anyway. The gunwales are glassed with 6-oz. woven and several coats of epoxy and will receive epoxy primer and paint, for the reasons you mentioned. (Even the exposed edges of plywood at the knees and breasthook are encased in glass, so there are actually no bare plywood edges anywhere.) (Actually, that's a lie...the undersides of the shear clamps are not glassed, nor are the edges of the frames...hmmm.) In addition, there will be a rubber rub rail which has a lip on it that covers the corner edge and about 3/16" of the top of the gunwales. I need the rub rail because as a tender it's going to bang up against the hull of my sailboat. I've bought a couple of fenders that will protect both the dinghy and my boat, as they will bend over the gunwales. Normal fenders won't work because they'll leave the top of the gunwales exposed.

I've figured out that I can get them into the double hatch you see on the stern seat pictured below.
However, when inverted the area I'm worried about is the top of the transom pictured here.
This area is bare 3/8" Meranti and when it's upside down, this will be touching the ground. So far my plan is to use a piece of pipe insulation that I can slip over it before I turn it upside down but now you've got me thinking perhaps a strip of glass is the way to go. Another thing I've considered is laminating another piece of 3/8" at the top of the transom between the knees. Maybe I should do that and then cover that with glass.
I've considered making a cover for it when it is stored right side up but haven't gotten that far yet. I'll use a cut-off gallon jug for bailing; I don't think I need a pump but there's a hand pump in the sailboat and a bucket as well.
Re: TJ's V10
Posted: Tue May 19, 2015 2:18 pm
by ks8
Re: TJ's V10
Posted: Sat May 30, 2015 4:33 pm
by terrulian
When I created the middle frames, I drilled a 1" hole at the top, port and starboard, to use for attaching lines, and then rounded them over.
As I assembled the pieces, I decided that the top of the frames, which had to be notched to accommodate the sheer clamp, had become pretty narrow at that spot, so they definitely needed to be glassed to the inwale to be strong enough to survive bashing against a boat or wharf. But of course the glass needed to be trimmed and faired and by the time this was done, the holes were hogged out and no longer acceptably round. Shoulda been a little more careful here.

I decided to wrap a 1" dowel with packing tape to create a mold...
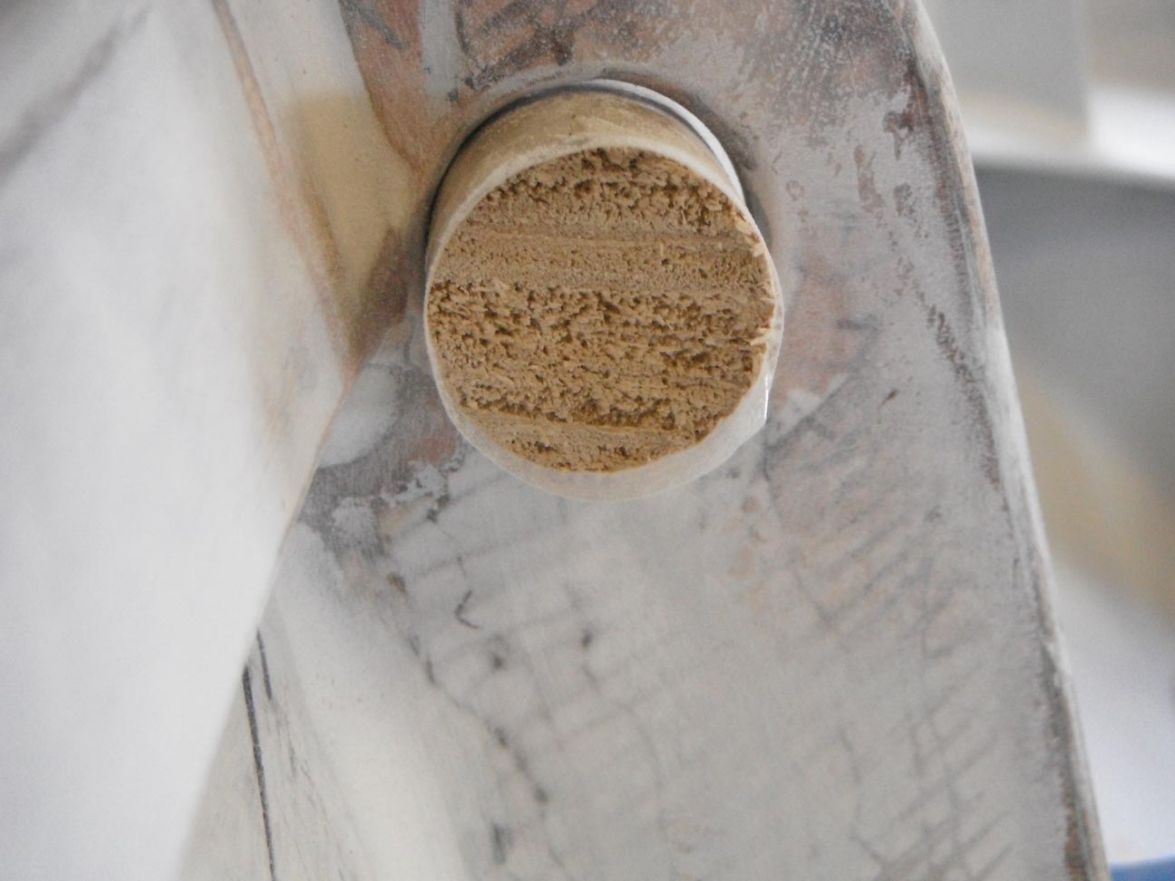
and then goop it in to hopefully recreate the circular shape of the holes.
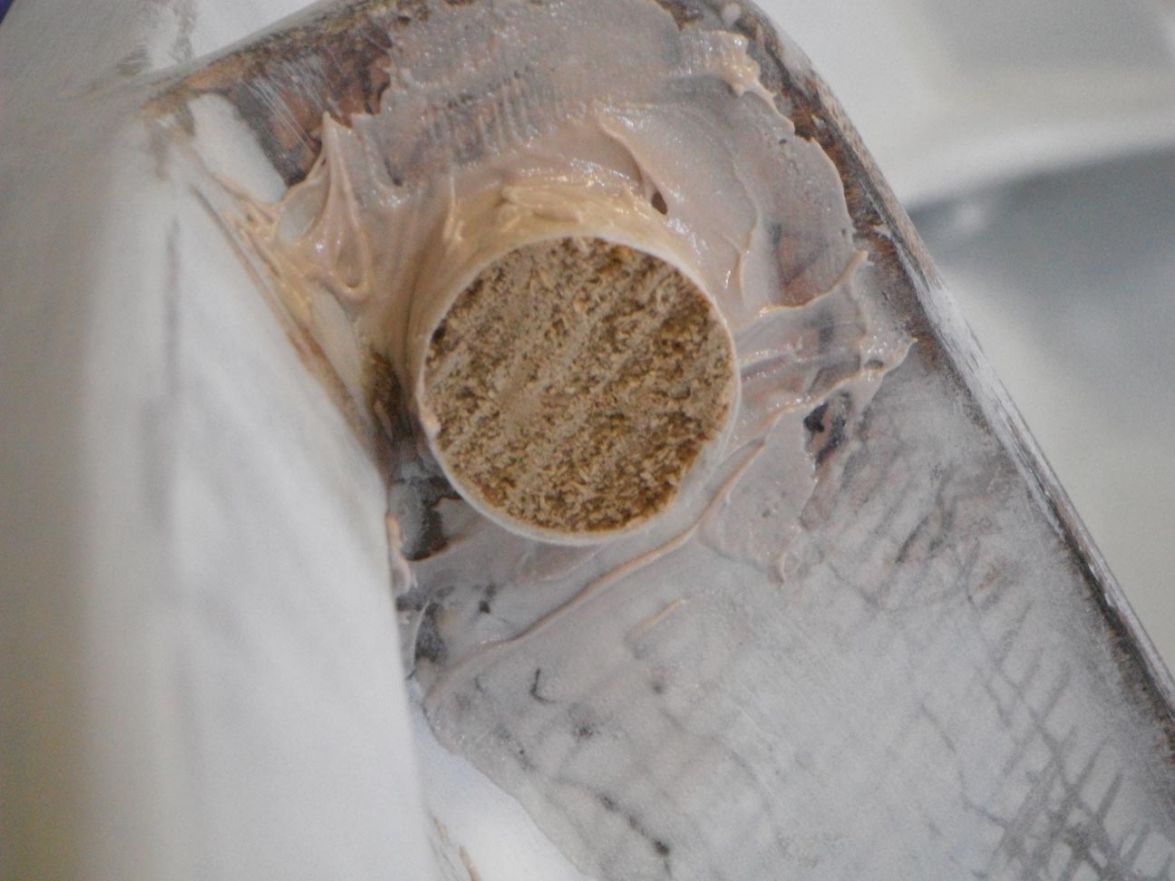
We'll see if this works.
Re: TJ's V10
Posted: Sat May 30, 2015 4:47 pm
by terrulian
Meanwhile, on the paint front, I have been pondering the lines between the varnished seat, breasthook, and knees, and the surrounding painted surfaces. If I just tape off the varnish and then paint as you would normally do, I'll end up with a ledge between the varnish and paint when the tape is removed. The best way I can figure to deal with this is to clear coat both surfaces, using several extra coats at these lines, and sanding down the ledge.
But putting varnish on top of the paint, much of which is off white, will turn it yellow. It is a very obvious difference in color that I cannot abide. Here you see the off white on the left, with a couple of coats of clear varnish on the right.
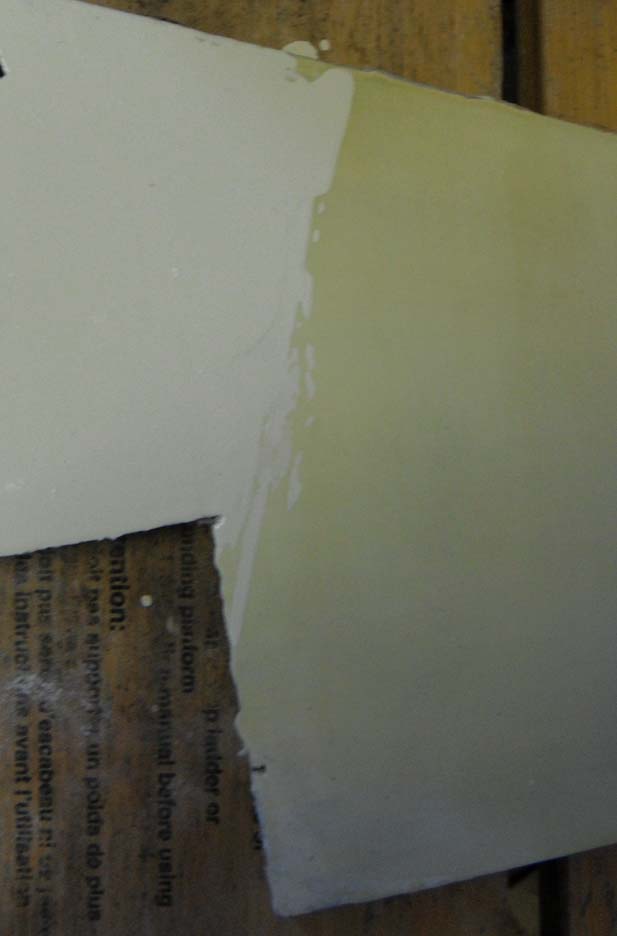
The only solution to this, unless you geniuses have another, is to use an exterior water-based polyurethane varnish, which is, unlike the oil based sort, clear. Jacques was doing a coat of EMC clear on something and was going to report about any yellowing with that product, but it's a bit pricey for my budget anyway. Any other ideas, either for products or a different way to deal with the ledge?
Re: TJ's V10
Posted: Sat May 30, 2015 4:53 pm
by jacquesmm
We will do the test next week.
The base coat is an experimental paint that we test for System Three and we want to wait for a 100% cure before applying the EMC varnish over it.
Re: TJ's V10
Posted: Sat May 30, 2015 5:42 pm
by Walkers Run
I used the EMC clear coat over epoxy on my toe rail. I took the clear right over the EMC paint. It worked great. I only have an inch of paint before the kiwi grip though.
Re: TJ's V10
Posted: Sat May 30, 2015 6:14 pm
by terrulian
Dang, that looks nice.
I doubt if I'm going to spring for the EMC unless I can't make some one-part work, but I'm still interested in the outcome of Jacques' treatment. I don't know what color your original paint was but the impression is that there is no yellowing. I have some water based polyurethane drying as a test right now.
Unfortunately, where I'm going to make my line there is no convenient break like there is in the 90-degree turn between your toe rail and deck...it's going to be just on a flat surface because I didn't prepare the situation correctly, as I changed my mind in the middle of the build.
Anyway, we shall see what happens.
Re: TJ's V10
Posted: Mon Jun 01, 2015 11:29 am
by ks8
My system three white and clear both yellowed a bit. In fairness, I didn't notice until I sprayed some fresh white next to a previously finished area. It yellowed noticeably over two years, but again, only noticed because of new fresh paint next to it. Haven't tried any varnishes on any of the bright work .. Just clear lpu.
Re: TJ's V10
Posted: Mon Jun 01, 2015 12:35 pm
by jacquesmm
We'll put it down later this week but there you have it: no yellowing.
Now, all epoxies will yellow a little bit over time because of the UV's. The way to prevent yellowing is to cover the epoxy with a UV resistant varnish, EMC or spar varnish.
How about trying the System Three one part varnish:
http://boatbuildercentral.com/proddetai ... r_satin_qt
Re: TJ's V10
Posted: Mon Jun 01, 2015 1:07 pm
by terrulian
Thanks, ks.
I put an inquiry in to Interlux and they are supposedly getting back to me. They had originally told me that although their Compass Clear may yellow a little over time, it would be negligible if I were starting with an off-white in the first place. But of course it is not negligible, and it didn't take any time at all.
I wouldn't mind if there were a little darkening over the brightwork. Who'd know? But I really don't want the off white to become a tired yellow. So far my inquiries have led me to believe that only a water-based polyurethane will be clear, and the one I tried was, if not perfectly clear, acceptable. But check this out: the instructions say NOT to use it over paint, which is exactly what I want to do. I don't know why they say not to; it seems to work fine. Is it going to peel?
Below you see a photo with the off white paint covered by nothing (black arrow), clear water-based polyurethane (red arrow), and Interlux Compass Clear on the right.

Which brings me back to the question if there are any other ways to eliminate the ledge.
On another note, in my researches I discovered a painter's trick that is so cool I can't believe I had to live almost seventy years before discovering it. You know when you tape something off and no matter how hard you try, you get a little glitch here and there where the new color bleeds into the old at a small imperfection in the tape's adhesion? Here's how you solve that: You tape off the first color just like you normally would. But along the tape line, instead of painting the new color, you counter-intuitively paint the margin with the color you've masked off. When that's dry, you go ahead and paint the new color as normal. When you remove the tape, that first bit of the old color along the tape line will have migrated into the tiny voids that create the imperfections, so that they are now blocked from being filled with the new color and match the old. You have a perfectly clean line. I'm sorry, that is just genius. Oh, you already knew this?
I haven't tried it yet but will report back when I get to that.
Re: TJ's V10
Posted: Mon Jun 01, 2015 1:12 pm
by terrulian
Jacques,
Several paint "experts" have told me that no oil-based one part poly finish is perfectly clear, they all have a bit of amber. Is the System Three water based?
Re: TJ's V10
Posted: Tue Jun 02, 2015 1:19 pm
by ks8
The System Three clear LPU is water-based. It is not perfectly clear. If you lay on many coats, it will introduce a slight cloudiness over the previous paint. There is no problem with applying S3 clear LPU over S3 tinted paint -- no incompatibility.
So again, over two years, both the S3 tinted paint (Orcas White) and the S3 clear LPU, both yellowed a slight bit. I can live with it. But after two years, laying down fresh Orcas White next to the older aging Orcas White, the yellowing was noticeable, from the same can of paint. If one paints the whole boat as a singular project, then such situations, ideally, won't develop. Maybe this year I will actually finish painting the seats (10 years later
).
Also, the S3 LPU, since it is water-borne, it will cause the paint can lid and opening to begin to rust, after several years. Little bits of rust then need to be picked out before mixing, or strained out, depending on your standard of finish.
I have not tried any brand varnish yet -- not System Three or any other brand, but I do have a couple of quart cans, somewhere, queued up to try on some projects.
That tapeline tip IS simply genius. Thanks! I hope I remember it for next time I mask a paint line.
Re: TJ's V10
Posted: Tue Jun 02, 2015 4:06 pm
by terrulian
I have talked to two people at Interlux/Awlgrip. I called them since the paint I'm using is their Brightside and so they'd theoretically be in the best position to give advice. Of course everyone recommends the 2-part but by the time you pay for that and the activator you're well over $100. For a quart. I've already bought a 1/2 quart of Epiphanes and a quart of Interlux Compass clear, both of which are quite amber and are useless to me. I'm just not keen on spending a bunch more money when I'm pretty darned sure that the paint will be dinged in a day or two.
So now what I think I'm going to do is get a garden variety one-part water based exterior polyurethane. I'm not going to topcoat the paint except at very narrow margins of the brightwork. I've sorted out a fairly involved plan, which I'll no doubt report in tedious detail when the time comes.

It's getting closer.
Re: TJ's V10
Posted: Tue Jun 02, 2015 4:16 pm
by Cracker Larry
by the time you pay for that and the activator you're well over $100. For a quart.
EMC is fantastic, but I just payed $130 for a quart of activator alone. It's not inexpensive.
Re: TJ's V10
Posted: Tue Jun 02, 2015 4:53 pm
by terrulian
Your boats are worth it.
Re: TJ's V10
Posted: Thu Jun 04, 2015 10:16 am
by terrulian
To my astonishment, I'm getting to a point where it seems I can't get there from here.
Although I've talked to a lot of paint experts who, disappointingly, have offered advice which is contradictory or contrary to reason, I seem to be at an impasse. All oil-based varnish is amber, so I would have to use water based. But I'm being told that 1) no water-based polyurethane will flow or lay down as well as an oil-based finish, as it dries too fast, and 2) You don't want to coat a boat with a water-based finish, as it will deteriorate in a wet environment. I think this latter advice, given by two different professionals, is odd. Once the volatiles in any finish evaporate, isn't it stable? I mean, once oil paint dries, you can't remove it with paint thinner. But even if I discount reason 2, it is true I haven't been able to get entirely satisfactory results in regard to getting a reasonable flow with water-based stuff. I don't want to invest in spray equipment, which is what a car painter would use. I'm going to try one more brand of one-part water based polyurethane that was presented to me as my "best bet" without enthusiasm by someone who seemed knowledgeable. If that doesn't work then I'll have to re-think my plan.
Re: TJ's V10
Posted: Thu Jun 04, 2015 10:26 am
by jacquesmm
Too long to explain in details here but you are correct.
Read about it by doing a search with the sentence;
"differences between water based and solvent based paints".
We still did not apply the EMC varnish over the S3 water based paint. We want the base coat to be cured very hard before experimenting with a clear coat or varnish but whatever we find out will not guarantee that the varnish will not yellow a little bit later.
Re: TJ's V10
Posted: Thu Jun 04, 2015 10:49 am
by terrulian
Thanks, Jacques.
I know it's apples and oranges if I'm not using a two part paint, but what length of time would you consider necessary for either a water-based or oil-based paint to be fully cured? I talked to someone who indicated we're talking a month or more.
Re: TJ's V10
Posted: Thu Jun 04, 2015 10:52 am
by jacquesmm
It depends on the conditions. A couple of days here in Florida but our case is special: we are currently testing a new paint for System Three and we want to be 100% certain of what we do.
If this was their regular paint, I would have put another coat on there in a few days.
Re: TJ's V10
Posted: Thu Jun 04, 2015 12:07 pm
by terrulian
I talked with a paint expert again about the curing. She said that even after curing, if you let paint thinner sit on a horizontal oil-based surface for awhile, it will bubble or spot. Same with water on water-based. Thing is, you are very unlikely to let a puddle of thinner sit on dry oil-based paint, whereas a little pool of water sitting on boat varnish is not at all unlikely. Oil-based varnish, according to this woman, can handle that, but water-based will spot. She's not talking about two-part paint here, just one part polyurethane. She believes that two-part water-based varnish is the only way to achieve what I want. I'm going to try one more brand of one-part but at this point I'm not clear I should trust it anyway and may have to just resort to plan B and use oil-based, which maybe is plan A since it was what I thought of before I realized that no oil-based varnish is clear.
Re: TJ's V10
Posted: Thu Jun 04, 2015 1:01 pm
by pee wee
terrulian wrote: Of course everyone recommends the 2-part but by the time you pay for that and the activator you're well over $100. For a quart. I've already bought a 1/2 quart of Epiphanes and a quart of Interlux Compass clear, both of which are quite amber and are useless to me.
You know what you need to do. You want the results of the two part finish, you don't want to pay for two part product, one part finishes won't do what you want . . . "everyone recommends the 2-part" . . . you've thrown good money away on product you can't use . . . wait for it, wait for it . . .
Re: TJ's V10
Posted: Thu Jun 04, 2015 2:05 pm
by terrulian
Peewee...not going to pull the trigger. A lot of money for the 2-part and no guarantee that even that will be flawlessly clear after a year or two.
What I think I've had to accept is going with my original plan, which is to varnish the bright stuff (which is glassed and epoxied) with Epiphanes, and then tape it up and paint up to the tape with the off-white topcoat, which is Brightside. I'll try to minimize the ledge and live with it. Besides, that process is a lot simpler. I've got a quart and a pint of stuff I'll probably never use but let's not sweat the small stuff. I'll give a 10% discount to those who ride in the boat if they notice the ledge and complain about it. 10% of nothing is...you do the math.
Re: TJ's V10
Posted: Thu Jun 04, 2015 4:43 pm
by gonandkarl
Hallo Tony,
I am not looking forward to the paint problems that you have with one part paint. I painted my boat builder test ( rowing ) boat with one part paint and I am quite happy with it because it was easy inside it is white and outside it is green. On my Adelie I would like to have the bottom either in darkblue ( or black if I use grahite ) and the top white and again in one part paint for ease of use for a leftish amateur boatbuilder. And the ledge which might develop between the two makes my pulse rise now already even that I am still far of this judgement day. Come to think of it by using the same number of coats there should be no ledge unless I decide on graphite for the bottom. I am thinking I could use a glue on tape like they use in the automotive industry for car and truck decoration and any ledge would be underneath. Well meaning friends already told me that I should have the outside boat paint done by a panelbeater just down the road who finishes all his cars in perfect colour and shine and with some coating like glass so that the cars hardly ever need a carwash. His shop is so close to my house I could push the boat on the building frame to him. Until I have to come to a decision I will follow your thread to learn maybe something which could apply for me as well once I get to this paint threshold and for now I wish you all the best for painting your boat.
Greetings from Karl ( Austria )
Re: TJ's V10
Posted: Thu Jun 04, 2015 5:27 pm
by terrulian
Nice to hear from you, Karl.
Come to think of it by using the same number of coats there should be no ledge unless I decide on graphite for the bottom
This is actually one way to do it and I've done it before on things like, for example, a sheer stripe, and they do it on cars sometimes, too. You tape off one side and then the other, using the trick I mentioned above to eliminate small glitches.
In my case that's what I'd like to do but there are too many curves and I'm positive I couldn't match the taping between the two colors since you have to tape it off and then come back with a mirror image. It works better on a straight or fairly straight line. Then after applying both colors you can sand down the ledge so that it practically disappears, since it is very minor. This is more or less how I'm going to do the line between my topsides paint, which will be dark blue, and the epoxy bottom, which is black. You can't really sand that black epoxy/graphite mix without dulling it so I'll just try to be as accurate as I can, and since they are both dark, the imperfections won't really show that much.
Re: TJ's V10
Posted: Sat Jun 06, 2015 1:45 pm
by terrulian
This is my favored method for finding imperfections, a 250-watt halogen light. For me it works better than a guide coat, although they both have their strengths.
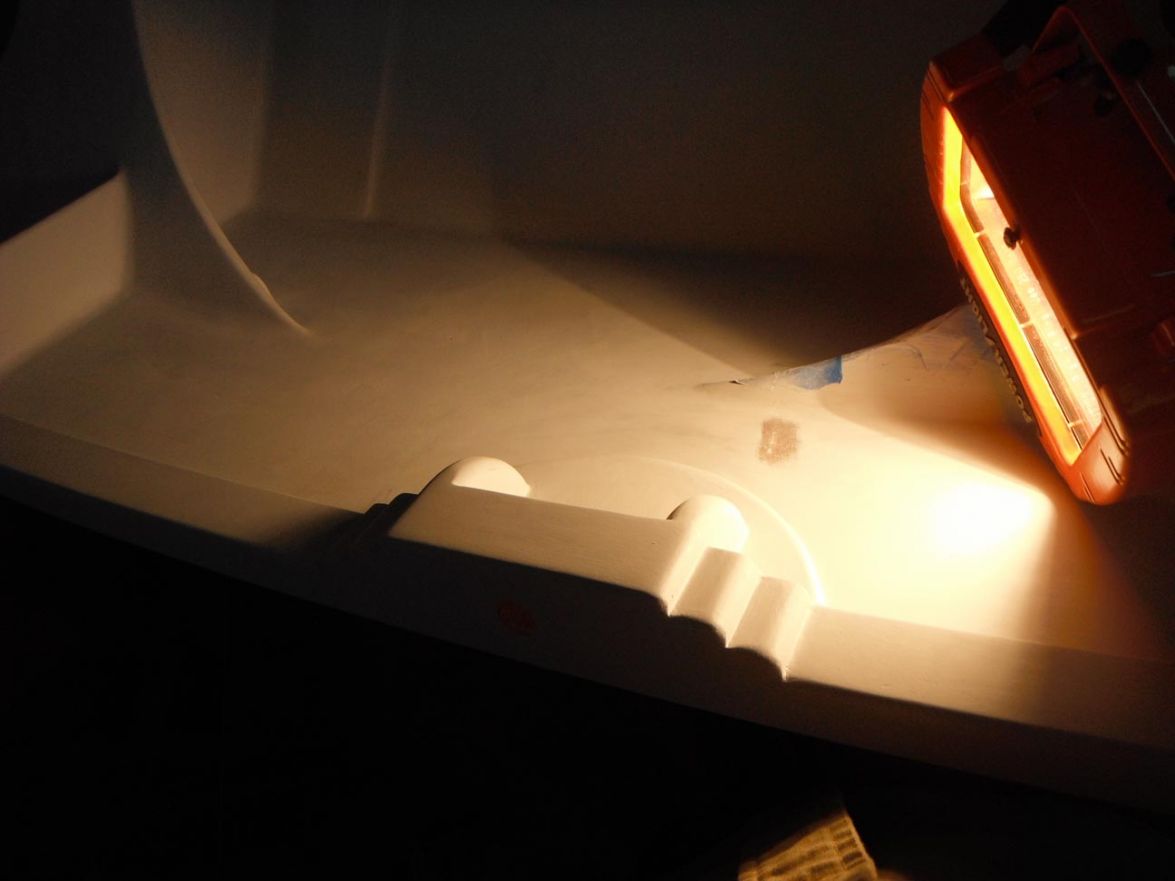
Here's the difference, although it's hard to show with a camera:
First, without the light.
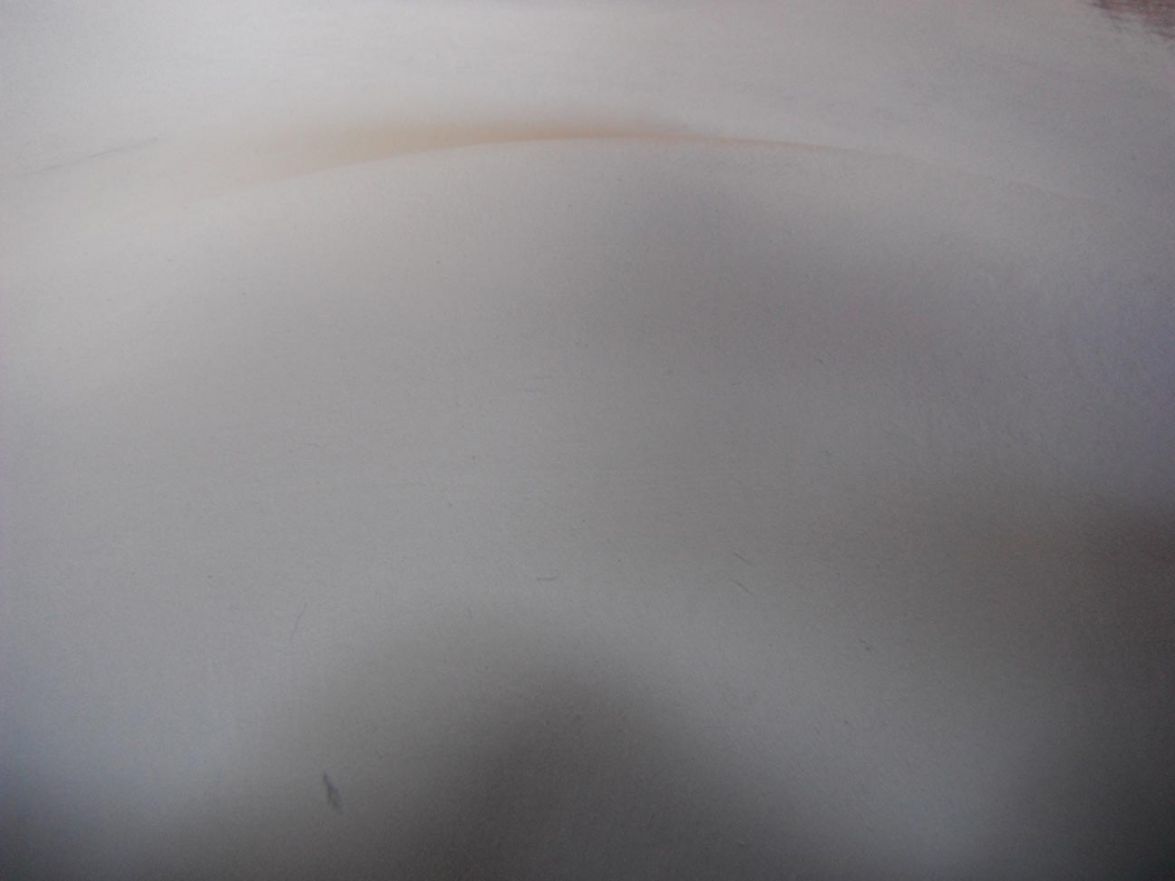
Now with:
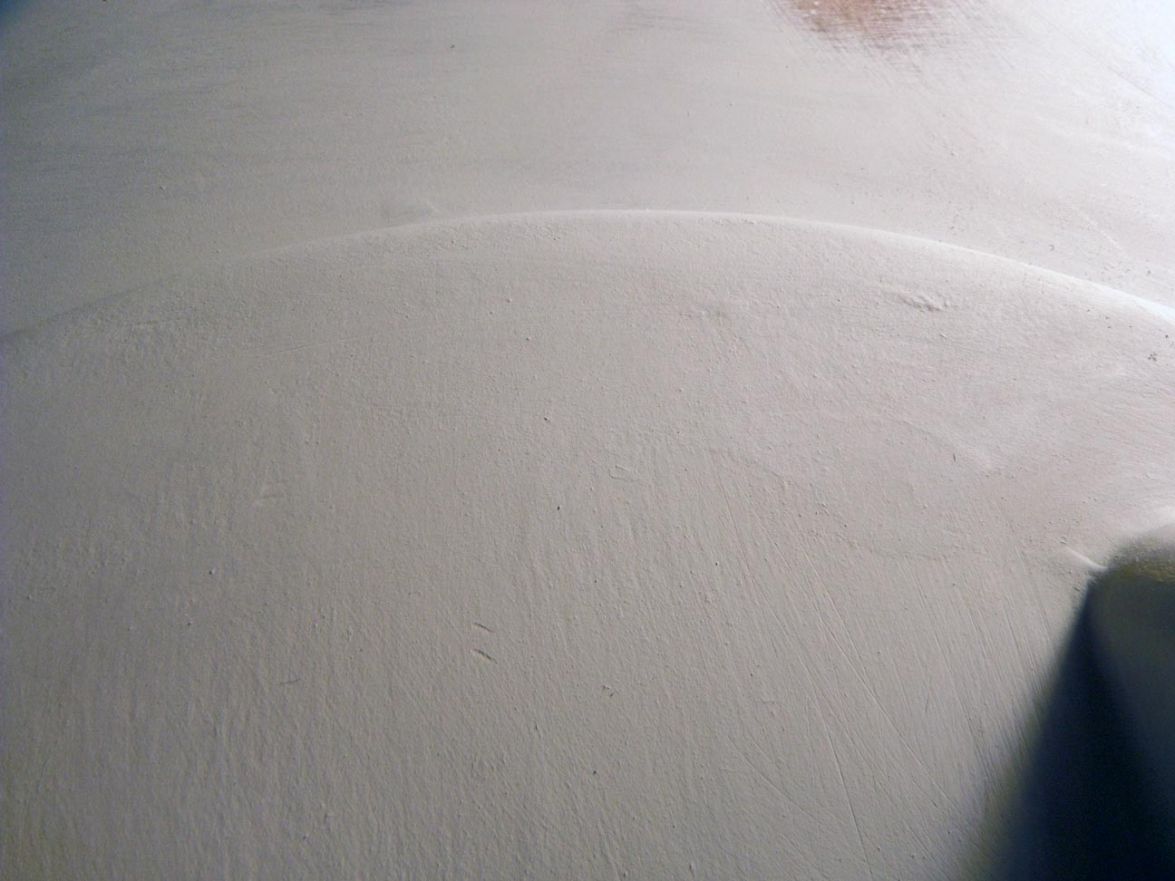
The imperfections aren't detectable by touch, at least not by me.
Re: TJ's V10
Posted: Sat Jun 06, 2015 1:52 pm
by ks8
Re: TJ's V10
Posted: Sun Jun 07, 2015 3:56 pm
by Walkers Run
Tony,
I just read your book. Your my new hero.
You cracked me up, well done sir!
Re: TJ's V10
Posted: Sun Jun 07, 2015 4:26 pm
by terrulian
That's extremely kind of you. Glad you got a few laughs.
BTW, the V10 I'm building is to serve as a tender for the little Catalina 22 that Mr. Shrode and I own. (Yes, he still is my buddy and favorite person to sail with.) For some of the year we keep it in nearby Tomales Bay where moorings are the only option so you have to get out to the boat. We bought the swing-keel Catalina specifically to for that location, where it's very shallow at the ramp.
Re: TJ's V10
Posted: Wed Jun 17, 2015 4:52 pm
by terrulian
Inside is pretty much faired and primed. The tape marks areas for final touch-up.
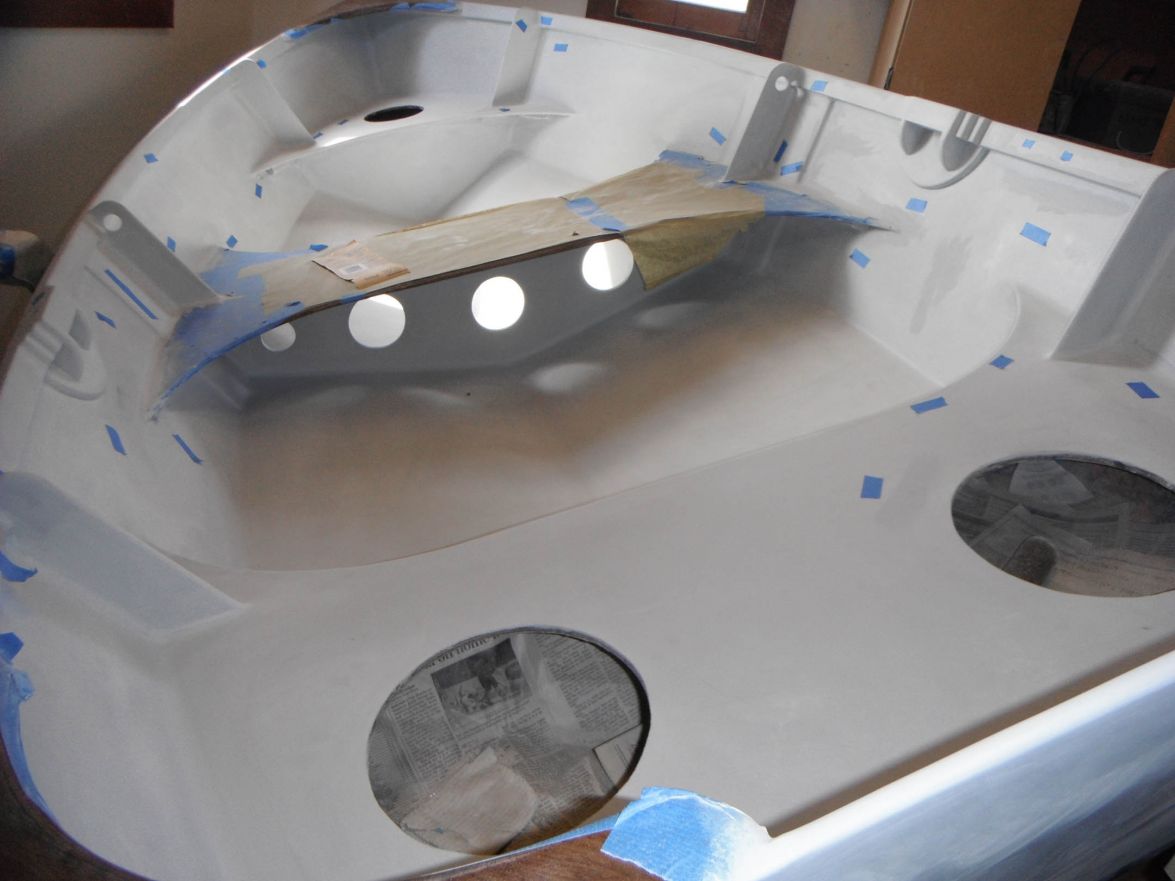
When that's finished I'll flip the boat. I have one little job on the bow to prepare a bit of a wedge so that the rubber rub rail won't pooch out as it rounds the tip. After that, a last inspection and touch-up of the hull, which is primed but has been banged around a bit while I worked on the inside. Then before painting the topsides, which I anticipate with excitement mixed with anxiety, I plan to vacuum the shop from top to bottom to evacuate as much residual dust as I can.
Re: TJ's V10
Posted: Sun Jun 28, 2015 2:57 pm
by terrulian
Having satisfied myself that the interior fairing was complete, or, to put it another way, having reached the point where, if I had to go over a spot one more time I would rip my clothes off and go screaming down the street, I flipped the boat again with the plan of starting the final paint on the topsides. This was followed by what I would consider an extreme cleaning of the shop. Although some of you work in an environment that is indistinguishable from a clean room, this is not my habit. I even washed the floor. It seemed to me I heard the shop speaking to me in a whiny voice, complaining about "inappropriate touching."
The most difficult issues of the inside fairing are the little "crotches" where three radiuses meet at a corner. There are forty-nine of these or so (an uneven number because of the pointy end), not counting the ones inside the hatches which will get my attention when pigs fly. Not one of them yielded to less than three passes of filling and sanding, and at least a couple took 5 or more. I haven't counted, but I'd guess not more than half a dozen are actually acceptable but screw it. CL likes to say there's either right or wrong, no in-between, but these terms are in need of modification when it comes to my sense of aesthetics.
Anyway, with the boat flipped a few things became evident to me. One, the graphite/epoxy bottom had gotten a few dings since I last saw it. This required another coat, and since that didn't go so well, I tried to touch it up. I did have one advantage I didn't have the first time I did this: I knew it would look awful and didn't expect any other result. But even so, the touchup was more of a mess than I can handle, so I'll sand it and have another go.
Also, it was a good time to create a filling wedge to accommodate the area at the bow where the rub rail won't turn the corner. It gets around the bow after some heating, but a void is created underneath it. With the boat right side up, a mold would have to be created to shape something to fill this void, but with the boat inverted, I taped it and filled it with wood flour and epoxy.
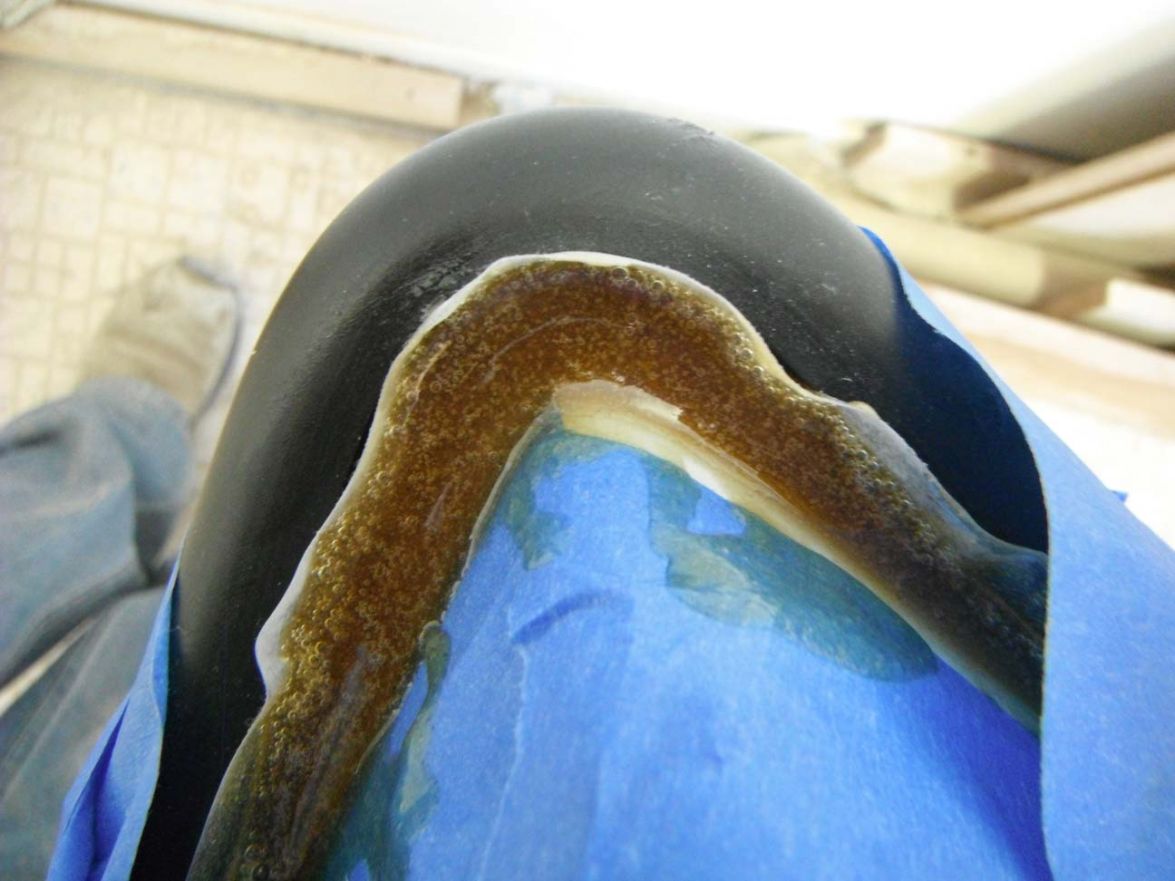
This, as you can see, didn't go too smoothly, but with the rubber removed and some Quick Fair, it was soon brought up to bureau standards.
In addition, I reasoned that now was a good time to paint the areas under the seats. Access to these areas otherwise requires, when the boat is right side up, a whole lot of grunting and foul language. This way it is pretty easy. This inspired me to fantasize about a whole different schedule for applying the paint and varnish which is a much better idea. But, haha, it is now too late to go back and start over.
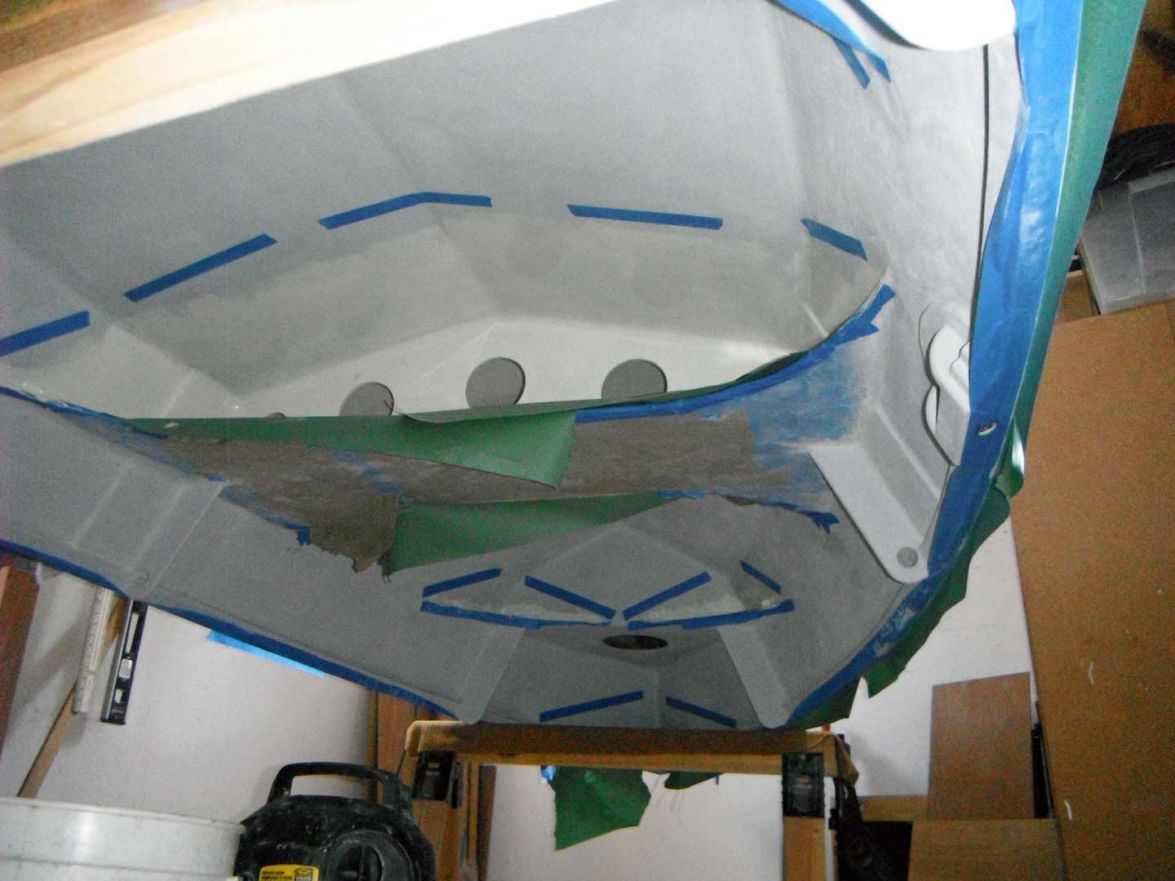
Re: TJ's V10
Posted: Mon Jun 29, 2015 10:40 am
by ks8
Real sense flipping the hull to work in there -certainly when it is easy to do.
Once the shaping structure of a smaller boat is complete and cured, work in some areas of them is much easier if there is some method of easily changing the orientation of the hull while working on it. My heavish CV16 needed the *roll molds* and they were worth every penny of cost and every minute of designing and fitting them. Took two people about 30 seconds to flip or roll the hull, safer with three, but doable with two. Maybe two minutes at the most if the jig had to be repositioned in the garage to have room for a full 180 degree roll.
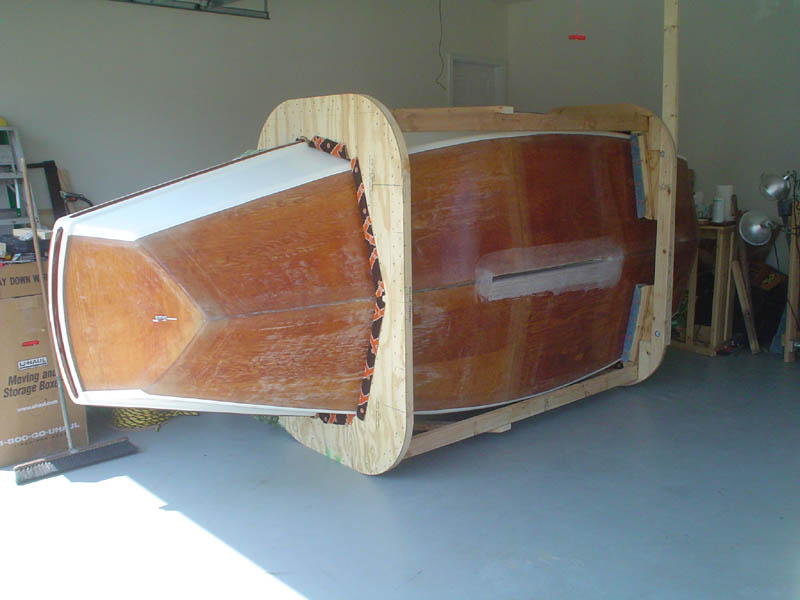
6127
Looking forward to more of your pictures as you finish up.
Finally ordering your book today.
I need some sense of humor next week (and now, but not paying for overnight as that would make the need even greater). No spoilers please!
Re: TJ's V10
Posted: Mon Jun 29, 2015 11:12 am
by Cracker Larry
Life would be tough to deal with, without a good sense of humor, and I really enjoy yours
Re: TJ's V10
Posted: Tue Jun 30, 2015 12:48 pm
by terrulian
No spoilers please!
Well, the big spoiler is, we survived, which was never a certainty. I don't think I mentioned this in the book, but during our season in the south pacific alone, six cruisers died from sailing-related, not land-based, incidents. It's not always like the brochures from the chartering companies, with girls in bikinis and 10 knots and sunny skies. I have no doubt that some of the entertainment value of my missives as they were first sent during our voyage to an email list, was that the readers thought "Hey, this is cool! These guys might die!!" So you won't enjoy the same sense of drama. I think there is sufficient, though, and many thanks for ordering the book.
I also have a system to invert the boat, a little less ornate than yours, as you see here:
This makes it fairly easy to flip, even by myself. However, I wouldn't want to do it in the middle of painting, for example when you want to change sides, because of the danger of knocking some dust or other debris into the boat.
Re: TJ's V10
Posted: Tue Jun 30, 2015 1:06 pm
by Cracker Larry
I need some sense of humor next week (and now, but not paying for overnight as that would make the need even greater).
Jeez KS, don't you work with technology? Kindle?Amazon will have it to you in seconds
Then you can read it on the kindle reader, or tablet, or smartphone. We haven't bought a paper book since Doc Dyer gave Mrs. Cracker a Kindle for Christmas, 3 years ago I think.
Re: TJ's V10
Posted: Tue Jun 30, 2015 3:03 pm
by Walkers Run
My son just gave me a paper book for Father's Day . It seamed strange to me. First you need something called a book mark to mark your page, weird.
And get this you need an exterior light source.
Call me old school but I like the Kindle reader on my iPad
Re: TJ's V10
Posted: Wed Jul 01, 2015 2:23 am
by gonandkarl
Hi Tony,
I worked since 1968 on computers and now I only own a noteook and a plain mobile to communicate and order things online. I wont ever get a Kindle or I-phone because my eyes dont like the glare of screens anymore. Therefore I ordered your book as paperback and even that I had to wait 3 weeks for delivery to Austria it was well worth waiting for. This book is something that one does not only read thru in one go but I take it in a break of boatbuilding to the garden, sit under my mirabelle plum tree, drink some red wine and dream a bit while I read your chapter of the mediterranian sea. (Obvious because it is the closest sea to Austria.) I could not do that with a Kindle, I am sorry.
Bytheway I like KS8 s roll over mold. I will make a combination of your method, straps attached to both walls next to the boat and then an adaptation to my buidling frame with rounded side supports like KS8. Wish you all the best for the endspurt now that your beauty is flipped.
Greetings from Karl ( Austria )
Re: TJ's V10
Posted: Wed Jul 01, 2015 9:58 am
by terrulian
Karl,
I have nothing at all against modern technology, as evidenced by my gratitude for taking part in this enlightening and entertaining forum, which would not have been possible for the majority of my life. But I don't have a Kindle either, or even a smart phone, and I read paper books. The Kindle version does have a few more pictures and they are in color, though.
I am very nervous about the day ahead of me. Last night I did a final sanding of the hull with 320, ran a tack cloth over it twice, cleaned it with lacquer thinner twice, taped the boat, and cleaned the shop again. This morning I'm going to put on the first coat of topsides paint. Several things will become apparent soon, and these are what concern me:
1) The paint will reveal the degree to which I've been indulging in wishful thinking about my fairing job.
2) Like several others on this list, I've little confidence in my ability to apply paint.
3) I'll get to see whether I made a mistake in choice of colors.
The second two can arguably be resolved by sanding and re-painting but at this point I do not think I have it in me to revisit any of the fairing, and I'll have to live with what I've got. It's all very dramatic to me after what is now over a year on this little boat.
Re: TJ's V10
Posted: Wed Jul 01, 2015 2:53 pm
by ks8
I like some books as audiobooks. Listened to about a dozen while working on the interior of the boat, when power tools were not involved. But its got to be done by a good professional reader/voice-actor. I tried a few audiobooks by readers who were .... not quite up to the spirit of the book. Almost ruined the story, or at least, in a way, made it a *different* experience. I'm not anti-Kindle. But if my bookshelves are nearby, I like paper. Right now I'm using a small mixing stick with dried S3 Orcas White as a bookmark for *Moby Dick*. What one uses as a bookmark is just as personalized as one's choice in books.
I'm thinking your V10 is already getting ready to carry you out to the big boat. Coming along nice.
Re: TJ's V10
Posted: Wed Jul 01, 2015 3:58 pm
by Cracker Larry
Mrs. Cracker and I both read a lot. We've got large built in bookcases with probably 400 books on it, and we've given away that many more. It's out of space and the walls are full and the closets are full.
In the old days, 4 years ago
when we got the newest paperback, we would argue about who would get to read it first, and be hurried up to finish it and pass it on. With an ebook we can share it between the Kindle, Android tablet and both phones, so both of us can be reading the same book at the same time, in different places, bookmark our spots when finished then later pick up any other device and resume where you fell asleep last
And I can carry a library of hundreds of books in my pocket. Much smaller package than 4 walls of bookcases, and it doesn't collect dust and dog hair like books do either.
How did that painting go? It's one of my lesser skills.
Re: TJ's V10
Posted: Wed Jul 01, 2015 4:59 pm
by gonandkarl
Hi Tony,
I can understand your apprehension about painting. I am also not very talented to paint. I painted the doors in our house with medium success. That was the first test for painting the boat.
The black glasstop of our garden table exploded into 1000 pieces 2 days ago for no reason( half shade half sun I dont know ).
I will replace it with a birch plywood sheet on which I can practise painting. I put a first coat of epoxy with a foam roller on and it was not spread all that well. After 24 hours I sanded with 180 sandpaper and put a second coat of epoxy with a 5 cm wide brush on.
This looks much better because the epoxy seems to flow to a glasslike finish like paint does.
For boat painting practise I will put 2 coats of marine primer and 2 or 3 coats of top paint on this sheet. Should do for a garden table which is outside most of the year. ( Found in the local hardware store marine paint produced here in Wels by a firm called Tiger Coatings
www.tiger.at )
I wish you good luck with your painting job and maybe test on a piece of plywood which has fairing on ( epoxy + microballoons )
and it will show you the exact colour you can expect on the boat.
Greetings from Karl ( Austria )
Re: TJ's V10
Posted: Wed Jul 01, 2015 5:22 pm
by terrulian
This looks much better because the epoxy seems to flow to a glasslike finish like paint does.
Yes, now if I could get the boat to lie flat before I paint it.
I've done the testing but still, it's hard for me to envision a whole boat from a small sample. I know some folks can do this.
The painting seems to have gone fairly well. I gave up on tipping, though. It seemed to me that just rolling it out and then re-rolling it when the roller ran dry worked OK and tipping just made it worse. There's a guy online using exactly the same paint and same color who gets results that must be computer generated. Not only does the paint not cover anywhere near that well, but tipping it doesn't result in a glass-like finish. I've done everything he says to do but there you go.
Maybe I'll try a little more thinner.
https://www.youtube.com/watch?v=k-SGcSl ... r_embedded
I'll get some pictures uploaded but right now I want to let the paint dry before I go to the shop and knock something into it.
Re: TJ's V10
Posted: Wed Jul 01, 2015 9:39 pm
by ks8
When I did the final epoxy seal on the bottom, before primer, I did one half the bottom at a time and did my best to achieve an *average* level for most of the V. It was worth it. Slowed down the final seal, sort of, because I faired and sealed each side separately, but if I had to I just might do it that way again.

6335
I'm thinking I'll do some sort of happy dance if I can ever have a roll and tip come out like in that video. I can tip epoxy well, but not paint, at least not yet.
Re: TJ's V10
Posted: Thu Jul 02, 2015 8:51 am
by terrulian
I admire the ornate sturdiness of those braces. I built my boat on a couple of wobbly saw horses.
Re: TJ's V10
Posted: Fri Jul 03, 2015 10:24 am
by terrulian
OK, here's an update on the painting so far.
This is two coats of Interlux Brightside Flag Blue. It is thinned about 10% and just rolled on with a foam roller. Tipping left brush marks. It looks OK but I'm not sure about the stippling or orange peel. I'm going to try another brush today to see if I can improve the tipping results, and also try not thinning it. If this is the best I can do without spraying and without going to a two-part paint, so be it. I think I can live with it.
The good news is that I think the color's OK and that painting hasn't revealed any terrible fairing errors, although this awaits further assessment once it's in full sunlight. There are small imperfections that can be seen, of course, upon a very close examination, which, hopefully, no one will be interested enough to observe. The first shot looks OK.
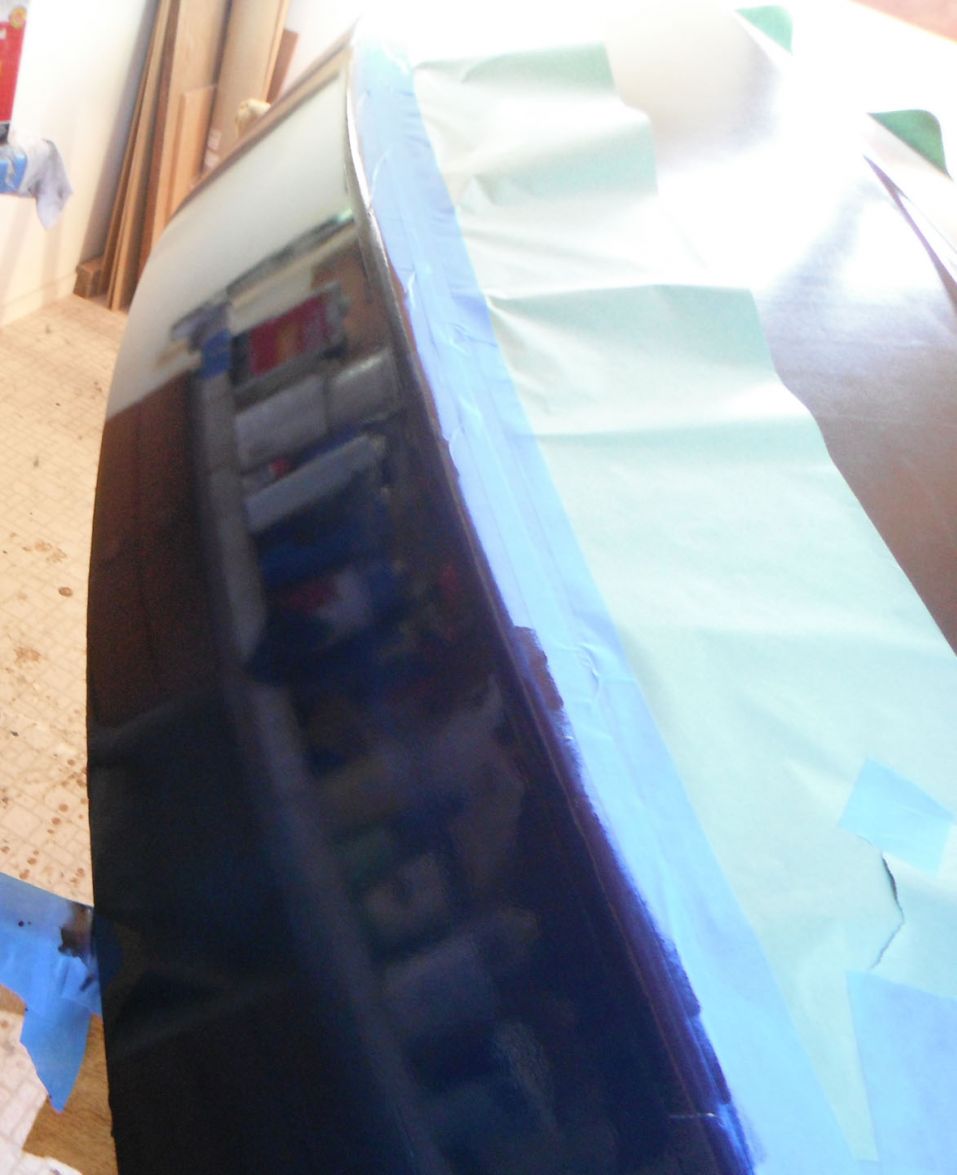
But this one shows the orange peel:
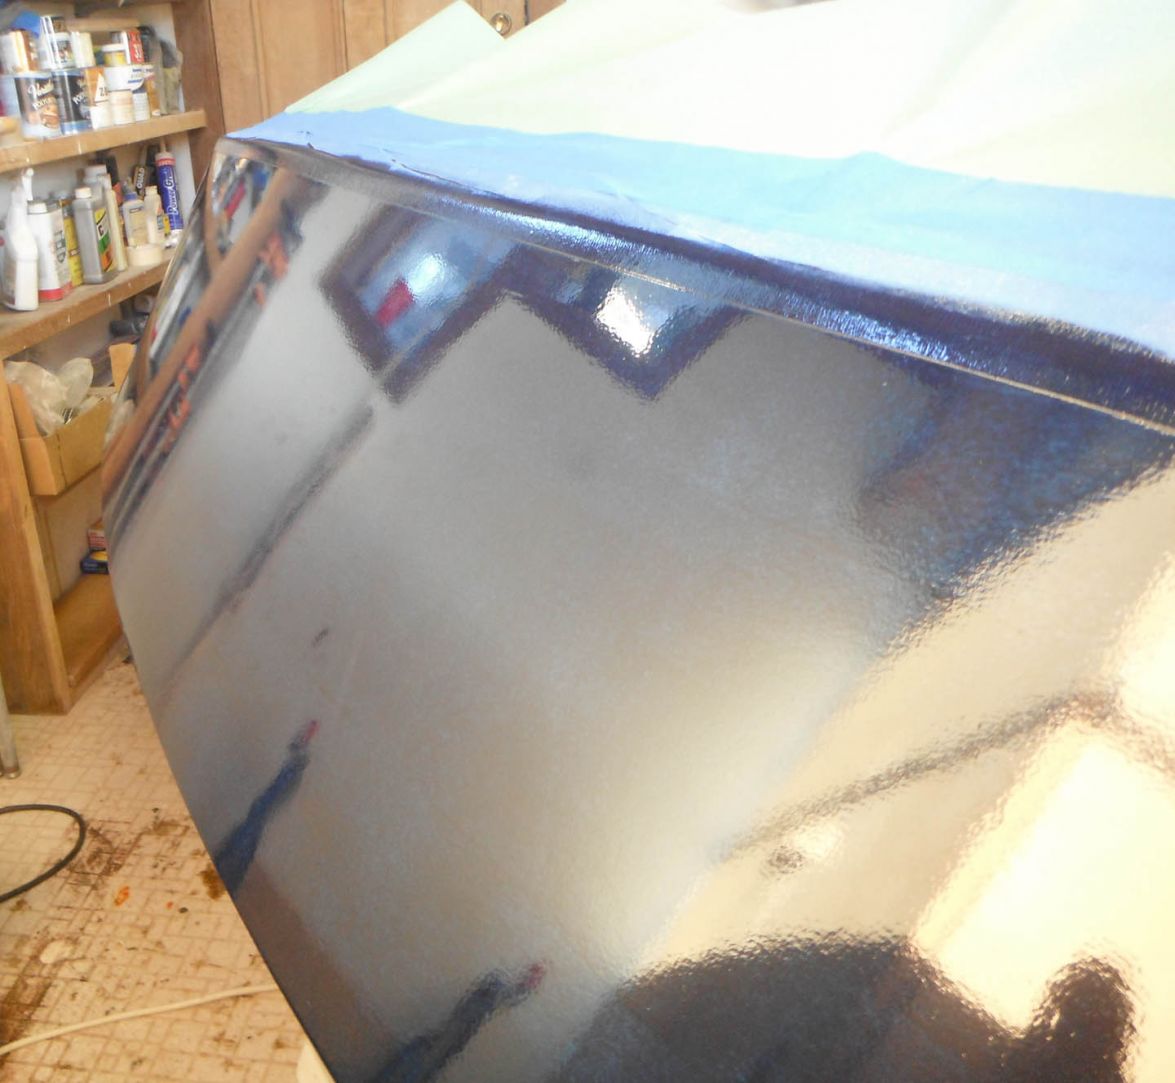
It needs another coat or two anyway so there is still time for experimentation. I'll be sanding it a little more aggressively than I did the first coat. Interlux recommends 320 between coats and that's what I did between one and two but now I think I'll try once with 220 and then again with 320. I hope that doesn't remove too much paint.
Re: TJ's V10
Posted: Fri Jul 03, 2015 10:40 am
by Cracker Larry
Try tipping with a foam brush, not a bristle type. Work in small areas, roll out about 3 square feet, roll in both directions. Tip in one direction only. I tip vertical from the top down. Keep your tipping brush clean, dip in the thinner and shake it off regular. Keep working the wet edge and don't go back.
I've found that orange peel in those paints is often caused by not using enough thinner. With the EMC, I found that the max recommended thinner worked best in our temperatures. 25% with that paint. 2 parts base, one part activator, one part thinner.
Re: TJ's V10
Posted: Fri Jul 03, 2015 11:08 am
by terrulian
Thanks, Larry.
I'm going to try some different things today. A different roller, for one, and I don't think I'll do what I said, which was to use no thinner. I might try more, in fact. I also bought an expensive brush but I'll also try a foam one. Another issue is that it has been real hot here so that may have meant that the paint dried before it could level itself.
First, I've got to sand it down and try to flatten out the stippling.
Re: TJ's V10
Posted: Fri Jul 03, 2015 11:30 am
by kcinnick
terrulian wrote:This looks much better because the epoxy seems to flow to a glasslike finish like paint does.
Yes, now if I could get the boat to lie flat before I paint it.
I've done the testing but still, it's hard for me to envision a whole boat from a small sample. I know some folks can do this.
The painting seems to have gone fairly well. I gave up on tipping, though. It seemed to me that just rolling it out and then re-rolling it when the roller ran dry worked OK and tipping just made it worse. There's a guy online using exactly the same paint and same color who gets results that must be computer generated. Not only does the paint not cover anywhere near that well, but tipping it doesn't result in a glass-like finish. I've done everything he says to do but there you go.
Maybe I'll try a little more thinner.
https://www.youtube.com/watch?v=k-SGcSl ... r_embedded
I'll get some pictures uploaded but right now I want to let the paint dry before I go to the shop and knock something into it.
Was Harry Potter in the background making that paint lay flat? Never seen a video of someone laying it down that smooth so quickly, I was planing on spraying the hull. I know how to work a spray gun, but these epoxy paints are nasty, way more nasty than the heat cure stuff I am familiar with.
Re: TJ's V10
Posted: Fri Jul 03, 2015 12:45 pm
by terrulian
Was Harry Potter in the background making that paint lay flat?
I know. Just to confirm: using the same paint with his proportions, it didn't cover nearly as well as he shows. It needs three coats to become completely opaque the way I'm going. Plus, tipping just left brush marks. I'm off to try again with a little more thinner, a different roller and brush, and slightly lower temperatures. There are so many variables there that I'm not sure I'll be able to sort out which does which.
Re: TJ's V10
Posted: Fri Jul 03, 2015 1:02 pm
by terrulian
After sanding quite a bit but still maybe not enough, I put a little more thinner in this time. Manufacturer recommends not going over 10% but I'm above that now. Tried the expensive brush, tried the foam brush...still, nothing was better than just going over it again with the roller, and for the most part the application was no different from the first two times. I'm a little nervous about going all the way to 25% as Larry mentioned but at this point I'm not sure what I have to lose. Maybe try that tomorrow. I'm going to call the paint rep today although he may not be working.
Re: TJ's V10
Posted: Fri Jul 03, 2015 2:39 pm
by ks8
Interlux has a choice of several thinners, each with different evaporation rates. Maybe call 'em and explain your environmentals. They may suggest a different thinner more appropriate to your temp and humidity.
Re: TJ's V10
Posted: Fri Jul 03, 2015 4:30 pm
by terrulian
ks: I just did that and they are of course closed today. But I am not going to wait around until Monday. I have their recommended thinner for this exact formula so I just think it's a matter of playing with proportions.
I put on coat three and one difference among others was that I wet sanded between one and two and dry sanded this time, more aggressively. I didn't wait more than about 1/2 hour between sanding, cleaning, and painting, but there sure seemed to be a lot more crud in the air that settled on the paint. I think next time I'll wet sand again and then maybe wait for a few hours to get as much dust out of the air as possible. Larry painted outside, but as we know, he's like, a master, and I think that the two-part paint probably kicks a lot faster.
Re: TJ's V10
Posted: Fri Jul 03, 2015 7:09 pm
by Cracker Larry
Mine has many imperfections too. Working outside in varying weather conditions, bugs, dust, dog hair, all make it almost impossible to get a perfect paint job. You can get it pretty good, but I've never got close to perfect. That's why professional painters use sealed paint booths with a controlled environment.
Re: TJ's V10
Posted: Fri Jul 17, 2015 1:38 pm
by terrulian
It's been awhile since I've posted. All this time I have been struggling to achieve an acceptable paint job. It has not gone smoothly. But while I'm trying to nail jelly to a tree, I have a question for you gentlemen: The boat is inverted so I have also been getting to a few areas that will be harder to paint with the boat upright like under the seat. The underside of the seat is coated with epoxy and will never see direct sunlight. Does it need varnish or paint for UV protection, or will that not be an issue for someone whose life expectancy is less than 100 more years?
Re: TJ's V10
Posted: Fri Jul 17, 2015 1:48 pm
by ks8
I would put some sort of UV paint on it, even if a sloppy brush job that no one will ever see. The sun (UV) will reflect off the floor and get up under there. A sloppy brush job is a minimal effort for peace of mind. imho.
In a locker that rarely sees daylight, I think many builders coat with tinted epoxy and do not bother with any UV product over that. But under a seat that is definitely exposed to reflected sunlight, often, I'd protect it with something.
Re: TJ's V10
Posted: Fri Jul 17, 2015 1:53 pm
by terrulian
OK, I may as well, I guess. Thanks, ks.
Re: TJ's V10
Posted: Fri Jul 17, 2015 1:54 pm
by ks8
see my edit to previous post.
Re: TJ's V10
Posted: Fri Jul 17, 2015 2:18 pm
by terrulian
I've got some spar varnish I'm not going to use so I'll lay a couple of coats of that on it.
Re: TJ's V10
Posted: Fri Jul 17, 2015 6:41 pm
by ks8
And no need to lay the specific spare spar varnish on sparingly in that space or spot .... did I just type that?
Re: TJ's V10
Posted: Wed Jul 22, 2015 9:24 pm
by terrulian
Finally, a transition.
I've had a very hard time with the paint, Interlux Brightside. I have about 9 coats on the boat, maybe ten, although much of this is now dust, as I sanded off a lot of it. Perhaps I have about 4-5 coats thickness on the boat. A video I posted earlier gave me a view of the job that my experience proved completely unrealistic. The video gave the impression that one coat was enough to completely cover the primer, but here's what I got after one coat:
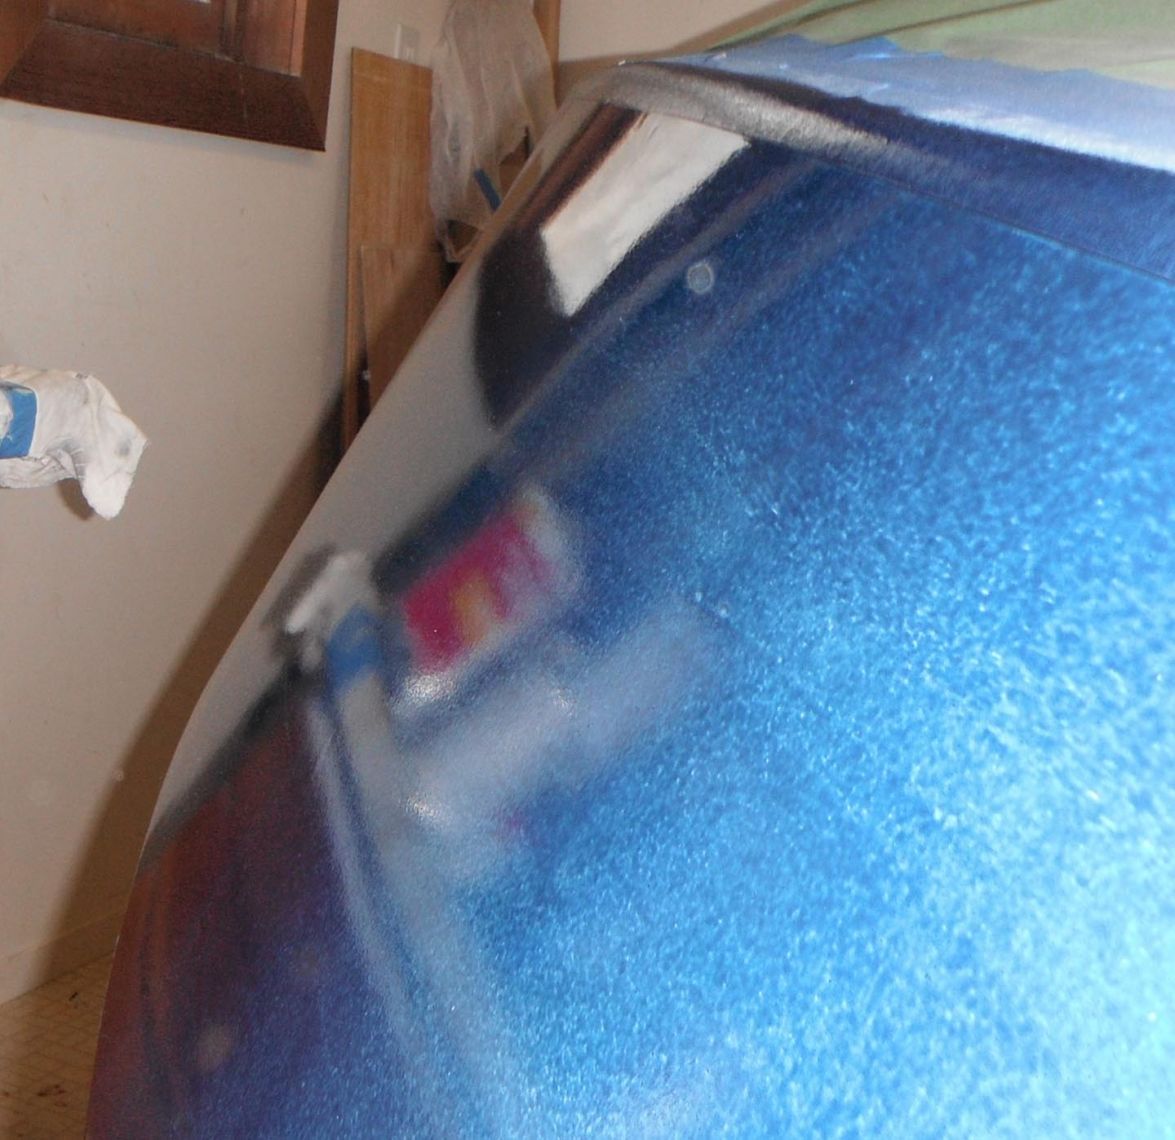
In all those attempts, sanding with 320 per the manufacturer's instructions, removing the dust with a damp cloth and a tack cloth, and then re-coating, I tried everything I could think of: I put it on without thinning, thinning 5%, 10%, and finally worked up to 20%, double what the manufacturer recommends. None of this made much difference, believe it or not, nor did the temperatures. I painted during temperatures ranging from 65 to 80 degrees, without any variation in the outcome. I tried tipping with this result:
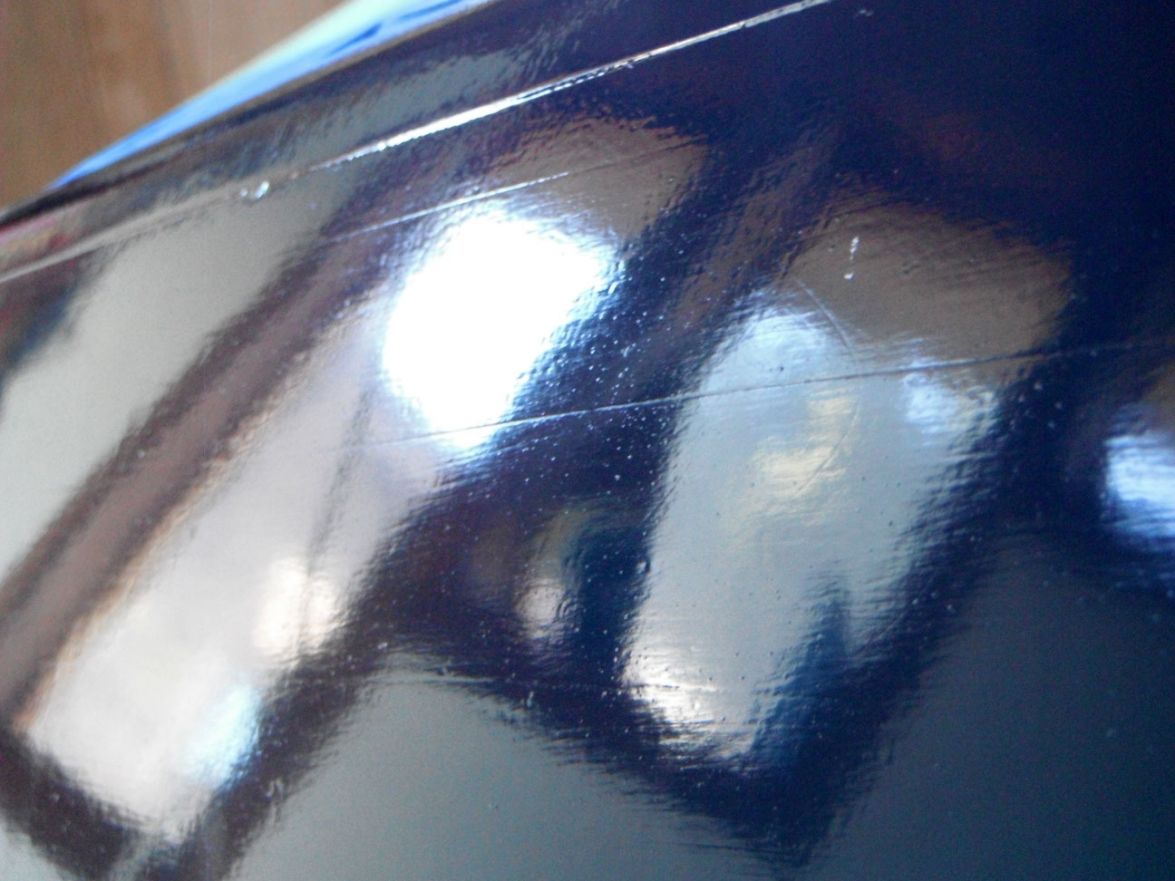
This is using a badger brush. I tried wetting the brush with thinner, and also wetting it with paint. But the brush strokes did not flow out whatever I tried. Admittedly, this is an extreme close-up. I called the Interlux rep and he said you just roll the paint on, tip it, and then walk away. Don't try to go back and fix things. "It's like a miracle."
But in fact, both tipping and rolling left marks that did not level out as the paint dried. My impression was that the little molecules of paint were supposed to seek each other out like a teenager going after Kate Upton. But I found them to be quite a bit less social, sitting high on their little hills gazing upon the plebians below. Here's a photo of the streak left by the edge of a roller:
I found that the paint will not do your work for you. I gave up completely on tipping with a brush. The best approach I found was to roll the paint on rather liberally, then with lighter and lighter strokes, even out the marks left by previous strokes, until you are barely touching the paint. Despite what the rep said, you really have 3-4 minutes to get it right before the paint starts to set up. No matter what I did, I could not get rid of the stippling or orange peel that I was hoping to avoid. I have three theories: 1) The paint was bad. I find this extremely unlikely, especially because I used two different cans. 2) My technique is really off of the scale of normal human behavior. This has to be allowed as possible, but as I said, I tried everything that this painter could think of and used as much care as I believe to be reasonable for any amateur. 3) The descriptions oversell the product. 4) I'm one of those terrible customers that every business loathes, that just can't be satisfied no matter what you do for him. OK, that's four. In fact, the rep finally said to me he was out of suggestions.
All that said, I'm not going to be driven into a terrible, black, life-stifling depression with the final result, which you will see below. My goal was to achieve a level of coating that would enable even the most casual observer to readily find the miscues and reckless abandon in my fairing, and I think that has been accomplished. Most importantly, I'm done with this and cannot bear another attack at the problem so, as the saying goes, it is what it is. On with the dance.
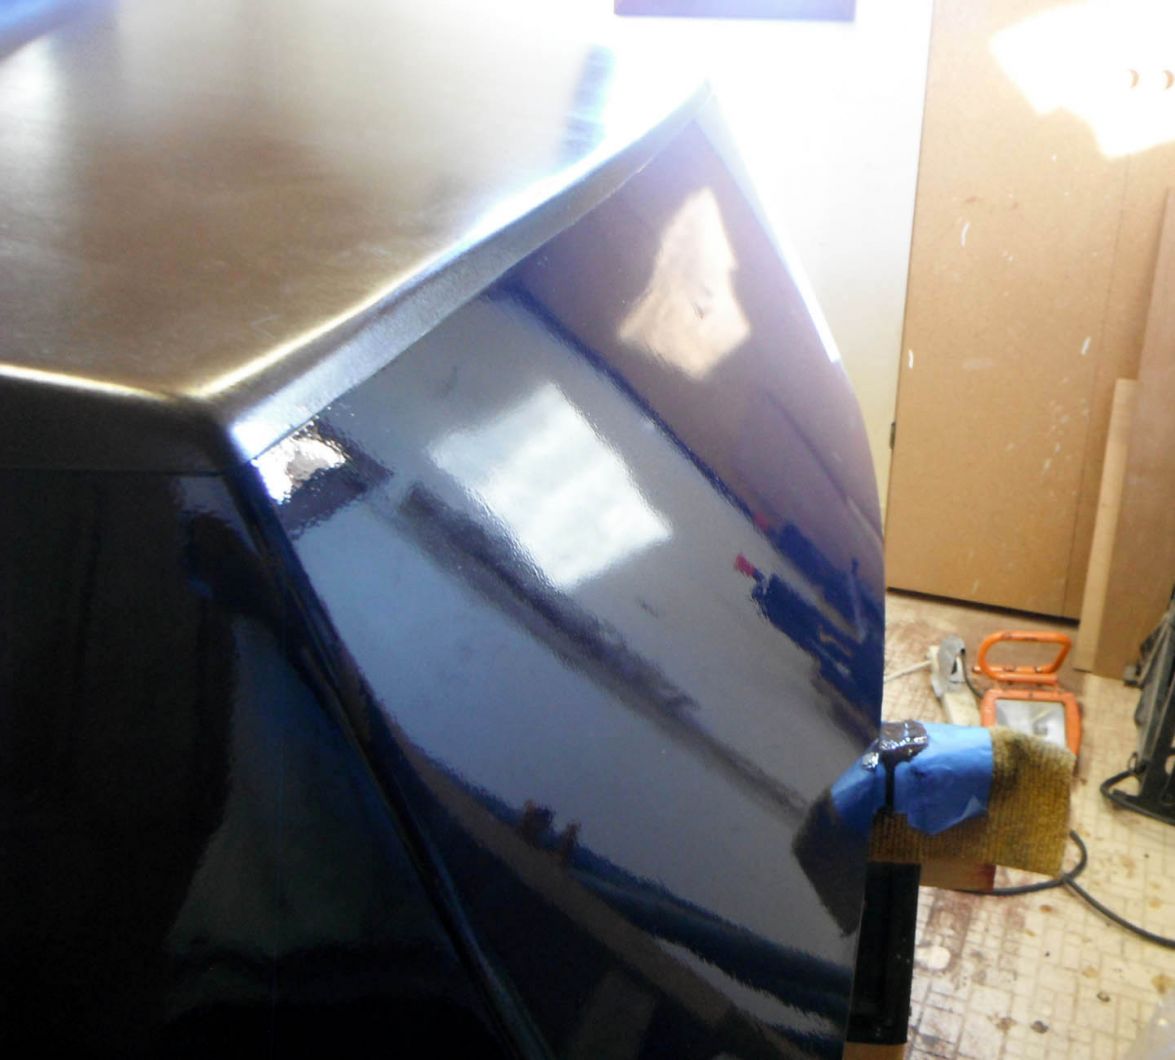
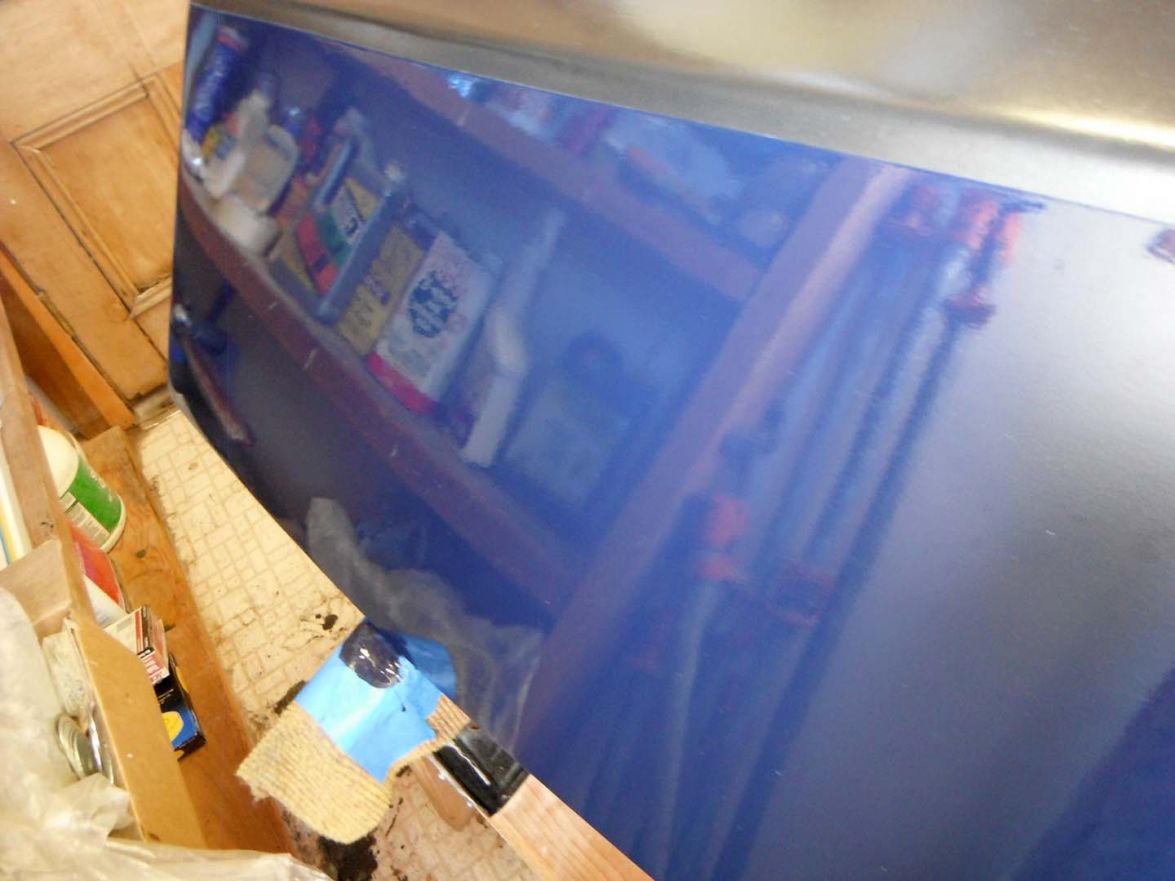
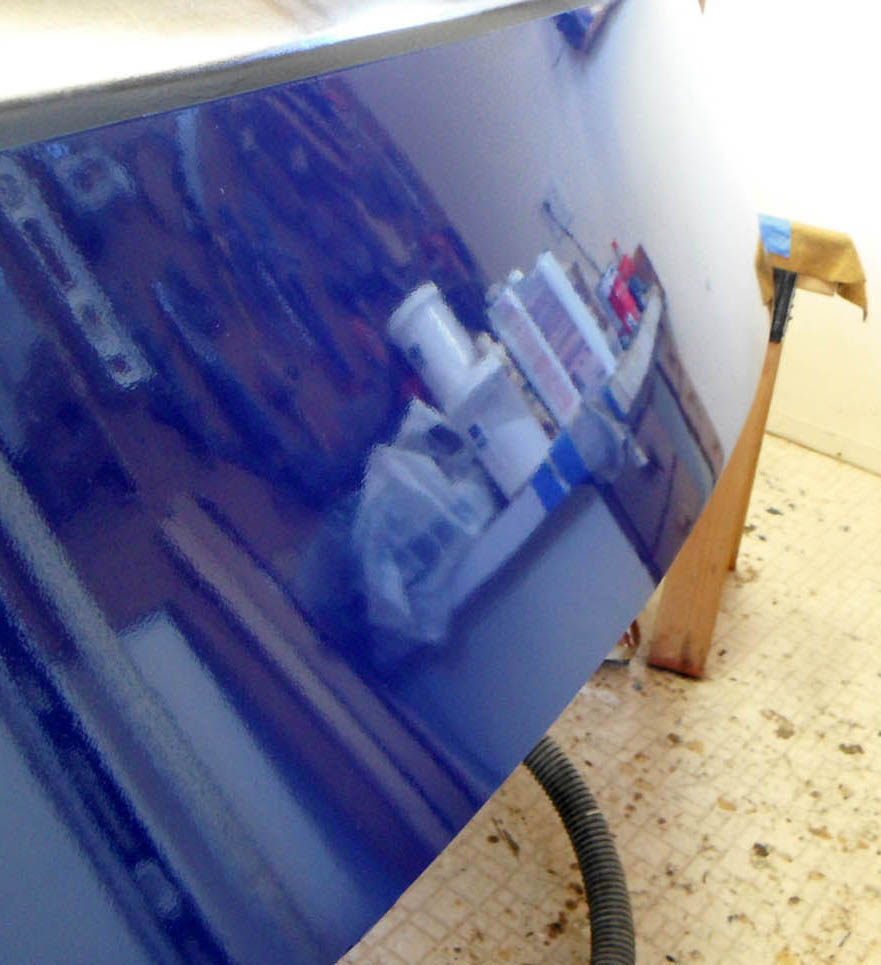
Re: TJ's V10
Posted: Wed Jul 22, 2015 9:35 pm
by Noles309
It looks pretty good from where I sit. Dark colors magnify every little thing as well.
Re: TJ's V10
Posted: Thu Jul 23, 2015 7:58 am
by Walkers Run
That looks great Tony. There are several custom hi end boat/yacht builders here in Stuart. I have never seen a perfect paint job.
As for bad paint, I did experience this. I had a gallon of paint that would not lay down right spraying or rolling. The next batch was compleatly different paint. Since the bad batch was my first attempt at this kind of paint it drove me crazy until Joel figured out it was the paint.
Your boat looks great, now get it wet!
Re: TJ's V10
Posted: Thu Jul 23, 2015 9:12 am
by topwater
I also think it looks good. I used emc paint and also had a hard time trying tofigure it out. I did every thing the instructions
Said and could not get it to cover evenly. last coat i used half of amount of reducer to get it to cover but also got
Orange peel. I said good enough and walked away
Re: TJ's V10
Posted: Thu Jul 23, 2015 9:37 am
by terrulian
Thanks, guys. It really is remarkable how supportive the folks on this forum are, and I know all of us appreciate that.
But of course I wasn't looking for a balm for my misery. I'm OK with it.
As far as the paint itself is concerned, I have used it before and always was satisfied, but on the other hand, in those cases I just slapped it on and wasn't trying to achieve perfection. Who was it on the forum who said that perfection or its pursuit angers the gods? But in this case I thought I'd just try to take it as far as I can.
My main reason for posting was just to document my progress, and also because I know one or two others may be planning to use this paint and perhaps this will be of some value.
I'll let it cure for a day or two and then flip the boat. I've got a bit of varnishing and then I'll be painting the interior with the same stuff, but a light color which won't show nearly as many faults. Then it's on to Kiwi Grip and installing just a little hardware and the hatches. Finally, the rub rail, which may be a bit of a challenge, and putting leathers on the oars. All of that sounds like fun actually, compared to endless fussing over sanding stuff.
At that point I'll have to go rowing. I don't know if that's light at the end of the tunnel, or just the end of the tunnel.
Re: TJ's V10
Posted: Thu Jul 23, 2015 1:33 pm
by ks8
It looks.... Fantastic! There might have been some drama to get there, but you're there in plenty, as far as I can see from here.
Re: TJ's V10
Posted: Thu Jul 23, 2015 2:13 pm
by terrulian
So I flipped it.
When I remember what this once looked like, with a bunch of gnarly biax tape and fairing compound, it doesn't look so bad at all...especially since it's a dark color that always shows your bad body work.
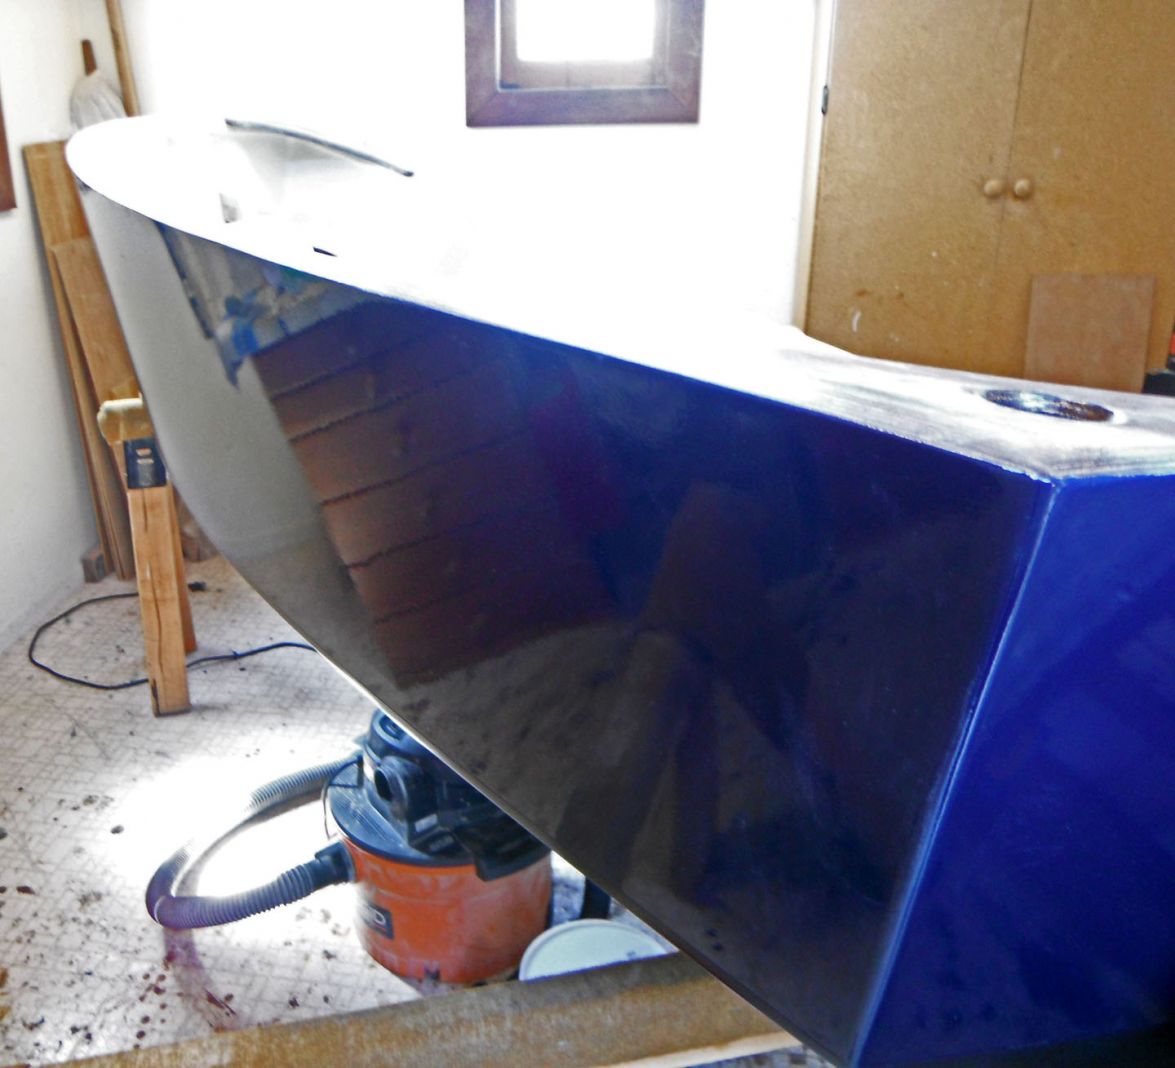
Re: TJ's V10
Posted: Thu Jul 23, 2015 3:56 pm
by gonandkarl
Hi Tony,
Your paint job is really nice. I can see only a beautiful finished hull and no fault in your painting whatsoever. As I am colour blind and because of my age the eyes are deteriorating a bit I nevertheless have learned a lot in your past painting discussion. I practised boat painting on a plywood sheet for my gardentable with your method and even that I used cheap local boat paint ( 18 Euros for 750 ml ) I got a good result and I could get a nice flow with the brush in just one direction with the added benefit of the board being completely flat and not round like a boat. I was happy with the outcome until my son came home for a weekend visit and used the new table to put his racing bycicle upside down onto it doing some maintenance. I have 2 longish scratches on the table and I know what will happen to the painted boat once I have been up and down a narrow slip .
At least there will be a certain time of satisfaction with ones finished paint job.
And I learned not to use dark paint on my boat to hide my faults. ( I know now already I will use white )
I wish you all the best with these little odd jobs you still have to do on your boat and happy rowing afterwards.
Greetings from Karl ( Austria )
Re: TJ's V10
Posted: Fri Jul 24, 2015 3:06 pm
by terrulian
Thanks very much, Karl, for the encouragement.
OK, I have a question for you wise ones on the installation of the rub rail.
Here's how I could do it: Get it a little warm in some water, put some 4200 where it's going to go, and screw it in. Downside is water getting in the screw holes and migrating into the plywood gunnels.
Another possibility is the same, but stretch it before screwing it in.
Third is to stretch it, screw it in, then remove it, drill out the holes where the screws were, fill with epoxy, then when that kicks re-install in the epoxy holes and seal with 4200. The downside here is that when I re-stretch the rubber, it will be difficult to get the screws in the same place, since I won't be able to see the holes. I could put masking tape on the rubber and correspondingly on the gunnel, and this might work but I'm not sure, and these markers may come loose when I put it in hot water.
FYI this is what I'm using:
http://store.hamiltonmarine.com/browse. ... 25602.html
It's got a rope insert that I'm hoping will look salty but may look stupid.
Any preferences?
Re: TJ's V10
Posted: Fri Jul 24, 2015 3:39 pm
by Dougster
I can't help much. I did it the second way with Tesslemarine (sp?), which is easier to install and needs no stretching. You screw in a nylon rail first, which is rigid but easily bendable and simple to remove to over drill and fill holes with thickened epoxy. I share your concern over the difficulty of stretching yours to line back up with the prepared holes. Somebody else will chime in.
Still foolin' with the PY12 Dougster
Re: TJ's V10
Posted: Sat Jul 25, 2015 12:28 am
by abahambi
Looks like this may be similar to your application.

Can't see the sense of making epoxy prep'd holes for something that you will be mounting with SS self tapping screws.
Not sure how much of an inwhale you have to screw into, but I've only ever gone to the trouble of an epoxy prepared re-drill for through fittings. The self tapping screws will hold better in wood / ply and the sealant you're planning to lay underneath will seal the screw stems well enough. One thought... Does 4200 show any shrinkage over time?
Re: TJ's V10
Posted: Sat Jul 25, 2015 9:31 am
by terrulian
Thanks for the reply, and yes, this is the exact rub rail I'm using. Sure would make the job quicker without having to re-drill and fill.
4200 remains flexible, and comes in black. I don't think I know of a shrinking issue. Do you have another suggestion?
Re: TJ's V10
Posted: Sat Jul 25, 2015 10:46 am
by abahambi
I'm assuming you've used marine ply for the hull construction, but if you were really still worried about it (like it will be stored upside down without any cover), you could try dabbing a little extra 4200 onto each screw stem once it breaks through the rubber. Getting epoxy involved at this point will create a mess. I can see how this approach would be pretty damn awkward because it would be one screw at a time as you fasten down and you'll have to get in between the strip and the hull skin. Unless that turns out to be a pretty simple exercise without much extra mess, I'd just plow on with the standard approach. You'd only know if you actually try.
There should be some additional weigh-in over the next few days... and you can select from the ideas.
Re: TJ's V10
Posted: Sat Jul 25, 2015 11:14 am
by Cracker Larry
I would use 5200 instead of 4200. My OD18 has a very heavy rubber rail and getting it on was like wrestling an anaconda. Mrs. Cracker and I put it on in the winter, not the best time but that's how my timing always works. We boiled it in a big crab pot to soften it up and make it behave, it took the 2 of us and a come-along to a fence post, to stretch it into position that could never be duplicated again. No drill and fill on this one, smear it with 5200 and shoot in the screws. She's pushing 8 years, no troubles yet.
Re: TJ's V10
Posted: Sat Jul 25, 2015 11:20 am
by terrulian
Thanks, guys.
Dang. I bought a whole tube of 4200 black and have no other use for it.
I'm still trying to work out some kind of rig to stretch it. I can't use your method, CL, because the boat only weighs something over 100 pounds so all I'll do is drag it along. I've got an idea, and anyway I'll post whatever I come up with. A few weeks left of other stuff before that step, which will be the very last thing.
Re: TJ's V10
Posted: Sat Jul 25, 2015 11:27 am
by terrulian
you were really still worried about it (like it will be stored upside down without any cover),
Yes. I think I'll run a serious bead on the underside of the rub rail but I'll have the boat taped off so it doesn't get on the topsides. Hopefully this will seal it right up for a few days.
But speaking of which, does anyone have a suggestion of where to look for custom boat covers? I don't have a machine strong enough to sew Sunbrella and I'm thinking of getting a cover made. The online places seem to just make covers for production boats. I can get a local canvas shop to do it but in any case it's probably going to cost as much as the boat...unless you count my very valuable labor.
Re: TJ's V10
Posted: Sat Jul 25, 2015 11:31 am
by Cracker Larry
This is rub rail stew
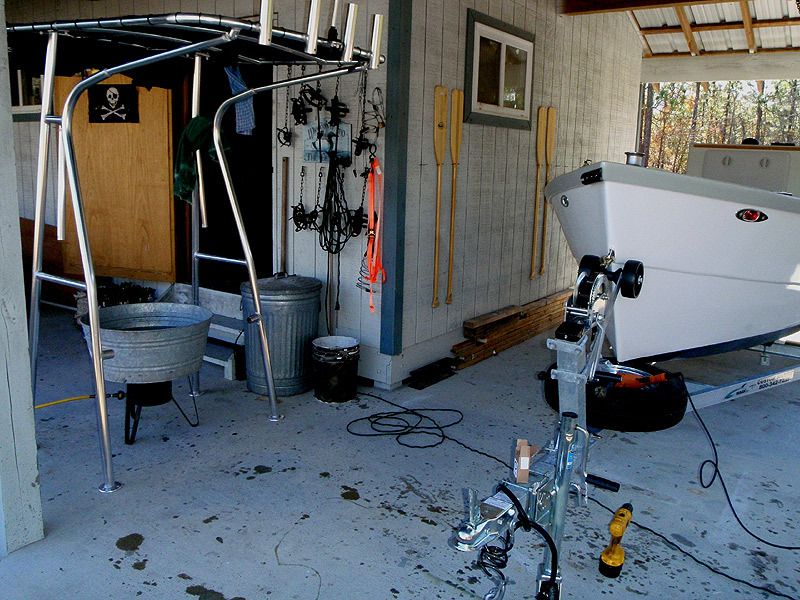
I used white 5200. Mineral spirits will wipe off the excess.
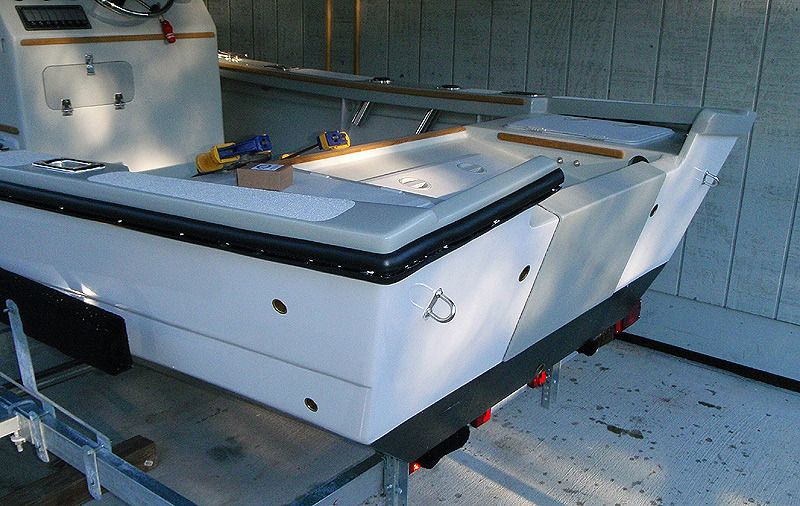
The insert was almost as hard to put on, we boiled it too, stretched it and used a heat gun and a mallet to beat it to submission.
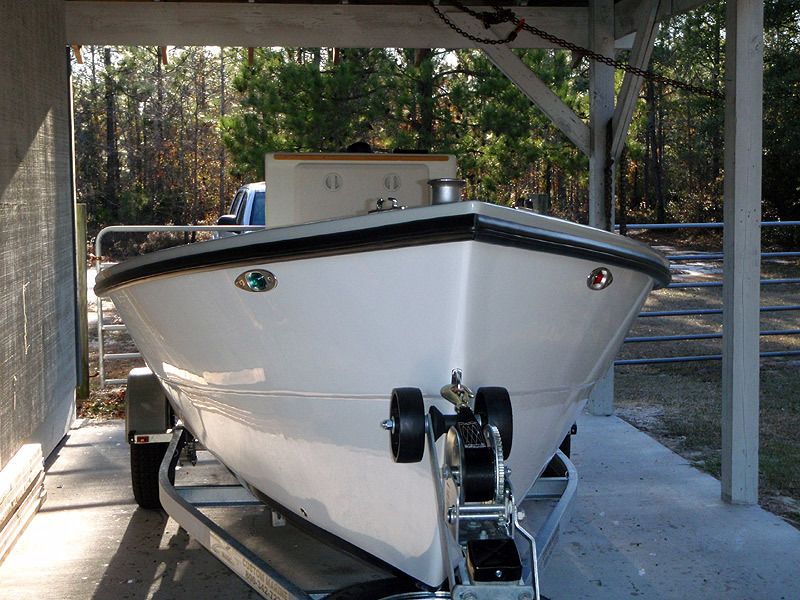
I can't use your method, CL, because the boat only weighs something over 100 pounds so all I'll do is drag it along.
Chock it and block it. We did it with the boat on wheels.
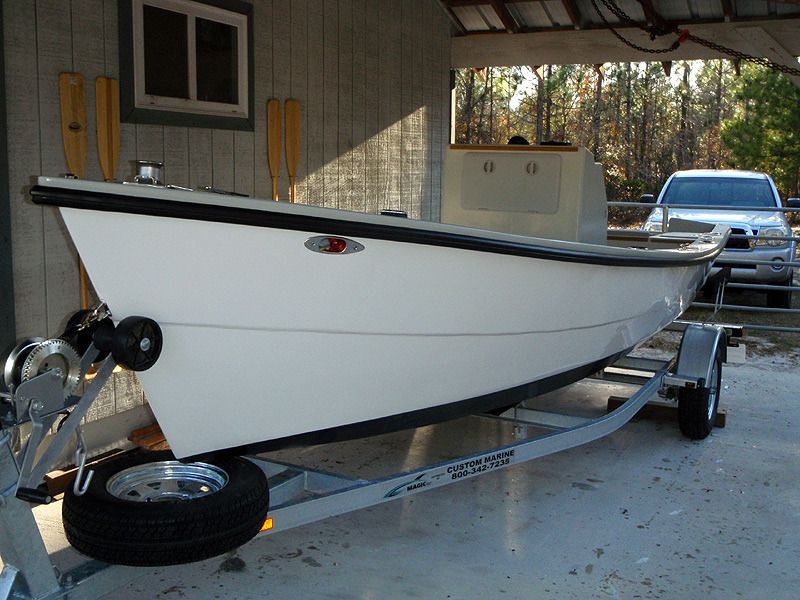
Re: TJ's V10
Posted: Sat Jul 25, 2015 11:46 am
by terrulian
Larry, I know I speak for all of us when I say I really appreciate all the pictures. I know it takes extra time to clean the muck off your hands and grab the camera, get the right shot, then upload it to the computer, photoshop it to crop it and take out the odd zombie, and upload it to the site. But it really pays off for us, so thanks.
Still, however, I think setting up a brace to hold the boat against the pull of the come-along would be more work than figuring out a brace I can clamp to the boat itself.
Re: TJ's V10
Posted: Sat Jul 25, 2015 1:47 pm
by Cracker Larry
Whatever works.
Re: TJ's V10
Posted: Mon Jul 27, 2015 4:24 pm
by terrulian
Varnishing is going a bit slow because the Epiphanes is taking more than a day to dry. So I sand and varnish, maybe an hour's work if I lollygag, and then have to wait a couple of days to do anything else, which is frustrating.
So I'm filling in the time with a little arts and crafts, stitching up the oar leathers.
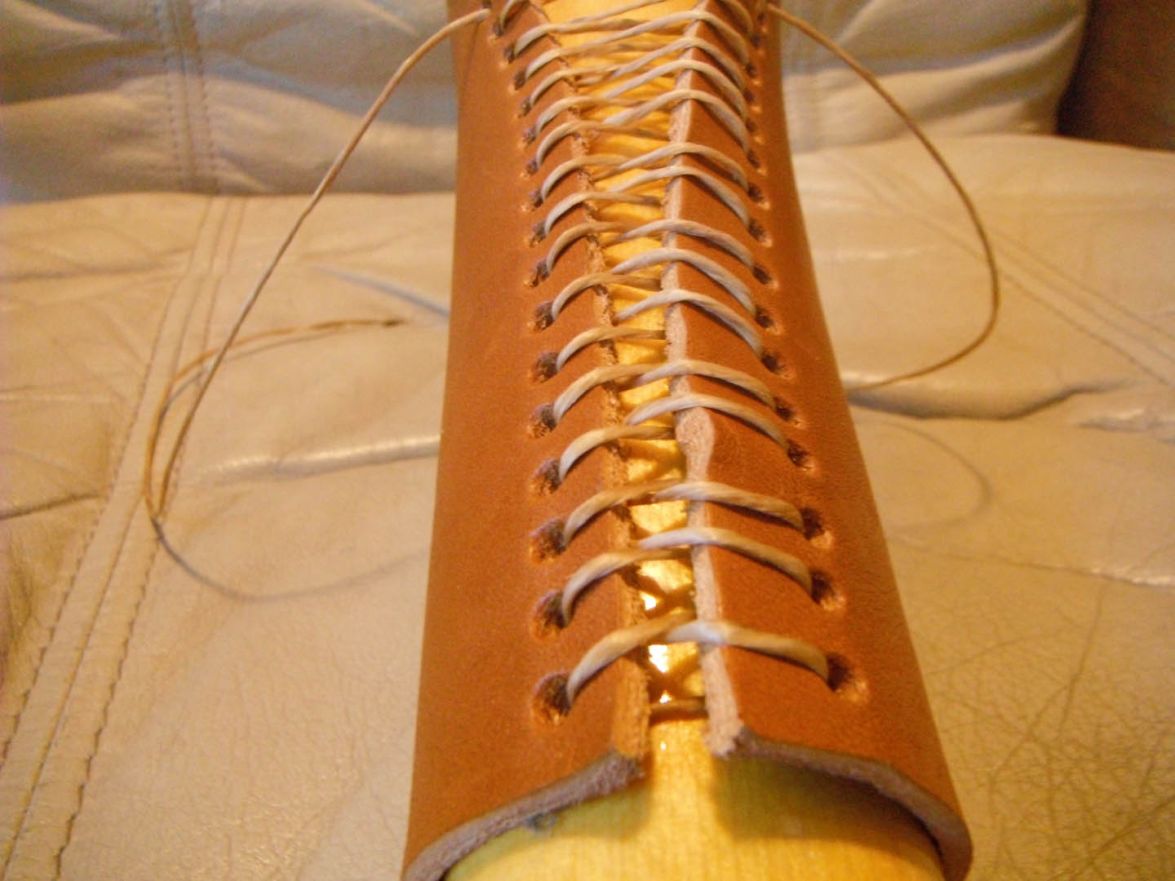
Re: TJ's V10
Posted: Tue Jul 28, 2015 9:36 am
by Cracker Larry
That's pretty cool there
Re: TJ's V10
Posted: Sat Aug 08, 2015 9:09 pm
by ks8
Nice
'One pleasant January day in a dead calm off the coast of Sri Lanka...' there were oars that needed some work.
Re: TJ's V10
Posted: Sat Aug 08, 2015 10:36 pm
by terrulian
Thanks for checking in, ks.
I had to re-string the leathers as I got crossed up on the stitching but here is the result with buttons attached as well:
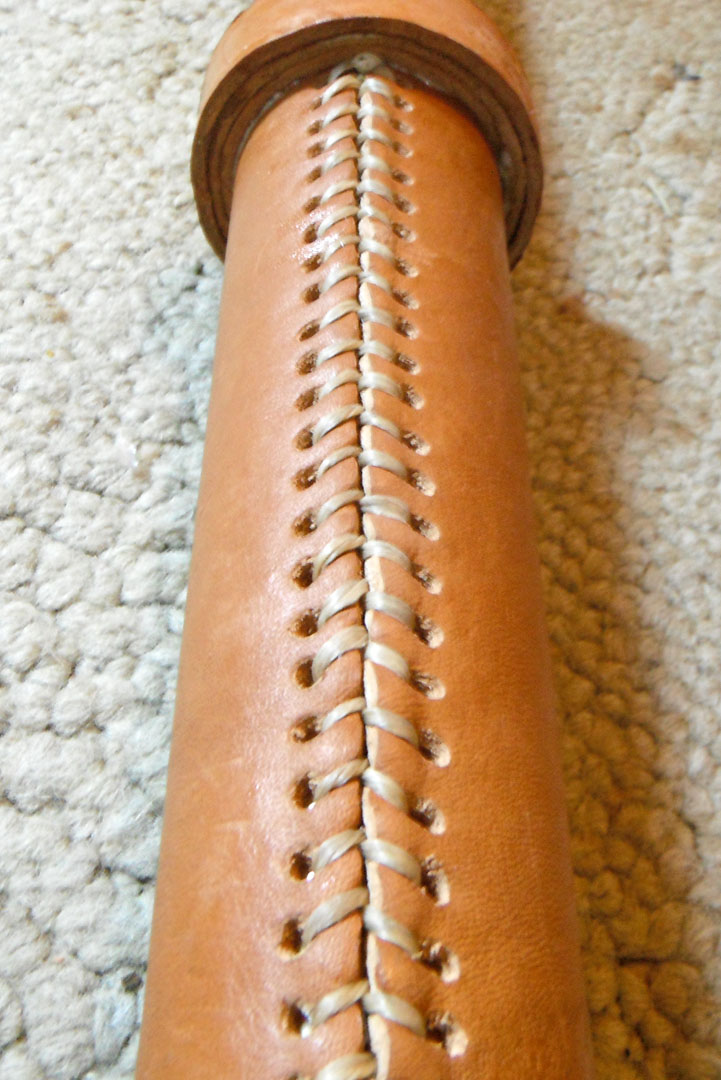
Unfortunately, after they were affixed to the oars they needed to be oiled or given some kind of waterproof treatment. I had read about using melted wax and since I'd never done that before and it seemed really traditional and old school I thought I'd try it. It sounded more adventurous than just putting on some leather oil. Unfortunately, it was a disaster because the melted wax was very uneven in penetrating the leather and left it splotchy. Sometimes when you do something old school, it is good to actually attend that school first. I'm not posting a picture of that
but it won't be visible from a distance of twenty yards.
I did the leather bit because I am so bored literally watching paint dry. Or not literally because it's varnish. I am having absolutely no better luck varnishing than I did painting. I don't want you to think this is for lack of effort; before every coat I sand with 320 although I'm now up to 400; I then vacuum and wash with water; when that dries I hit it with a tack cloth; then I wait several hours for any dust to settle; then I change into clean clothes, hit it with a brand new tack cloth right out of the package, strain the varnish twice, and put on another coat. Then I quietly retire from the shop with my heart full of hope, and leave it closed up overnight to not disturb the sleeping masterpiece.
I've watched every You Tube video I can find with some smiling sadist proudly showing me how simple it is. I've tried no thinning, and thinning 5, 10, 25, and 50 percent. I've tried an expensive bristle brush and a foam brush. I've tried Epiphanes and Interlux Compass Clear, neither of which are the low-priced spread. I called both manufacturers and talked to their 24-hour therapist. I asked whether I am being overly picky (read: insane) or if I am extraordinarily stupid and clumsy in a way that is so off the bell curve that their R&D could never have anticipated it. They pat my hand--not so easy over the phone but these guys are pros--and tell me, not at all, you should have NO PROBLEM achieving absolute perfection with our product. They are very supportive and no help at all, bless their hearts.
But although every coat with a new approach is slightly different, these differences consist of being wrong in new ways. Not one coat has lived up to my hopes. I think I've got about 8 on right now but I'm not giving up. I may have made some advances, I'm not sure, but when I get that feeling it is often followed by a horrible next effort. I think this painting and varnishing business has to be left to people with a special weird brain unsuitable for correspondence with the rest of humanity. Aliens, in other words. Not guys like me. It doesn't look so bad but you're not here to examine it closely.
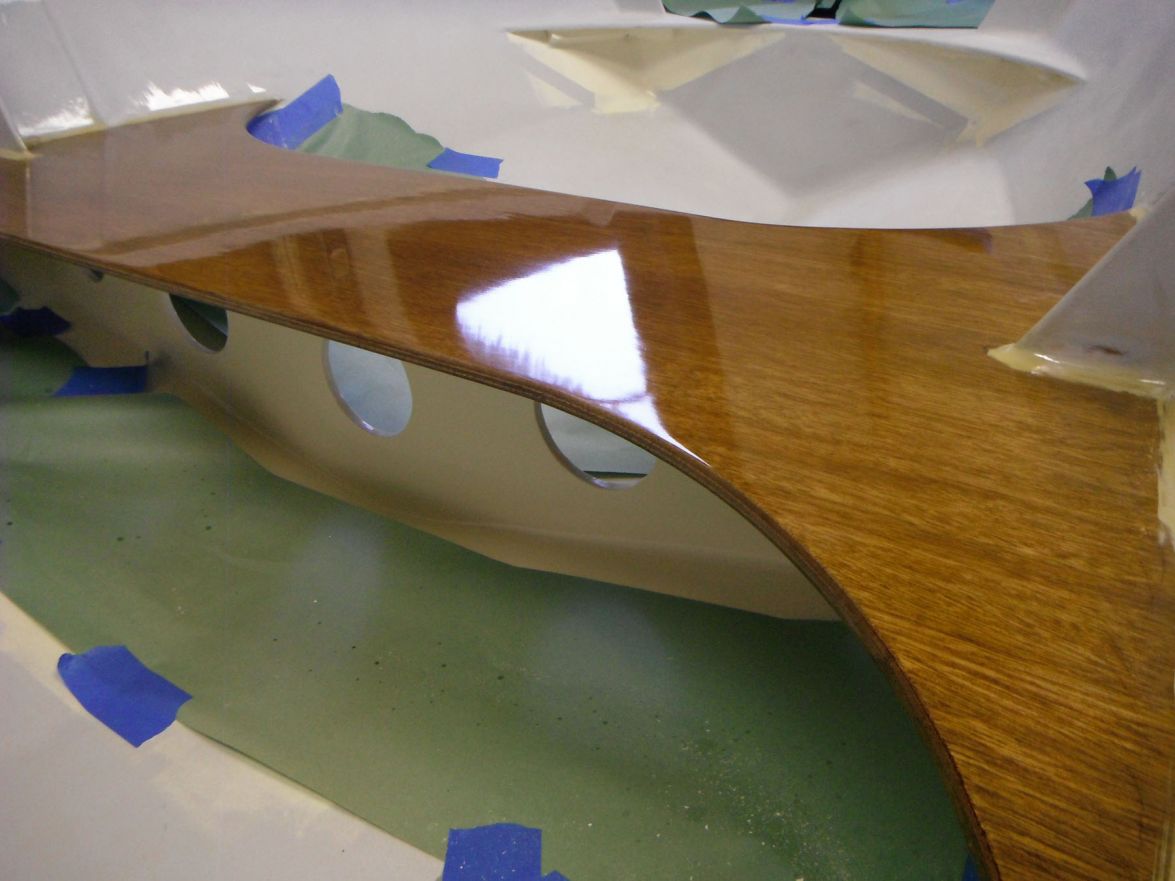
Re: TJ's V10
Posted: Sat Aug 08, 2015 11:32 pm
by ks8
I think I've been delivered of the desire for a 24 coat perfect mirror finish, But if I should happen to stumble upon achieving it, accidentally, I won't fight being pleased about it. May you have such a happy accident ... before coat number 24.
And don't you dare tell me that the seat top is a twenty yard finish.
Re: TJ's V10
Posted: Sun Aug 09, 2015 9:31 am
by topwater
That seat top looks real good to me
But i cant paint worth a dam either.
Nice work on the oar leathers . Try snow seal on them i use to use it on my work boots.
It goes on like vasaline then you heat it up with a hair dryer and it thins out and soaks in,
keep doing it until it wont take it anymore. You can also heat the leather before hand
then rub it in just dont burn your hands .
Re: TJ's V10
Posted: Sun Aug 09, 2015 10:00 am
by terrulian
Thanks for the tips, topwater. I don't if I have the gumption to try something new with them again but I'll contemplate it.
Re: TJ's V10
Posted: Sun Aug 09, 2015 10:16 am
by pee wee
I've used snow seal, too. It seems to be a wax that melts at low temperatures.
I'd think you got a splotchy result because the leather isn't saturated yet, you quit too soon. It's pretty hard to mess up.
Re: TJ's V10
Posted: Sun Aug 09, 2015 12:24 pm
by terrulian
It's pretty hard to mess up.
I don't think you've observed me in action.
The wax is liquid; you put it on the leather; in some areas it saturates but in others it cools, just like wax you drip from a candle. What am I missing?
Re: TJ's V10
Posted: Sun Aug 09, 2015 1:48 pm
by Cracker Larry
That leather work is very nice
Are you part blooded Native American?
X3 on the Snow Seal, I use it on boots and belts and holsters too. Good stuff!
I don't paint very well either, probably my weakest point of boat building. You need a sealed paint booth and controlled environment to consistently do good painting.
Re: TJ's V10
Posted: Sun Aug 09, 2015 3:00 pm
by pee wee
terrulian wrote:The wax is liquid; you put it on the leather; in some areas it saturates but in others it cools, just like wax you drip from a candle. What am I missing?
I think if you warm up the leather it will melt the wax and you can get better saturation. Then again, just put the oars to use and they will warm up! Seriously, it doesn't require much heat.
Re: TJ's V10
Posted: Sun Aug 16, 2015 1:25 pm
by terrulian
OK, so the folks at Epiphanes and Interlux have basically stopped talking to me...in a nice way.
I've come to the conclusion that there are two problems I'm having with the varnish:
1) No matter what application process you use--foam brush, bristle brush, roller, roll and tip, wiping it on with a dirty rag, smearing it on with your fingers; thinned, not thinned, thickened, or adding cocaine or virgin's blood--there remain some visible marks from the application process even after the varnish has cured. Brush marks or orange peel, in other words. No matter what the salesmen say, I cannot find any way around this and am determined to leave that goal for my next life. The best I can do is level the boat so that if any of that horrible liquid desires to make a run for it or sag out of place, it won't be getting any assistance from me.
2) There are specks of dust in the varnish. This is aggravated by the fact that varnish takes an excruciating amount of time to dry, and during that period, if any dust from Mars happens to have traveled to the outer atmosphere of the earth, it will find its way to your project. An amplifying issue is that the instructions for Interlux' Compass Clear varnish require you to use their 333 thinner, which, right on the can, says "slow."
After again vacuuming and cleaning the shop in the effort to achieve what those in the know call a "dust-free environment"--something I think I've seen sometime in my life although it's a distant memory--I have decided to attack this by constructing my version of what CL suggested, a tent out of plastic sheeting. I left a little area for light from the window without which you may as well forget it. This is absolutely my last effort, and if this doesn't work, screw it! Although my circumnavigator buddy Terry says I said the same thing last week. I'll let you know how it turns out.
Re: TJ's V10
Posted: Sun Aug 16, 2015 8:38 pm
by Cracker Larry
The quest for perfection is a long and difficult road. You hit a point where it's good enough, and it's easy to make it worse.
Re: TJ's V10
Posted: Sun Aug 16, 2015 9:14 pm
by terrulian
it's easy to make it worse
So far, I haven't really made it worse; I've just got a situation where continually increased effort yields no improvement.
Re: TJ's V10
Posted: Sun Aug 16, 2015 11:12 pm
by gtcoupe
If nothing else you've set a high bar for single minded bullheadedness. An admirable trait, at least amongst my Norse ancestors.
Re: TJ's V10
Posted: Mon Aug 17, 2015 9:01 am
by terrulian
An admirable trait, at least amongst my Norse ancestors
I consider it a high honor to be thought of in their company.
Re: TJ's V10
Posted: Mon Aug 17, 2015 4:01 pm
by ks8
terrulian wrote:it's easy to make it worse
So far, I haven't really made it worse; I've just got a situation where continually increased effort yields no improvement.
That happens to be one way of defining *worse*, because of the time and labor involved, aimed at improvement, but not achieving any, unless your goal is more simply to burn calories.
I certainly will not add here a popularly misquoted remark of Einstein, about what is crazy, since it is so often grossly mis-applied, (his anti-razor is typically far more generally applicable), but instead I will simply say that only you know how much you are willing to invest toward the hope of improvement. Those who hit the highest marks persevere through to the *break-through* (that's why it is called a break-through), if there is indeed a break-through to reach with the current materials and environment. Me thinks you may have plateaued out with the current materials and environment. IOW.... if no higher mark needs to be reached, or never can be reached ...
... gud'nuf! (also known as the short version)
The *best* result just might be to finalize with spray, and then wetsand down the orange peel, and polish polish polish... but that is a *best* that is willfully ignorant of effort and time for such an end result, something concerning which I am less and less willful as the years go by. If I were making my own 15" reflector mirror for a home built dobsonian, that is a very different sort of thing, not expecting to get salt water and fish blood on the mirror with each use, or to slide my sandy bottom across it repeatedly. Or just postponing the splash? Need more pictures....
Re: TJ's V10
Posted: Mon Aug 17, 2015 4:51 pm
by terrulian
Of course the whole exercise is like a Tibetan sand painting, which will be destroyed upon completion. There is no doubt that the present quixotic endeavor is silly but I've never found that to be a good reason to avoid anything.
I had to look up Dobsonian. I'm not uninterested in astronomy but never have invested in a telescope. Not a lot of action in the stars, unless your life span is at least a couple of hundred thousand years.
I've put on that last coat under the plastic. I put on a shower cap, clean clothes, and used a nylon brush. I didn't thin the varnish because it took so long to dry last time, and as it was hot here I think the breasthook and knees may be OK, but the seat was large enough so I couldn't really get a flow going before it started to skin over a little. This will have to be tackled again but maybe I can get away with the other bits. It was very difficult to get a proper light angle under the plastic, too. Once I was done I immediately left and closed the door and will not open it until tomorrow afternoon to minimize any disturbance. Can't send pictures until then.
Re: TJ's V10
Posted: Mon Aug 17, 2015 6:05 pm
by Cracker Larry
I've never had great results with varnish either, but if you are striving for a good clear finish the EMC clear coats are amazing. It's not cheap, but it goes a long ways and you'll never buy varnish again.
Re: TJ's V10
Posted: Tue Aug 18, 2015 8:55 pm
by terrulian
With a bit of trepidation I ventured into the shop 48 hours after I had quietly shut the door and tipped-toed away, following the the last coat of varnish. I think there has been some improvement and room for hope. As requested by ks8, here are a couple of photos:
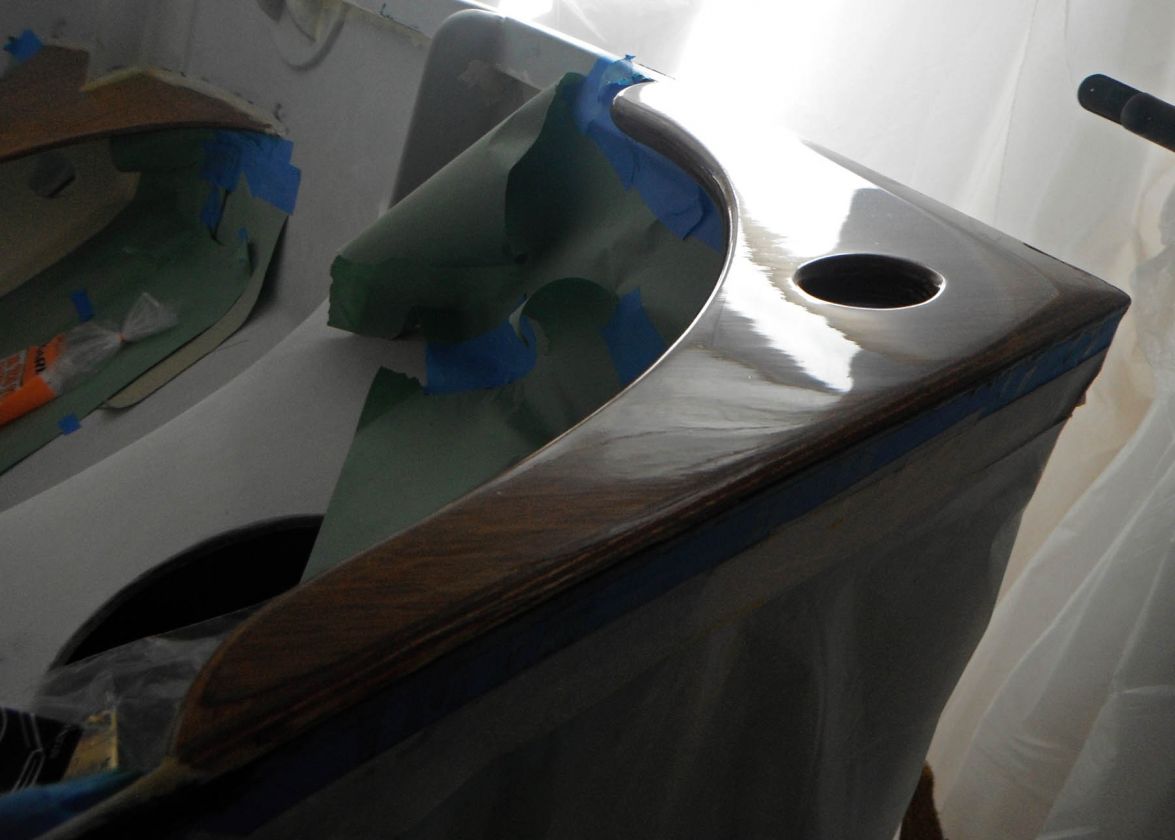
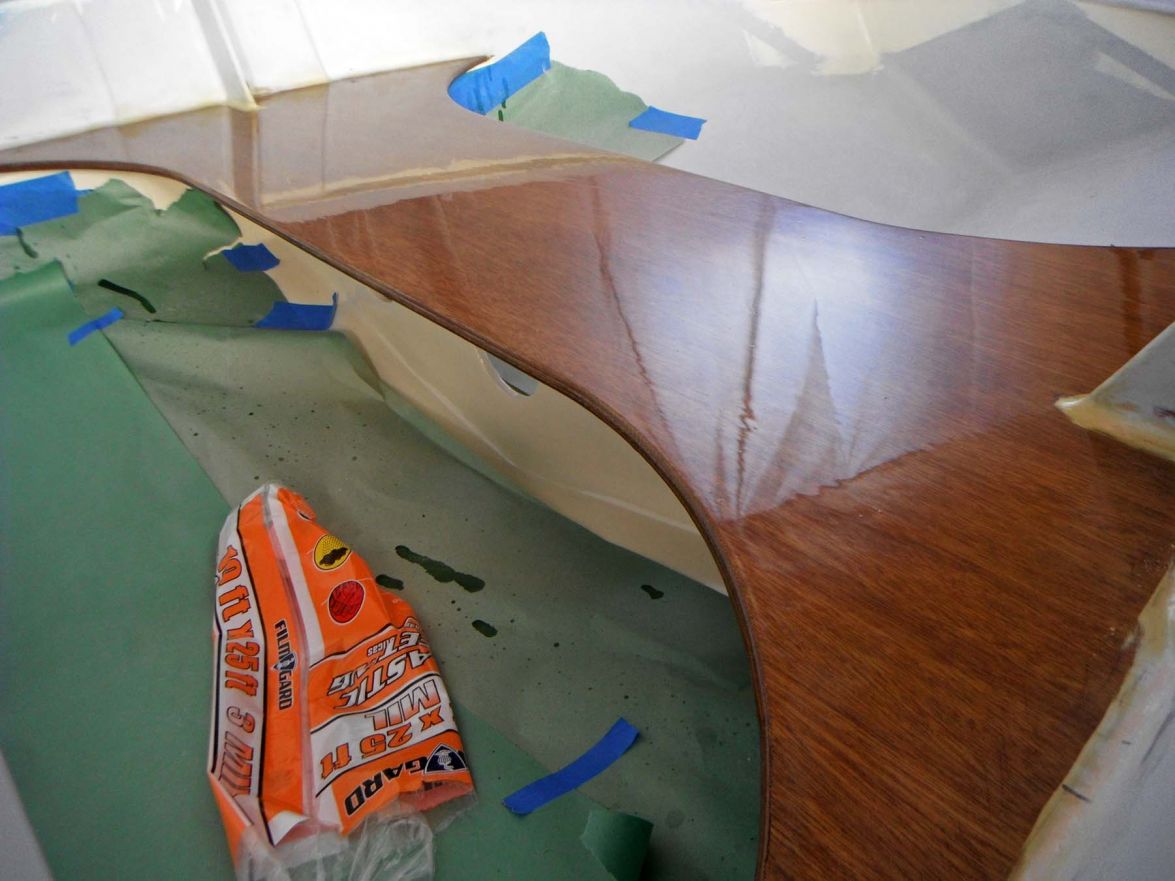
But if you look closer you can find problems. I anticipated this a bit because on the hot day I did this, I decided not to thin the varnish, which was a mistake.
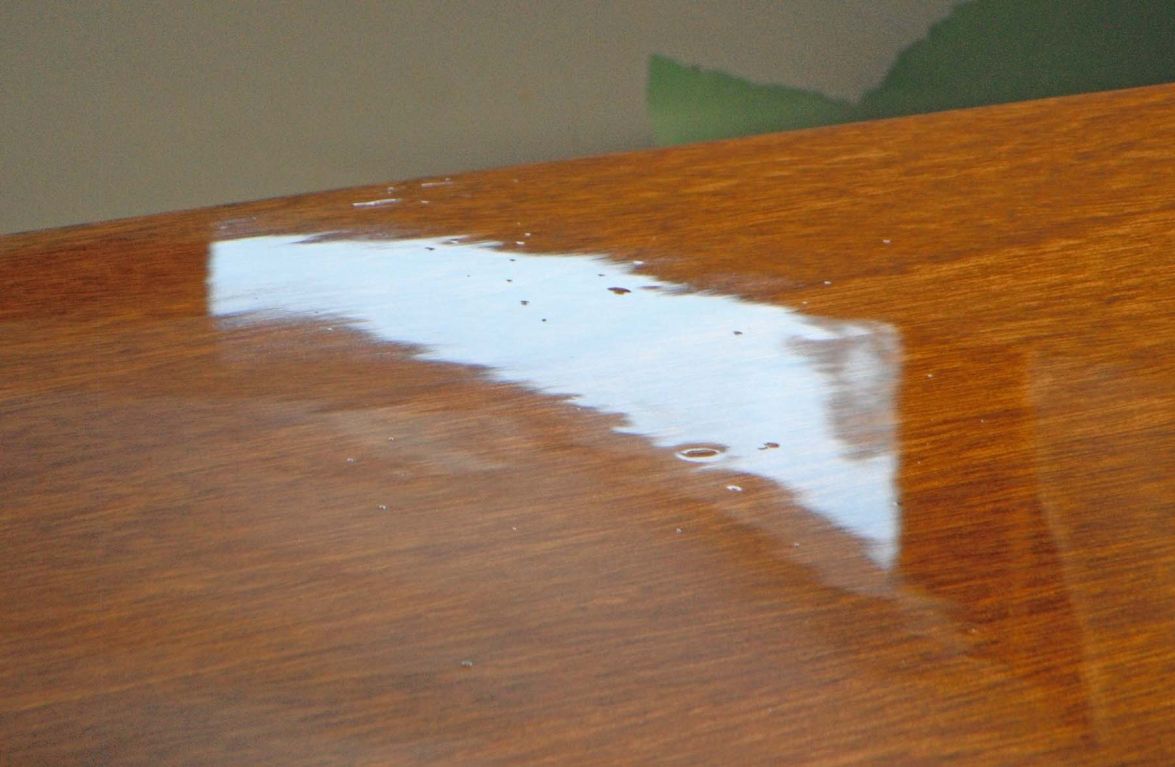
In some areas it didn't flow so well and there appear to be some bubbles. On the upside, there was a considerable reduction in dust. Now the problem is to determine what of this will pass muster, and what must be sanded. I can possibly live with the starboard knee as pictured. The port knee and the breasthook have some of the same type of lapses seen in the last picture above of the seat. They are on the cusp. The seat must be redone. And the challenge will be to sand enough to clear out the uglies without creating any dust!!
. I'll carefully wet sand and hope for the best. Also, I think this time I will ask my wife to hold a light opposite where I'm varnishing. Even with the break in the plastic for the window to admit sunlight, the area it illuminates is not large enough for me to see everywhere I need to, and otherwise the light is dim. Putting a light on a stand won't do because I need to be able to adjust the refraction where I need it.
PS to ks: in regard to the dubious Einstein quote regarding insanity, I shall say in my defense that I am NOT doing the same thing over and over and expecting a different result. I am doing different things and expecting a different result, but getting the same one. On the other hand it might perhaps be argued that boating is a matter of distinguishing insane things which are smart from insane things which are dumb.
Re: TJ's V10
Posted: Wed Aug 19, 2015 12:49 am
by ks8
I can relate to the effort, and it is beginning to look very good indeed.
I realize you are trying different things, and the Einstein insanity quote doesn't fit at all. I mentioned it because while reading so many forums, I see that quote misused far too often, when it does not rightly apply at all. One reason I prefer, if quoting Einstein, to mention his anti-(Occam's)-razor -- paraphrase -- *State everything as simply as possible, but no simpler*. Me thinks KISS often needs *, but no simpler* tacked on the end of it. There are often very much some necessary small details that need mentioning, despite the protests of those claiming over-complication. Of course, there is also over-complication.
When I did my transom bright, the final epoxy seal flow was very nice, near perfect. When I then sand prepped it and put on the clear lpu, I had all sorts of problems, no matter what I tried. With a determination to splash very soon, (under not so subtle coercion), I put off sanding and trying again and again for the glass smooth gloss I want for it. To this day, it is good enough, but not exactly what I wanted. After all, I've got to paint the seats first!
My overly ambitious scheme is to one day stand up the boat on its bow such that the transom is perfectly level, and then do two or three flow coats in a controlled environment, but at present I haven't a work area enclosure with 17 foot clearance to the ceiling.
One day it'll get sanded and recoated, but I sure do relate to your efforts to master that product and that finish, future sand scratches or not.
Thanks for the pictures!
Re: TJ's V10
Posted: Wed Aug 19, 2015 5:08 am
by gonandkarl
Hallo Tony,
I am following the finishing of your boat all the time and I got so excited about the finish You achieve even that there setbacks towards a mirror like clear surface that I am more and more convinced that I would like to make my transom also with
clear paint. ( I can get EMC here in Austria ) As I am just painting the bunks before I put the bench seats onto the top I will carry on following the nice conversation about painting on your thread and hopefully have learned a lot by the time I eventually will paint the transom. I like KS es idea of having the transom flat for painting and I am sure I can do that in a big barn of a farmer related to me where I will hang my 14 foot boat from a roof rafter. I know he also got enough scaffolding to get me into a good painting position. I catch myself planing too far into the future.
I wish you lots of success with the redoing of the seat and that it will turn out as beautiful as the knee.
Greetings from Karl ( Austria )
Re: TJ's V10
Posted: Wed Aug 19, 2015 8:13 am
by terrulian
Thanks, guys.
An old acquaintance of mine, Chris Burden, who, after I knew him, became a world-famous artist and head of the art department at UCLA, started his road to notoriety by having himself shot in the arm with a .22 rifle as a piece of conceptual art. People at the time, of course, doubted his sanity. He recently died, which inspired a lot of retrospectives both online and in print. He gave up the "performance" art stuff and for the remainder of his life did many very large "installations." One of these was a piece called "Ghost Ship," an autonomous traditional sailboat that navigated 400 miles between two European ports without any human guidance, or that was the plan. Apparently (he should have asked me first) they weren't quite able to do this without a little bit of intervention to trim the sails remotely from the mother ship. They were supposed to be set by computers and hydraulics on board but this wasn't quite achieved.
Anyway, the point is he was once asked what the motivation behind his art was and after pondering he said, "Having things the way you want it" which, although grammatically dubious, is something I can relate to...and I'll bet everyone on this forum can relate to.
The Internet and the world are full of so much chaos and insanity (not that there's anything wrong with that) that I have nothing but admiration for the devotion of guys here who go to a lot of trouble--way more than I have--to get things just the way they want them. By comparison to much in life, that purity of focus on a clear-cut, fiberglass and wooden goal seems eminently sane to me.
Good luck hanging your boats. Be sure to post pictures!
Re: TJ's V10
Posted: Wed Aug 19, 2015 8:42 am
by Cracker Larry
I'd like to sit down and have a few drinks with you sometime
Re: TJ's V10
Posted: Wed Aug 19, 2015 9:15 am
by tcason
Probably too late for suggestions BUT have you tried to roll the varnish on and then tip it with foam brush?
I find I try to lay down too much varnish with a brush and it is too thick in some spots about right is some spots and too thin in some spots - the roller seems to put in on more evenly (and a thinner coat)................ and then tip it off with a foam brush.
I am attempting to get my seats "bright" and I am about 5 coats of varnish into it over two coats of epoxy.
Hope my seats look as good as your rejected attempts...............
Carry on!
Re: TJ's V10
Posted: Wed Aug 19, 2015 9:28 am
by terrulian
BUT have you tried to roll the varnish on and then tip it with foam brush?
I did try rolling and tipping but I think I used a bristle brush for that particular tipping experiment. I understand about getting an even coat but even more important is that the varnish flows. At least in my attempt, by the time I had rolled it on and began tipping, it wasn't so happy about flowing. Or another way to put it is that if I tipped it right after rolling it, that meant that I hadn't rolled out the entire surface yet, so you have that wet-edge problem. You either roll the whole area, in which case it doesn't want to flow when you go back and tip, or you roll and tip small areas, in which case the transition between the first area and the next becomes problematic. There are actually a
very large number of variables and I believe that in this, like many things, a person would have to spend quite a long time in a shop varnishing piece after piece to get that kind of feel that Stephen Curry has when he is shooting a three. I know I will fall short because I will not have enough iterations to try every possible combination of roller/bristle brush/foam brush/proportions of thinner/temperature/humidity/light, etc.
I'd like to sit down and have a few drinks with you sometime
I have no doubt at all that this would be a pleasure and an honor. The chances are not good, however, since my wife and I may have done about as much travel in this life as we have a hankering to. We seem to more and more confine our roamings to 100 miles or less.
Re: TJ's V10
Posted: Wed Aug 19, 2015 10:02 am
by Cracker Larry
I don't usually get too far from home anymore either. This body has a lot of miles on it, trying to make it last as long as it will go now.
Re: TJ's V10
Posted: Wed Aug 19, 2015 10:10 am
by Fred in Wisc
That's some pretty nice looking varnish. I'll be pleased if mine turns out that well.
But respect to you for wanting it "just right" and being willing to put in the time and effort to make it so.
I've finally abandoned that, since it increases my build times tenfold or so, including long periods of inactivity where I just don't have it in me to pursue perfection, knowing that I will not achieve it. A man's gotta know his limitations.
That said, that's a beautiful little boat and I hope you can achieve the level of craftsmanship that you are working toward.
Re: TJ's V10
Posted: Sun Aug 23, 2015 2:50 pm
by ks8
Cracker Larry wrote:I'd like to sit down and have a few drinks with you sometime
I rarely have more than one glass of wine per month anymore (austerity brain cell budget), but I second that!
Re: TJ's V10
Posted: Sat Sep 19, 2015 12:41 pm
by terrulian
OK, guys, it's been well over a month since I started varnishing the center seat. At that point I figured in two weeks I’d be in the water; I mean, just slap on some varnish and paint, put on the rub rail, and I’m done! But this has been the most frustrating period of the build. In fact, if I listed the top 20 difficulties I've had building this boat, varnishing would take up the first 15 slots. I've now put about 22 coats on, although there isn't nearly that much on the boat as most of it has been sanded away. Not one of those coats has been acceptable but I am going to compromise and move on. Coat #22 is not better than coat #5. After consulting professionals, amateurs, the experts at varnish companies, and every piece of literature and video I can find, I am left where I started and I don't think anything has been learned or gained.
It's odd because my experience has been that if you put your mind to it, even on a task you're not familiar with, eventually you should be able to do about as well as the next guy unless you're trying to sing like George Jones or play like Ricky Henderson. But varnishing has given me my comeuppance. I’ve had plenty of experience with various finishes and have used spar varnish on boats in the past. But they were surfaces like frames or handrails, not wide, flat seats that show up every single blemish or speck of dust. And decades ago I switched to oil or Cetol on exterior teak, and polyurethane or stain and wax on interior wood.
Perhaps the worst aspect of this was the fact that you couldn’t do an honest day’s work on the project. You sand for 15 minutes, then prep and varnishing takes another 15, and then you wait an entire day for your humiliating result. It’s a shame because after all the careful fairing and sanding, the surface that presents itself to the world is flawed.
Don’t want to end on a negative; I’m thrilled be moving ahead and comforted, just a little, by the fact that no one will notice but me. I still love this little boat and anticipate doing a bit of rowing in the near future.
Re: TJ's V10
Posted: Sat Sep 19, 2015 2:56 pm
by Cracker Larry
I've never been much good with varnish either, or paint for that matter. I spend way too much time with it and get half ass results. But give the EMC clear coat a try. It's actually easy and works good. 2 or 3 coats and done. Cost more than varnish though.
Re: TJ's V10
Posted: Sat Sep 19, 2015 3:08 pm
by terrulian
You recommended this from the beginning, and perhaps I should have taken your advice--usually a good idea. It looks to me like the price difference is substantial, however, amounting to over $200 with the activator compared to about $30 for spar varnish. I couldn't justify this for the amount of surface area I was covering, about 5 square feet. Plus, I had no idea that I couldn't achieve a respectable result and am still amazed by my failure. Every time I put it on, in fact, I did it expecting great results, so by now I do qualify, quite proudly, for ks8's Einstein reference regarding insanity, which is doing the same thing over and over and expecting a different result.
But people have done insaner things and at least no one got killed.
Re: TJ's V10
Posted: Sat Sep 19, 2015 4:58 pm
by remedy32
I've had good luck with interlux Schooner varnish. It's still looking good after 5 years or so on our FL14. Yes, boat is covered much of the time. 3 coats on the Meranti thwarts looked great with minimal fuss. I remember working outside in the shade and moving the boat into the sun after applying to speed drying and reduce dust and junk collection. If you find it too thick to flow well try warming in a pail of hot water. Thinning is not the best way to go. Light 220 sanding between coats.
Bill
Re: TJ's V10
Posted: Sat Sep 19, 2015 5:29 pm
by terrulian
Bill,
I didn't try that, but I did try Interlux Compass Clear and Epiphanes and Man O' War.
I am persuaded that, no matter how many tricks you tell me will work, they will not work for me
. I just heard one I didn't use today and thought "now you tell me" but I am certain it wouldn't have helped anyway and I am moving on. Not one more coat of any brand of any kind of clear finish goes on this boat as long as the boat and I are in existence. I am at peace now. Ommm.
Re: TJ's V10
Posted: Sat Sep 19, 2015 7:58 pm
by sds
terrulian wrote:[...]
Not one more coat of any brand of any kind of clear finish goes on this boat until the day either the boat or I are no longer in existence.
Now that's what I like to hear!
But wait... that means you'll be varnishing in Heaven.
doh!
Re: TJ's V10
Posted: Sat Sep 19, 2015 10:45 pm
by terrulian
If I'm varnishing, then you know where I'll be, and it is not heaven.
Re: TJ's V10
Posted: Mon Sep 21, 2015 3:25 pm
by sds
Didn't want to say...
Instead of rolling a rock up a hill, it'll be an eternity brushing varnish.
Best live right.
Re: TJ's V10
Posted: Tue Sep 22, 2015 6:10 am
by ks8
results are far better than trying to carry water in a sieve.
Re: TJ's V10
Posted: Tue Sep 22, 2015 11:49 am
by terrulian
Yes...
Well, another humbling find in my build. I'm kind of down to the last bits now and have put a couple of coats of paint on the interior. I was quite proud of the fairing on the outside of the hull. Although the paint job itself was a bit disappointing, the fairing that the shiny surface revealed was, although not 100% perfect, pretty danged fair, especially considering the topsides were painted a dark color. But the outside was faired entirely with longboards, no power tools.
The interior poses different challenges, which I clearly did not meet. The exterior of the hull has long runs of smooth surface but the inside is full of nooks and short spaces that I addressed with a combination of RO, multi-tool, and hand sanding. I spent hours and hours on the radiuses where the sides and frames meet in a fillet, and particularly on the frustrating "crotches" in the corners. These actually did come out quite nicely. But my success on the outside and the concentration on these joints led me to indulge myself in some overconfidence with the flatter areas. I also failed to use graphite powder to reveal lapses in my execution, and the method I did use, a bright light, had a limitation I didn't take seriously enough, which was that the interior of the boat presents problems in sight lines. You just can't put your head anywhere you want and a lot of angles can't be seen without the special effects staff from "Honey, I Shrunk The Kids". The final result is that while the joints are fine, the flatter areas are not, and reveal an uneven surface visible to the casual eye.
I'm not going to revisit the fairing at this point, that's for sure. Maybe I could repaint in satin or flat instead of gloss and the holidays wouldn't show up so well. But in my next lifetime when I build another boat, I will be a lot less careless on the interior panels. I have not been able to capture the vagaries of the fairing in pictures but maybe this will be possible when the light changes. Right now the photos look perfect so I won't post them.
Re: TJ's V10
Posted: Tue Sep 22, 2015 12:01 pm
by terrulian
OK, so now the light did change enough so I got some horrifying photos. So bad, in fact, that I can't at present bring myself to upload them.
Re: TJ's V10
Posted: Tue Sep 22, 2015 3:57 pm
by PMac62
Having finished cars and trucks I have come to this exact same result. In the shop things look fine. And in natural light...OMG
. To achieve perfect results requires an artist and engineer. I'm neither.
Re: TJ's V10
Posted: Wed Sep 23, 2015 3:00 am
by ks8
Some judicious intentional orange peel, or, a base/print effect, or a base/print/tint effect. Did lots of that when painting repairs to make them *invisible*, matching what was there already from the manufacturer.
Re: TJ's V10
Posted: Wed Sep 23, 2015 9:03 am
by terrulian
ks, I applaud the clever solutions.
However, I think I'm willing to live with it as a humbling reminder of my limitations. It will be much more obvious to me than anyone else. You have to catch it in just the right light...I hope.
Re: TJ's V10
Posted: Thu Sep 24, 2015 1:58 am
by ks8
And so it is with those who want to actually launch the boat, or maybe build another one...
A boat doesn't always have to be a perfect manifestation of a flawless 3D geometric theoretical function. (hee hee)
Just like my golf game does not need to be developed until it is an even 18 on the scorecard for 18 holes. At least I no longer have an 18 on each hole...
Re: TJ's V10
Posted: Thu Sep 24, 2015 8:32 am
by terrulian
There is an old saying that anything worth doing is worth doing well. I pretty much go along with this, but on the other hand, that would mean almost no one would dance or sing. You are probably well advised to dance and sing no matter how bad you are.
Re: TJ's V10
Posted: Thu Sep 24, 2015 8:58 am
by Cracker Larry
I like that analogy
It ain't got to perfect as long as you do your best. I sure can't dance or sing, can't paint very well either, but I'm hell on a sander.
Re: TJ's V10
Posted: Thu Sep 24, 2015 9:37 am
by terrulian
I coulda used you on the interior panels.
My old circumnavigator buddy Terry stopped by to see the progress yesterday and he scoffed at my criticism of the boat's imperfections, saying that it's amazing it started out as sheets of plywood. But he's just finished remodeling a house, and says he has the perverse tendency to do the same thing--point out all the flaws in his workmanship for anyone willing to listen. And he's a better craftsman than I am.
ks said:
And so it is with those who want to actually launch the boat
I was visiting a yacht club with my beloved Ericson 39 once and a guy stopped by to reminisce on how he used to race on one. Even though the boat's sails, rig, gear, and engine were in tip-top shape, I found myself apologizing for the brightwork and paint. He said, that's the way it is if you like to go sailing. When I first saw her she was in pretty rough shape, but I could tell it was not from neglect but from being rode hard and put away wet. I was immediately smitten.
I always need to remind myself that this boat will get beat up being dragged on beaches and stowed outside, and to stop fussing so much.
Re: TJ's V10
Posted: Thu Sep 24, 2015 12:49 pm
by gtcoupe
Tony, there's something to be said about NOT putting your heart and soul into the finish when things like this can happen:
During the repair process, I was thankful that I hadn't wasted more time building it, and yet I find myself doing a much more careful job on the new panels that I've added. I don't know if I'll ever successfully negotiate the fine line between good enough and really nice.
Re: TJ's V10
Posted: Thu Sep 24, 2015 12:58 pm
by terrulian
I remember this...have you posted updates on the repairs?
Re: TJ's V10
Posted: Thu Sep 24, 2015 9:59 pm
by gtcoupe
Thanks for the reminder Tony, just did!
Re: TJ's V10
Posted: Fri Sep 25, 2015 10:52 am
by terrulian
Here's a question on Kiwi Grip. Gong to do it this morning so I hope someone reads this soon.
I would like to have the surface non-skid but I don't want it to hurt to walk on it in bare feet. How would you suggest I apply it? With the roller they send?
Re: TJ's V10
Posted: Sat Sep 26, 2015 9:09 pm
by ks8
Although I've never used it.... since no one else has responded yet.... I think there are different rollers that can work with it, and produce different textures. Don't know which one comes with it, compared to other choices *available*. Wish I could tell you more. Well, there is a full lunar eclipse Sunday night into Monday morning in North America, in a day. Starts about 9pm EST. But I don't think that will help customize the texture of the kiwigrip any.....
Re: TJ's V10
Posted: Sat Sep 26, 2015 9:52 pm
by Cracker Larry
I've used a lot of it, but only with the roller that comes with with it. You can adjust the texture by how much you apply and how much roller pressure you use. You put it on with a notched spreader and the smaller the notch size you use the less coarse it will be. I usually use the medium notch on a plastic spreader. Play with the roller pressure to get the texture you want.

And I hope it quits raining and we can see that super moon tomorrow night!
Re: TJ's V10
Posted: Sat Sep 26, 2015 11:20 pm
by terrulian
Larry,
Thanks...but I'm wondering...when I'm applying it it won't be hard yet so just by looking I don't know if I'll be able to tell whether it will hurt my feet. I actually think it probably will be OK whatever I do because I have never been on a boat with non-skid that was painful to walk on...but what's your usual style? I'll just go with that if it's possible to explain it.
ks: thanks for the reminder on the eclipse. I understand that here on the west coast the eclipse will already have started when the moon rises. I don't think I've ever seen that before.
Re: TJ's V10
Posted: Sun Sep 27, 2015 8:08 am
by Walkers Run
Not sure of the effect of the eclipse on kiwi grip.
I learned the hard way that you can't go back over it with the roller once it begins to stiffen. You'll get sharp peaks. It's very easy however to repair once dry.
Once you stop working it with the roller it lay out a little bit. Very cool stuff
Re: TJ's V10
Posted: Sun Sep 27, 2015 9:09 am
by Cracker Larry
..but what's your usual style? I'll just go with that if it's possible to explain it.
Hard to explain, more a matter of getting the feel for it. Use the medium size notches and spread it evenly in both directions, then roll it out in both directions. The more roller pressure you use the coarser the texture will be. It dries fast, work in small areas and pull the masking tape before it dries, or it will tear the edges. It also produces a lot of splatter, so mask and paper everything around it, including you and your hair. Splatter will clean up with water when it's still wet, but after it cures it doesn't come off.
I recommend making a couple of small test panels and playing with it, before committing yourself to the boat. I always do this when using new products I'm not familiar with.
Re: TJ's V10
Posted: Sun Sep 27, 2015 9:13 am
by terrulian
Thanks a million, Larry and Walkers Run, great advice.
I'm now fairly certain I would have gotten myself in trouble without it.
Luckily, I decided on another coat of paint before I went to the Kiwi Grip so that delay will allow me to take advantage of your tips.
Re: TJ's V10
Posted: Sun Sep 27, 2015 9:39 am
by terrulian
Sorry but Larry, one more question. Like you I usually try a test run of something I don't know about...but in this case you have the roller that comes with the stuff to consider. Once you use it can it be re-used?
Re: TJ's V10
Posted: Sun Sep 27, 2015 9:40 am
by Cracker Larry
Yes, multiple times. It will clean up real good with just water. Just clean it before the KG dries, or it ain't going to happen.
Re: TJ's V10
Posted: Sun Sep 27, 2015 10:16 am
by terrulian
Thanks very much.
Re: TJ's V10
Posted: Tue Sep 29, 2015 8:02 pm
by terrulian
A further Kiwi Grip question:
I tried a sample patch and the application seems unproblematic except that the roller picks up bits and pieces of the goop up so that you get small holidays. I tried the medium and small-toothed spreader but that didn't seem to be the issue. I sanded lightly with 220 but do you think more aggressive sanding would provide better adhesion?
I'll have to wait until tomorrow when it dries to try it on bare feet.
Re: TJ's V10
Posted: Wed Sep 30, 2015 7:27 am
by Walkers Run
I use 100 grit to prep for kiwi grip.
Re: TJ's V10
Posted: Wed Sep 30, 2015 7:58 am
by terrulian
OK, great. I was not going anywhere near that. Thanks.
Re: TJ's V10
Posted: Wed Sep 30, 2015 8:31 am
by Cracker Larry
I use 80 grit before the KG. That stuff is thick!
Re: TJ's V10
Posted: Thu Oct 01, 2015 7:35 pm
by terrulian
Thanks, guys, but I'm still having a little trouble. Sanded with 80 and then used the spreader and roller but still was having trouble avoiding holidays where the roller seemed to pull up the KG--see for example the small dot center bottom, which is surrounded by less visible points that were not fully covered.
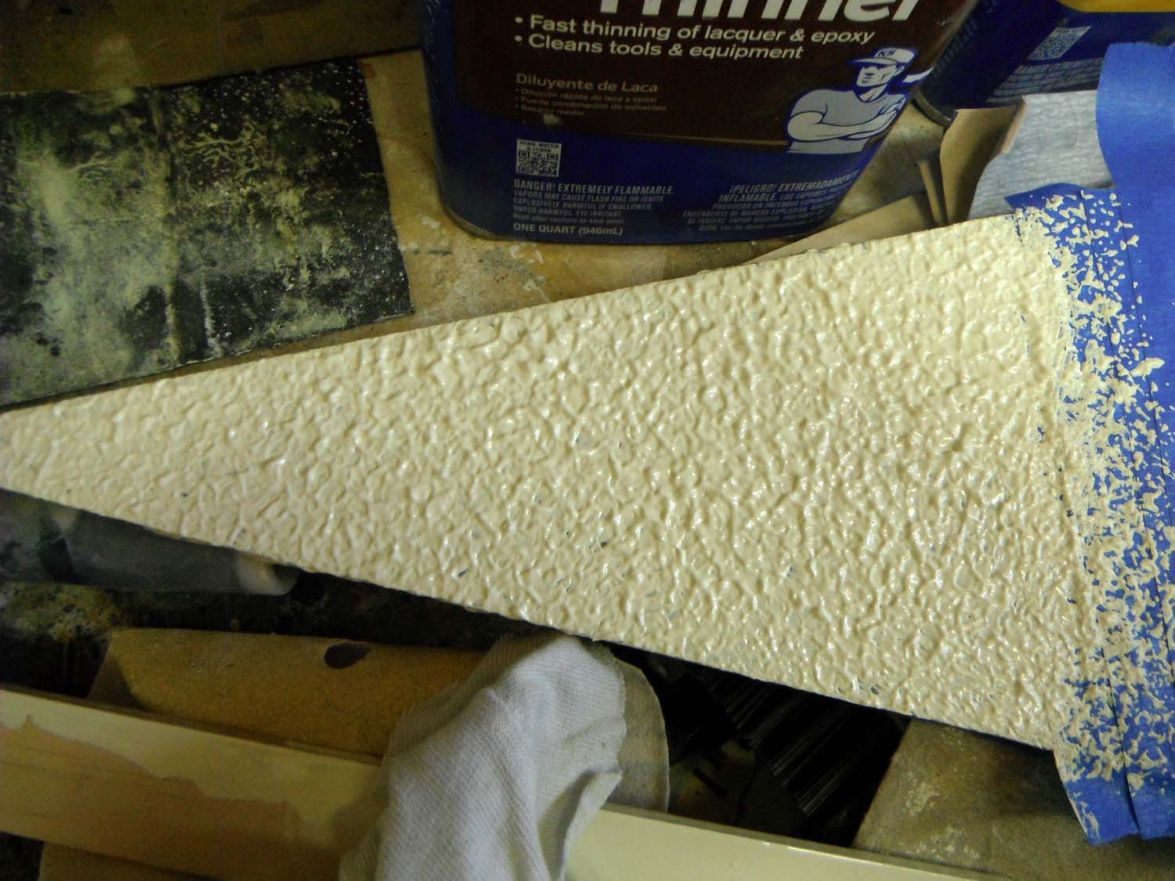
Suggestions?
Re: TJ's V10
Posted: Thu Oct 01, 2015 7:47 pm
by Noles309
Are you getting the roller loaded up before you start rolling? Just a thought. If its too dry it might lift it
Re: TJ's V10
Posted: Thu Oct 01, 2015 8:52 pm
by terrulian
Wow, now there's a thought. I didn't load the roller at all, thinking it was just a texture tool.
I'll try that tomorrow.
Thanks!
Re: TJ's V10
Posted: Fri Oct 02, 2015 9:03 pm
by terrulian
OK, it turned out that just applying the KG to a larger surface instead of the test area resolved the issue, because as Noles pointed out, the roller wasn't loading up in that small space. So after almost three months of fussing over painting and varnish, this went on first try with no problems at all. Thanks again to Larry who cautioned me that it splatters all over the place, so I was sufficiently taped and papered to prevent a disaster. It turned out that KG Cream is almost the exact color of Interlux Hatteras Off-White. It's one thing to see it online and another when it is on the boat. The picture seems to reveal more contrast than there really is, just because of the difference in texture.
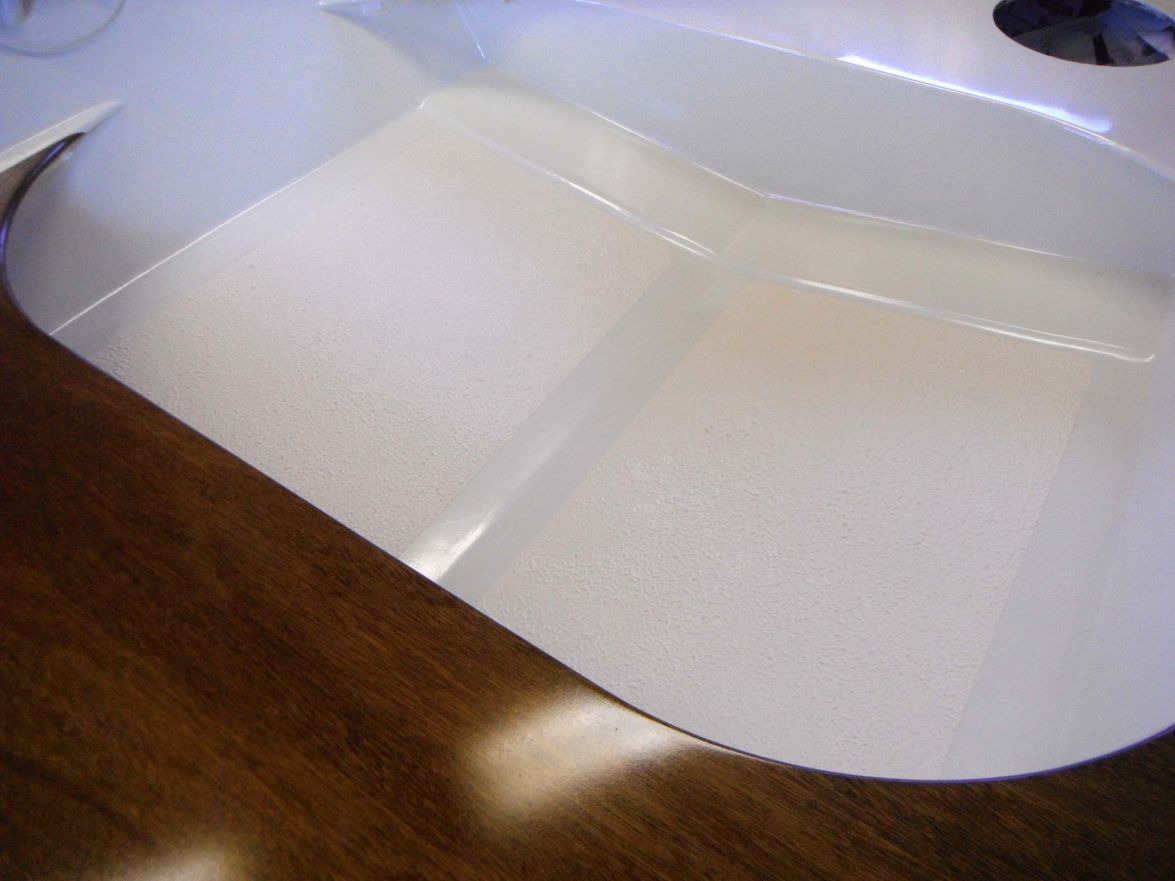
After that set up a little I removed the tape and looked at the mostly complete project for the first time. Not too bad but I'm no where near giving up my day job.

All that remains is installing three hatches, one cleat, and two oarlocks, and then the rub rail which could be a bother. It's very possible I'm going to launch next weekend...that is IF it fits into my van. I've been nervous since day one about getting it in there.
Re: TJ's V10
Posted: Fri Oct 02, 2015 10:53 pm
by gtcoupe
Gorgeous work Tony.
Re: TJ's V10
Posted: Sat Oct 03, 2015 6:49 am
by Noles309
Man, she's a beauty. Great job
Re: TJ's V10
Posted: Sat Oct 03, 2015 8:08 am
by topwater
Thats a great looking sailboat
Nice job.
Re: TJ's V10
Posted: Sat Oct 03, 2015 8:42 am
by Cracker Larry
Kiwi Grip is fun stuff. That looks great.
Topwater, you need to change your signature now that you are a Floridian
Re: TJ's V10
Posted: Sat Oct 03, 2015 8:51 am
by wegcagle
Absolutely beautiful
. The brightwork is stunning.
Will
Re: TJ's V10
Posted: Sat Oct 03, 2015 2:51 pm
by ks8
Re: TJ's V10
Posted: Sat Oct 03, 2015 6:04 pm
by Walkers Run
Beautiful! That's got to feel great.
Re: TJ's V10
Posted: Sun Oct 04, 2015 7:54 am
by terrulian
Thanks for all the very kind words for a project which, in the context of all the amazing builds at Bateau, is a very modest one. As I have said before, this forum features a combination of generosity and mastery that is rarely experienced. In addition to all of you gentlemen, the credit for that goes, as my dad always reminded me, to the man at the top. I wonder if Jacques can comprehend the number of hours of enjoyment he has contributed to the world.
Re: TJ's V10
Posted: Sun Oct 04, 2015 2:28 pm
by timbamford
Looking awesome Tony! I've enjoyed following your build. Great bright work!
Tim
Re: TJ's V10
Posted: Sun Oct 04, 2015 2:53 pm
by PMac62
Looks terrific! I've always planned on some bright work on my build but this confirms it. The taping and painting on the seat area looks detailed and really draws my eye. No one will ever mistake this as a box store buy.
Congrats!
Re: TJ's V10
Posted: Mon Oct 05, 2015 10:00 am
by Fred in Wisc
That looks just like how I wish my little boats would turn out. Very nice work.
Re: TJ's V10
Posted: Mon Oct 05, 2015 10:55 am
by terrulian
Thanks guys...but don't look too close.
PMac: I learned an interesting thing in the area you mentioned, the taping of the varnish/paint border. Earlier on this string I posted a trick I read somewhere about putting a stripe of the old color over the tape boundary. The idea is that any voids left in the taping, which are in my experience inevitable, are filled by, in this case, varnish, so that when you apply paint up to the line, it can't migrate across into the varnish, so you get a clean line. But what happened to me was that I think I applied at least 4 and maybe 5 coats of paint in addition to the varnish stripe, in keeping with my quixotic attempt to achieve the perfect coating as I did with the varnish. (Painting the off-white drove me nuts and blind because I could not distinguish between areas I'd painted and areas I hadn't...until the next day with some different light!
) Anyway, I was undone by this problem: the paint is formulated to stick to itself as well as the surface, so that molecules of paint bond to one another creating an impermeable layer. The result was that at some places when I pulled the tape, there was enough paint so that the paint stuck to its companion across the line and the line tore instead of cleanly separating with the tape. So the seat lines aren't as perfect as I'd like. I'm not at the boat now but perhaps later I can take a picture and upload it so that everyone can enjoy my faults. This may not have occurred with other paint; I don't know.
Re: TJ's V10
Posted: Thu Oct 08, 2015 12:37 pm
by terrulian
Hatches, oarlocks, cleat, and rubrail installed.
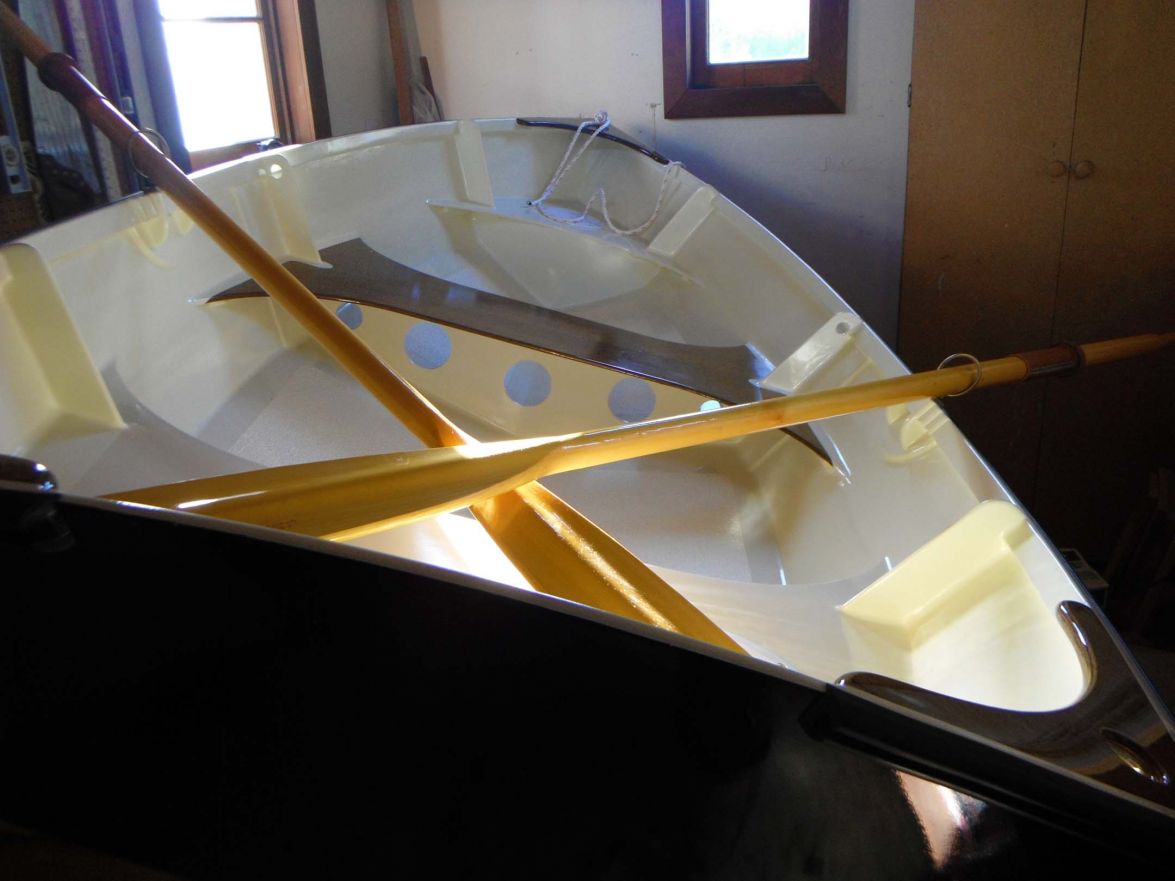
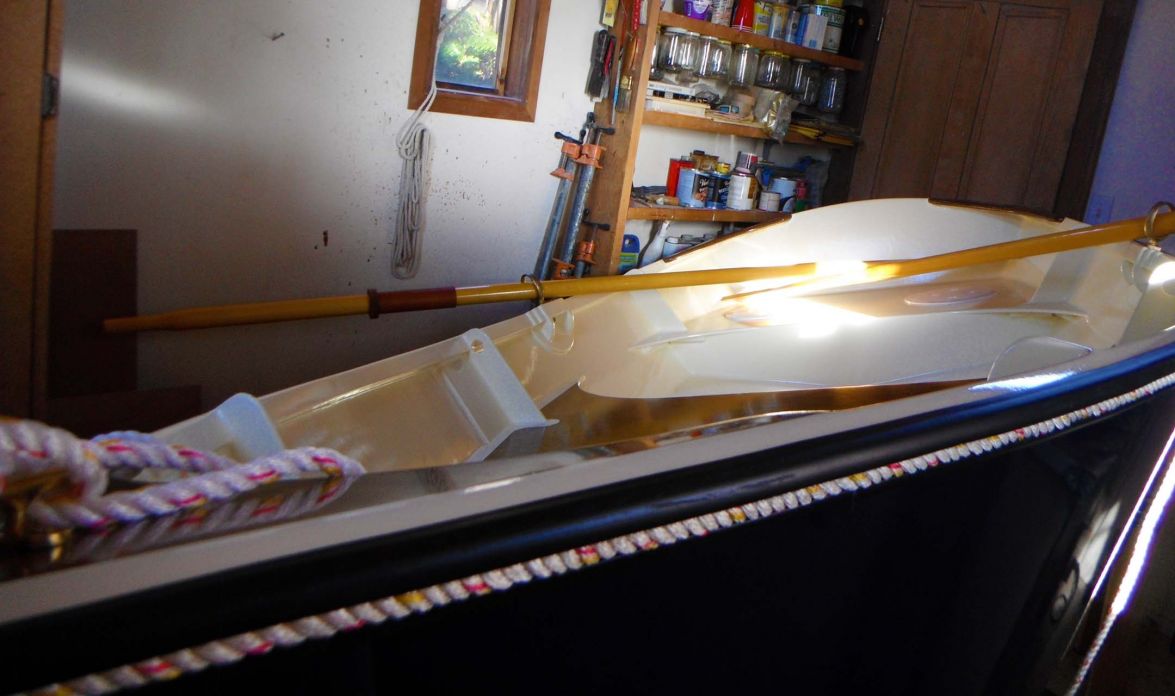
There is a rope insert in the rubber rail. At first I thought the rope Hamilton Marine provided was too clownish but I've warmed to it. It reminds me of both the colors on a dressed ship and a kid's toy and it seems to fit with the flag blue paint, so I'm keeping it. It has turned out to be a PITA to smash it into the rubber, however. I'm reluctant to use heat in fear of damaging the paint, and the tricks I've found online don't help.
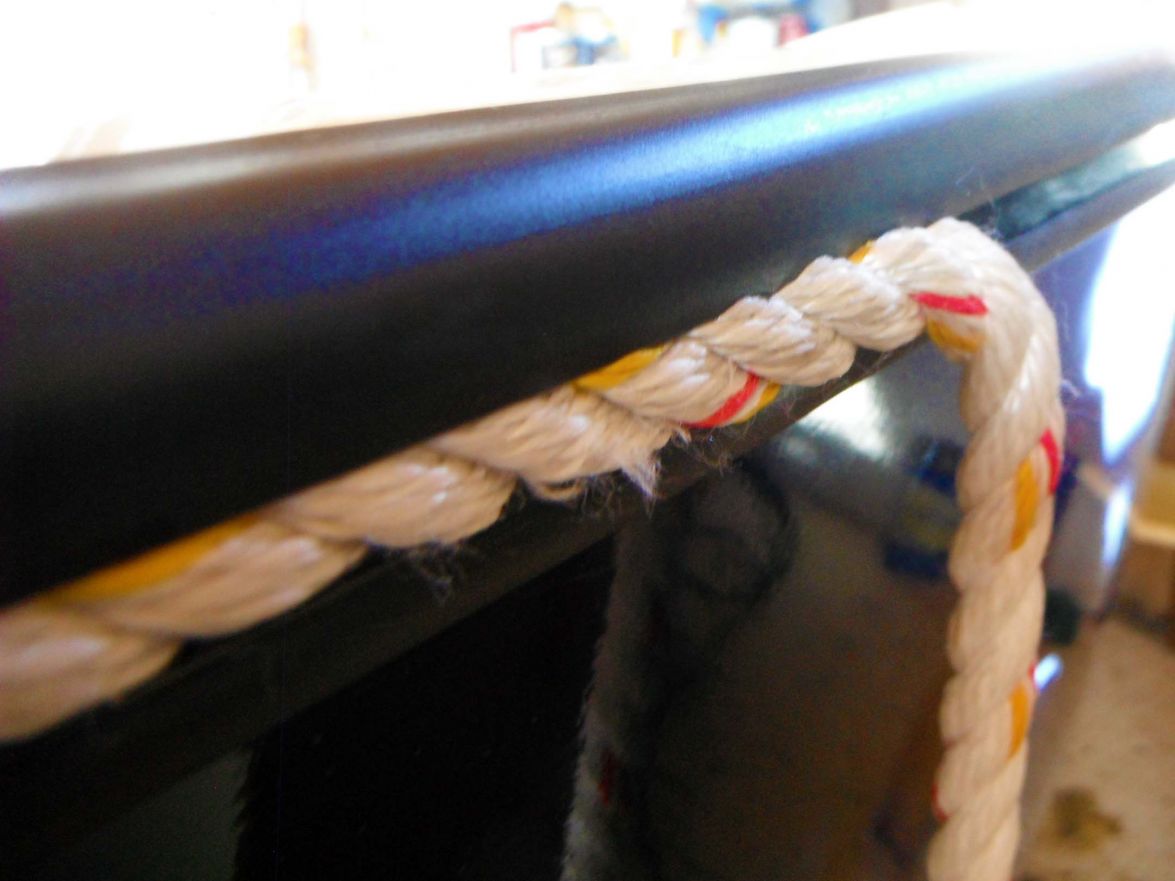
I've ordered these things from LA, as I couldn't find anything similar in a local store:

Hopefully I can get the rope in using these to pry apart the rubber. If so, she'll go into the water this weekend.
Re: TJ's V10
Posted: Thu Oct 08, 2015 1:34 pm
by PMac62
TJ - You'll have to slap on the macro lens because from where I'm sitting the lines look really, really, good.
Re: TJ's V10
Posted: Thu Oct 08, 2015 2:15 pm
by terrulian
PMac...
Thanks...but....
Anyway, one other thing about brightwork: When I started the build I planned on zero. But what happened was, after looking at the very fine work of other builders, I got seduced into considering it. By that time, however, I had already done some things which made it impossible to, for example, leave the inwale clear. I had used a couple of different colors of fairing compound and without grinding all that out, I couldn't figure a way to leave it visible. If I were to do it again I would have a clearer plan from the beginning so that kind of thing wouldn't happen. I think the boat would look better with clear inwales.
Re: TJ's V10
Posted: Fri Oct 09, 2015 1:41 am
by gonandkarl
Hallo Tony,
Your boat looks beautiful and I am glad You can try it out this weekend. That shine on it is marvellous and encourages me to finish my boat as soon as possible and hoping to be a bit as successful with the painting. Although I wont get it to such fantastic perfection. Let us have also pictures of the watering. You know the Bateau community can read well but pictures top all the boat building.
Greetings from Karl ( Austria )
Re: TJ's V10
Posted: Fri Oct 09, 2015 9:13 am
by terrulian
Thanks, Karl.
Those pliers I got do the trick with the rub railand I'm a bit amazed they are not more widely available. They're well made and sort of like snap ring pliers except sturdier and have wider jaws. They're only $20 plus shipping.
http://www.expandingpliers.com/
I still haven't completed inserting the rope into all of the rub rail but am almost certain I can do that today, which would mean we'd launch tomorrow.
I have commanded (or was it begged?) my wife to document the launch and will be assisted by my long time sailing companion, Terry Shrode. We will do our best to provide photos and/or video.
Re: TJ's V10
Posted: Fri Oct 09, 2015 7:29 pm
by wegcagle
Looks absolutely beautiful. Only one more thing to do now
Will
Re: TJ's V10
Posted: Sat Oct 10, 2015 9:36 am
by terrulian
Launch today if I can get her in the van.
A couple of last photos in the shop. She's never been in the outside world before so she is spending a few more moments lounging in pristine serenity, prior to being ravaged by sun, waves, rocks, sand, and careless seamanship:
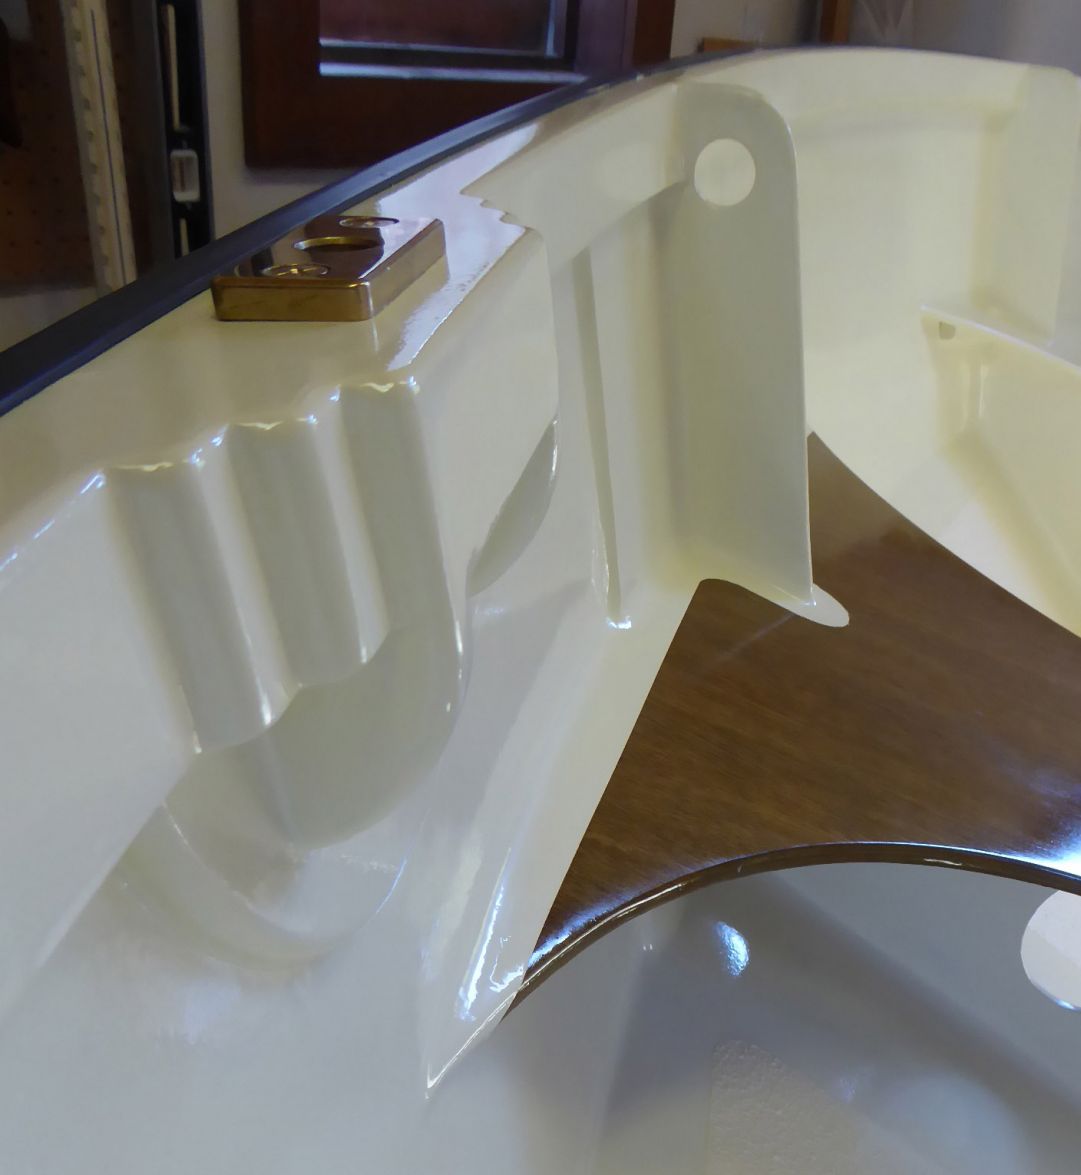
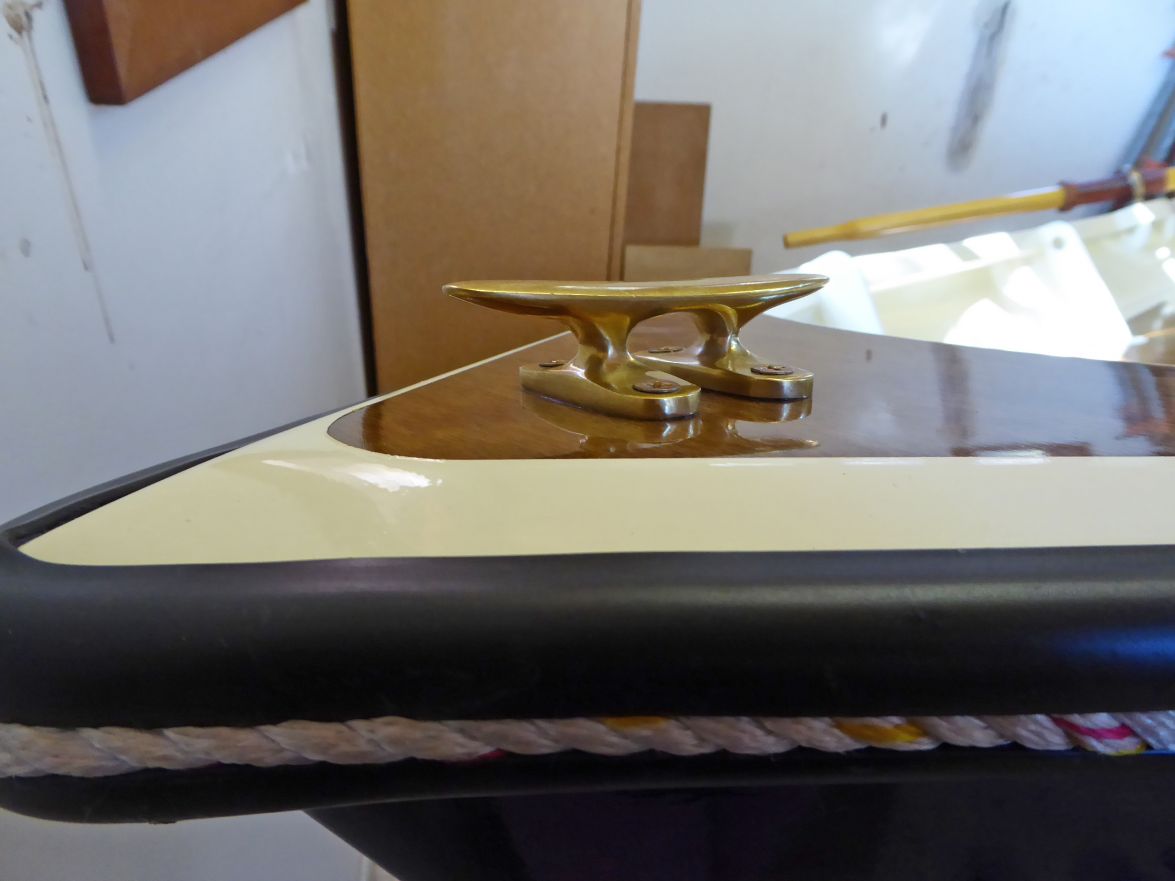
Re: TJ's V10
Posted: Sat Oct 10, 2015 10:19 am
by Corto Maltese
Have pity on this beautiful boat - put her into pool
There is a history of fine craftsmanship and the philosophers: from Socrates to Spinoza; and now Tony's splendid little boat.
Congratulations,
Dario
Re: TJ's V10
Posted: Sat Oct 10, 2015 4:22 pm
by Fuzz
I am with Corto! How are you going to actually use that thing
I would be too worried about scratching it to ever enjoy it. There is a ton of fine work in a small package. Looking forward to seeing it on the water.
Fuzz
Re: TJ's V10
Posted: Sat Oct 10, 2015 4:50 pm
by sds
That's a beauty. The brightwork looks very rich. The oarlocks are setting a new standard in ... oarlocks.
Now go put on some wear! I want to see scratches, dings and dents!
Re: TJ's V10
Posted: Sat Oct 10, 2015 5:48 pm
by pee wee
sds wrote:That's a beauty. The brightwork looks very rich. The oarlocks are setting a new standard in ... oarlocks.
Now go put on some wear! I want to see scratches, dings and dents!
and fish blood! and crumpled carbonated malt beverage containers thrown on the sole!
Seriously, that turned out so nicely that you have give it some fresh air and be the one who puts the first ding in her (make it small).
Re: TJ's V10
Posted: Sun Oct 11, 2015 8:49 am
by topwater
Beautiful finnish and boat
Just take her out and use her don't worry about dings and scratches , she was
built to be used.
Re: TJ's V10
Posted: Sun Oct 11, 2015 11:34 am
by terrulian
Now go put on some wear! I want to see scratches, dings and dents!
Not to worry, gentlemen; I dinged it before I even got the boat out of the shop.
I had rigged a scale, and dropped it leaving about a 1/8" hole in the interior paint. The boat weighed in at 120, which is less than I feared but still kind of a load. After assembly with one layer of glass over the bottom not required in the plans, it weighed about 92 with the seats just placed aboard. So the other 28 pounds is from glassing the seat tops, gunnels, knees, and breasthook (all not required in the plans), plus fairing, paint, oarlocks, cleat, and hatch covers.
However, I will say that after today I am very glad I glassed the bottom and gunnels. We launched on a gravel beach at China Camp, a state park that was home to an old Chinese shrimping operation, so the stones took a toll, especially on the skeg which lost some epoxy/graphite paint. I'll be asking CL about his copper recommendation. And at one point in the day I drifted into an ancient marine railway from the defunct boatyard at the park. There are some scratches on the bottom.
However, the boat handled beautifully, turned on a dime and tracked with confidence. A sweet little craft in both aesthetics and performance.
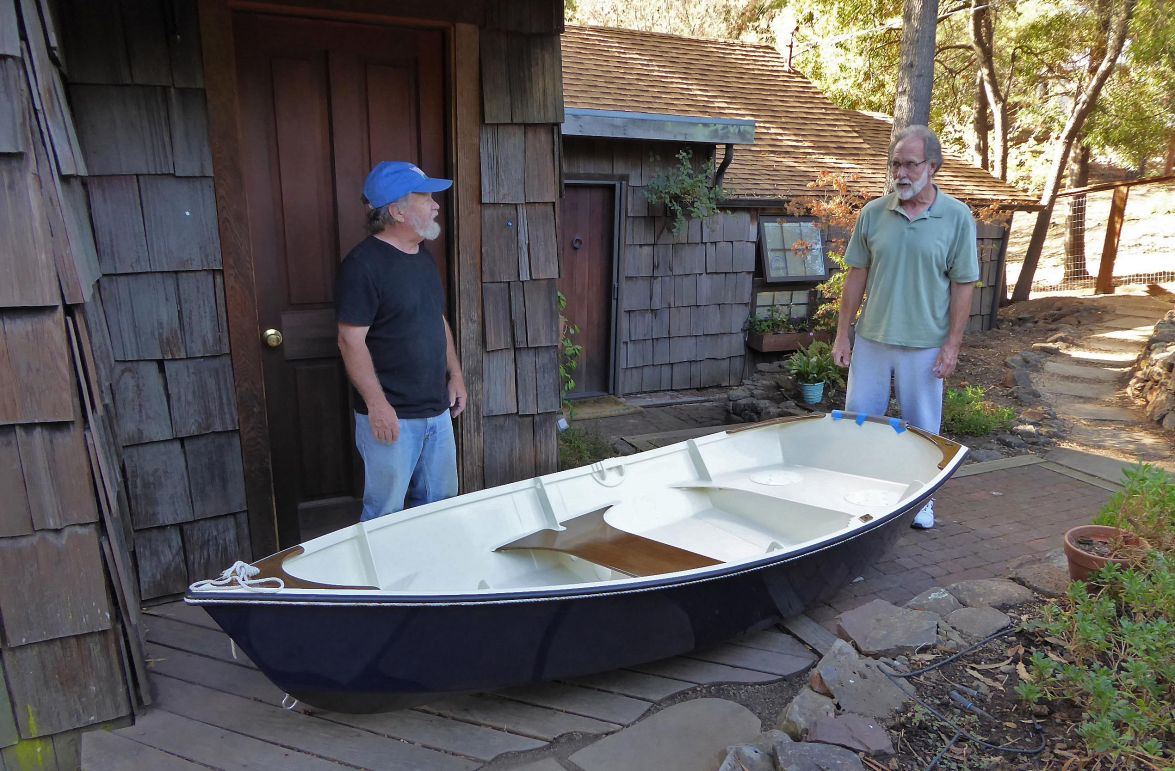
Shall we take a breather, old buddy?
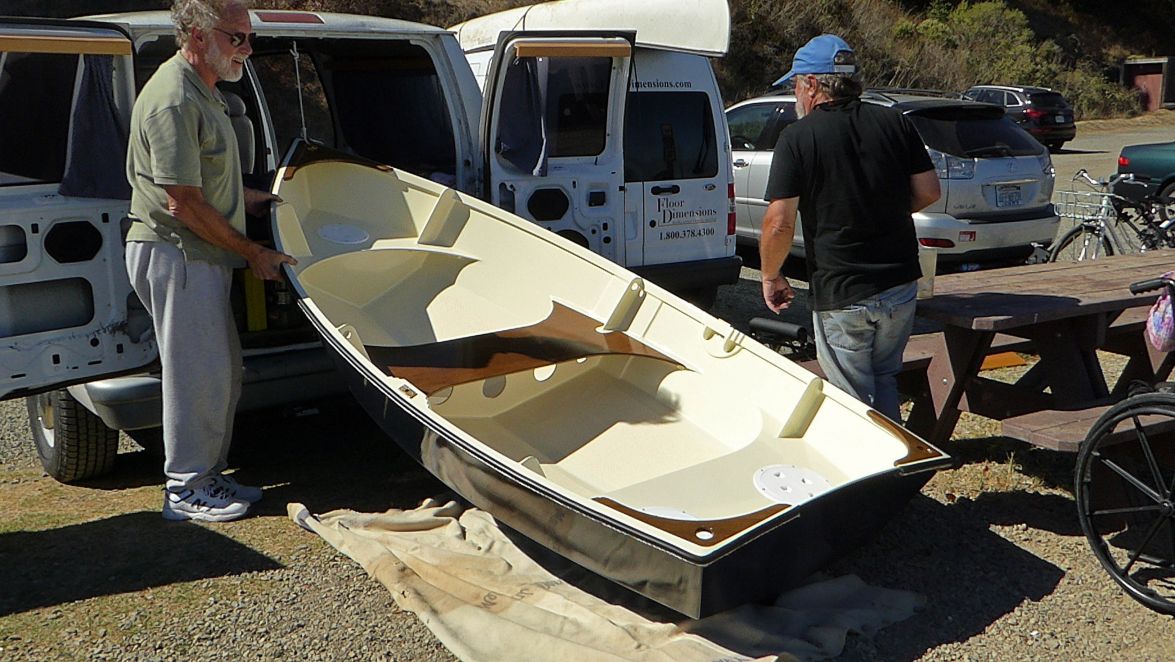
It did fit in the van after all.
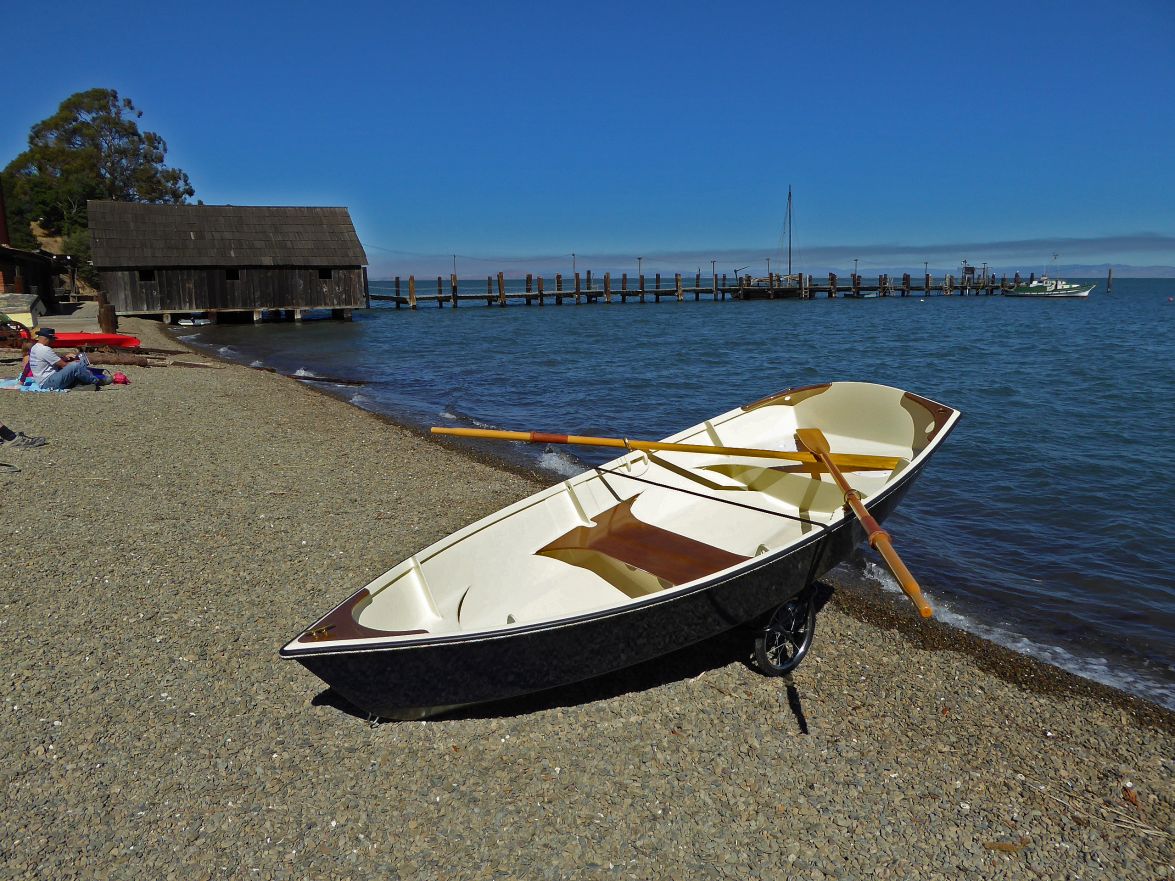
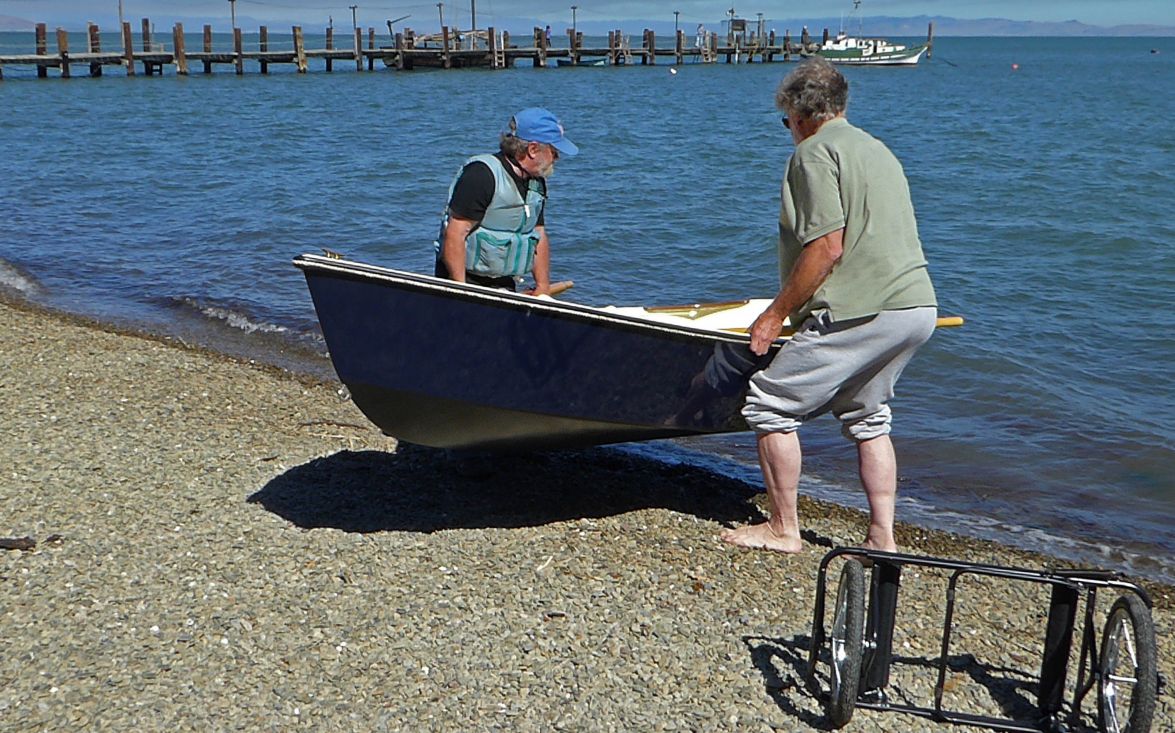
Here she goes.

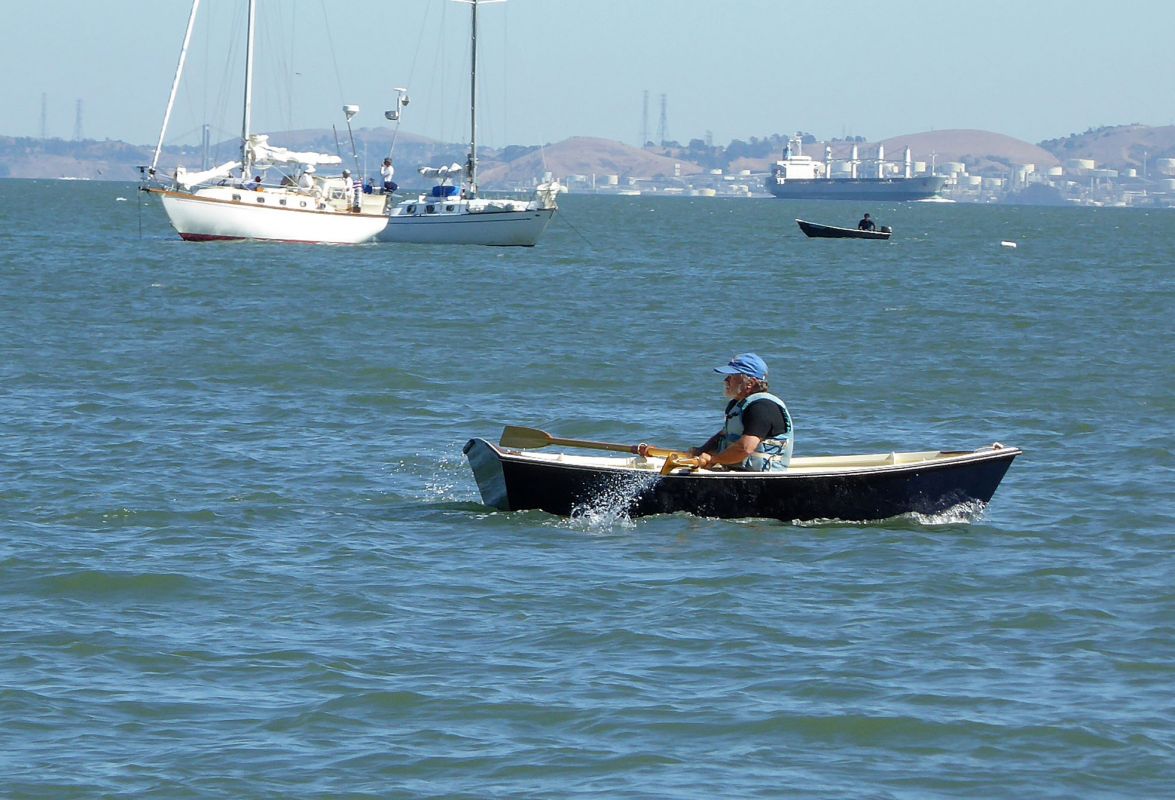
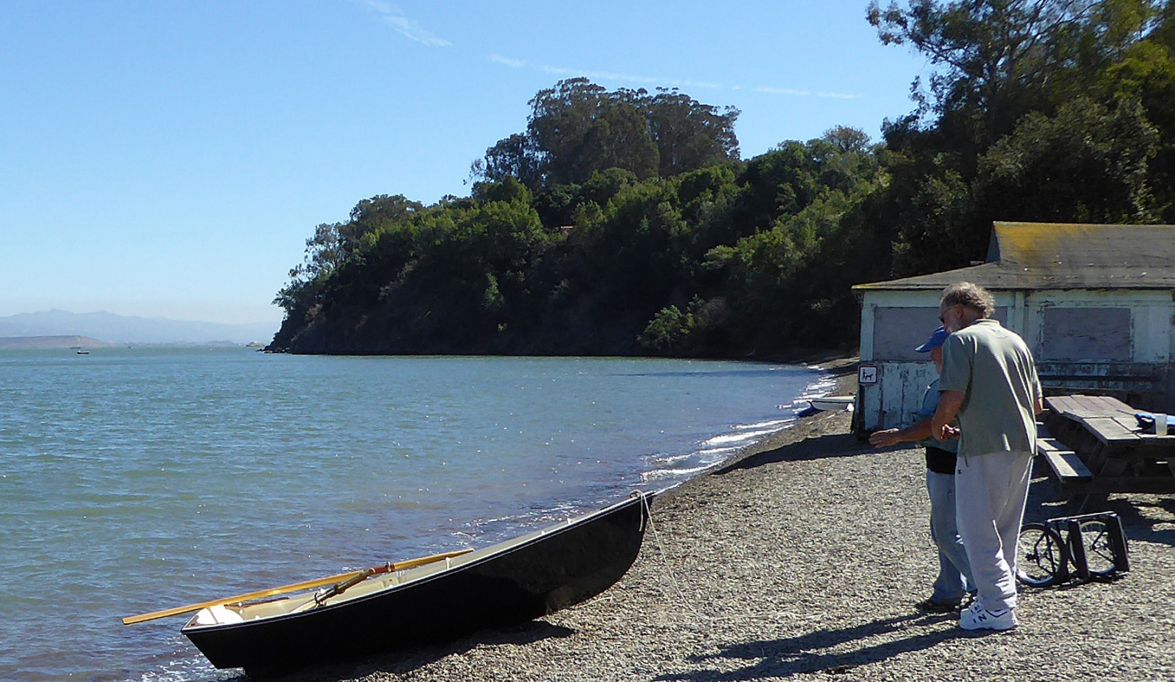
Video is here: [youtube]
https://youtu.be/_ztCVOzODY0[/youtube]
Re: TJ's V10
Posted: Sun Oct 11, 2015 11:37 am
by terrulian
It's time to thank all of you on the forum for your tips and encouragement. I can't say for sure which was more important but I'm going with encouragement. What a great bunch of people we have here.
And most of all, thanks to Jacques for his patience and wonderful designs. He has spread a lot of happiness in the world.
Re: TJ's V10
Posted: Sun Oct 11, 2015 12:47 pm
by Cracker Larry
Re: TJ's V10
Posted: Sun Oct 11, 2015 4:33 pm
by Walkers Run
That's so sweet! Congratulations
Re: TJ's V10
Posted: Mon Oct 12, 2015 6:54 pm
by wegcagle
Great job
Will
Re: TJ's V10
Posted: Mon Oct 12, 2015 7:06 pm
by terrulian
Here's a video of the build process:[youtube]
https://youtu.be/re8l-5FHnFA[/youtube]
Re: TJ's V10
Posted: Mon Oct 12, 2015 10:07 pm
by pee wee
Great job on the video, love Tom Waits' music. It also reflects how much more time a showroom finish can add to a build as compared to a work boat finish. Beautiful results, congratulations. I hope you enjoy her for many years.
Re: TJ's V10
Posted: Sun Nov 01, 2015 4:42 pm
by Joe H
Hey Tony,
Wonderful build on the V10, I've been looking for a boat I can build with and for the Grand kids and I think the V10 will fit the bill, teach them a little about boating and maybe, and that's a big maybe, sailing, I personally have never sailed before, never even been on a sailboat so it will be a bit of a learning curve for the kids and myself but with the help from all the sailing experience on this forum, CL, GK, you and others, should be fun.
I've seen Doc's V10 at Boca, and not sure if GK had his V10 at Crystal River but did witness his sailing and boat building expertise, and now your V10, so, even after reading through this entire build thread, I ordered V10 plans last night.
Joe H
Re: TJ's V10
Posted: Mon Nov 02, 2015 2:05 am
by gonandkarl
Hi Tony,
Whenever a new post is on your thread I naturally read it and cant help looking at your videos over and over again.
The building video as well as the launching video are really nice and an inspiration to strive for similar perfection if one should get up in the morning thinking having a lazy day. It really helps me getting on with my boat building, because the longer one builds the more one realizes that a lot of small steps are necessary to succeed even when no one can see a small batten fixed under the floor on the finished product. I did not know about it until the previous post that the music on your video influences my BBV mood also a lot.
Have you rowed a lot in your beautiful V10 since launching ?
The weather does not seem to be too good on your side right now.
Greetings from Karl ( Austria )
Re: TJ's V10
Posted: Mon Nov 02, 2015 8:49 am
by terrulian
Thanks, Karl.
I've done a couple of adventures on the little boat. I had planned the inaugural one (after the first launch and proof of concept) since before starting the build: My buddy Terry and I towed the dinghy behind our sailboat out to an island we'd never landed on in San Francisco Bay that has a sort of odd history. It's always been private land but it is almost impossible to build on. I think it is for sale now for about $5 million. Anyway, it is rarely visited although there are legends, as you might guess, of buried treasure and mining wealth. A couple planted a tree or two on the island to celebrate their marriage many years ago and visited often with enough water (there's none on the island) to sustain it.
Here's a shot of the V10 on the island's beach with our sailboat anchored offshore.
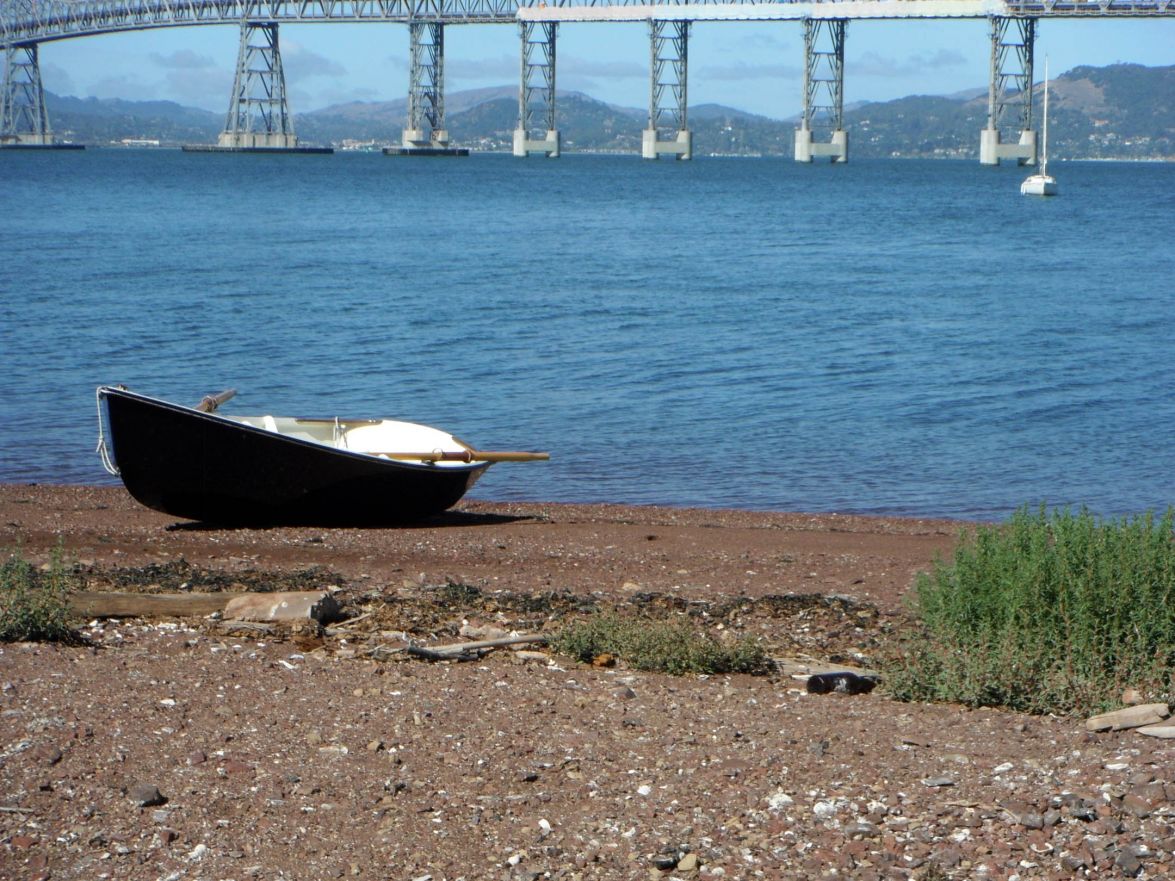
I have quite a few other little trips planned. I ordered a cheap cover for the boat after considering getting a custom one made, which would have been hundreds of dollars. This one is a generic inflatable dinghy cover. Right now I'm constructing a frame to put under it to create an arch so that the cover doesn't fill up like a swimming pool in the rain.
It's a little hard for one person to get the boat out of my truck and onto a dolly. I'm still working on the technique but am confident I'll figure it out. I want to make it easy to transport. The other project, when we get to it, will be to see if we can jam it into the berth next to our sailboat at the marina. We constructed a little dry dock out of scrapped Styrofoam and PVC for our previous dinghy to keep it just above the water so we wouldn't have to bother with anti-fouling. I don't know if the V10 will fit it, and it is quite a bit heavier. So we'll have to see how practical that is.
Re: TJ's V10
Posted: Mon Nov 02, 2015 9:20 am
by terrulian
Joe,
GK and Doc were, as you might imagine, inspirations to me and set a very high bar. I didn't attempt to match their expertise and certainly didn't achieve it, but I got a lot of ideas from them and others. GK, I think it was, offered the tip on using discs from the RO and also the multi-tool to use, after they had passed their useful life on the power tool, for hand-sanding. They have a stronger backing that is still good to bend into shape for corner and radius sanding. It seems a humble little tip, but it was VERY helpful.
And then there's Doc. When I first started reading the forums I discovered his build and would tell friends of mine who are interested in building things, "There's this knucklehead who...." I think I remember that he built a lathe with a hand drill and dolly wheels to turn his home-built mast, and then that wasn't good enough so he had to make a carbon fiber one. If I remember he also did bronze castings to create finials for his rub rail because he didn't like the ones the manufacturer provided. (I considered doing the same and actually took a casting class, but after a couple of tries casting mock-ups in epoxy, decided I couldn't come up with a workable shape for my situation.) I hope I'm not mixing him up with others who undertook great feats but I can't find his thread right now.
CL of course was always full of ideas and encouragement for everyone, and I am very fond of his attitude--shared by a lot of builders--that accepts the fact that you might have to do something two or three or four times before it works.
In regard to sailing, I have taught sailing for over 20 years (I know CL teaches also) and can tell you this: If you are going to take even a small boat out and you plan to take little ones with you, it is worth every penny to learn how to do it right. I am always amused when I teach a couple, and the man says, "I've been sailing my whole life, so I don't need this class but I wanted my wife to learn so I came along." And then it is revealed he doesn't even know the rules of the road. Taking people on a boat means you are the captain and are responsible for their lives once you untie the lines.
Best of luck on your build. Jacques has designed a beautiful little boat that rows nicely and tracks straight. I look forward to many hours with it.
Re: TJ's V10
Posted: Mon Nov 02, 2015 10:35 am
by Cracker Larry
I've got pictures of GK's at Crystal River and Doc's at Boca Grande. Both were first class looking rigs and both sailed well. I did have to tow GK's with my OD18 when the wind didn't blow
Re: TJ's V10
Posted: Mon Nov 02, 2015 10:22 pm
by Doc_Dyer
terrulian wrote:
NOT ME
copied GK
And then there's Doc. When I first started reading the forums I discovered his build and would tell friends of mine who are interested in building things, "There's this knucklehead who...." I think I remember that he built a lathe with a hand drill and dolly wheels to turn his home-built mast,
and then that wasn't good enough so he had to make a carbon fiber one.
close first one was ash, second one was ping-pong zebra wood ( better known as Lacewood)
NOT ME EITHER
If I remember he also did bronze castings to create finials for his rub rail because he didn't like the ones the manufacturer provided. (I considered doing the same and actually took a casting class, but after a couple of tries casting mock-ups in epoxy, decided I couldn't come up with a workable shape for my situation.) I hope I'm not mixing him up with others who undertook great feats but I can't find his thread right now.
my thread sorry for no pic in beginning, clicked wrong button and lost all my photos.
http://forums.bateau2.com/viewtopic.php ... &start=120
Bradley
Cracker Larry wrote: Doc's at Boca Grande. sailed well.
This is debatable
Re: TJ's V10
Posted: Mon Nov 02, 2015 11:38 pm
by terrulian
Thanks for the link and also thanks for the corrections. Credit where it is due and sincere apologies to GK.
.
Doc: I see that I stole your color design as well.
I think the knucklehead title is well deserved by both you and gk, however.
Re: TJ's V10
Posted: Tue Nov 03, 2015 8:35 am
by Cracker Larry
Cracker Larry wrote:
Doc's at Boca Grande. sailed well.
This is debatable
There wasn't much wind that day
It looked good though.
Re: TJ's V10
Posted: Tue Nov 03, 2015 8:36 am
by Doc_Dyer
Re: TJ's V10
Posted: Sun Jan 17, 2016 5:20 pm
by terrulian
Here's a little half-oval 3/8" brass strip I added to the skeg because without it, the epoxy/graphite was stripped away after one day on the rocky beach. We'll see how it does.
It was pretty much a pain to get this right, at least the way I do things. First, I sanded the graphite/epoxy on the edge of the skeg, which was rounded over. Then I drilled and countersank holes in the brass strip. This was a dicey operation, because the strip is pretty dainty to begin with and you definitely weaken it with the holes and even more with the countersink. Next, I pre-drilled some holes in the skeg to match the holes in the brass, carefully bending the brass around the curve at the end of the skeg. Then, I mixed up some glass fibers and high density filler with epoxy and glommed that onto the skeg, and put packing tape on the brass. I screwed the brass into place and waited for the epoxy to kick, and then removed the brass trying not to bend it at the sensitive spots. The point of this was to fill in the gaps on either side of the strip, between the rounded skeg and the flat side of the brass. Then I over-drilled the screw holes and filled them with thickened epoxy, and when that kicked I drilled pilot holes for the screws. Next, I smeared on a bunch of 5200 and screwed the strip on. I let that set up for a couple of days and then filed off the remnants of the epoxy and 5200. I also filed the edges of the screw heads, which were proud of the curvature of the brass...I hope I never have to get them out. Then I taped off the brass and mixed up some epoxy/graphite and re-painted the sides of the skeg. Yes, it really was that complicated, and I don't even know if it will stick.
I'm sure you know of a smarter way to do all of this, but please, don't tell me now.
Even the picture was a problem. The difficulty of balancing the lighting between the black hull and the semi-shiny brass did not result in an Ansel Adams level shot.
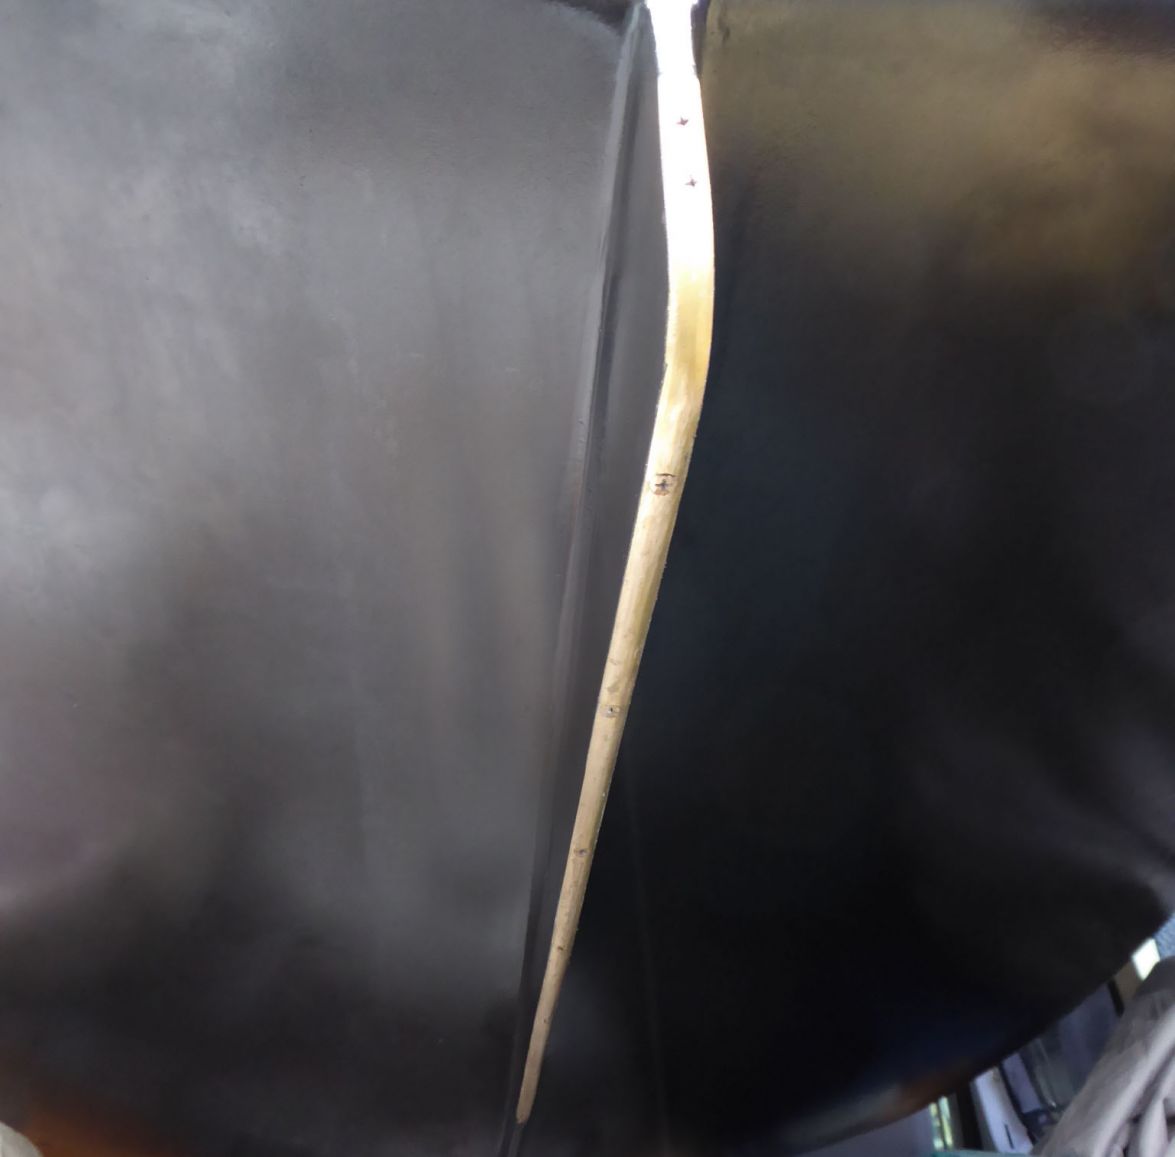
Re: TJ's V10
Posted: Tue Jan 19, 2016 11:03 am
by ks8
Nice skid.
Re: TJ's V10
Posted: Sat Jan 23, 2016 6:30 pm
by Laszlo
terrulian wrote:Here's a little half-oval 3/8" brass strip I added to the skeg because without it, the epoxy/graphite was stripped away after one day on the rocky beach. We'll see how it does.
I did pretty much exactly the same thing, including the countersunk screws, for the same reasons on my V12 7 years ago. Still working just just fine with no maintenance. You'll be really glad you did this.
Laszlo
Re: TJ's V10
Posted: Sun Jan 24, 2016 10:11 am
by gonandkarl
Hi Tony,
Thank You for the perfect instruction advise for the strip on the skeg. I did such a strip on my test build ( rowing ) boat but in stain less steel and I ruined a lot of drills until someone told me to drill very slow and possibly cool the drill. I will do the skeg on my AD14 with a brass strip just like you described it and maybe also the bottom of the centreboard shoe.
Greetings from Karl ( Austria )
Re: TJ's V10
Posted: Mon Jan 25, 2016 8:42 am
by terrulian
I have found cobalt, or better yet, titanium bits last longest when drilling stainless. Doesn't hurt to dip the tip in cutting oil. Also it is helpful to use cutting oil when creating threads with taps and dies if you want a good result. But I'm not a real machinist, and don't even play one on TV.
Re: TJ's V10
Posted: Tue Jan 26, 2016 9:10 am
by topwater
But you did stay at a Holiday inn express last nite
Re: TJ's V10
Posted: Sun Feb 07, 2016 10:53 pm
by terrulian
With the weather cleared up, I was able to do a couple of outings and can report that the V10 rows very well. I was easily able to do 2.5 knots on flat water with no current. If I pushed it I could hit 3, but 2.5 is a better pace at about 30 strokes/minute using 8-foot oars. Jacques may have recommended 7 1/2 feet, I don't recall, but I can't complain about this performance. I weigh about 150, so I don't know what it would be like with someone heavier at the oars.
Against a little breeze, say 10 knots, you'll lose .5 knots. Haven't been out in anything above that or in any chop over about 3-4".
With two in the boat, it's not easy to row, which is to be expected. I haven't timed it but I'm sure it's a lot slower as it is significantly down at the stern.
Re: TJ's V10
Posted: Sun Feb 14, 2016 10:59 am
by terrulian
Another outing with the V10 as tender to our Catalina 22. GG Bridge in background.
Re: TJ's V10
Posted: Sun Feb 14, 2016 1:00 pm
by gonandkarl
Hallo Tony,
What a nice picture and the sandy beach is also perfect to tow the boat out.
Have lots of fun with your tender.
Greetings from Karl ( Austria )
Re: TJ's V10
Posted: Mon Feb 15, 2016 2:59 pm
by Corto Maltese
What an iconic picture! Evokes stories...
Re: TJ's V10
Posted: Sat Aug 13, 2016 1:32 pm
by gonandkarl
Hi Tony,
I can understand that you will not come to Florida to the boat builders meet. I just looked again at your pictures in this thread and you have got everything I would want to have close by, the sea. As you know I live in a land locked country and its a 450 km ride to come to the Adriatic sea where we go to Croatia once a year for a week to have a holiday at the sea. When I mentioned to my wife that the builders meet falls on my 70 th birthday she suggested to me to celebrate it with going there as I do not like big ( birthday) partys and would much rather be at the sea. That is how most probably my last long trip came about. If I could see the sea and Golden Gate Bridge like you just about every day, not ten horses could get me away from such a nice spot.
Wish you fair winds and nice sailing trips.
Greetings from Karl
Re: TJ's V10
Posted: Sat Aug 13, 2016 11:45 pm
by terrulian
Wish you fair winds and nice sailing trips
.
And same to you, Karl!
Re: TJ's V10
Posted: Mon Sep 25, 2017 5:14 pm
by terrulian
Some updates.
First, here's a look at some of the rowing expeditions I've done around Marin County, just north of the Golden Gate Bridge. I foolishly did not record all of them.
Secondly, I cleaned the boat a bit and had a look at some specifics after two years of relatively hard, if not regular, use. I thought these photos might be informative.
First, the good news:
Bow seat, which is glassed, looks OK. Stern seat looks as good.
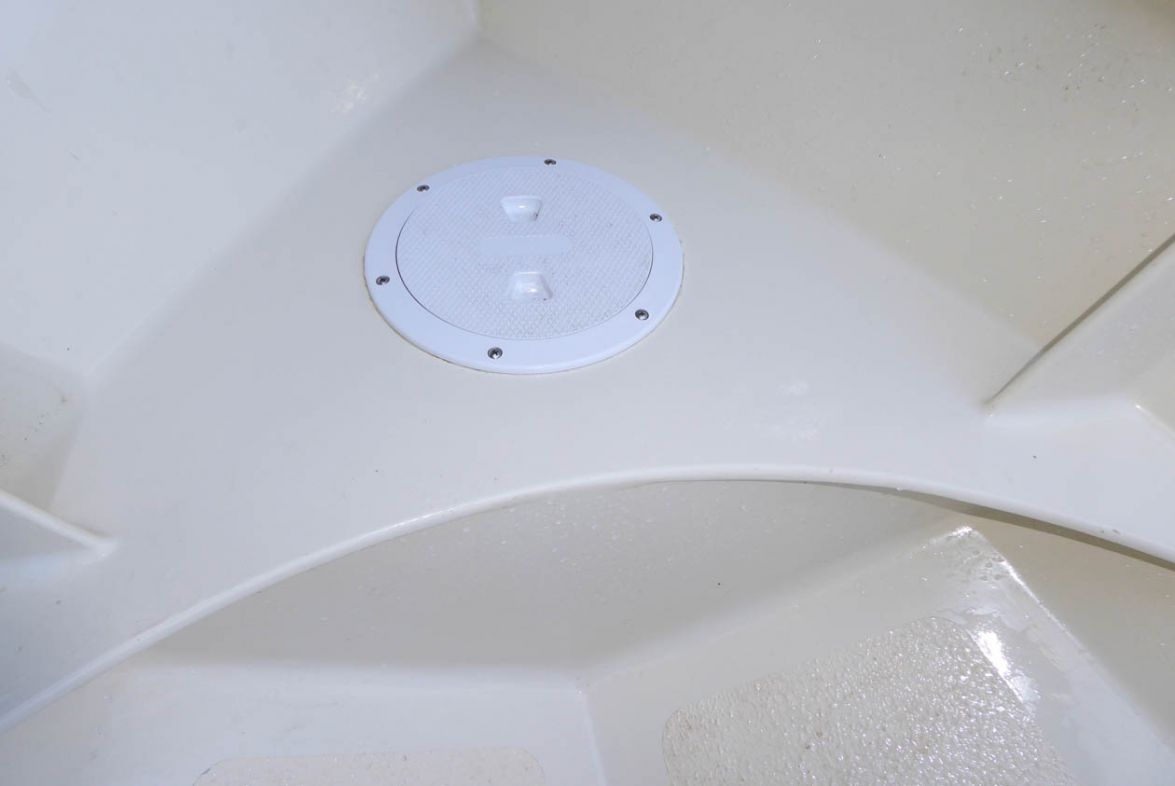
Center thwart, which was also glassed and obviously gets the most use, is fine. The blobbiness you see is a combination of reflection and wetness, as I just rinsed it off. There are no deep scrapes or gouges.
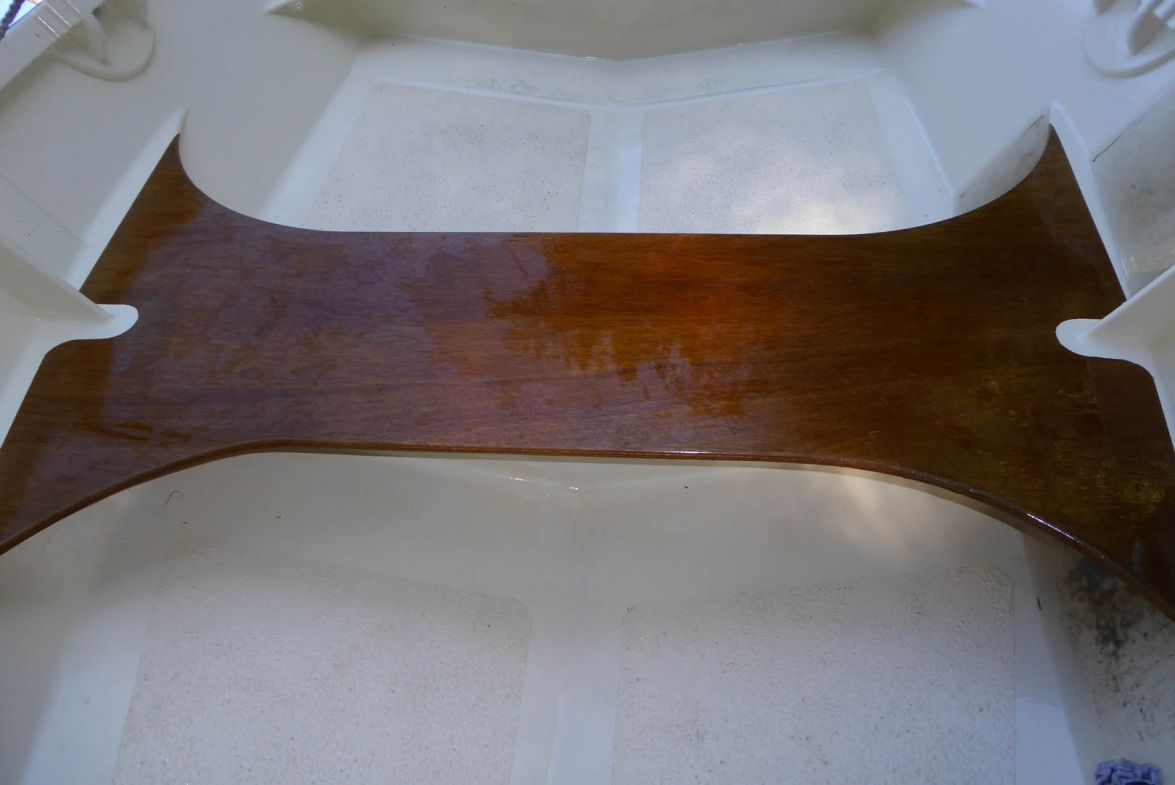
Breast hook looks fine and again the irregularities are from lighting and water sitting on the surface. It's way shinier than this photo shows:
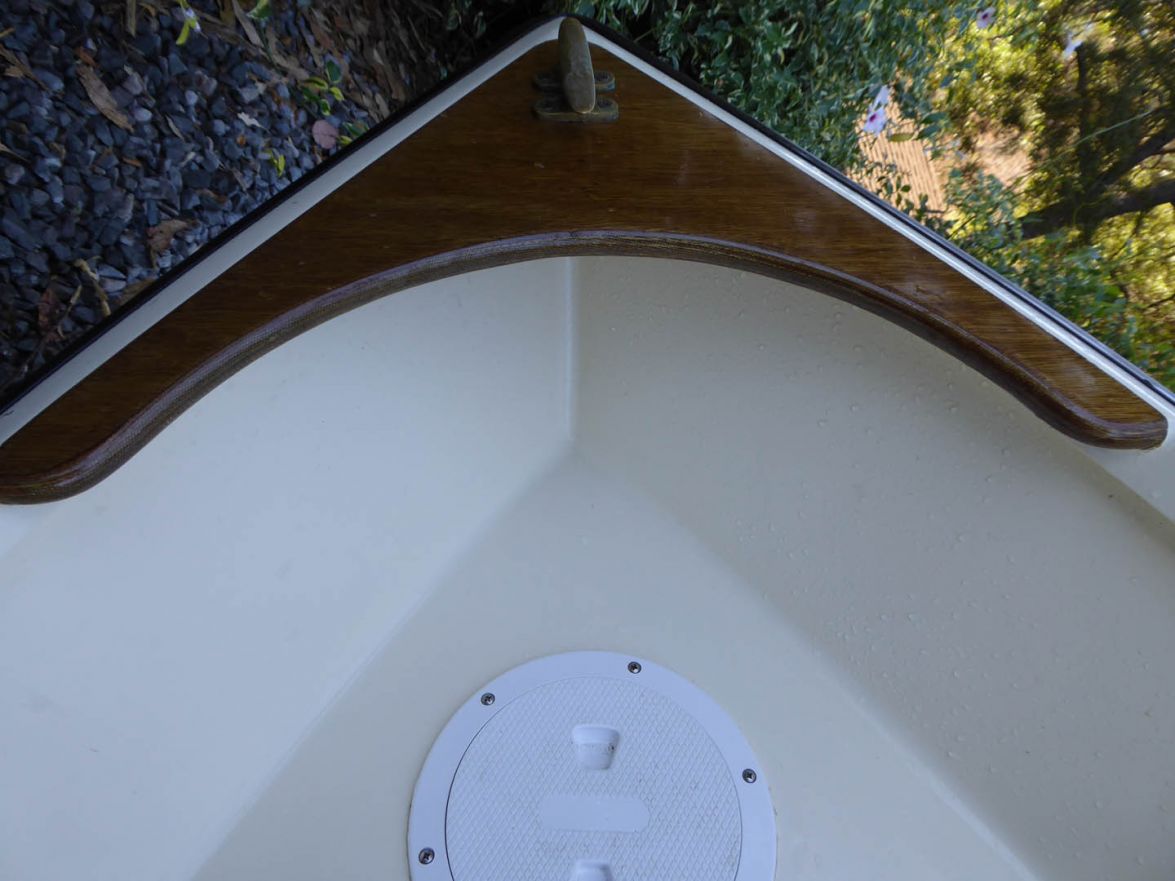
Here are some other shots where wear is more apparent, but the point is that all these areas were glassed, and had they not been, these scrapes would have gone through to the wood.
Top edge of the transom:
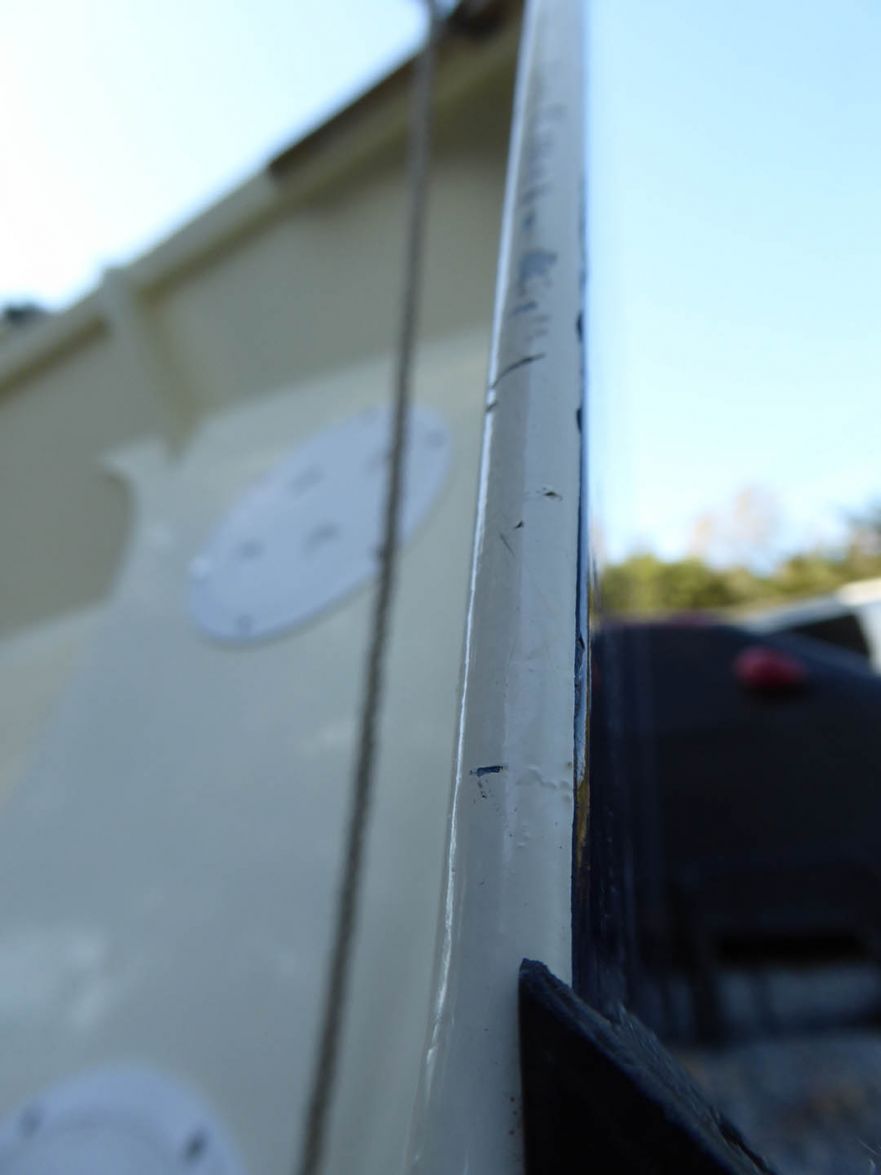
Gunwale bordered by the rubber rail (blobs are not peeling paint but water on the surface):
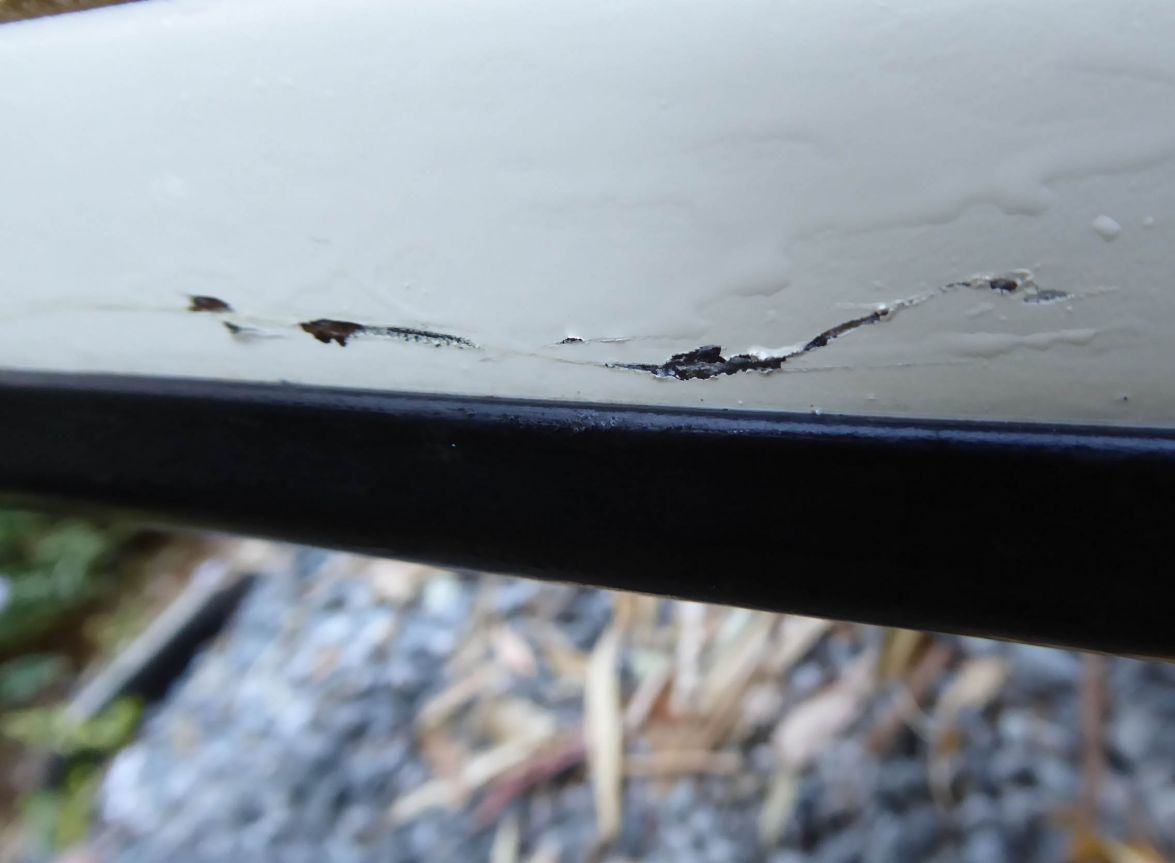
Now the bad stuff. Pursuant to Jaysen's look at his boat, here are a couple of spots, one at the knuckle below the stem:
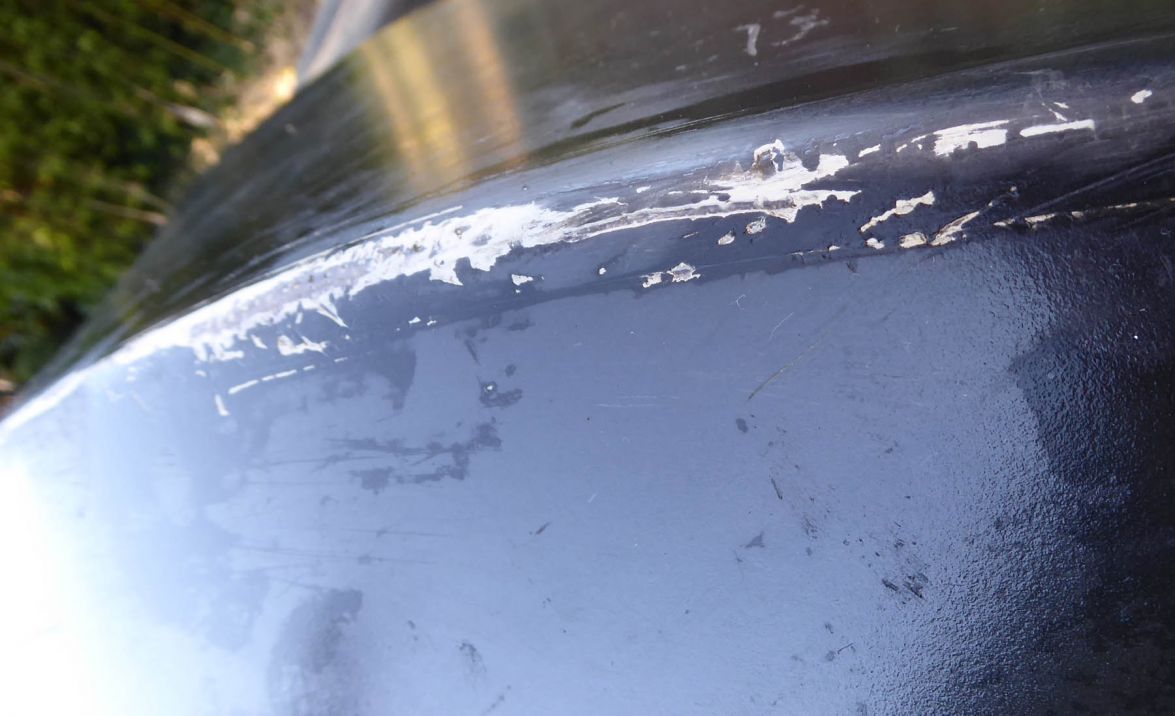
And the really bad one, just forward of the bronze runner that protects the skeg. Note that the bronze is fine, but the skeg, covered in two layers of glass and about 4 or 5 coats of graphite/epoxy, is down to the wood. The bronze has held up extremely well.
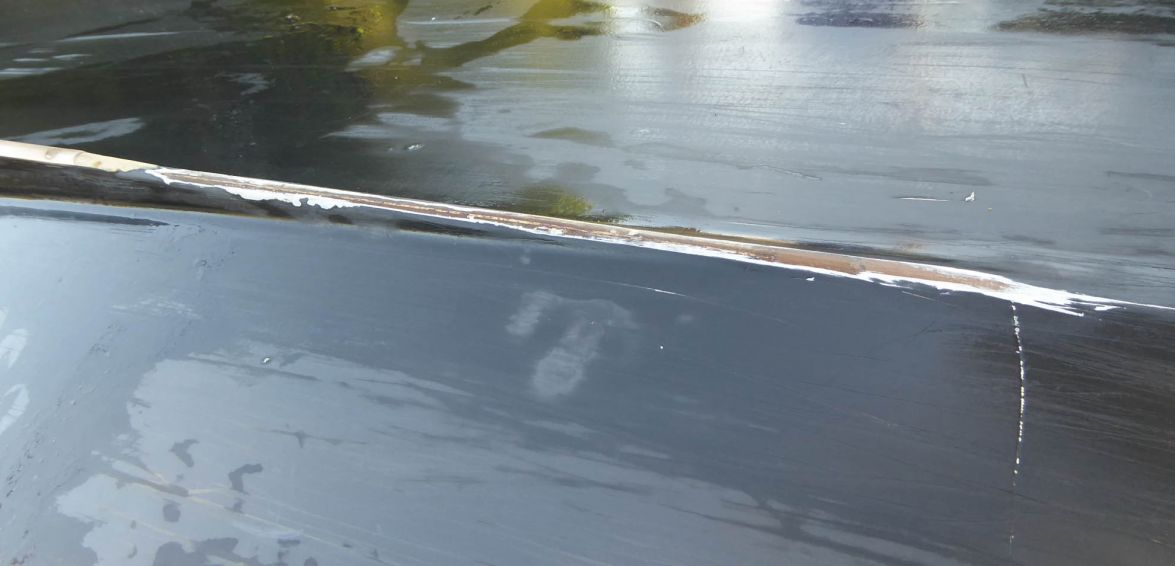
I'm going to put at least two more pieces of 3" glass tape from the stem to the beginning of the bronze, and then several more coats of epoxy/graphite. The reason I didn't continue the bronze strip farther is that it was screwed into the skeg, and forward of where it ends screws would have penetrated the hull.
On another note: I have added an extension to my cart and with the extra length, it is a breeze to just slide the boat into the water, and recovery is equally easy. You still have to maneuver it in and out of the truck, but that is comparatively easy.
The 1" ID pvc has an OD that fits just right inside the 1.5" OD aluminum extrusion. It is held in place with a stainless bolt and wing nut.
Re: TJ's V10
Posted: Mon Sep 25, 2017 6:03 pm
by Jaysen
She looks good Tony. I'd be tempted to run that bronze all the way forward. As far as the screws go... 5200. How many HP are you generating with those oars?
Re: TJ's V10
Posted: Mon Sep 25, 2017 6:09 pm
by terrulian
The bronze is attached with screws as well as 5200 and is adhering very well.
How many HP are you generating with those oars?
Man, it's Herculean!
I do about 2.5 knots comfortably and about 3.2 with a little more effort, in flat water with no wind.
Re: TJ's V10
Posted: Mon Sep 25, 2017 6:14 pm
by Jaysen
Ha!
My thought was more that 5200 would hold that strip on with just about anything a person or the wind could hit. I'd only bother with screws on the bow (where built up) and on the skeg (over drilled and filled). If we were motor boats... then I'd think we'd need screws through the whole length.
Re: TJ's V10
Posted: Mon Sep 25, 2017 7:58 pm
by terrulian
Perhaps I should have more confidence in the 5200, but I've never used it in a situation where it was likely I was going to drag it over a rock.
Just now I laid three more layers of 3" tape stem to stern. It's kind of an ugly job compared to my original but I'll do some shot at fairing just a little. The fact is, even I never see the underside the boat, and if I don't, who does?
Re: TJ's V10
Posted: Mon Sep 25, 2017 9:22 pm
by Aripeka Angler
A think few dings add character, she looks mighty nice to me.
A little touch up on the bare spots is all you need.
You have certainly used the boat a bunch according to the map of your adventures.
By the way, I have never sailed much but I have surely enjoyed reading your book...
Re: TJ's V10
Posted: Mon Sep 25, 2017 10:17 pm
by terrulian
Very kind of you to say so, AA.
I've gotten a lot of use out of the V10. Unlike most of you guys who knew what you were building a boat for, I just wanted to build a boat and wasn't sure I'd like rowing. But I've found my way into a lot of obscure spots right in my own back yard that you really can't get to any other way. It's also great exercise and a very quiet and serene way to spend a day.
Re: TJ's V10
Posted: Tue Sep 26, 2017 2:49 am
by gonandkarl
Hi Tony,
Lovely pictures of your boat are always a treat for me. The same way as you said I was not sure I like rowing so it is with me and sailing. But now that I am in the final stages of my sail boat build I look forward to sailing in it.
If you do not trust the 5200 glue all that much why do you not try epoxy and a bit of wood flour for glueing the bronce strip forward of the skeg and also use it on the 1/8 inch side of the strip to sort of make the strip flush with the bottom. My expierience is that epoxy wood flour glue between metal and wood is excellent but I only tried it with galvanized steel.
Greetings from Karl
Re: TJ's V10
Posted: Tue Sep 26, 2017 8:33 am
by terrulian
Thanks, Karl,
Yes, I thought of epoxy/wood flour but I personally have had little success gluing metal with epoxy but have very little experience with it. The bond between glass and metal here has to be particularly strong because of the abrasion that occurs when you drag a 125-pound boat across gravel or rocks. Obviously I try to avoid doing that but it happens. I'm adding some glass along the centerline for now and we'll see how that works. Also, I'd have to get some more bronze and that would cost a little, whereas the rest of the stuff is sitting in my shop for free.
Re: TJ's V10
Posted: Tue Sep 26, 2017 9:15 am
by Jaysen
JB Weld is epoxy for metal to metal so it can be done. I think the surface prep is key. With JB you use 60-80 to scuff the surface of the metal. I think that's all you'd need to do. I'd still think 5200 as CL seemed to look at that stuff kind of like God saying "let it be stuck together!" and it was stuck.
I'll tell you what, I'll try to glue up some scrap alum to a piece of pine before we leave this weekend. Then when we are back next weekend I'll see if I can pull it apart. That might be the test we need.
Re: TJ's V10
Posted: Tue Sep 26, 2017 9:37 am
by terrulian
I have tried JB weld in a high stress situation and it broke immediately but it was definitely a challenging application.
I'll look forward to your test with the 5200 on pine...but why not stick it to epoxy which is what you would really be doing?
Re: TJ's V10
Posted: Tue Sep 26, 2017 9:54 am
by Jaysen
Sorry for the confusion. I will be using marin epoxy from BBC not 5200. I'm too cheap for that stuff when I've got marin just begging me to build another boat...
Re: TJ's V10
Posted: Tue Sep 26, 2017 10:52 am
by terrulian
OK, either way I'd love to hear the result. I'd had reasonable experience with stainless or bronze to fiberglass but as I remember, uneven results bonding metals using epoxy, likely the result of operator error.
Re: TJ's V10
Posted: Tue Sep 26, 2017 11:06 am
by Jaysen
terrulian wrote: ↑Tue Sep 26, 2017 10:52 am
OK, either way I'd love to hear the result. I'd had reasonable experience with stainless or bronze to fiberglass but as I remember, uneven results bonding metals using epoxy, likely the result of operator error.
Well.. I know more than one jeep that is more JB Weld than metal at this point. I know it will work but it does require the right JB product and the right prep. It's possible that you had the wrong JB product. I'd not question your prep
Re: TJ's V10
Posted: Tue Sep 26, 2017 11:37 am
by terrulian
Oh, you can question it.
But it was probably more that I was asking the JB Weld to do something that nothing on earth would have done. It was a last resort for a fix at sea where of course we had limited access to supplies.
Re: TJ's V10
Posted: Tue Sep 26, 2017 12:42 pm
by bigyellowtractor
My mate works in tungsten carbide and I was amazed to discover that they glue wear parts and cutting tips to metal so there must be something that will stick a rubbing strake to a dinghy.
Re: TJ's V10
Posted: Tue Sep 26, 2017 2:33 pm
by terrulian
Well, if you find out let us know.
Re: TJ's V10
Posted: Tue Sep 26, 2017 4:27 pm
by bigyellowtractor
terrulian wrote: ↑Tue Sep 26, 2017 2:33 pm
Well, if you find out let us know.
An enquiry to Loctite might come up with some suggestions
Re: TJ's V10
Posted: Wed Sep 27, 2017 9:14 am
by topwater
I have used silvertip epoxy to glue bronze and brass , aluminum . I have glued bronze to Ipe , brass to aluminum.
The key is to really rough up the parts you are going to epoxy . The more bite the better. I used epoxy with silica
to stick it. No problems so far. Make sure the parts are super clean " acetone or alcohol" . There is a whole chapter
about epoxying metal in the Gougeon brothers book on boat building.
Re: TJ's V10
Posted: Wed Sep 27, 2017 9:45 am
by terrulian
Thanks, topwater. I probably should have considered this originally but didn't.
I just finished slapping three more layers of tape on the centerline and will finish with some more graphite/epoxy, and leave that option for next time I need to repair it since I am hampered by a schedule right now.
BTW, I can't believe what a sloppy job I'm doing this time around compared to the guy who built the boat...all dictated by rushing.
Re: TJ's V10
Posted: Wed Sep 27, 2017 9:52 am
by Jaysen
And knowing you can fix it. Don't forget that little tidbit. It's easier to look at it and say "eh... sandpaper next time" than it was to recognize "it is all fixable" while giving birth to your boat the first time.
Re: TJ's V10
Posted: Thu Nov 23, 2017 11:28 am
by terrulian
For any of you interested in my adventures on my little V10, send a friend request to Tony Johnson on Facebook. You might get some other stuff but I don't post too much. The latest outing was an expedition to the island seen here, off the Marin County coast in San Pablo Bay.

The description of this particular voyage is here on FB. Perhaps I should make these public so you wouldn't have to suffer the indignity of being my "friend."
https://www.facebook.com/tony.johnson.1 ... 437&type=3
Re: TJ's V10
Posted: Thu Nov 23, 2017 11:37 am
by Jaysen
That idiot named Jaysen sent you a request.
Happy turkey day!
Re: TJ's V10
Posted: Thu Nov 23, 2017 12:53 pm
by terrulian
Yep, I got it...confirmed!
Re: TJ's V10
Posted: Thu Nov 23, 2017 4:49 pm
by Fuzz
Whats facebook
Re: TJ's V10
Posted: Thu Nov 23, 2017 9:16 pm
by Jaysen
It’s what the Mrs Fuzz does to you when you get all handy while she’s reading Tolstoy.
Re: TJ's V10
Posted: Fri Nov 24, 2017 1:45 am
by Fuzz
Got that covered. Sending her back to Momma in a few days for retraining
My mother in law REALLY likes me
Re: TJ's V10
Posted: Fri Nov 24, 2017 4:36 am
by gonandkarl
Hi Tony,
Definitely want to be a friend of yours.
Greetings from Karl
Re: TJ's V10
Posted: Fri Nov 24, 2017 8:55 am
by terrulian
Great, Karl, done.
Re: TJ's V10
Posted: Fri Nov 24, 2017 9:01 am
by Bogieman
Permission to come aboard, Captain?
Bogie
Re: TJ's V10
Posted: Fri Nov 24, 2017 9:24 am
by terrulian
Permission to come aboard, Captain?
Yes, please.
I see I've run into a slight problem here because like everyone on Facebook I get friend requests from scammers, and of course many of us don't use our full names on Bateau. May I assume you're Scott? I welcome all of the builders here of course.
Re: TJ's V10
Posted: Fri Nov 24, 2017 9:36 am
by Bogieman
Tony,
Yup, my name is "Scott" in real life.
Re: TJ's V10
Posted: Fri Nov 24, 2017 10:37 am
by peter-curacao
Fuzz wrote: ↑Thu Nov 23, 2017 4:49 pm
Whats facebook
It's a Social media platform 
Re: TJ's V10
Posted: Fri Nov 24, 2017 12:21 pm
by Jaysen
peter-curacao wrote: ↑Fri Nov 24, 2017 10:37 am
Fuzz wrote: ↑Thu Nov 23, 2017 4:49 pm
Whats facebook
It's a Social media platform
I think my answer was more fun.
Re: TJ's V10
Posted: Fri Nov 24, 2017 4:24 pm
by peter-curacao
Jaysen wrote: ↑Fri Nov 24, 2017 12:21 pm
peter-curacao wrote: ↑Fri Nov 24, 2017 10:37 am
Fuzz wrote: ↑Thu Nov 23, 2017 4:49 pm
Whats facebook
It's a Social media platform
I think my answer was more fun.
Sorry missed that without a quote, but yes it was
Re: TJ's V10
Posted: Wed Oct 25, 2023 1:07 am
by gonandkarl
Hi Tony,
I have seen on facebook that you want to sell Your beautiful V10. Please let us know the reason. The video with You rowing near the Golden Gate Bridge is unforgettable. I must confess after having built three boats that I have not been on the water this Summer with them, because my towing car a Citroen C3 bit the dust due to old age and I did not replace it. I built myself a 3 wheel cycle trike for trips up to 20 km and anything further I rent an electric car of my municipal power supplier who has 7 vehicles parked at different places in town of which one is very close to my house. This transport turns out dirt cheap 2 Euros rent per hour and 20 cents per km. That is why I also thought about selling my boats. But I am not convinced that I really want to go through with it although old age let it be more real that I might spend next Summer again on dry land.
Greetings from Karl


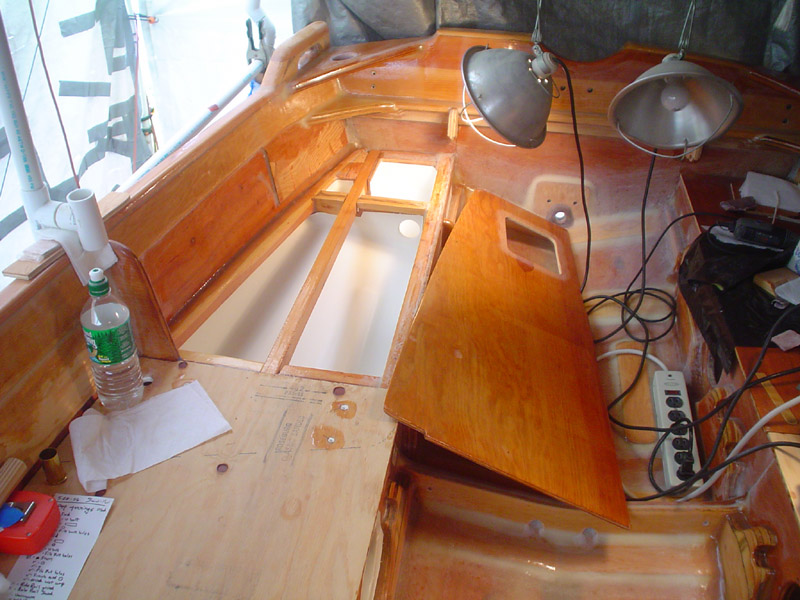
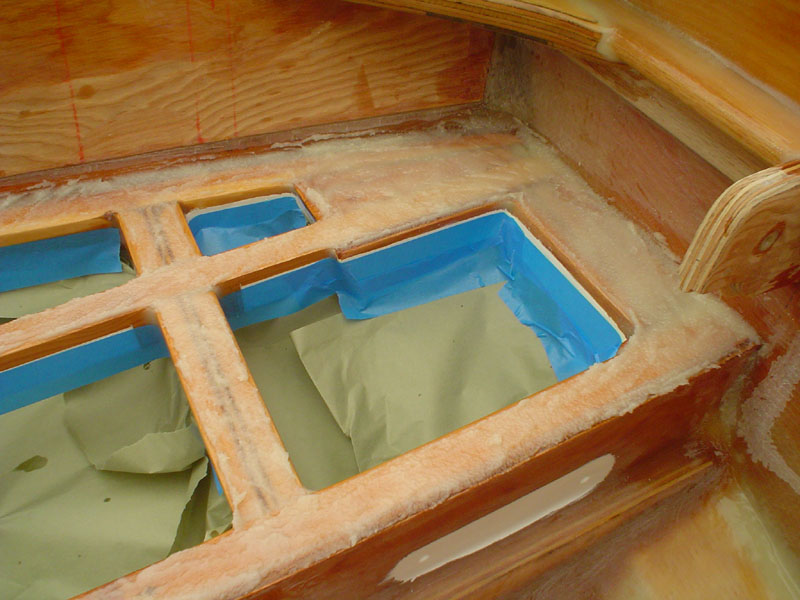
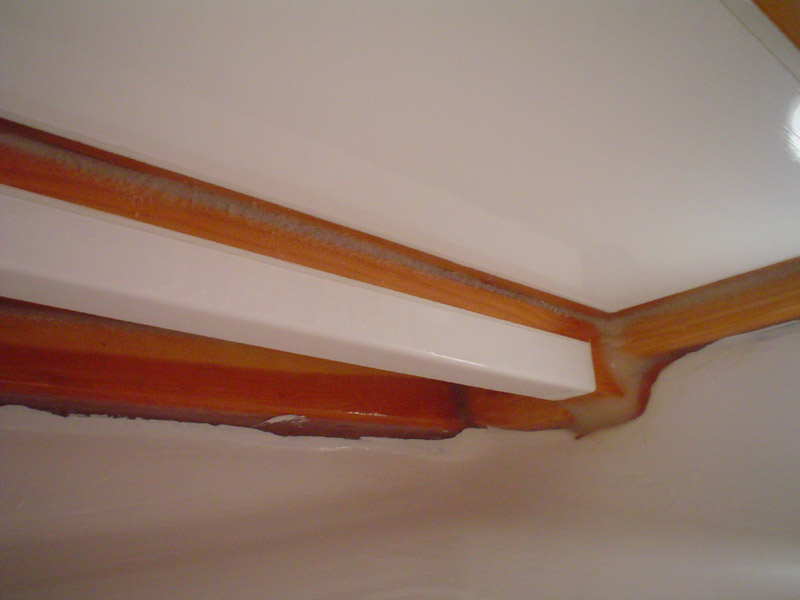
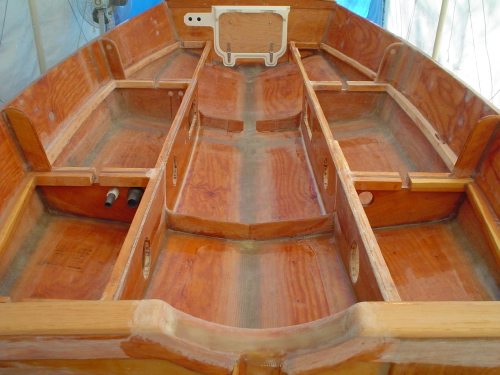