Page 1 of 1
JustInCase FB11 build
Posted: Sat Dec 13, 2014 11:53 am
by JustInCase
So Im committed. Here's the build plan for the FB11.
-Do a little experiment cutting curves in plywood this weekend and build a window box size planter that looks something like a canoe using stitch and glue. If it looks good I may even paint it next weekend before starting on the FB11.
- While I am off work between Christmas and January 5 build the hull and get as far as I can on the FB11.
- finish the boat working nights and weekends through the winter and launch her in spring or early summer.
I have the plywood now. I'm going to do the full sail, row, motor set up on this so I got 4 sheets of the 6 mm okoume for the hull and a sheet of 18mm Meranti for the foils. I'm also going to make a small change to the plan and move the forward seat up to the gunnel and stretch it back to cover the upper mast support. That and adding all the parts for the motor and sail option made getting the 4the sheet of 6 mm nessissary over the 3 in the plan/kit.
I'll post progress here and add pictures to the gallery I just created....I may even link them here if I figure that out.

Re: JustInCase FB11 build
Posted: Sat Dec 13, 2014 11:59 am
by Cracker Larry
I ran a charter boat out of Ft. Lauderdale for a while, it was named Justin Time. It carried a dinghy/life boat on the bow named Justin Case

Here is your picture...

Re: JustInCase FB11 build
Posted: Sat Dec 13, 2014 12:09 pm
by terrulian
Why don't you post a photo of the window box, too?
I don't have the plans but the photos of other boats look as if the front seat is already at the gunnels but perhaps the sailing version is different.
Re: JustInCase FB11 build
Posted: Sat Dec 13, 2014 12:41 pm
by JustInCase
The plans have the fwd seat a few inches below the gunnel with the upper mast support a few in back and at the gunnel.
I'll post pictures of the planter when it's done or maybe at the end of the day...I'm off to the store now to get a sheet of cheep 1/4" plywood to play with before working with the spendy stuff.
Re: JustInCase FB11 build
Posted: Sat Dec 13, 2014 6:11 pm
by JustInCase
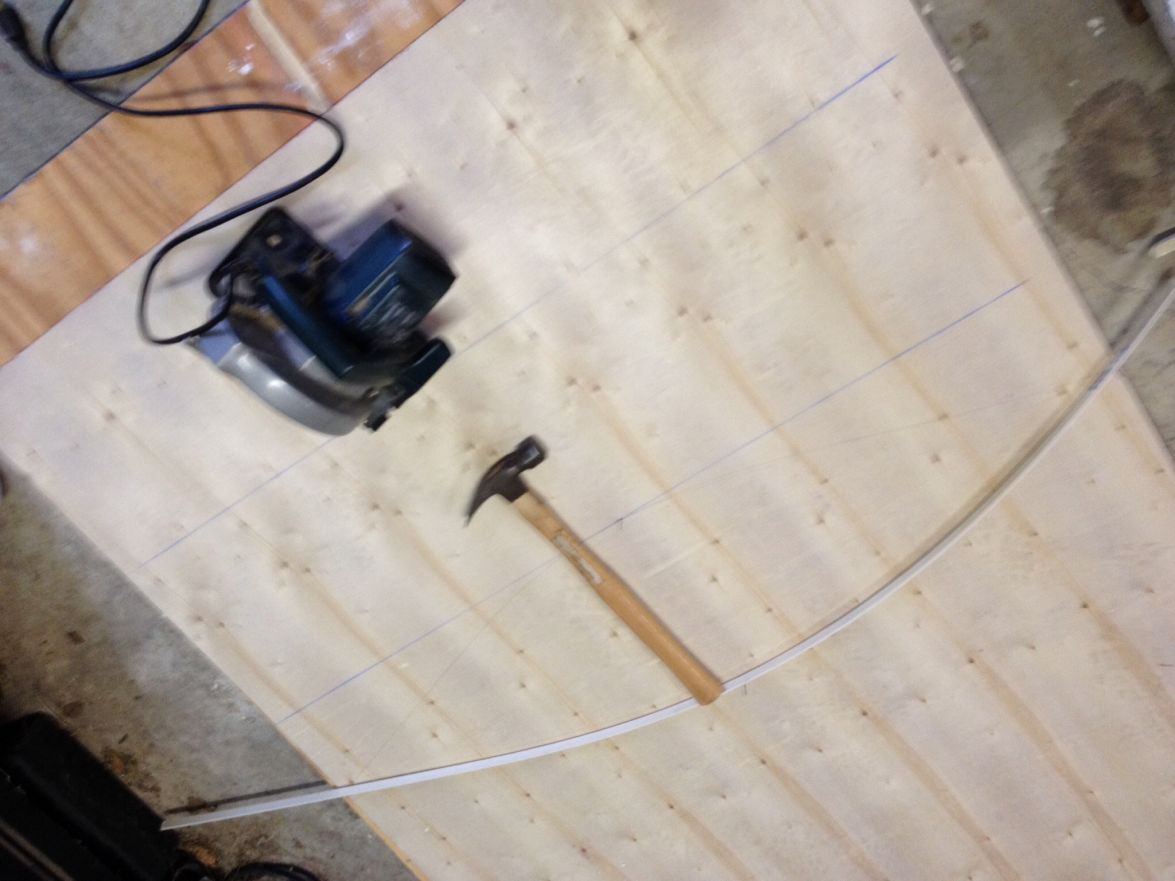
Ok so I found some 5mm interior plywood to play with so here is the stitch and glue planter.
First I layed out lines for the three panels:
http://gallery.bateau2.com/displayimage ... fullsize=1
Re: JustInCase FB11 build
Posted: Sat Dec 13, 2014 6:15 pm
by JustInCase
Re: JustInCase FB11 build
Posted: Sat Dec 13, 2014 6:40 pm
by JustInCase
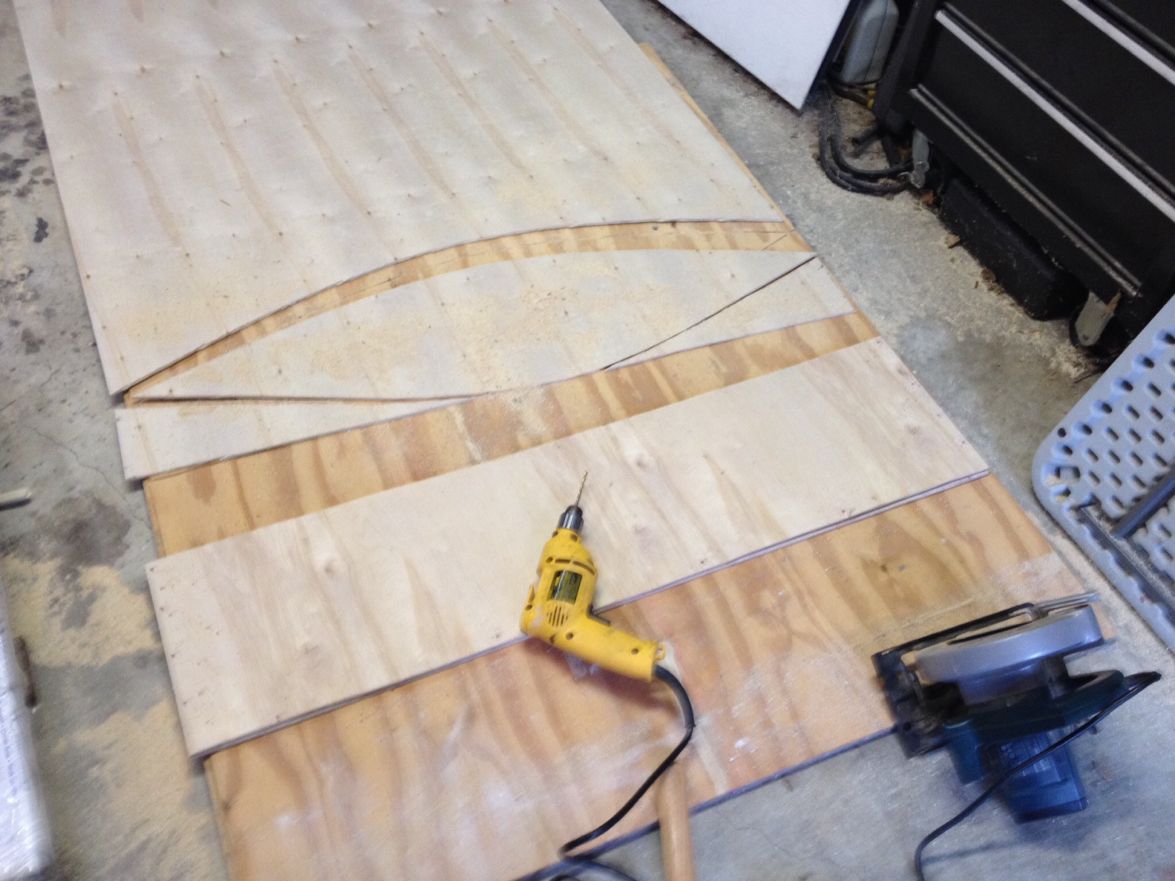
I Did learn some things that will be good to know.
1) The top ply on the cheep wood I got was very thin and delaminates from the next ply down very easily.
Next time I need to de-bur all edges and holes to keep that from happening.
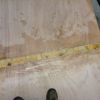
2) cut on the outside of the line with the circular saw and walk it in to maintain a nice exact curve. Go slow and use a nice new plywood/panel blade to prevent chipping.
Re: JustInCase FB11 build
Posted: Sat Dec 13, 2014 7:18 pm
by Cracker Larry
Re: JustInCase FB11 build
Posted: Sun Dec 14, 2014 12:41 am
by JustInCase
Can't right click with the I pad. Dont tell me I'm going to have to use the computer....

Re: JustInCase FB11 build
Posted: Sun Dec 14, 2014 7:22 am
by Cracker Larry
A lot of people do it with an Ipad, but I don't know how. Sorry.
Re: JustInCase FB11 build
Posted: Sun Dec 14, 2014 10:22 am
by terrulian
I don't have an iPod but Google revealed this:
To "right click" on an iPad:
Locate a link, page or image on which you wish to "right-click."
Press and hold your finger on the item for about five seconds. A menu appears with options such as "Save," "Copy," "Paste," "Select" or "Open in New Page."
Lift your finger and tap the appropriate option. If you don't want to select any option, tap the page outside of the menu
Read more :
http://www.ehow.com/how_8285170_right-ipad.html
Re: JustInCase FB11 build
Posted: Sat Dec 27, 2014 11:50 am
by JustInCase
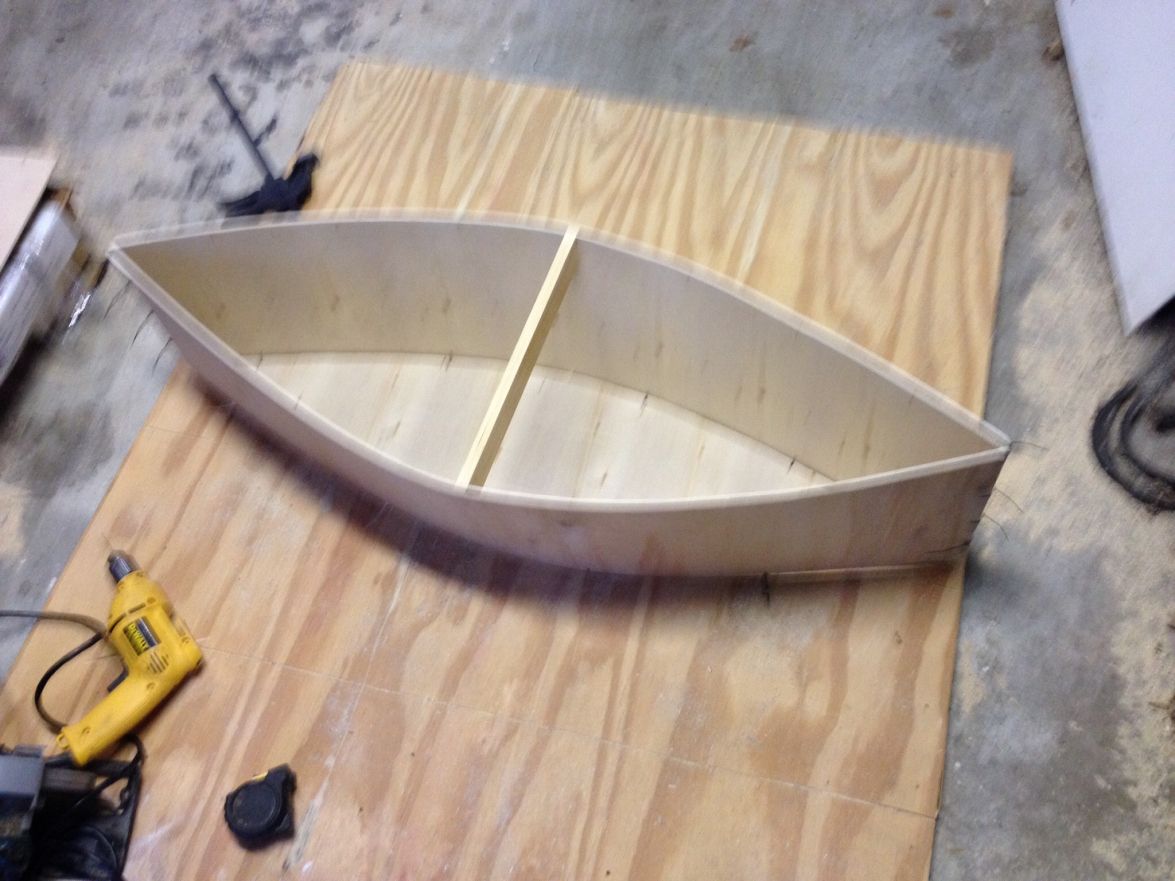
I puttied the joints between the ties and added some glass to hold it together.
And then filled in all the fillets:
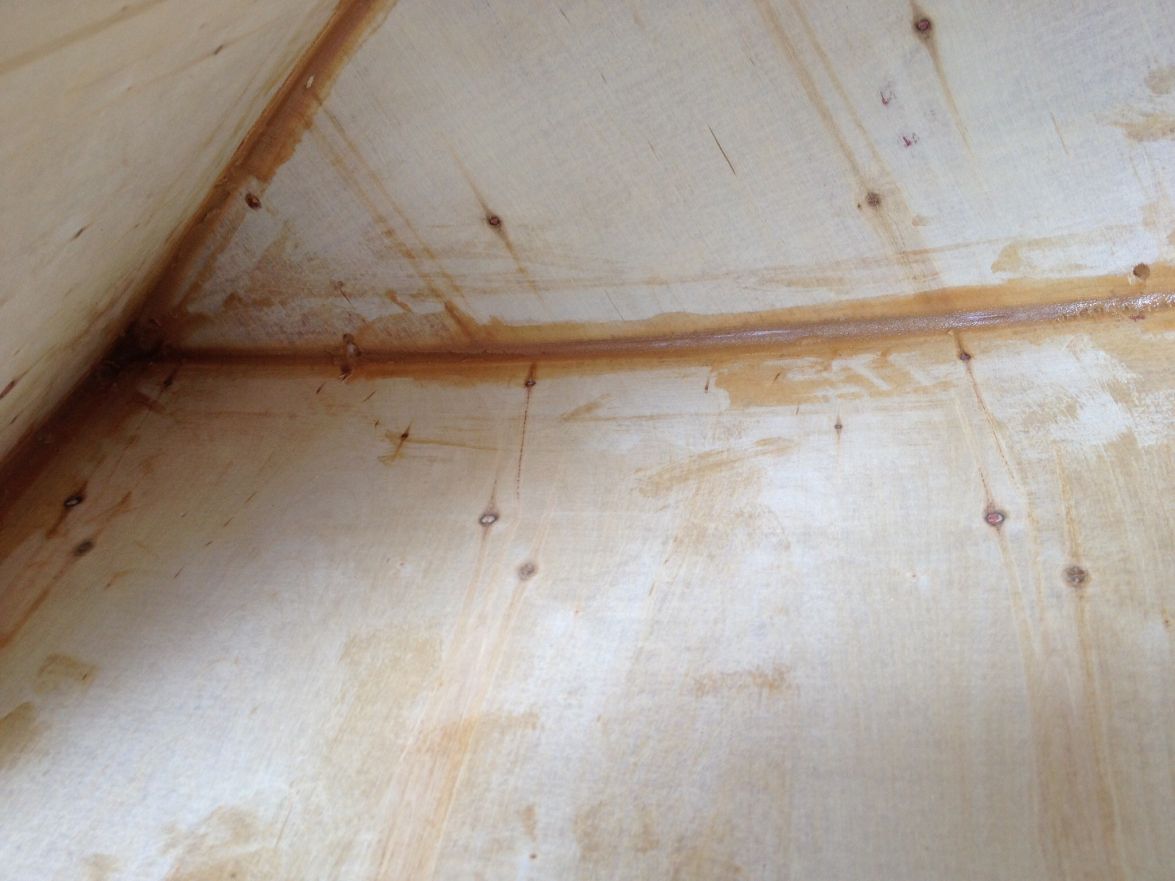
Then I coated the inside and outside with a thin coat of epoxy:
I'm leaning so that's good. I got some runs on the epoxy on this planter box that's not a big deal but would suck and have to be sanded off on the boat....need to maybe use less epoxy or use some other techniques.....I'll play around with thins a little more while I start to lay out and cut my parts for the FB11
Re: JustInCase FB11 build
Posted: Tue Dec 30, 2014 1:53 pm
by JustInCase
ok I'm over half way through my holiday and haven't even started on the real project.
It is cold and rainy here with highs ~50 deg F lows around 30 F and high humidity and that is making my epoxy experiments on the planter slow to cure under plastic it's taking about 16hrs to cure up, Exposed on a wood surface 24 to 30 hrs The residue in a cup is hard in ~8 hrs. So my experiments are going very slowly. My roll of glass tape has one edge that blends easily and one edge that just wont lay flat...

I'm considering trimming that edge off just be for laying it down. I think the roll has a defect on the weave on that edge. Its better if you cover with plastic and squeeze it out but will likely still leave a lip to sand off prior to fairing...that could be a lot of work. I tried using both a painters plastic drop cloth and a kitchen trash bag to cover the seams and the thicker film drop cloth is easer to get the bubbles out of....I still need a better method and was unable to find a proper fiberglass roller locally. I'm going to finish the window box planter today and after painting will cannibalize the used small paint roller that has a solid plastic center with a 1/2" OD and see if that works better for working creases and bubbles out from under the plastic.
I'm getting ready to jump in on the real project the fist big decision was what kind of joints to use on the long panels. The plan calls for a scarf joint or a router lap joint and the notes from the site say a butt joint is fine. I don't have equipment to do the scarf joint so I'm looking at either butt or lap. I made up an sample of each using scrap wood from the planter and did it quick and dirty dong both sides at once and not being very carful with air bubbles but this is what I got:
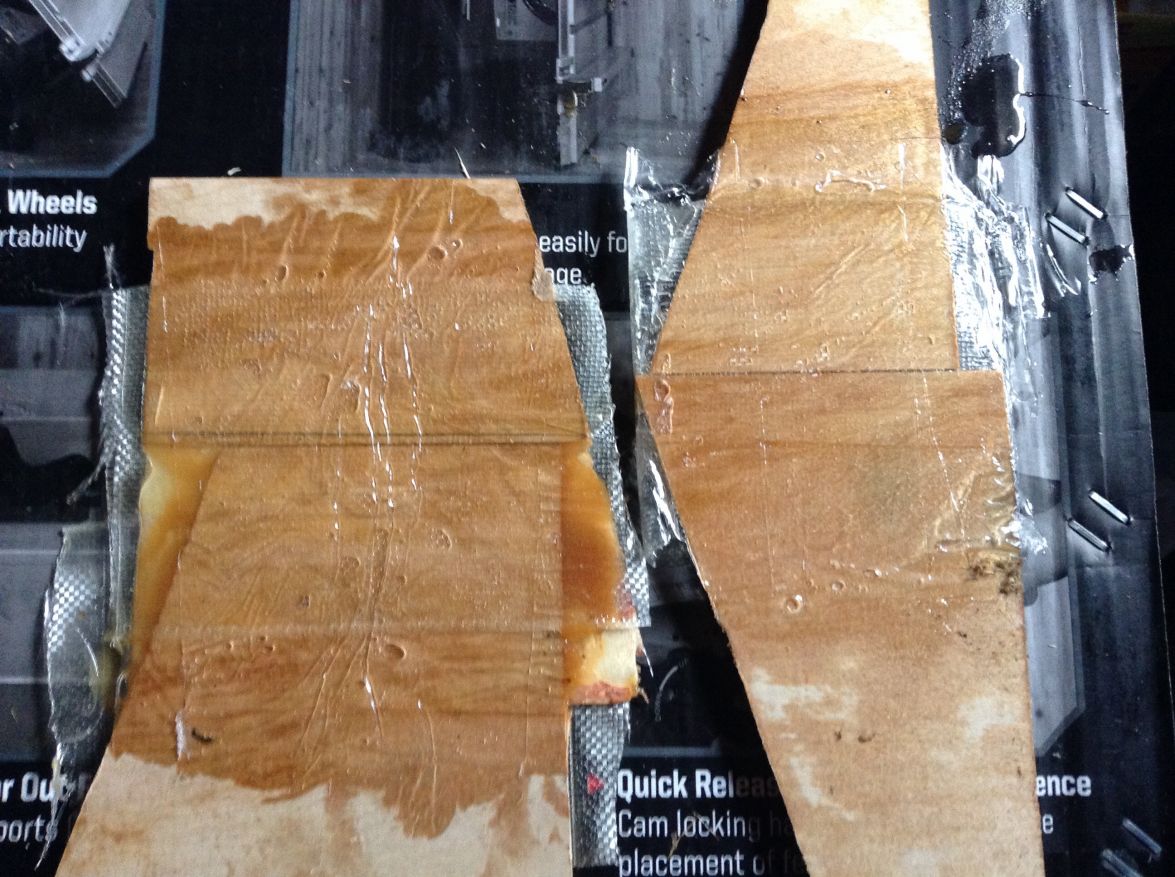
Both seem look adequate I'm thinking that the lap joint is stronger but I'm also thinking that it may be too stiff to bend properly and could result in flat spots in the hull....
what type of joint would you guys go with on something with the curvature in the FB11 and should I join the whole panel and then cut them out or cut them out and then join them together?
Re: JustInCase FB11 build
Posted: Fri Jan 02, 2015 1:58 pm
by JustInCase
So I decided to go with the but joint.
Ya well how did that work out?
Not Too Good!
Well what happened?
My plastic was too thin and pulled up into the but joint from the bottom.
The plastic was to thin on the top and stretched when I tried to pull it smooth.
I got air bubbles in the joint under the weights I put on it.
And to top it all of the roof sprung a leak last night right over the joint in the center of the panel.

notice the wet floor on the right and the white spots where I have air under the biax tape.
......and the leaking roof above:
I cut it apart and will make the two now messed up edges the out side edges when I try again.
I stacked the wood back on the pallets on the side of the garage where the roof isn't leaking.
Now I have to fix the roof and its 45 deg F outside with thunder showers all day. Then get thicker &%^#$
Plastic sheeting and try again..... Once the wood has dried out. I do have 4 sheets so may use the two virgin sheets to make the first parts after the roof is fixed. Lesson Learned Don't Cheep out! Get the thick drop cloth plastic not the cheaper thin stuff!
Re: JustInCase FB11 build
Posted: Sun Jan 04, 2015 8:17 pm
by JustInCase
Got the roof fixed....damn shingle came off the end of the ridge vent. Got good 4 mil plastic...and I'll get back on it soon.
Re: JustInCase FB11 build
Posted: Sun Jan 04, 2015 8:57 pm
by Corvidae
You know that point where you're debating, "should I throw one more coat of epoxy on it?". I'm gonna say yes, you should probably take that extra precaution, just to be sure. And get yourself a rabbits foot, while throwing some salt over your shoulder or somethin. Can't be having bad mojo stalking a good boat.
Re: JustInCase FB11 build
Posted: Sun Jan 11, 2015 9:31 pm
by JustInCase
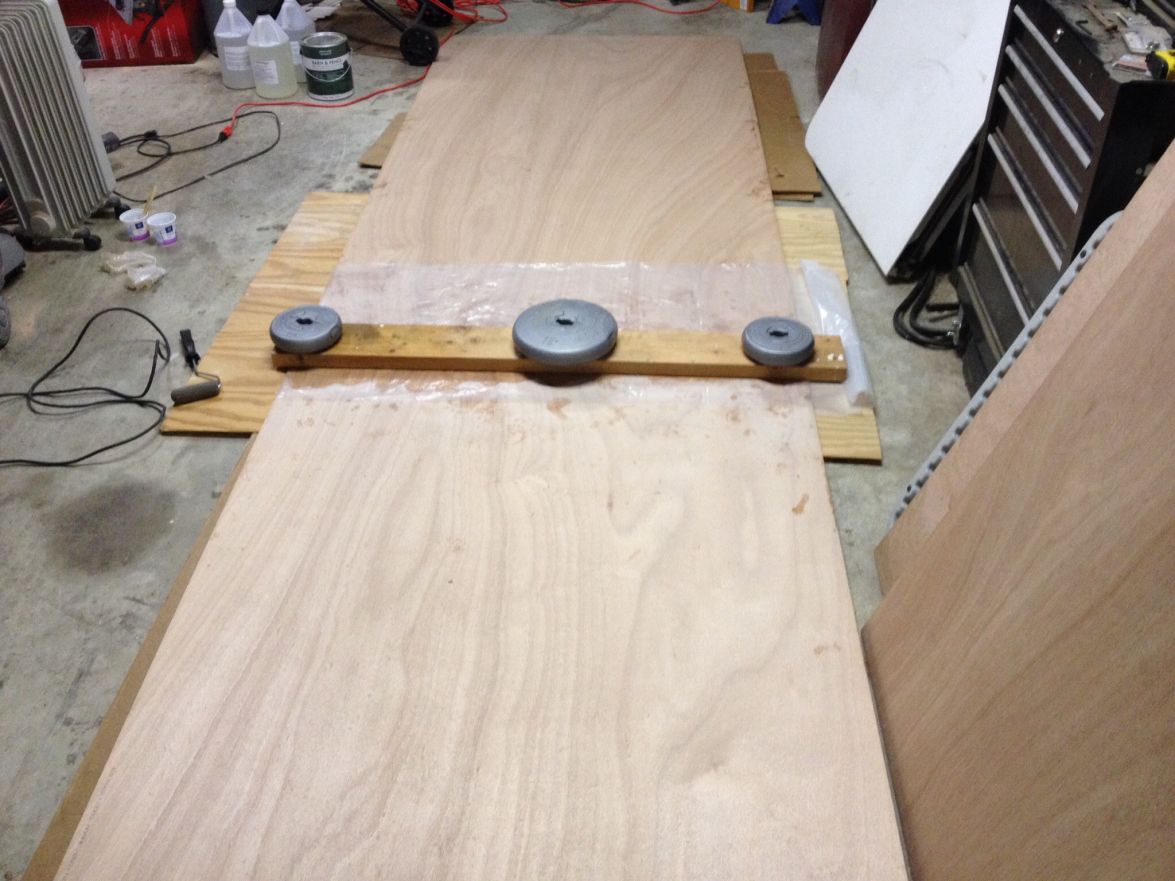
So I took the 1st fiasco and decided that it was because this boat wants lap joints like in the plans so I broke out the router and got the first joint bonded up this weekend. Maybe after work this week I'll get the first 3 long panels cut out and then bond up the left over to make the 4th. If all goes well I may be able to start stitching it together next weekend...or maybe the weekend after if things go slow.
Here is the panel an it is waiting to cure:
Re: JustInCase FB11 build
Posted: Sat May 16, 2015 7:21 pm
by JustInCase
Things got busy and my progress slowd down and I quit posting.
Now I'm back with an update:
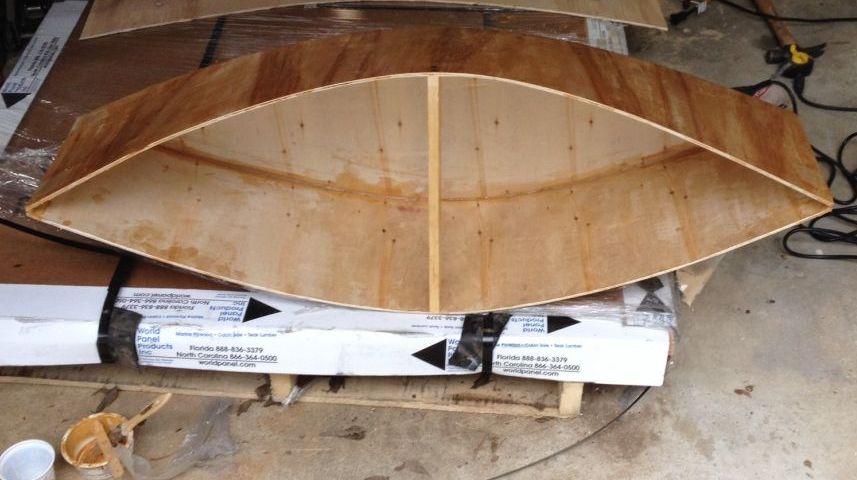
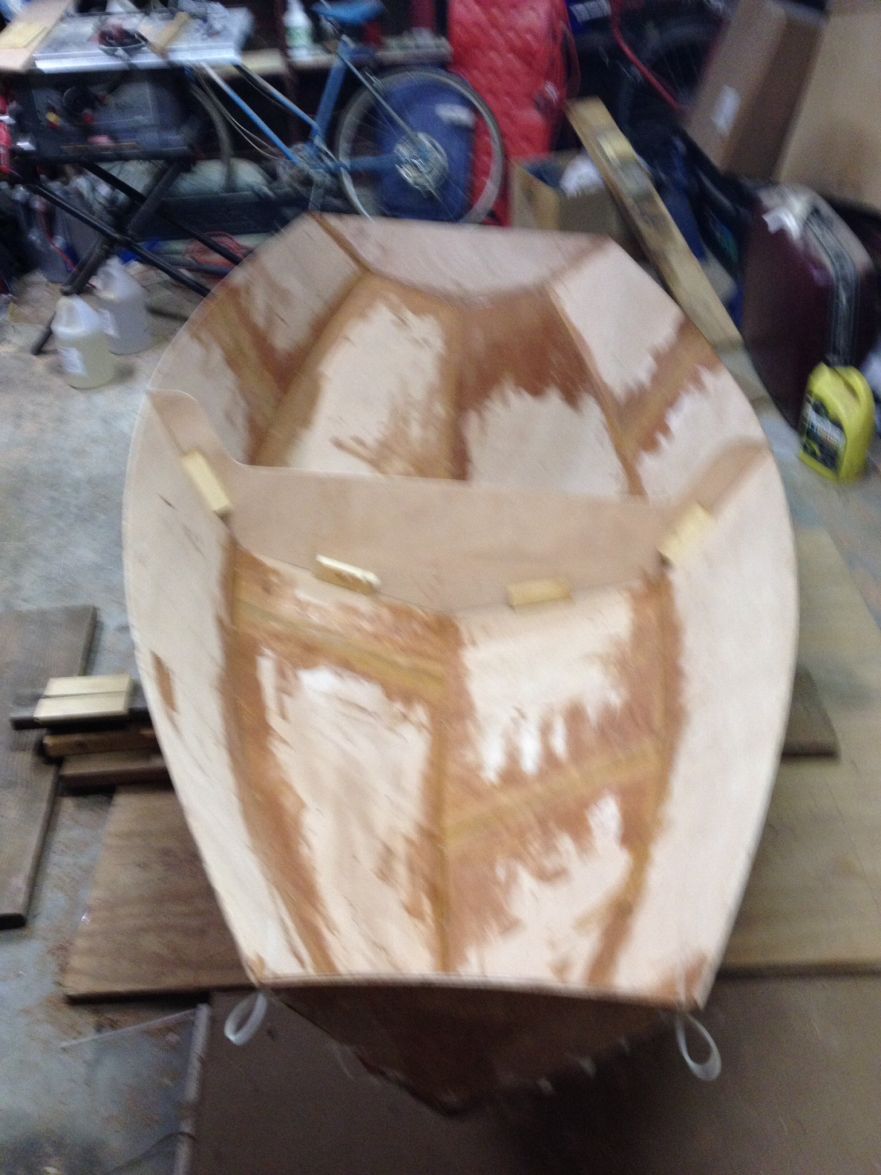
I got the parts all cut out in late January:
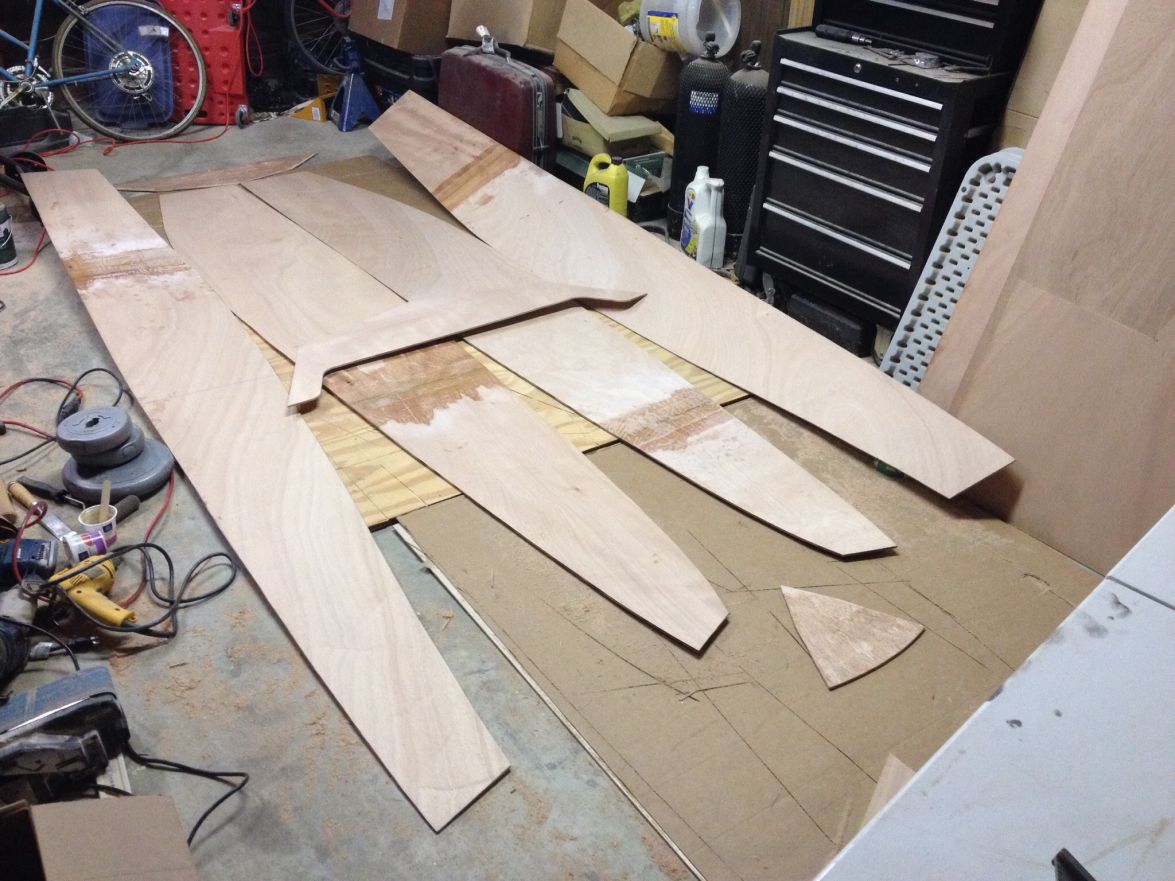
I got them mostly stitched together the first week of February:
Then it sat for a while, I had some trouble getting the bow and the stern to fit right.
I finally ended up trimming the long panels a little to make everything fit.
I then taped the outside and bonded it together with the inside fillets.
The picture was out of focus:
Then the inside tape. Followed by the outside,
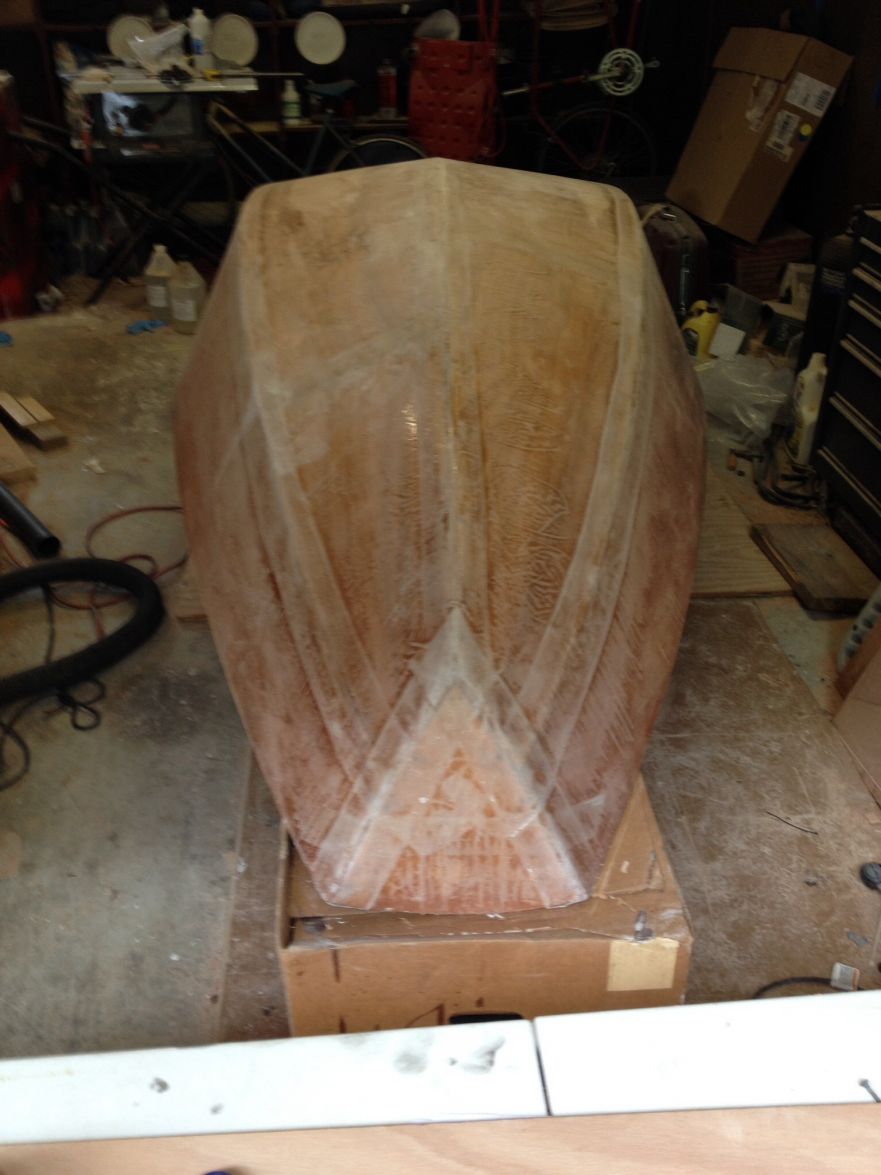
then the 2nd bulkhead.
The PVC was to hold the 2nd bulkhead back against the fist on the bottom to keep them even.
Re: JustInCase FB11 build
Posted: Mon May 18, 2015 1:52 am
by JustInCase
Just to be clear I used a pice of 4 mm wrapped in plastic sheeting between the bulkheads to set the spacing. With the clamps on the top the bottom was bowing out. That is why I stuck the pvc pipe in there to hold it down against the spacer.
Re: JustInCase FB11 build
Posted: Mon May 18, 2015 11:16 am
by JustInCase
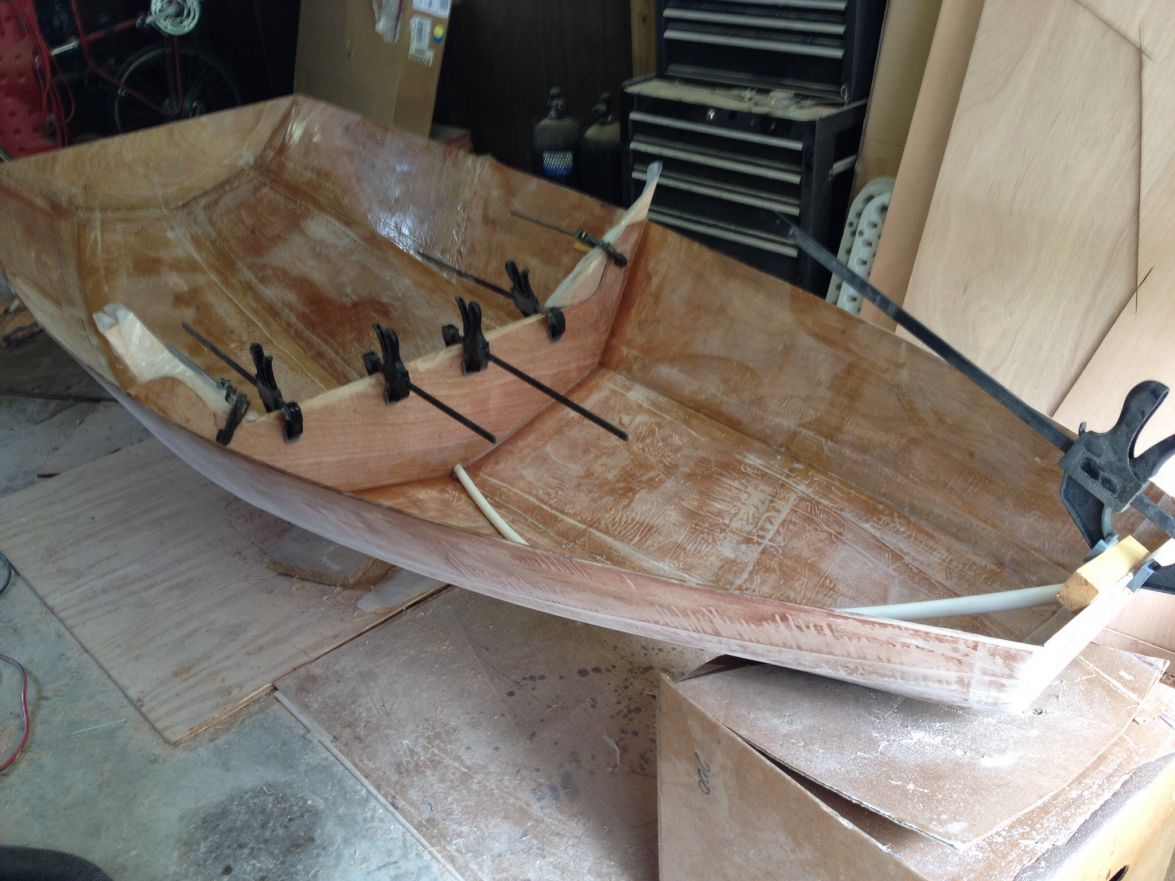
I got the seats all cut out and test fitted them last night.
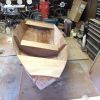
It looks like a boat.
Re: JustInCase FB11 build
Posted: Mon May 18, 2015 1:04 pm
by jacquesmm
Very clean job.
Re: JustInCase FB11 build
Posted: Tue May 19, 2015 11:26 pm
by JustInCase
Thanks it's been fun. Having gotten as far as I did I think it was worth noting that the layout on the plans is not to scale. I was able to cut all of the parts required for the motor and sail options out of the 3 sheets including my larger forward " seat" that is now a foredeck. So when I'm done I'll have one full sheet of 6 mm left over. Hum, What should I use it for?
Re: JustInCase FB11 build
Posted: Sun May 24, 2015 1:23 pm
by JustInCase
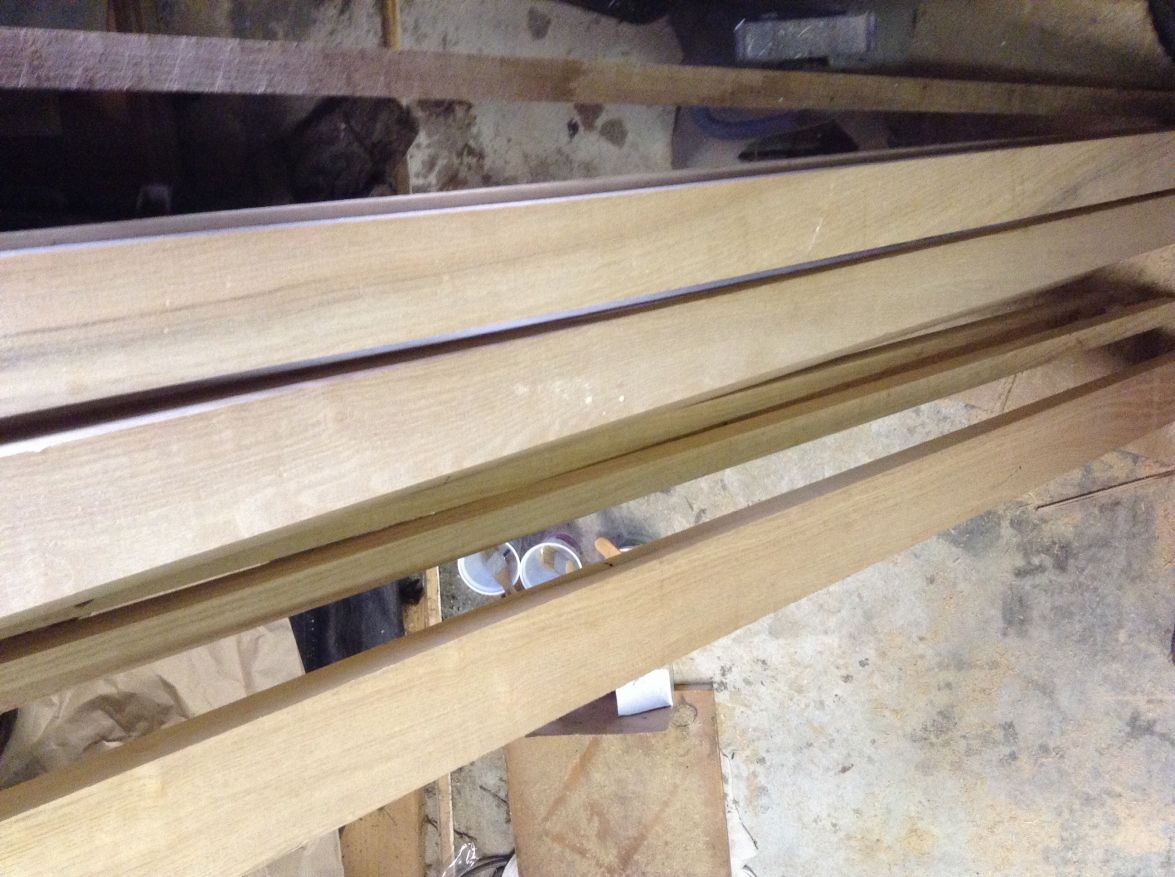
For the hard wood on the boat I am using Sassafras from a local small volume mill. It's harder and denser than poplar but not as dense as Oak with a good strength to weight ratio, is bug and rot resistant, and was relatively knot free all at $3.50 bdft. On top of all that It smells marvelous! He only has lumber in 8' to 8'3" lengths with odd widths. His kiln in 8'6" long so all of his logs are cut to length rough cut, Kiln dried and then skip planed to 15/16. I got 4 X 6-7" wide boards and ripped it down to the specified widths for all the hard wood parts yesterday. Also picked up some longer poplar at a big box store to make the mast from. Finding the 2" foam has been a challenge, The big box stores only carry the stuff to go under siding at 3/4" thick with the aluminized Mylar film on one side. I did get a lead on a commercial roofing supply place that may have the thicker stuff but they are only open 7-3 on weekdays. I'll call Tuesday and if they have it I'll go get it Wednesday and be in late at work.
Re: JustInCase FB11 build
Posted: Wed Jun 10, 2015 12:24 am
by JustInCase
I got all of the stiffeners and cleats in. Also bonded in the transom gussets and the mast support. I'll be cutting her in half soon.
Then foam and dagger board and I'll be ready to fair, prime and paint.
Re: JustInCase FB11 build
Posted: Fri Mar 31, 2017 8:06 pm
by JustInCase
Launched her last year but didn't post any pictures so here are a few
Took a while to get the sail rigged so that it could be trimmed property but keep forgetting to have someone take pictures after I sorted it out.
Re: JustInCase FB11 build
Posted: Fri Mar 31, 2017 8:07 pm
by JustInCase
After one season we had two annoying issues: 1) on the little lake running the rudder into the bottom about 8-10 feet short of the shore. 2) when you have more than one person in the boat sailing the tiller is too long.
So this winter I made a new tiller, what I'm calling a Chesapeake Bay rudder and a shorter dagger board. Should get to try them out soon.
Re: JustInCase FB11 build
Posted: Tue Apr 04, 2017 2:49 pm
by Buz
Don't know why I missed this thread in my searches. My FB11 is for rowing only. But seeing your sailboat makes me reconsider.
That lake looks grand! Sent ya a PM.
edit: Yep, I looked again at the top of Green Mt, compared with your pic. Thought it looked familiar. That lake is Grand! I have a house across the road.