Page 1 of 1
FS19 in Washington State
Posted: Wed Jul 22, 2015 5:13 pm
by cazuza
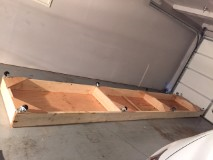
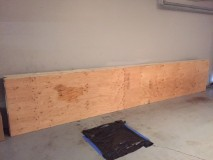
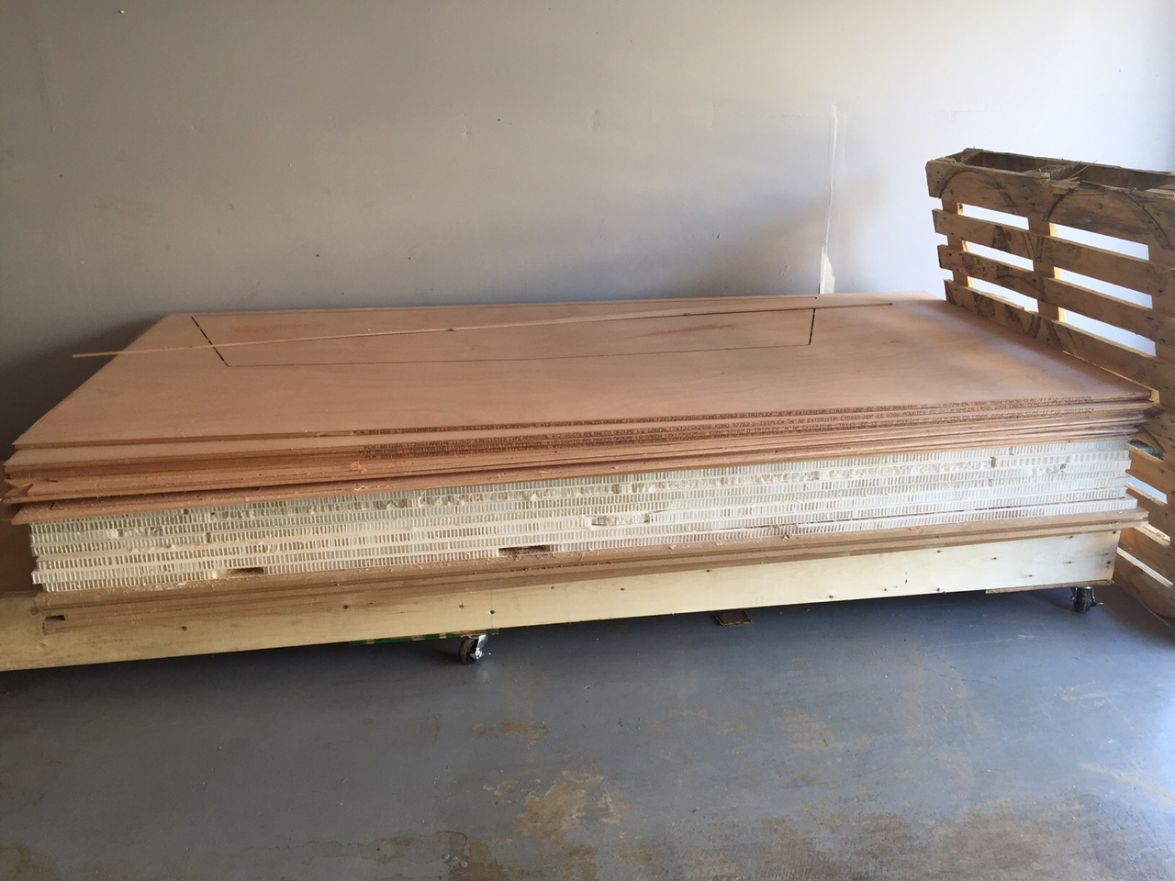
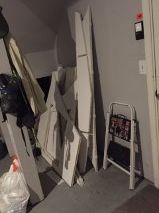
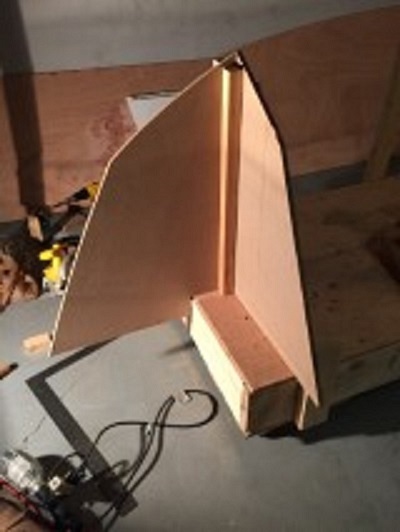
The wife and I finished the strong back today. Epoxy kit is here except for one box due tomorrow. The CNC kit is somewhere between here and Vero Beach FLA. Here's some pics of the finished strong back.

Strong back at rest against the wall
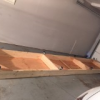
Wrong side up
Took five tries to figure out the picture thingy.
Re: FS19 in Washington State
Posted: Wed Jul 22, 2015 5:40 pm
by pee wee
I'm not sure why it didn't cooperate for you.

I think you are the first person to start a FS-19 build thread, can't wait to see it come together!
Re: FS19 in Washington State
Posted: Wed Jul 22, 2015 6:11 pm
by kcinnick
What is the advantage of boxing in your strong back? I have seen some do it. I plan on building mine before my kit arrives. It would be nice to be on casters, but my building area slopes slightly.
Re: FS19 in Washington State
Posted: Wed Jul 22, 2015 6:14 pm
by cazuza
I saw from CL thread that he uses it as a table to assemble the long pieces.
Re: FS19 in Washington State
Posted: Wed Jul 22, 2015 9:13 pm
by Cracker Larry
Yes, for lay out, cutting and splicing table. You will need one almost as long as the boat. Unless you have the space for both a lay out table and a strong back individually. I don't, so one has to do double duty.
I'm also looking forward to seeing a FS19 build. I really like that design.
Re: FS19 in Washington State
Posted: Wed Jul 22, 2015 9:37 pm
by kcinnick
I have enough room to layout most everything in the A/C portion of my shop. I wish the entire GP21 would fit, it will, but I would have to demo brick walls to get it out...
Re: FS19 in Washington State
Posted: Wed Jul 22, 2015 10:26 pm
by TomW1
Looking forward to this build. Like Larry said you can do all the cutting, gluing and assembly on that strong back.
Re: FS19 in Washington State
Posted: Wed Jul 22, 2015 11:20 pm
by Fuzz
I will be keeping a close eye on this build. I am sure there will be lots of others doing like wise. I am glad somebody started one and can't wait to see how it all works out.
Fuzz
Re: FS19 in Washington State
Posted: Thu Jul 23, 2015 4:32 pm
by jnb
Very curious to see how this build goes. What bodies of water are you planning on using it on? I'm located in Seattle and have decided on a FS19 for the Sound and San Juans. Will hopefully get started this winter.
Re: FS19 in Washington State
Posted: Thu Jul 23, 2015 4:46 pm
by cazuza
I live in Bothell so I'd imagine we would use the same areas. On thing I'm struggling with is I haven't seen many center console boats around here, you're more likely to find cuddy cabins to get out of the rain.
Re: FS19 in Washington State
Posted: Thu Jul 23, 2015 5:03 pm
by jnb
Absolutely--I just posted a question over the in the main FS19 thread about whether a small cabin is possible on the FS19.
I used to have a cuddy cabin, but just picked up an aluminum with a center console to get me through the next couple years while I build the boat I really want. I didn't think I was going to mind the center console, but after a few trips this summer, but girlfriend and dog have expressed some strong opinions in favor of going back to a boat with a cabin. The type of short chop and rain (well, maybe not rain this year) that we get around here makes things pretty uncomfortable without a cabin. I also fish a lot up in the San Juans and on Vancouver Island where long runs are common, so even on calm days I'd like a little protection from the wind.
I love the hull shape of the FS19--looks very efficient, but has just enough V to take the edge of the chop. (Kind of reminiscent of an Arima, but lighter?) However, a little protection from the elements would really be nice. On the other thread I mentioned a small hardtop, but maybe just a full windshield with a canvas top would be nice?
Re: FS19 in Washington State
Posted: Thu Jul 23, 2015 5:10 pm
by cazuza
Exactly my thoughts.
Re: FS19 in Washington State
Posted: Thu Jul 23, 2015 5:14 pm
by kcinnick
The wind is welcome down here, the rain not so much. One guide I use "turns on the A/C" when we are done for the day. Translation, gets his Yamaha 300 to full throttle. That can't be good on gas...
Re: FS19 in Washington State
Posted: Thu Jul 23, 2015 6:20 pm
by TomW1
I don't know if these would work with the FS19 but look in the Console section for the Pilot Consoles I, II and III. Jacques has designed some nice weather resistant consoles.

I'm thinking you could build a cuddy back to the console with entrance through the console. You would need to keep it very light.
Let's wait for Jacques to get back for a real answer on the cuddy.
Tom
Re: FS19 in Washington State
Posted: Thu Jul 23, 2015 7:13 pm
by cazuza
Yes, I have ordered the console drawings and agree there would be some possibilities there also.
Re: FS19 in Washington State
Posted: Thu Jul 23, 2015 10:09 pm
by cazuza
Looking at the Console 2 dimensions it is 45 inches wide, seats are 16 to 17 inches wide, this would leave 10 to 12 inches between seats and 10 to 12 inches on each side to walk around the console. The roof is 60 inches long. It might also be possible to increase the width to 68 inches to the width of the sole.
Re: FS19 in Washington State
Posted: Sun Aug 02, 2015 11:18 pm
by cazuza
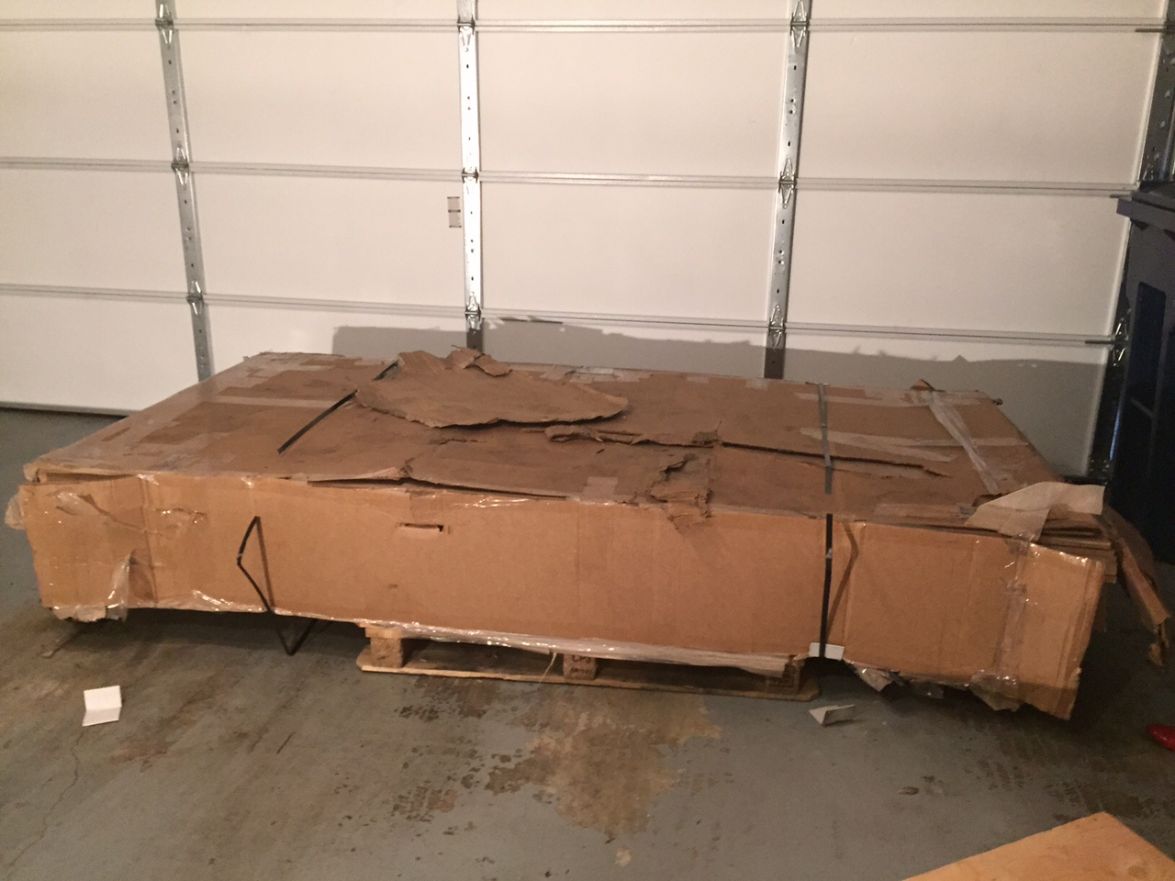
CNC Kit came last Friday, managed to get the freight company guy to put it in the garage. Box was a little beat up after 3 load unloads.
Thanks for the advice, made it on linking the full size pic. I think you get a different depending on what version of windows you have.
Re: FS19 in Washington State
Posted: Sun Aug 02, 2015 11:37 pm
by terrulian


It appears you used the wrong URL to paste between the [Img] commands and/or the Img should show up in brackets both before and after the URL of the photo. Go to your gallery, open in image you want to insert (not the small thumbnail but the full image), right click on it and select "copy image URL" then return to your post and put the cursor where you want the photo but before you paste in the URL you just copied, click on Img just above the text field. Then without doing anything else, hit paste or control V. You'll see the photo in position if you click on the preview tab.
That box is trashed and if any of the contents are damaged--which they don't appear to be in the photo--you have a justifiable claim with the trucking company. So I'd look at everything fairly carefully.
Re: FS19 in Washington State
Posted: Mon Aug 03, 2015 11:04 am
by jacquesmm
This is disgusting! We spend more than one hour per kit on packaging but we can't protect against careless forklift operators who dent the side of a kit package with the forks. It is negligent, we put the kits on a pallet for a reason, they must lift the pallet.
To all kits buyers: if you kit arrives in that condition, please write down "damaged" on the receipt. Unless you do that, we can not claim damage.
From now on, we will take a picture of each kit before shipping and email it to the kit purchaser the day we ship.
A little spot or scratch on the cardboard is OK but those forklift dents in the sides are unacceptable.
Re: FS19 in Washington State
Posted: Mon Aug 03, 2015 9:31 pm
by cazuza
I did note the box damage on the shipping paper. I also forwarded separately to the order desk, photo's of the damage to one of The Nidacore Core frames.
Re: FS19 in Washington State
Posted: Tue Aug 04, 2015 12:01 pm
by jacquesmm
Thanks, the orderdesk filed a claim and we will replace the damaged part.
Re: FS19 in Washington State
Posted: Wed Aug 05, 2015 11:25 pm
by cazuza
The kit came last Friday along with my wife's sister from Brazil. That blew the weekend but we started on Monday and had all the parts including the molds cut out by Wednesday morning. Here are some pics of the The good pieces and the left overs
Cut out plywood peices
Cut out Nida Core pieces
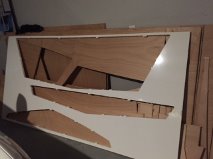
Leftover stuff
More leftover stuff.
Now comes the big decision, can I throw some away?
Comments?
Re: FS19 in Washington State
Posted: Thu Aug 06, 2015 7:26 am
by Cracker Larry
I wouldn't throw anything away yet, you will use them for many small parts as you progress.
Re: FS19 in Washington State
Posted: Thu Aug 06, 2015 10:34 am
by cazuza
I searched the forum and couldn't find any specifics for the use of GelMagic. I know its used for the transom, how about the stringers. Are there any other uses?
Re: FS19 in Washington State
Posted: Thu Aug 06, 2015 11:05 am
by jacquesmm
GelMagic is a glue and we use it anywhere we need glue like gluing layers of plywood together: stringers and transom mostly but also butt blocks. It is used for wood assemblies like consoles and benches.
We sell a lot of it to cold molded boat builders.
To use it is so simple that it does not need a tutorial: mix the components 2 to 1 and the glue is ready.
For our small boats, many builders use resin mixed with wood flour instead of GelMagic but for larger boats, building and repair, GelMagic makes sense.
Gelmagic is a stronger glue than wood flour epoxy and is required for layering transom foam like our Aquaplas.
Re: FS19 in Washington State
Posted: Sun Aug 16, 2015 3:45 pm
by cazuza
Sister in Law left yesterday early for Brasil so we started working again today. Finished gluing up the transom with the GelMagic and laid out the stringers for tomorrow. In mixing the GelMagic I noticed the instructions say not to mix up more than you can use in 10 minutes. Pretty tough to do with a transom the size of this one. Had one mistake, first part to which we applied the glue was the transom with the engine cut out. We applied the glue to the whole thing and not just the area covered by the clamping boards. We didn't notice until the next day after it had set. I guess sanding will be the best way to get it off or at least smooth.
Re: FS19 in Washington State
Posted: Sun Aug 16, 2015 6:22 pm
by BarraMan
Sand it smooth!
You'll glass over it later in the build - nobody will ever know!

Re: FS19 in Washington State
Posted: Mon Aug 17, 2015 11:11 am
by jacquesmm
It depends on the temperature but 10 minutes is the pot life, not the working time, not the open time.
Once the glue is spread over the part, you have at least 30 minutes.
In 10 minutes, you can mix let's say 12 oz., quickly pour it over the part and then you have 20 minutes or more to spread it with you notched spreader.
Re: FS19 in Washington State
Posted: Fri Aug 21, 2015 10:16 pm
by cazuza
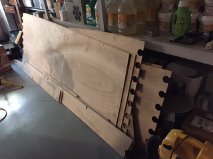
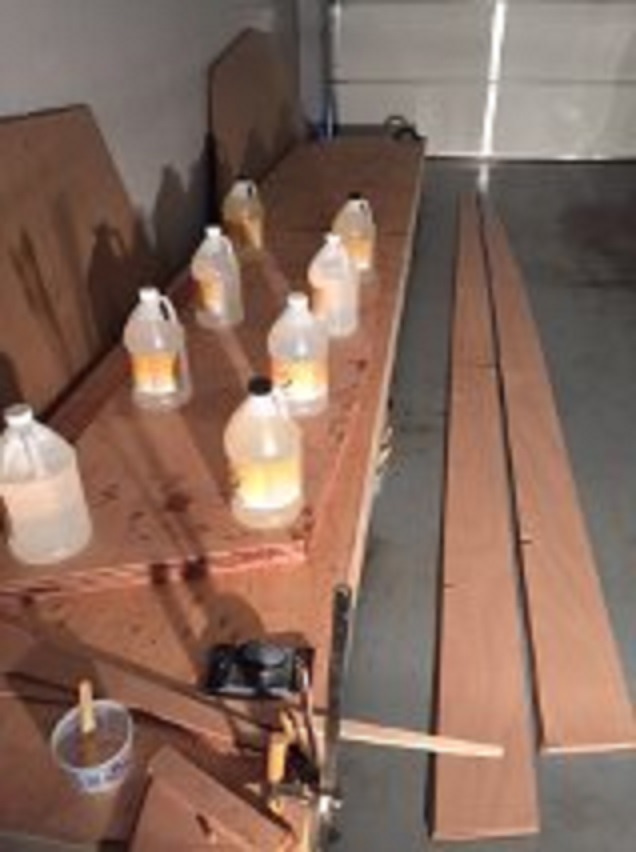
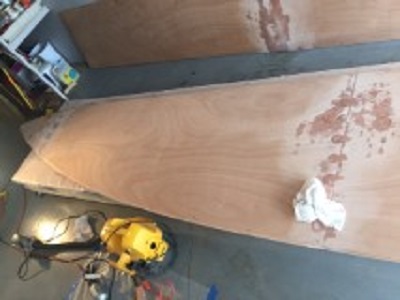
Made some progress today, got one of the stringers glued together. Our intention was to do both but after the first it didn't look like we had enough of the GelMagic left to do the second. I found a source locally where I can buy it tomorrow at a 20% premium. Here's a picture of the first one.
Re: FS19 in Washington State
Posted: Mon Aug 24, 2015 4:53 pm
by cazuza
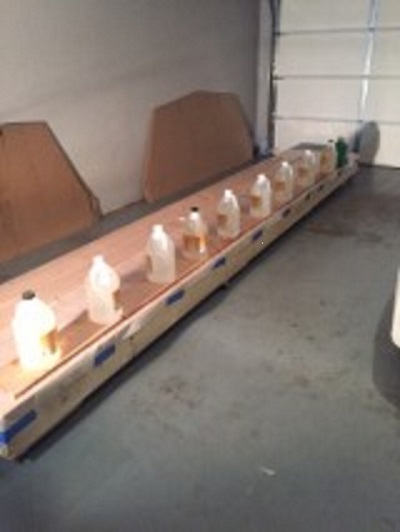
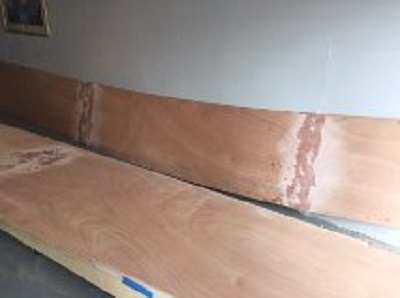
Got the other stringer done yesterday, Today we did the bottom panels. The puzzle cuts seemed to go quite well, for a while we almost beat it to death, you would hit it one place and another place would move. We found out that a slight pressure would push it back into place, I guess that's why the weight on top. Here's a photo of the two bottom panels done and curing. They sure are long, it over laps the 16 foot strongback quite a bit on both ends.

Re: FS19 in Washington State
Posted: Tue Aug 25, 2015 3:48 pm
by cazuza
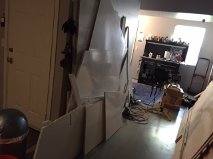
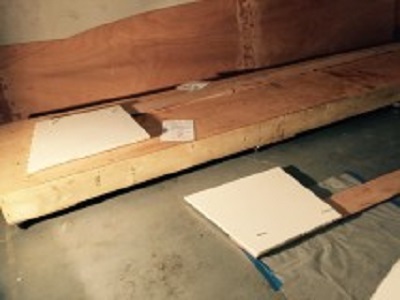
We did the sides today, puzzle joints worked really well. Here's a photo of the side glued together, over 20 ft long. You can see the bottom panels leaning against the wall behind. All the cut out plywood pieces from page 3 are gone and 6 much longer pieces remain, now its time to start setting up the jig on the strongback.
Re: FS19 in Washington State
Posted: Tue Sep 01, 2015 12:20 am
by Bowmovement
I'm not far from ya. Just north of you in north Lynnwood. Ever need a hand let me know.
Love the FS19
Matt
Re: FS19 in Washington State
Posted: Wed Sep 02, 2015 9:55 pm
by cazuza
Well, to keep up with the guru's of the forum I felt I had to post something. We've spent the last few days grinding down the tip of the sanding iceburg. We completed the hull sides and bottom as well as the stringers. In doing the puzzle joints I bought a Home Depot plastic 3' X 50' roll and covered the strongback with it and used short pieces on the top of the joint. Wow, did this ever create an uneven surface after the epoxy dried. Spent a lot of time cleaning it up. Here are some pics of the finished product. We start setting up the jig tomorrow.
Hull Bottom
Hull Side Panels
Re: FS19 in Washington State
Posted: Thu Sep 03, 2015 8:53 am
by jacquesmm
Strange problem with the plastic sheet.
I have been told that some plastic sheets leave a residue. We use that technique and never had the problem.
Re: FS19 in Washington State
Posted: Thu Sep 03, 2015 9:13 am
by cazuza
After the first application of epoxy it was apparent that the epoxy had wicked through the joint and not completely filled the gap so we added another coat of epoxy and put the plastic and weight back on. Maybe shouldn't have added the weight and plastic back on or needed more weight.
Re: FS19 in Washington State
Posted: Thu Sep 03, 2015 9:33 am
by Matt Gent
I've had the plastic leave a wrinkly pattern too. Its from an old scrap that I've re-used for a bunch of things, not pulled off a clean roll.
Never had a residue problem though.
Re: FS19 in Washington State
Posted: Thu Sep 03, 2015 10:08 am
by pee wee
I think that wrinkly pattern comes from excess epoxy, try to wet out the glass but no more.
Re: FS19 in Washington State
Posted: Thu Sep 03, 2015 10:44 am
by Cracker Larry
I've never had good luck with plastic either, it always leaves wrinkles. Some places you have to use it, to prevent gluing things together that you don't want glued together, but I can do a much cleaner job with a roller and wide spreader. Skip the plastic.
Re: FS19 in Washington State
Posted: Thu Sep 03, 2015 7:10 pm
by TomW1
What I don't see is any fiberglass on the joints. It looks like you used an excess amount of epoxy on the other side and it bled through the joint and the plastic was not smooth enough to contain it. 3 mil is to thin, I use black heavy duty garbage bags or 10 mil plastic.
Re: FS19 in Washington State
Posted: Fri Sep 04, 2015 6:49 am
by remedy32
What I don't see is any fiberglass on the joints.
Thought the same thing looking at this. Has JM put together a different way of handling this splice with the puzzle joint? If not, I'd try to work wet on wet on at least one side. I'm no fan of using plastic except to keep the work area clean. Thick or thin it's not for me. Just seems to encourage excess resin and resulting puddling. If you want the benefits of peel ply, buy a yard or two IMO.
Bill
Re: FS19 in Washington State
Posted: Fri Sep 04, 2015 9:11 am
by jacquesmm
No need for a fiberglass splice over the puzzle joint when the two sides are going to be covered by fiberglass.
We tested puzzle joints with and without glass splice and there was no difference.
The puzzle joint is in the neutral axis and does not contribute much to strength.
This applies only to panels with at least one layer of structural glass on each side (minimum 12 oz. biaxial 45/45).
All other require a glass splice.
For example, on a small boat topside, with no glass inside and just a thin layer of glass outside, we need a fiberglass splice on the inside.
The puzzle joints exist only in kits and if necessary, the kit notes mention the fiberglass splice.
Re: FS19 in Washington State
Posted: Fri Sep 04, 2015 10:41 am
by cazuza
1. DQ (dumb question) coming up. I've been worrying how is the transom supported and located as part of the jig. Studying the notes and pictures it looks like the motor well sides are glued to the stringers and the some sort of separate jig must be built to support the transom. (That hummer is heavy, must be close to a 100 lbs). Should the hull panels encase the transom or butt-up against the fwd outbd corners of the transom.
Re: FS19 in Washington State
Posted: Fri Sep 04, 2015 2:01 pm
by jacquesmm
The transom is very heavy and must be supported by more than the motorwell sides.
The motorwell sides give it the correct angle but to support the transom, clamp a 2x4 to it, the 2x4 resting on the shop floor.
Yes, the transom fist between the sides and the bottom.
Re: FS19 in Washington State
Posted: Fri Sep 04, 2015 4:38 pm
by remedy32
No need for a fiberglass splice over the puzzle joint when the two sides are going to be covered by fiberglass.
We tested puzzle joints with and without glass splice and there was no difference.
The puzzle joint is in the neutral axis and does not contribute much to strength.
This is a nice benefit of the kit. Do this carefully and the fairing and paint job get a bit simpler.
Bill
Re: FS19 in Washington State
Posted: Mon Sep 14, 2015 10:54 pm
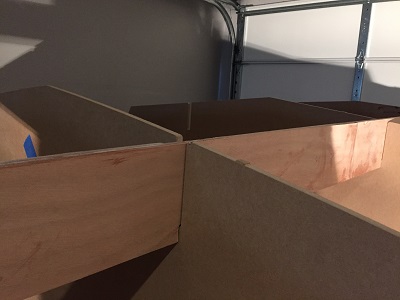
by cazuza
Haven't posted in a while so I thought I'd give an update. Here are pictures of the Nidacore motor well sides glued to the stringers. One of the motor well side has a slight interference with the stringer slot. we'll wait until the stringers and molds are installed to see how it fits.Since then we are setting up the molds on the strongback. We should have this done in the next couple of days. The 2 car garage is starting to get smaller.
Re: FS19 in Washington State
Posted: Wed Sep 16, 2015 10:02 am
by cazuza
OK, here goes the 2nd dumb question 2. DQ, when attaching the transom to the hull because of the angle between the transom and the hull the space is larger on the inside. Do you inject the glue, (wood flour or EZ Fillet mixture) from the inside?
Re: FS19 in Washington State
Posted: Wed Sep 16, 2015 10:23 am
by Cracker Larry
Yes, just pack thickened epoxy in from the inside to fill the gap and finish it with a smooth fillet. Then tape over it.
Re: FS19 in Washington State Jig and Bow Mold
Posted: Sat Sep 26, 2015 12:37 pm
by cazuza
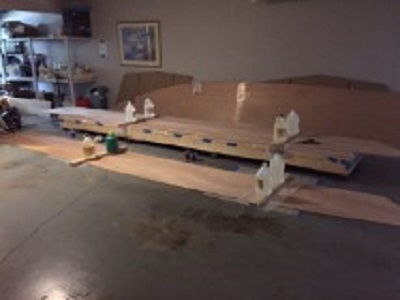
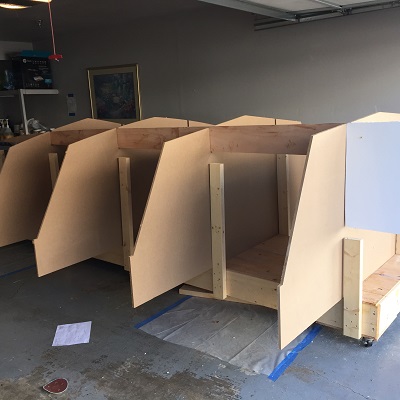
Today we put the bow mold and one of the hull molds into place. I build the jig 16 feet long as specified in the notes but with wheels.Here are some pictures.
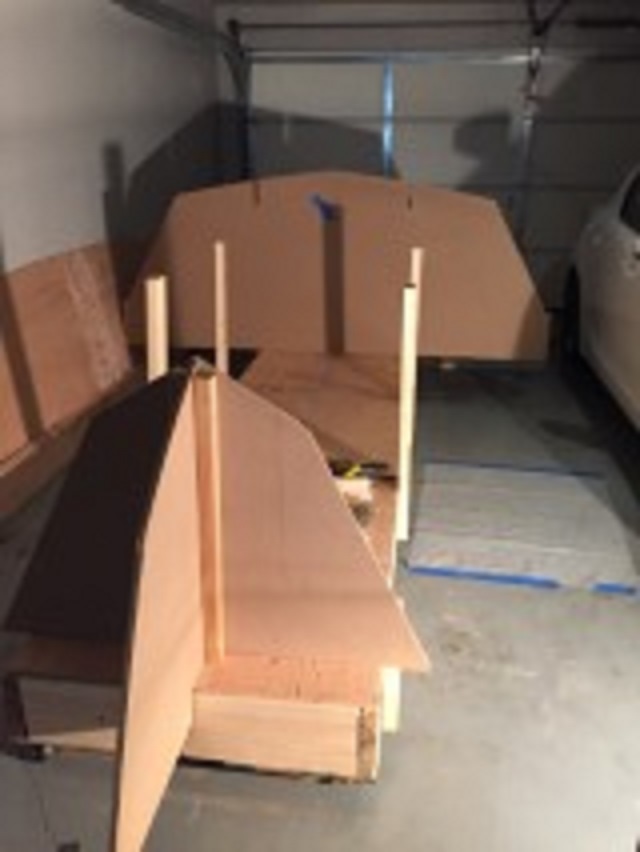
Here's a picture of the jig next to my car in the garage. Not a lot of space. That's why I put the jig on wheels.
Here's a picture of the jig with the bow mold in place. I had to notch it to accommodate the bow mold. I will also have to extend the jig 3 feet so I can build a fixture to hold the transom and allow the whole thing to roll on the wheels. I hope the baseline is established by frame A height and not the bow mold.
Re: FS19 in Washington State
Posted: Sat Sep 26, 2015 12:51 pm
by jacquesmm
Good pictures.
You can't go wrong with the baseline there. As long as the bow mold lines up with mold A you will be fine.
Re: FS19 in Washington State
Posted: Sat Sep 26, 2015 1:31 pm
by cazuza
3. DQ There are no holes drilled in the Bow Mold. Should I drill holes and run the tie wraps through both the Bow Mold and th hull panels to pull the hull into shape and not have the famous "droop".
Re: FS19 in Washington State
Posted: Sat Sep 26, 2015 2:26 pm
by remedy32
the famous "droop".
I trust JM's thought that the droop is caused by the lack of a bow mold or incorrect use but the more I look at my FS17 in profile the more I'm inclined to feel that it's also a result of the sides "closing in" (ie slightly reduced beam at deck level) that really hits the eye (oops...my eye

). The flare of the hull in that area is pretty great and just a little pinch in will raise the sheer line in the area about 18-24" aft of the bow. If/when I do this again I will take a really hard look at the boat in side profile before I build out the rail/gunwale. If the line were 1/2" lower (maybe even less) in that area on my boat there would be no drooped look. An easy thing to "correct" if caught early in the build. I did use a bow mold when building but now realize that pulling the sides "back" hard at deck level when joining will induce outward flare in the area that creates the droop look. Hope the geometry of this makes sense.
Bill
Re: FS19 in Washington State
Posted: Sun Sep 27, 2015 10:39 am
by cazuza
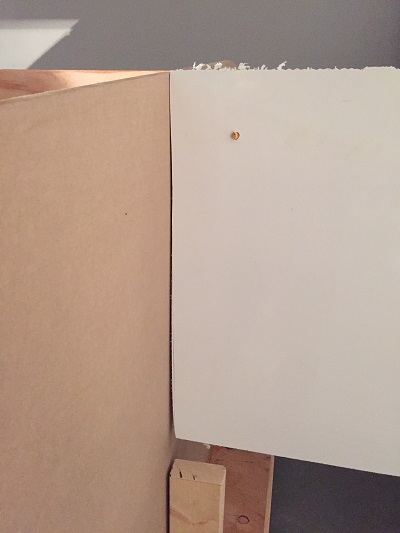
Started assembling the jig yesterday and ran into a small problem, the slots in mold C are 5 inches deep. The height of the stringer above the slot for mold C is only 3.5 inches. I plan on making a 1.5 inch plug to make the slot 3.5 inches.
Re: FS19 in Washington State
Posted: Mon Sep 28, 2015 10:42 am
by jacquesmm
Yes, the notches in mold C are too deep.
I checked all the other molds and they are correct.
Here is a picture of mold D with the stringer in red.
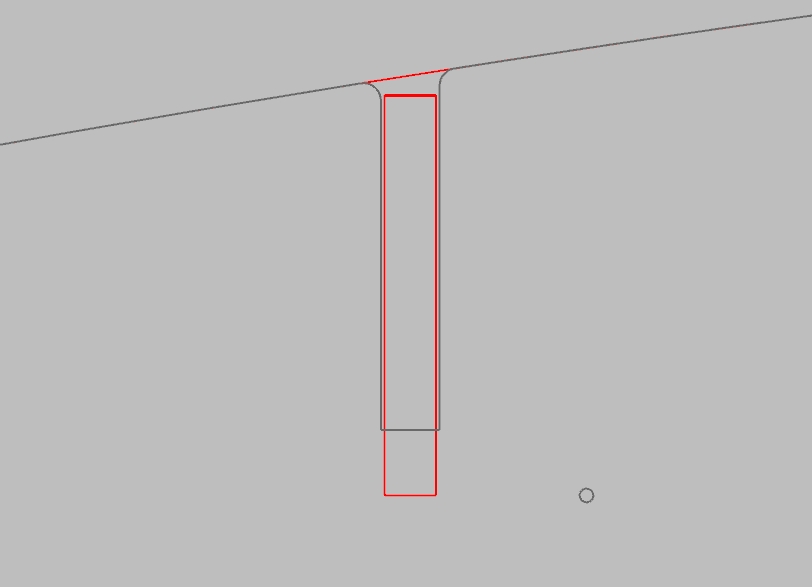
Note a couple of things:
- the stringer also has a notch, it will fit.
- the stringer is not exactly flush with the bottom, I leave a small gap, about a 1/4".
- there 2 small holes in each MDF mold. When you join them by a line, they become the plans baseline, the top of the stringers.
Except for mold C.
Mold C is correct but the baseline and the notch are offset by 1".
I don't know why . . . but your fix is correct: install a wedge in there.
I would use a 1" wedge, not 1.5". We want the stringer edge a little below the mold as in the drawing.
Re: FS19 in Washington State
Posted: Mon Sep 28, 2015 10:49 am
by jacquesmm
BTW, all the bottom edges of the MDF are at 31" from the plans baseline except for the bow mold that must be lined up with mold A.
The bow mold butts against A and their tips (keel) must match.
The molds are set up exactly as on the plans jig drawing.
On that drawing, you can see that the bow mold lower edge is below the strongbacks. The side panels will go a little bit below the strongbacks.
I am still trying to understand why I made that notch in C too deep. There must have been a reason . . .
Re: FS19 in Washington State
Posted: Mon Sep 28, 2015 2:48 pm
by cazuza
This mold was also missing the holes.
Re: FS19 in Washington State
Posted: Mon Sep 28, 2015 3:02 pm
by David Sours
Hello Cazuza,
I too look forward to watching this. I'm the proud and happy owner of a Downeast 25 cruiser (long cockpit). I live in Poulsbo (Brownsville, actually). My brother lives in Kenmore and I'd love to stop by for a look-see when you get going. Instead of a center console, you might consider 2 side consoles with a hinged window between the 2 console windshields. Then you could put canvas over the whole thing. Of course, if we have a couple more summers like this last one, you'll see a lot more center consoles!!
Re: FS19 in Washington State
Posted: Mon Sep 28, 2015 10:12 pm
by cazuza
That was my intent, side consoles with windows and a center opening window to the front casting deck. It'll all have to be custom and built in place on the boat. I ran it by Jacques and he agreed. See:
http://forums.bateau2.com/viewtopic.php ... &start=170
Re: FS19 in Washington State
Posted: Tue Sep 29, 2015 11:20 am
by jacquesmm
cazuza wrote:This mold was also missing the holes.
I remember hesitating about those holes. I put them in some kits and not others.
The holes are redundant in a mold like the FS19 because all the MDF molds are cut to sit straight on the strongbacks.
All the edges of the MDF molds are at the same distance from the baseline.
Some of the kits have baseline holes, others don't, that may be the reason.
Holes or not, all MDF molds edges are 31" below (or above) the baseline with is the top of the stringers.
I think your kit has all the molds cut for notched stringers except for mold C. Our very first kit did not have notches in the stringers. That is why you need a 1" spacer at C.
I think we had a mold C left in the shop and it ended up in your kit, sorry but the mold is accurate, the notch is too deep.
Re: FS19 in Washington State
Posted: Tue Sep 29, 2015 3:24 pm
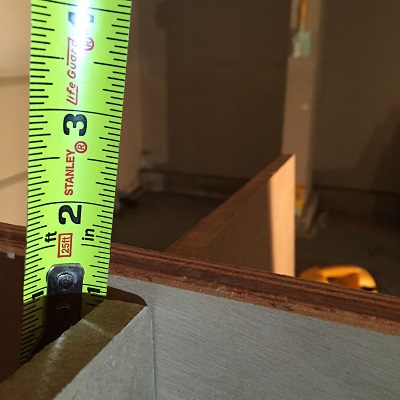
by cazuza
We added a 1 inch spacer to mold C and it fits as you said with the stringer 1/4 inch below the mold. however we have run into a problem with mold E, the slot is 5 inches and the stringer is 5.5 inches above the slot. It looks like I should increase the depth of mold E 3/4 inch ? At mold F both the slot and the stringer are5.75 inches so the stringer fits flush with the top of the mold. We also found the Nidacore motor well sides are cut exactly the same distance as the distance from the aft face of the slot for mold F to the back of the stringer. This appears to be to tight,we had to sand off about 1/4 inch to get it to fit into the slot in the mold.
Re: FS19 in Washington State
Posted: Tue Sep 29, 2015 3:57 pm
by jacquesmm
cazuza wrote: . . . mold E, the slot is 5 inches and the stringer is 5.5 inches above the slot. It looks like I should increase the depth of mold E 3/4 inch ? At mold F both the slot and the stringer are5.75 inches so the stringer fits flush with the top of the mold.
The inside edge of the stringer has to match the inside edge of the slot there. That means the outside edge of the stringer will stick out a little bit out of the notch but certainly not by 1/2".
Put the mold on the strong backs and if the stringer hits at the bottom of the notch, cut it a little bit deeper but do not raise the mold.
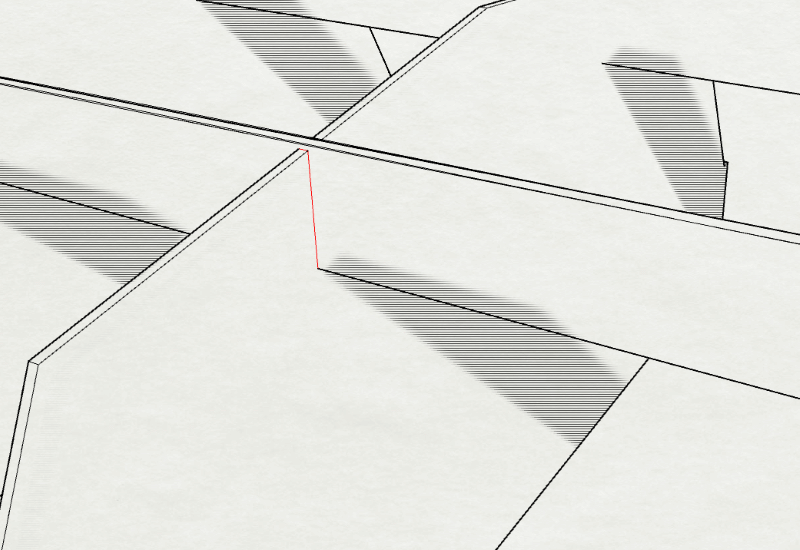
That's a drawing of the kit at that mold, it should look that way.
With all the molds and stringers in place, run a batten along the bottom and see if something sticks out.
Because of the deadrise and camber at the bow, the stringers will be matching on one side or the other or even a little deeper at C.
We also found the Nidacore motor well sides are cut exactly the same distance as the distance from the aft face of the slot for mold F to the back of the stringer. This appears to be to tight,we had to sand off about 1/4 inch to get it to fit into the slot in the mold.
In theory they must match but grind a little bit off for easy assembly. I expected that to be tight, feel free to sand them down . All gaps will be filled with resin later.
Re: FS19 in Washington State
Posted: Tue Sep 29, 2015 5:11 pm
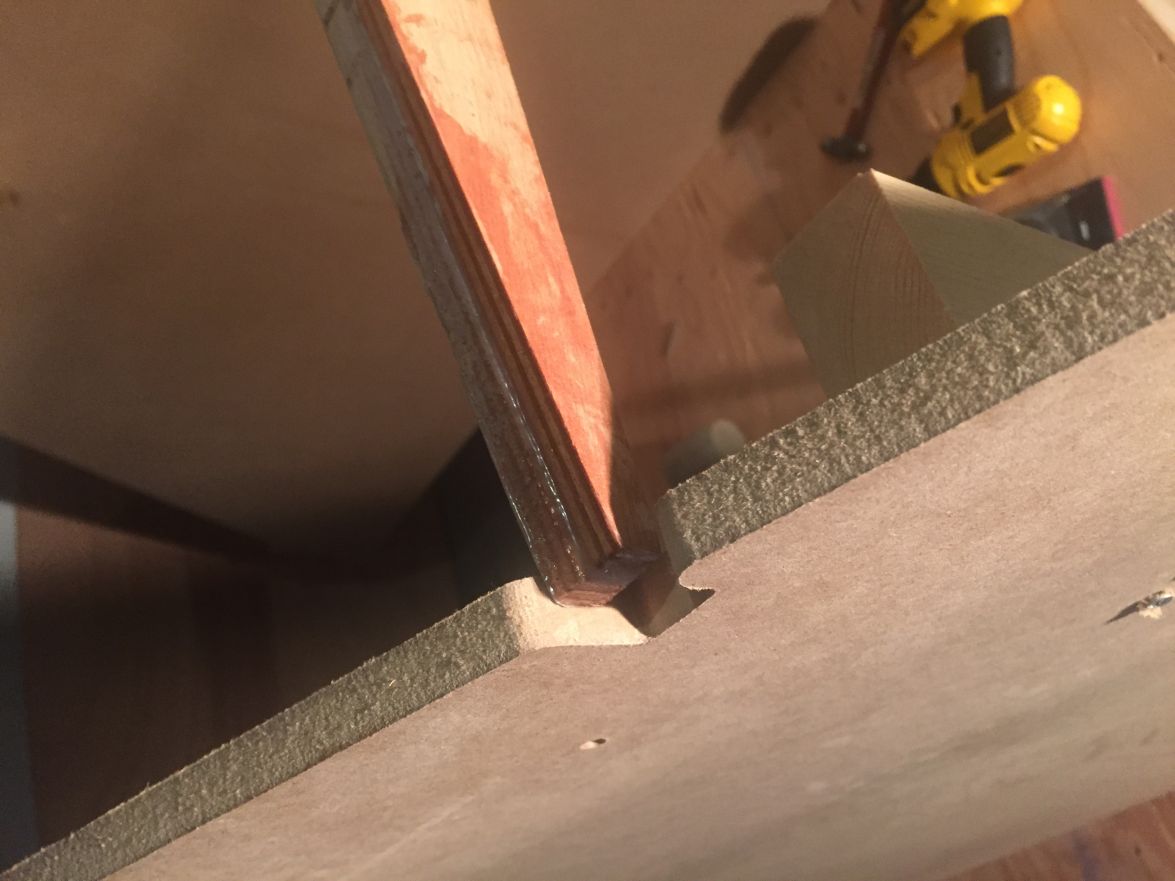
by cazuza
Molds C thru F are mounted on the strong back which is level and molds are perpendicular using a level.
The stringer is flush with mold F.
Picture of molds D and E.
The stringer at mold E is about 1/4 inch higher than the mold at the inside of the slot
Re: FS19 in Washington State
Posted: Wed Sep 30, 2015 8:59 am
by jacquesmm
Leave it the way it is, it looks good.
I went through my notes and see that for the kit, I faired the bottom curve of the molds manually.
I may have faired a little too much in places but it does not affect the assembly or the shape of the hull.
The fairing created the differences we see.
I did not fair the stringers: they will be touching the bottom panel or be very close.
Re: FS19 in Washington State
Posted: Mon Oct 05, 2015 10:11 pm
by cazuza
Still struggling with the jig, all the molds are installed and as near vertical as we can get them. I think its more important that the molds enter the stringers and the tolerance on the 36 inch spacing at their base acn vary up to 1/4 th of 1/2 inch. The diagonals are within 1/4 inch. The main issue I am encountering is the interface between the stringer and frame C, there is only 1/4 inch overlap. Is this OK?
Re: FS19 in Washington State
Posted: Tue Oct 06, 2015 9:42 am
by jacquesmm
As long as it is fair, it is OK.
It is designed to be flush with a 3/8 plywood frame but the Nidacore frame is thicker, that explains the difference.
All that will be filled with epoxy putty later: once the inside is fiberglassed, all those frames and stringers will have to be fitted, corners grinded.
Re: FS19 in Washington State
Posted: Tue Nov 17, 2015 12:38 am
by Spokaloo
NIce to see another PNW guy building.
I'm over in Spokane, but you may see my LB22 Nina kicking around over there, sold it to a fellow from Edmonds.
On your weather issue, I currently own a 23' Uniflite that I turned from a cabin cruiser to a center console with a t-top, and fish on a few that run out of Westport and Ilwaco. Very much prefer the center console and t-top to side consoles if you intend to fish. It also allows for more humans per inch than any other layout, as everyone can sit on the side decks, just about anywhere. Closing in with a glass windshield and good canvas sides with large eisenglass panels makes for a dry, comfy boat. Mama and the pup will both be happy if you go that route.
It is also the light option, which is pretty important to the FS hulls, they like being light. One guy can move a 6'x9' full height t-top easily, they're extremely light. The same could not be said for any lid over a boat.
If you're on the dry side, hit me up. Always nice to talk boats.
E
Re: FS19 in Washington State
Posted: Tue Nov 17, 2015 7:31 pm
by Typhoon
Jacques, I have worked in freight, warehouses and been a delivery driver and I agree the package is in poor condition.
Sadly though, the industry is rife with low wages, casual employees and employees who are just there for a job.
I've also worked in manufacturing (of expensive, fragile products) and know there is really nothing much you can do when someone just doesn't care, but I would suggest cutting cheap, sacrificial plywood boards to put vertically on all the faces of packages like that, using cheap foam to fill voids (to make the package even dimensions all round and protect corners when loads are stacked) and put sacrificial sheet boards top and bottom to protect the materials stack in the middle.
If you use a fairly thick piece of junk board for the bottom of the stack, you can screw/glue/nail that board to the pallet, minimising the chances of the pallet shifting under the stack and also allowing you to keep the stack within the dimensions of the sacrificial board on the bottom of the pallet.
jacquesmm wrote:This is disgusting! We spend more than one hour per kit on packaging but we can't protect against careless forklift operators who dent the side of a kit package with the forks. It is negligent, we put the kits on a pallet for a reason, they must lift the pallet.
To all kits buyers: if you kit arrives in that condition, please write down "damaged" on the receipt. Unless you do that, we can not claim damage.
From now on, we will take a picture of each kit before shipping and email it to the kit purchaser the day we ship.
A little spot or scratch on the cardboard is OK but those forklift dents in the sides are unacceptable.
Re: FS19 in Washington State
Posted: Wed Nov 18, 2015 9:59 am
by jacquesmm
Thanks for the advice.
We use heavy corner protection and heavy cardboard all around, double on all edges
We may have to switch to some kind of plywood boxes.
Re: FS19 in Washington State
Posted: Fri Nov 20, 2015 10:24 am
by cazuza
Spokaloo, any chance you could post a picture of your T-top.
Re: FS19 in Washington State
Posted: Sun Jan 10, 2016 4:23 am
by Fuzz
Any updates on your build?
Fuzz
Re: FS19 in Washington State
Posted: Sun Jan 10, 2016 6:00 pm
by cazuza
Making slow progress, had to rebuild the jig to lower the transom 1/2 inch and I have to jury rig a design to move the boat around the garage. With the hull panels in place its to heavy for the wife and I to push it. About ready to align and glue the panels together. I have one question on the bow mold. Should the side panel tie raps also be inserted through holes in the bow mold or is its purpose of the mold to only assure the sides are pushed forward sufficiently to not allow the panel to bow out aft of the mold nose.
Re: FS19 in Washington State
Posted: Wed Sep 07, 2016 11:55 am
by Marshall Moser
Do you have an update on this? I'm really interested in your build.
Re: FS19 in Washington State
Posted: Wed Sep 07, 2016 12:39 pm
by Fuzz
What he said
Re: FS19 in Washington State
Posted: Wed Sep 07, 2016 12:47 pm
by Marshall Moser
I'm very, very close to ordering the kit. Just waiting for a house to close.
Re: FS19 in Washington State
Posted: Thu Jan 05, 2017 3:40 pm
by narfi
Any updates?
I have purchased the FS19 plans and am curious to see how you are doing.
I am especially curious to see your dual console setup.