Page 1 of 1
Steve's FS18
Posted: Sat Oct 22, 2016 2:14 am
by Dutch1
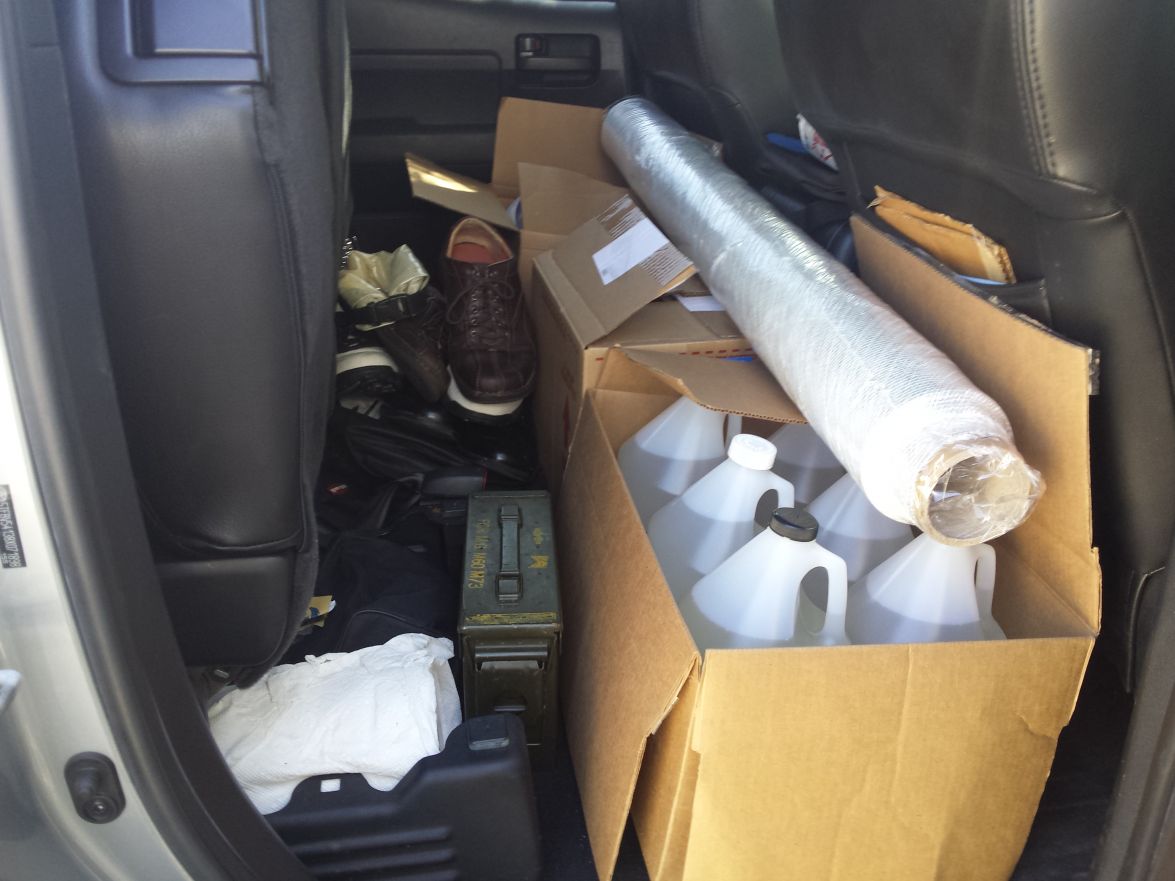
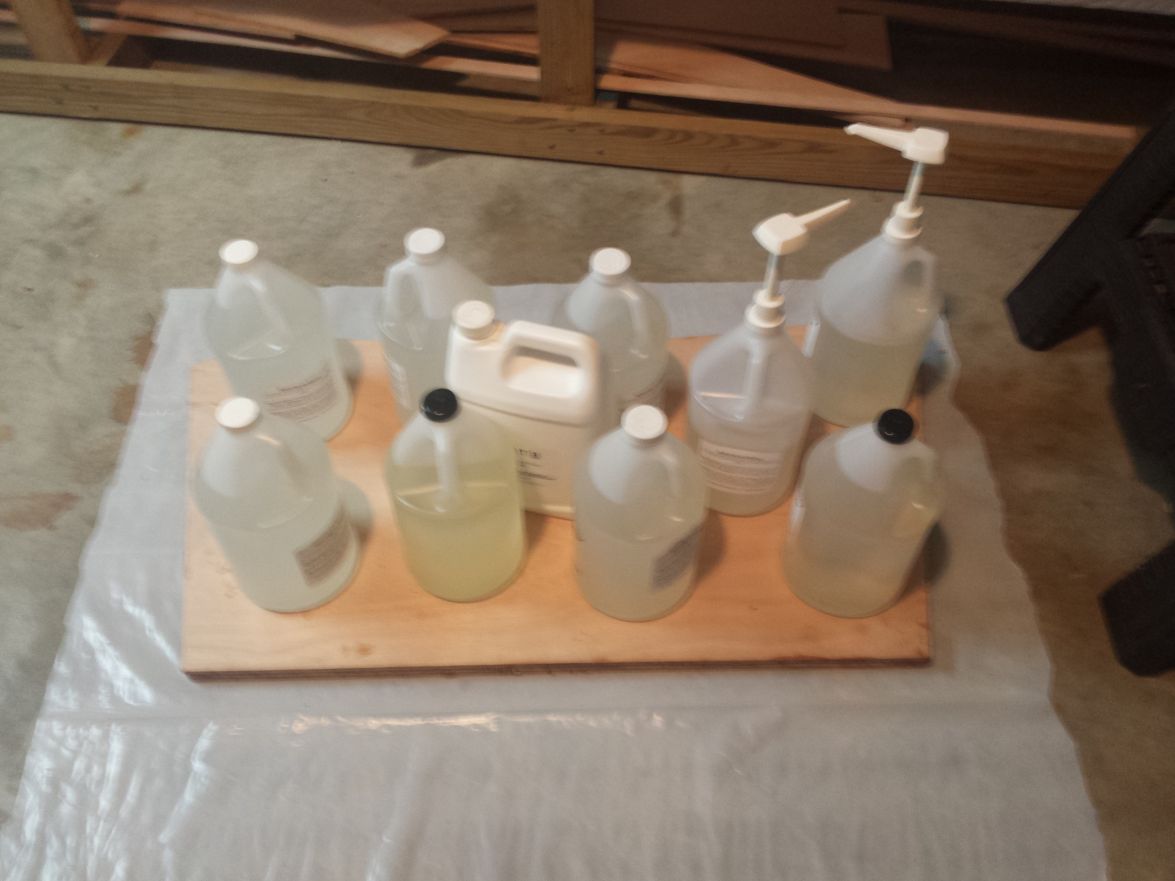
I stopped by BoatBuilderCentral to get my supplies and plywood for my FS18 build. It was nice meeting everyone and they have a great setup. It was hard to leave there without spending more money on the other items they sell. I'm sure I'll be calling before this is over. . I grabbed a pic once we loaded the plywood since I haven't seen one here yet of them. I think one gentleman from their team was out at the time.
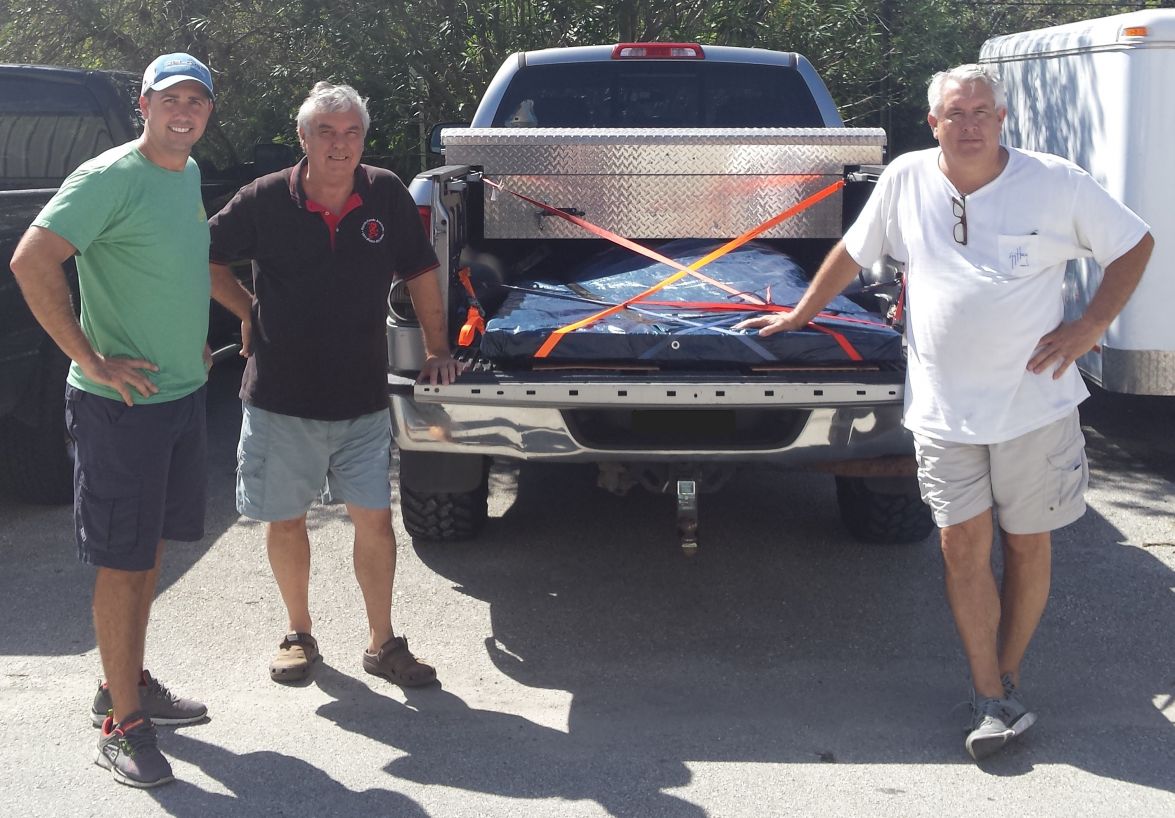
The load of epoxy, fiberglass, wood flour, etc, etc.
I'm going to try and post a lot of pictures during this build. There are a few things in particular I wish I could see more pictures of on others FS18 builds. I'm also thinking about using the gopro and taking pictures every 20 minutes or so when I'm working on it to make a video of the build.
Now for my list of newbie questions. . .
1. Does anyone have the measurements for a bow mold? I didn't see them in the plans but may have glazed right over it. I know it isn't required but there are a lot of limestone rocks and oyster bars around where I fish. I'd prefer to have the added strength.
2. How level should I make the strongback? After scratching my head for a few minutes after building it I realized my garage floor slopes towards the door by about 1/2". But, I also have one corner that is 1/8" low from a bow in the 2x6. I know it's there and can compensate for it if needed. Or, should I make it truly level? BTW, it's square.
3. How high should I make the strongback? I'm thinking about 24" high. I don't want to be bent over the whole time I work on it before flipping if it's too low. If you have pics of good designs please send them. I saw a good pic of Seaslug's and Cracker Larry's but I will need it to be mobile. I'm not going to sand this thing in the garage for one 5' 2" reason.
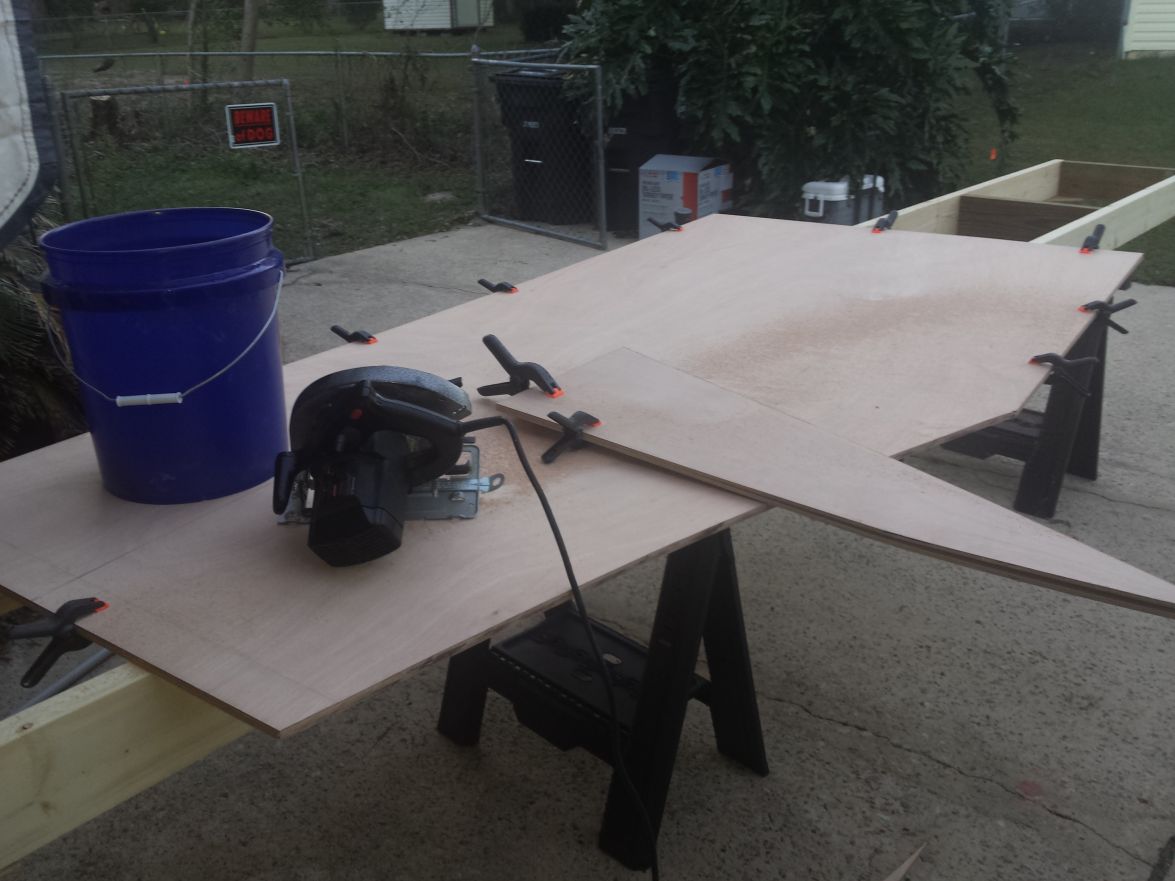
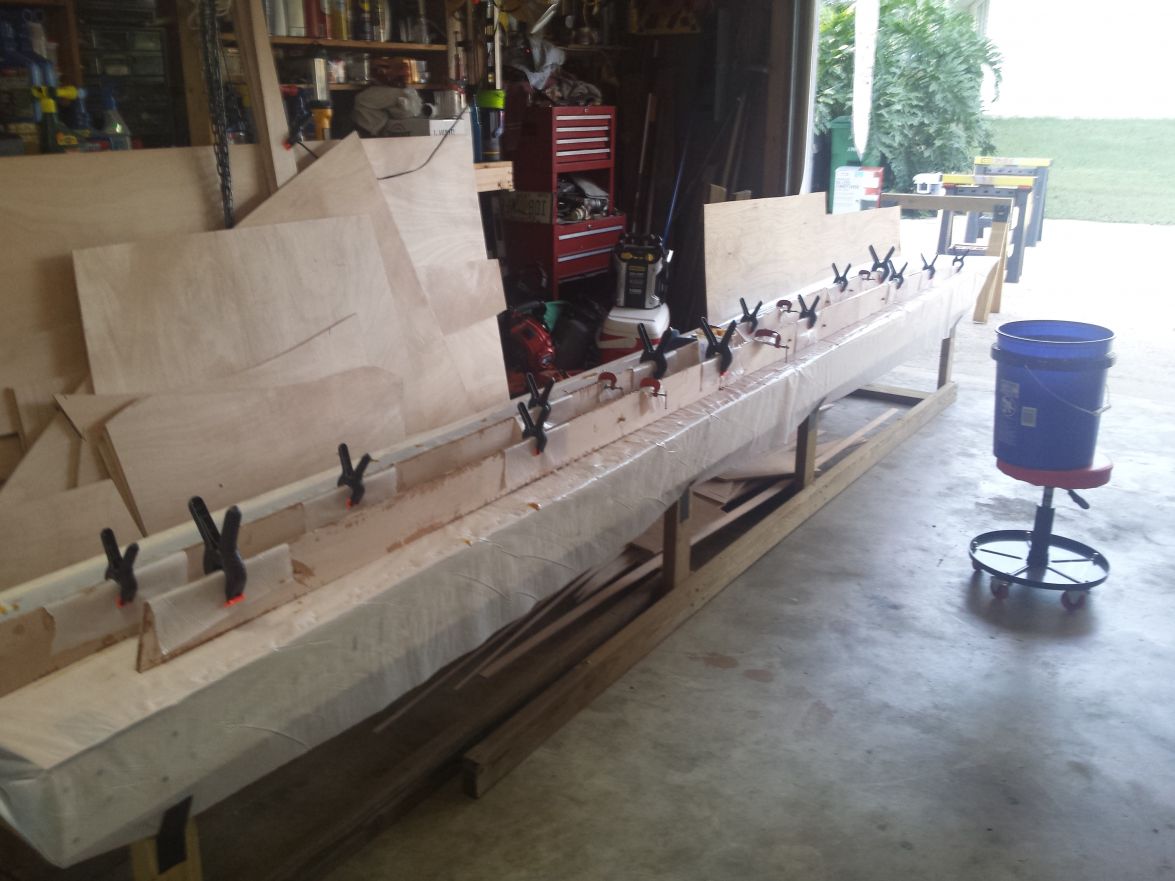
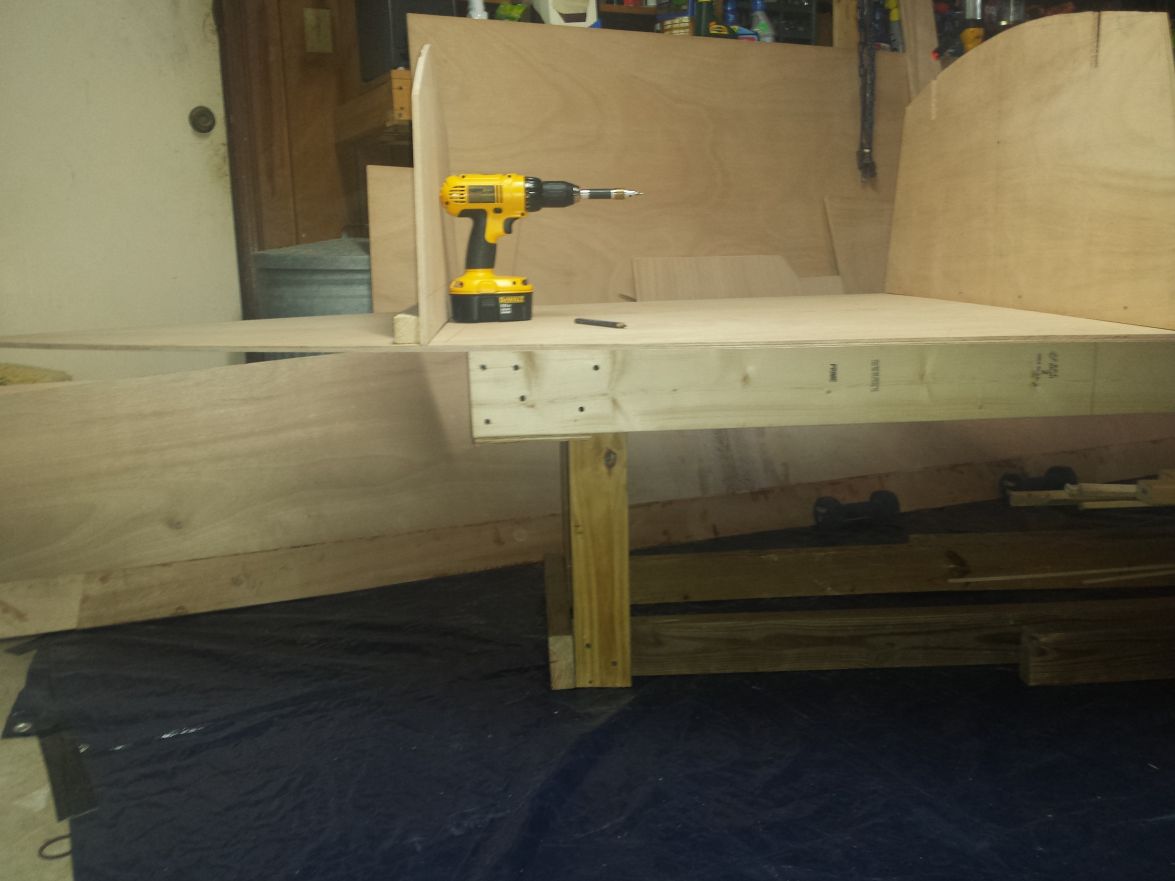
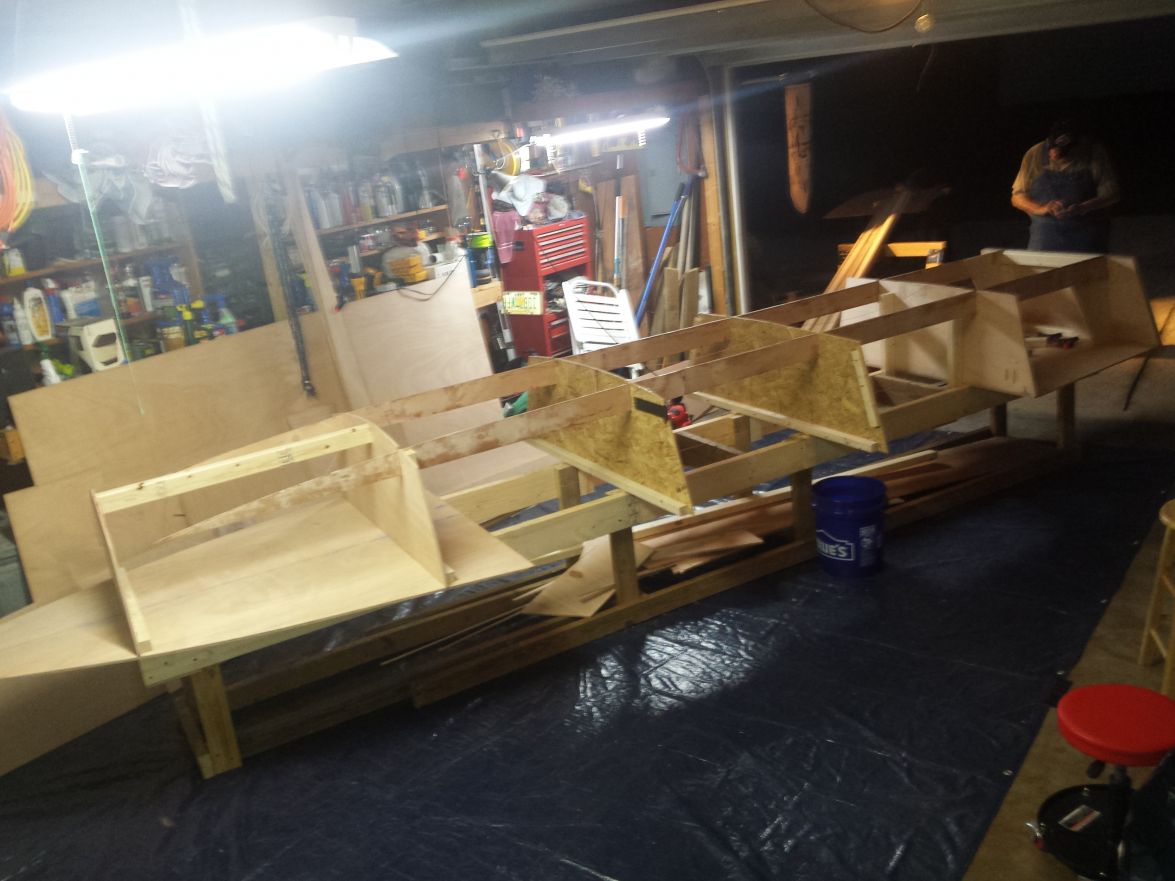
A few pics of today's events.
The mascot wondering what's going on.

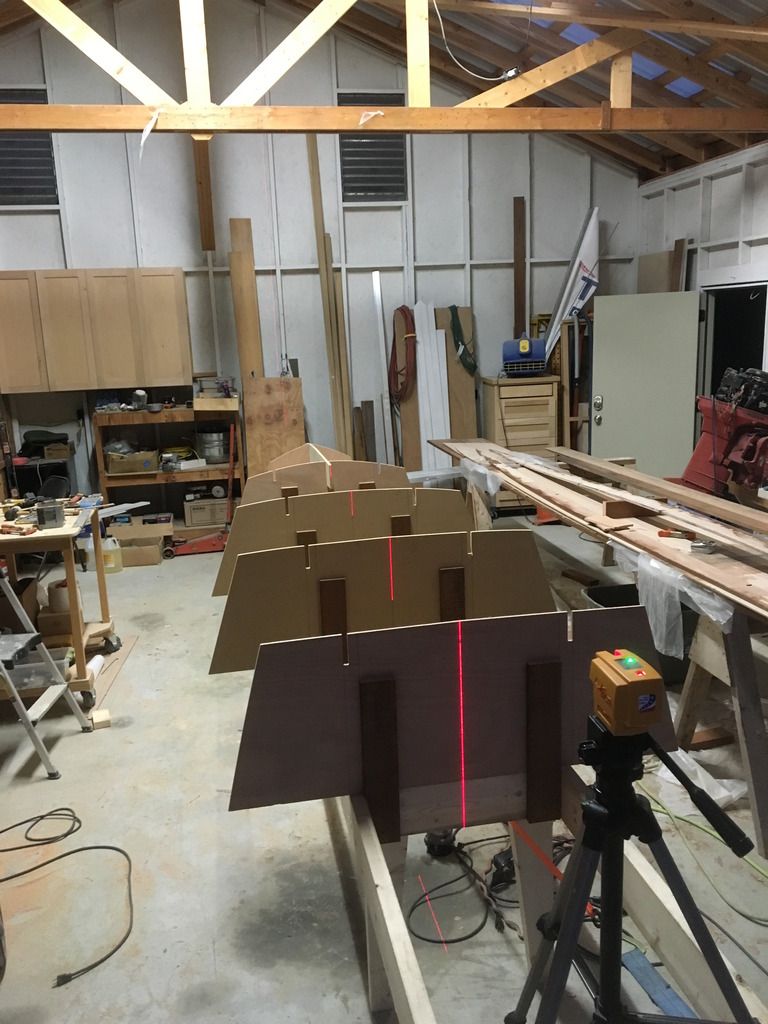
Where I'll spend time scratching my head over the next few weeks. .

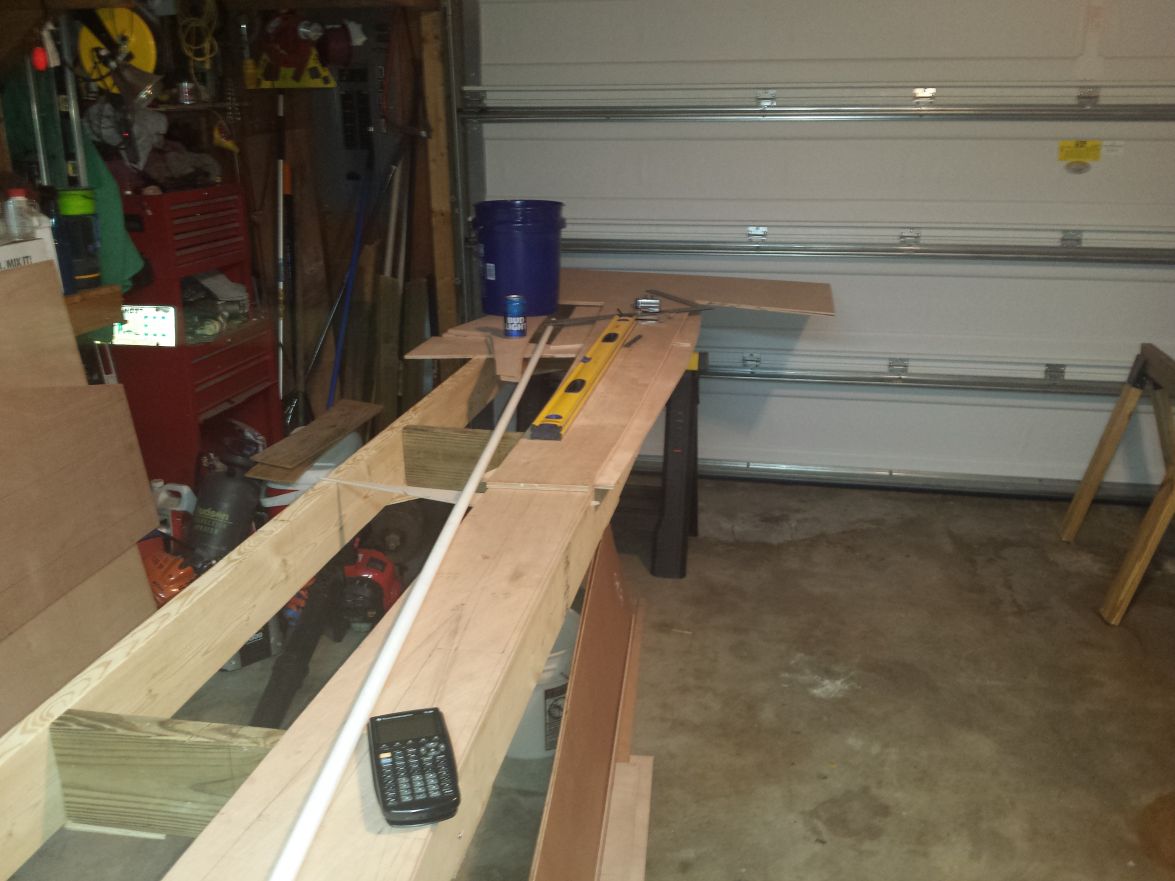
Basic strongback

Re: Steve's FS18
Posted: Sat Oct 22, 2016 7:00 am
by Jeff
Dutch1, very nice meeting you in person last week and glad the long drive got you back home safe and sound!! We will be watching your build closely!! Thank you for your business!! Jeff
Re: Steve's FS18
Posted: Sat Oct 22, 2016 9:57 am
by jacquesmm
Bow mold: the dimensions should be there, on the stations or frames drawing. I don't have the plans with me, I ma in Homosassa.
The mold does not stay in the boat, it's role is to shape the bow. For a stronger bow, add a layer of tape but you"ll see that it is string as designed.
The strongbacks *2x4's) should be in the same plane, not twisted. Level is better and easier to work with.
As for the height, make it so that you can easily reach the keel, let's say 18 to 24" for the strongbacks.
Re: Steve's FS18
Posted: Sat Oct 22, 2016 1:07 pm
by Dutch1
jacquesmm wrote:Bow mold: the dimensions should be there, on the stations or frames drawing. I don't have the plans with me, I ma in Homosassa.
The mold does not stay in the boat, it's role is to shape the bow. For a stronger bow, add a layer of tape but you"ll see that it is string as designed.
The strongbacks *2x4's) should be in the same plane, not twisted. Level is better and easier to work with.
As for the height, make it so that you can easily reach the keel, let's say 18 to 24" for the strongbacks.
Wish I was there with everyone but as you know, I wanted to get started. The bow mold isn't on the D279/3 drawing but it doesn't matter since I thought the mold would stay in there for support. And, I'm going to go with the 1/8 drop on one corner of the strongback. I'll use that end for the transom and compensate when I tack that end.
I'm currently spooked by the Station E drawing and sitting here pondering with a tape measure and pencil. The 3/4 above baseline has me stopped in my tracks. Mainly, I don't know what the top width of station E should be. 49"? I'm thinking that isn't right since the baseline is 3/4" below the top of the side panel and if I cut it 49 that will leave a 1/2" gap on the aft edge of the fore deck. Shouldn't the measurement be from the half width of the baseline edge? The "cutting a plywood frame" tutorial is good but doesn't cover the baseline question. I can't figure out my center line until I know this width. I may draw it out without using the corner of the plywood as a starting point as the nesting drawing shows. Perhaps on a piece of cardboard first. And, do I subtract the 3/8" deck width from the height of the station? I read that on another users build but didn't want to second guess the plans for the stations.
Re: Steve's FS18
Posted: Sat Oct 22, 2016 1:44 pm
by Dutch1
OK, before anyone wastes any time on answering my station E question. I drew it out on cardboard and the difference is marginal and could be filled in with epoxy putty. But, I measure 24 5/16" from the centerline to the baseline edge. And, I didn't compensate for the deck width. IF I have to cut the deck width out I'll do that when I flip it and take the stations back out. The 24 5/16" measurement came after using the station E plans. I'll draw out station A on cardboard as well since that has a bigger baseline gap.
Good stuff. . .
Re: Steve's FS18
Posted: Sat Oct 22, 2016 9:53 pm
by K2FS18
Just measured mine. Currently with the skiff upside down, it is at 22". I am currently fairing and getting ready to epoxy/graphite paint. When I first built the frame, it was at 27" to top of 2x6. I cut 7" off when I flipped to work on the inside (20"). It is know resting on 2" boards across the frame. All of those heights worked great for the work that was being preformed at the time. I am 6'.
Re: Steve's FS18
Posted: Sat Oct 22, 2016 9:56 pm
by K2FS18
So who is who in the photo?
Also, always got to have the dog for a helper. Mine is always laying out front of the shop just watching the world go by. Unless I am using the Fein saw, then he heads into the house as the noise is beyond loud.
Re: Steve's FS18
Posted: Sat Oct 22, 2016 10:05 pm
by K2FS18
Also on the frame. I am assuming that the mid blocking is laid out with the stations. If not, position them so as it makes installing stations much easier. When installing stations, screw ledgers to station then to the upper part of the blocking, then wedge the bottom part of the ledger to plumb the station. I would try to make the frame as level as possible. It will help when you lay the panels on the stations and start to get the hull in position.
You may consider getting a sander that you can install to a shop vac along with bags that go into the shop vac and good filter. I don't have an issue with sanding dust, just the sawdust from cutting. Moving in and out of the shop will keep moving hull on the stations and possibly get it all out of wack.
Re: Steve's FS18
Posted: Sun Oct 23, 2016 2:43 am
by Dutch1
Thanks for the info and taking the time to go measure your strongback K2! I've had about 5 hours of sleep the last two days so I'm drawing a blank on one of the guys names. . . From left to right is Jeff, Jacques, and .... I think Sean. I'll remember as soon as I hit submit on this post. Dang it, sorry guys. Time for some zzz's.
I didn't put much thought into where the cross support braces would go for the strongback. The recommendation of adding them at the station locations is my first official lesson learned for this build. That would have been one nice piece of information to have. . . I'll check when I go back out and I may just put some 2x4's at those locations. I don't know what you mean by ledger. Do you have a pic? I've marked all station locations (inside and out) and the centerline on the strongback. I've also marked the centerline and a horizontal line on the stations so I can line it up easy before I mount them to the strongback. Right now, it's sitting on two saw horses and the height is perfect for drawing out all of the pieces. I'm 6' as well and thinking the strongback will end up around 22". I can always raise it easier than lower....
I really like the idea of hooking up a vacuum hose to the sander. I always thought the little bag on there was a joke anyway when I used it previously. I'm thinking some gorilla tape should hold the hose on there pretty well. I'll give that a try.
Re: Steve's FS18
Posted: Sun Oct 23, 2016 1:07 pm
by K2FS18
Here you can see the layout of the med blocking 2x6's and what I am calling the cleats, the 1x4's attached to both the blocking and the stations. I also screwed my frame together as screws hold better than nails and if it needs adjustment it is easy.
Re: Steve's FS18
Posted: Sun Oct 23, 2016 1:21 pm
by K2FS18
Steve, here are the tools used or not used.
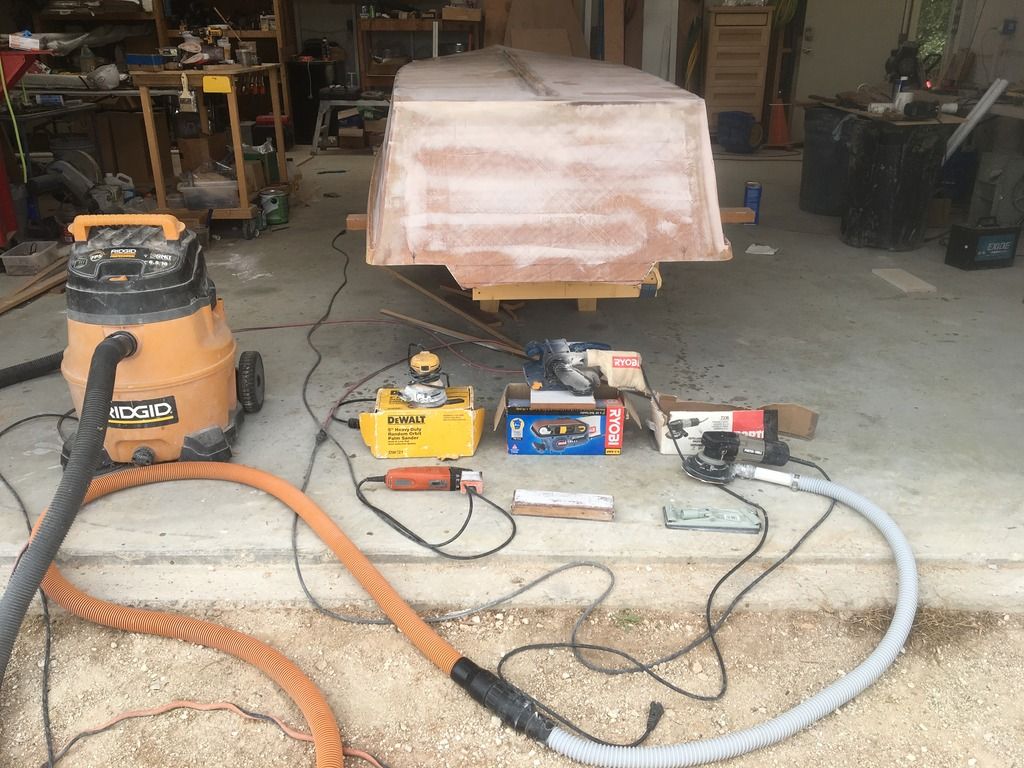
The shop Vac has flexible hose extension and reduces down to 1.25". It is used for the Porta Cable 6" varible speed sander with the vac attachment on the sander.
The 5" dewalt palm sander is not used at all. I haven't used this tool since I got the Porta Cable. Night in day in the sanding abilities. The belt sander was used mainly to shape the panels once cut out. I screwed the 2 halves of the panels together and sanded the edges so that both where true with each other.
The sanding block with the belt is used just to knock down the humps in the layups and build ups, but not used that much. Same with the drywall sanding pad, just used to knock down humps; but this time for the quick fair. Very little use.
The orange tool on bottom left is a Fein saw. Basicly the original oscillating multi tool. Currently I have the sanding attachment on it used to get the inside corners. This tool is used often for cutting, trimming, sanding.
Re: Steve's FS18
Posted: Sun Oct 23, 2016 10:31 pm
by seaslug
Nice work K2, and especially like the laser transit. I used a pink string line, which worked fine, just not as high tech. Your strong back is about the same as mine was, with mine at 23" high, screwed firmly to the floor until the hull was glassed, than I attached 2" casters to the bottom so it could be rolled outside for the heavy sanding. I'm 5' 10" and that height was comfortable for me. The overall length of the strong back was 179" with the baseline even with the end so the transom hangs off the end of the frame, and the bow extends past the other end of the strong back 35", for a total of 214" to the tip of the bow mold. This way frame A sits over the strong back, but the bow overhangs and allows easy access from underneath for shaping the bow if you are creating the rounded chine.....Dutch, If you're planning on using the boat for poling the flats, I suggest you choose the Straight sheer (flush deck) option on the bottom of drawing D279/4, than after the hull is built and flipped I lowered the sheer line 3" at the transom to zero at the bow. This is done by clamping a long flexible batten along the sheer and eyeballing a good line. It takes a lot of adjusting and standing back and looking at it to get a good clean line. Make sure you have the bulkheads in place at least temporarily because the weight of the side panels will cause the sides to fall away from the centerline, and if you cut the sheer that way when you install the bulkheads the sheer line will be slightly off..... Also, with the rounded chine, on drawing B279/6 at the top left, I left the bow panel long instead of cutting as shown, and used the multi tool during assembly to get a perfect fit. Same drawing showing the 1" rips for the rounded bow, if you're very careful and make really straight and neat cuts, forming the bow will be easier..... As K2 said; The Porter Cable 6" sander is an excellent tool, and the multi tool essential in my book.... If I can be of any help answering questions feel free to ask. It's a great boat in every aspect, you'll love it. Have fun with your build. Mike
Re: Steve's FS18
Posted: Tue Oct 25, 2016 11:06 pm
by Dutch1
Hey guys. Thanks for the information. It's been a few days so I wanted to post an update. I cut everything Sunday night and plan to get the stations on the strongback this week. The level is nice but I'll just use a string and measure everything 20 times . . . And, I plan to use the sureform on the edges until I get the hang of rounding the edges. A belt sander can do some damage quick. I don't plan on rounding the chine or modifying anything else. I like the old school look.
I'll also post some more pics along the way later.
Re: Steve's FS18
Posted: Sat Oct 29, 2016 10:02 pm
by Dutch1
First off, I can't thank you guys enough for taking a few minutes to provide some recommendations. Thank you again! I stood at Lowe's for 10 minutes looking at those nice laser levels today and decided not to spend the money. I'll just use the string method. Here's a few pics. .
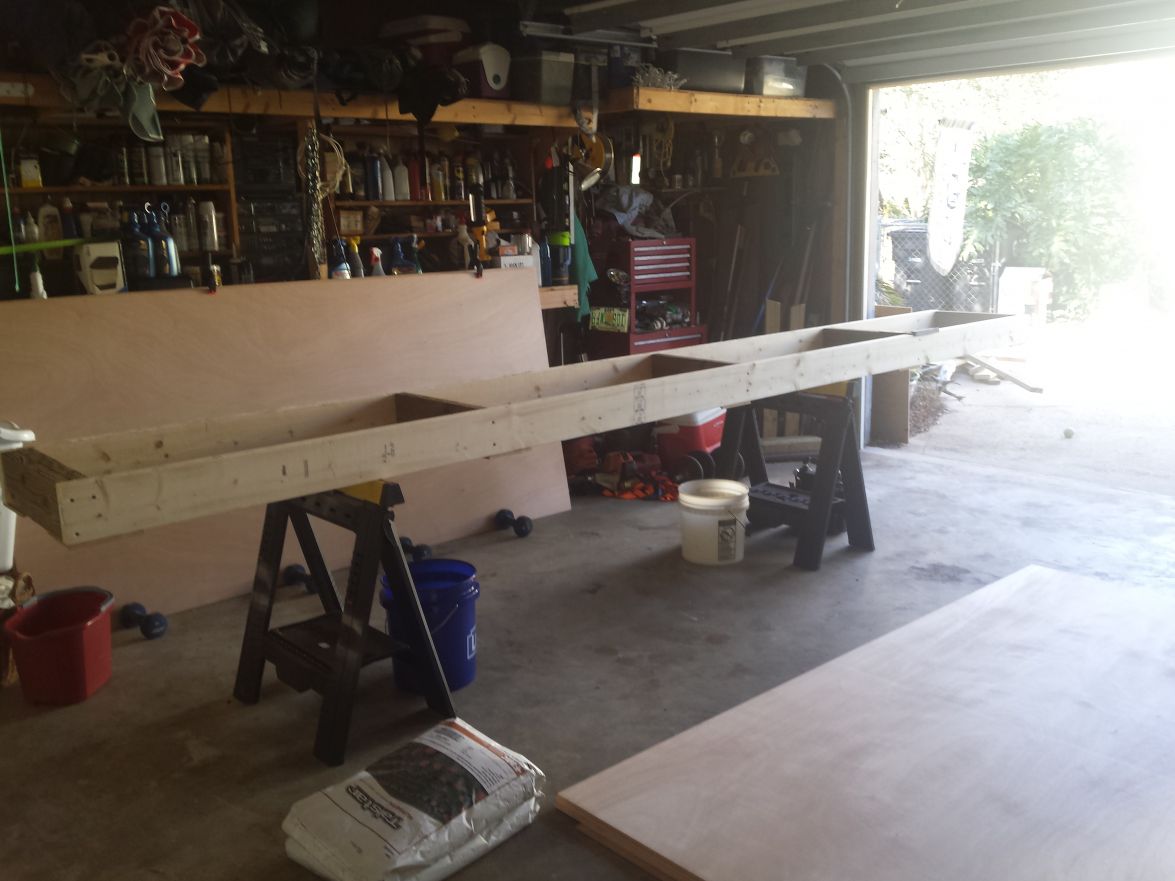
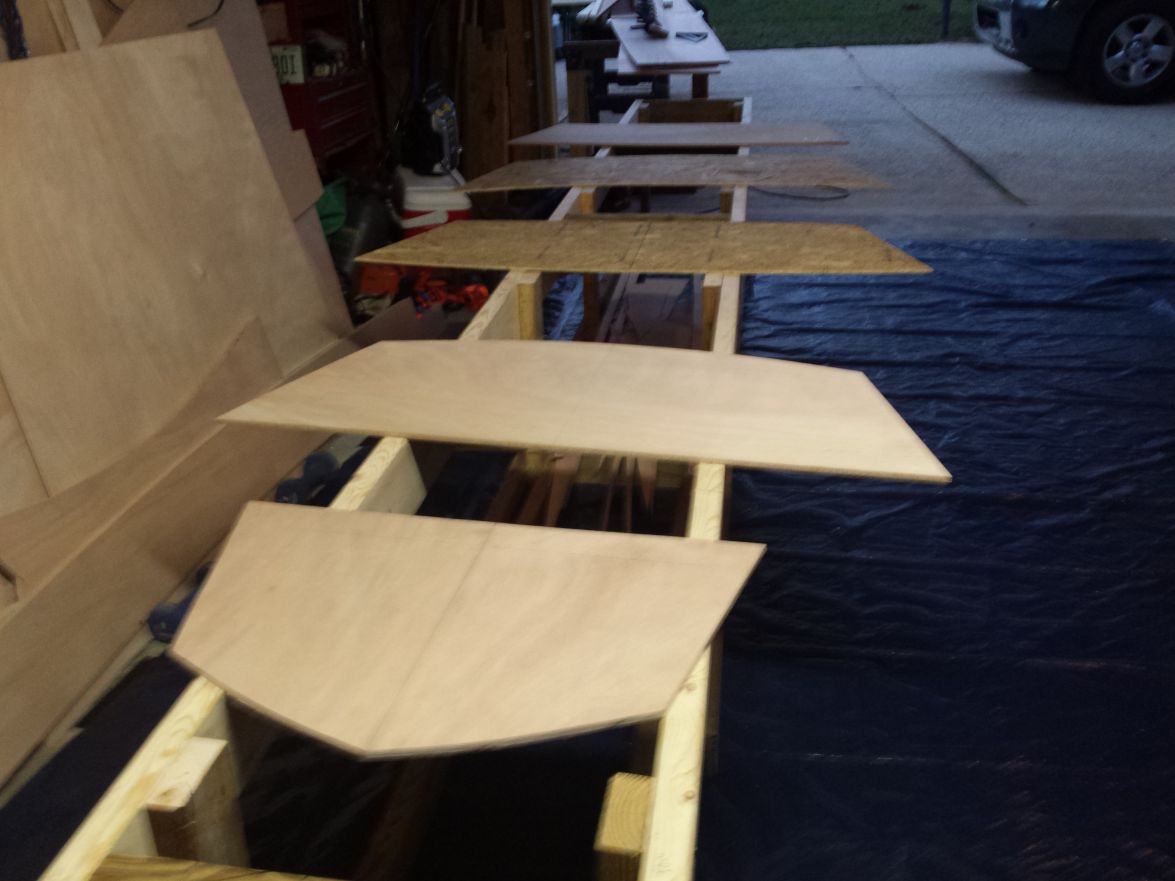
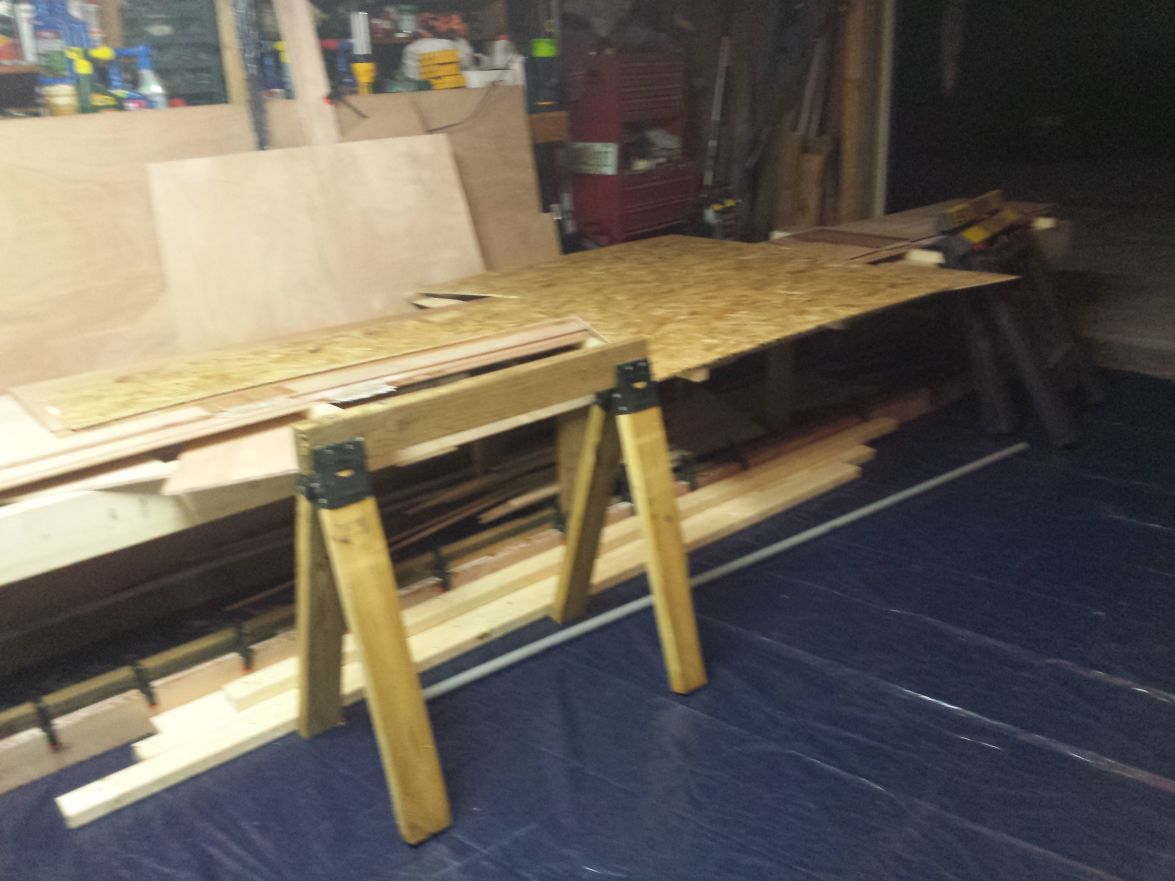
I used the sawhorses to have a good work area while I drew everything out.
First Cut! Got everything but the stringers got cut last Sunday night.
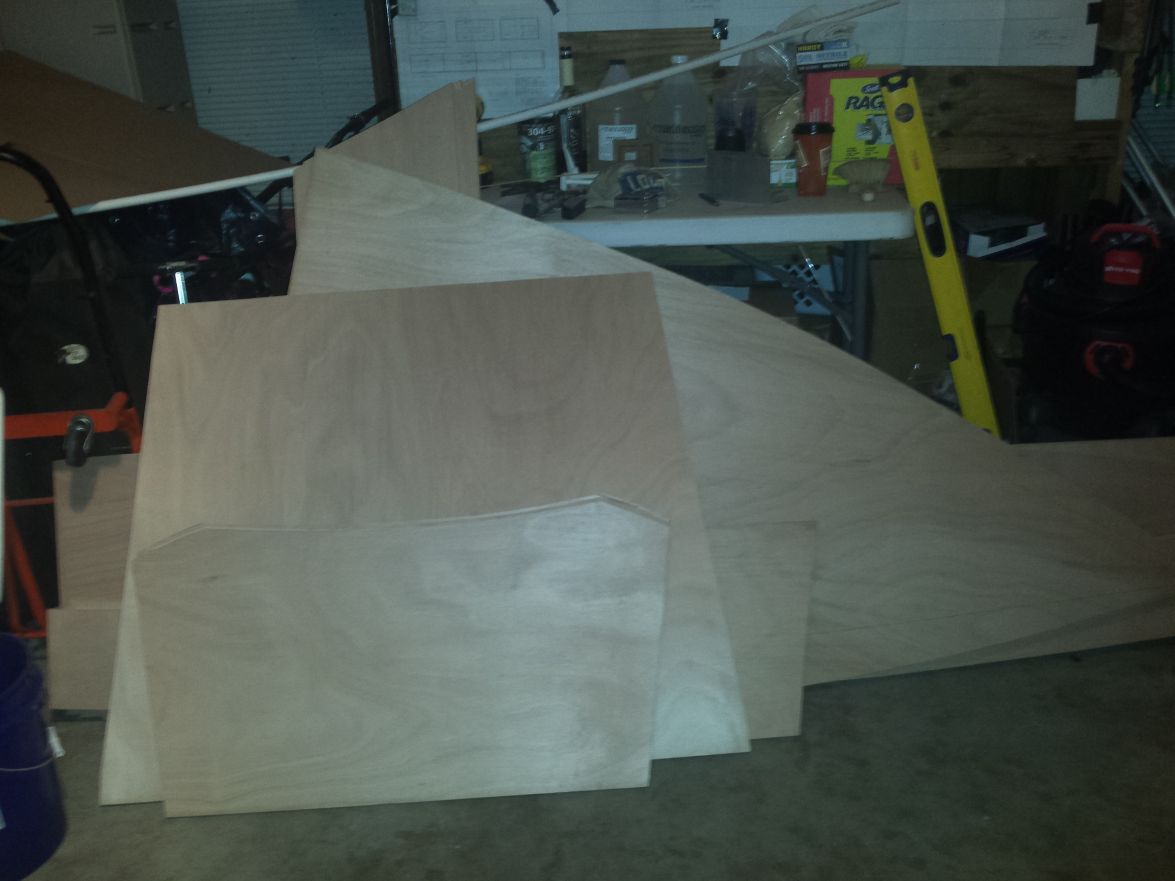
Everything is cut and waiting.
I made the very stupid decision of not marking out the stringers before I cut everything. This cost me way too much time one night last week while I had to first figure out the center of the pieces that were left so I could measure and mark the stringers accordingly. I DO NOT recommend following my lead on that! I know, that was dumb! Just too overzealous. . I got them cut during the week and pieced together with dowel rod holes drilled and ready for epoxy glue.
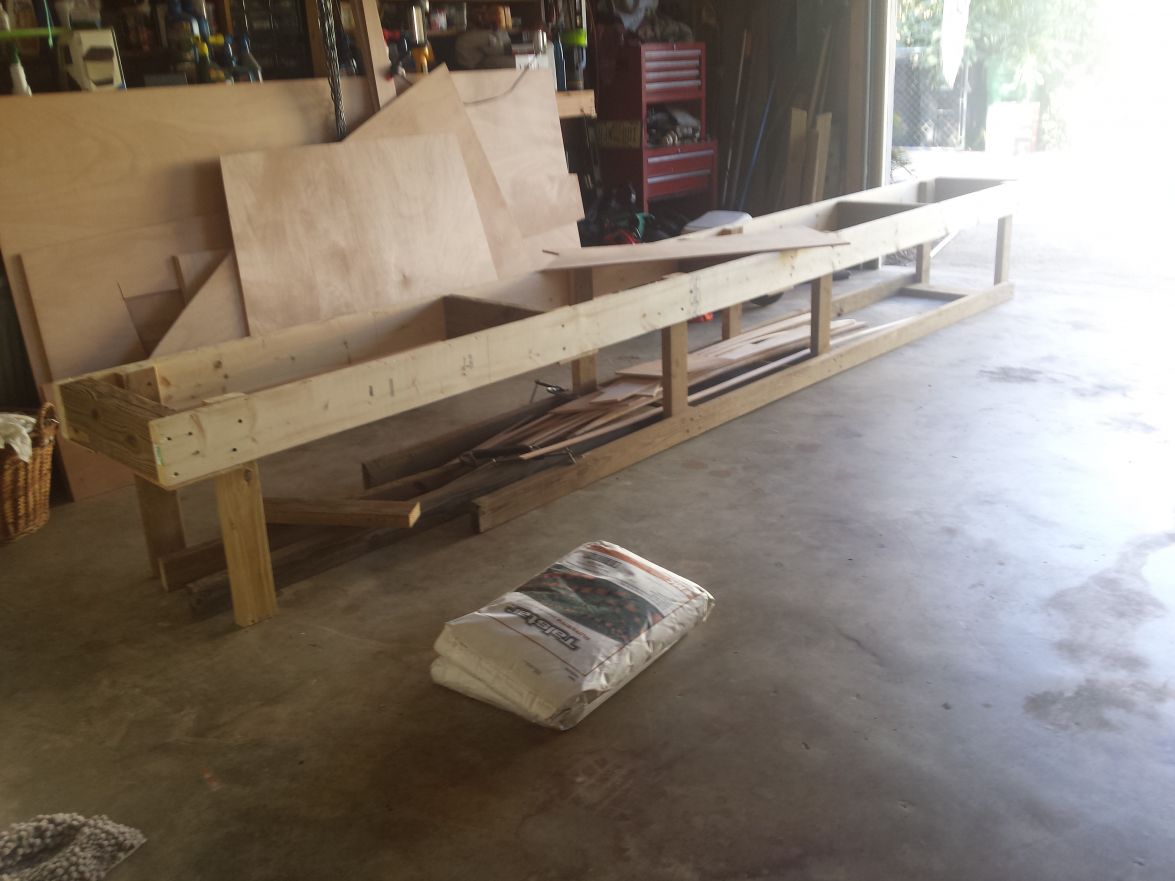
I worked on lowering the strongback during the week and finished it today. It wasn't finished in the pic.
I got the stringers glued today after staring at the 2:1 ratio scale on the side of the quart mixing containers for far too long and then just using the pumps on the containers. I still don't get it after talking to the BBC guys and if the pumps work as they should I'll be fine.
Also finished gluing the transom. I also witnessed a batch curing too fast. I let it sit in the quart container with the brush in there and it maybe lasted 30 minutes with a slow hardener.
After church tomorrow, I'm going to pull the stringers off the strongback and start splicing the long panels together.
Re: Steve's FS18
Posted: Sun Oct 30, 2016 11:39 am
by Jeff
Dutch1, looks like you are off to a good start!! Keep the progress photos coming!! Jeff
Re: Steve's FS18
Posted: Sun Oct 30, 2016 2:38 pm
by peter-curacao
Looks good from here

Re: Steve's FS18
Posted: Sun Oct 30, 2016 3:27 pm
by seaslug
Try to mix small batches where possible. 30 minutes is way too long to have any amount of epoxy sit in a large container. If you think you'll be working with a batch for a long time, try to spread it out in a shallow flat type tray, it will last longer before kicking. Unless I'm doing a large lay up, I usually work with 6-12 ounces at a time, and never waste a drop. Mike
Re: Steve's FS18
Posted: Mon Oct 31, 2016 9:53 pm
by Dutch1
Here's what happened with the pot curing too fast. I was mixing up six ounces at a time with a quart container to glue the transom. When I pumped one pump of hardener I realized I didn't know if I had pumped three or four pumps of resin. So I put two pumps of hardener and decided to check the measurement with another quart container. I mixed another 6 ounces and checked and it was OK so I mixed it up. I set it aside while I mixed some epoxy glue in the other batch and put it on the remaining transom piece. I still needed to paint the other side of the middle piece of the transom and as I pulled the chip brush out of the epoxy it felt funny and wanted to string. For lack of a better definition it felt clumpy and as I sat there for about 20 seconds looking at it wondering if that was what I had read about it literally strung like a sticky ooze. Realizing I wasted that pot since I left it in the container I mixed another three and finished the job. It was about 80-85 last night and that didn't take it long to start curing by leaving it in the quart container. I need to go invest in some of those small paint roller pans to spread it out while I use it. Now I know that the pumps output is roughly an ounce per pump so if I do that again I can just check the measurement for a batch.
I also needed another arm last night to hold down one of the long panels I was splicing. My cut pieces have been sitting all week leaning up against the wall. One of the ends of a center hull piece wanted to bow up on me at the splice point by about 1/4". I could hold it down but the second I let up it lifted the epoxied fiberglass splice. After cussing it for a while I got all of my jugs sitting next to me so as I picked my hand up I could put a gallon of resin on it. I used a piece of plastic with a scrap piece of wood with five gallons for weight. It was my first epoxied fiberglass splice and it was trying my patience but I don't give up that easy. I spliced the other end of the long panel and decided to give it 24hours to see how I did. Tonight I flipped it. The splice looks good and there isn't a bow. I had a little epoxy seep through and puddle on the underside so I sanded it a little before splicing the other side. It's curing as I type. If I think it looks good tomorrow I'll finish the other three long panels and set up the stations. Then I'll finally be ready to put it all together. I can't wait.
Re: Steve's FS18
Posted: Mon Oct 31, 2016 10:20 pm
by Fuzz
Lots of the guys weigh the resin and hardener before mixing it and it works fine for them. Others use the pumps and that works good for them. Me, I am too lazy, I just buy a bunch of 3 oz throw away cups or larger ones. Fill two cups with resin and one with hardener and mix as needed. Hard to mess up that way. If I need a smaller batch I just fill one cup and eyeball half a cup for the other. I guess either my eye is good or I am lucky as I have never had a problem...............YET

It seems to be close enough as the epoxy is pretty forgiving. At the end of three gallon bottles they are all empty at the same time. Just my two cents worth.

Re: Steve's FS18
Posted: Mon Oct 31, 2016 10:40 pm
by Dutch1
Fuzz, thanks for letting me know. To be honest, my biggest fear is a batch not curing since I just don't have much experience using epoxy. My comfort level is growing and soon I won't even think about it as I do now. I whipped up 3oz tonight to finish splicing one long panel. It was very close to the perfect amount needed. I'm learning as I go and expected to have a few head scratching moments along the way. I'm going to post good or bad here to be honest with the folks that are on the fence about building one of these boats. If I screw up, I'll post it. I've always admired hand built boats and have wanted to do this for a long time. And, I spent the $$ on some of those nice BBC quart containers so I'm using them until I mess them all up. I originally was going to put hardener in one container and the resin in the other. I literally marked two of them with a sharpie. Now I just use the pumps and one container when I mix a batch. Then set it aside when I'm done and pull out any residue the next day after it cures.
Re: Steve's FS18
Posted: Thu Nov 03, 2016 2:34 pm
by AGreen29
Looking good Steve, wish I was still in town to help you out. I'll let you know when I am in town again so I can check it out and give you a hand. Will probably be around a bunch with the holidays looming. Keep the pics coming and can't wait til you head my way with her so we can slime the decks.

Re: Steve's FS18
Posted: Fri Nov 04, 2016 9:48 pm
by Dutch1
AGreen29 wrote:Looking good Steve, wish I was still in town to help you out. I'll let you know when I am in town again so I can check it out and give you a hand. Will probably be around a bunch with the holidays looming. Keep the pics coming and can't wait til you head my way with her so we can slime the decks.
Thanks man! Hopefully it will be in one piece when you get back over here. We'll have to plan ahead. I'll have the rum ready for a fiberglass party! And yes, we'll scout around your new neck of the woods soon enough to slime it up!
All of the long panels are spliced together. I'll post some more pics soon. It's been a long week at work. I didn't work on it any last night so I'm a day behind where I wanted to be for this weekend.
Re: Steve's FS18
Posted: Fri Nov 11, 2016 2:53 pm
by Dutch1
Happy Veterans Day! Thank you to all of my brothers and sisters who served! And, happy late birthday to my U.S. Marine Corps brothers and sisters!
OK folks. It's been a little while since I posted any pics. I was mainly working on the long panel splices in the evenings. I'm limited on working space so I could only splice and sand so much at one time. At the present time, everything is spliced and ready for assembly. Which is what I'm going to work on this weekend.
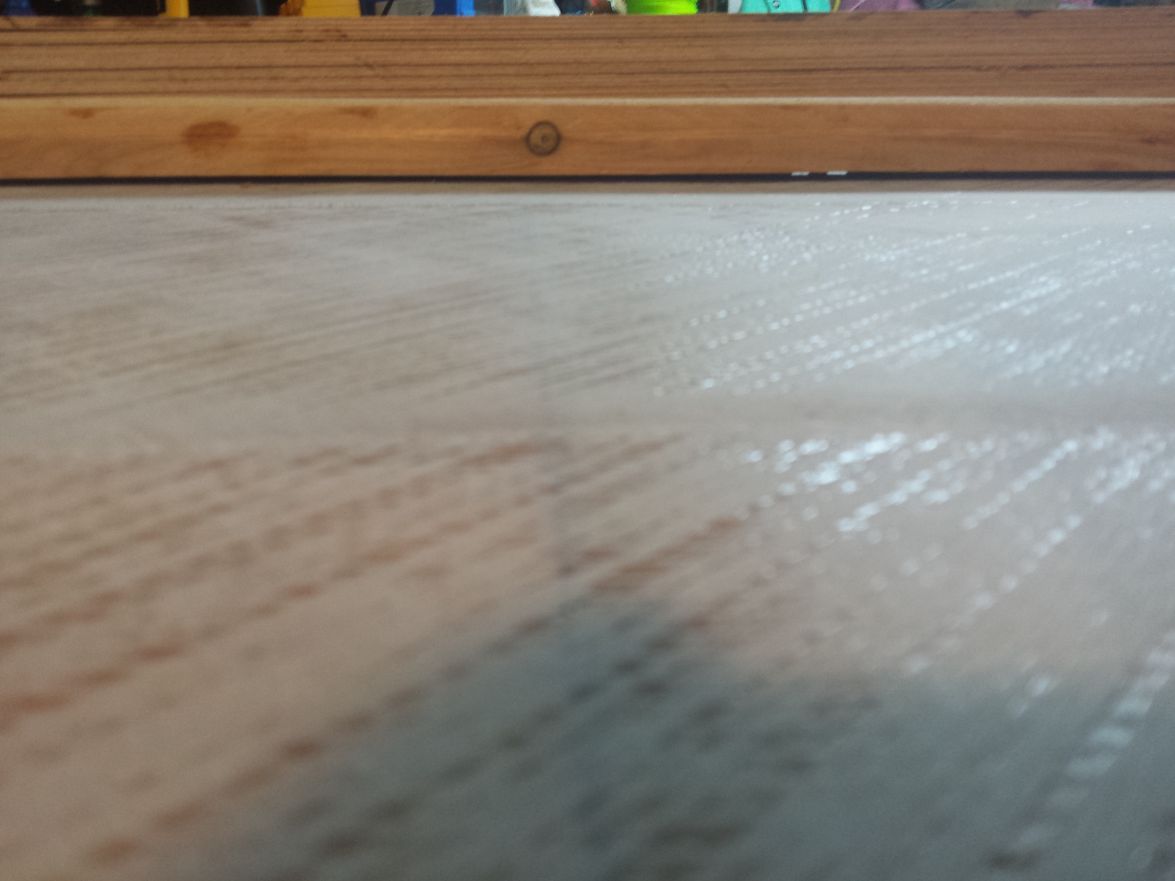
My goal is to do this right. As I mentioned before I hadn't worked with epoxy before this build. I need everyone's opinion on my splices. I
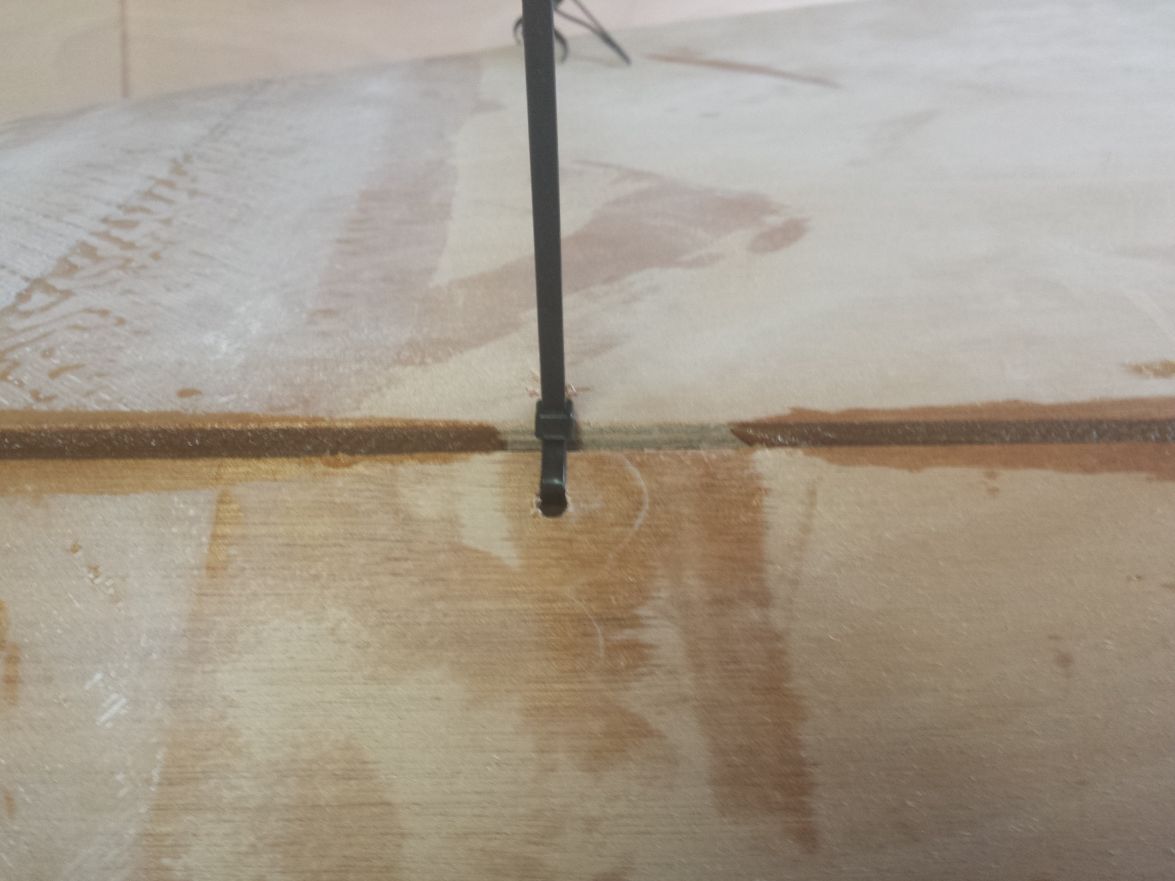
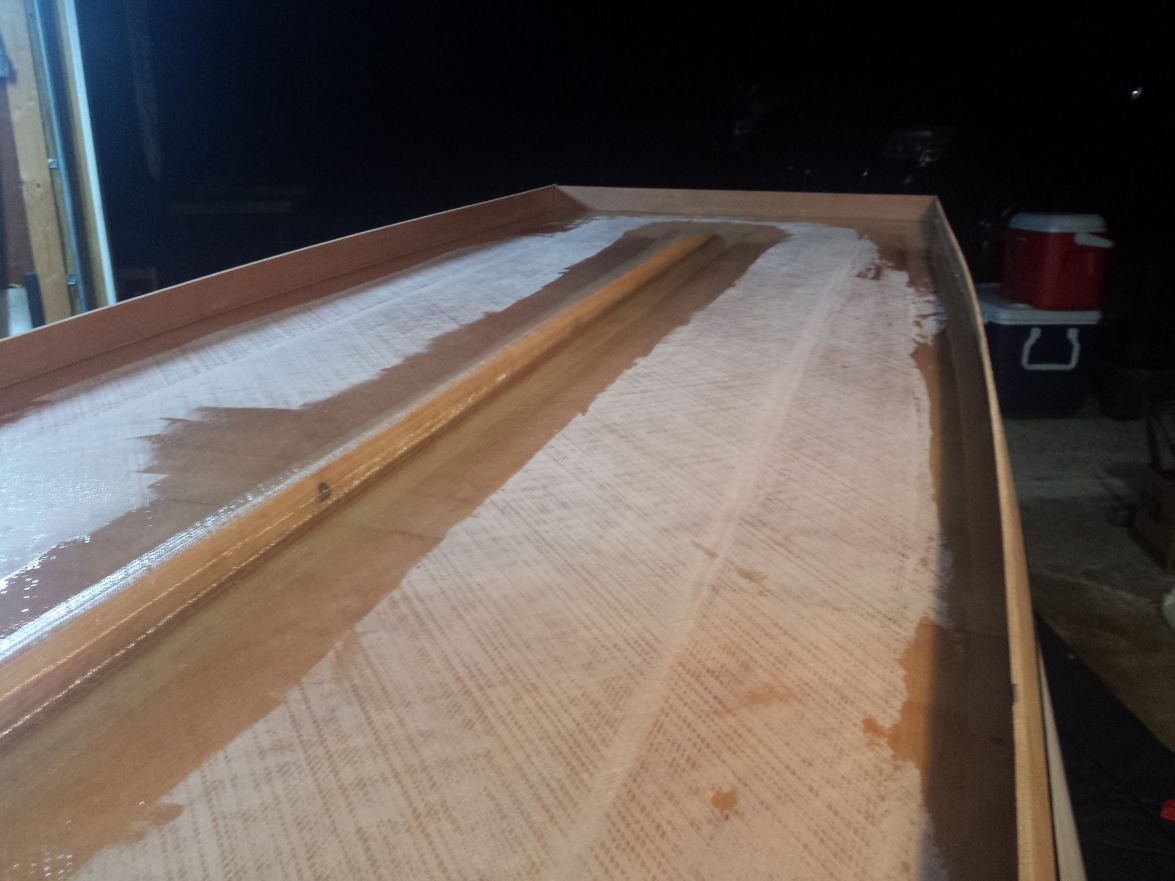
think I ended up with what a good splice should look like on my last several splices. All splices are surprisingly strong but I think I left too much epoxy on the top of the fiberglass for my first few splices. I was worried about the fiberglass not being saturated with epoxy enough. And, for some stupid reason I put plastic over the splices, then wood and weight. I had to do this since the wood was wanting to bow up and not be even for the first side but once I flipped the long panels I didn't really need the weight on there. As you can see in the first pic there is a crease in the epoxy. I used a roll of plastic that you had to unfold and it still had a crease in there and it showed in the epoxy. I actually thought about trying to smooth out the plastic but felt it wouldn't have mattered much at all. So...
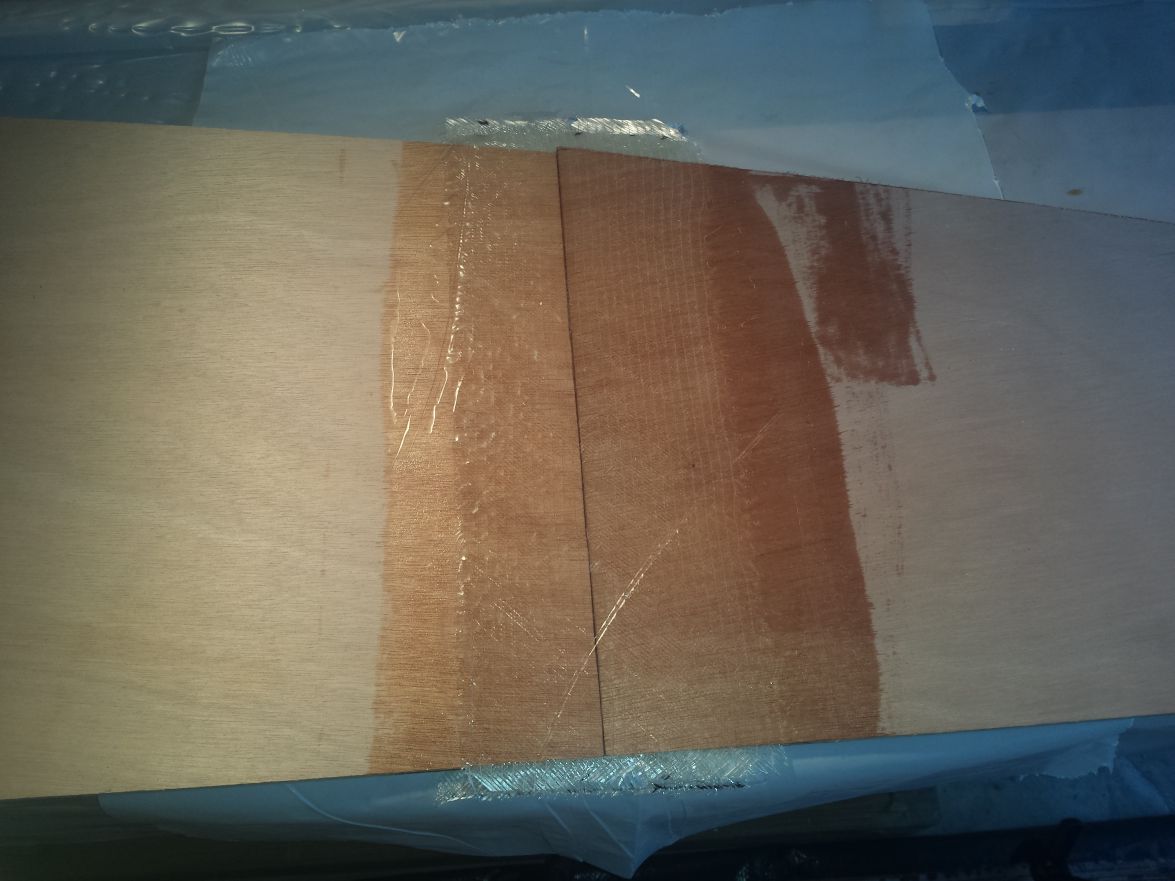
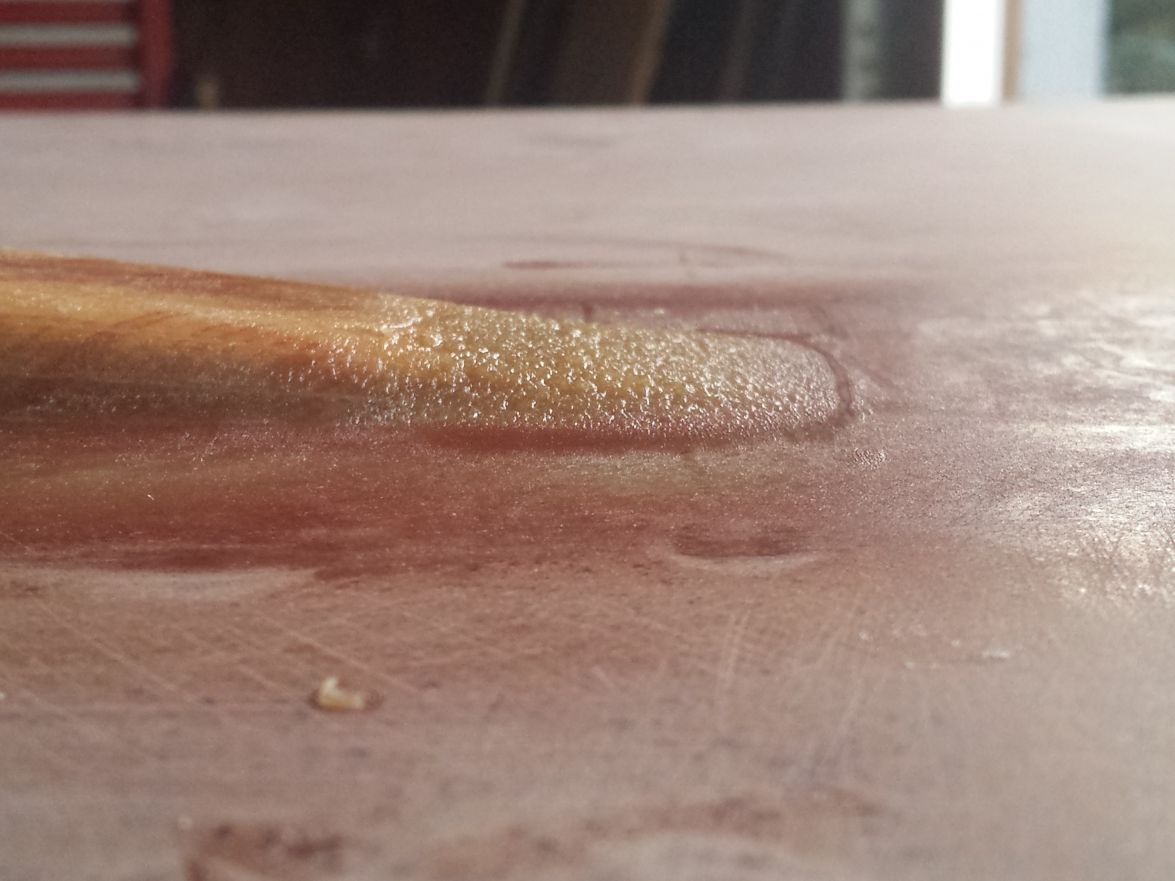
This is one of the first splices. Notice the crease. It was very strong but I didn't like the way it looked. I wanted it as smooth as possible since I would be fairing over one side of these long panels. Seeing this I knew I would be sanding this down. And, I started critiquing my splicing method.
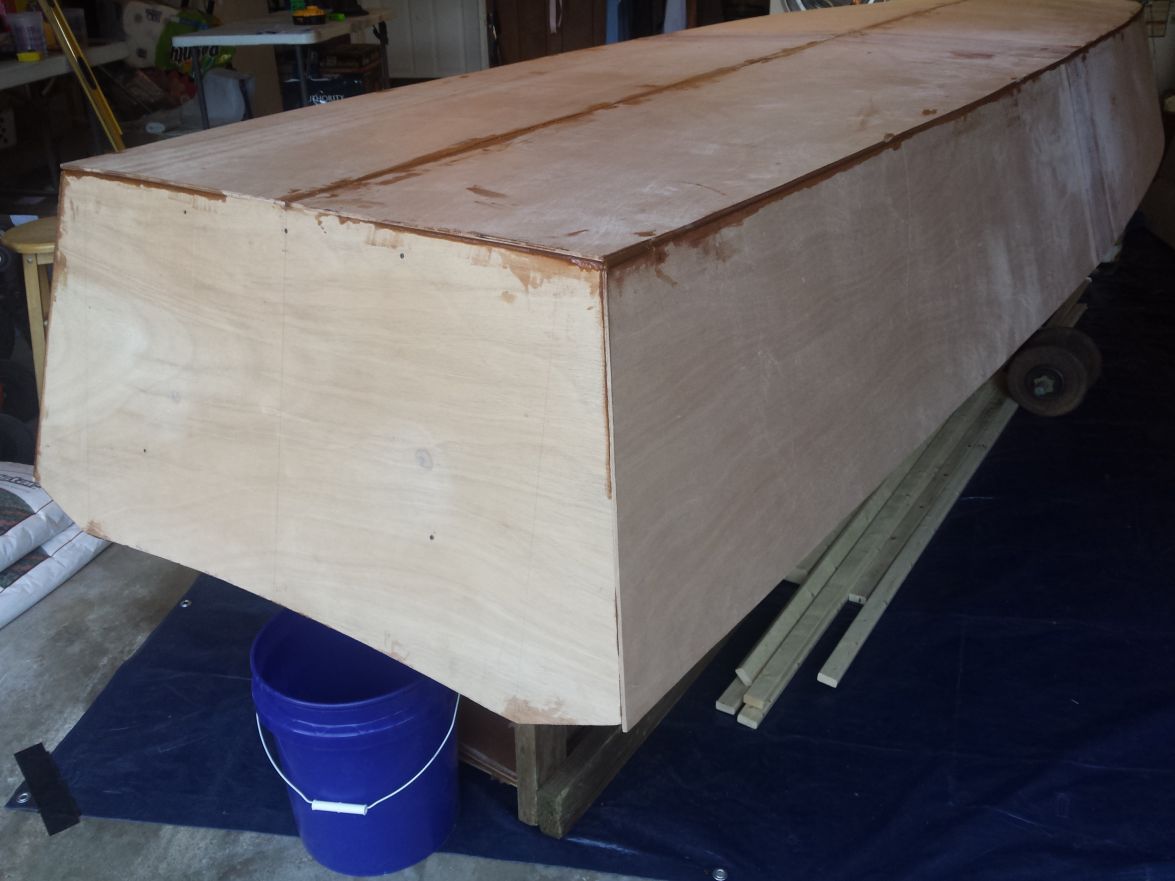
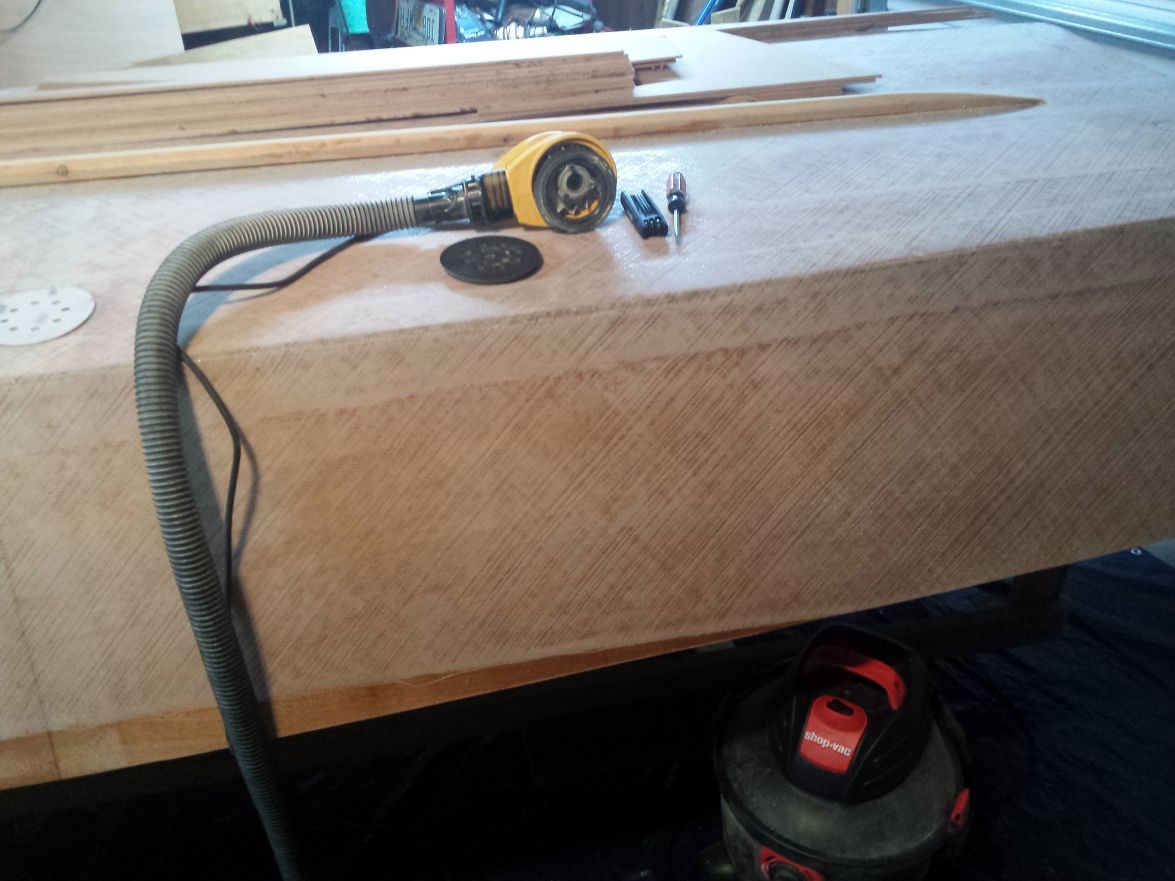
Then it hit me. I purchased this tool below and planned to use it but forgot about it. As I sanded through the epoxy to smooth it down I got to thinking about what needs to take place for the splice to be strong and be more glass than epoxy. I finished sanding and went digging for that tool.
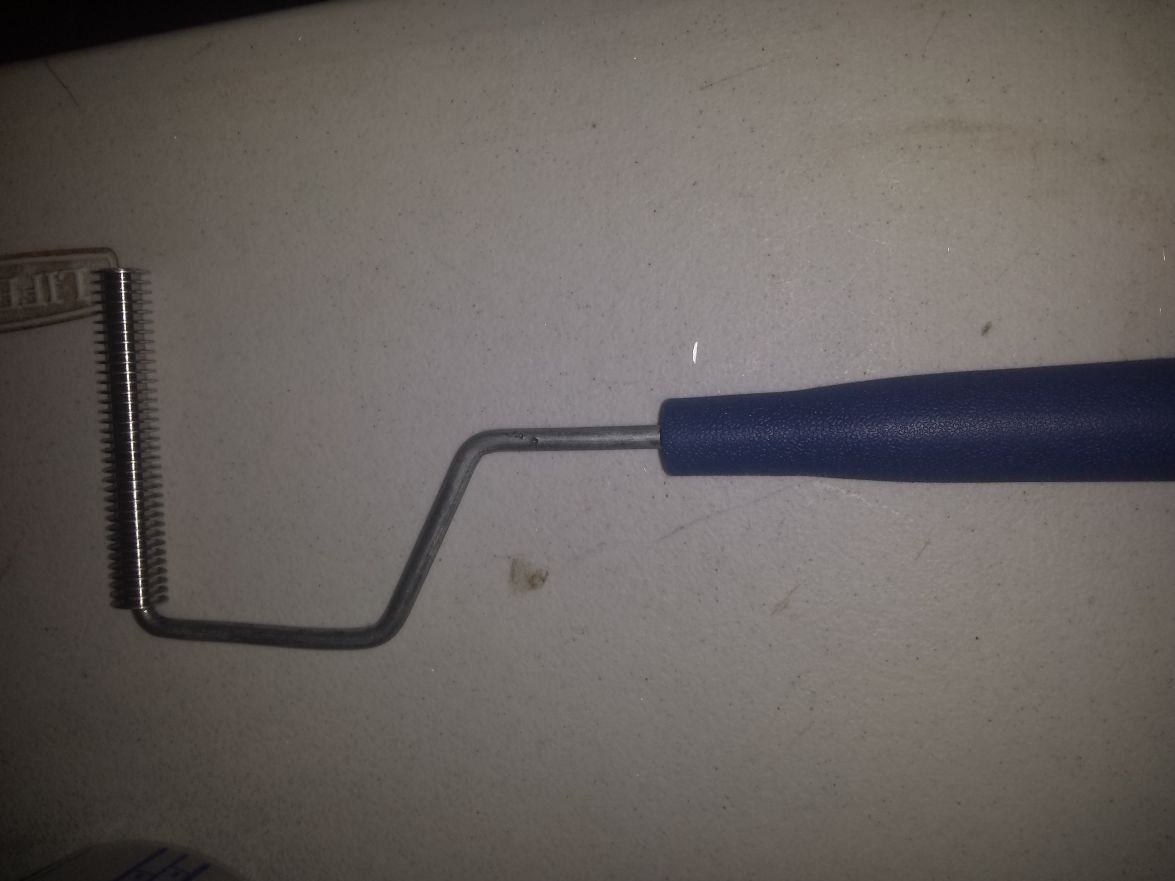
This does the trick. I brushed a coat of epoxy on the splice area, then placed the glass over the spot. Then by rolling the fiberglass with this tool I could tell what area needed more epoxy and I dabbed more in that spot with the chip brush and rolled it more with the roller. When everything was saturated I then used the squeegee (plastic) to get any excess epoxy out and ended up with what I thought was a good looking splice. To the point I didn't put plastic on the splice. My plan was to let it dry as is and if I didn't think it was good I would sand through the fiberglass and do it again.
And for those of you that haven't used one of these tools before it cleans up very easily. I just had a quart container of water that I swished it around in when I was done. The epoxy settled in the bottom and the roller looked great. I don't know why the water did so good but I'd be interested to know if someone can tell me. I don't think the marine epoxy would stick to the metal and the water decreased it's bonding capability. ??
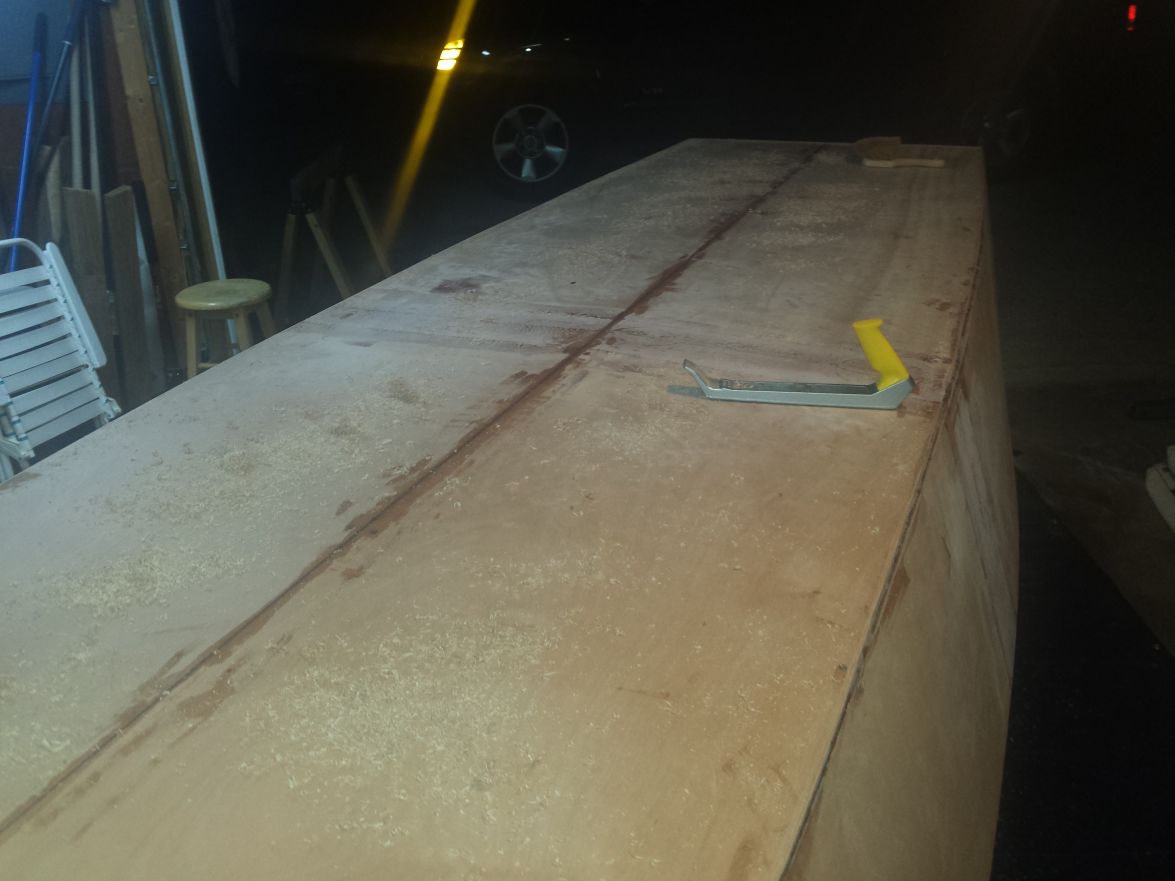
So what do you think? Is this what it is supposed to look like?
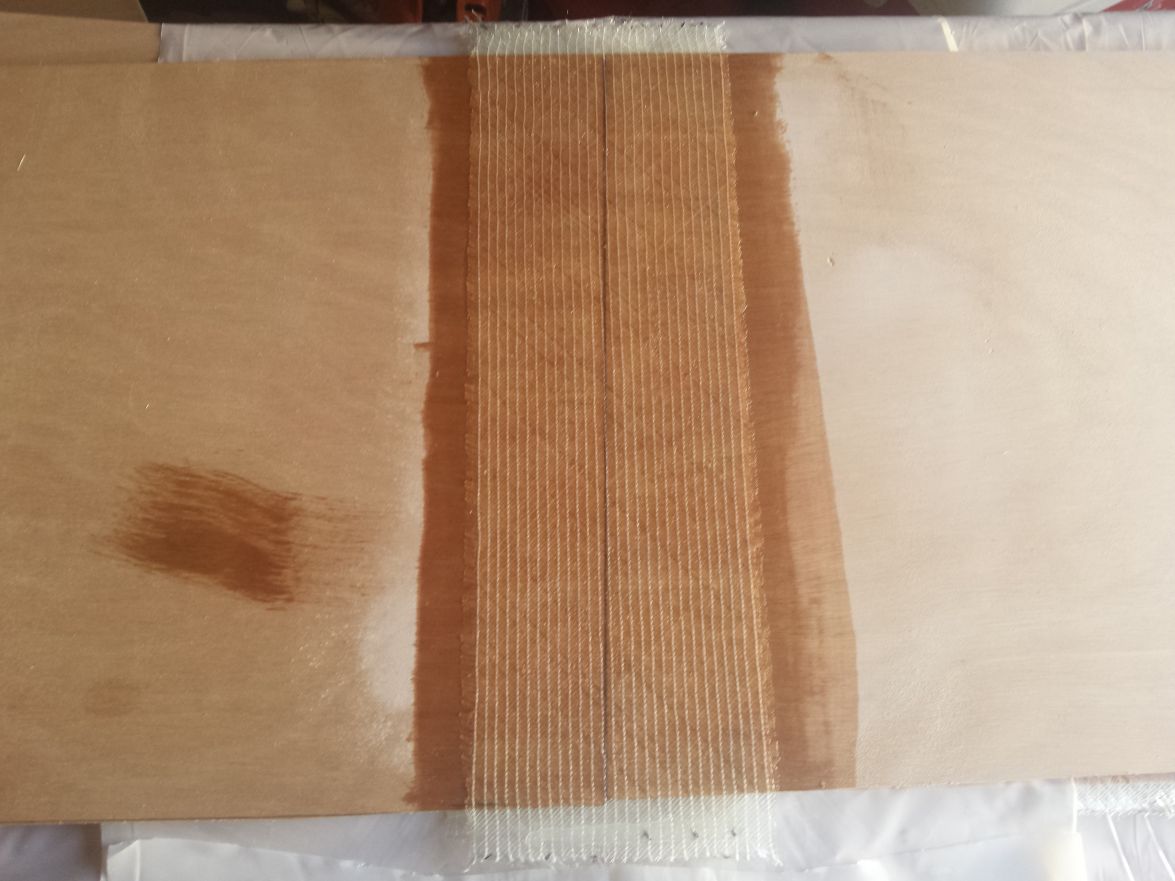
It is strong and the only sanding that is needed would be on the seams/threads that hold the fiberglass together and the edges. I'd read on Cracker Larry's threads that when sanding and you get through the seams and see the cross pattern of the fiberglass to stop. I think I can get to this fairly easily and still have a very strong splice.
The plan was to have all of the stations set up and ready last Saturday but this is as far as I got. Family duties impacted my plans for the day. . . I'll leave it at that. . .
So I packed up everything until I could work on it again. I took my wife to Louisiana over the last week for our 20th Anniversary. Interesting place and I even got some fishing done while I was there to scratch that fishing itch for a while and give me some motivation to finish this boat. We both needed the break and it was a great trip.
I'll post some more pics of what I can get done this weekend.
Re: Steve's FS18
Posted: Fri Nov 11, 2016 3:22 pm
by tcason
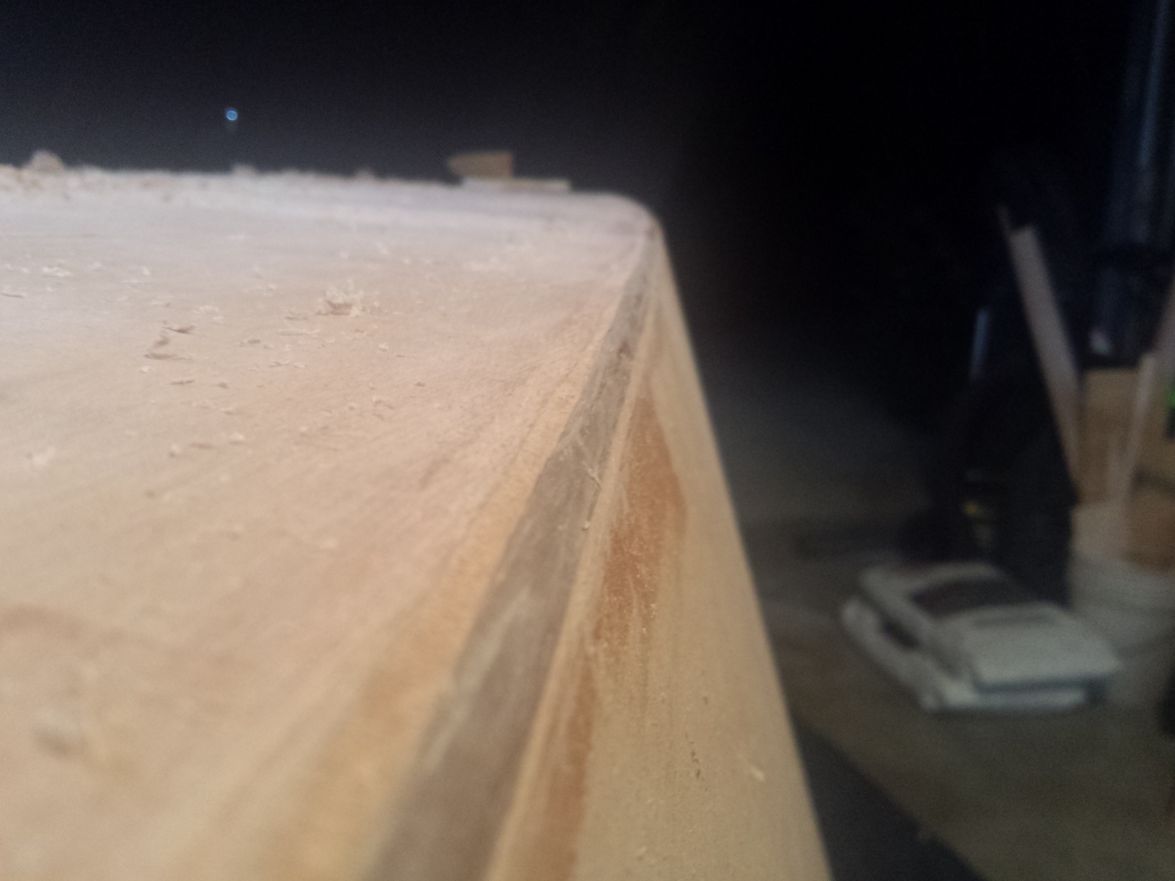
second splice looks perfect - less resin better - more sanding now the easier it will be in future
I like my resin warm about 80 to keep it thin...........
Re: Steve's FS18
Posted: Fri Nov 11, 2016 3:25 pm
by peter-curacao
tcason wrote:second splice looks perfect -
It surely does
Re: Steve's FS18
Posted: Fri Nov 11, 2016 4:16 pm
by Jeff
Dutch1, looks good!! Yes, send us some photos when you finish the weekend!! Jeff
Re: Steve's FS18
Posted: Fri Nov 11, 2016 5:15 pm
by Cracker Larry
Second splice looks perfect. Like they said
And a good Veteran's Day to you and yours.
Re: Steve's FS18
Posted: Sat Nov 12, 2016 11:29 am
by Dutch1
Thanks everyone. I thought it looked a lot better than the first splice. I spent a few hours sanding last night to clean them up before I put it all together. I'm probably going to move a few jugs of resin in the house to keep it around 70. It's starting to cool off here and pushing thick resin through fiberglass doesn't sound like it would work too well.
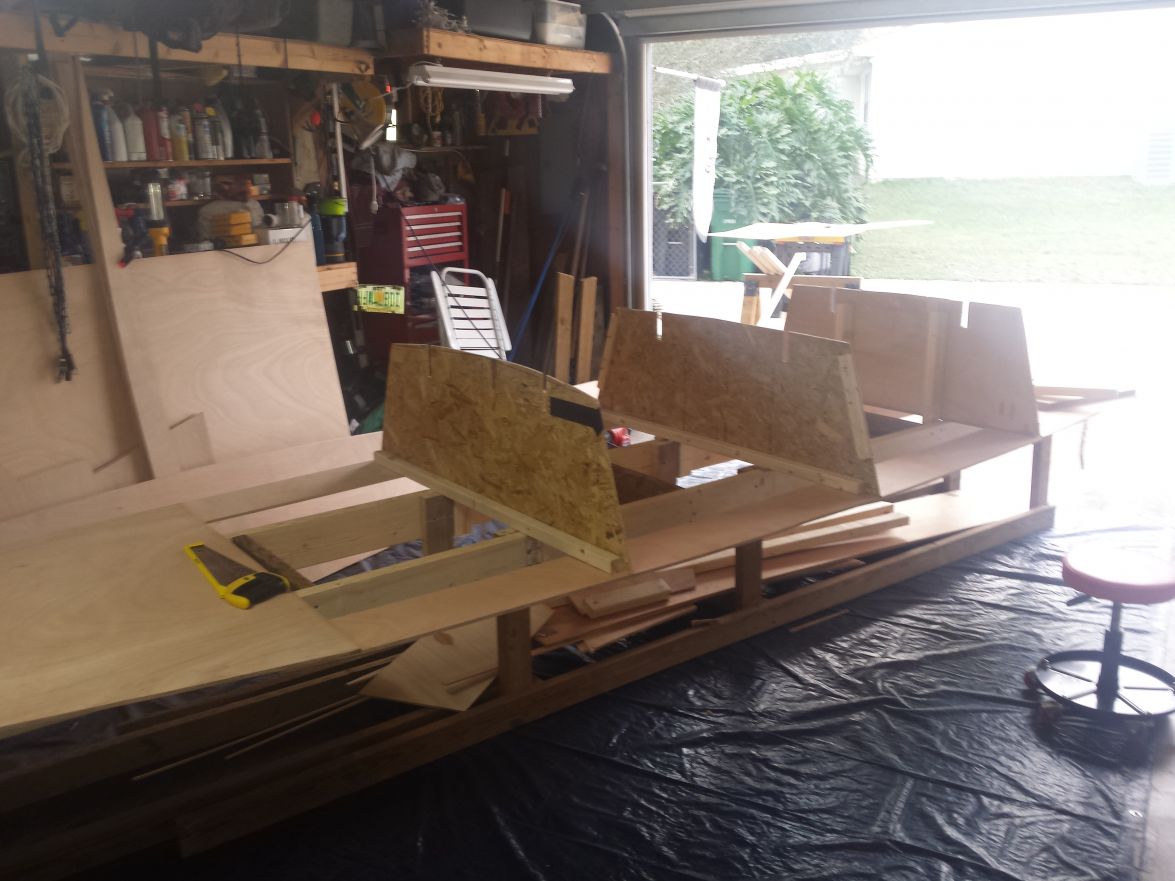
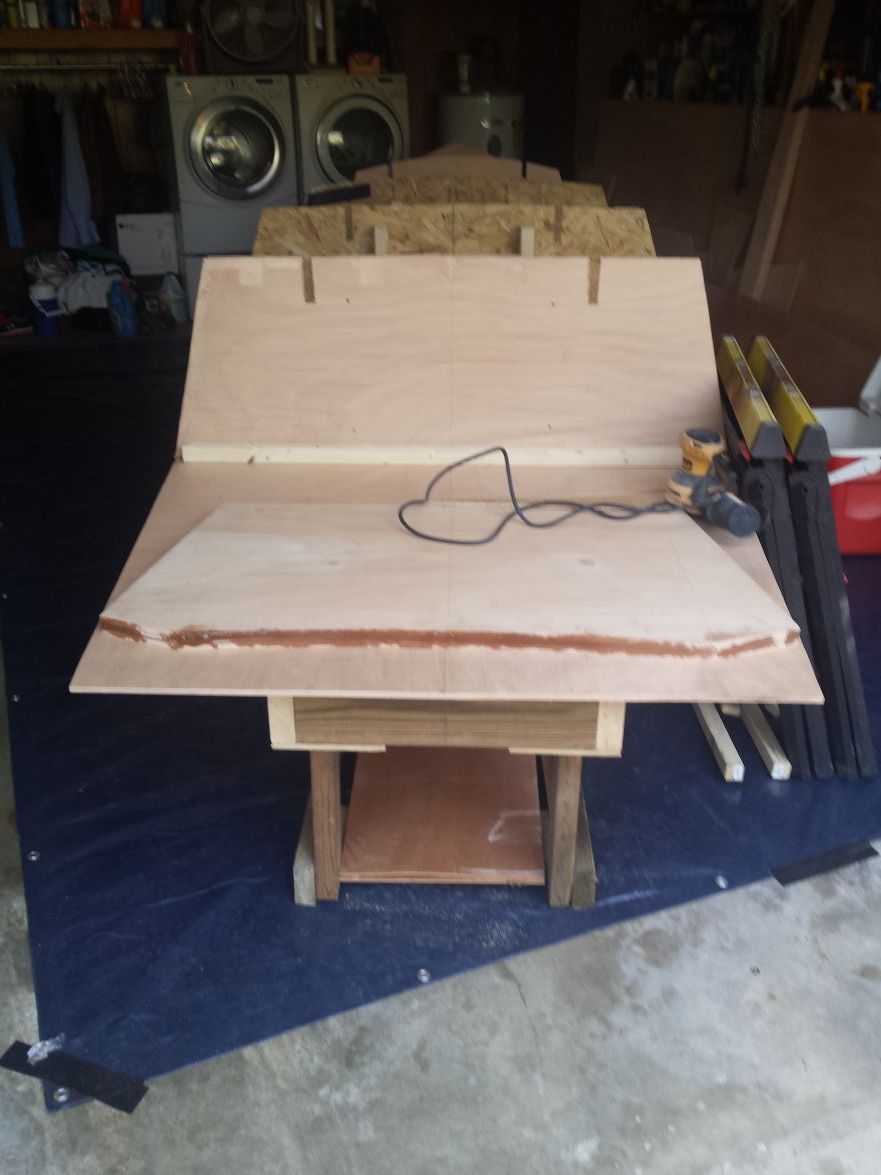
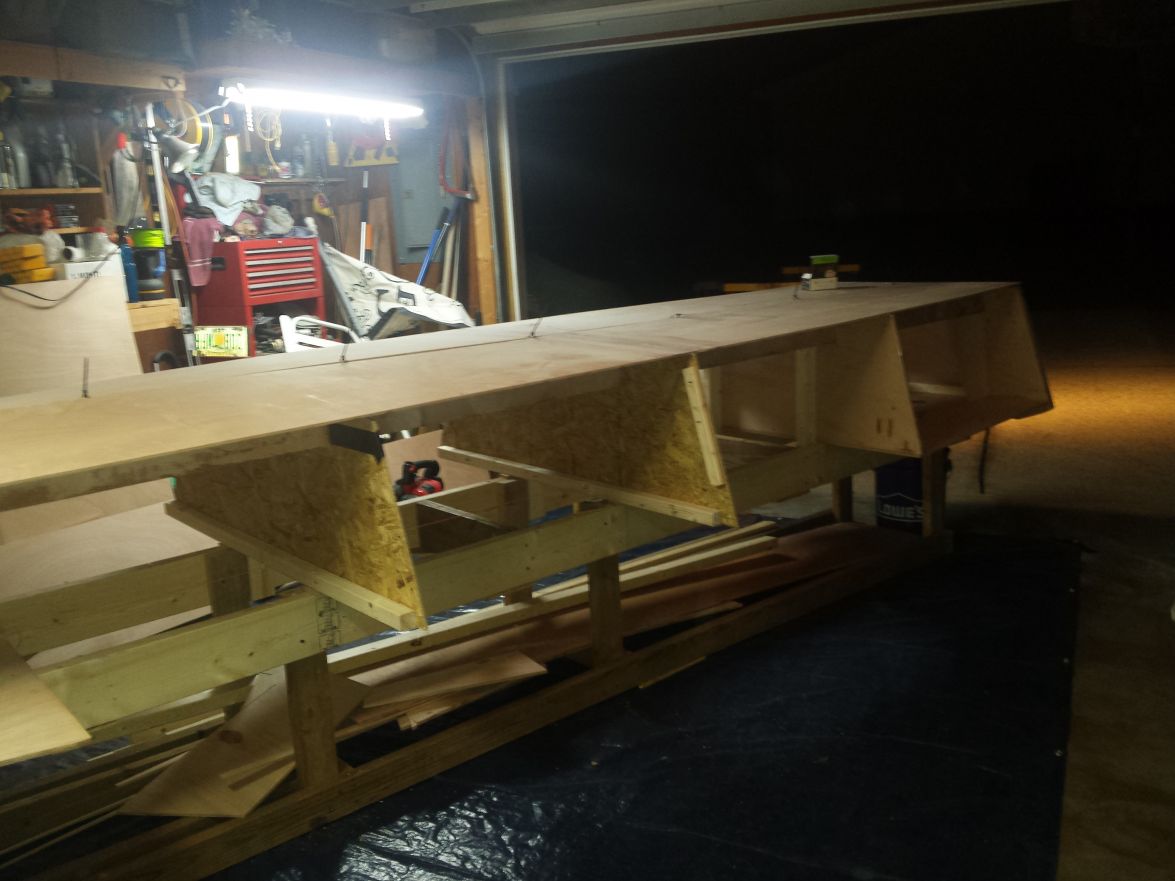
I decided to put the decks on the strongback and then the stations on top as the plans show. Just taking it slow to make sure it's right. I have a few on now and hope to have them all on today. Space is getting tight in the garage...
Re: Steve's FS18
Posted: Sat Nov 19, 2016 9:29 pm
by Dutch1
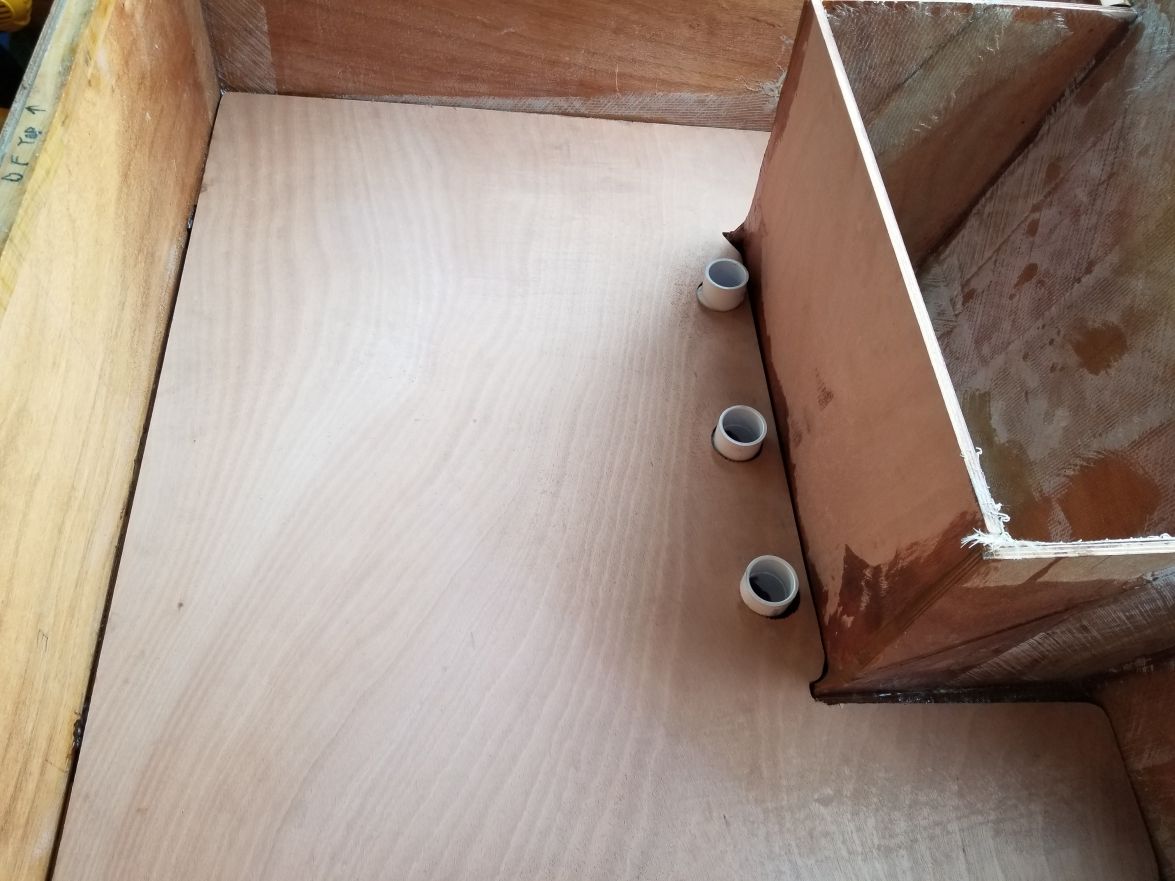
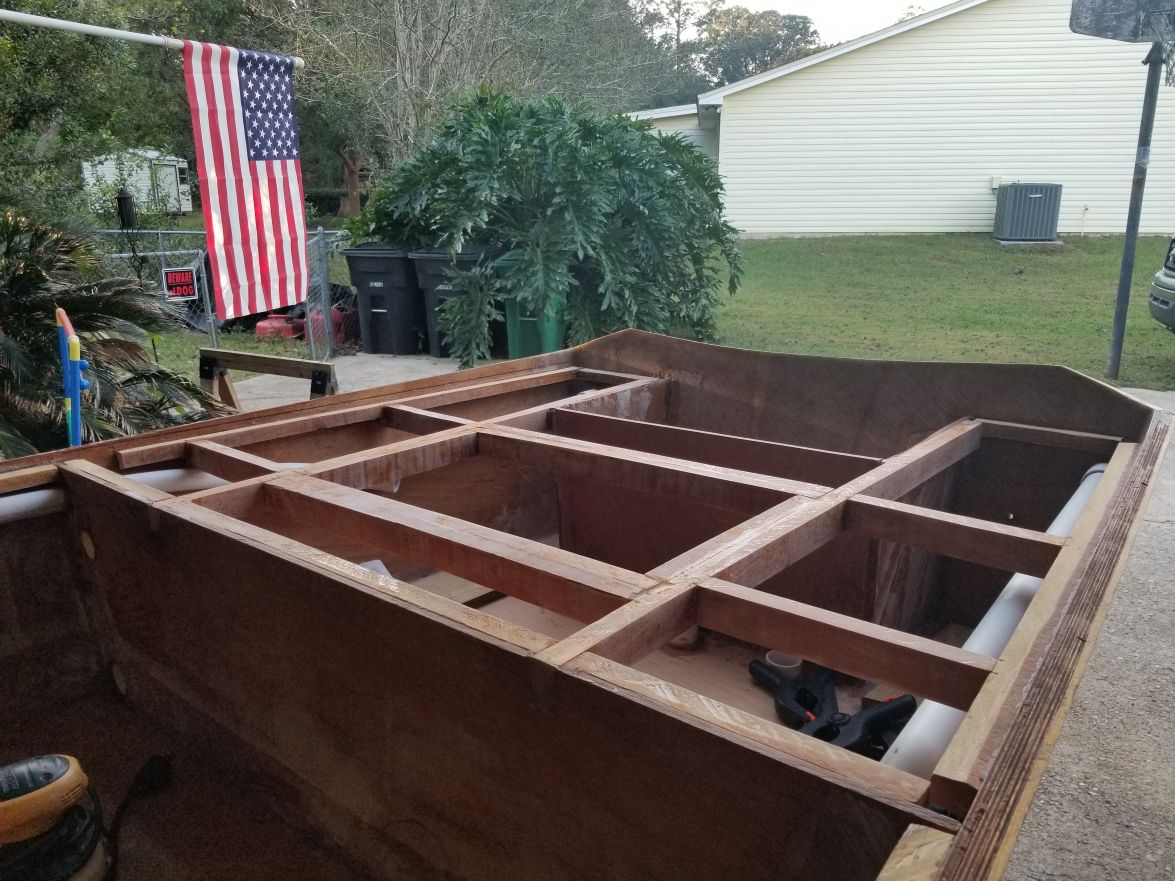
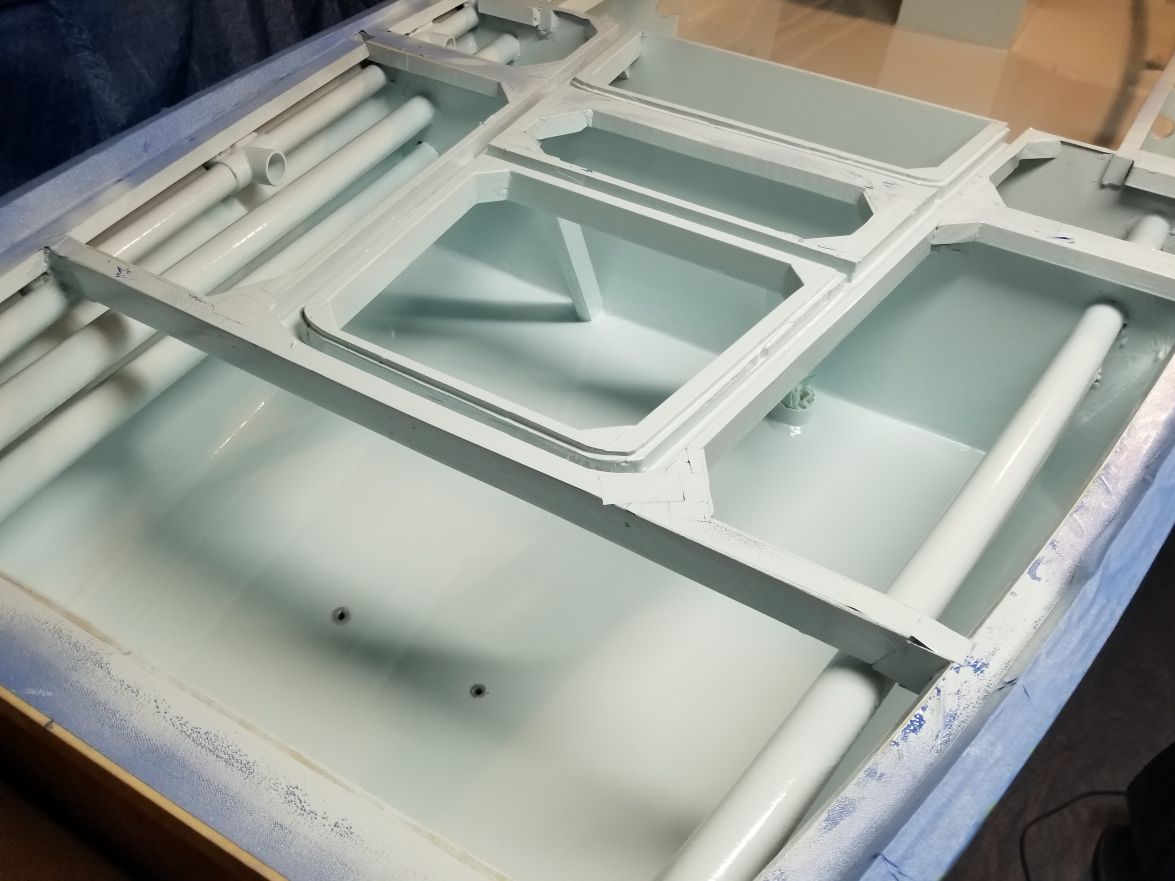
Good evening. I finished the first part of the glue today. I've taken a lot of pictures so if there is something you want to see that isn't below let me know.
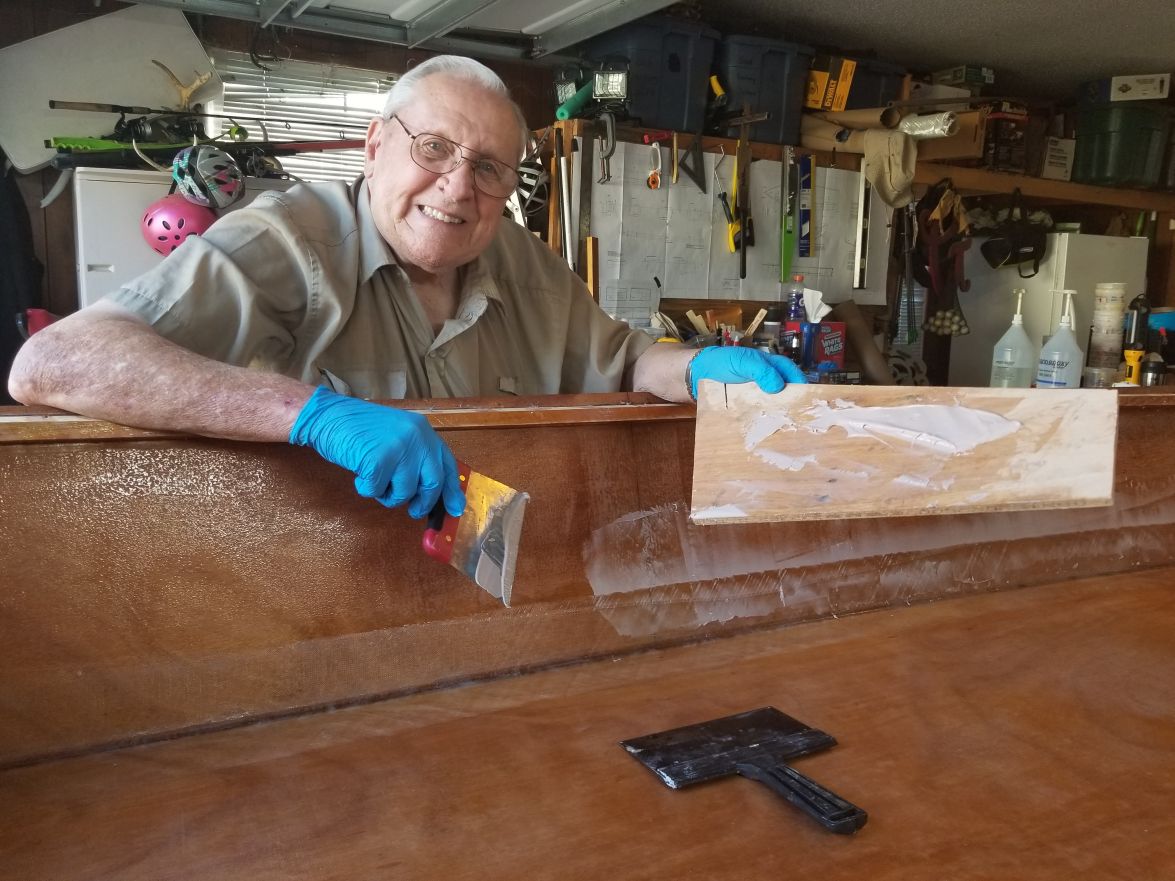
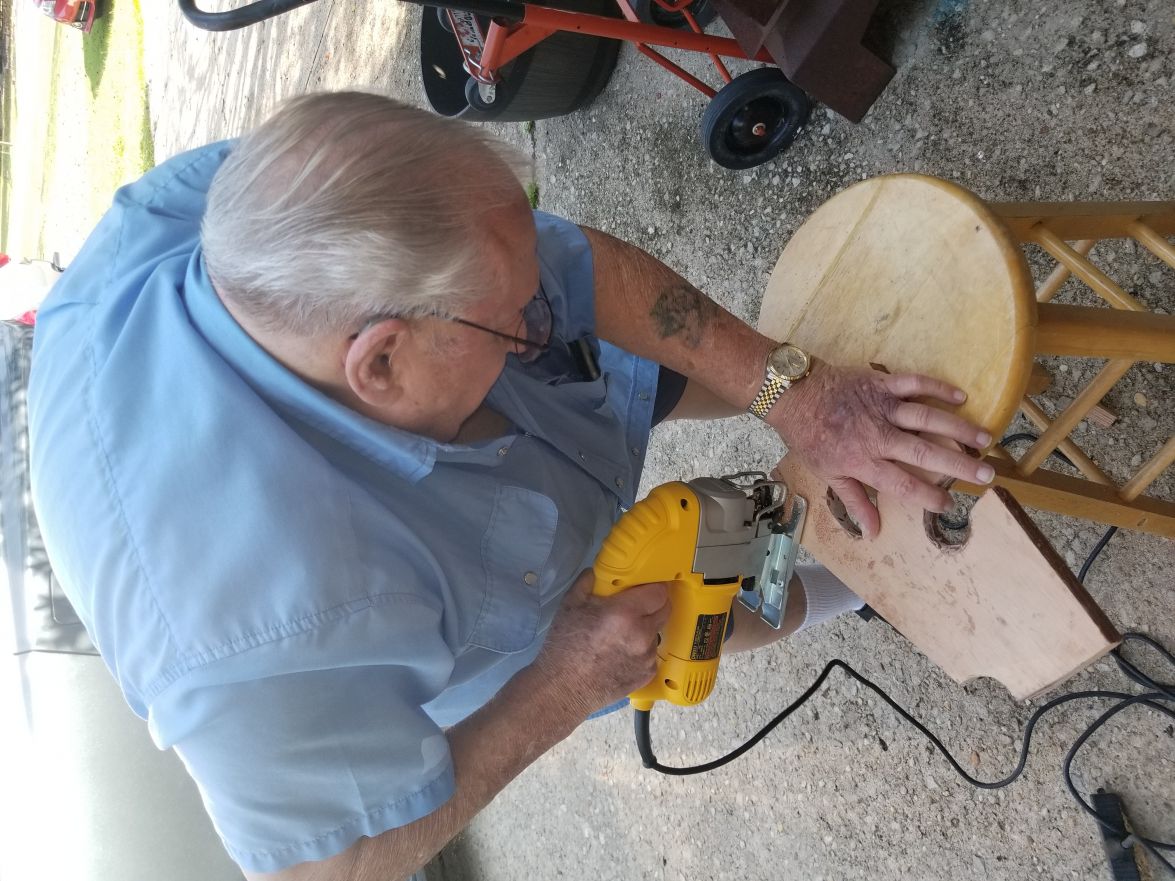
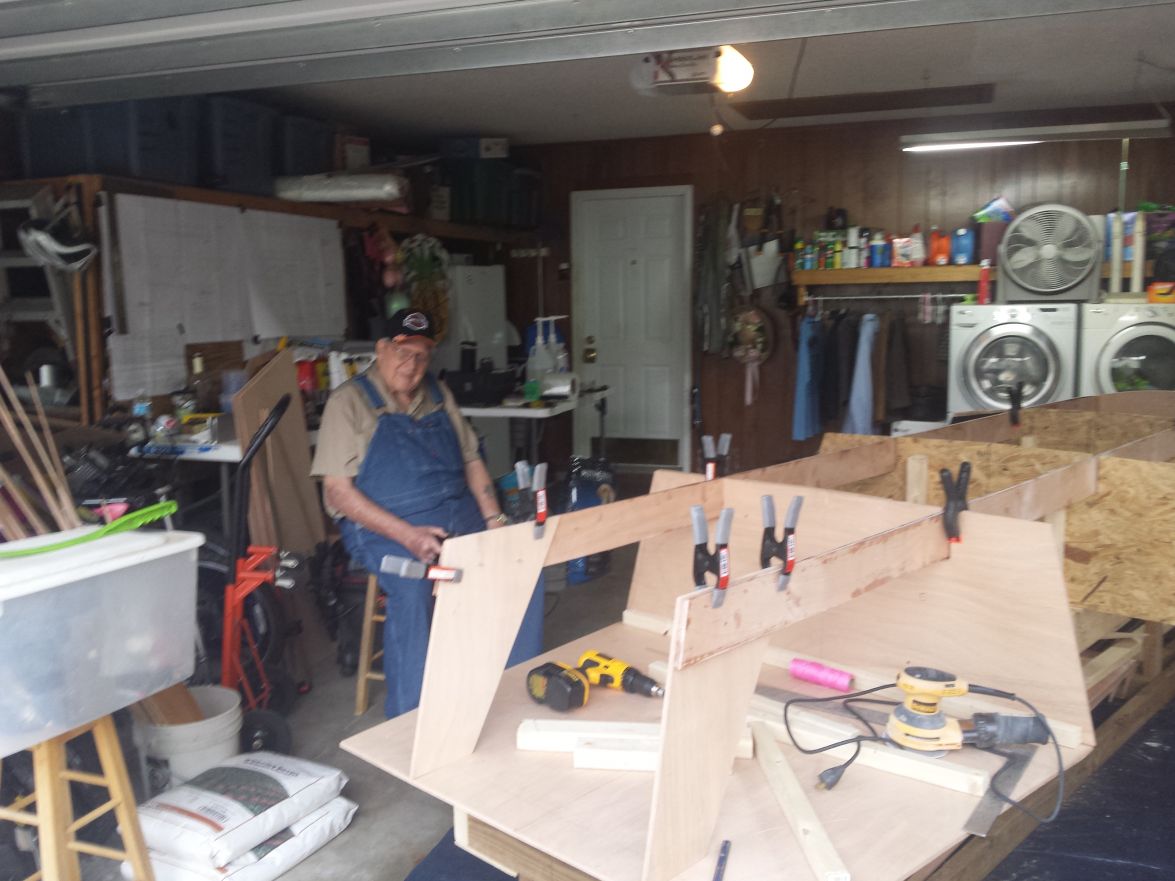
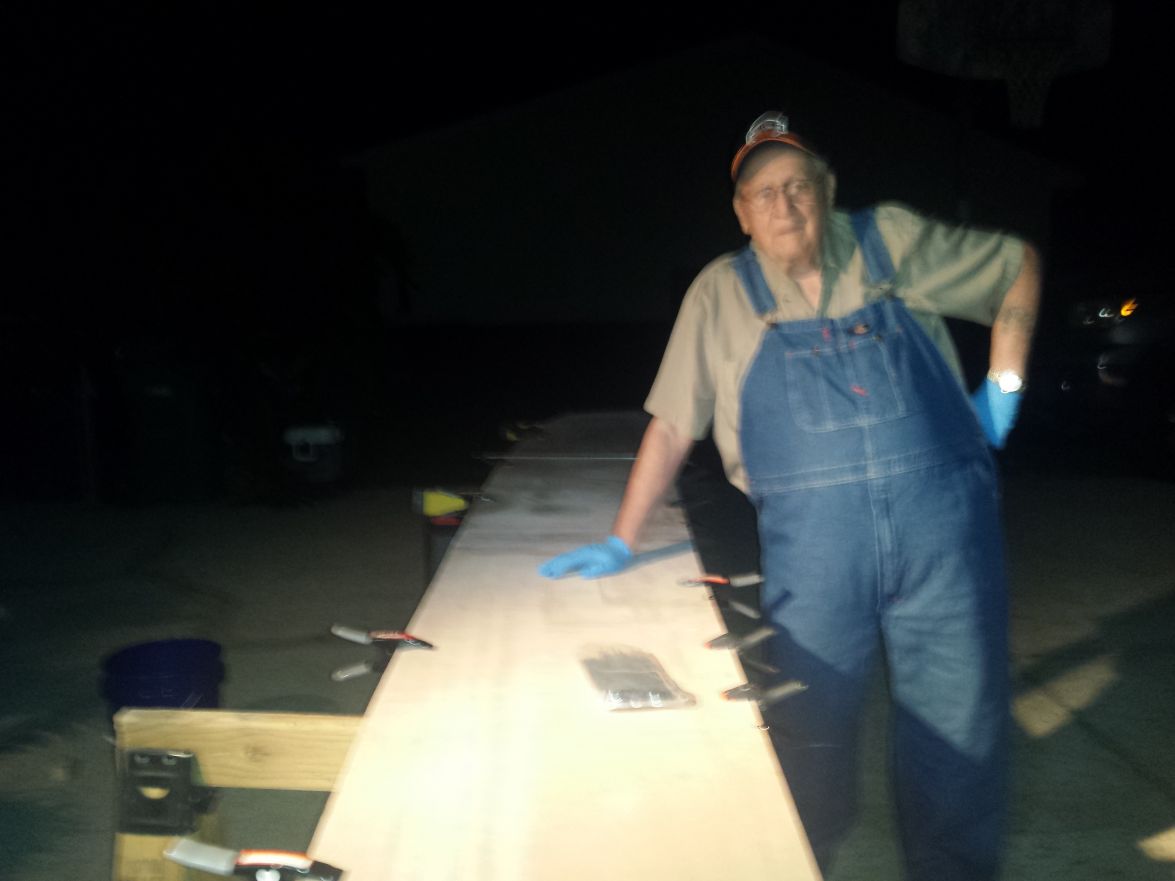
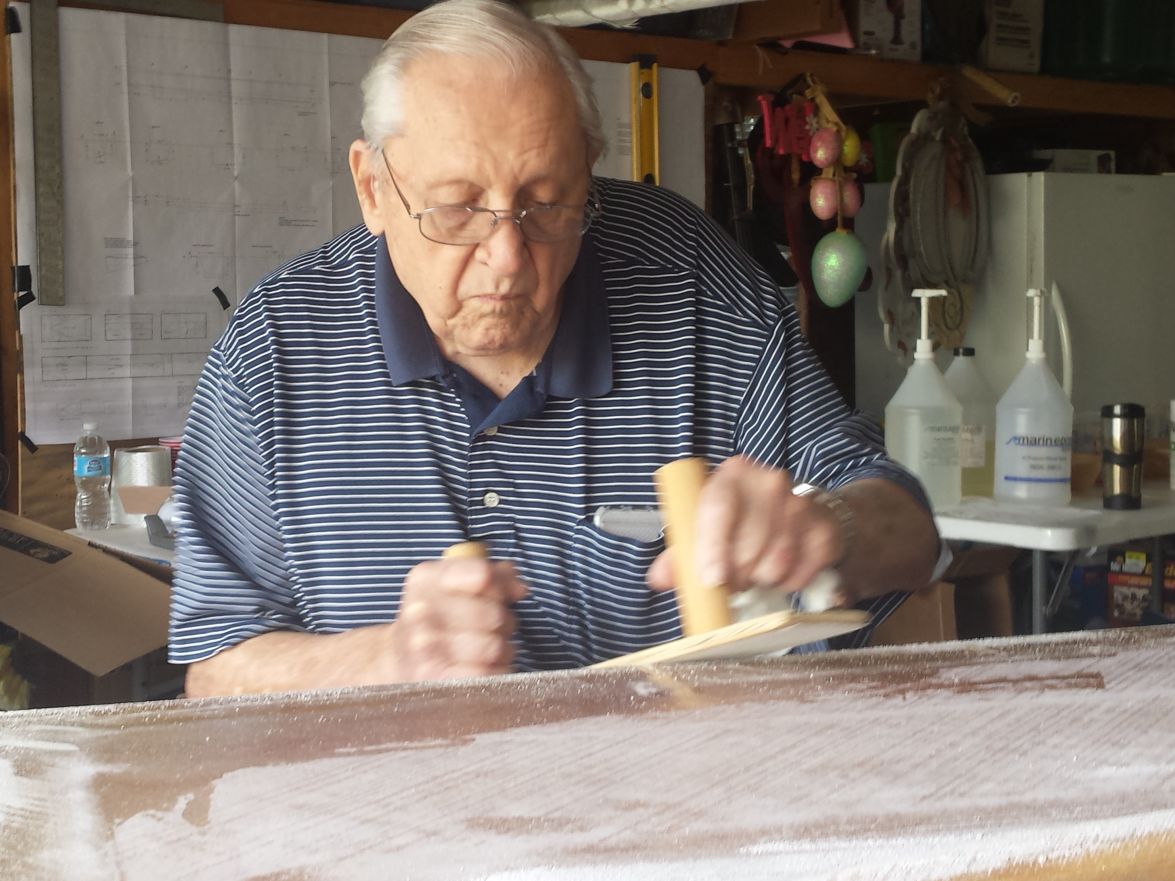
My grandad is helping me with this boat on the weekends. I love having him around and am thankful he is able to help. He made a comment today that he can't wait to get this done so we can go fish! Doing well for 87...
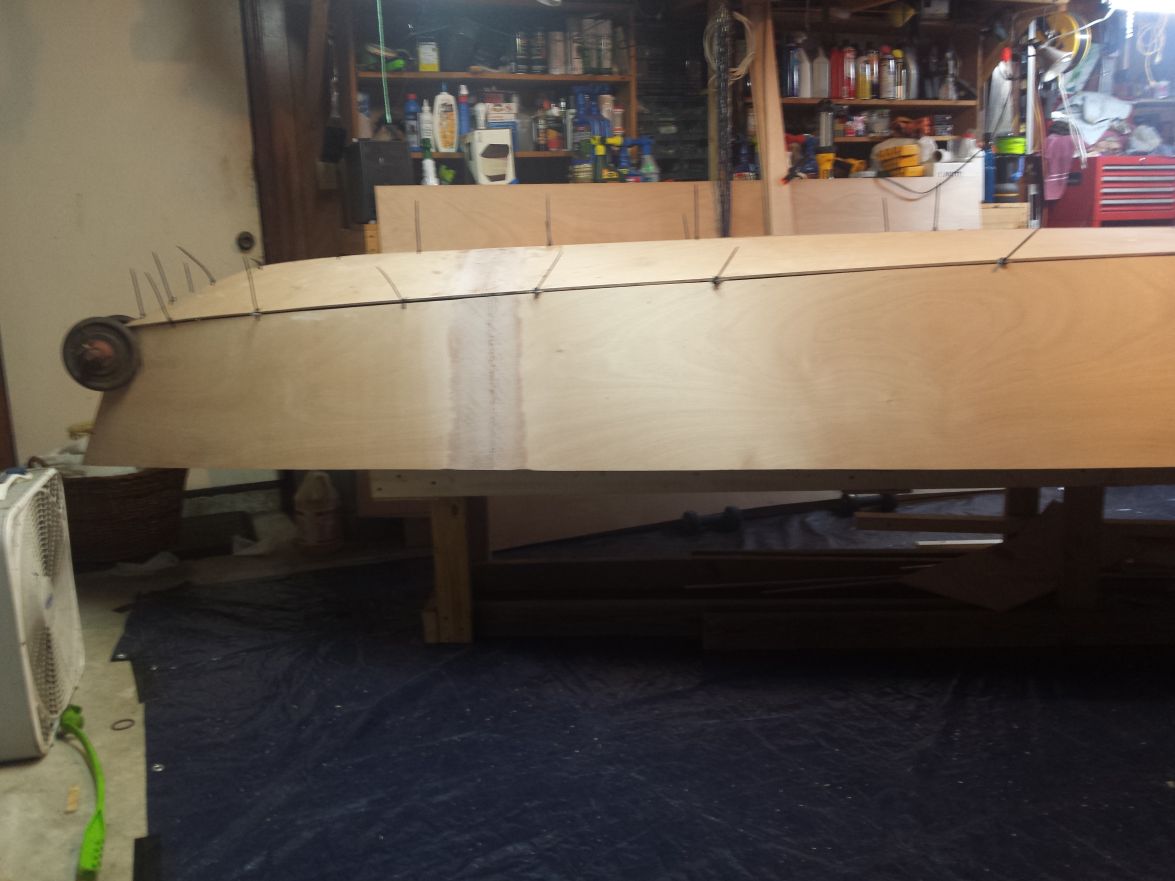
Last weekend we set up all of the stations, stitched the bottom hull panels, and placed it on the stations. Monday night I came home and attached the side panels. Then I worked it for a few hours and had it done but I didn't like the way it was going together without a screw here and there holding things in place. Tuesday night I pulled everything back off and reset everything by using a few screws. Especially on the hull to pull it down on the stations. Each night I did a little more and by late last night I was happy with the way it looked and ready to glue.
I decided to attach the gunwales since I had the decks on there. I ended up taking them off due to the pic below.
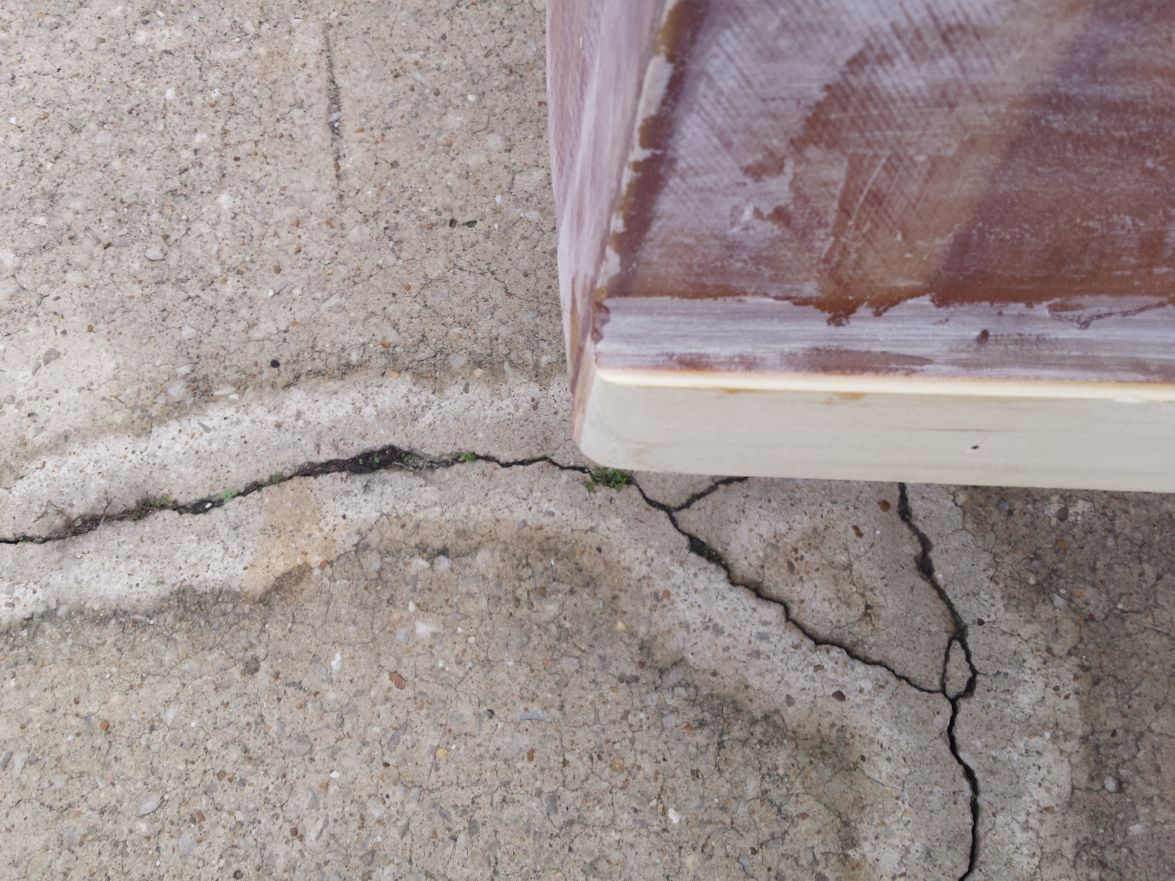
Hmm, this wasn't supposed to happen and had me stumped for a few minutes. I checked everything. It turns out I didn't cut the sheet I used for the gunwales down to 8ft. Once I trimmed both ends of the gunwales and shifted the front deck back it fit as it should have using the gunwales to check. Then I just set them aside. Thankfully I caught that for all of the other sheets. Can someone please tell me why high end lumber is not 4x8ft?
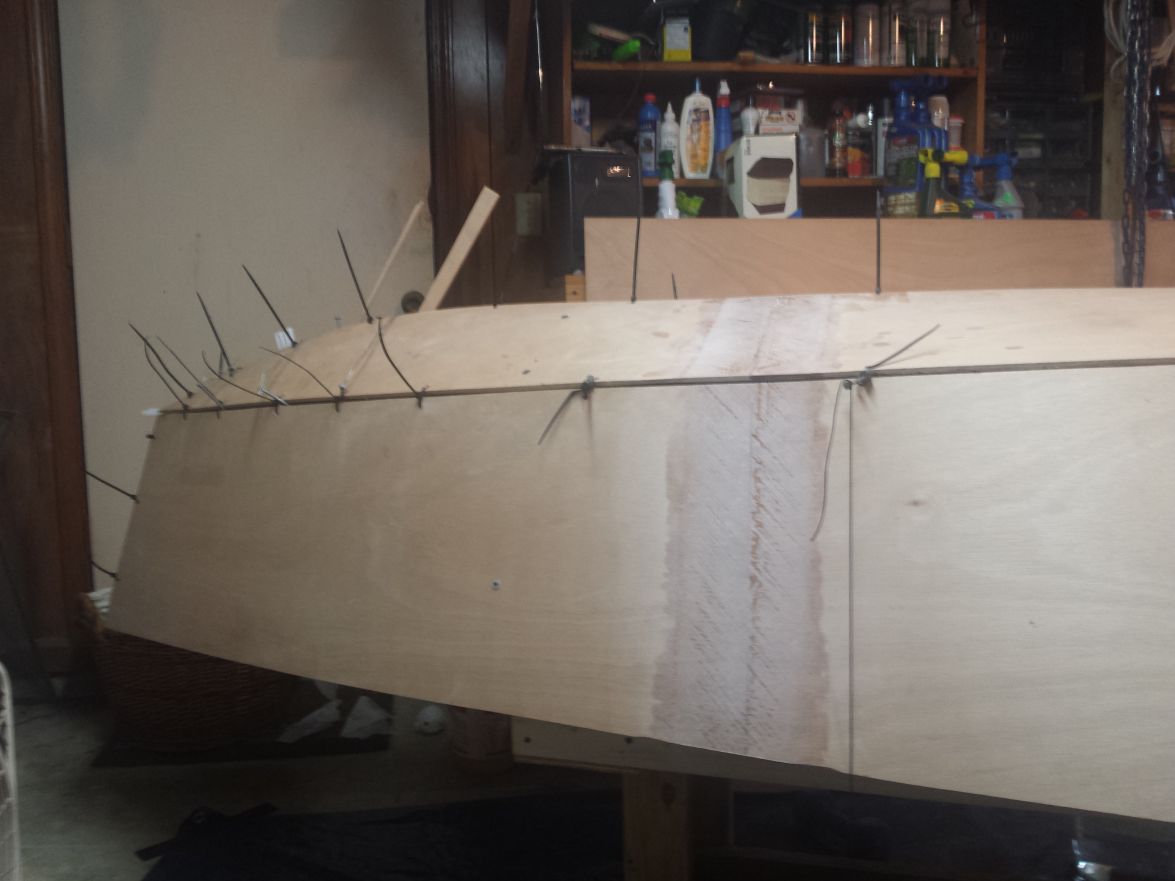
Everything is lining up good.
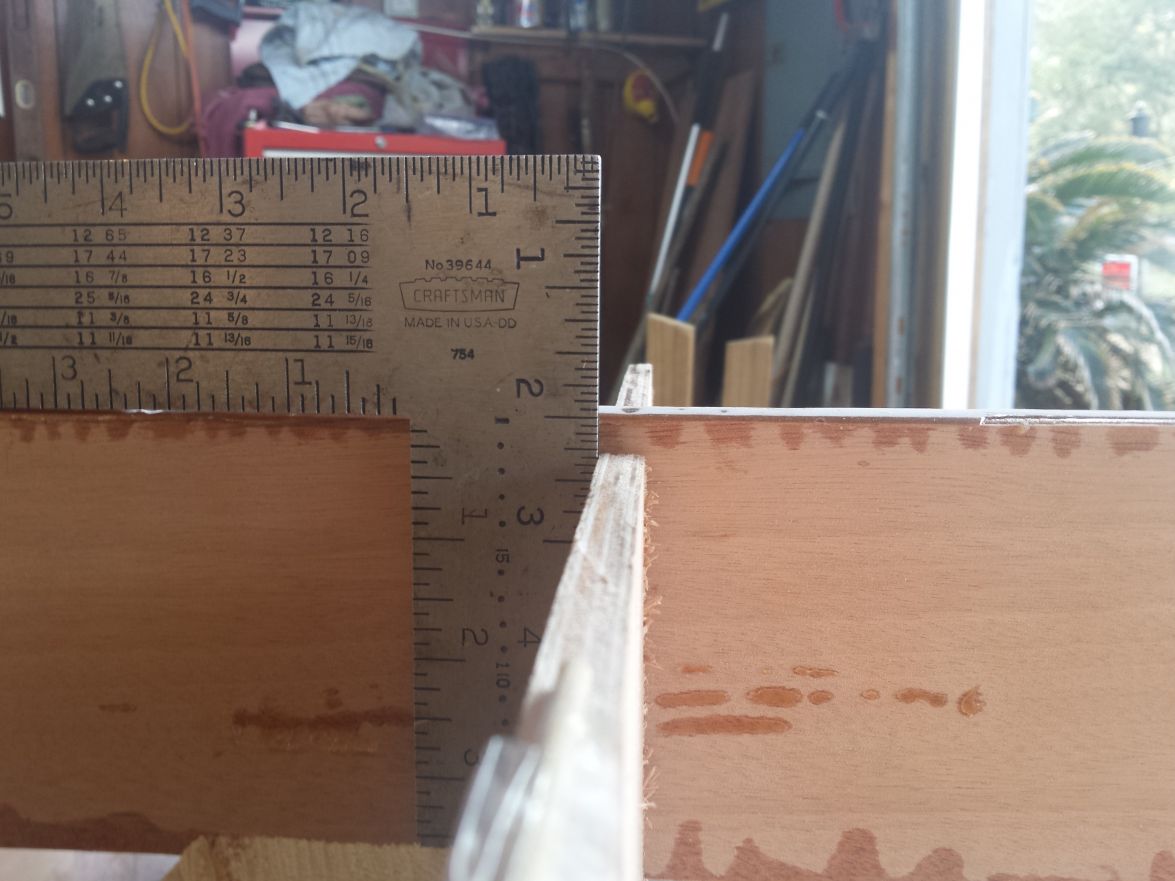
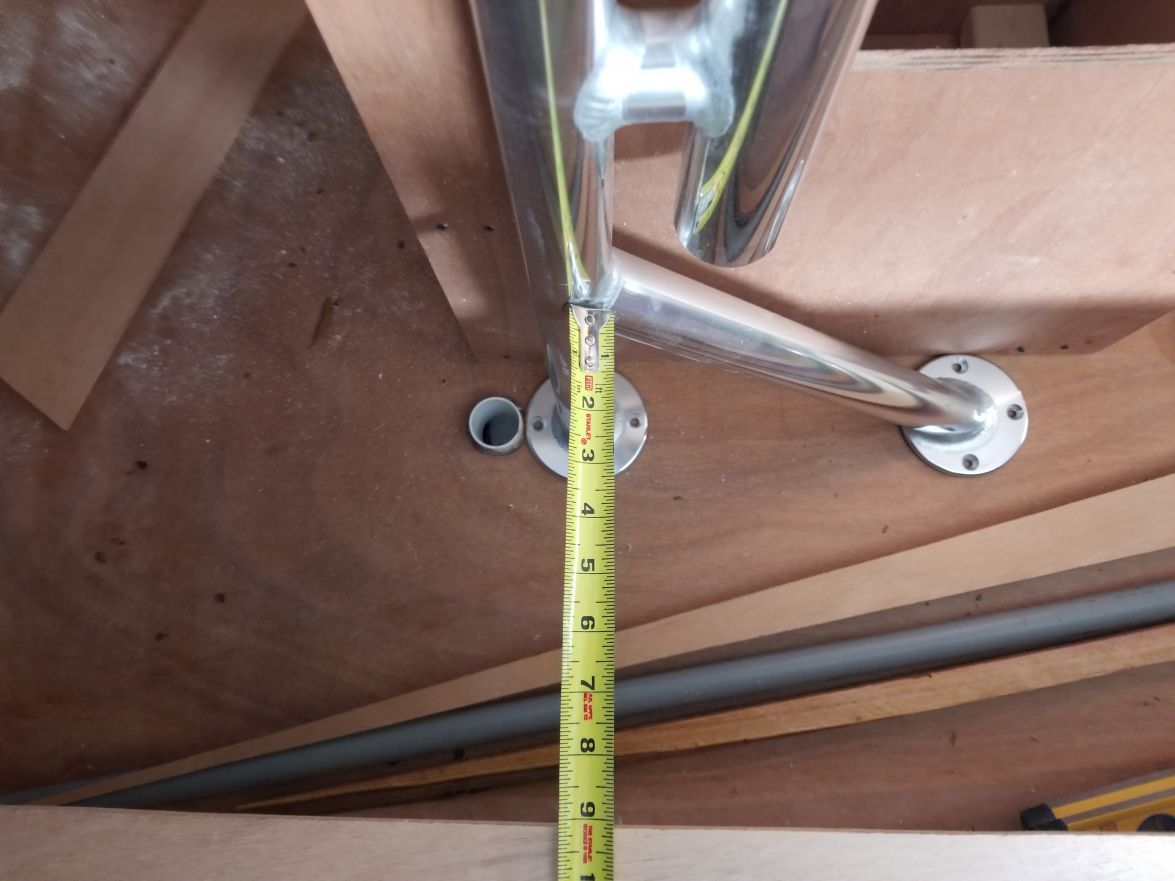
This had me checking measurements again. It was consistent all the way through the stations. 3 3/8" isn't enough. I lowered them and tacked them in place.
Getting ready to attach the transom.

Ready to start drilling holes for stitches.
I was glad to get to this point last Sunday night.
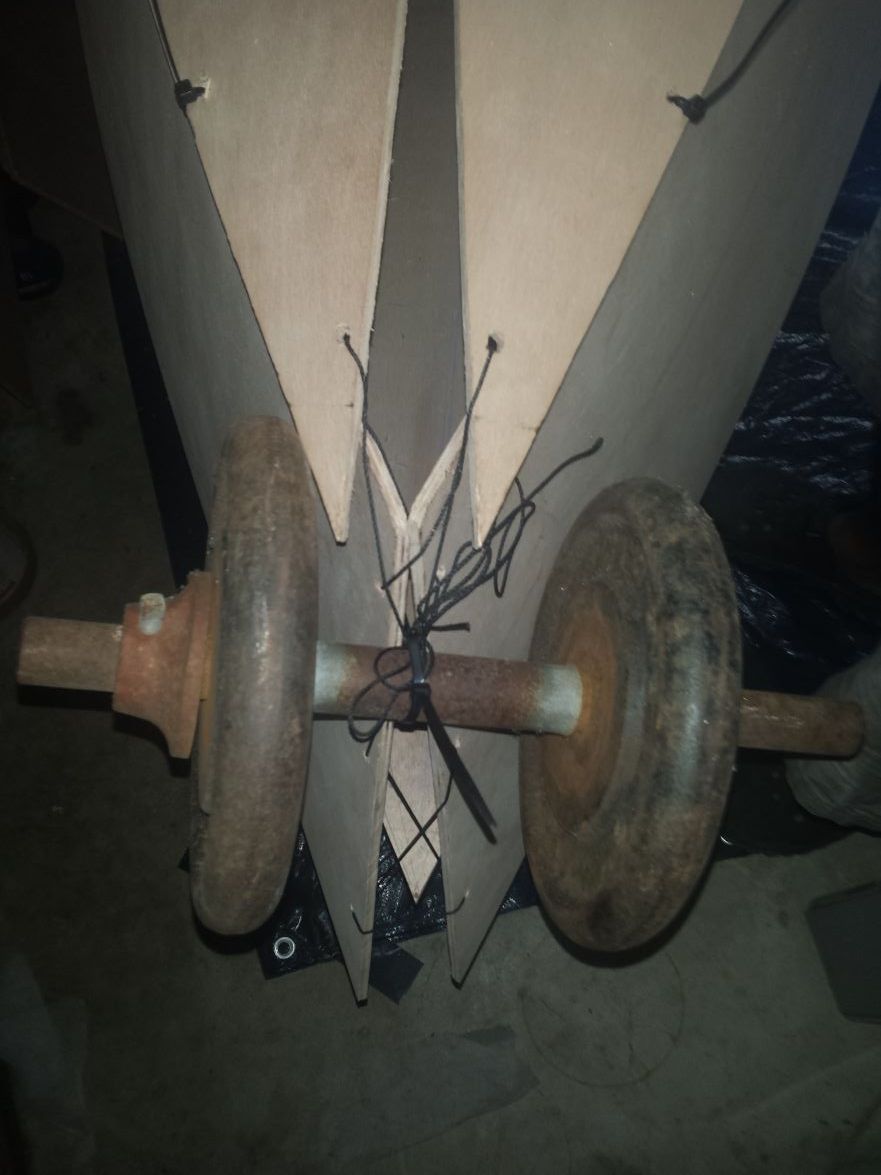
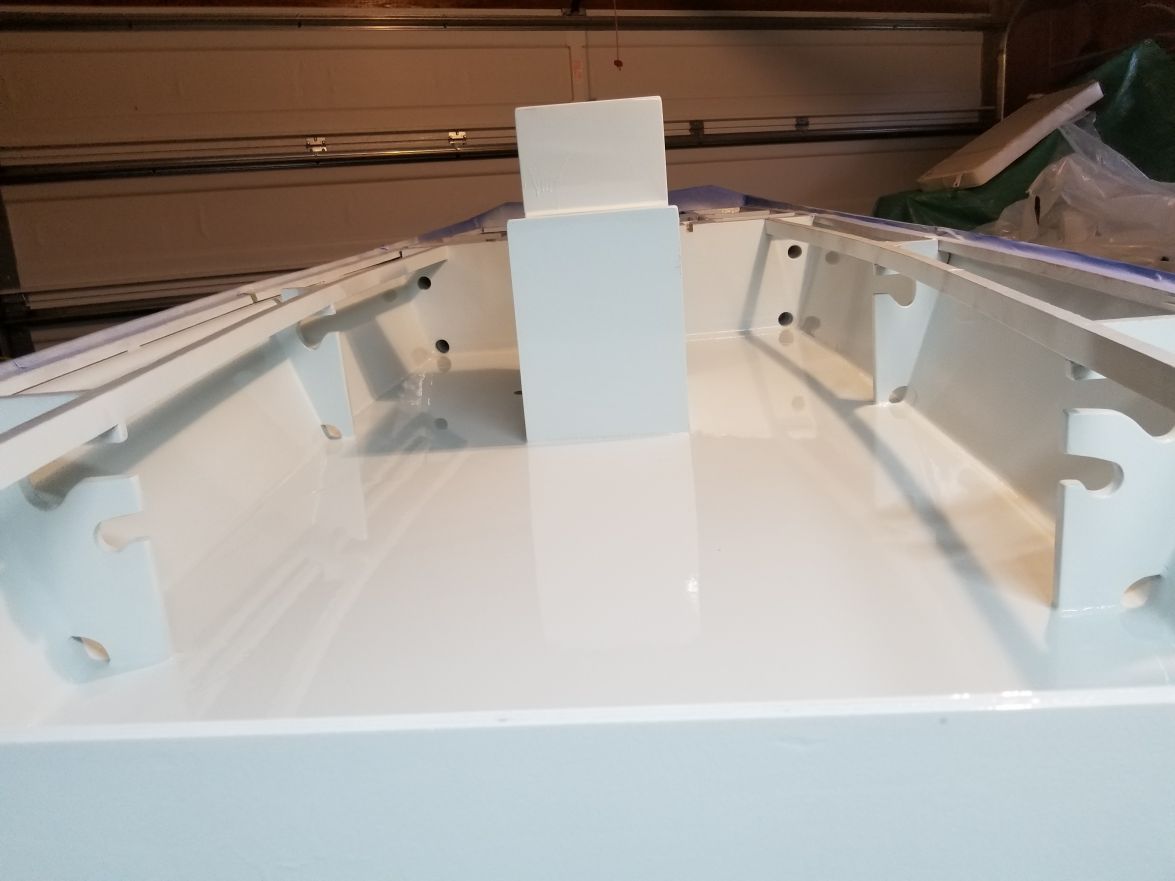
I fought the front and ended up just using this for weight to try and keep the wood bent down so I could work the stitches. A third hand if you will.
The look last Monday night. I couldn't get it to sit down on the stations.
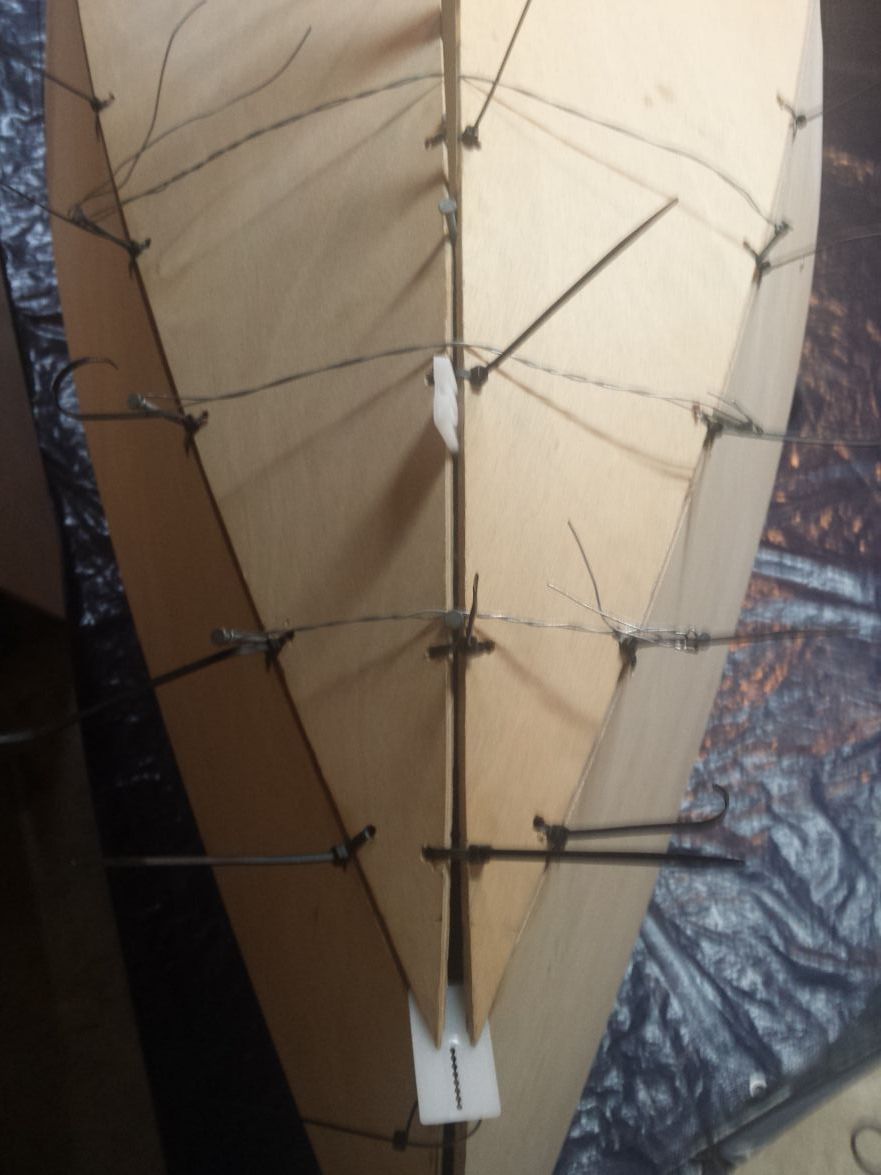
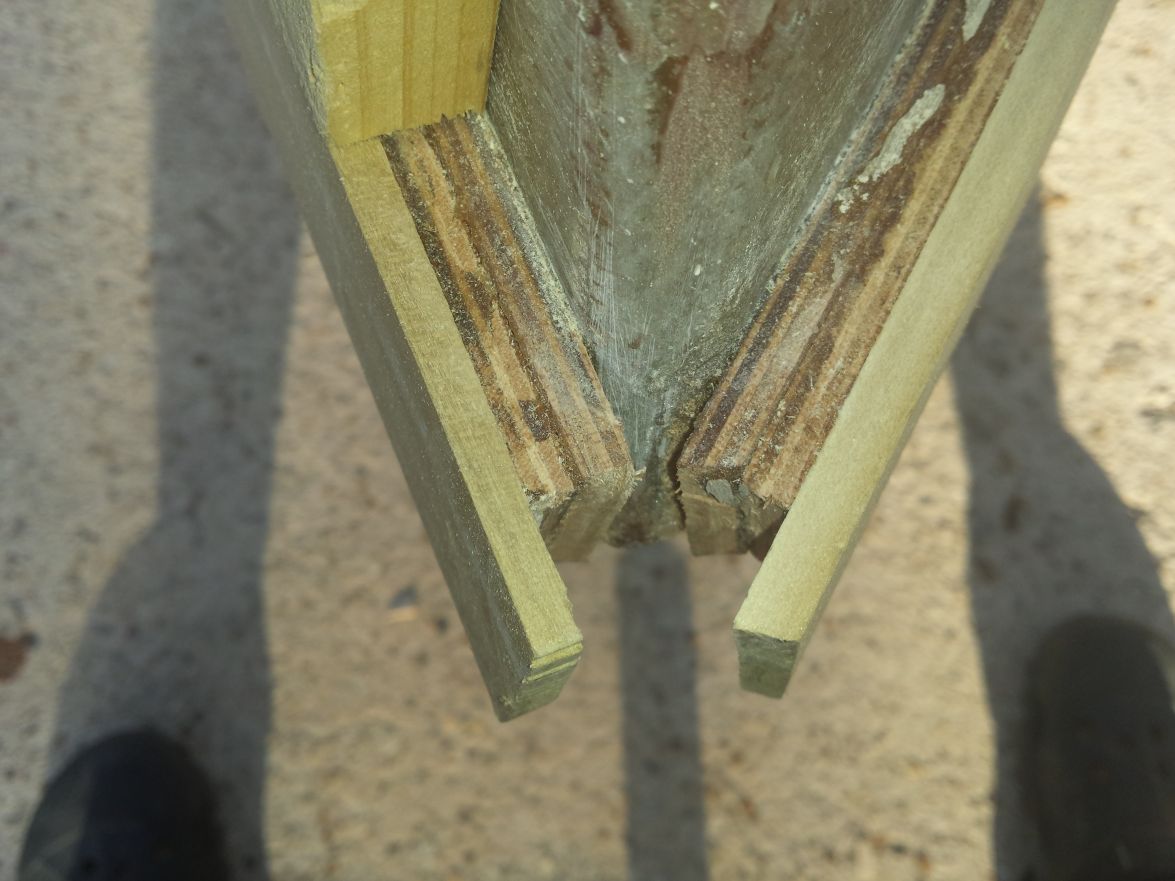
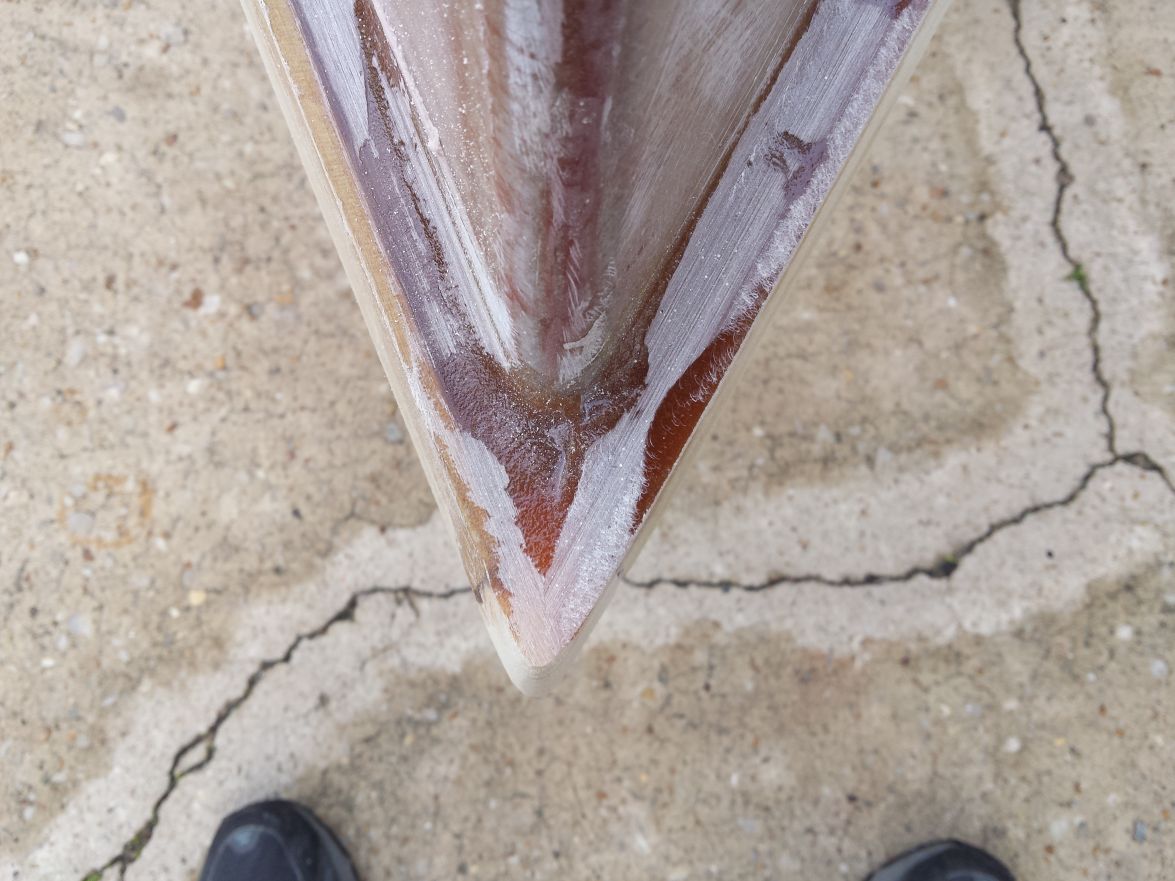
The look of the bow after SEVERAL tries. I cussed and had thoughts of putting a hammer through it before I got it to this point. A rounded chine would have been easier. The biggest problem was it wanted to fold rather than give me the gap I wanted in between the panels. I like the way it turned out and was pleased with the results. As long as it stayed that way..
The look last night. There was still a hump from that one piece of 1/4" sticking up. I used that to hold it in place. I took care of it before I glued it up.
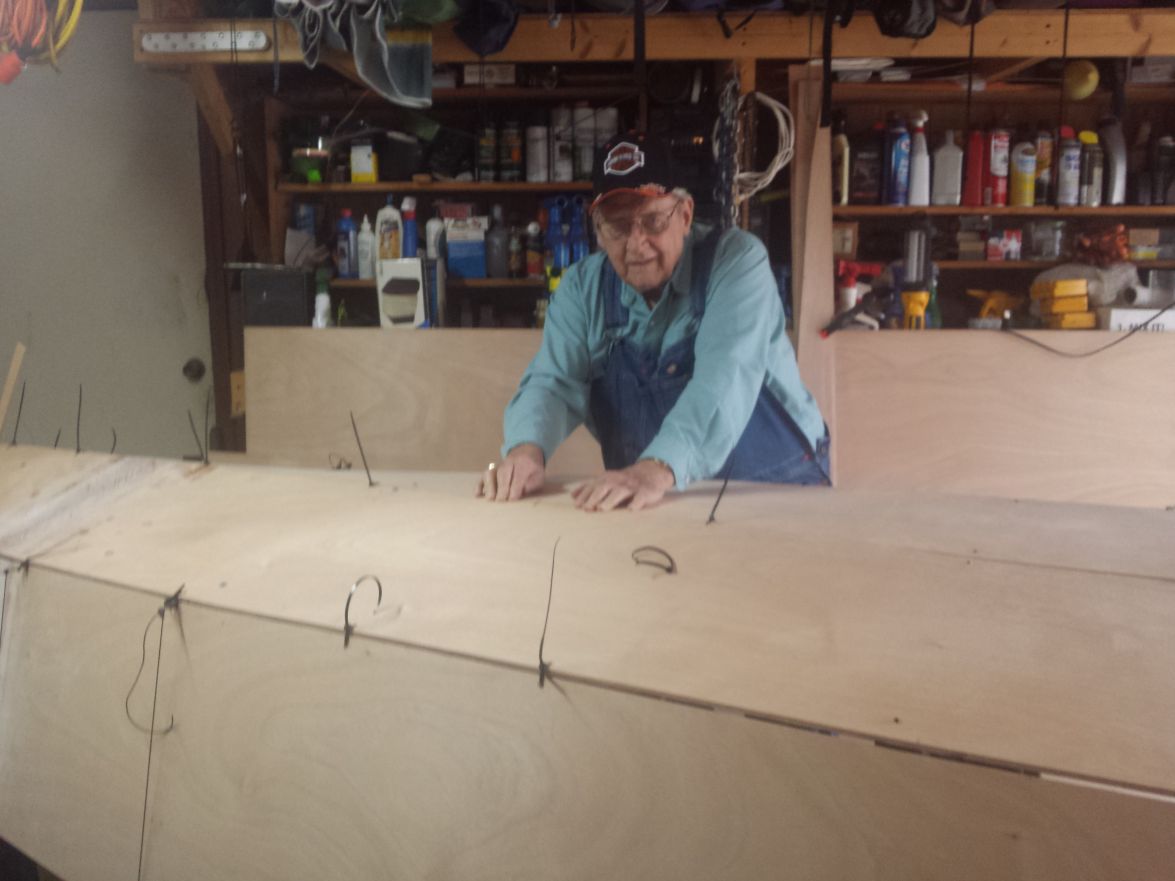
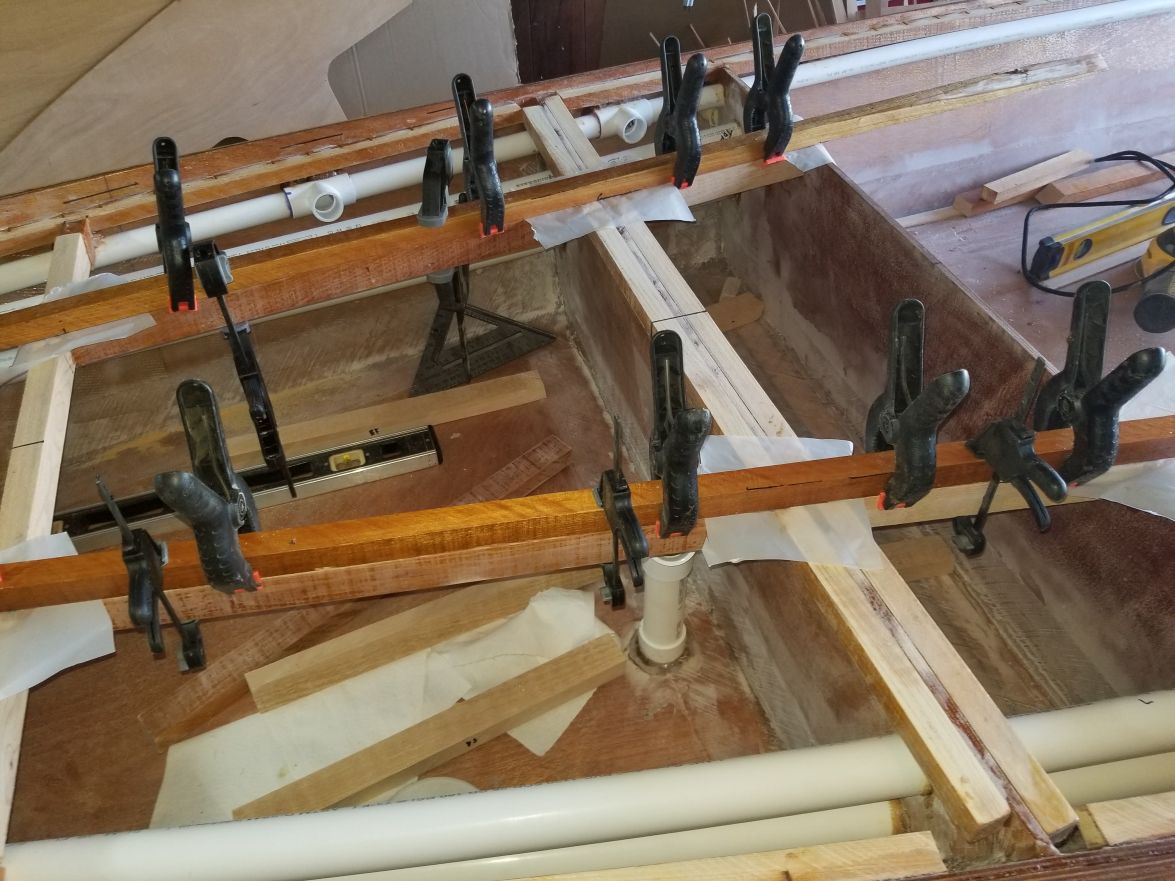
Grandad helping me tidy up a few things and even up a spot prior to gluing.
Big hurdle for me. I'll check the glue tomorrow. It's supposed to get down to the low 30's tomorrow night so it will delay my cure time considerably. I've moved my resin inside. When it's ready I'll finish up these spots and start shaping getting ready for taping and fiberglass next weekend.
I'm not sure if I would put the decks on the strongback if I built another one of these. It impeded access to those areas and made it more difficult. BUT, it was nice having them as guides. I might cut a copy out in the future with a BIG hole so I could reach back up to the hull from the bottom. I'm also over not wanting to use a screw. It made it a lot easier working by myself. I kept shifting the whole boat around and the screws just kept everything in check.
Again, if anyone wants to see a particular pic that wasn't posted, let me know. Happy early Thanksgiving everyone!
Re: Steve's FS18
Posted: Sun Nov 20, 2016 3:03 am
by Fuzz
I envy you getting to build a boat with your grand dad. That is something most people will never get to do. He is looking really good for 87
Boats coming along nicely too
Re: Steve's FS18
Posted: Sun Nov 20, 2016 8:37 am
by Jeff
Nice to have your Grand Dad involved in your build!!! Jeff
Re: Steve's FS18
Posted: Mon Nov 21, 2016 7:34 pm
by Mikem59
Steve,
Build is looking good. Your splice looks real good, mine didn't look that pretty
Like others have commeted neat that your grandfather is able to help.
Mike
Re: Steve's FS18
Posted: Sun Nov 27, 2016 10:43 pm
by Dutch1
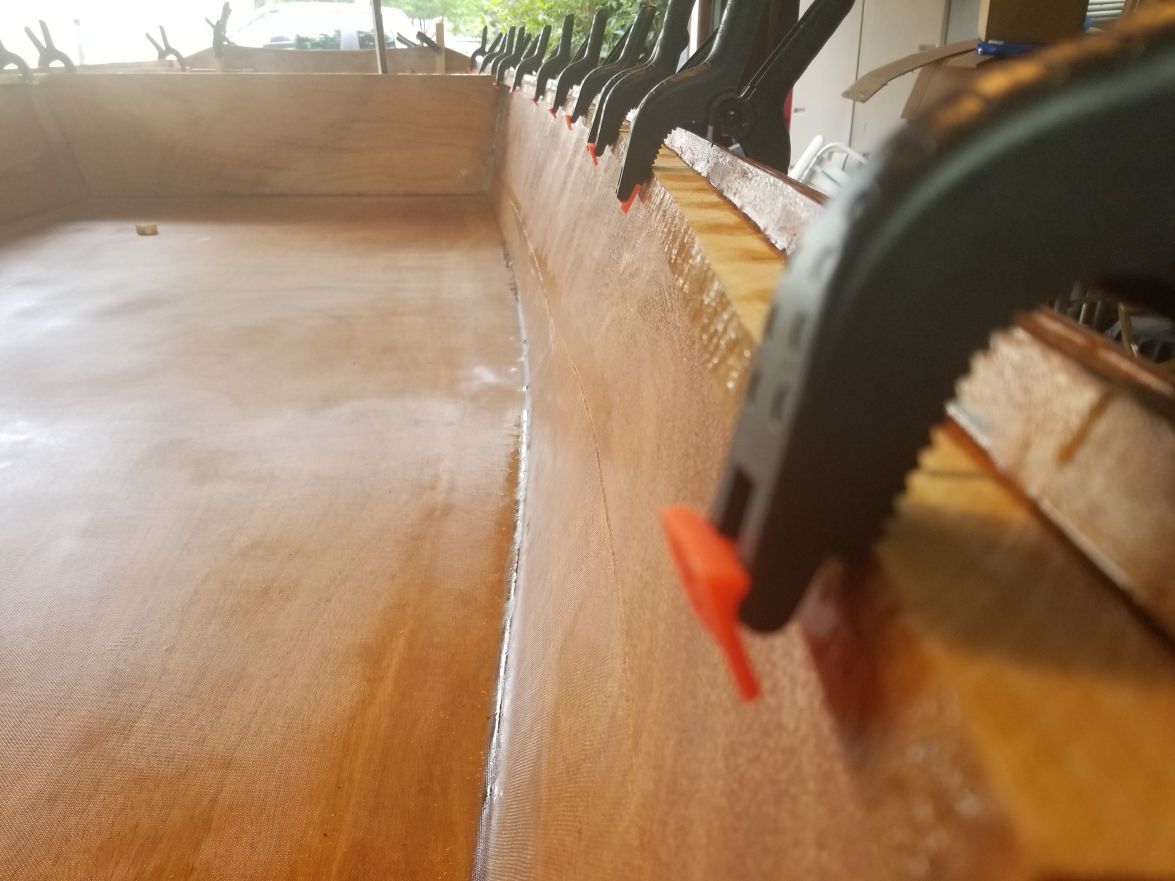
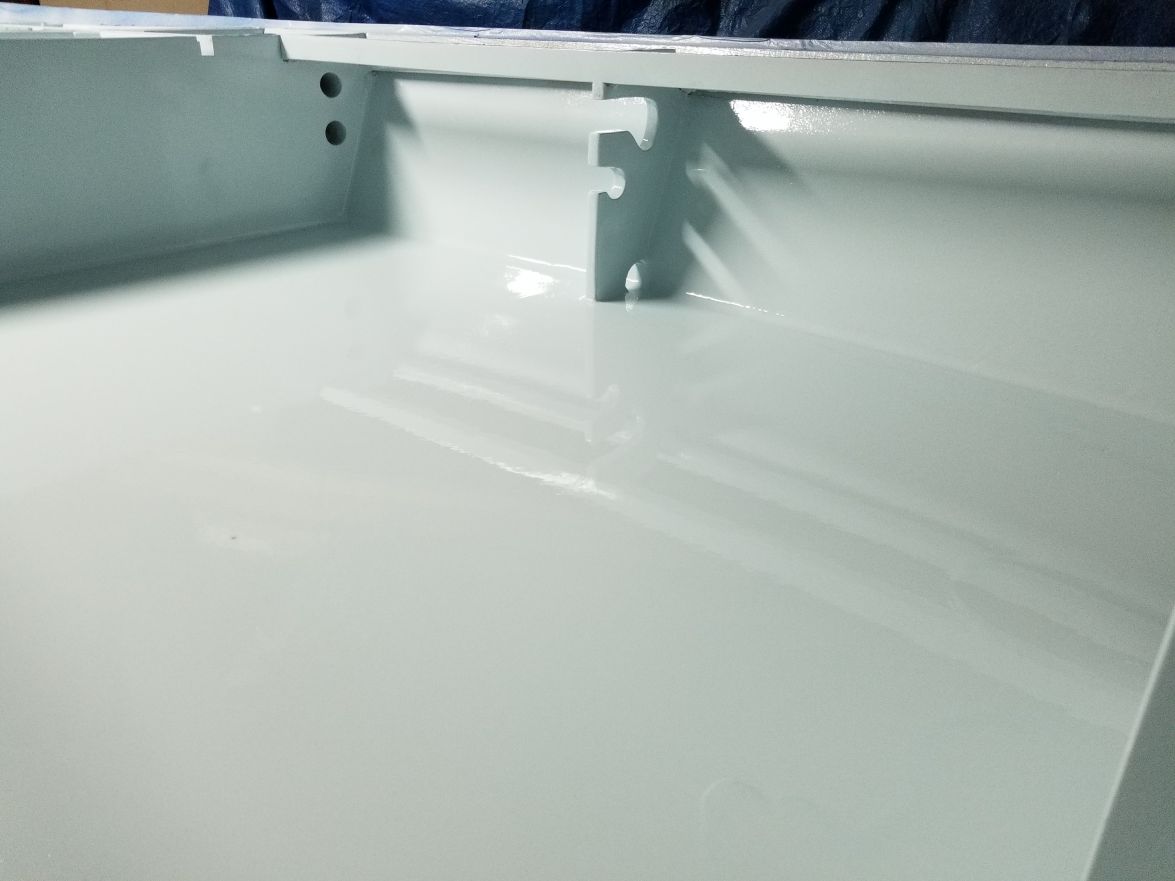
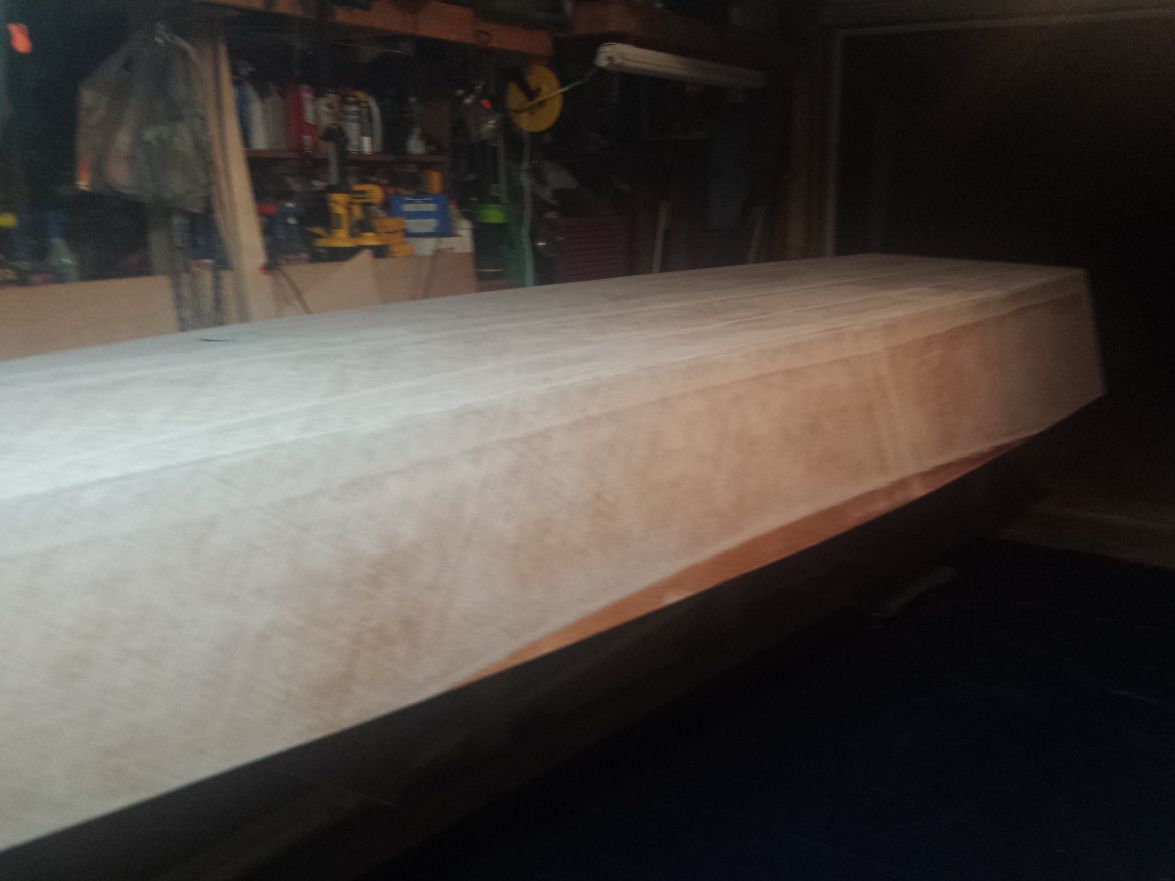
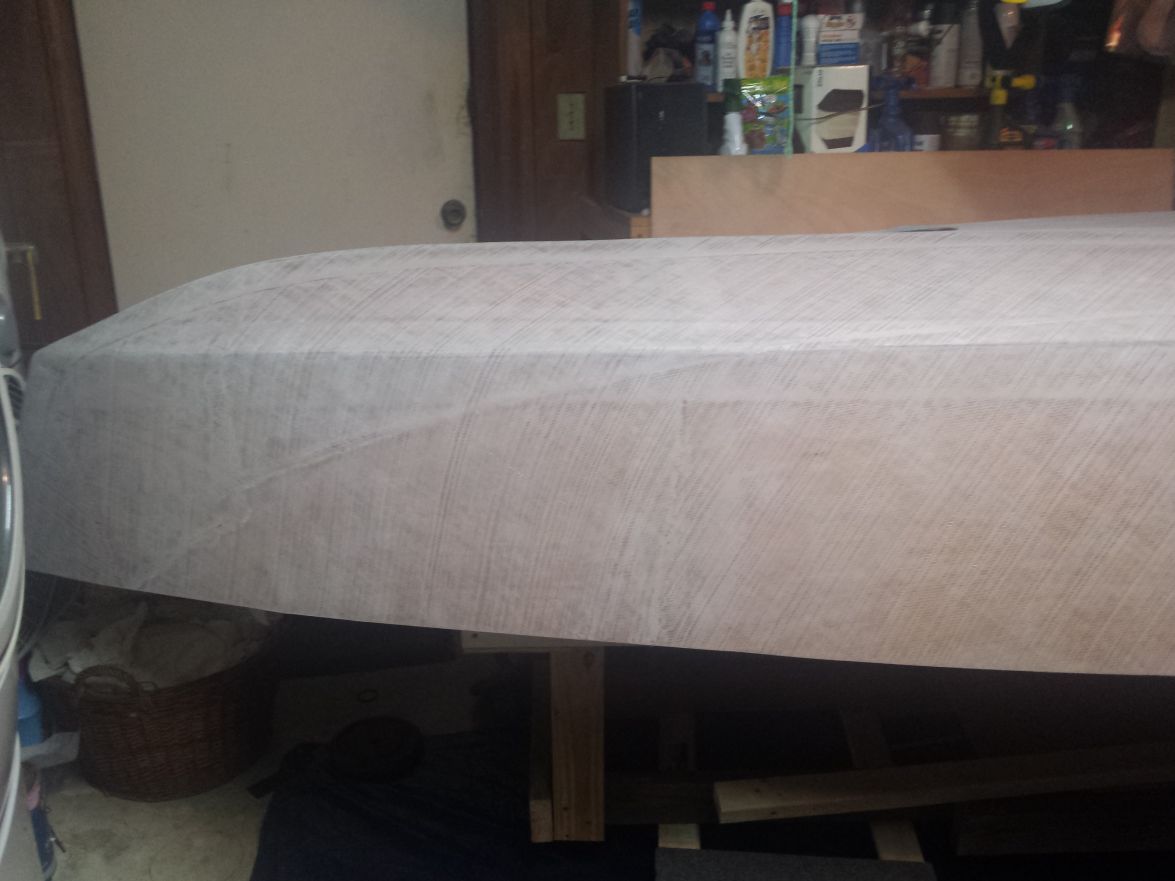
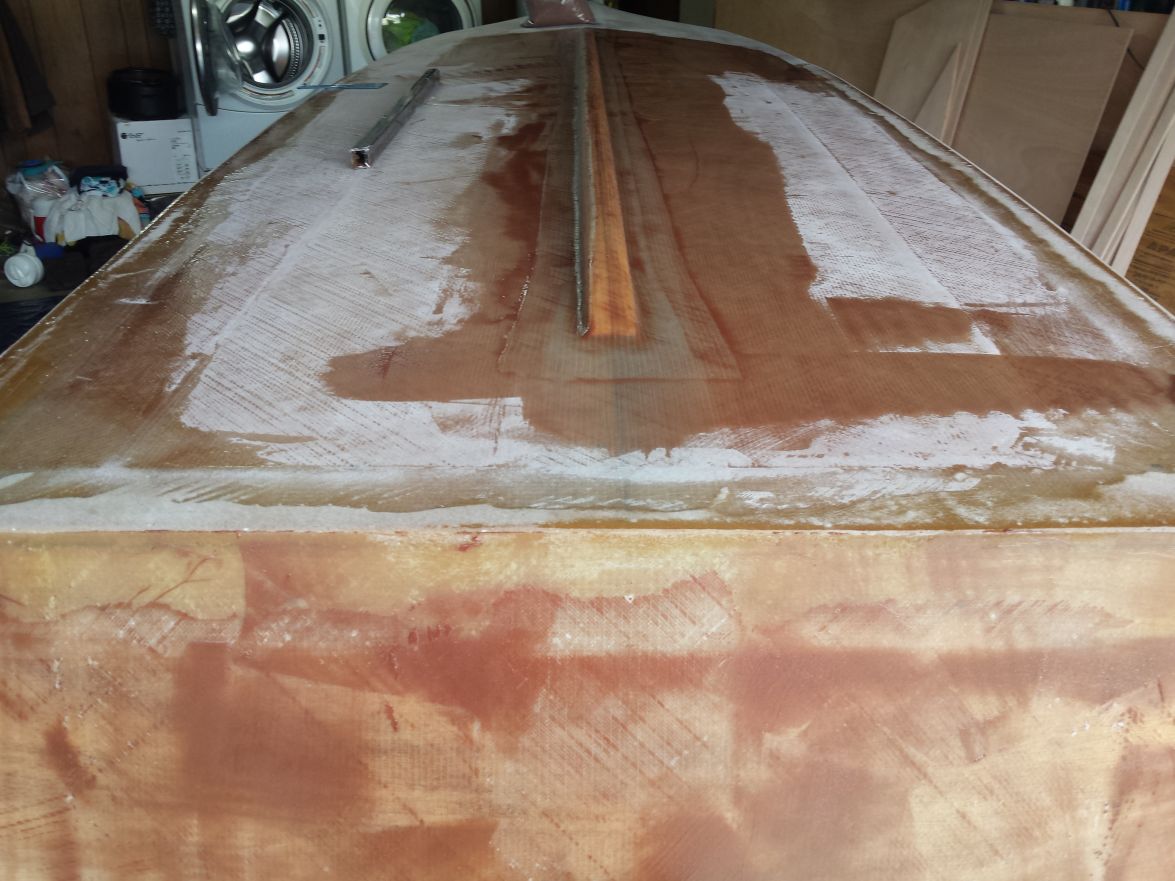
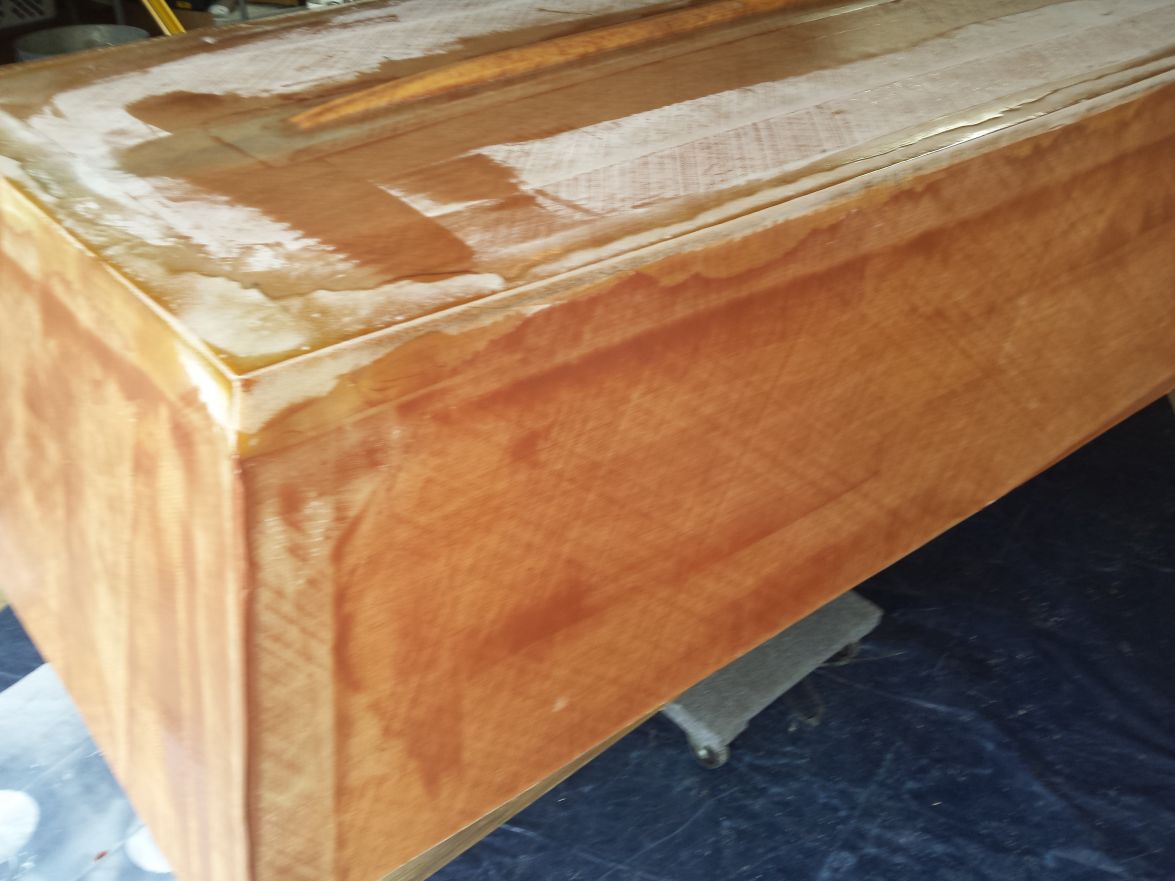
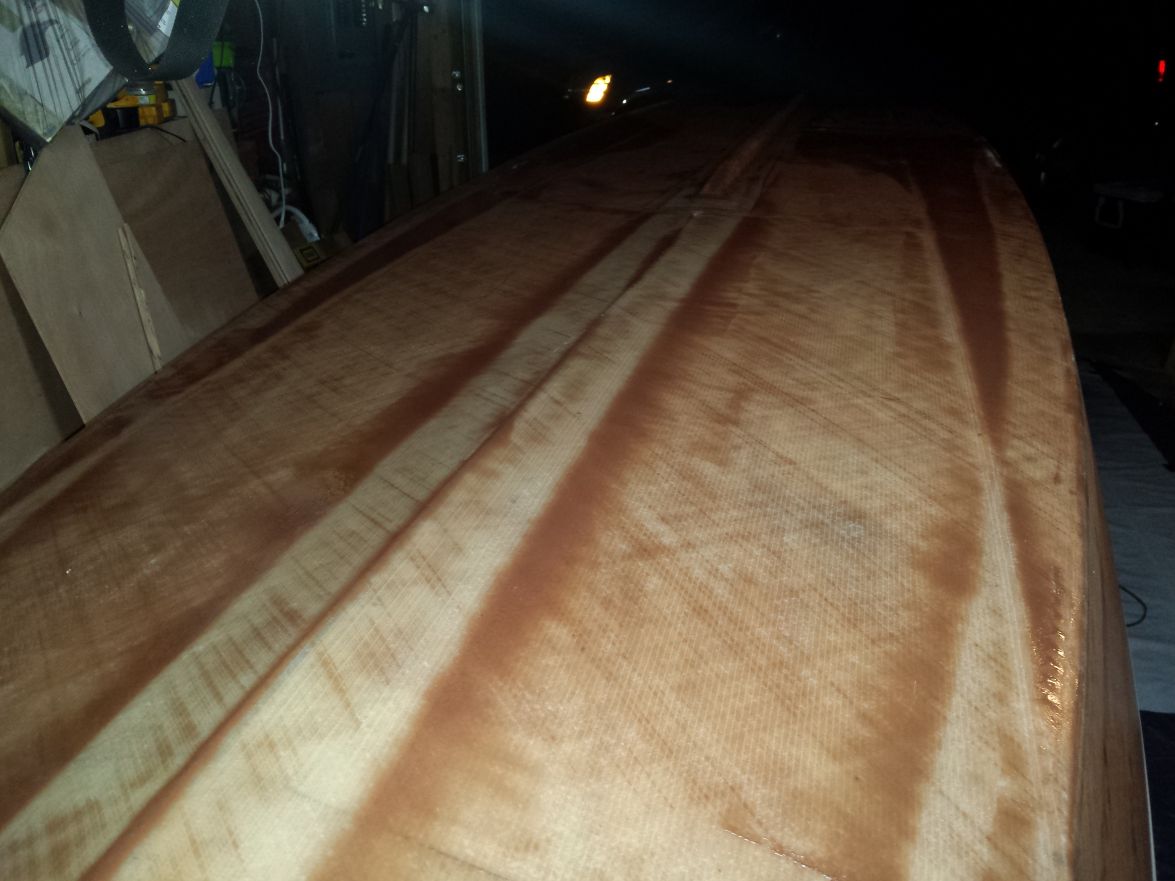
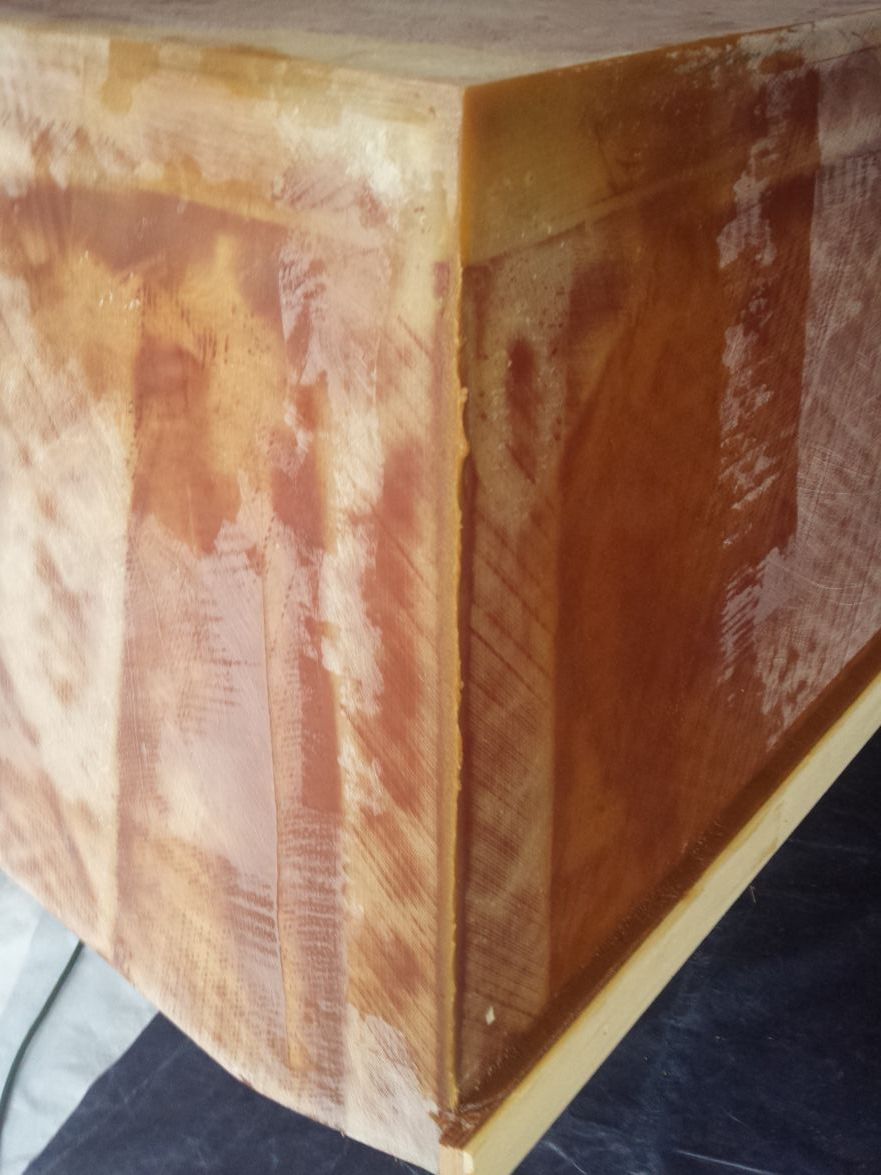
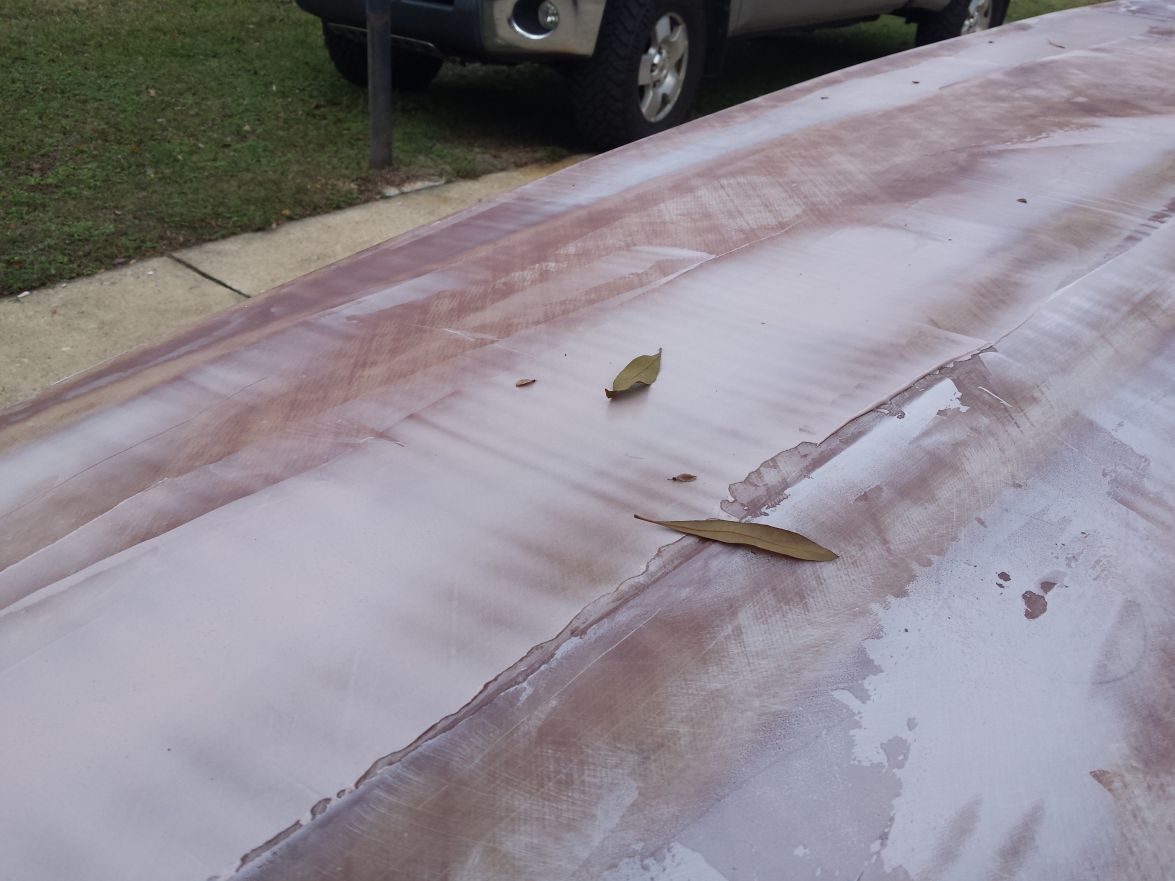
Finished the fiberglass. I took K2's lead and wrapped the sides as well by using the full 50" of fiberglass with a large overlap of the keel. And, I really didn't feel like cutting the entire roll of fiberglass down the middle. If I build another one I'll see if I can get it cut first. I know. It was overkill. BUT, there are rocks the size of cars where this boat will spend a lot of its time and I feel better with the added strength and weight. Some of the large rocks come out of the water 3-4 ft during low tides and they are an ominous reminder of what could be. Others swear the smaller ones move with the tides/storms (and I agree) and I have to go through this area when I'm near shore and fishing that area.
https://binged.it/2fUwc4P This is another bay I play around in quite a bit that is FULL of oyster bars/beds. Spend much time around here and you will eventually hit something.
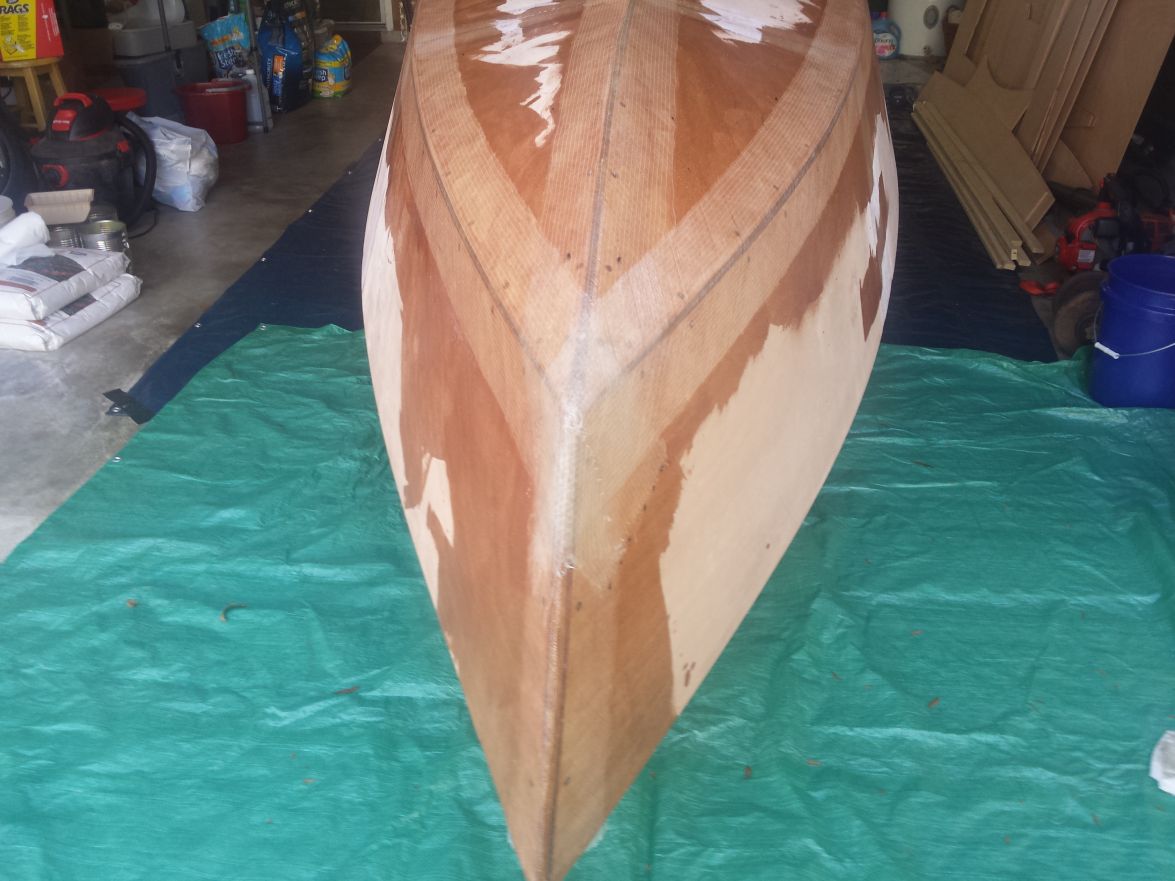
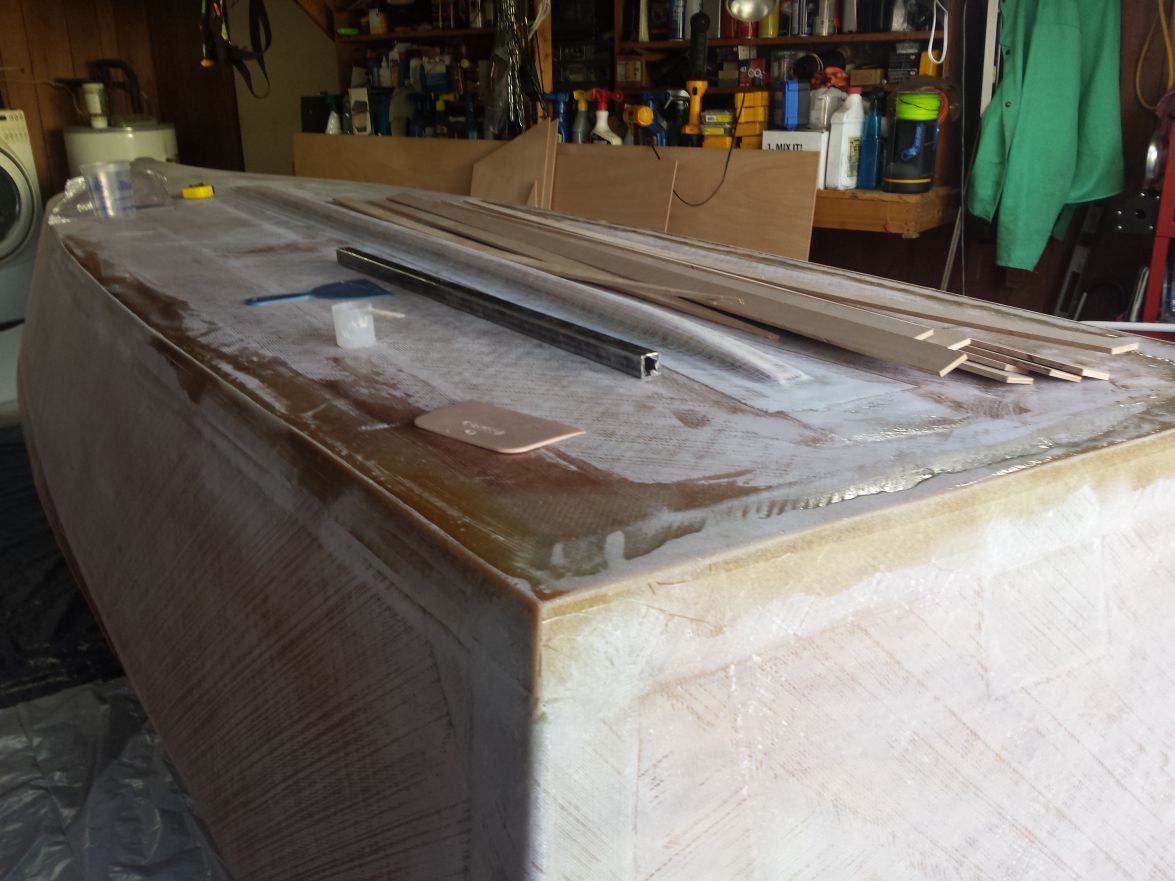
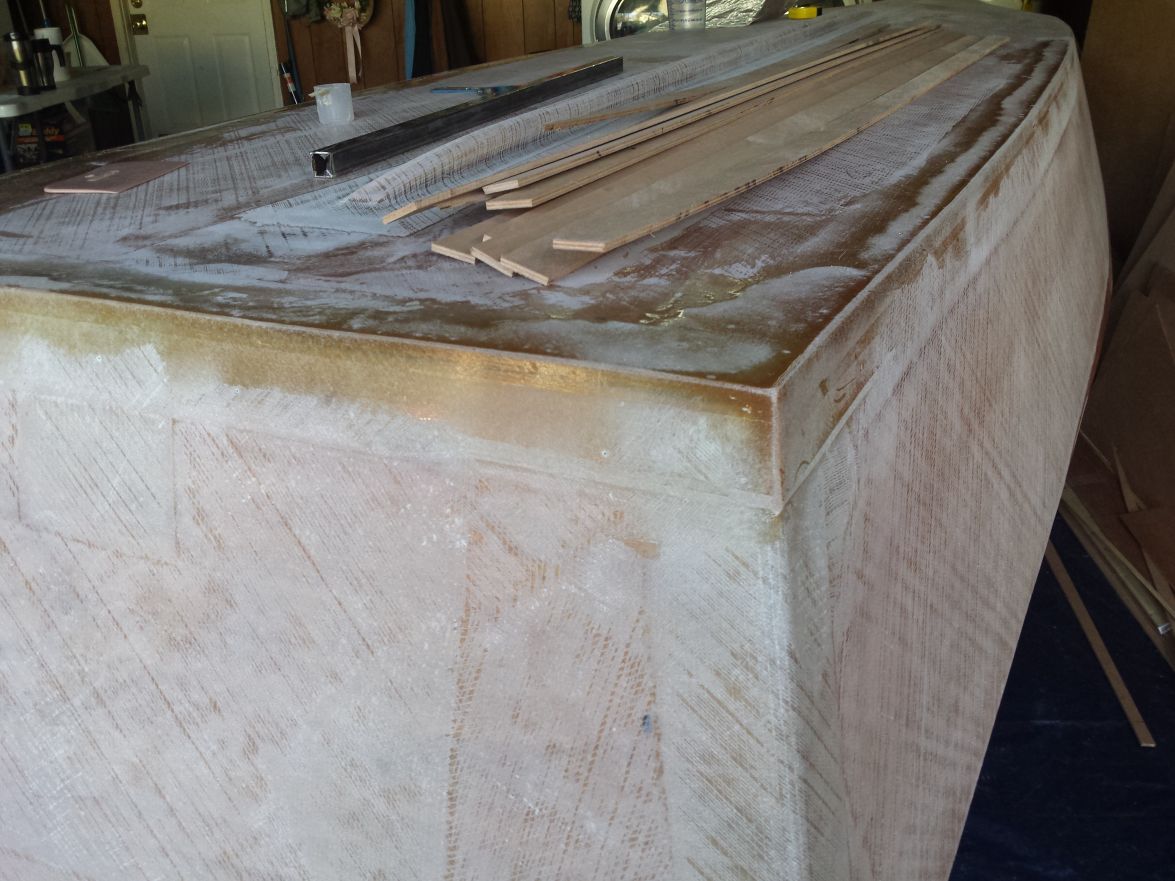
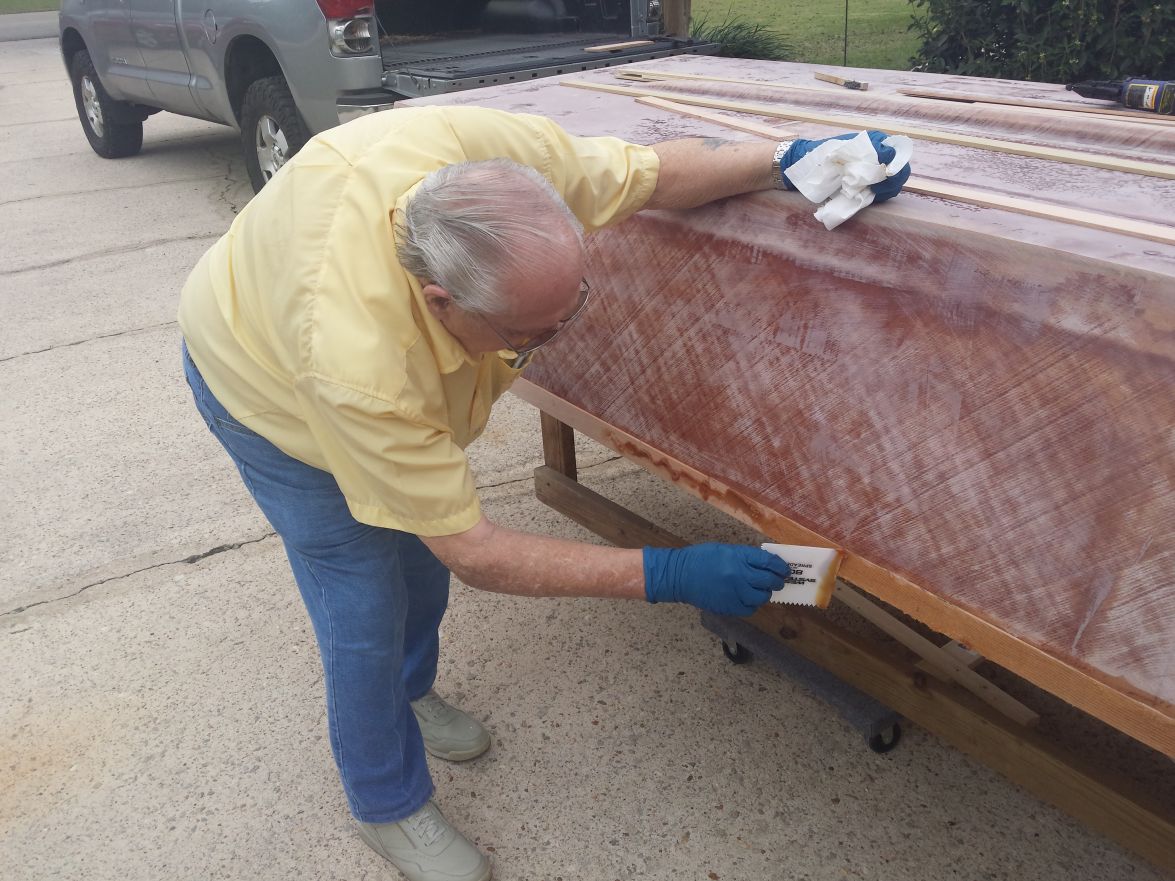
I prepped the hull during the week and on Saturday Grandad came over at 8 and we started the long job of fiberglassing the hull.
Ready for rounding the corners
Waiting for Saturday
I didn't bother taking many pics from this point to the finish. It was a long day.
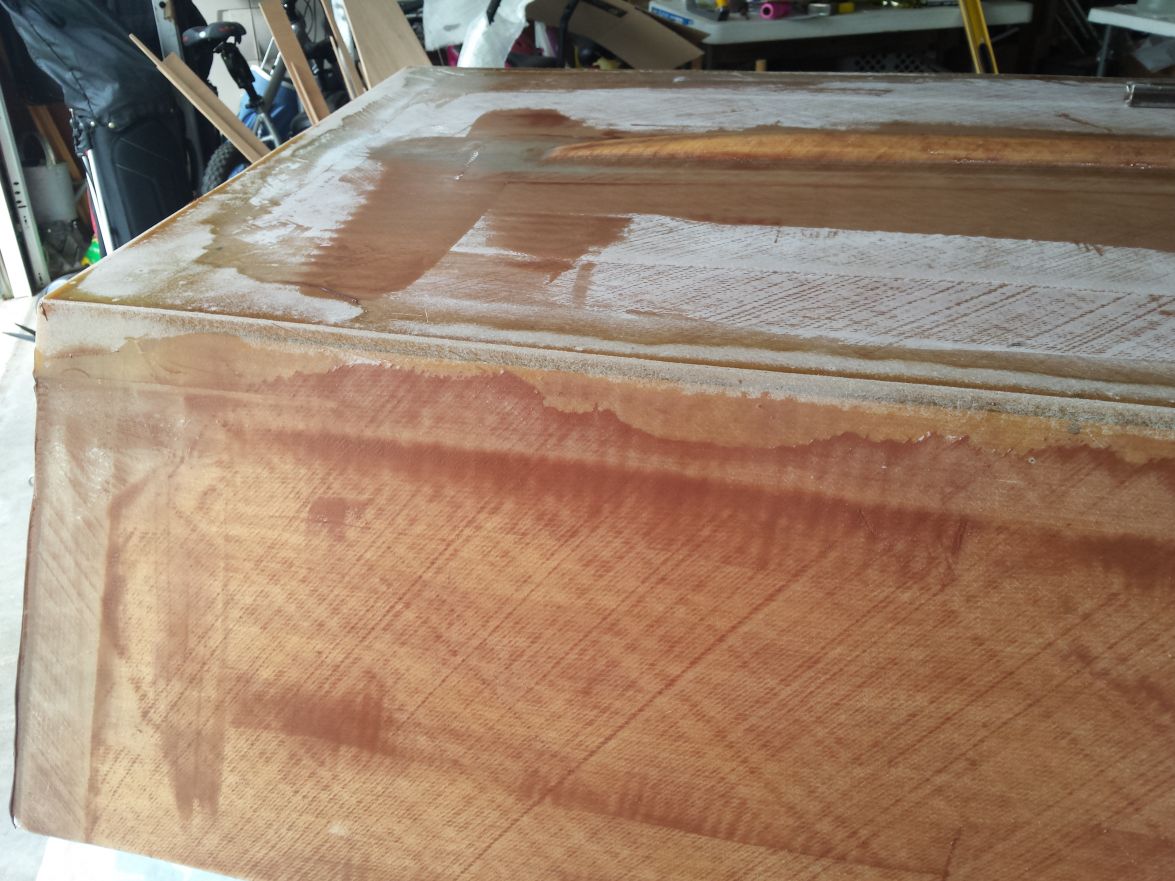
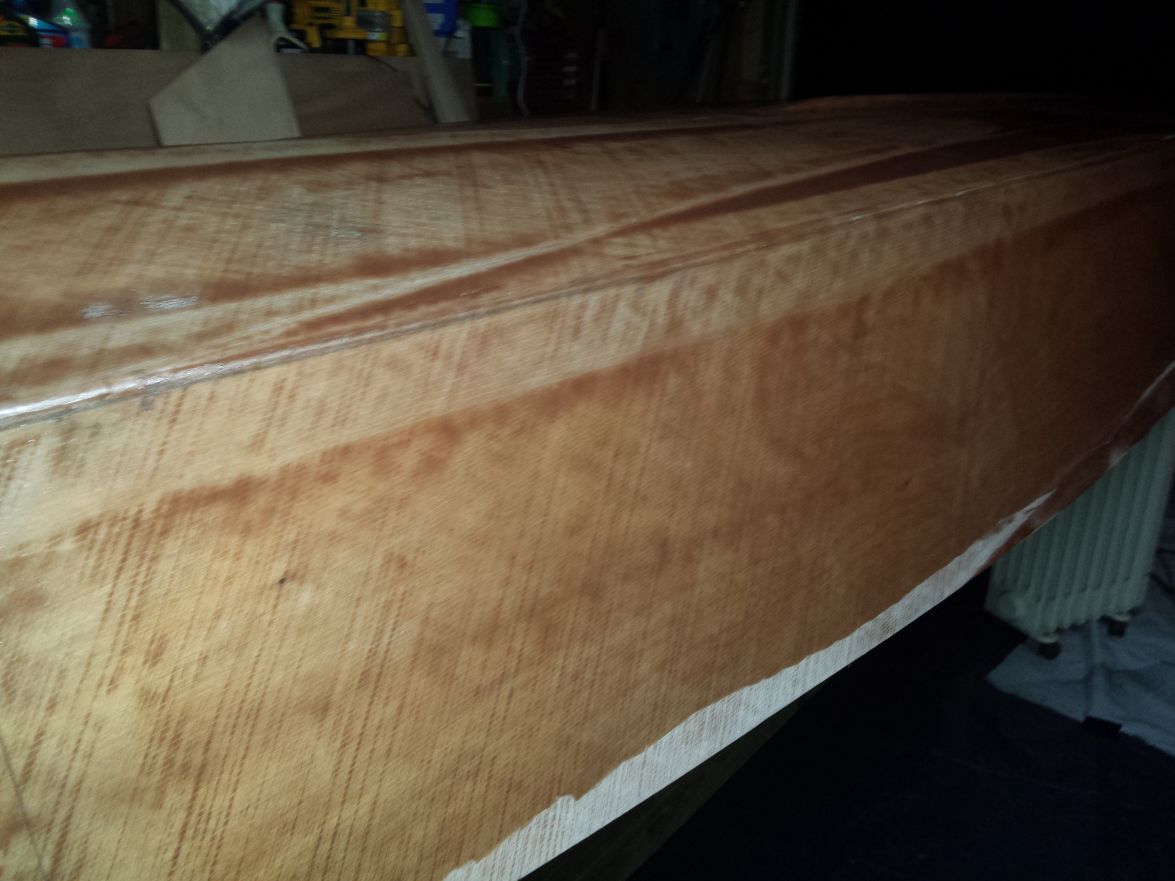
Trimmed up and curing.
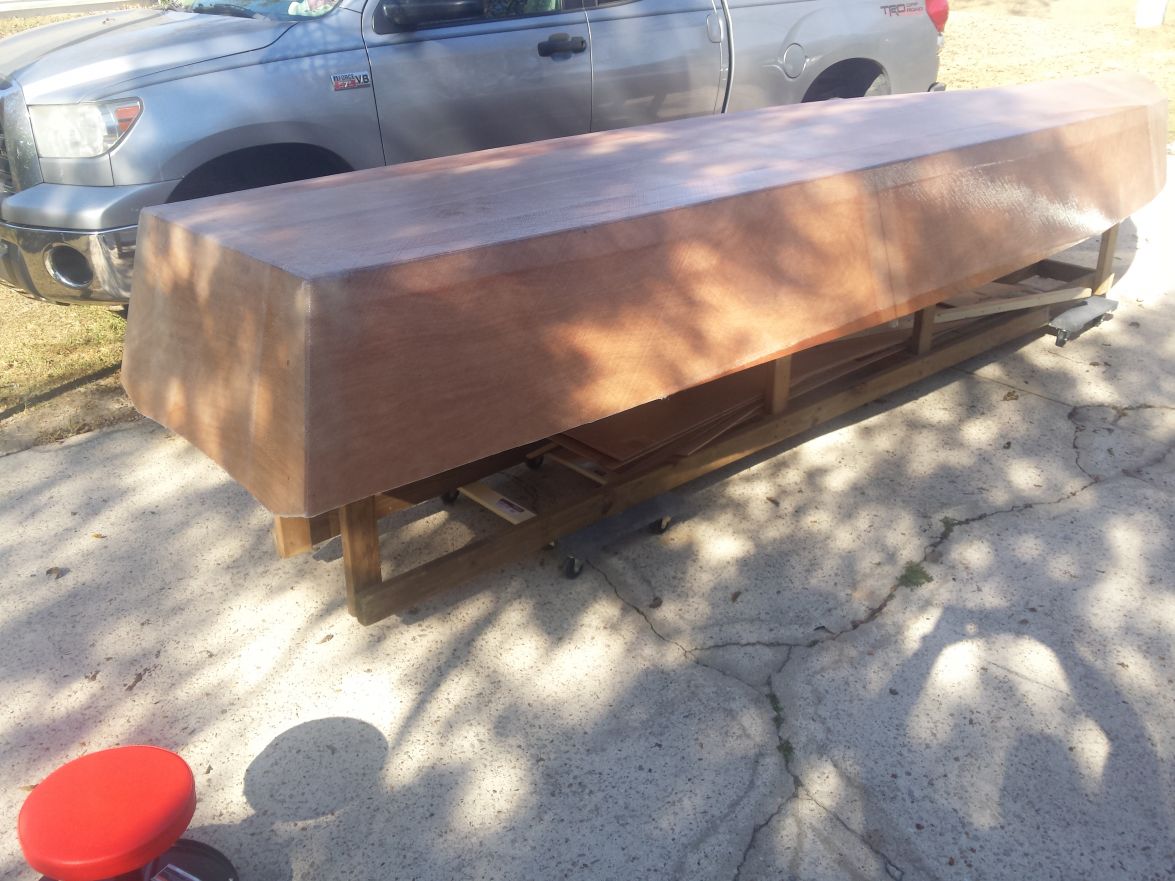
I've got to give my Grandad some props here. He hung with me until 5PM wetting out the fiberglass. I had to finish it by myself and that was tricky with the temperature dropping fast when it got dark. I had to put the epoxy in a large stock pot with hot tap water to get it to flow and I didn't have much time to work it until it thickened up. It got to the point where the pump would barely work at all. I thought the pump was going bad at first before I realized it was just cold.
I trimmed up the fiberglass with a carpet razor and rolled it out into the sun for a few hours today. It was still tacky when we got home from church and after a few hours in the sun it wasn't tacky at all but I know it still has some curing to do before I start sanding. I plan to start sanding this coming Saturday. If I finish it up I'll start fairing. I'm hunting a cheap/used coffee grinder to grind up the filler for fairing. I saw that on another post and felt it was a good idea.
Now for some questions:
1. Keel- What kind of wood should be used? Has anyone molded their own keel out of an epoxy filler material?
2. Rubrail - Should I stick with the plans and piece together the rubrail with scraps or do you recommend another kind of wood? I can see how the laminated strips would be very strong but also a royal pita to put together. Red Oak, Teak, etc?? What should I stay away from?
3 . Cleats - What kind of wood should I use for the cleats? From the posts I've seen with pics of the cleats they look like cheap pine but I can't tell.
4. Graphite - It's going to more than likely be cool when I paint the graphite on the bottom. In reading other posts they recommend it be as hot as possible. Is that critical or will it be OK? Is that to keep it warm so it will spread well? I can use heaters in the garage if I need to and that will warm it up real good.
Thanks for the help!!
Re: Steve's FS18
Posted: Mon Nov 28, 2016 1:29 am
by narfi
Looking good.
What were the temperatures in the evening when you ran into trouble?
Which brand and speed epoxy are you using?
Re: Steve's FS18
Posted: Mon Nov 28, 2016 1:37 am
by Fuzz
Hey Narfi I bet you are wanting to know how cold you will be able to work in. Go to Bateay2.com. In the tutorial section there is one called epoxy cure times. It should give you the info you are looking for. I use only fast hardener and work down to around 50F.
Sorry if this is a hijack Steve.
Re: Steve's FS18
Posted: Mon Nov 28, 2016 1:43 am
by Fuzz
Steve as for spreading the epoxy/graphite mixture I understand the warmer the epoxy is the thinner it will be and it will lay out smoother. also the graphite will mix much easier if the epoxy is warm. Somebody else compared it to trying to mix powered creamer in cold coffee. If the coffee is warm no problem. Not so much if it is cold.
Sorry somebody else will have to help with the other questions.
Re: Steve's FS18
Posted: Mon Nov 28, 2016 10:03 am
by topwater
Don't use red oak for the keel , its way to porous and rot proun . Doug fir or almost any kind of pine will work and be easy to
find , cypress works well and is very rot resistant . whatever you use glass it and it should be good to go.
Re: Steve's FS18
Posted: Mon Nov 28, 2016 2:33 pm
by Dutch1
narfi wrote:
What were the temperatures in the evening when you ran into trouble?
Which brand and speed epoxy are you using?
It was around 40 when I started having to go to smaller batches to finish. I could see my breath REAL good and it was definitely too cool for this FL boy in shorts and a t-shirt but I was trying to finish. The epoxy was just cold and didn't take long for it to thicken up but it wasn't curing. That thought didn't even come into my mind. Check out the diagram Fuzz was talking about. A slow hardener in those temps would take a loooong time to kick. Probably somewhere around 100 minutes or so. I was able to go back and roll several feet where I had already worked if I saw a bubble or something so it wasn't kicking. It was just getting thick. Think of trying to wet out thick fiberglass with cold syrup. Then you will get the idea. I wasted epoxy that night but I learned. If it got thick I would throw it out and mix another 6oz batch. I just went to smaller batches to go faster. When it was warm right after mixing it was smooth as butter going through the weave and I had about 5 minutes before it started to thicken up so I worked as quick as I could. I'm
very pleased with the epoxy results so far but I should have pulled it in the garage and tried to warm up my work area and the boat. Another lesson learned. . . I used the Marine Epoxy sold here with a slow hardener. Since you are in Alaska I would try to keep it warm where you worked.
Fuzz wrote:Sorry if this is a hijack Steve.
NP at all, we are all in this together! And, thanks for the info. I remember Cracker Larry saying that in another thread. I figured it had to just help it flow but wanted to make sure. I'll go get an electric heater and warm up the garage REAL GOOD before doing the graphite. I'm wondering how much epoxy it will take to graphite the bottom.
topwater wrote:Don't use red oak for the keel , its way to porous and rot proun . Doug fir or almost any kind of pine will work and be easy to
find , cypress works well and is very rot resistant . whatever you use glass it and it should be good to go.
I'm glad I asked because I was leaning towards red oak. I'll see what I can get my hands on around here.
Should I primarily stick with pine or cypress?
Re: Steve's FS18
Posted: Mon Nov 28, 2016 2:49 pm
by Dutch1
I had to go look... The page Fuzz is talking about is here
http://bateau2.com/howto/cure_times.php
At 60 degrees it will start to gel at 120+ minutes so who knows how long it would have taken to to start kicking in those temps. Like I said, I worked several feet back a few times if I saw something where I had already been without any issues. I could both roll and use a scraper (piece of plastic) and it didn't give me a minutes trouble. Still a nice finish.
I think I might go ahead and order a jug of fast hardener too! You never know what the weather will do down here. We'll have lows in the 20's and highs around 50 or so by the time I've flipped it and working on the inside. At 50 degrees I'll have around 50 minutes of work time with a fast hardener and that should be more than enough.
And I thought it would be easier waiting for the winter to build this thing. . . I should have started when it was still hot.
Re: Steve's FS18
Posted: Mon Nov 28, 2016 4:16 pm
by K2FS18
Dutch, I used western hemlock for my keel and rub rails. Rub rails are laminated with 3 layers of 1/4" that I ripped and planed. I laid one after the other using a brad nailer to hold in place. The brad nails where long enough on the first ply to pull through form the inside, the middle layer they are buried within the wood and the third layer I used longer brads so i could pull through from the inside. This made the job go quick and easy. If I did not have the Hemlock, I would have used cypress.
It seems some guys will glass over their keels while others used it as a sacrificial keel. I choose to glass.
I am currently graphite epoxying. Having a hard time with it laying out smooth. I am picking my days where we have warm temps so my epoxy has a good workability. The rollers are the difficult part. I used the west systems epoxy rollers; total suck. Also used the HD epoxy roller; not as sucky. The West Systems must have some type of chemical in them that is causing the epoxy to fish eye. They also seperate from the roller. Takes two per coat. The HD epoxy roller works better, but the gap in the seam of the roller telegraphs and leaves a line in the finish. Looks like I will need coat number 5 and a new type of roller. Gonna take CL advise and get the premium 3/8" nap for glossy acrylic latex kitchen/bath bath from Lowes.
BTW, nice looking glass layup.
Re: Steve's FS18
Posted: Mon Nov 28, 2016 4:19 pm
by K2FS18
You will need to add an additional 6" tape down the center line if you did your layup same as mine. Should have 4 layers (or is it 3 layers) of 12oz over the center line per Jaqc. Somewhere there is a question and answer in the boat help section.
Re: Steve's FS18
Posted: Mon Nov 28, 2016 4:53 pm
by Dutch1
K2,
Thanks for the info. I need to call around and see what kinds of wood I can get my hands on. I have a stupid idea banging around in my head of making a keel out of epoxy and filler materials and then attaching that to the hull. And, I was thinking about laminating different kinds of wood for the rail just for the nicer clear look. These are the dangers of me having time on my hands while the epoxy dries. . . I'm just trying to plan ahead. And, I'll go get those rollers that CL mentioned too. I'm going to get my garage HOT before I put the graphite down.
How much epoxy are you using for each coat? Good to hear from you and thanks!
K2FS18 wrote:You will need to add an additional 6" tape down the center line if you did your layup same as mine. Should have 4 layers (or is it 3 layers) of 12oz over the center line per Jaqc. Somewhere there is a question and answer in the boat help section.
You made me go look when I saw your other post. It's three layers per side. You had it right. One 6" to tape the seam(s) and then two more of the 12oz cloth with 6" overlaps of the keel. We just overlapped the keel A LOT more than 6 inches. They show the layers on one of the drawings. I'll post later which one it is and reply.
Re: Steve's FS18
Posted: Mon Nov 28, 2016 9:36 pm
by Dutch1
Dutch1 wrote:
K2FS18 wrote:You will need to add an additional 6" tape down the center line if you did your layup same as mine. Should have 4 layers (or is it 3 layers) of 12oz over the center line per Jaqc. Somewhere there is a question and answer in the boat help section.
You made me go look when I saw your other post. It's three layers per side. You had it right. One 6" to tape the seam(s) and then two more of the 12oz cloth with 6" overlaps of the keel. We just overlapped the keel A LOT more than 6 inches. They show the layers on one of the drawings. I'll post later which one it is and reply.
Weeelllll, I have to take that back. The lamination schedule on the plans state "keel, bow, and transom = 2 layers of biaxial tape each side" even though the instructions don't say ANYTHING about it so yes, I will have to add another layer to the keel. The image above the lamination schedule doesn't show the tape and I thought the two layers as shown was sufficient. I missed the word "tape" in that instruction and I don't know what "each side" has to do with the bow or keel. I read it as inside and outside the hull as per the above image on the plans. I just thought I was done fiberglassing the hull and now I have to sand it before I put those extra layers down. So I should have read everything 10 times instead of 9. Incredibly frustrated with the instructions/plans right now. So much for wet on wet all the way through. At least I'll know that the transom and keel should be double taped on the next build.
Right now I have:
Tape - 1 layer of tape on all seams overlapping other seams on the bow and transom by at least 6 inches
Wide fabric - 2 layers over the hull with about 12" overlap over the keel and large overlaps on the sides of the transom and the bow. The bow has 5 layers with the overlaps. The sides of the transom has three layers total due to the overlaps (this includes one layer of tape).
The bottom and sides of the transom has one layer of tape and two layers of fabric. So I think I'll have to add one more section of tape to the bottom and sides of the transom and one more to the keel to make it 4 layers. The middle (keel) will get another layer when I install the keel for a total of 5 layers.
Re: Steve's FS18
Posted: Tue Nov 29, 2016 1:42 am
by Fishwater
Based on the previous pic, I think you're good. Two overlapped 6" tape on every seem inside and out. Then the 12oz fabric, one layer inside and out. I think you're good.
Nice glass work btw.
Re: Steve's FS18
Posted: Tue Nov 29, 2016 9:26 am
by tcason
from god's mouth to your ears.........................
I tipped my epoxy after rolling
Cracker Larry graphite finish
Rule number 1. Work when it is as hot as possible. I'm not kidding. When I put the first coats of graphite on this boat it was still cool weather and no matter what I did, I got lumps, clumps and bubbles. Have you ever tried to stir powdered coffee creamer into cold coffee? It doesn't hardly dissolve. Stir it into warm coffee and it instantly dissolves. Same for the graphite powder. The last coats were done in the middle of the day, outside temp was about 104, the epoxy temp was near 100. The powder mixes completely and it flows out like water. In the heat of the day the epoxy obviously cures fast, so you have to work fast. This is a big advantage because the faster it cures, the less time it has to accumulate bugs, dust, dog hair and other trash.
Rule 2. Sift the graphite twice, but don't turn the crank or squeeze the handle on the sifter mechanism, just shake the sifter lightly and collect what passes through easily. Discard the rest. This boat needs 9 ounces of mixed epoxy for a full coat, to that I add 3 ounces (volume) of sifted powder.
Rule 3. Mix the resin and hardener completely before adding the graphite, stir it very good, then let it sit a minute before using. This will let any chunks settle to the bottom of the cup. Pour it out slowly and evenly over the entire bottom of the boat, but don't pour out the last 1/2 ounce or so in the bottom of the cup. This is where the uglies live, and they are best left in the cup
Rule 4. Do not use a foam roller, it induces bubbles and usually foam fragments too. I got the best results using a 3/8 nap roller made for glossy acrylic latex kitchen and bath paint. Premium grade, from Lowes. Use a full size roller, the smaller ones leave a lot of roller marks, the wide ones not so much. Roll it out completely in every direction with a lot of pressure, then roll it lightly in one direction only to remove the roller edge lines and smooth it all out.
Rule 5. Roll it out very thin and use multiple coats. I wet sanded with 120 grit between each coat, then before the last coat I scrubbed with a Scotchbrite pad and water. You do not want to dry sand this stuff
Re: Steve's FS18
Posted: Tue Nov 29, 2016 9:32 am
by K2FS18
http://forums.bateau2.com/viewtopic.php?f=2&t=61463
This is the link to my question to Jacq about the lamination schedule.
"FS18 glass laminating schedule", currently on page 4 of the "Power Boats" tab.
Re: Steve's FS18
Posted: Tue Nov 29, 2016 9:44 am
by Dutch1
Thanks Fishawater, TCASON, and K2. I went ahead and sanded the keel all the way to the bow and the transom bottom and sides last night. Some 40grit and my frustration made that a pretty quick job. Then I added another layer of tape. It will be a pita to fair now... Having the wide fabric over the tape made it a smoother transition point. The epoxy had cured to the point that it could be sanded. I think it was overkill but I'm not a marine engineer so I have to trust the plans.
I've learned to watch the cups I mixed the epoxy in to really know when it has cured. Since I'm reusing quart containers I clean them out when the epoxy cures. It comes out in one piece. If I check it and the container still bends without popping the epoxy loose I know the boat isn't cured yet either and I give it another day.
Re: Steve's FS18
Posted: Wed Dec 07, 2016 2:06 am
by Dutch1
Evening everyone. I hope your week is going well.
I finished up sanding tonight in preparation for fairing. I have a 1/8" gap for about two ft. on the bottom about 2ft. from the transom just before a splice. The only other area that has me scratching my head is on one side by the transom there is a larger gap from the side to the corner if I place a level (straight edge) on it. I guess the fiberglass is higher on that corner and I'll have to build it up with fairing. I spent some time with the shop vac cleaning up the dust on the hull and now I'm not sure what I should do next. I've got a few questions before I continue.
1. Should I wash the hull to clean off all of the fine dust or does it matter before I fair?
2. For future reference, can I wash the hull now that it has been sanded?
3. I'm going to install a cypress keel. Should I do that and fiberglass it before I fair?
4. Should I install the rub rail prior to fairing? My thinking is it will be a better bond directly to the hull instead of over/through fairing.
5. What is the best way to fill in that 1/8" gap on the bottom. Unfortunately it is right in the middle. Adding the keel will definitely fix it and I could fair from that point.
If I should put some of these questions somewhere else in the forum please let me know.
I have a Toys for Tots event this weekend so I won't be able to work on it at all. My whole weekend will be dedicated to the event and it's worth it to me to lose the weekend on the build. Whatever I can get done in the next few days will be it until Monday. The hull will have plenty of time to dry IF you recommend me washing it before continuing.
Thanks for the help!
Re: Steve's FS18
Posted: Wed Dec 07, 2016 9:56 am
by K2FS18
A few answers maybe, I am by no means an expert in this type of stuff.
I installed the keel before I faired. I glassed it down with 12oz tape.
I also installed the rub rails before I faired. But I also flipped the boat and installed all the interior stuff other than upper decks then I flipped her back over to fair. I figured that would definetly (sp???) keep the haul locked into place and provide a haul that doesn't move after I faired. Plus, I needed a break from working on the bottom and wanted to move on to the good stuff....layout.
All my sanding tools are hooked into the dust system so I have very little dust to deal with. I typically shop vac and then wipe with a rag and alcohol.
I used way more QuickFair than needed. Had to reorder twice. Another member informed me to just mix wood flour to fill those low spots first, then QuickFair. That worked great. Don't rush this part and don't try to get too much filled in one pass. My base lines for fill was the hard chine edge and the joint from the keel. I started laying down QF from hard edge to about half way up tape joint on keel. Pulling a straight edge from the rear working forward to bow along the flat bottom section. Next, after a light sanding to knock off ridges, I pulled same direction, but this time I worked from edge to closer the the keel/haul joint. Sand to knock off ridges then pulled from keel to hard edge. Sand to remove ridges and skim coat. You will have a low area on the rear section from the tape from the transom, chine and keel. I filled this area first in multiple steps working in both directions so that I had a good starting point. I don't believe that I sanded very much QF off and I have a supper flat smooth bottom. I am waiting on a break in the wet cold weather to apply my last coat of graphite epoxy then I will QF the sides and paint.
Re: Steve's FS18
Posted: Wed Dec 07, 2016 9:23 pm
by seaslug
As K2 said, no need to wash down the hull. You can wipe down with Alcohol or Lacquer thinner, but it isn't necessary, the little bit of fine sanding dust will just be absorbed into the next epoxy you apply....I also would fair the bottom before adding the skeg, and the best way to fair the bottom is to make a rigid long board, longer than the distance from the keel to the chine, and those 2 points are your guides to sanding it nice and flat. I buy rolls of 3" wide sticky back sandpaper, and for the initial fairing a heavy grit like 36-40 will really mow down some epoxy fast....Don't worry about the 1/8" gap, that's actually perfect, and just fill with any thickened structural epoxy like EZ Fillet, or epoxy with filler you add yourself, but not a fairing filler. Also, good Idea to use 2" masking tape under the gaps so the epoxy doesn't push through and create more work on the back side of whatever you're gluing. Being careful, and working as neatly as possible saves a lot of hideous sanding. I learned a lot on my first build, and on the FS14 LS I just finished today, after glassing the bottom I made only 1 very thorough and carefully applied layer of fairing and after sanding was 95% finished with only a few minor low spots to fill. I had the bottom faired and sanded in probably 6 hours total....Good for you for doing the Toy for Tots, I'm 62 years young, can you send me a toy? Mike
Re: Steve's FS18
Posted: Wed Dec 07, 2016 10:57 pm
by Dutch1
Thanks K2 and Mike.
K2, I hate that you are having to wait due to the cold and rain. You made some incredible progress on your boat. I can't wait to see more pics of it. I'm on the hunt for a heater to use in the garage so I can keep it warm/hot when I work on it. BUT, I'd like to have a shop like yours too!
seaslug wrote: I'm 62 years young, can you send me a toy? Mike
I'm gonna have to leave that one alone. . . too many jokes I'll get in trouble for. . . Maybe over a few drinks at next years get together.
I plan to use a piece of square tube steel about 3-4ft. long with masking tape on it for fairing. I keep plenty around for welding and it will work great as a strong straight edge. Heck, I may weld me up a long board. I have some flat steel too. I just can't find anywhere around here that sells adhesive backed sandpaper with a 40 grit.
Where do ya'll buy yours from?
That's good to hear about the gap. I figured I would just put a lot of epoxy glue or fairing down and flatten it out with the long edge. Wait to dry and sand, and sand. I don't understand what you mean but not a fairing filler? I need to research the difference. Unless you mean a silica (cabosil) filler. That would be too brittle right?
seaslug wrote:just fill with any thickened structural epoxy like EZ Fillet, or epoxy with filler you add yourself, but not a fairing filler.
I planned to use the epoxy filler powder (silica and phenonlic microballoons) I got from BBC to fair with.
seaslug wrote:
Also, good Idea to use 2" masking tape under the gaps so the epoxy doesn't push through and create more work on the back side of whatever you're gluing.
I taped the stations but not the inside of the seams. I saw that a week ago on someones post and thought it was a great idea. I will definitely do that on the next build. I haven't looked under the hull to see if I have that problem but I plan to break out the grinder for that job. If it went through anywhere, it will be up front on the bow.
Re: Steve's FS18
Posted: Wed Dec 07, 2016 11:43 pm
by seaslug
Fairing filler is just what it says, it's only for fairing, not for structural purposes, that's why it's much easier to sand. Fillers like micro balloons are used for fairing. Talk with the guys at Boat Builder central when you order, they'll get you the right stuff..... I have a Ben's paints locally that I buy my sandpaper rolls and discs, but if you don't have a source like that you can order online. I use all 3M paper, but there are other brands of good quality abrasives available. None of the good ones are cheap, but they cut a lot better than the cheap crap, like the junk sandpaper at Harbor Freight. I also bought a Sander at Ben's that's made by R&H and is 16" long by 2 3/4" wide and holds 3M Automotive Green Corps File Sheets, that I use with 36 grit, and this will eat epoxy like butter, and 1 piece of paper lasts forever.
Re: Steve's FS18
Posted: Thu Dec 08, 2016 12:03 am
by Dutch1
Thanks for the info!
Re: Steve's FS18
Posted: Thu Dec 08, 2016 12:17 pm
by tcason
I buy all my paper from
https://www.woodworkingshop.com/
they have a great selection and great technical support - just call them and they will guide you to correct paper for your sander and application
Re: Steve's FS18
Posted: Thu Dec 08, 2016 7:53 pm
by Dutch1
Thank you!
Re: Steve's FS18
Posted: Sat Dec 17, 2016 9:11 pm
by K2FS18
Dutch, what color do you plan to go with?
Re: Steve's FS18
Posted: Sun Dec 18, 2016 8:54 pm
by Dutch1
K2FS18 wrote:Dutch, what color do you plan to go with?
Hey man,
I was thinking about a color similar to the "Blue Tone White" on the EMC color chart page at BBC.
http://boatbuildercentral.com/emc_color_chart.pdf. I don't want it white but I don't want a blue either. I don't think I want to spend the $$$ for EMC paint on this boat. So right now I'm trying to find a good quality paint with a similar color that isn't that much per gallon. I don't want cheap stuff but I don't want to buy $250/gallon primo either.
I plan to get this boat in some tight situations and that's the whole point of building it. I've done a lot of kayak fishing around here for several years and I can't wait to get this boat in some of those areas where no one takes boats. BUT, I want to build more of a bay/offshore boat next and that one will definitely have a good quality paint on it.
I added a skeg yesterday and don't like it at all. I think it's too tall. I'm going to cut it down lower in the morning. I could only get my hands on some 1x4 cypress so I had to rip some pieces and epoxy glue them together. I just bought one of those F50 sonic tools yesterday so that will be the first job for it.
I have a gallon of fast hardener coming from BBC this week and I plan to use it to make some good progress over the next two weeks and not waste time waiting on epoxy to cure. I'll probably still use the slow hardener for the graphite when I get to that job.
The next two weeks plans are to finish the skeg, add a hard chine/transom edge, install the rubrail, fair the hull, and hopefully graphite the bottom. I'll be happy if I can get that done. If the fairing goes faster, I want to paint it too. I want to get this baby flipped!
Re: Steve's FS18
Posted: Mon Dec 19, 2016 9:34 am
by Dutch1
Ken,
Quick update. I did some more research last night. I'm now pretty sure I don't need a gallon and a little goes a long way so I may very well use a really good paint. Plus, I don't want to have to repaint this thing in 3 years.
Jeff at BBC called me this morning and he is looking around for some options in the color I'm wanting. Those guys rock!
Re: Steve's FS18
Posted: Mon Dec 19, 2016 10:03 am
by Jeff
Dutch1, I will get back to you later today or tomorrow with some options on the paint as well as exactly how much paint SeaSlug used on his FS18!! Jeff
Re: Steve's FS18
Posted: Mon Dec 19, 2016 12:29 pm
by seaslug
I saw the email about the paint. So here it goes. I used Awlgrip which is extremely pricey, but I haven't even compared it to other paints because I've worked with it for over 20 years, like the results, find it easy to use, and can purchase locally. That being said, there may be a similar product, or a better one, and possibly a less expensive one. Also, I always seem to have some paint, primer, catalyst, and reducer left over for the next project.....I use the 545 high build primer, and I used more than 2 quarts, so may as well buy the gallon kit. You'll need a quart of paint, price varies by color, 1 pint of brushing reducer, and a quart of slow brushing reducer. These are the minimum sizes they sell, and if you need a second color, you might need another pint of catalyst also, but you won't need additional reducer. It can run into $400.00+ pretty quick, but the results to me are worth it. The finish is rock hard, will not dull or fade, but I don't think drips can be buffed out like some paints. No problem, just don't have any drips, right. If you decide to go with Awlgrip, and if you have any questions about anything before starting, feel free to call or email me.
cowdellm@aol.com 386-864-0720. Mike
Re: Steve's FS18
Posted: Mon Dec 19, 2016 12:35 pm
by bateau-webmaster
Is this what you used for the entire boat, inside and out? I came up with 240 Ft2 of surface area, which for EMC Paints would take a whole gallon to get the recommended coverage @ 3 mils.
Re: Steve's FS18
Posted: Mon Dec 19, 2016 2:15 pm
by seaslug
I used more primer than paint because even though it's very thin going on, you can keep rolling on additional coats one after another without having to let it cure all the way. So I use the 4" roller with the 1/4" nap from Lowe's and roll on multiple coats until I'm satisfied with the coverage. When cured, it sands super easy to a fine powder, and being a high build primer you can actually hide small flaws in the surface by building up the thickness, than sanding. I mostly hand sand with a fine grit like 150. After priming all you need is 2 thin coats of the finish paint rolled on with a foam roller, tipped vertically one time on vertical surfaces, and on a flat surface like the deck just roll on and leave alone to flow out, but if you get bubbles forming I tip immediately with the brush or for small areas I like to tip with a foam brush. It takes less than a quart of paint along with the required catalyst and reducer to apply 2 coats. If you feel a third coat is necessary you'll have plenty of paint left in the quart for that. So for 2 coats of finish; Approximately 16 ounces paint, 8 ounces catalyst, reducer approx 6-10 ounces. The paint and the catalyst ratio of 2 to 1 is critical, not so for the reducer. The paint is deceptively thin, like rolling on water, but don't try and load it on, you'll only end up with runs and sags. First coat will look very transparent, but second coat usually covers enough for me. In a more perfect world, where I had lots more money, Id go for 3 or 4 coats just for the hell of it......This is just for the outside of the hull, the inside I bought another quart of white, of course with additional other parts. So $400.00 is probably the low end with primer, and 2 colors.
Re: Steve's FS18
Posted: Tue Dec 20, 2016 10:13 am
by bateau-webmaster
seaslug wrote:I used more primer than paint because even though it's very thin going on, you can keep rolling on additional coats one after another without having to let it cure all the way. So I use the 4" roller with the 1/4" nap from Lowe's and roll on multiple coats until I'm satisfied with the coverage. When cured, it sands super easy to a fine powder, and being a high build primer you can actually hide small flaws in the surface by building up the thickness, than sanding. I mostly hand sand with a fine grit like 150. After priming all you need is 2 thin coats of the finish paint rolled on with a foam roller, tipped vertically one time on vertical surfaces, and on a flat surface like the deck just roll on and leave alone to flow out, but if you get bubbles forming I tip immediately with the brush or for small areas I like to tip with a foam brush. It takes less than a quart of paint along with the required catalyst and reducer to apply 2 coats. If you feel a third coat is necessary you'll have plenty of paint left in the quart for that. So for 2 coats of finish; Approximately 16 ounces paint, 8 ounces catalyst, reducer approx 6-10 ounces. The paint and the catalyst ratio of 2 to 1 is critical, not so for the reducer. The paint is deceptively thin, like rolling on water, but don't try and load it on, you'll only end up with runs and sags. First coat will look very transparent, but second coat usually covers enough for me. In a more perfect world, where I had lots more money, Id go for 3 or 4 coats just for the hell of it......This is just for the outside of the hull, the inside I bought another quart of white, of course with additional other parts. So $400.00 is probably the low end with primer, and 2 colors.
One caveat to this for EMC, Is that the reducer ratio is a firm 2:1:1. We've had some guys come from Awlgrip over to EMC, and have a hard time because of their experience with Awlgrip not applying to the EMC Reducer ratio. Reducer is cheap, when talking about EMC Paints, so always go with the 2:1:1 in that case.
Also We can get Awlgrip blue tone white (as well as other colors) through one of our newer suppliers.
Re: Steve's FS18
Posted: Tue Dec 20, 2016 12:12 pm
by seaslug
Jamie, can you get all of the Awlgrip colors? If so, I'd prefer buying from you on my next project.
Re: Steve's FS18
Posted: Tue Dec 20, 2016 1:58 pm
by Jeff
SeaSlug, absolutely we can. Just completed an arrangement so that we can sell the full line of Awlgrip--all colors!! We were planning to get the products on our website by early January 2017!! Happy holidays to you and your family Mike--enjoy the cruise!! Jeff
Re: Steve's FS18
Posted: Fri Dec 23, 2016 4:02 pm
by Dutch1
Hmm, I'm thinking that Awlgrip "Blue Tone White" is going to be the one for me.
Jeff,
Do you guys do any samples so I can see how it looks? I'd be willing to pay for a small sample if it was offered.
Re: Steve's FS18
Posted: Fri Dec 23, 2016 5:22 pm
by Jeff
Dutch1, I don't currently have samples at the shop as we don't expect to start selling Awlgrip until just after January 1 but let me see what I can find out next week, after Monday, as most shops are closed on Monday!! I will see what we can get you to look at!! Merry Christmas!! Jeff
Re: Steve's FS18
Posted: Fri Dec 23, 2016 6:42 pm
by Dutch1
Thanks Jeff! No rush at all. I'm still fairing and have to get the graphite on so it will be a good week before I will be ready to paint. Still trying to figure out how hot I can get the garage for graphite.... I'll be posting new pics in a few minutes.
I hope you and the BBC crew have a Merry Christmas!
Re: Steve's FS18
Posted: Fri Dec 23, 2016 8:13 pm
by seaslug
Jeff, I'd appreciate some free samples also, say around 32 ounces. Need to make sure I like the color.....Dutch, FYI, I rolled on the Graphite using a 4" foam roller, even though I recall they weren't recommended, and I doubt I had my garage above 70 degrees, and it came out pretty good. I sanded it down to finish paint anyway, so a perfect finish wasn't absolutely necessary. Mike
Re: Steve's FS18
Posted: Fri Dec 23, 2016 8:46 pm
by Dutch1
Come on man, just a little sample is all I need. If I can do a sq ft of it I will know if it's the right color. It's not like I can take it back to Lowes and tell them I don't like the color and get another gallon. Mixing a small batch would be interesting but should work in theory. Do you think it would?
It's been almost a month since I posted any pics. Enjoy.
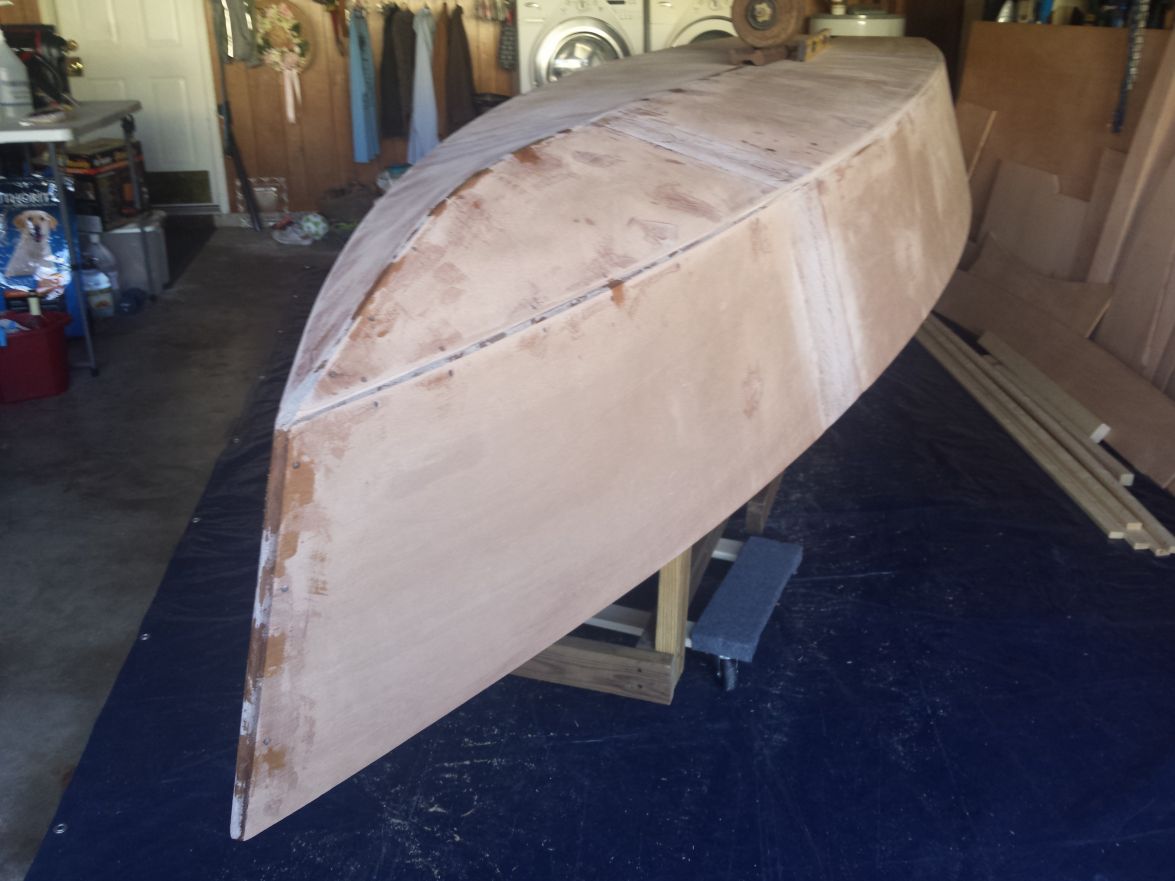
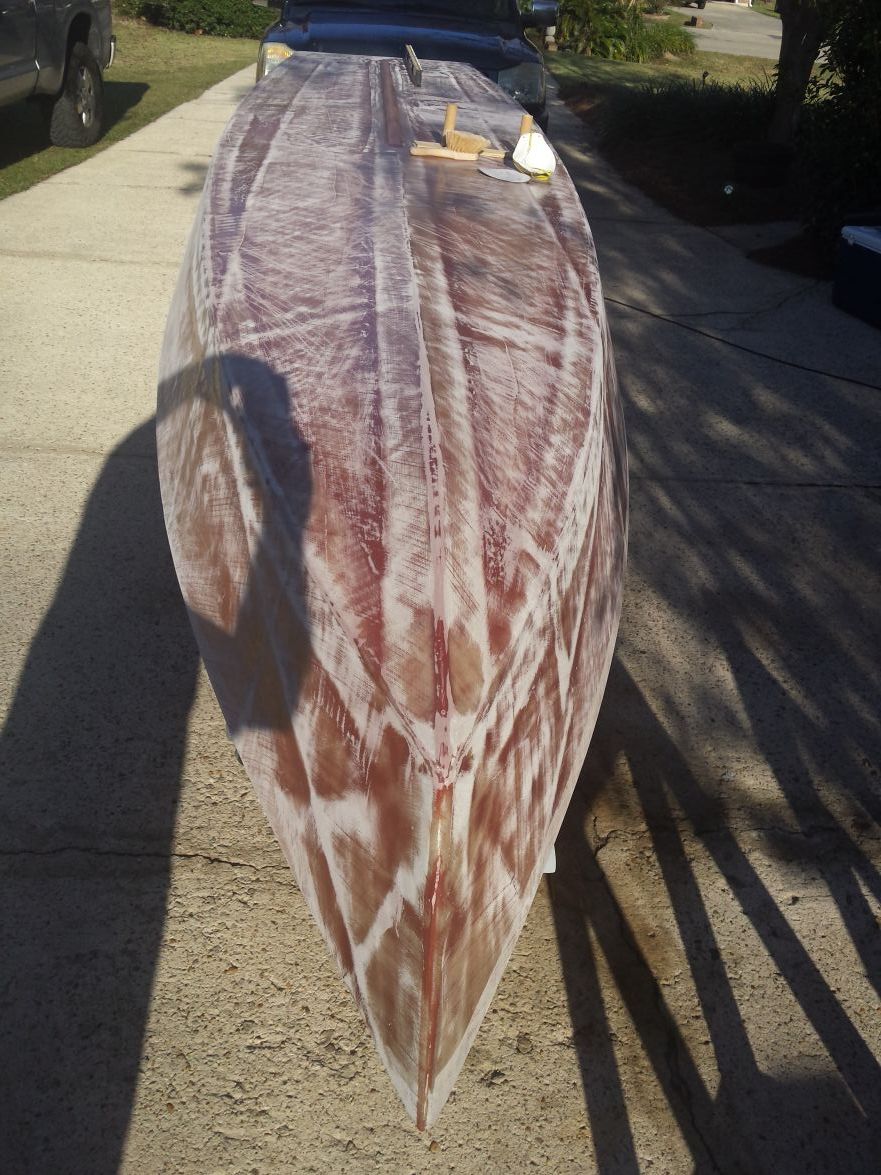
Sanded the hull over a few days to get it right.
I have a 1/8" gap in one spot of the hull I have to fill.
I've never worn out the hook and loop pad on a sander before. Thanks to Lowes, this baby is back in action.
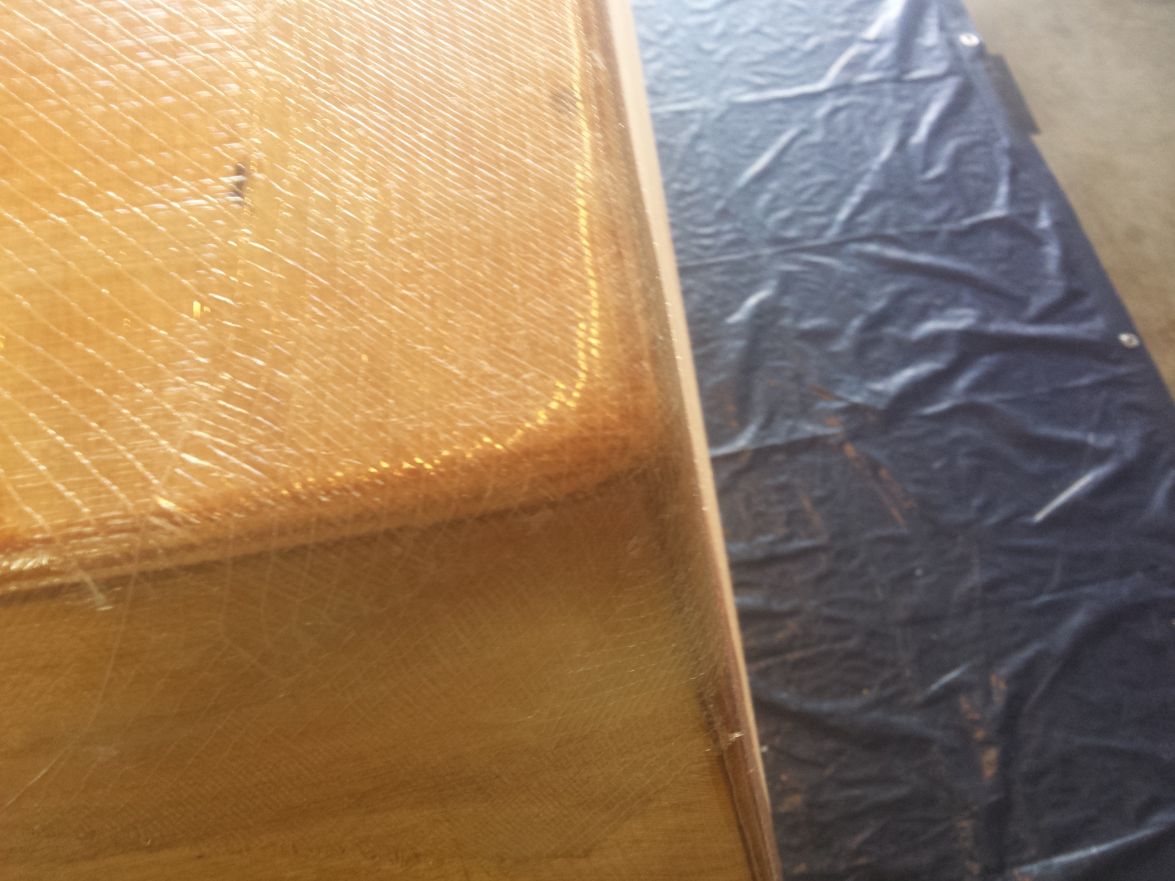
Added a hard chine. Thanks CL!
Grandad taking a little of the edge off of the new hard chine. It's my understanding you don't want a true "edge".
Getting ready for fairing.
Fairing
Ready to dry for the night. It's an old oil heater and it doesn't get too hot so I'm OK with it being under the hull.
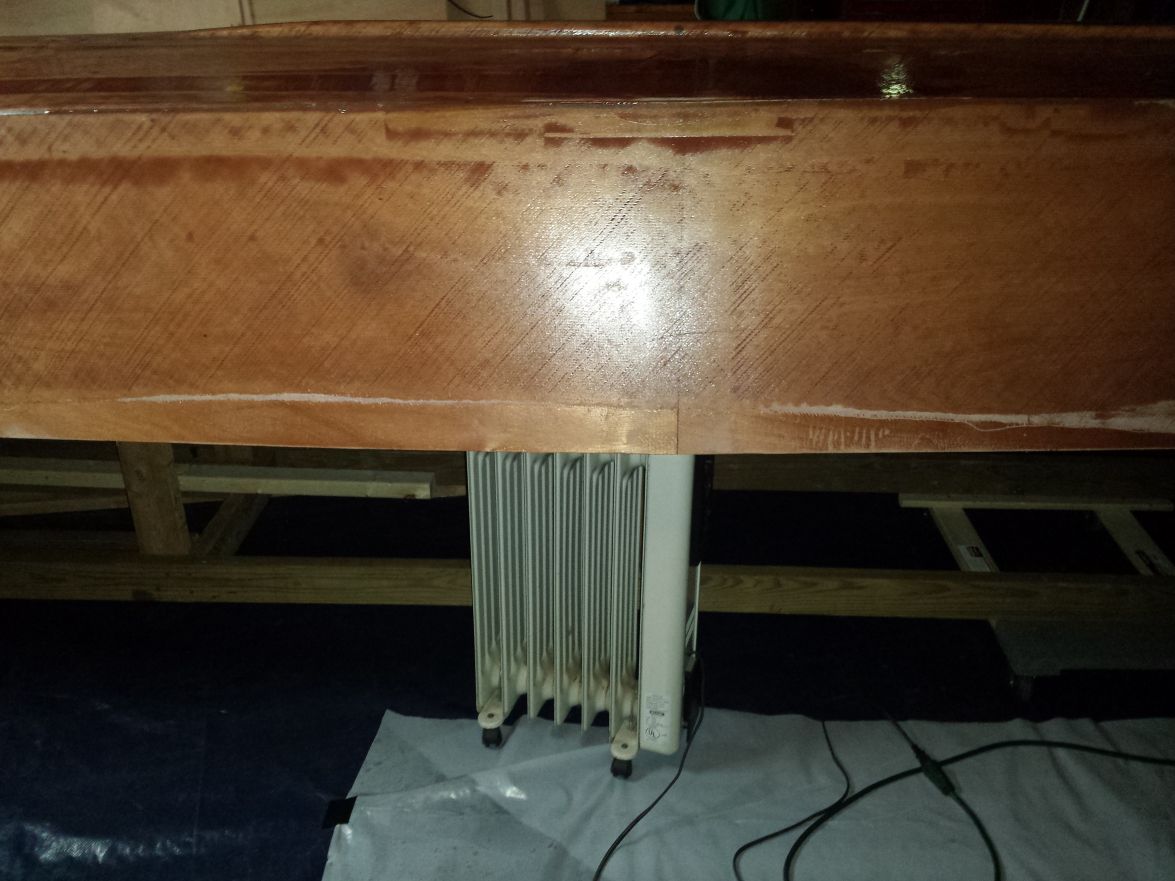
I finished the hard chine last night and the heater helped it to cure by this morning enough to sand. I was able to sand and clean it up fine. Hopefully, it will do the same to the fairing. I will be sanding tomorrow if all goes well. I plan to put the first layer of rub rail on tomorrow morning so it will have a little more time to cure if it needs it.
I switched to a fast hardener with the cooler weather and of course it's 70 something degrees today and will be for the next several. You definitely can't screw around with a batch of that stuff. We'll see how many times it takes me to get it faired. I may switch back to a slow hardener while I'm fairing. I have to build up the back edges on the transom to match the hard chine so I know it will be at least one more coat in that area.
Re: Steve's FS18
Posted: Fri Dec 23, 2016 8:57 pm
by Dutch1
seaslug wrote:Dutch, FYI, I rolled on the Graphite using a 4" foam roller, even though I recall they weren't recommended, and I doubt I had my garage above 70 degrees, and it came out pretty good. I sanded it down to finish paint anyway, so a perfect finish wasn't absolutely necessary. Mike
I already have a handful of the small nap rollers to use but I'll go to my leftover 4" foam ones if I have to in order to finish. Good point on sanding it down to a better quality. I'm only going to use that oil heater and it can get the garage about 70 so I should be OK. What grit did you use in between layers?
Re: Steve's FS18
Posted: Fri Dec 23, 2016 10:14 pm
by seaslug
I hadn't discovered those 1/4" nap rollers until after I did my Graphite, but I would definitely try them. Either way you'll probably get bubbles forming, but I didn't care because I was going to sand and put primer and finish paint anyway. I only sand down to 120 or 150 on everything, don't see any need to get it smoother than that. I saved one of the foam rollers that was saturated with epoxy and Graphite, and it's so hard you can't dent it with a chisel. Tuff stuff. Mike
Re: Steve's FS18
Posted: Sat Dec 24, 2016 1:01 pm
by K2FS18
I had a tough time with rollers. The Rollers made for epoxy delaminated while rolling. I used the "Best" quality 1/4" nap rollers as found in the box stores as suggested by CL. I first poured out the epoxy mix on the bottom of the boat and used a 4" soft plastic spreader to move material over most of the area and then back rolled to even out. I did not have issues with bubbles, but I had to deal with the fuzz. Maybe the foam will work better. Good Luck.
Re: Steve's FS18
Posted: Tue Dec 27, 2016 10:57 am
by Jeff
Dutch1, Sorry for the bad news but after three calls to Awlgrip Distributors and one solid Awlgrip Fan (Seaslug), there are no sample sizes of Awlgrip Paint. It would appear the primary reason for no samples of the paint is that Alwgrip would also have to produce sample size catalyst and reducers as well. Again, sorry for the bad news but on an upside I can get you Awlgrip with just a days notice!! When you have a minute, ask Seaslug how much Blue Tone White you need to paint your FS18!! Happy holidays, Jeff
Re: Steve's FS18
Posted: Tue Dec 27, 2016 4:55 pm
by Dutch1
Jeff, Not a problem. That's what I meant by it would be interesting mixing such a small batch of the ingredients. I think seaslug covered how much it would take to paint the outside in a post a page or so back. It looks like a quart for the outside and another quart for the inside. With the catalyst and reducer for each quart. I have no idea what color I want on the inside yet. I'll look at the color page again and let you know. Plus, I have a lot of time before I need paint on the inside. I can't wait to get her painted and flipped.
seaslug wrote:I used more primer than paint because even though it's very thin going on, you can keep rolling on additional coats one after another without having to let it cure all the way. So I use the 4" roller with the 1/4" nap from Lowe's and roll on multiple coats until I'm satisfied with the coverage. When cured, it sands super easy to a fine powder, and being a high build primer you can actually hide small flaws in the surface by building up the thickness, than sanding. I mostly hand sand with a fine grit like 150. After priming all you need is 2 thin coats of the finish paint rolled on with a foam roller, tipped vertically one time on vertical surfaces, and on a flat surface like the deck just roll on and leave alone to flow out, but if you get bubbles forming I tip immediately with the brush or for small areas I like to tip with a foam brush. It takes less than a quart of paint along with the required catalyst and reducer to apply 2 coats. If you feel a third coat is necessary you'll have plenty of paint left in the quart for that. So for 2 coats of finish; Approximately 16 ounces paint, 8 ounces catalyst, reducer approx 6-10 ounces. The paint and the catalyst ratio of 2 to 1 is critical, not so for the reducer. The paint is deceptively thin, like rolling on water, but don't try and load it on, you'll only end up with runs and sags. First coat will look very transparent, but second coat usually covers enough for me. In a more perfect world, where I had lots more money, Id go for 3 or 4 coats just for the hell of it......This is just for the outside of the hull, the inside I bought another quart of white, of course with additional other parts. So $400.00 is probably the low end with primer, and 2 colors.
The rub rail is installed and drying as I type. I'm going to hit all areas with some 150 grit in a few minutes to give the next layer of fairing compound something to stick to. Then when I get the quick fair from you guys tomorrow (hopefully) I'll do that tomorrow night. I'm on track for getting either the primer or the graphite on by the end of the weekend! It will depend on how good of a job I did fairing.
Re: Steve's FS18
Posted: Tue Dec 27, 2016 5:02 pm
by Jeff
Dutch1, you are making great progress. Make sure to take photos at every step!! Jeff
Re: Steve's FS18
Posted: Tue Dec 27, 2016 5:10 pm
by Dutch1
Thanks! I got chased inside by potential rain about an hour ago so I have to pull it all back out again to sand. . . Sure wish I had a workshop!
Re: Steve's FS18
Posted: Mon Jan 02, 2017 8:48 pm
by Dutch1
Evening folks. It's been an interesting two weeks with all of the holiday gatherings, birthday, and new year with in laws and trying to get some work done on the boat. The hard part is planning ahead so you can complete a task so it will be ready for the next set of tasks when you start again. I wasn't able to get the primer or graphite on it by the time I had to go back to work due to the crazy weather we've had the past few days. If I hadn't lost so much time the last 3-4 days perhaps I would have been able to get to that point.
Enjoy the pics.
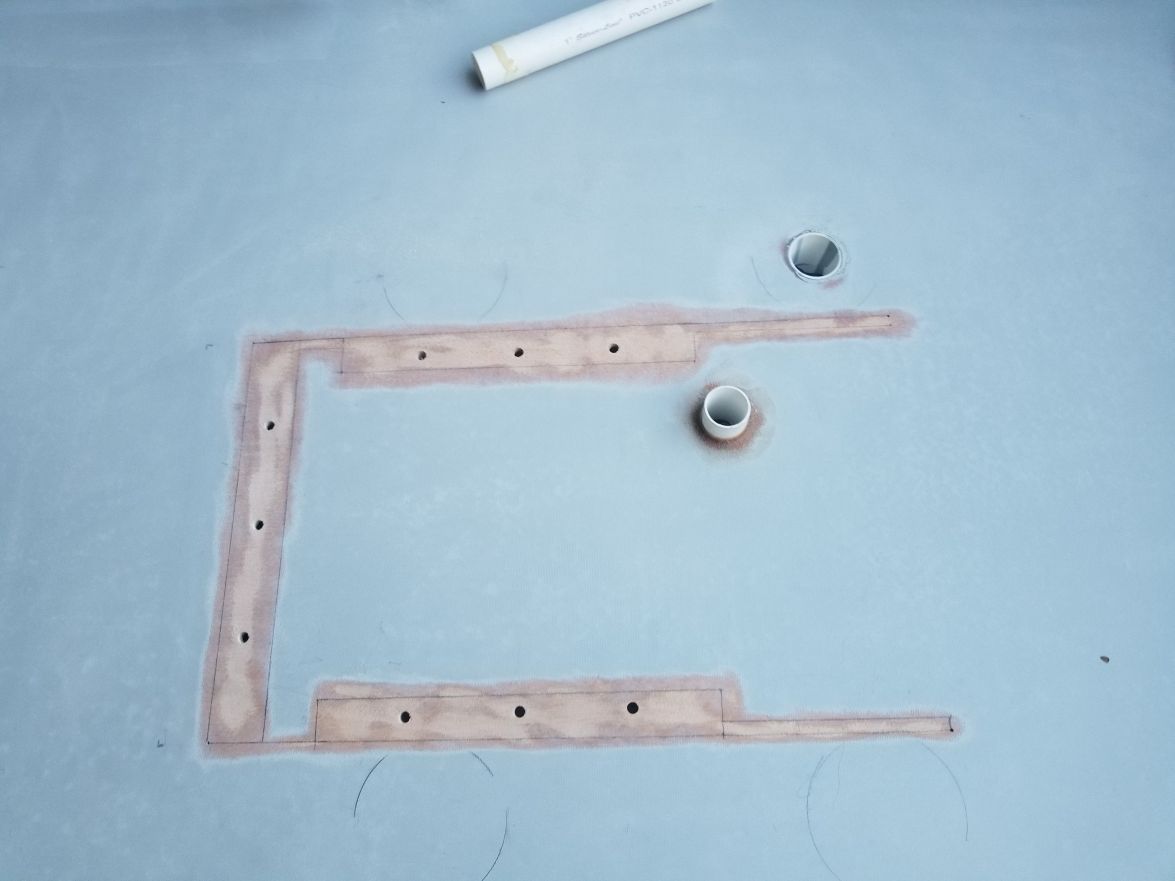
I had an air bubble in the hard chine edge I found while sanding. It ended up being a little smaller than an english pea. I ground it down and prepared to fill it the next time I had something to use.
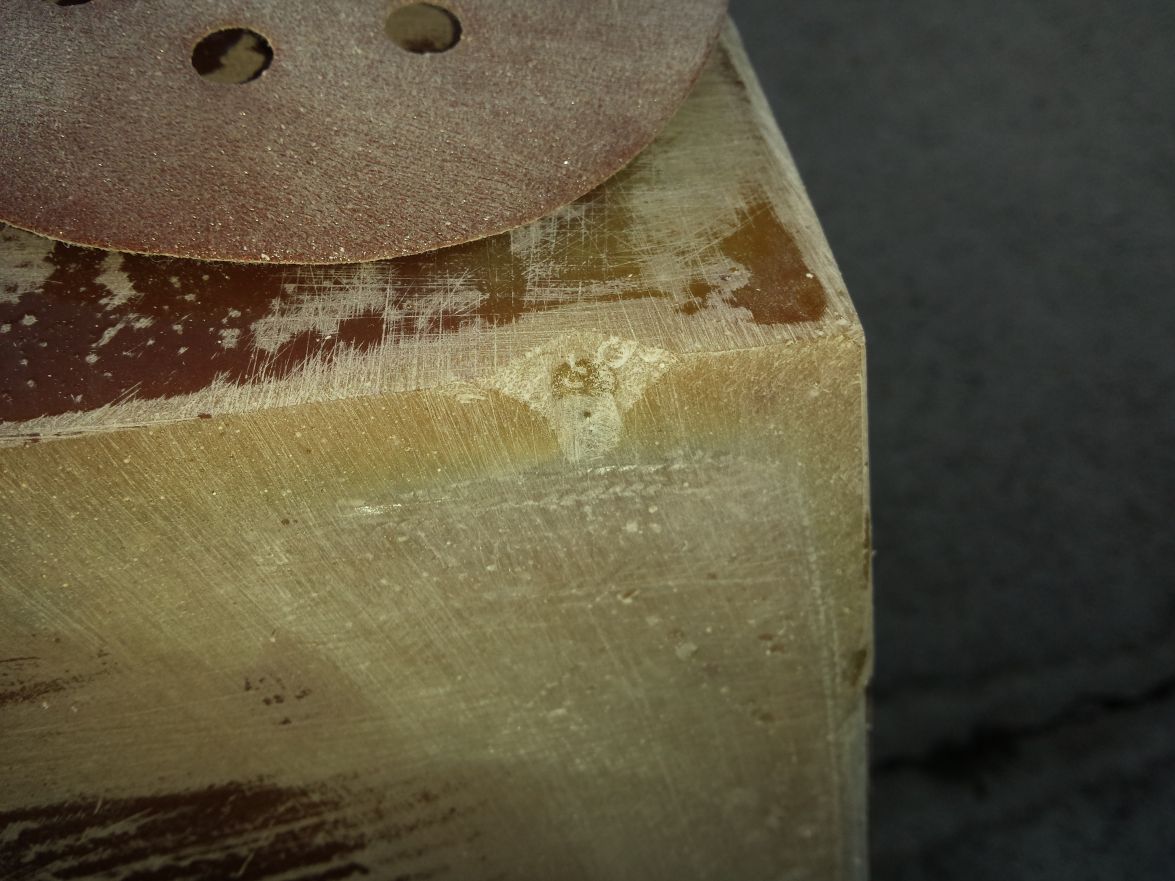
I used the silica/microballoon mixture to start fairing the hull. It sat over 24hrs so I sanded all of the smooth spots to give the next layer some teeth.
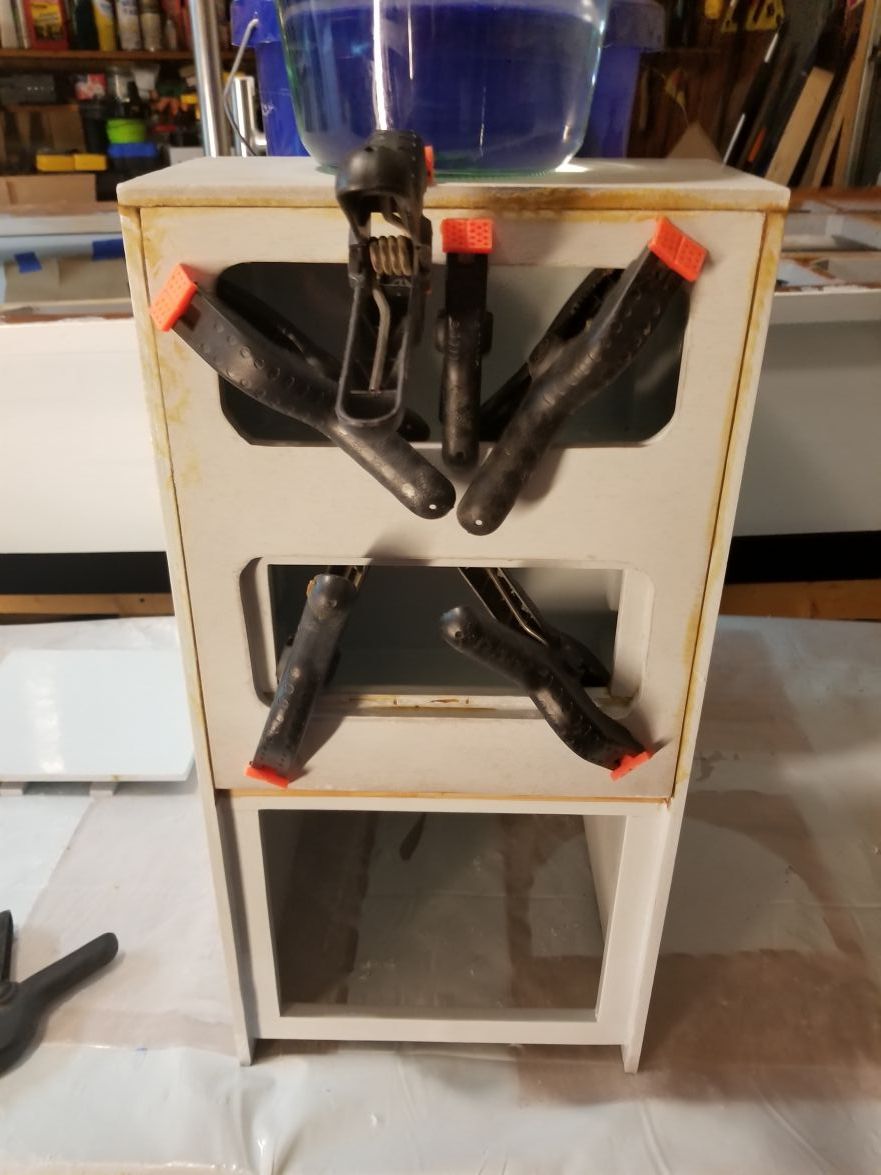
My grandad was able to help a few days. We were adding the rubrail here.
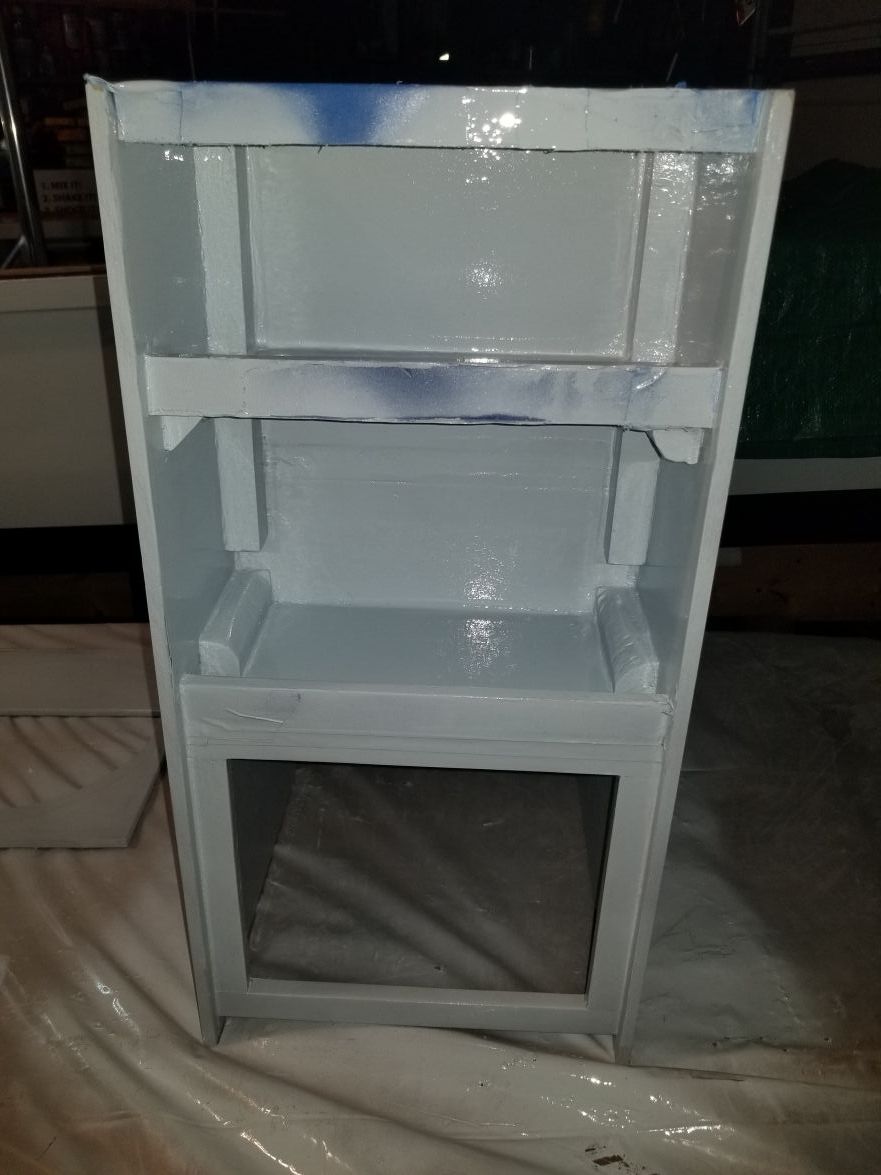
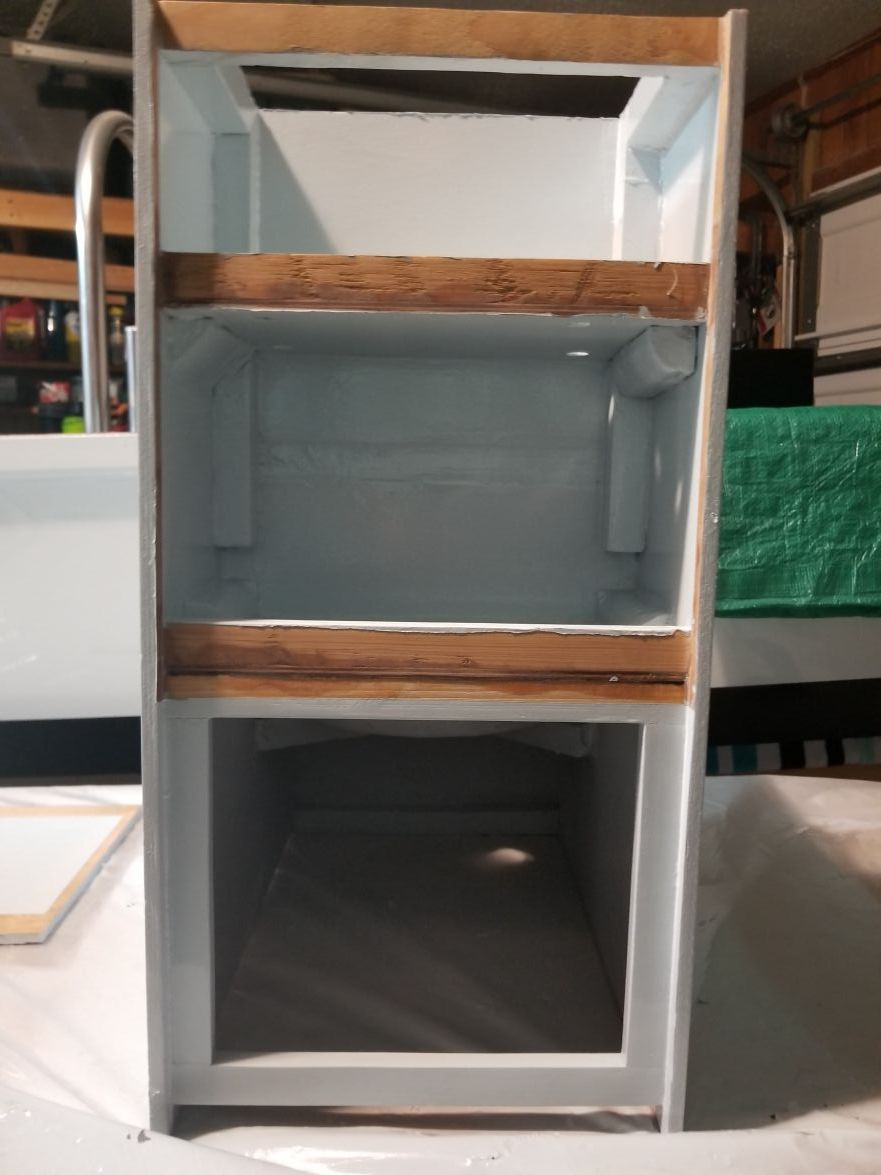
I had some ideas on what to do for the nose but just ended up cutting it and trimming some 1x4 cypress to epoxy glue in and laminate the two pieces together.
Bottom piece in
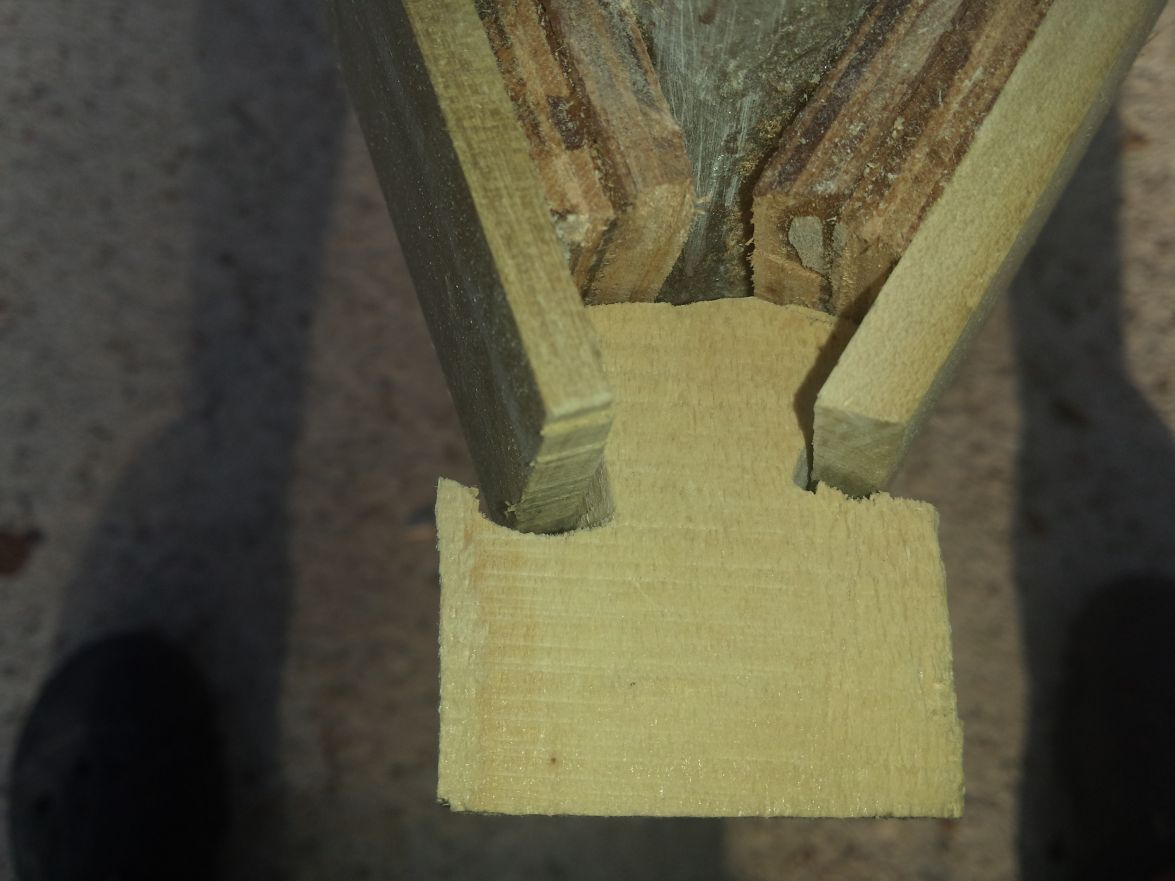
Top piece in
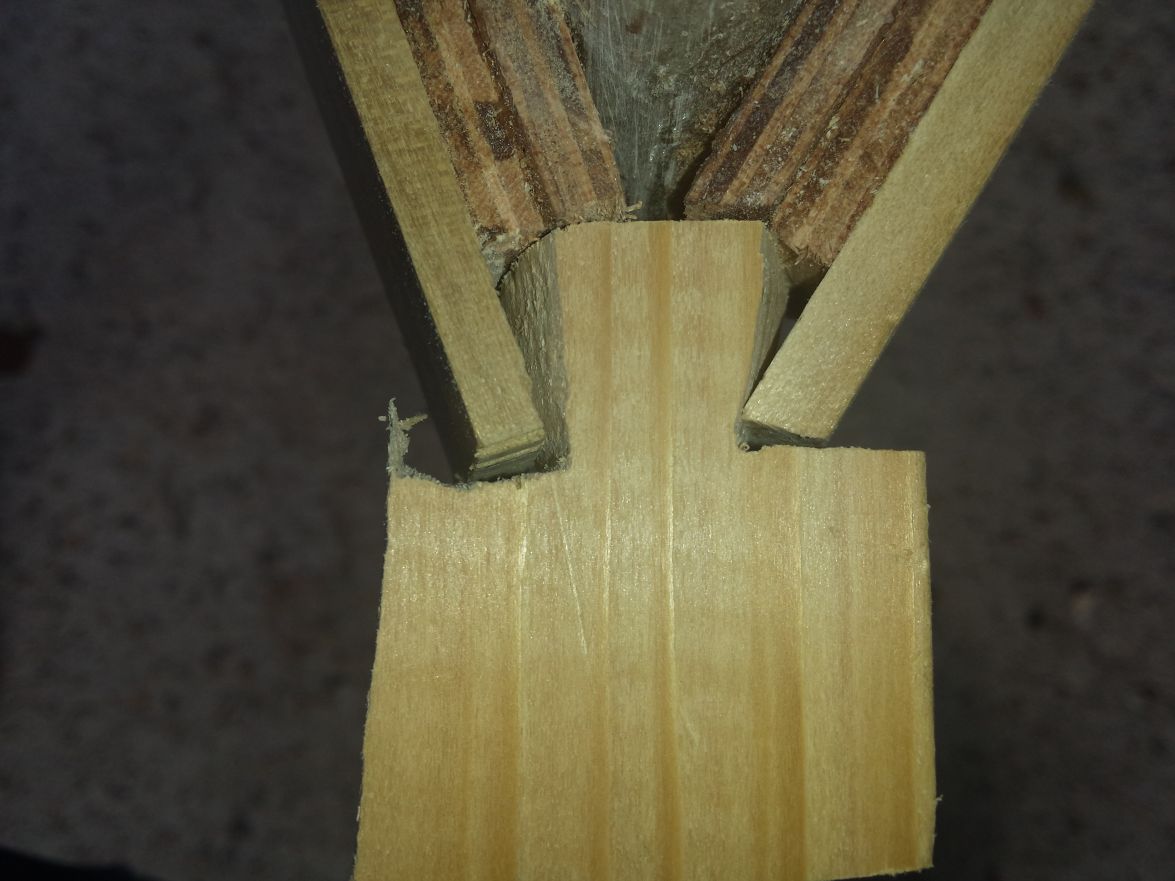
Completed. I may round off the tip a little more
I built up the back transom edge, the air bubble, and the transition on/off the keel with some milled glass and wood flour.
I rounded off the fillet from the hull to the rub rail with a 1" dowel rod all of the way around. I think it turned out ok.
I learned quick fair doesn't appreciate being placed in a sealed gallon freezer ziplock. . . My plan was to just squirt it out where I needed it. I started in one spot and just placed the bag on the hull while I worked on that section. I looked up after a few minutes and it was steaming. It literally melted the bag. This picture was taken after a few minutes and it wasn't steaming as bad. I first threw it in a bucket then thought better and put it on top of the trash can. It had already created a firm blob in the middle and when I bent it the whole thing split.
This is how you waste a 9oz batch of quick fair. Ouch$$$

Needless to say I was pissed. The good news is after speaking with Jeff and SeaSlug about what happened, they gave me some pointers and it works great.
Since I'm building in the garage, I don't want to sand too much inside so I roll the boat out on the driveway to sand. The last few days it has been raining on/off all day so I've been rolling it inside while it rained and back out to work on it some more. Today, I attempted to get one last layer of quick fair down and it was so windy I kept getting leaves on the hull. I will definitely build some kind of lean to before I start another build.
I may work on it at night this week but I do plan to have it sanded and ready to paint the primer on next weekend. We will see. My right elbow will appreciate the rest too!
Re: Steve's FS18
Posted: Mon Jan 02, 2017 9:20 pm
by Jeff
Dutch1, great progress and really nice documentation of your build!!! Also, great to see your grandfather participating in your build!! Great for him and good for you to include him!! Happy New Year!! I will call or mail you tomorrow regarding the Awlgrip paint!!! Jeff
Re: Steve's FS18
Posted: Mon Jan 02, 2017 11:24 pm
by JaredH
Awesome progress! I like what you did at the bow with the rub rail filler piece.
Even working on a flat piece of cardboard I had some quickfair go a bit stiff on me yesterday and Friday. Small batches seemed to be the key for me. I found that 4 plastic spoon scoops of the brown with 2 of the white was a good amount, no idea on how many ounces that is though.
I hear you on the sore elbow, after 3-4 hours straight last night with the longboard I decided to take tonight off. Tough work!
Re: Steve's FS18
Posted: Tue Jan 03, 2017 12:12 am
by Dutch1
JaredH wrote:Awesome progress! I like what you did at the bow with the rub rail filler piece.
Even working on a flat piece of cardboard I had some quickfair go a bit stiff on me yesterday and Friday. Small batches seemed to be the key for me. I found that 4 plastic spoon scoops of the brown with 2 of the white was a good amount, no idea on how many ounces that is though.
I hear you on the sore elbow, after 3-4 hours straight last night with the longboard I decided to take tonight off. Tough work!
Thanks Jeff and JaredH.
JarehH,
I finally went out and bought a $14 scale from WalMart and I'm using that to measure out the Quick Fair. Your scaring me with the spoons! I'm down to 3oz batches and that is working very well and goes a long way.
I think I'm in a vicious circle with the fairing. I'm convinced the more I fair the more work I make for myself. I'll sand down what I have and take a long look at what's left. I have essential tremor which makes my hands shake and it is very hard for me to make a smooth line like I need for fairing so it is frustrating and more time consuming (sanding). If you look at the last pic with the leaves you will see the bumps on the long strip of quick fair. I can only get rid of it by applying a lot of pressure but then it bends the spreader and removes most of the quick fair. At least the stuff is easier to sand. . .
Re: Steve's FS18
Posted: Tue Jan 03, 2017 8:38 am
by stickystuff
Get yourself a 4 or 6" drywall knife.When you make the initial spreading just tilt the blade with about 1/4 bend Then after the initial spread go back and almost lay the knife down on the flat of the blade ,then press down and pull forward spreading the mix. I use a 10 or 12" knife for a wider spread and cover more territory quicker. I have done a lot of drywall in the past and still have all or most of my tools.I have even used a 16 or 20 " paint edger. The one that you use on the edges of trim to keep paint from getting on the wall etc.For large areas I use micro balloons. It covers a lot of area, cheaper than easy fair. It takes a little longer to sand out. I have an 80 gallon two stage air compressor and an air file that helps to do all the elbow work. I have many air tools so you have to have a large storage tank as well as a lot of air. Thats why I have a two stage compressor. When you make your first pass you can see the high and low spots due to the color of the faring compound. It will be a redish in color. Then I use a long aluminum straight edge 3 or 4ft, and lay id down on its edge and you can see if you are high or low. If its high take some more off. If its low then next time you are ready to mix just skim over the shiny parts.That is what you see when you are not all the way down to level . Make sure you clean all the epoxy mix off your tools when done. If it hardens on then its is a biatch to get it off. Have fun and Happy New Year. (This is for full size boats , not model scale, which is really neat to look at. I will be watching for more pics.
Re: Steve's FS18
Posted: Tue Jan 03, 2017 8:54 am
by stickystuff
Another thing I use . I save all the yogurt cups. Wash them out and Stash them in my mixing cart. 2 to 1 mix easy to do. Two cups epoxy, one cup of hardener then mix together and then ad your faring comp, silica or microballoons. Ad a little at a time to the consistancy you want. Adding a little silica to the balloons will help to keep it from sagging on edge work.Another, Small solo cup and one reg size solo cup.The top ridge of the cup, you see it just below the very top approx. 1/2" Small cup is for hardner, standard cup at that same ridge is for epoxy. The small cup is one part e, big cup is two parts of resin. Gives you an exact mix. 2 to 1. No need to go out and buy a scale.

:

OK< My tips for the new year.
Re: Steve's FS18
Posted: Sun Jan 08, 2017 1:01 am
by Dutch1
Thanks StickyStuff! I've been using a 6in drywall knife and/or the paint edge thing (whatever it's called) to apply the fairing compounds.
I didn't touch the boat all week. That is a first for me since I started the build. It was hard but I knew I needed to give my right elbow some rest and by doing anything it would only delay the effort. I sanded for a few hours last night and marked a few more low spots. The elbow is pretty good today. I think once I fill those spots I'll be ready for primer. It's driving my family and friends nuts being so picky on the fairing. I think they want to see it done more than I do. I just want it to look good.
Today, it was 30 degrees this morning and never got over 45 here all day. It's supposed to be 26 tomorrow and possibly the next morning. So much for a lot of boat progress this weekend!
I helped a good friends son do some welding on his jeep to pass the time this afternoon. I ended up showing and coaching him how to fabricate and weld what needed to be done. He had never even used a grinder before today much less weld. I didn't weld a lot today but he did for the first time. The older I get, the more I do enjoy days like today. I don't know it all but I wish I would have had someone tell me 20 years ago and let me try what he learned today. It took me years to learn the things he learned in one afternoon. I guess that's why I like this forum so much. Everyone wants the other to succeed.
I'll warm up the garage and fill the last few low spots tomorrow afternoon and wait for Jeff's answer on the System 3 primer and Awlgrip adhesion question in another post Monday. It's supposed to be back in the 70's next weekend so the plan for now is to prime it next weekend.
Re: Steve's FS18
Posted: Sun Jan 08, 2017 10:15 am
by Jeff
Dutch1, I will get you an answer on the S3 Highbuild Yacht Primer use with Awlgrip tomorrow unless someone like SeaSlug gets you a answer first!! It was 53 degrees this morning and the winds are blowing!! Seas are projected at 13-15 feet off Stuart, Florida!!! Jeff
Re: Steve's FS18
Posted: Tue Jan 17, 2017 8:57 pm
by Dutch1
It's been a few weeks since my last update. Two weekends ago it was too cold to do anything (highs of low 40's) and this last weekend it was in the high 70's so I made it a marathon weekend and got as much done as I could. It's supposed to be warm this weekend but it will be raining.
I tried Jared's spoons method of measuring the quick fair. It worked fine. I didn't need three ounces at a time.
I spent way too much time working on the transition from the rub rail to the hull. I used a 1" dowel rod to lay the epoxy glue bead to make it smooth. When I sanded it, I wrapped the dowel rod in sand paper and went at it. Weelll, I also sanded a nice groove too that I had to refill. ROOKIE mistake. That was a pain to fair and I won't do that again. It also used a lot of epoxy.
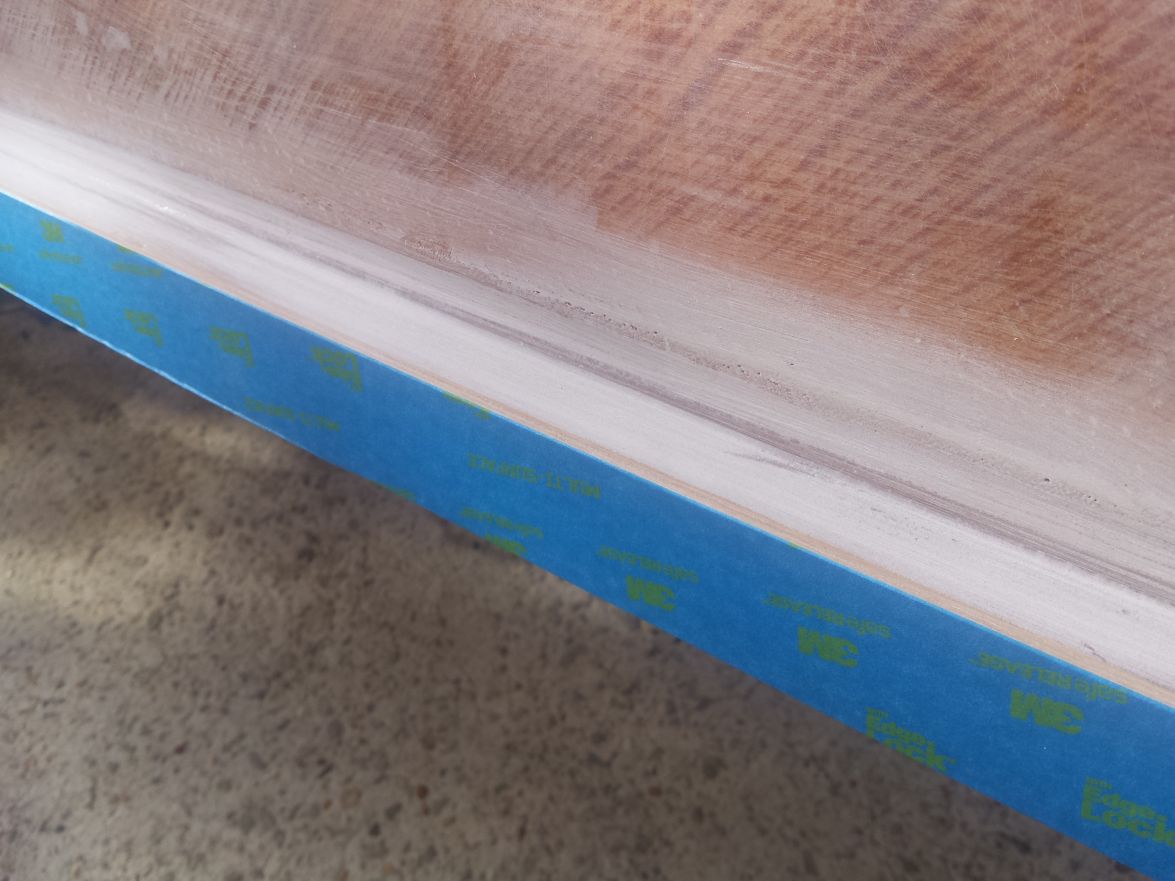
I don't know how many times I've sanded this hull but I thought I had it to the point to go ahead and prime it to get a good look. I'll fair the next boat differently. I used the System Three primer and was very impressed. It is very forgiving with a two hour initial cure time which I liked. The first coat covered it pretty well but you could still partially see through it. It took 10oz to cover the sides and transom for the first coat. I used the last little bit to paint part of the bow.
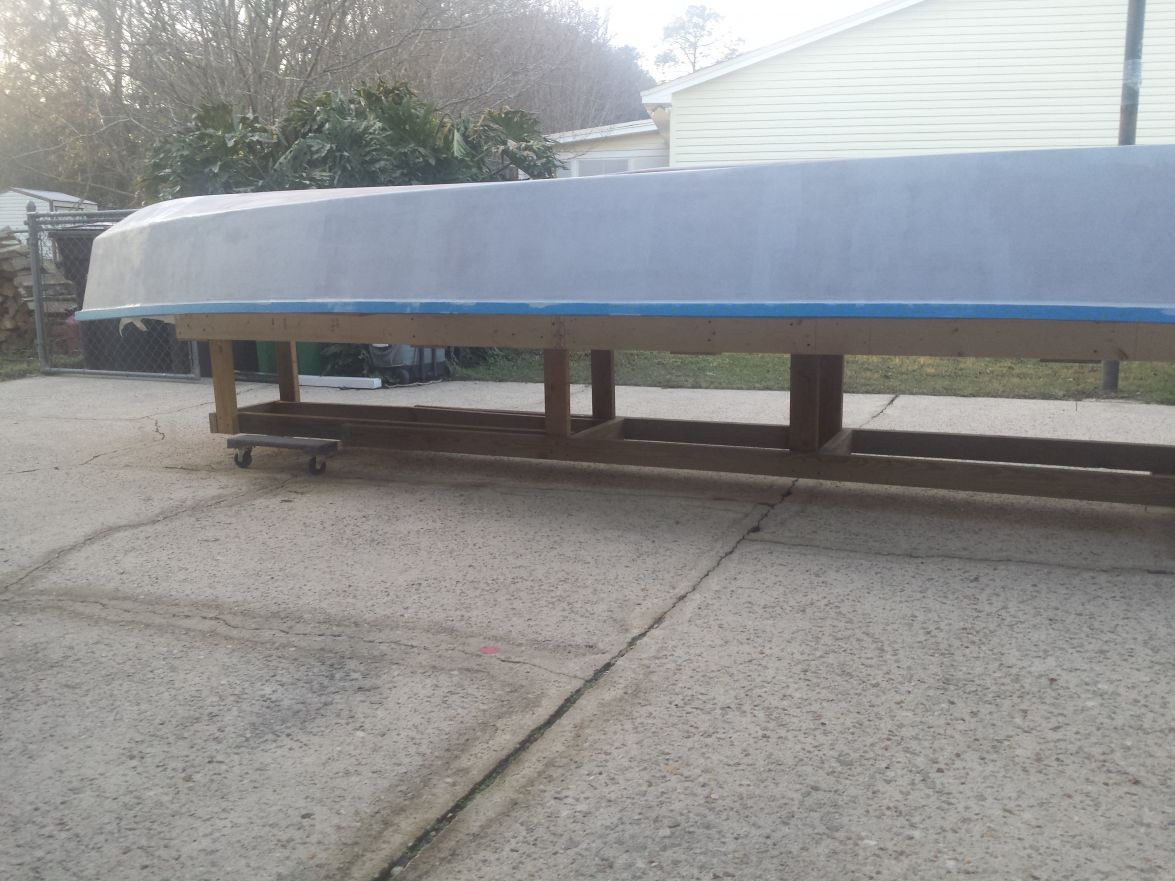
I added the second coat later that night and it covered it well. It was the first time I could really get a good look at the boat and see how fair it was. I was very happy with the way it looked. Nice design Jacques! I still had a few spots to fair though. I mixed another 10oz batch for the second coat and it went a lot further so I used the last bit on the bottom. It also almost completely filled a few of the small spots I thought I would have to quick fair.
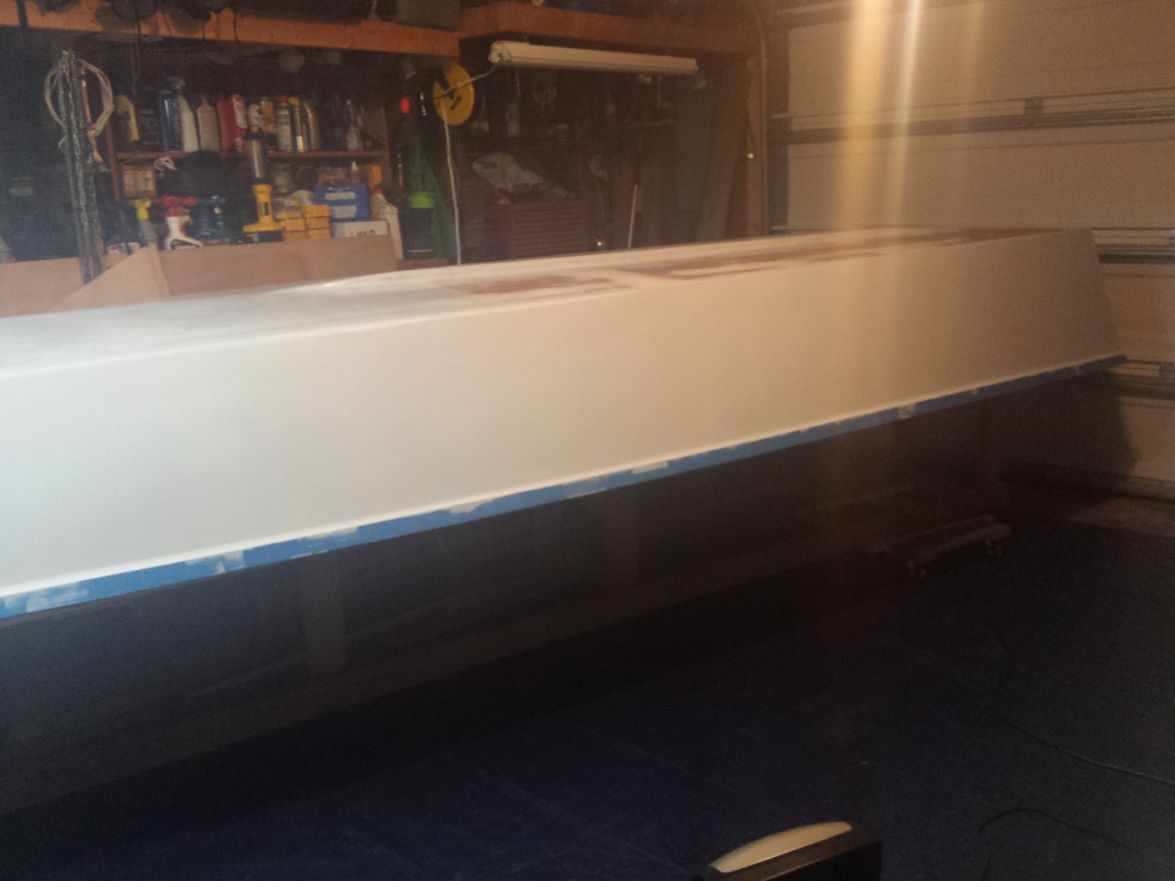
I pulled it back out the next day to get a good look and decide what to do next. I ended up going ahead and sanding the hull. Then I began taping and adding a coat of graphite. Since it was 75 degrees I used the slow hardener. It also gave me a little more time to work it which I was happy to have since I've never painted a coat of graphite epoxy on anything before. I mixed a 12oz batch since I was going over the bow. I used a full size 3/8" nap roller from Lowes. It had to have soaked up a good 1 1/2oz's. I barely finished.
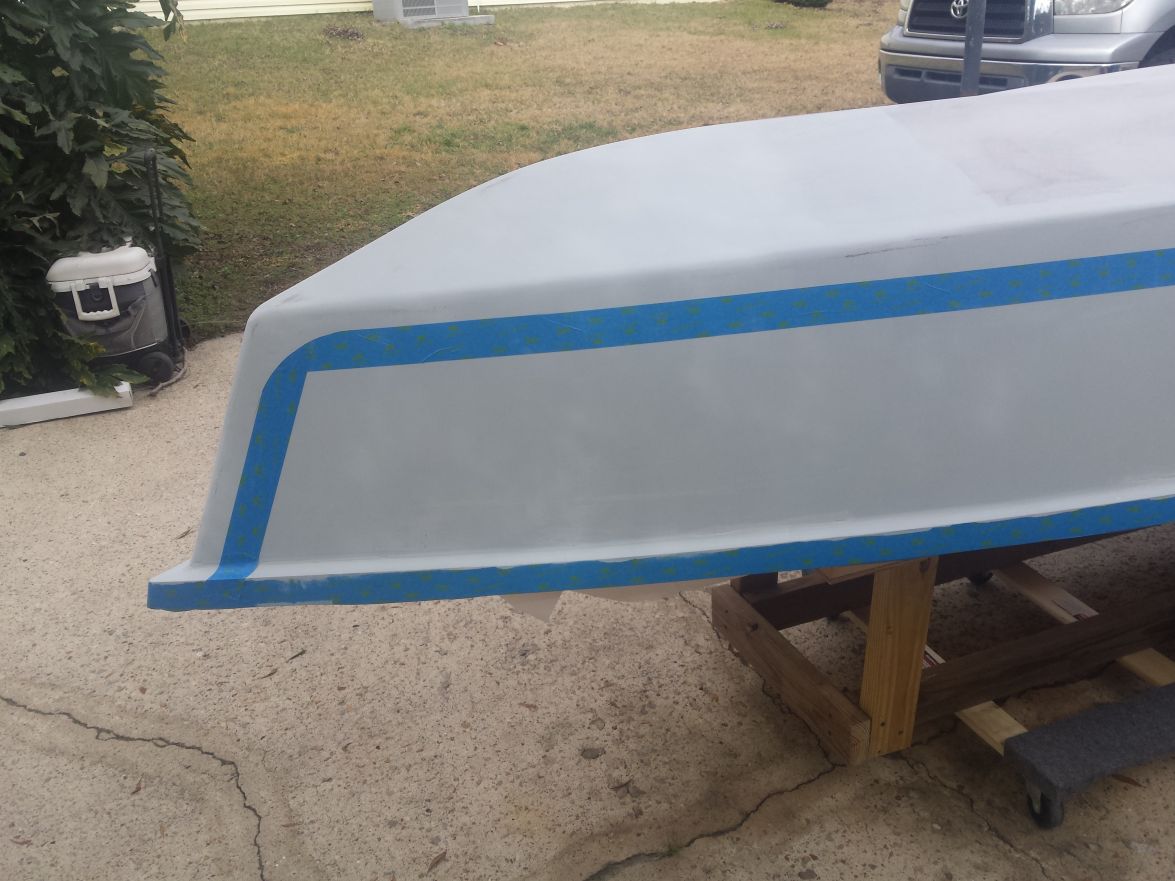
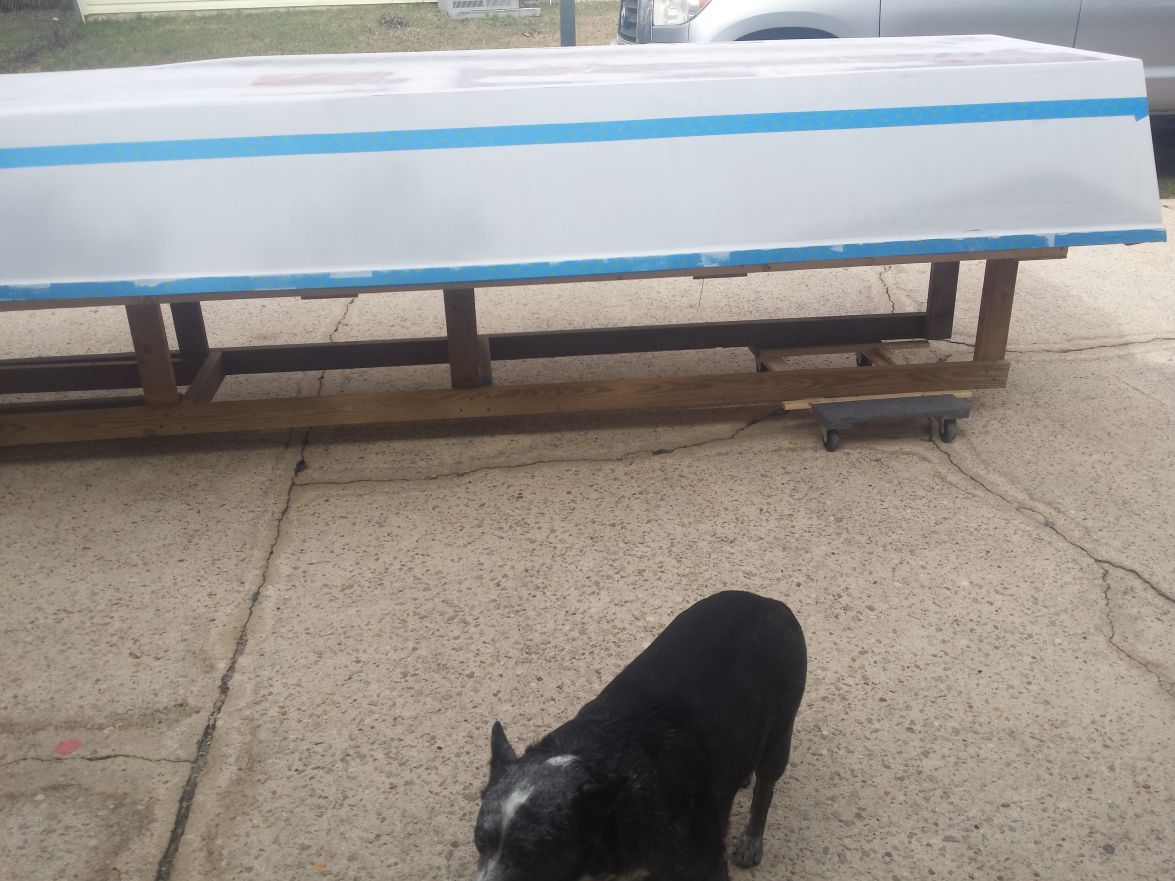
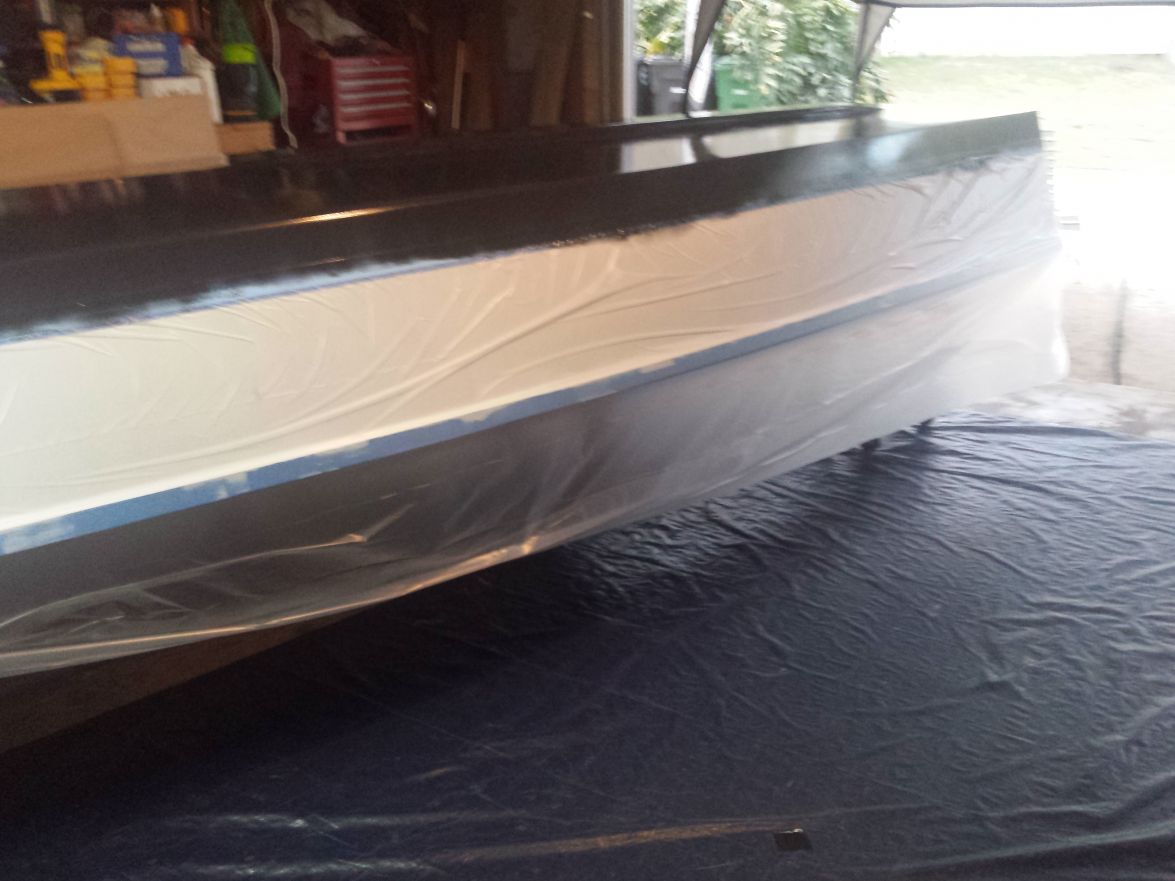
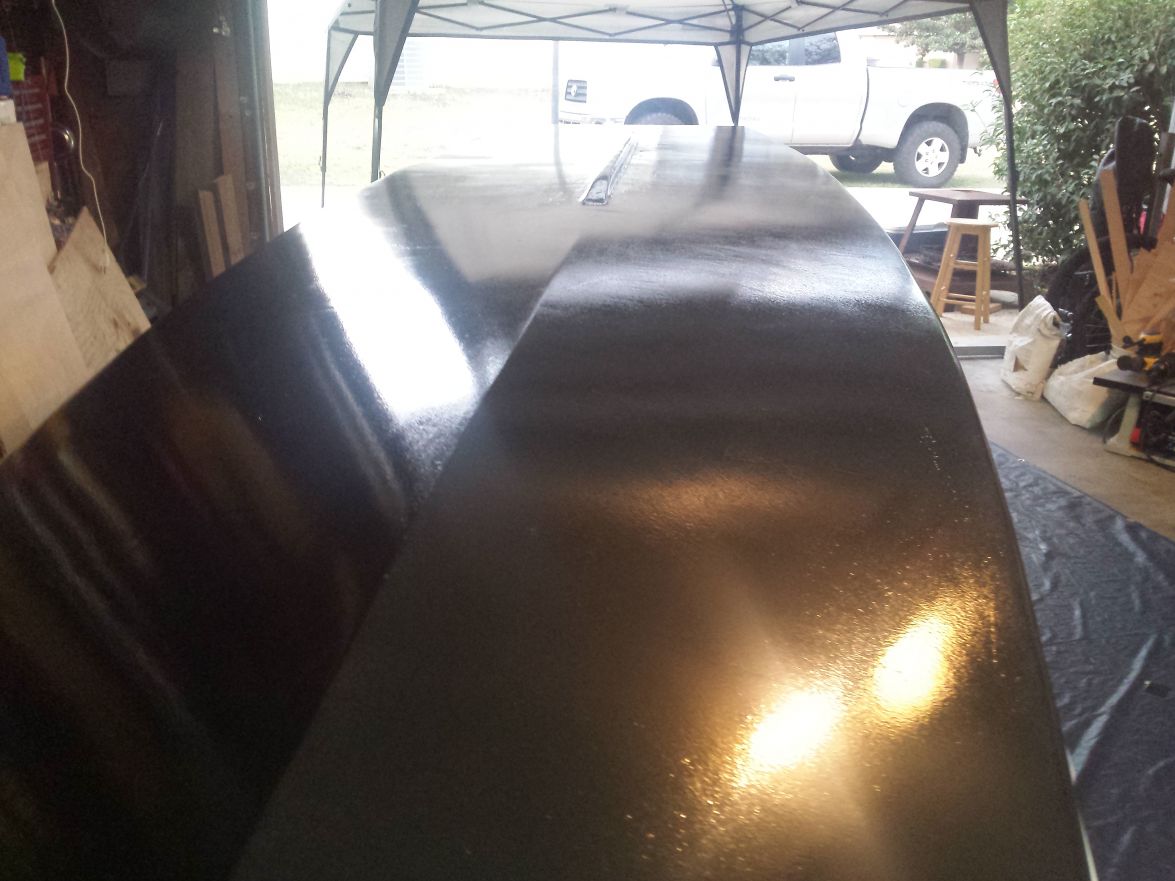
Not too much fuzz. Maybe 7 spots. I used my hands with latex gloves on to try to de-fuzz the rollers. I thought I did it good enough. Apparently not. There are a few spots that could be smoother but I think I'll leave it alone. If I do, I'll sand it and then quick fair the spots. I'll wet sand the graphite this week and try to get another coat of graphite on one night. I might have to take the weekend off of boat building with all of the rain headed this way.
Re: Steve's FS18
Posted: Wed Jan 18, 2017 6:10 am
by Jeff
Dutch1, I think you are really looking good!!! Jeff
Re: Steve's FS18
Posted: Wed Jan 18, 2017 1:07 pm
by Fuzz
Nice job with the graphite! Wish mine looked that good.
Re: Steve's FS18
Posted: Wed Jan 18, 2017 11:25 pm
by Dutch1
Thanks Jeff and Fuzz. I sanded the graphite tonight and added another 12oz (12oz epoxy and 3oz graphite) coat. Several mosquitos and other bugs decided to crash the party but at least they didn't decide to do the backstroke down the hull. They stayed in place where the landed. We'll see how it turned out tomorrow.
Re: Steve's FS18
Posted: Sun Feb 05, 2017 6:56 pm
by Dutch1
Finally got the boat flipped today. Between work and weather that was too cold to paint graphite on the hull it burned up three weeks. I put the last coat of graphite on yesterday (12oz epoxy and 4oz sifted graphite) and am pleased with the way it looks. I used the heater in the garage last night and pulled it out in the sun this morning to finish curing the epoxy before we flipped it this afternoon. It's good to see it from this upright angle and now I can make some progress on the inside. Pics later. You've seen them before. Same ol' stuff. I left it primed on the sides. I'll flip it again before I finish the inside to add the finish paint once it warms up more.
Of course it's supposed to be close to 80 the next couple of days and I have to work. It would be nice to take advantage of the warmer weather. It's good to see some of the other FS18 builds coming along.
Re: Steve's FS18
Posted: Sun Feb 05, 2017 7:08 pm
by Jeff
Dutch1, pictures are never old, please update when you have time!! Jeff
Re: Steve's FS18
Posted: Sat Feb 11, 2017 6:44 am
by Dutch1
Jeff. I definitely will post more pics. I had 130 hours of work over the last two weeks and just wanted to post the flip more than anything. We literally flipped it, pulled the stations, placed it back on the strongback, strapped it down and pushed it back inside with no more time to work on it that day. I took a few pics of the process.
I cleaned up and sanded a few areas on the inside where I piped the glue all the way through the other night in preparation for glass. A handful of Kentucky Bourbon Ale's last night and a good night of sleep and I'm ready to go today. I'm going to take advantage of the warmer weather today and get all of the inside glassed. Well, not "all", just where I'm supposed to fiberglass but I'll go ahead and paint on a coat of epoxy everywhere else to seal everything up. I won't be able to touch it tomorrow. I'll try and catch up on the pics tomorrow night.
Re: Steve's FS18
Posted: Sat Feb 11, 2017 8:34 am
by Jeff
Dutch1, wow, you have really been working!! Yes, nice weather down here as well!! I look forward to seeing your photo's!! By the way, is your grandfather still helping you with the build? Jeff
Re: Steve's FS18
Posted: Mon Feb 20, 2017 10:05 pm
by Dutch1
Jeff wrote: ↑Sat Feb 11, 2017 8:34 am
Dutch1, wow, you have really been working!! Yes, nice weather down here as well!! I look forward to seeing your photo's!! By the way, is your grandfather still helping you with the build? Jeff
Jeff,
Sorry, I just saw this response from you back to me today. Yes, he is here just about every time I work on the boat. I'm sure to always take a few pics of him working on it. Two weekends ago he helped tape and glass the inside. This past weekend, he was sanding the inside. We got the stringers tacked in and will get them glassed in soon. I owe you all some pics but not tonight. It takes too long and I'm just stopping in for a quick look.
Steve
Re: Steve's FS18
Posted: Tue Feb 21, 2017 6:22 am
by Jeff
Dutch1, I think it is great that your grandfather is assisting with the build!! I really appreciate those dad/son, dad/daughter or mom/son or any other family builds as I believe this is great for kids to learn and understand building something rather than those inside gamers!!! Nice to see kids/families outside doing something together!! Sorry for the soap box speech!!! Jeff
Re: Steve's FS18
Posted: Thu Feb 23, 2017 11:20 pm
by Dutch1
No problem at all Jeff. I love having him help me on the boat. He is learning as we go along. Sure, it slows me down if I'm being honest but I don't know how long I will have with him so I take it in and enjoy it. I would love my daughters to help me with the build but I just don't want them messing around with epoxy and most of the work these days is either sanding or glassing and that would turn them off quickly. I've been trying to think of how they could help me finish up the boat. I'm sure as I get into the finishing (wiring, etc) of the boat they will help me more.
Now for some promised pics of the boat to date. . .
I put three coats of graphite on it with two coats of primer. I have a few spots to smooth out on the hull but I'll probably wait until we flip it again to paint it to fix those areas.
Letting the last coat of epoxy/graphite cure in the sun.
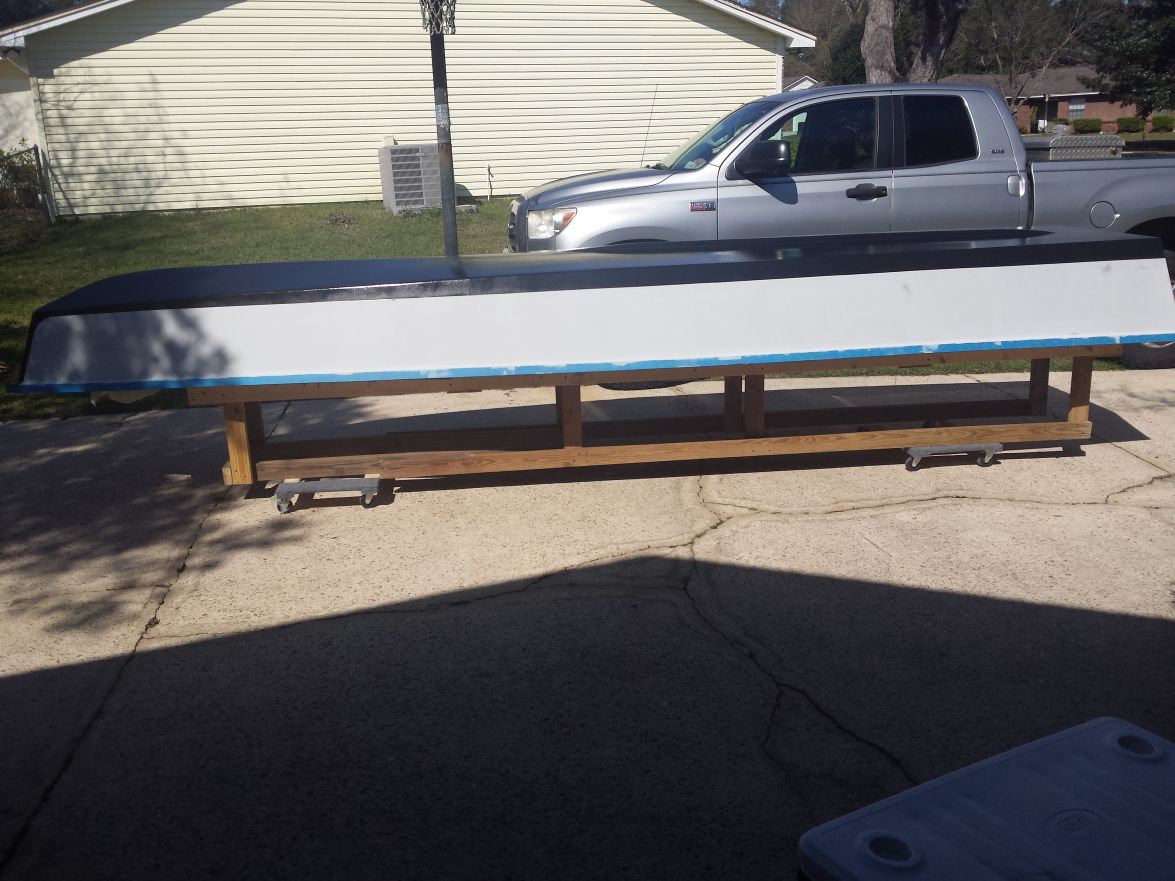
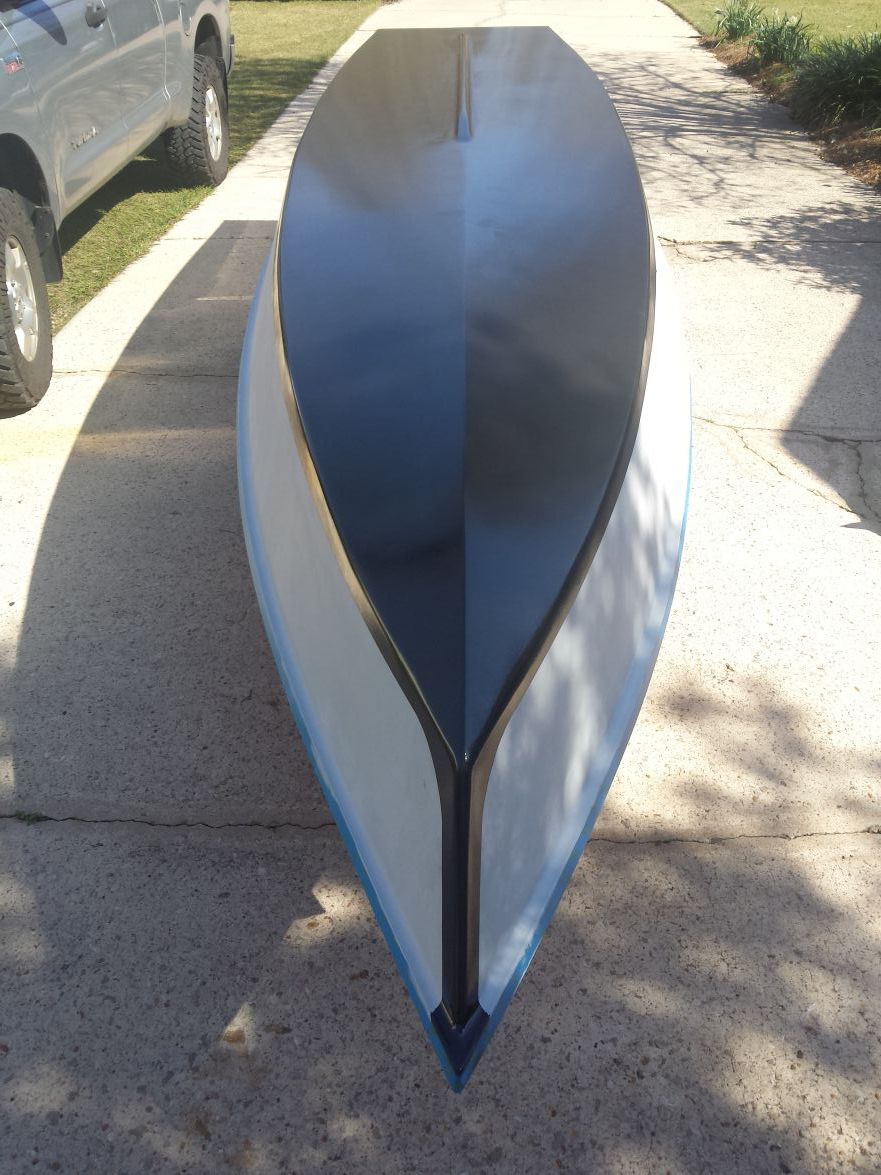
Instead of waiting for warm weather to paint I decided to go ahead and flip it to get started on the inside. I needed the change too since I was tired of messing with the outside of the hull.
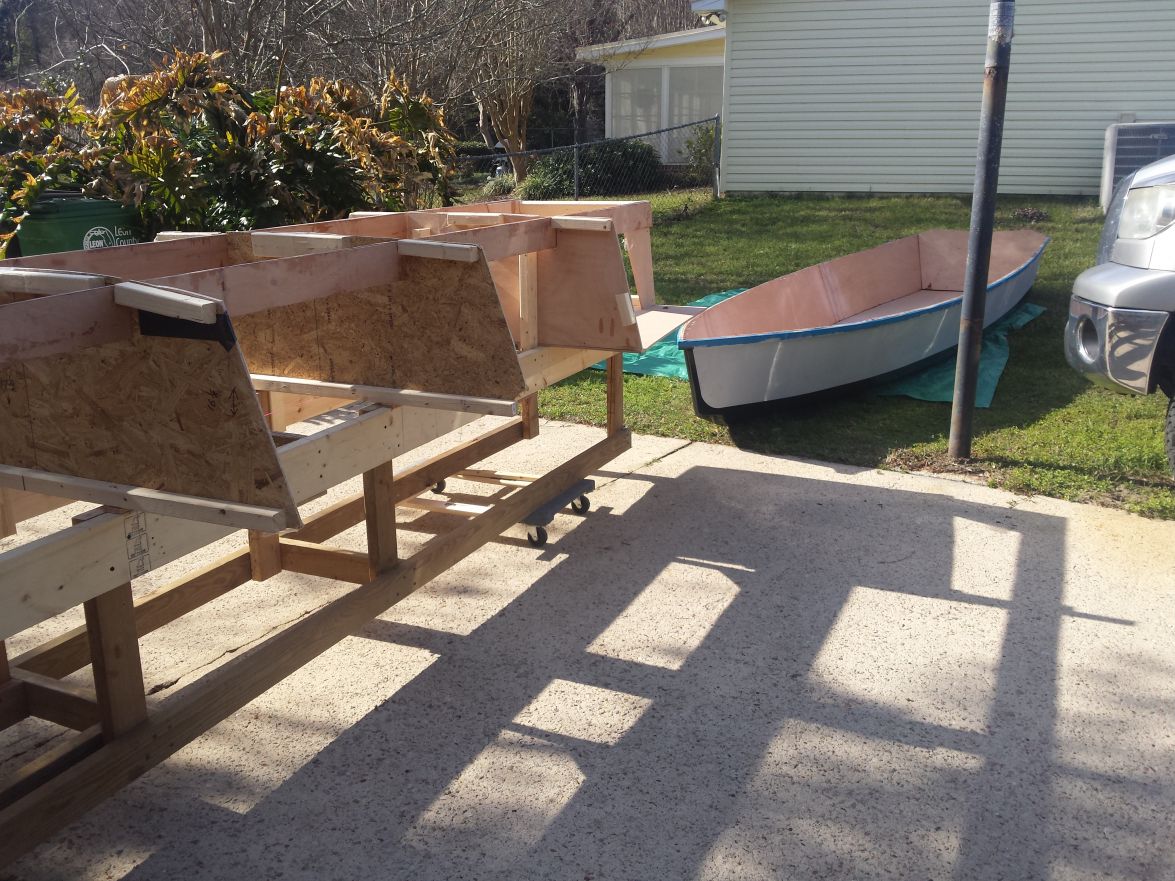
Only had time to flip the boat and get it back on the strongback before I had to get back to working. Disappointing but had to be done. It was great to see it right side up.
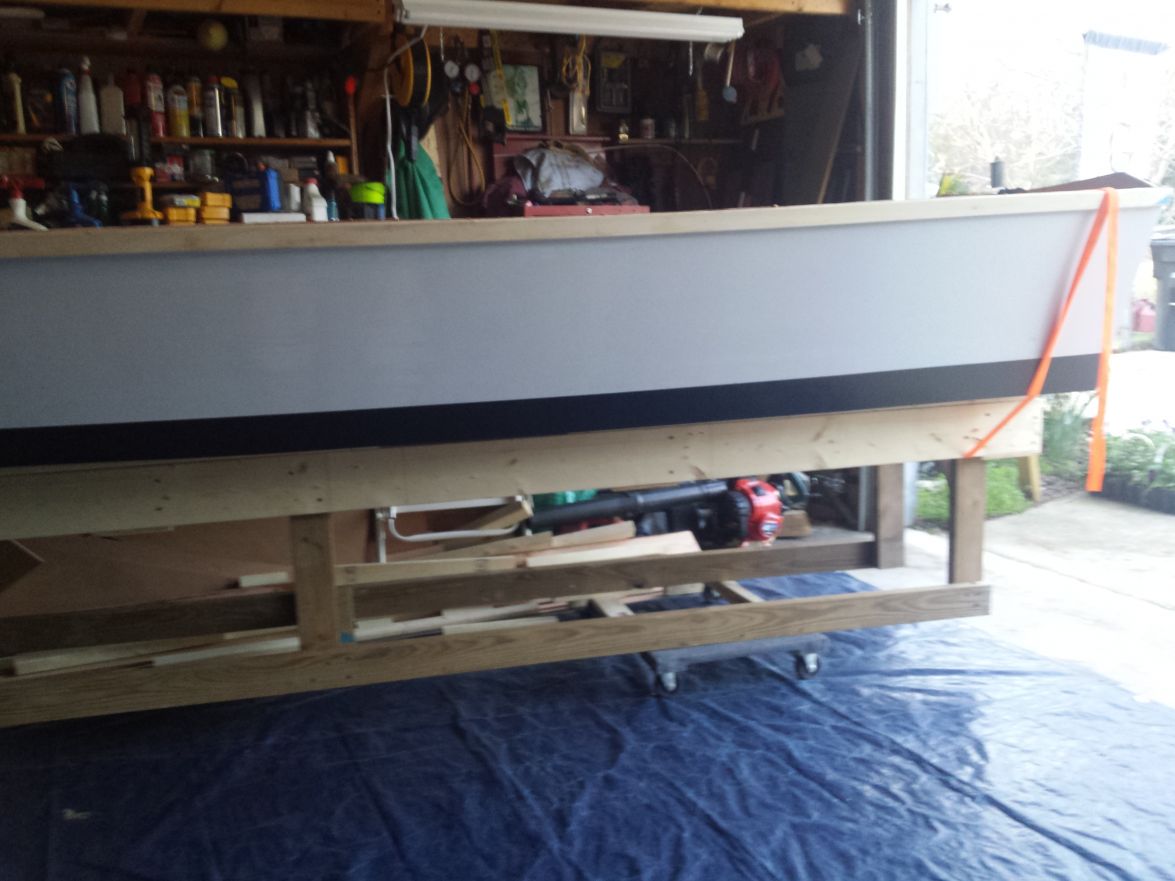
I cleaned up a few spots in preparation for fiberglassing on Saturday. We ended up getting everything fillet'd, taped, and fiberglassed inside in one day. Yes, grandad stayed the whole day and helped out. At the end of the day a home made meal helped replenish his energy and mine too!

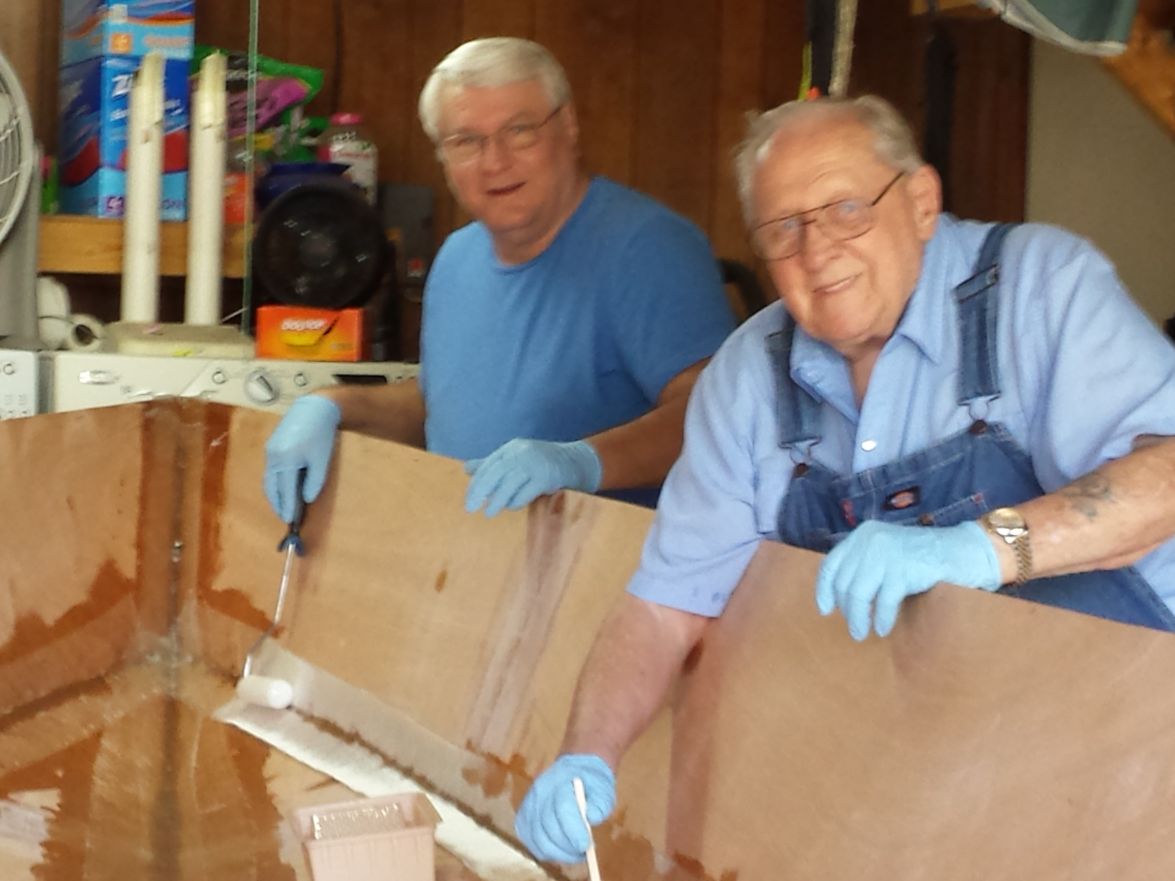
Bad pic the next day
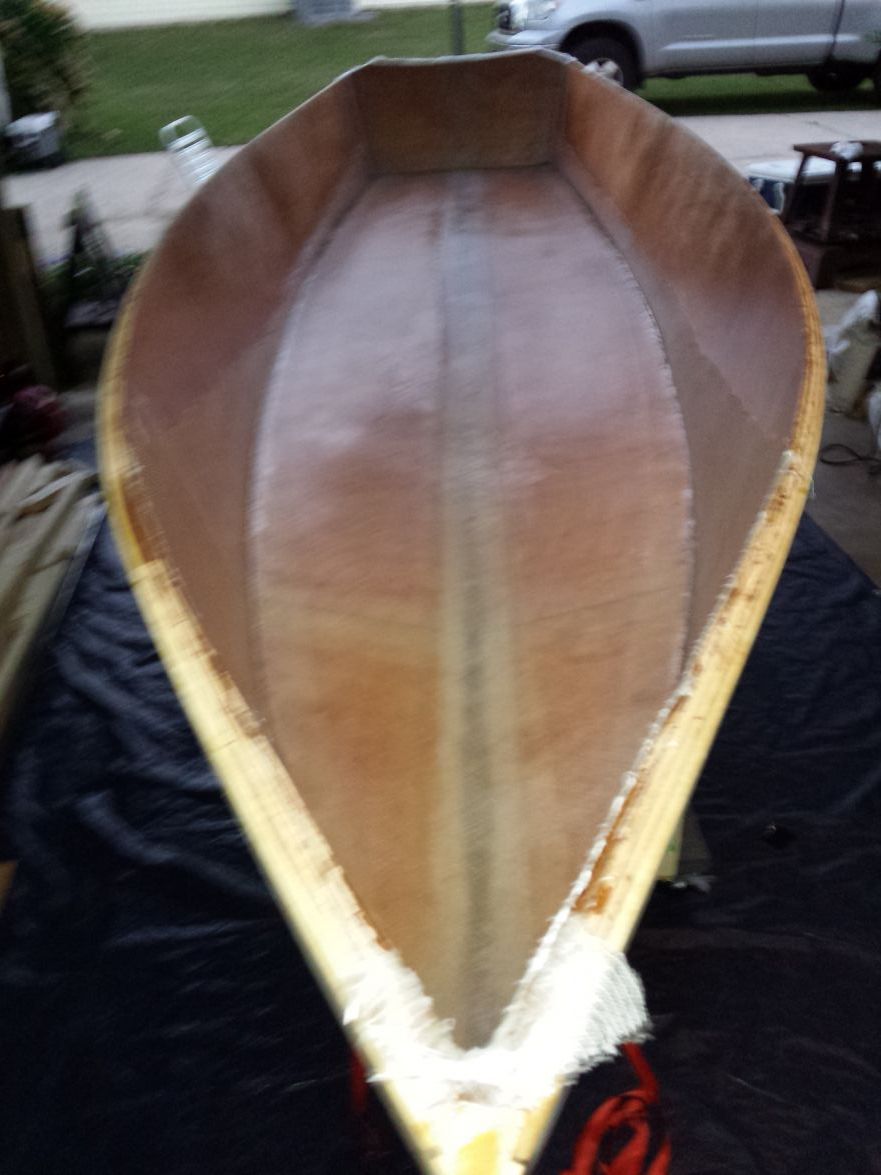
Just a few pics of the inside once everything was cured. I had a few bubbles pop up that I need to fill.
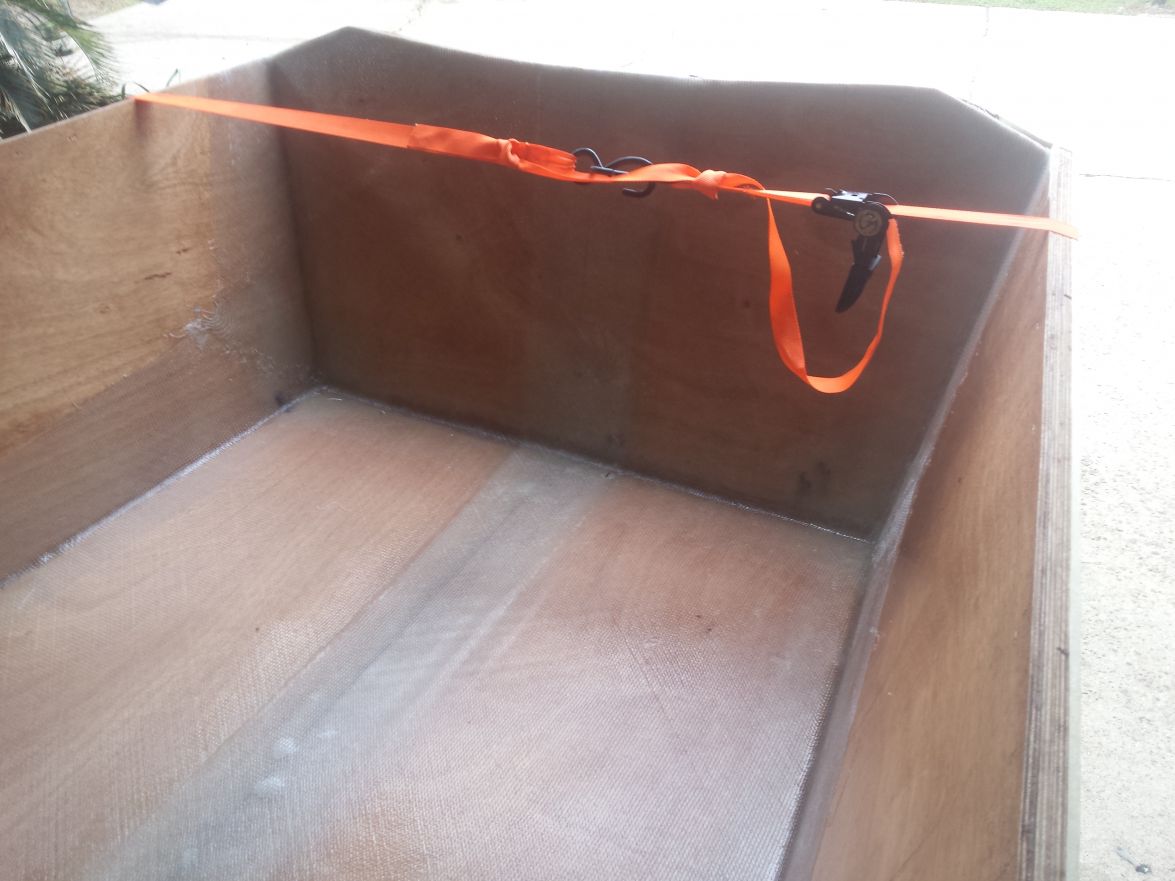
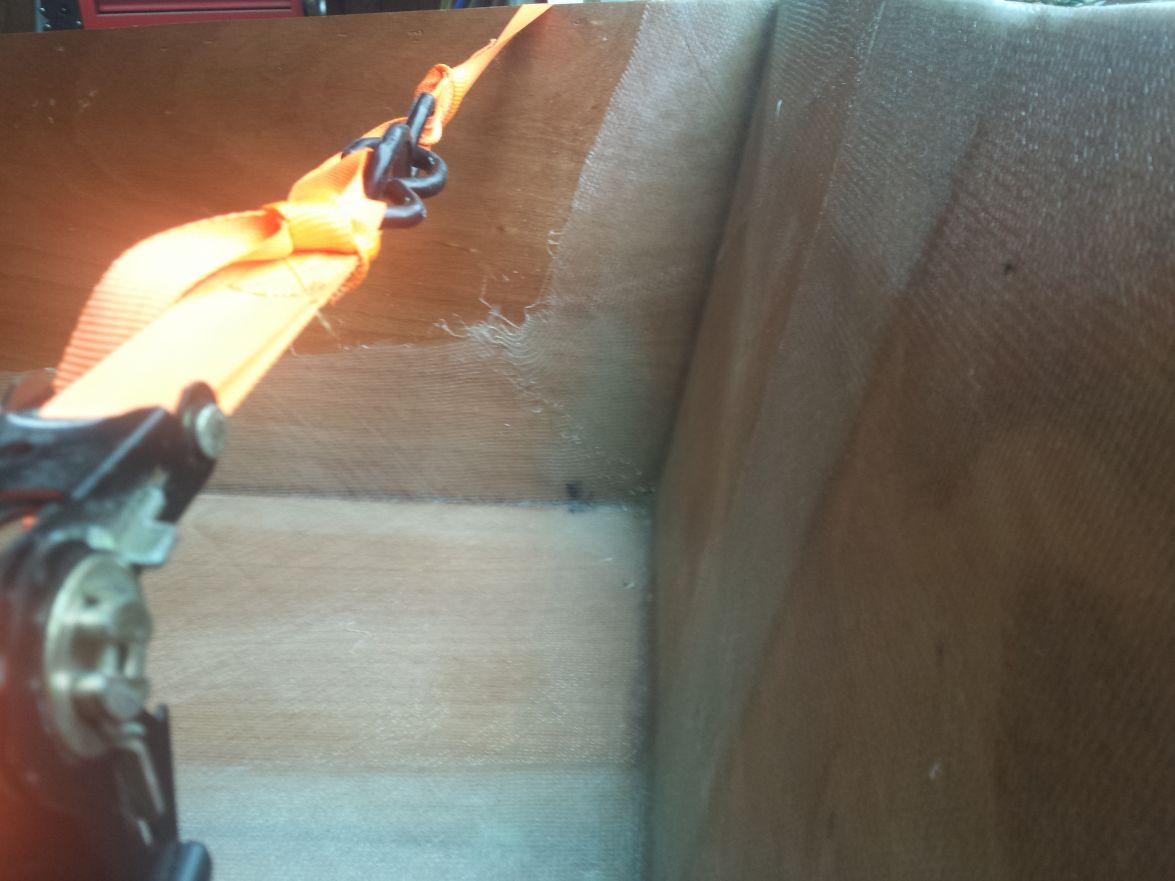
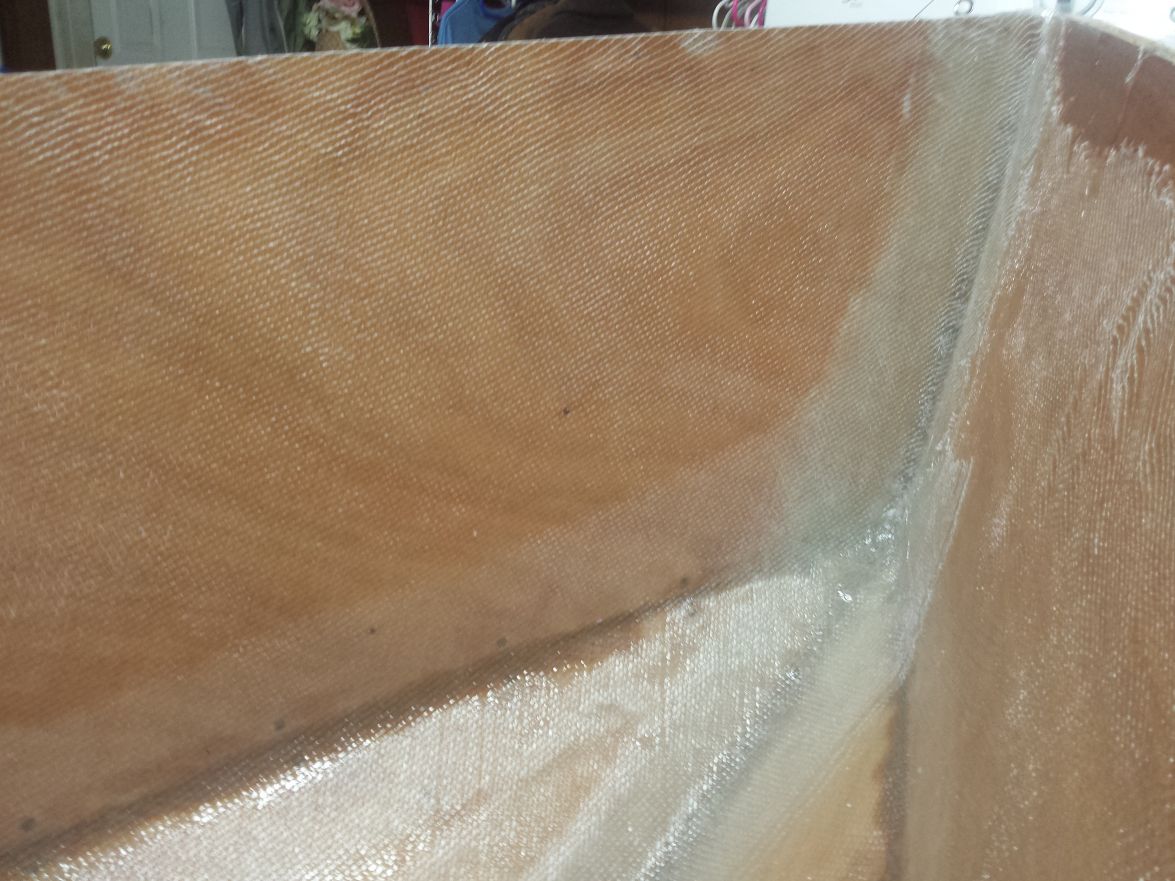
I have to figure out what to do here. I messed around with it tonight. More than likely I'll splice in some pieces to fill it.
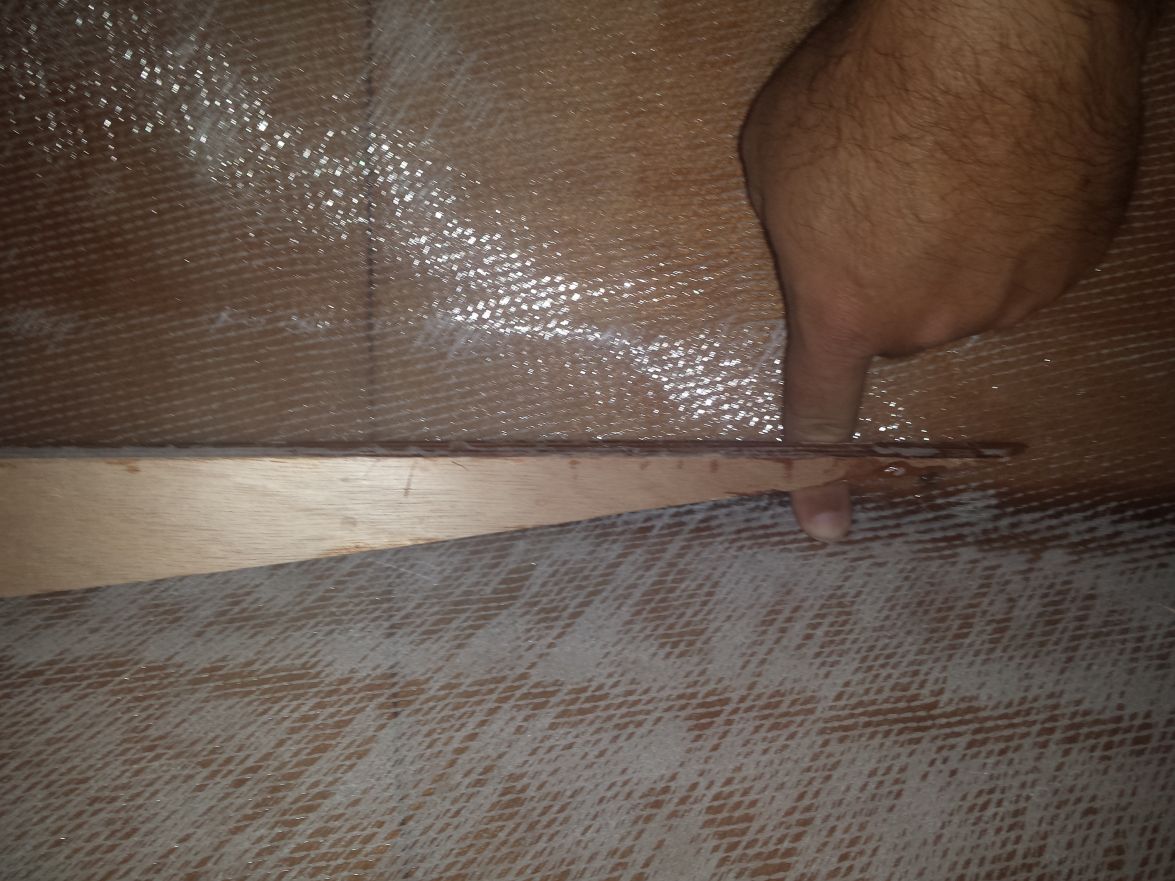
This is the top side of that nose piece I made with the multitool one day while I waited on UPS to deliver my quick fair.
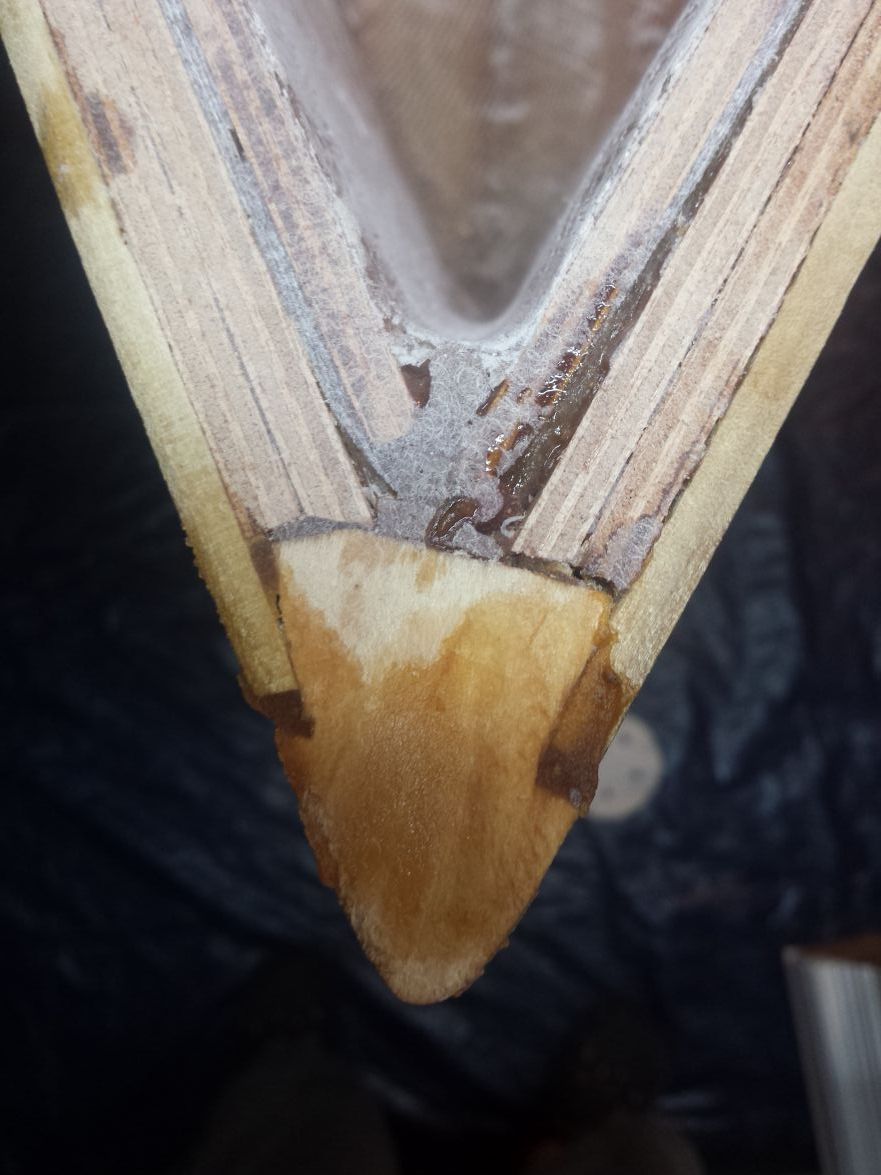
My plan is to fillet and glass the stringers tomorrow night. Then put some time in over the weekend getting the stations set in place.
Re: Steve's FS18
Posted: Fri Feb 24, 2017 9:57 am
by jacquesmm
It looks really good, thank you for the pictures.
I like the way you deal with the seams tape by drawing a style line along the edge.
Others have done it but yours is really neat.
Re: Steve's FS18
Posted: Fri Feb 24, 2017 10:08 am
by 94'325is
That's really nice glass work, it's going to really pay off when it comes time for sanding/fairing.
Re: Steve's FS18
Posted: Fri Feb 24, 2017 1:52 pm
by Dutch1
Thank you! I hope to make a lot of progress on it this weekend with the warm weather and no rain.
Re: Steve's FS18
Posted: Fri Feb 24, 2017 3:21 pm
by Jeff
Nice work Dutch1, very nice!!! Jeff
Re: Steve's FS18
Posted: Sun Mar 05, 2017 10:08 pm
by Dutch1
It's been two weeks and I've been able to make some progress on getting the stringers, knees, stations glassed in, and a coat of epoxy on all exposed wood. Last weekend I ended up using the last bit of my epoxy Friday night getting the stringers and transom knees glassed in. I had a little left but knew it wasn't enough to start the next tasks. It was OK since most of Saturday was taken up with soccer. We ended up just dry fitting everything together and sanding edges, rough corners, and cutting the pieces for the station C and D pieces Sunday afternoon. It was time well spent and we would have done it anyway so no real time lost. Thankfully, I ordered 3 more gallons from BBC Friday on the way home knowing I was getting low and knew it would be delivered soon. It was at my front door Monday night! Awesome!
I messed around during the week and prepped for this weekends work. We tacked the stations in with some fast hardener on Saturday. We didn't get started til around 1:30 due to morning soccer games so we had to watch epoxy dry in the sun. I mixed two 6oz batches and one decided to take longer to cure. I was pouring the last bit from the bottles and obviously got it a little off. Where I piped in the first batch was rock hard but the other was still tacky after 3 hours. We pulled the boat out and two more hours in the sun fixed that issue. We got the stations C and D pieces under the sole glassed in Saturday night. We finished up the rest of them today and got another coat of epoxy on everything to include the stations.
Now I have to make the real hard decision of whether or not I want to finish it like I'd really like it or just to be able to fish with and call it done. I "could" finish the layout pretty quick but I have some ideas for a grab rail and what to do with the extra space under the end of the front deck right behind station b on the station c side. I do know I'm not cutting the deck there. I'd rather have the extra deck space. And, probably the most important thing is I need to figure out where I can put a seat post mount for grandad in that area.
Now for the pics..
Stringers and knees glassed in. Well, the knees aren't glassed in yet but they are glued in.
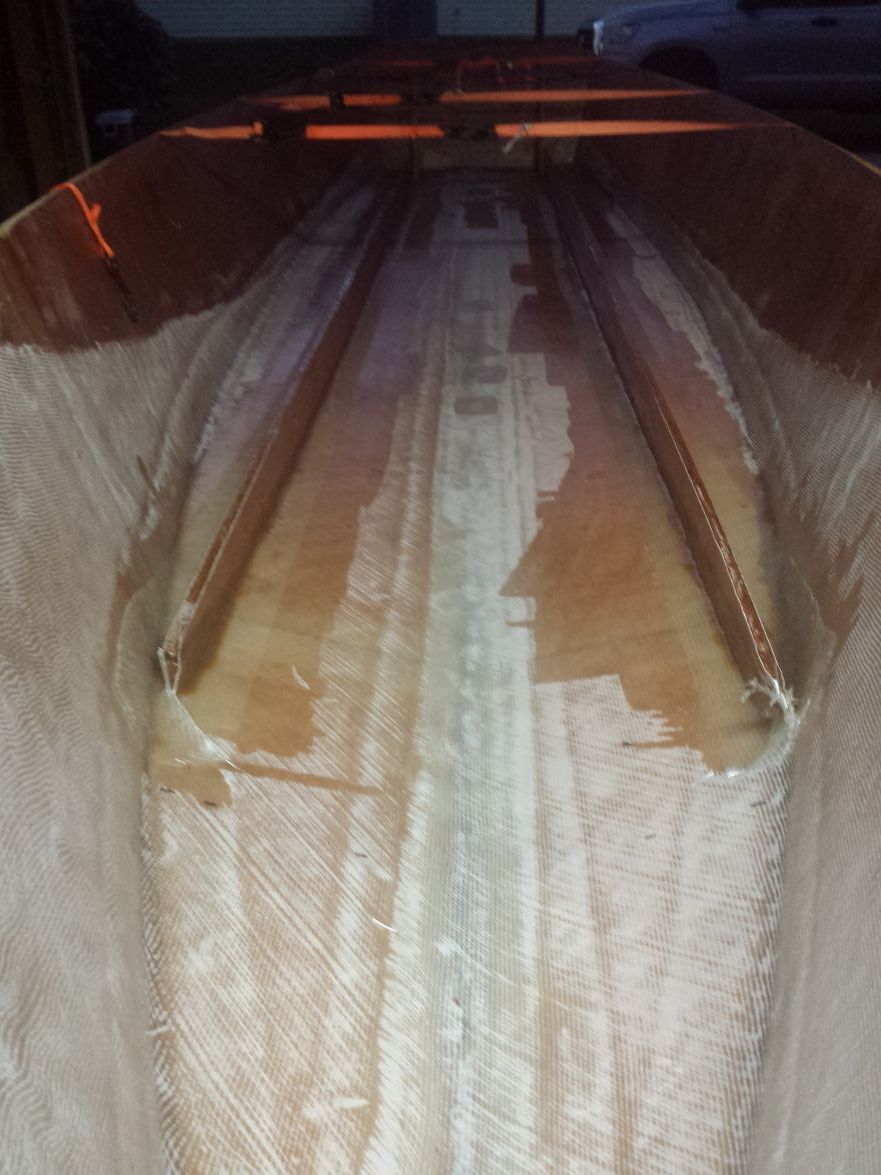
Dry fitting last Sunday.
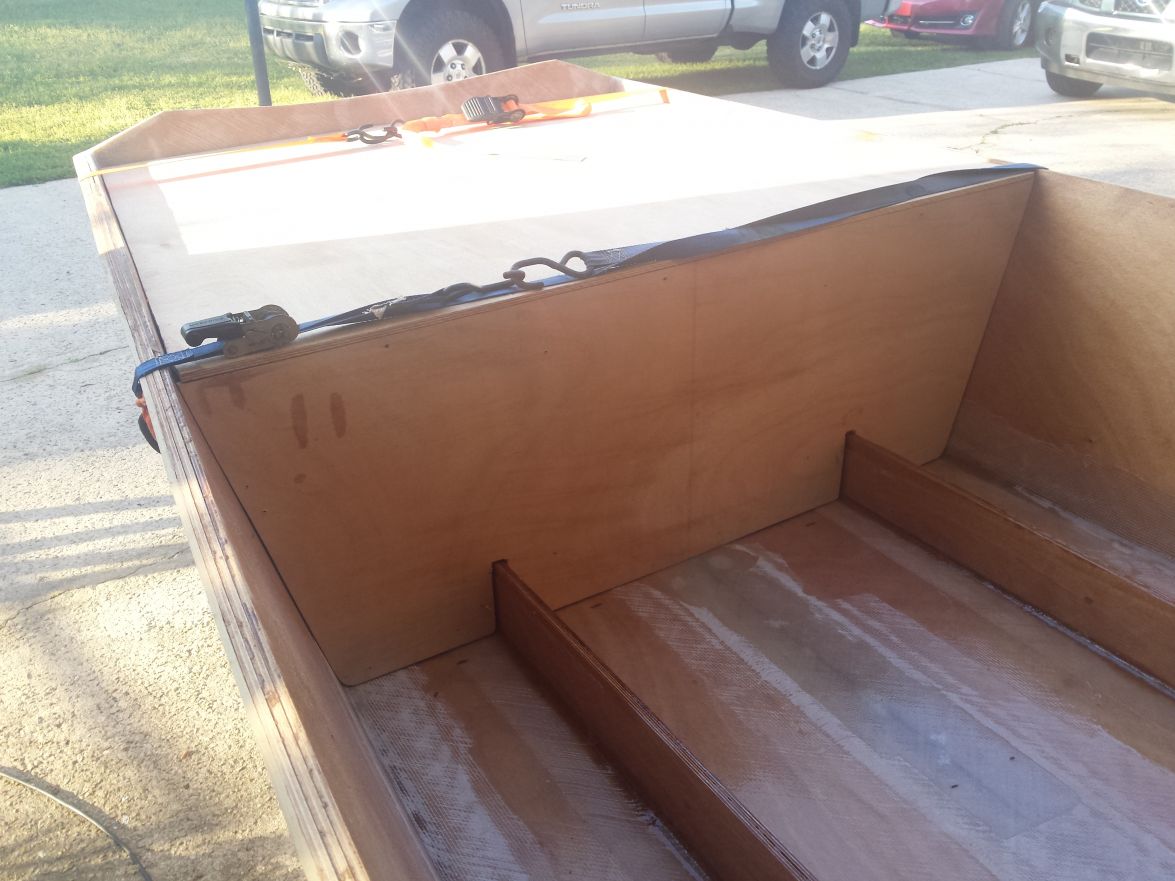
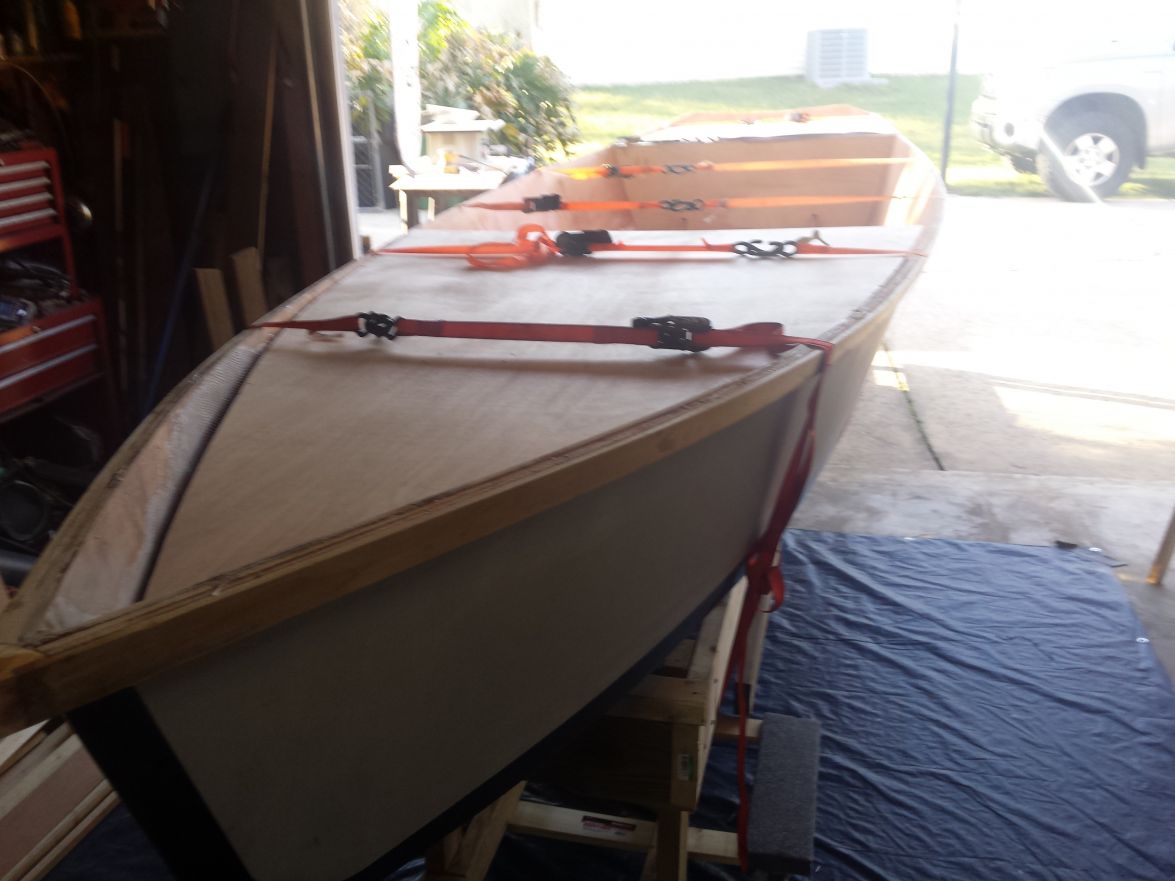
I don't know who first thought of this but it saved me a ton of time and ensured everything lined up right. I can't remember whose forum I saw it on. I hot glued the pieces to some scrap wood (about a 1/2" in three places each) and it allowed me to tack it in and I knew it would be level. It would have been a pita to keep the pieces right without moving while I set them with glue.
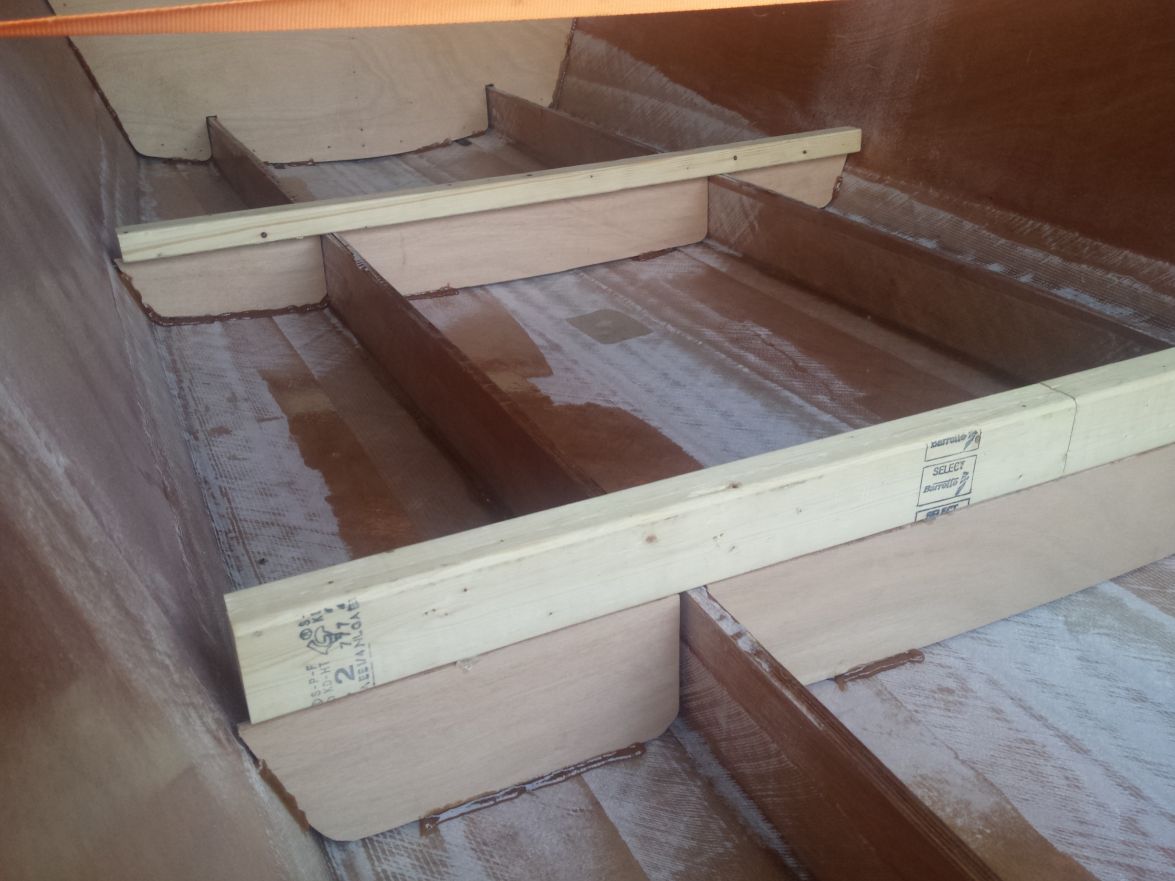
Glassed them yesterday and today I pulled the scrap wood and it popped off just right. A few minutes of pulling the pieces of the glue off and they were done.
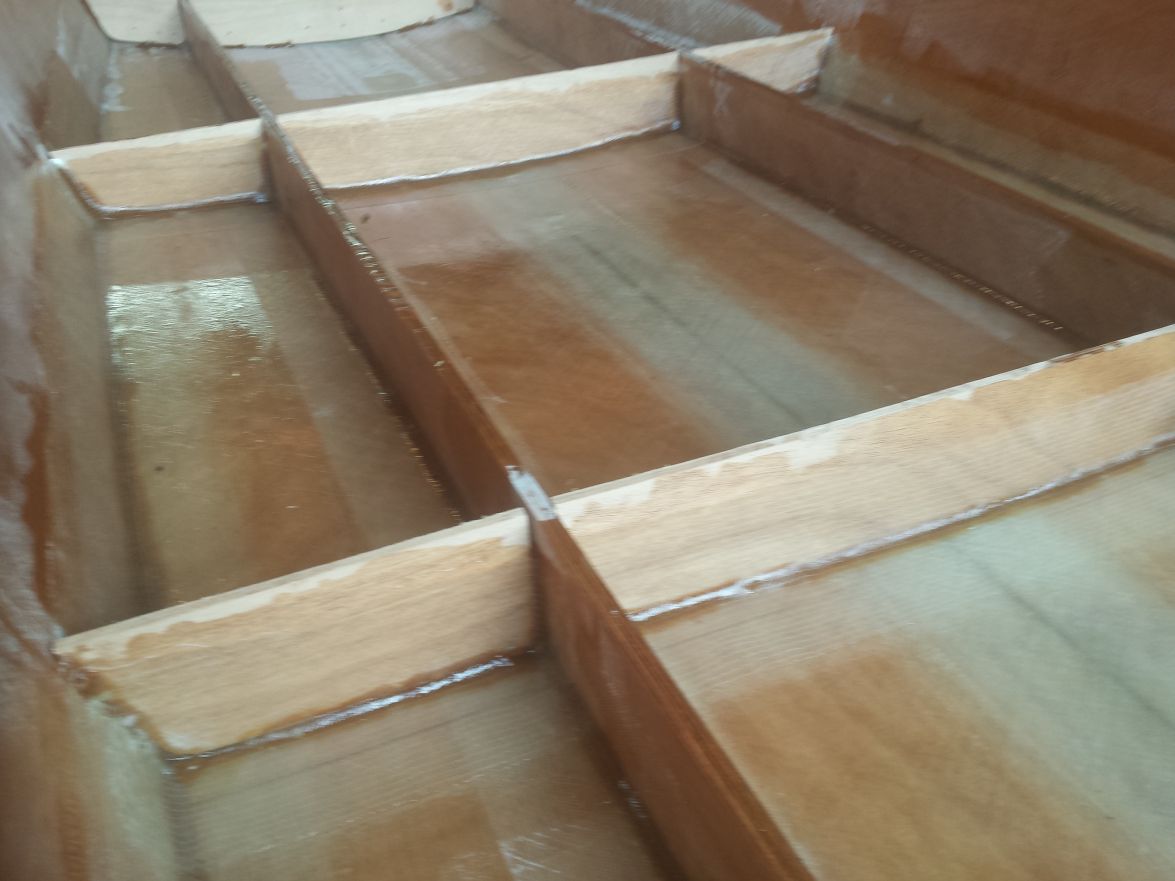
All stations are glassed in. Last pic tonight. Everything is coated with epoxy and drying.

The entertainment while we took a break today. Thought I would share a pic I happened to catch with her catching a ball. That dog loves her grandad and even blows by me when he arrives.
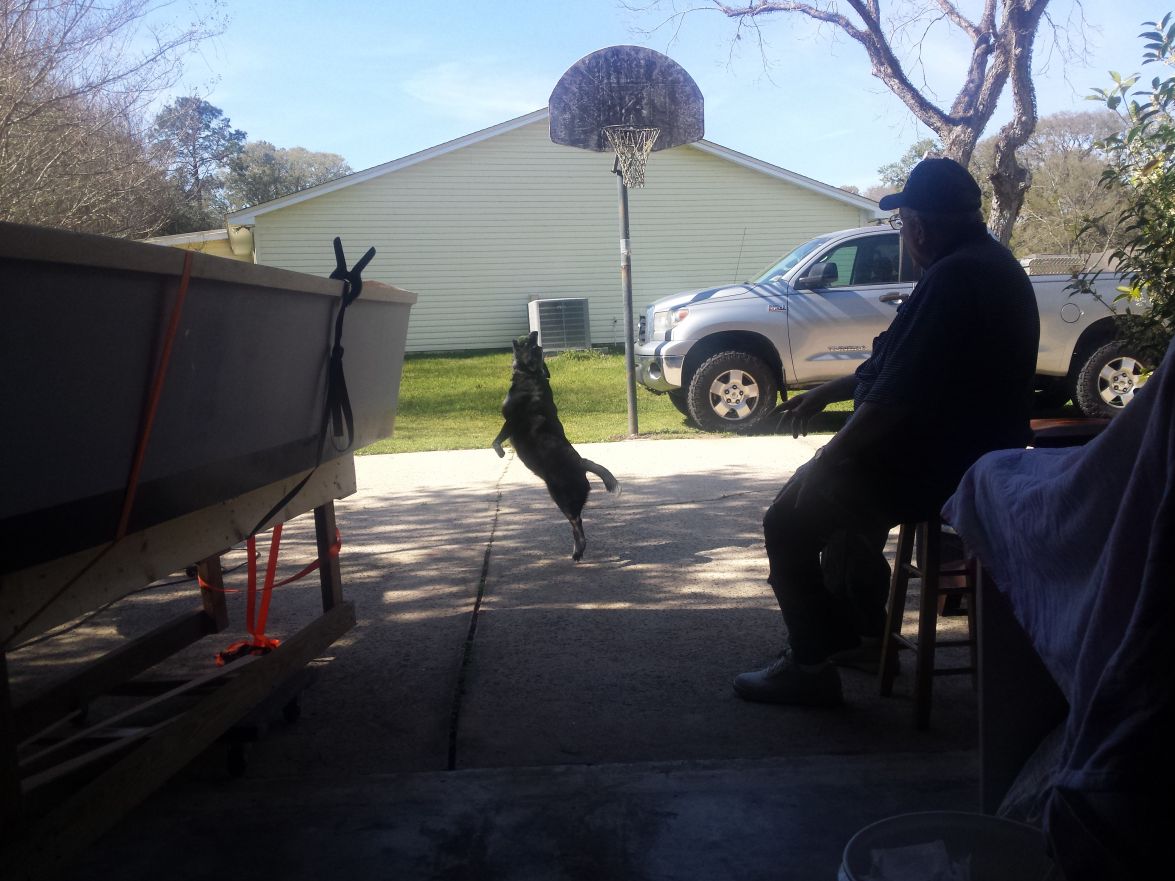
I have some questions on the prep for foam and other items but I'll post those on the power boats section.
Re: Steve's FS18
Posted: Sun Mar 05, 2017 10:17 pm
by K2FS18
Looking good. If you keep it real simple you can forgo lots of work.
Re: Steve's FS18
Posted: Sun Mar 05, 2017 10:37 pm
by Dutch1
K2FS18 wrote: ↑Sun Mar 05, 2017 10:17 pm
Looking good. If you keep it real simple you can forgo lots of work.
Yeah, but yours looks too dang good. I just saw your other pics in your thread. Now I'm sitting her pondering what to do...
Re: Steve's FS18
Posted: Mon Mar 06, 2017 5:03 am
by Eric1
Your build is looking great Dutch!
Re: Steve's FS18
Posted: Mon Mar 06, 2017 6:14 am
by Jeff
Nice work Dutch1!! Jeff
Re: Steve's FS18
Posted: Mon Mar 06, 2017 11:30 am
by willg
Nicely done!
Re: Steve's FS18
Posted: Tue Mar 07, 2017 6:10 pm
by Dutch1
Thanks guys. Now on to the cleats!
Re: Steve's FS18
Posted: Tue Mar 07, 2017 11:03 pm
by Mikem59
Good work, looks very good. I remember seeing the discussion about hot gluing as well. I like the way you did it.
As for cleats, well, just loads of fun. I remember when I began cutting out cleats, I questioned Cracker Larry on how many he had made for his FS18. I believe he had in excess of 100 cleats. I haven't done a final count on how many I ended up installing, but the number continued to grow.
Keep up the great work and looking forward to seeing another build pass me up
Re: Steve's FS18
Posted: Wed Mar 08, 2017 2:09 am
by Fuzz
When I was building my dory I tried something different for the cleats. Take a 2x and rip it to the total width for two cleats plus the stringer/frame. Using my table saw I cut a dado in the 2x. You could cut it so it only leaves a 1/4 in the dado area. Prime the stringer and dado, apply glue and drop it over the stringer. Your deck ends up a little higher but you don’t have to mess with all the clamping. Just an idea.
Fuzz
Re: Steve's FS18
Posted: Wed Mar 08, 2017 4:48 am
by cape man
That's some pretty work you've done. If you take Fuzz's advice, which I like, just remember the sole will need to be wider than the plan. There was an OD18 build many years ago where he raised the sole an inch and installed a 2" piece of bright work in the centerline of the boat. It was gorgeous.
Re: Steve's FS18
Posted: Fri Mar 10, 2017 12:12 am
by Dutch1
Thanks guys. I like the idea of overlapping the stringer with the cleats but I don't have that nice of a table saw. Right now I'm looking at 50bucks worth of cedar I plan to go ahead and use for the cleats. I'll cut it tomorrow night and do some strength testing on some 1x1" pieces. If all goes well I'll be cutting a lot and start painting with epoxy Saturday. I'd planned to use cypress but I can only get 1x4's. Which is only 3/4 inch wide so..
I haven't cut the sole yet but I won't need more than 1 sheet since I'm adding another bulkead/station where the front deck ends behind station B. I'm sure that sheet is bowed at this point since it's been leaning against the wall since the end of October when I picked it up and started this build so that will be interesting. I forget the width measurement but had plenty of room in case I do decide to raise the sole using your cleat method.
I really want to add a baitwell somewhere on the boat but haven't decided where. I'm thinking about right in front of the grab bar but I need that area for a seat/cooler too. I use finger mullet, other small bait fish and shrimp if I can cast net them so I want to have a live baitwell somewhere on the boat. Then again, I don't know if I want to run all the pipes required.
Mikem59 wrote: ↑Tue Mar 07, 2017 11:03 pm
Keep up the great work and looking forward to seeing another build pass me up
I don't know. You've made some great progress lately. I have a ways to go to catch you. And, I have to make a final decision on several things. All I know is the more I add the more money I spend, the more complex it will be to finish and the more weight I will add to the boat. I just want to fish!
Re: Steve's FS18
Posted: Fri Mar 10, 2017 9:34 am
by pee wee
Check your build notes, I thought the cleats were called out as 1x material, therefore a nominal 1" which is an actual 3/4".
Re: Steve's FS18
Posted: Fri Mar 10, 2017 10:51 am
by K2FS18
3/4" x 3/4" is plenty. You will have about 2" of glueing surface (3/4" + 1/2" +/-, 3/4"). I did not pre-prime my sticks ahead of time. Seemed to be a wasted step. Once I had all cut and dry fitted and all was ready to go, I pre-primed the glueing surfaces, let that slightly tack and stuck into place with the peanut buttered floured epoxy and used the brad nailer to hold it in place. The brads are permanent fixtures of the boat. They will never see water. Once all sticks where installed, I epoxy painted them in place.
Re: Steve's FS18
Posted: Fri Mar 10, 2017 7:54 pm
by Dutch1
Thanks guys. The plans call for 1x1 for the cleats so I was trying to stick with that. I cut one of my overpriced cedar 2x4's tonight and decided to check it for strength. It broke too clean for me to feel comfortable using it for the cleats. I would rather it have splintered or bent more before it broke. It is very dry but I'd rather go ahead and get some other kind to use for the cleats. I am curious though how much epoxy it will actually soak up so I might try that tomorrow. I've wasted enough epoxy up to now that I won't make a special batch. I'll wait until I mix some up. The place I got my cypress from last time is closed tomorrow so I'll find something else to do on the boat tomorrow if I can't get my hands on anything.
Maybe I can find something at Lowes...
Re: Steve's FS18
Posted: Fri Mar 10, 2017 11:31 pm
by BB Sig
There is a "thrift" shop on Appalachee Pkwy that had a sign saying they have cypress. It might be open tomorrow. I don't know if there is a name for the place but they have an old sail boat for sale along with some older utility trailers.
Re: Steve's FS18
Posted: Sat Mar 11, 2017 12:25 pm
by pee wee
Dutch1 wrote: ↑Fri Mar 10, 2017 7:54 pm
Thanks guys. The plans call for 1x1 for the cleats so I was trying to stick with that.
Do what you're comfortable with, but a 2 x 4 measures 3-1/2" x 1 1/2", a 1 x 2 is 3/4" x 1-1/2, and a 1x1 cleat measures 3/4" x 3/4", that is what the plans are calling for. Making the cleats an actual 1" square won't hurt anything, a little more gluing area and a little heavier.
Re: Steve's FS18
Posted: Sat Mar 11, 2017 12:29 pm
by Dutch1
BB Sig wrote: ↑Fri Mar 10, 2017 11:31 pm
There is a "thrift" shop on Appalachee Pkwy that had a sign saying they have cypress. It might be open tomorrow. I don't know if there is a name for the place but they have an old sail boat for sale along with some older utility trailers.
Confirmed and purchased. Thanks BB! For any folks around Tallyho the thrift shop is out the parkway as you go down the hill on the right before you get to Mom and Dads restaurant. All of it is rough cut from 1" to 1 1/4" thick, 17ft long and the widths vary from around 7" to around 10" for $1.25 per board foot. There are about 15 pieces left. He also has some blue pine that looked pretty good.
Re: Steve's FS18
Posted: Sat Mar 11, 2017 12:53 pm
by Dutch1
pee wee wrote: ↑Sat Mar 11, 2017 12:25 pm
Dutch1 wrote: ↑Fri Mar 10, 2017 7:54 pm
Thanks guys. The plans call for 1x1 for the cleats so I was trying to stick with that.
Do what you're comfortable with, but a 2 x 4 measures 3-1/2" x 1 1/2", a 1 x 2 is 3/4" x 1-1/2, and a 1x1 cleat measures 3/4" x 3/4", that is what the plans are calling for. Making the cleats an actual 1" square won't hurt anything, a little more gluing area and a little heavier.
Yep, I hear ya on the false labels for commercial lumber. It's false advertising plain and simple and we the public keep taking it every day. That's another reason if I see any rough cut timber I will stop and take a look at what it is. As detailed as Jacques plans are if they say 1x1 to me that is a minimum.
Re: Steve's FS18
Posted: Sun Jul 09, 2017 7:55 pm
by Dutch1
I can't believe it's been March since I posted any updates. I barely did anything between March and June due to work and life. I got back part time on Saturdays in June and have been working each weekend since. I negotiated a huge contract at work so I hope I can have the energy to devote more time to it and make some good progress.
I have a lot of pictures to upload but have to figure out how to do it again since something changed. I used to just use the URL from the gallery but that isn't working. I'm getting a message saying it wasn't possible to determine the dimensions of the image.
Hopefully soon.
Re: Steve's FS18
Posted: Sun Jul 09, 2017 8:01 pm
by BB Sig
Good to see you back at it! You have to double click the picture and then right click the new picture and copy the url.
Re: Steve's FS18
Posted: Sun Jul 09, 2017 8:05 pm
by Dutch1
BB,
I've tried the media button and image with every different URL I can find for the image(s). The URL link works but that's just a link and doesn't post the image.
Re: Steve's FS18
Posted: Sun Jul 09, 2017 9:59 pm
by Dutch1
I figured out the issue with attaching images. I had to go to edit files in my gallery and then use the full URL listed for the image.
Between March and June I started measuring and coating the cleats. I ended up using the 1/4 inch rollers so they didn't soak up so much epoxy. The foam rollers waste a lot of epoxy and soak up around 3oz when you start.
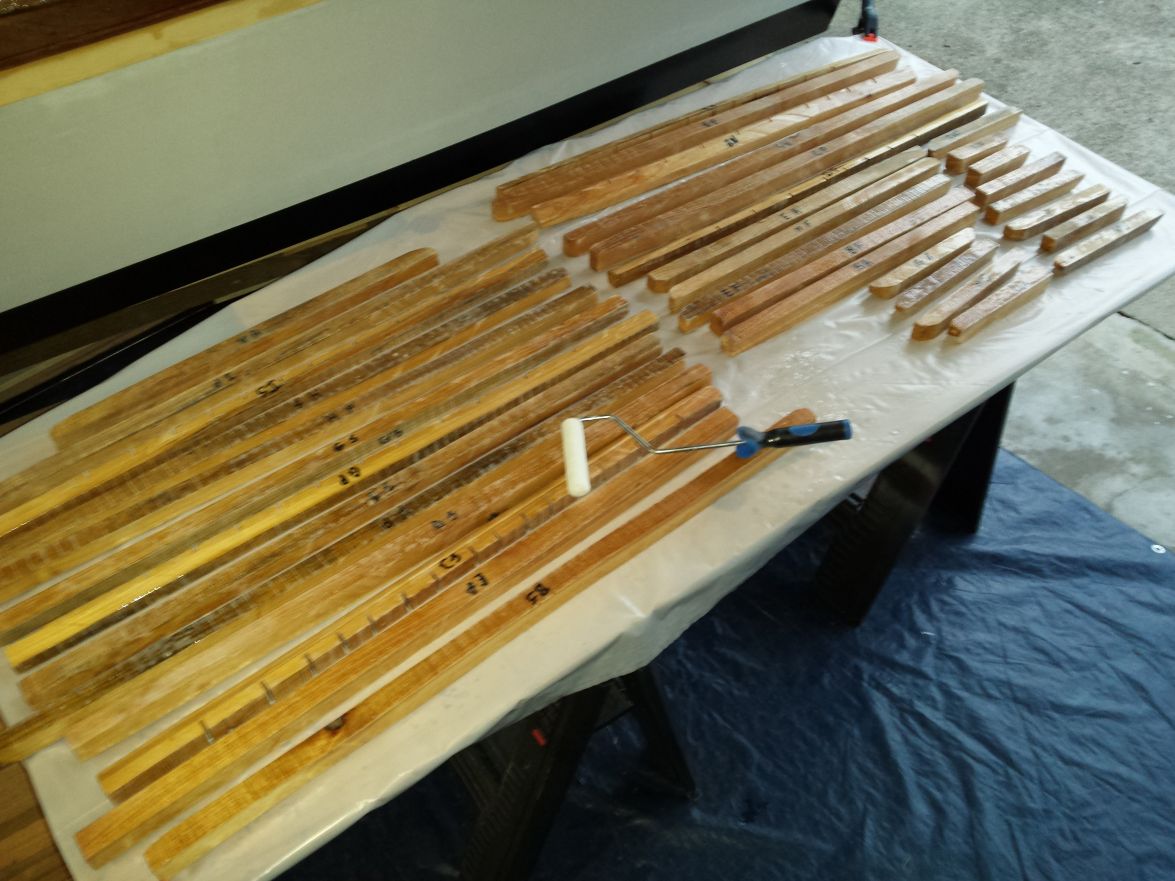
I need about twice the amount of clamps I had in this pic. I ended up getting some more to finish up.

This was 4 gallons of foam. I ran lines for gas, power, console, and bait well.
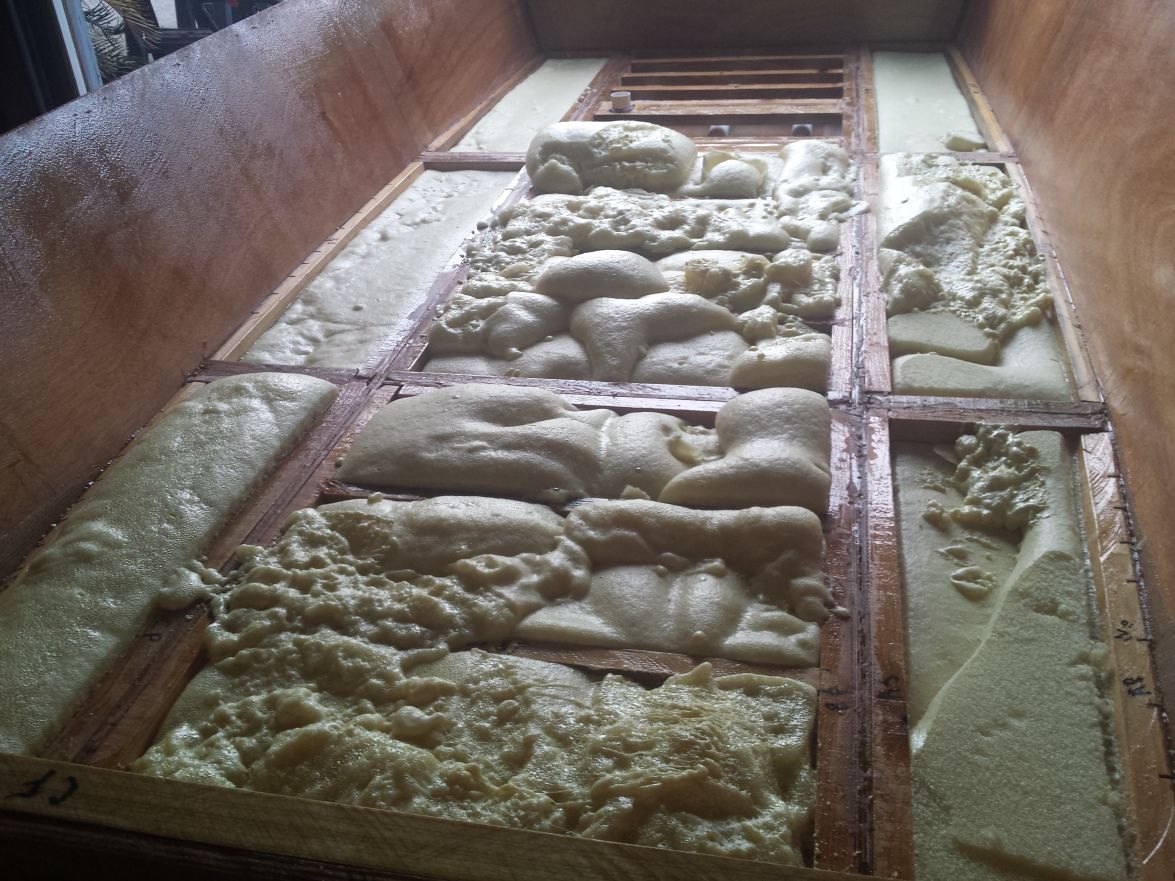
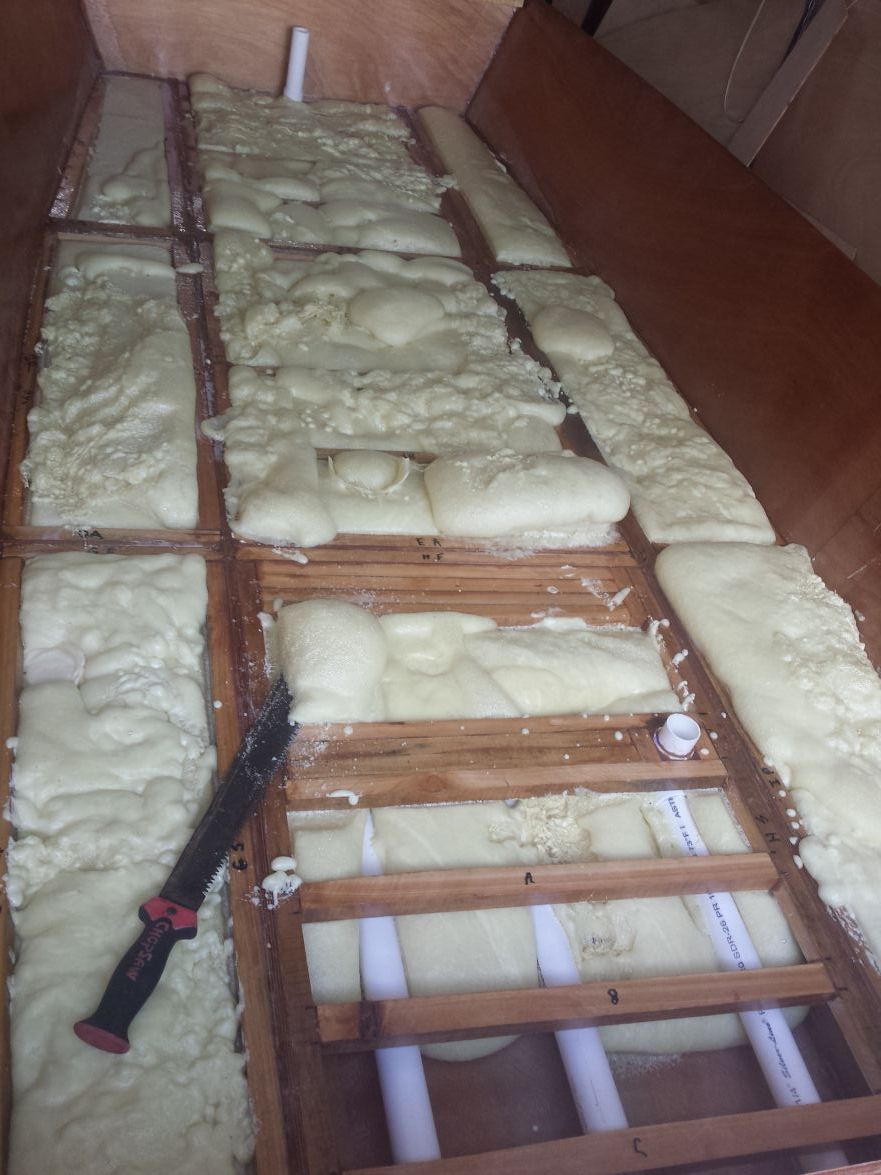
I started to trim the foam with different things (saw blades and then tried my machete) and ended up just sanding the foam. It gets everywhere! I learned that if you sand the foam it collapses about a 1/4 inch after you are done. Luckily I caught that very early. I just sanded it and left a good 1/4 inch and then came back the next day to finish it up.
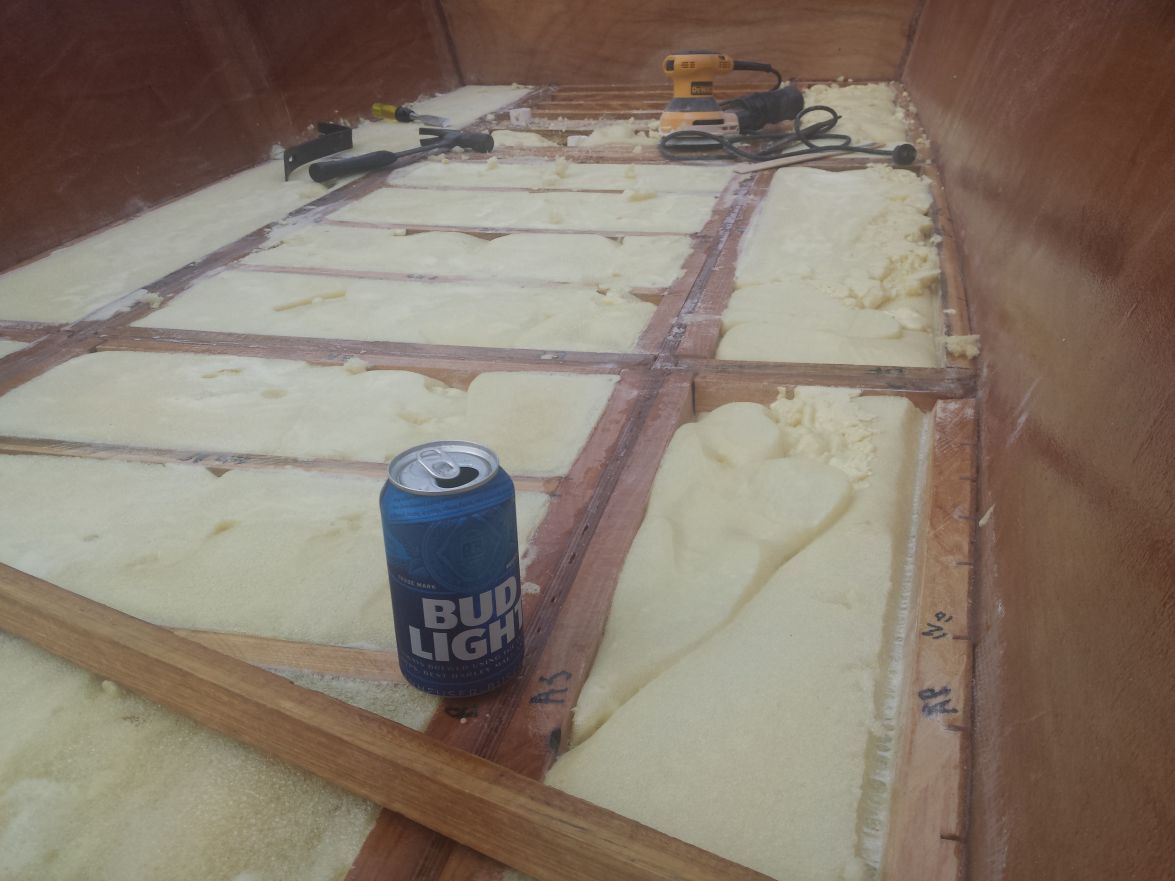
We used a big piece of paper to mark the sole. Then transferred it onto the piece of plywood. It worked great and we only had to sand the corners to get it fully in place.
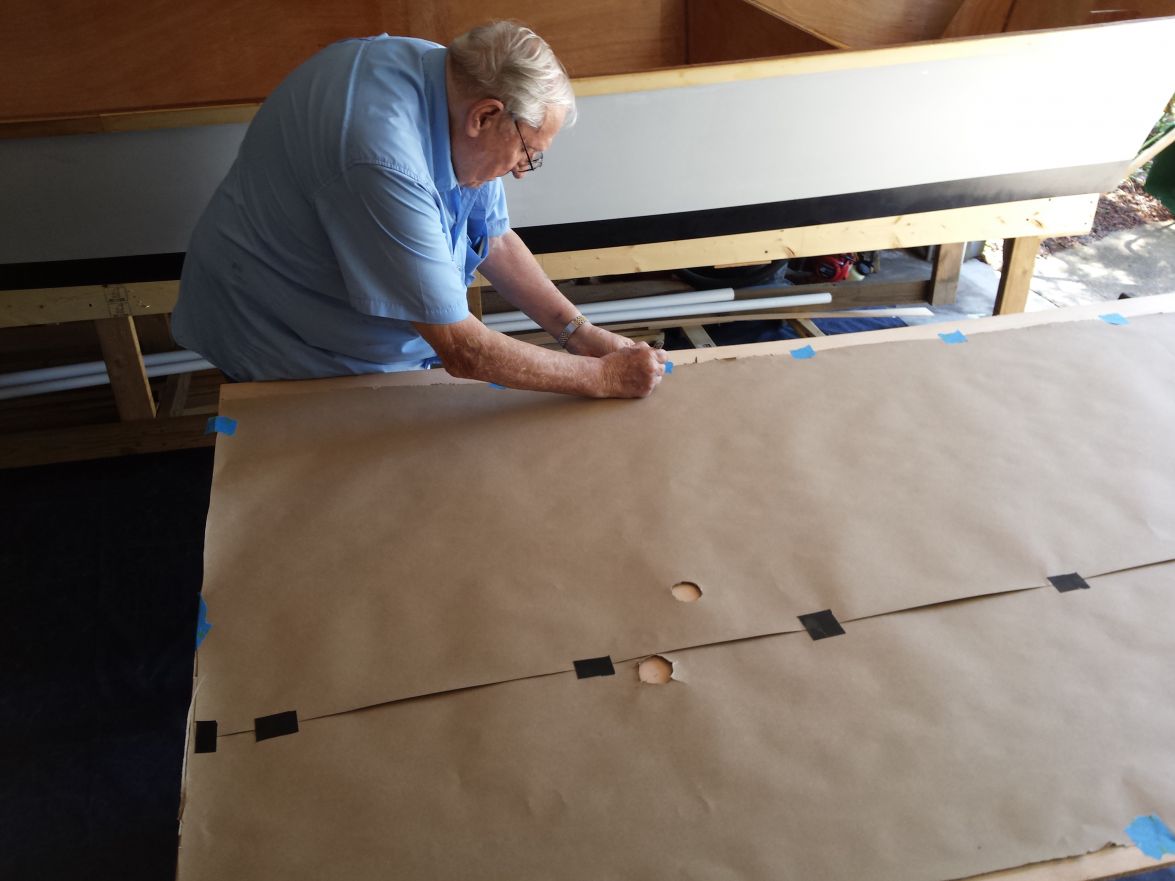
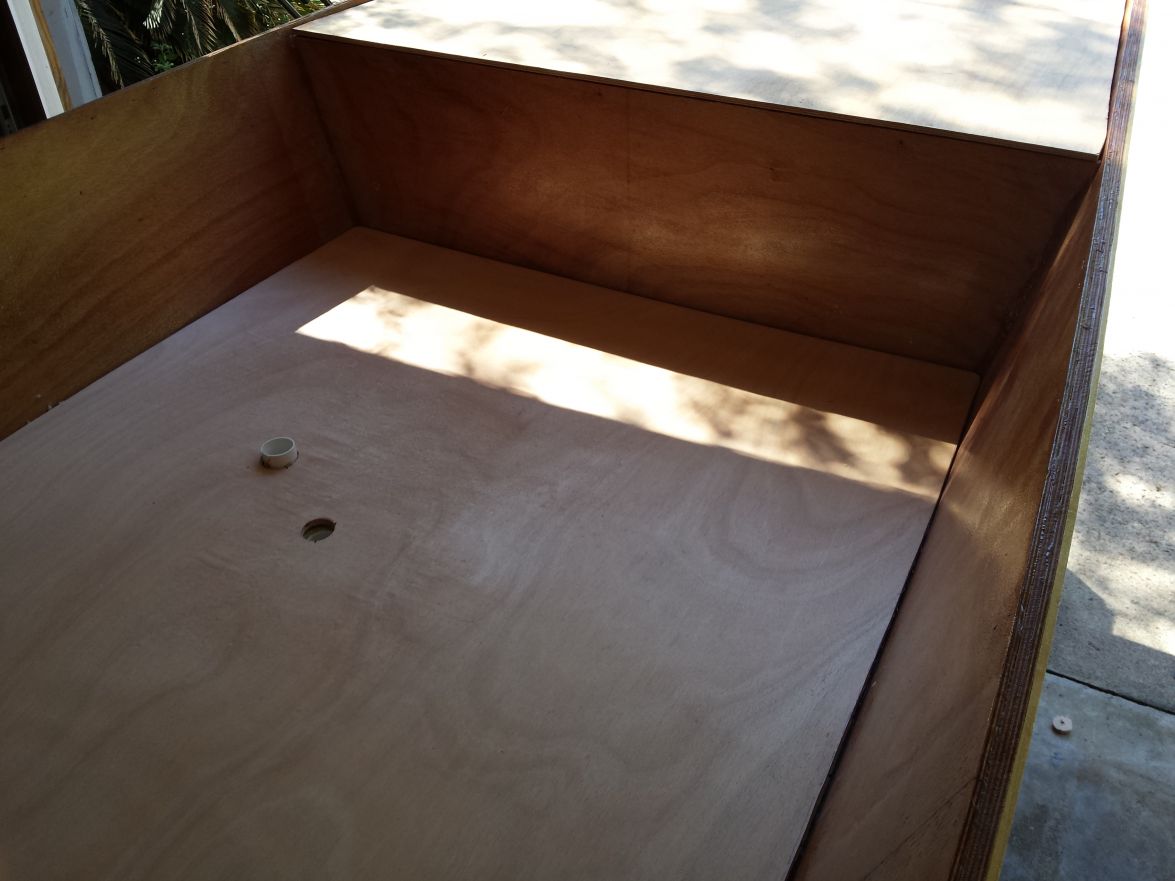
I've been waiting to set this in on the sole and see how it looked. I drilled out the bottom of the grab bar and will run wires up through there and into a console. I'll sand down the pipe right before we mount it.
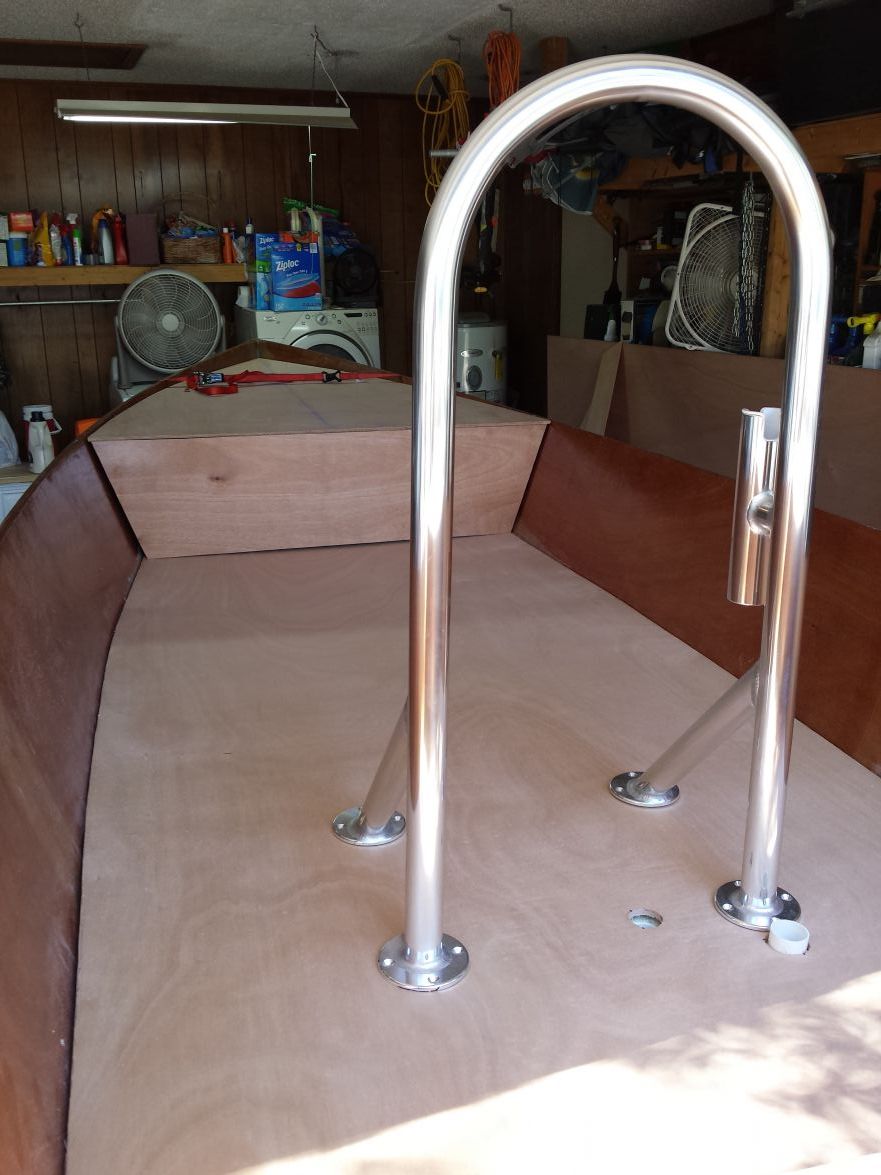
This is in between stations A and B. I'm putting a gas tank as close to station A as I can to be able to have a good storage area. We used the paper here to transfer the shape on the plywood.
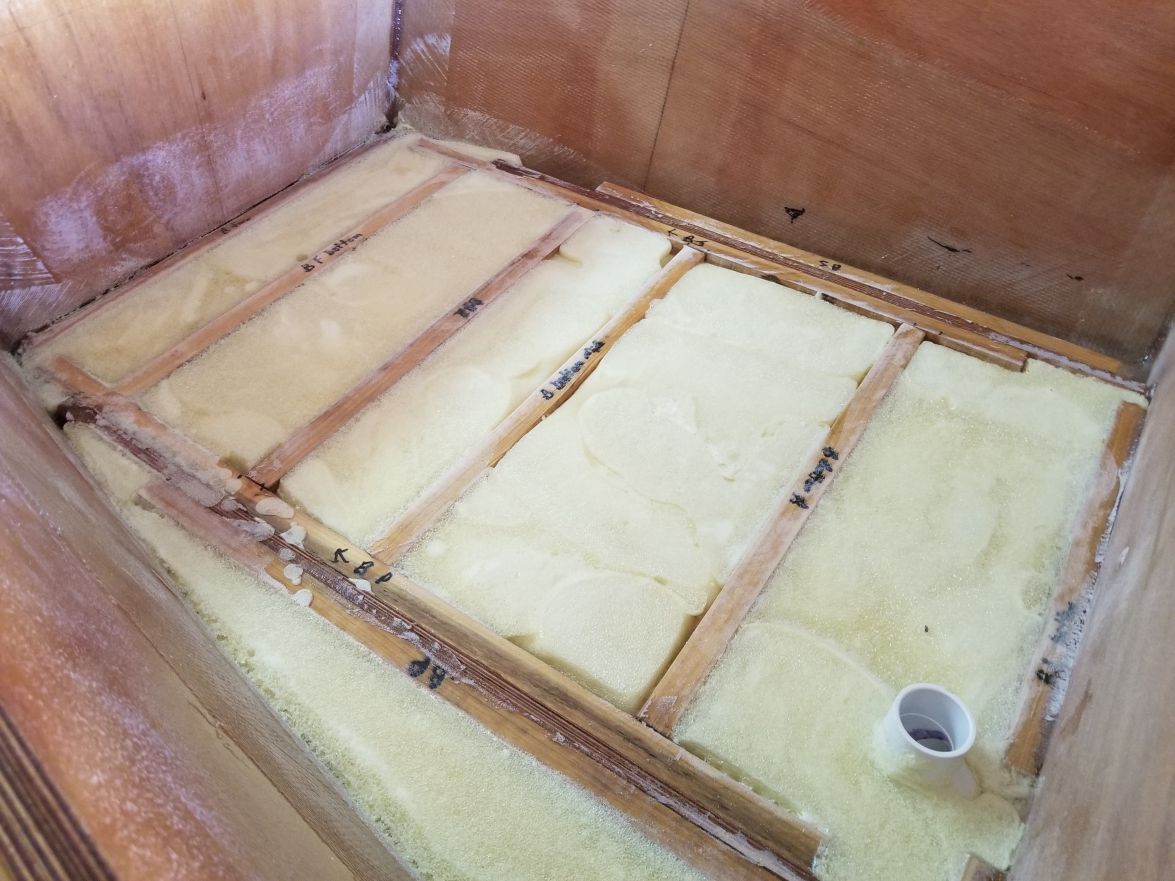
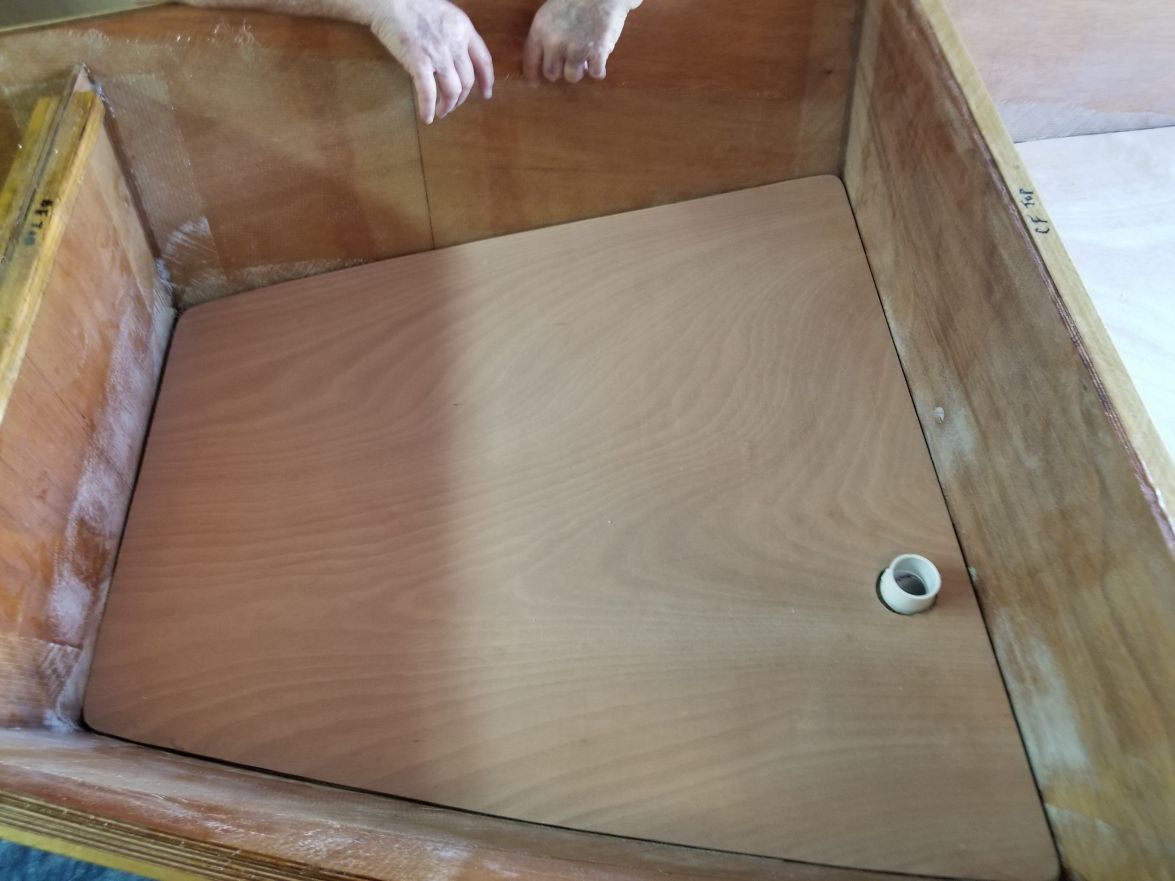
I'm going to add another station for this area. This will be for the battery and accessible through a hatch on top. I'll add a second battery for a trolling motor later.
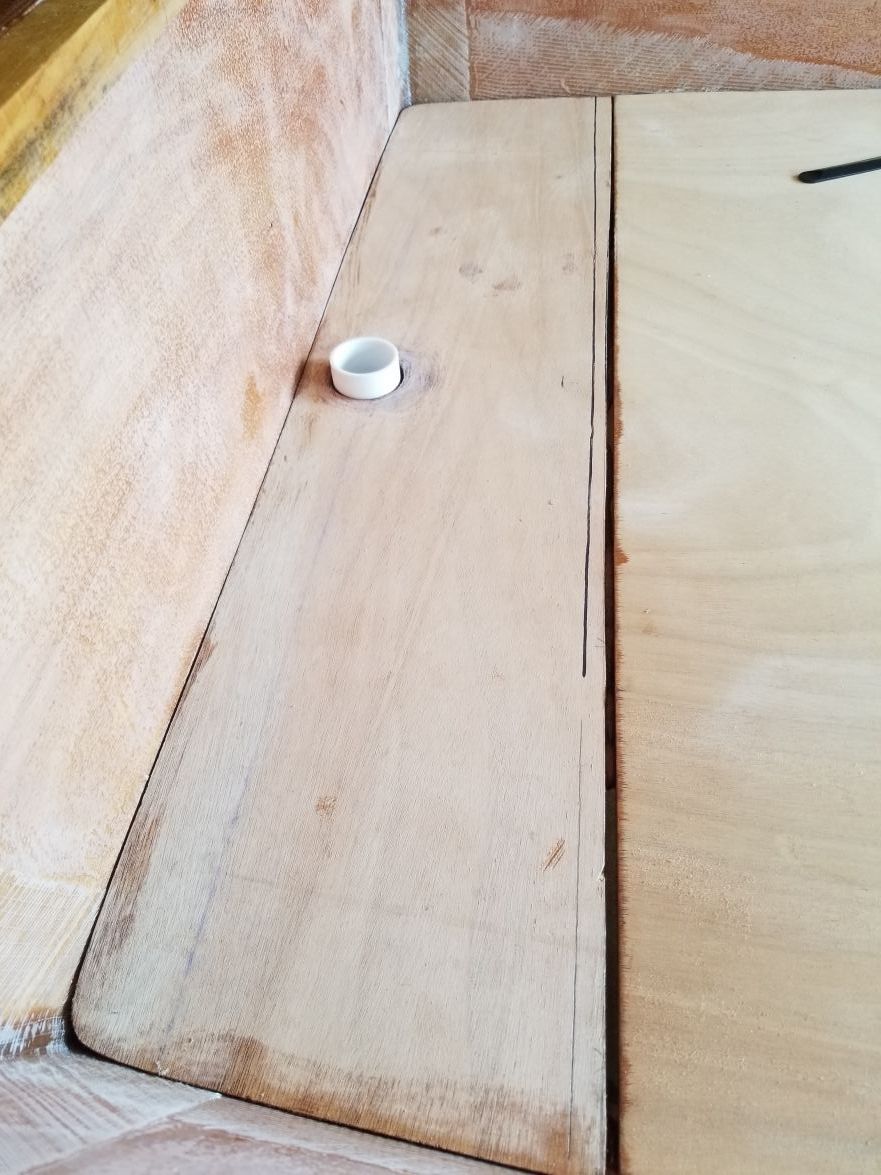
I'm going to make a small console to mount a gps/fish finder on top, switches, and an electronics/personals box on the back with a bait well that will go in between the grab bar. This was a rough mock up with cardboard.
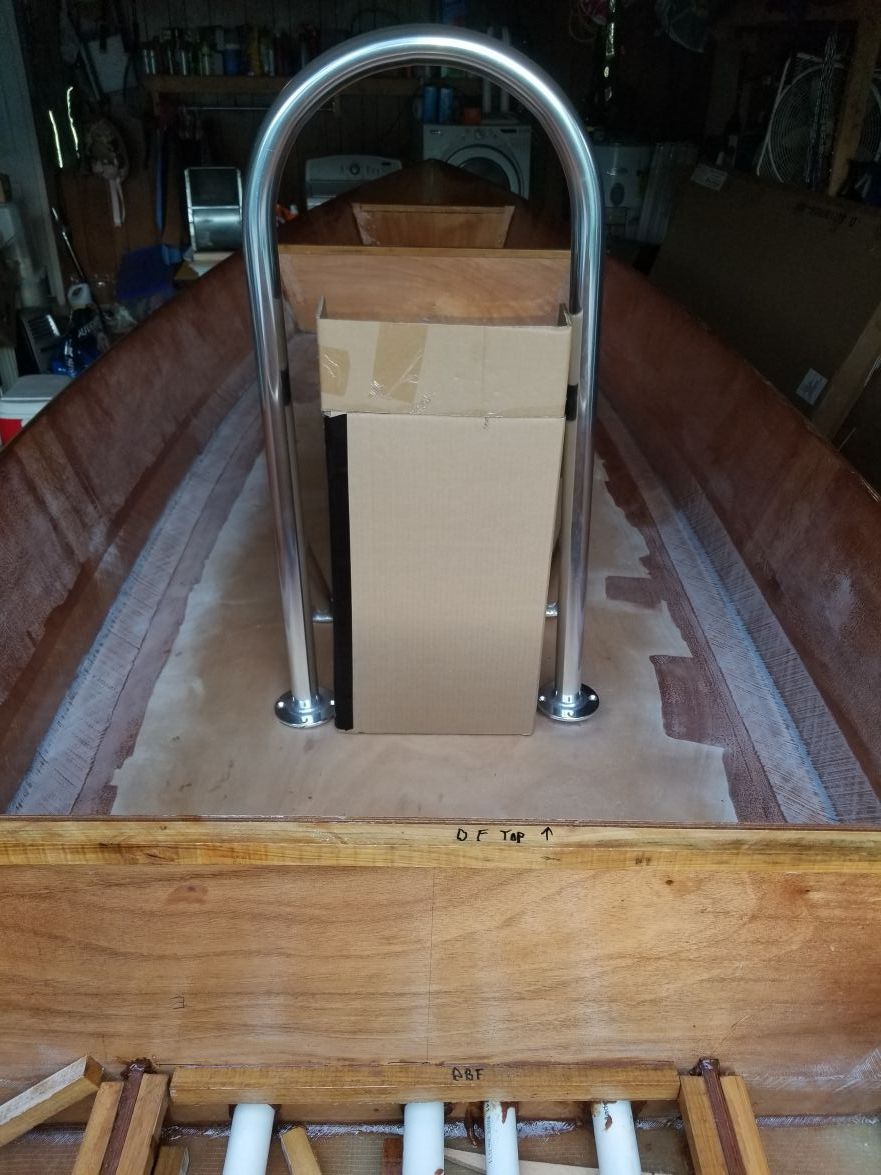
Put a light layer of fiberglass on top of the sole. Very pleased with it and it was effortless to lay out. I've thought about using some EMC clear on the sole with a coat of non slip. Then I checked the price of that stuff. Yikes! I just hate to cover that beautiful wood up.
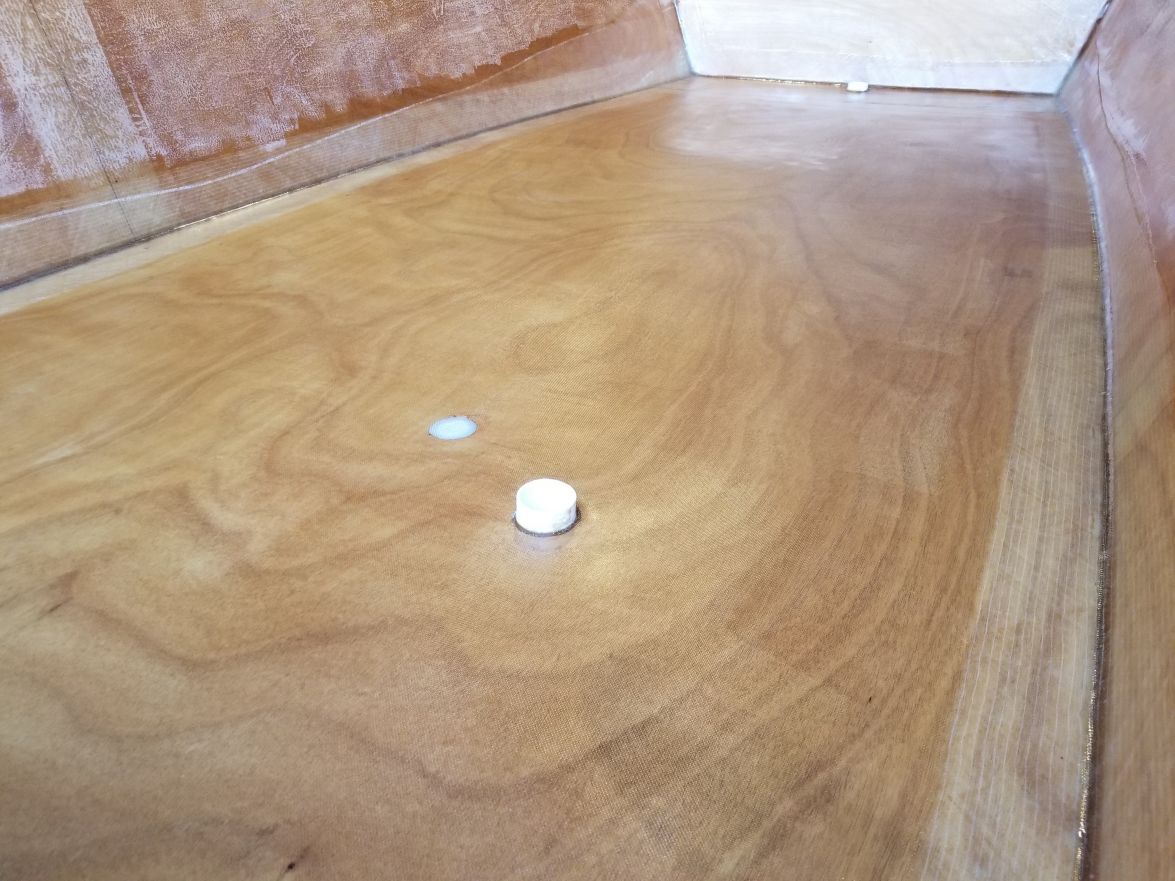
I got the busted Mercury I talked about a while back. At some point I have to fix this. The only other busted piece that I could tell was the intake cover on the cowling. The intake cover is $100 to replace. It can't be fixed.
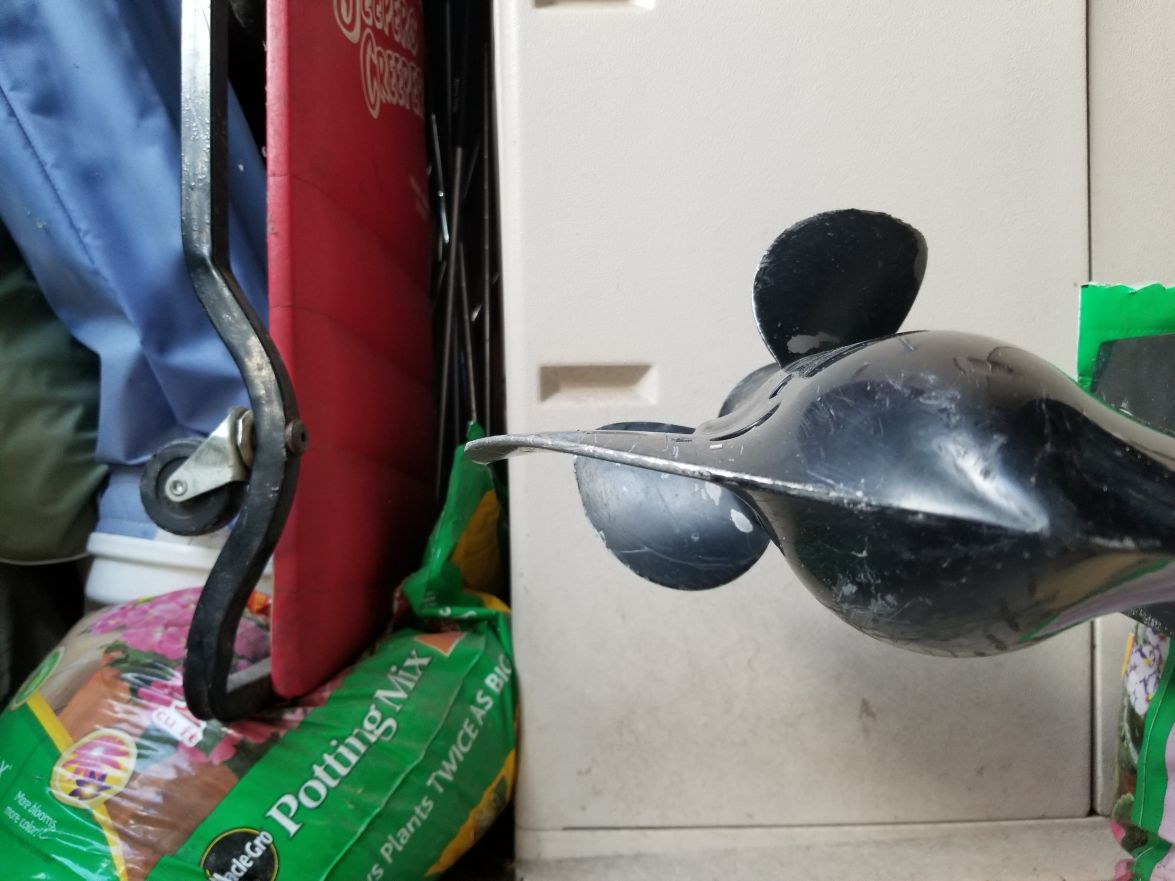
I drilled out the eye bolt holes and got it right the first time. Surprised myself. I decided to build that area up some. I used a small piece of cypress and glued/glassed it in.
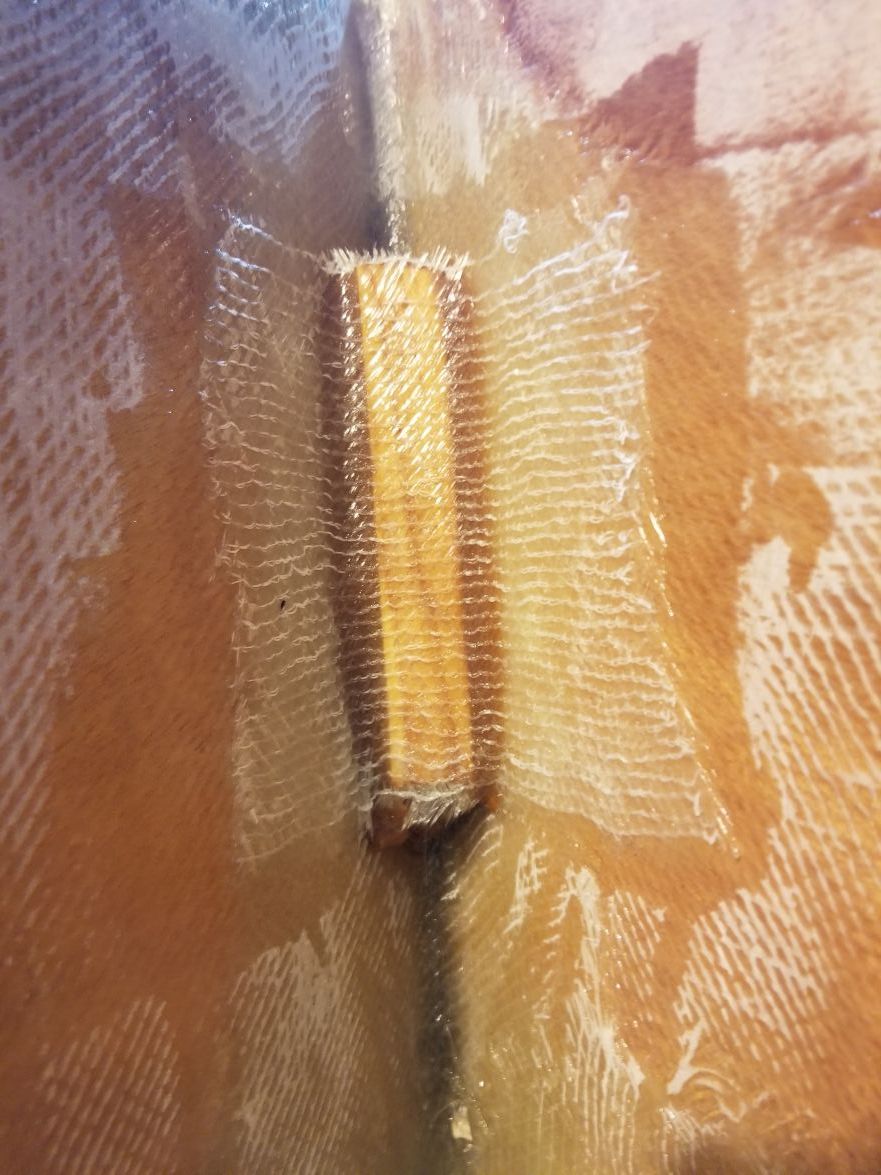
I'm filling the station A area up as much as I can with foam for some upright flotation. I want to leave some area on top in case I decide to run power for a trolling motor later. I haven't decided where I'm going to add upright flotation in the back transom area. Perhaps also around the bait well in the console.
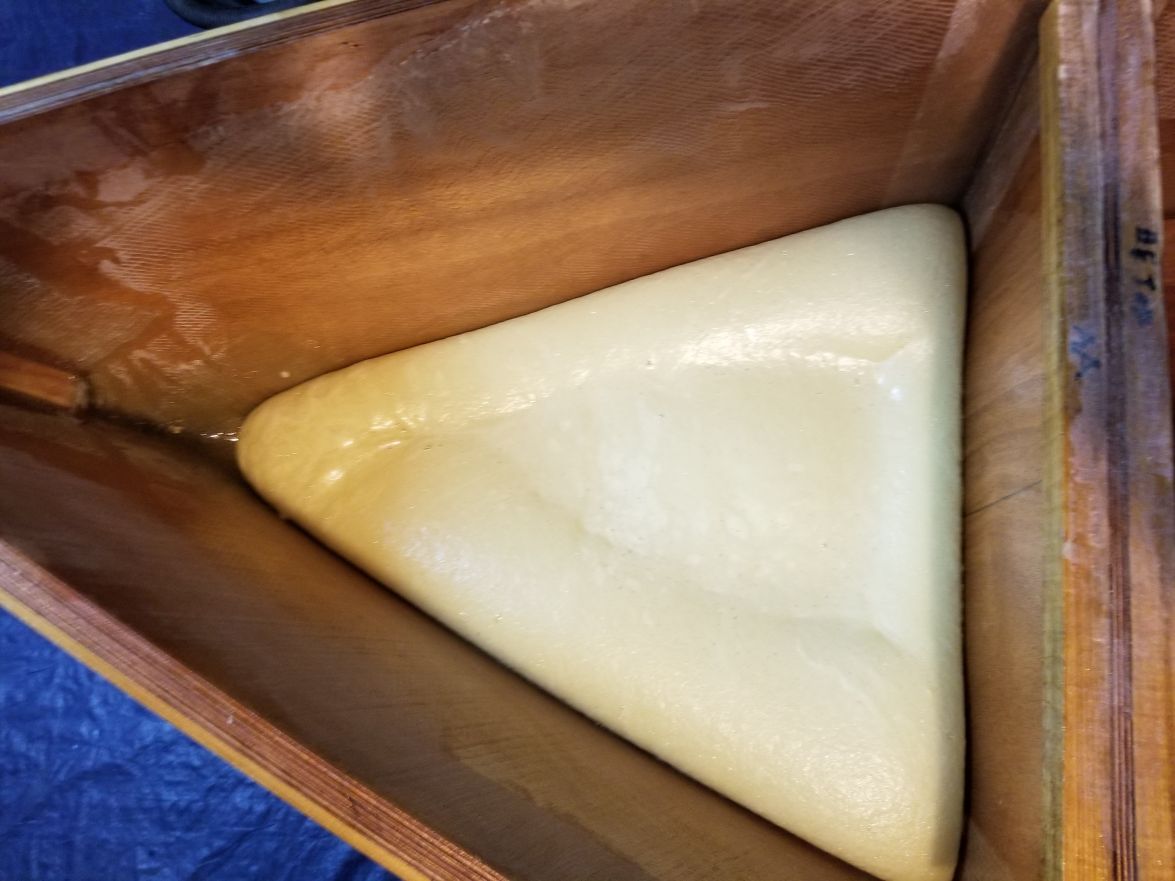
Between A and B was completed last night.
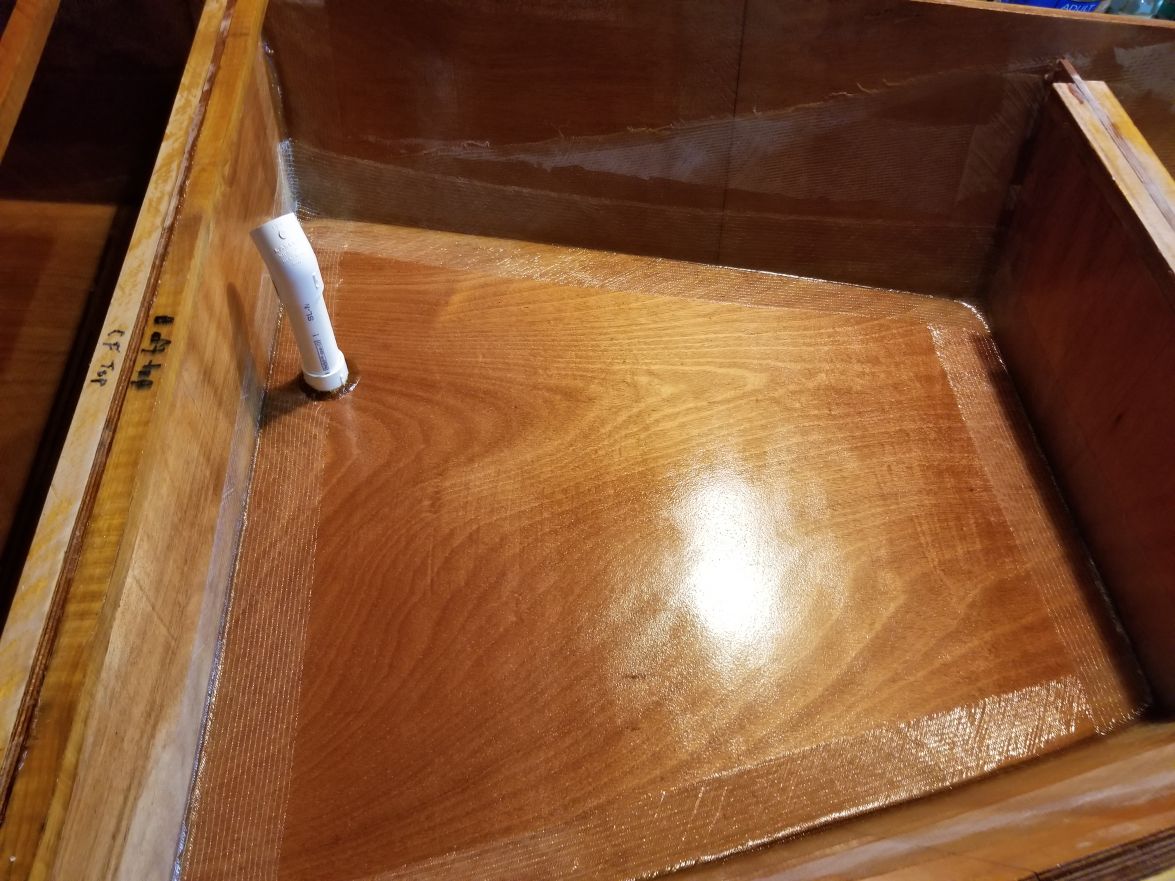
Re: Steve's FS18
Posted: Mon Jul 10, 2017 5:43 am
by Aripeka Angler
Very nice looking work and very well thought out!
Your epoxy and glass work is very neat and clean.
I'm hoping you got my reply to your pm? The pm function on here sometimes doesn't work for some reason.
I also have a quick question for you.
What is the distance from the center of your grab bar to the transom?
I'm hashing out this distance for my build and appreciate your input
Re: Steve's FS18
Posted: Mon Jul 10, 2017 6:30 am
by Jeff
Steve, very nice and clean glass work!!! Jeff
Re: Steve's FS18
Posted: Mon Jul 10, 2017 9:50 am
by Dutch1
Aripeka Angler wrote: ↑Mon Jul 10, 2017 5:43 am
Very nice looking work and very well thought out!
Your epoxy and glass work is very neat and clean.
I'm hoping you got my reply to your pm? The pm function on here sometimes doesn't work for some reason.
I also have a quick question for you.
What is the distance from the center of your grab bar to the transom?
I'm hashing out this distance for my build and appreciate your input
Richard - Thank you. Yes, I did receive your PM and thanks for responding. I'm going to hold off on a jack plate for right now. Please see below for some pics I took of the measurements before I put the sole down. I didn't know if anyone would be interested so I didn't upload them. I actually measured what would be comfortable for me while standing with my heels against something to figure out how far to set the grab bar. Just add another 30" to get the measurement to the transom. The tall pipe will be sanded down flat and the wires will go up through the rear right bar on the grab bar.
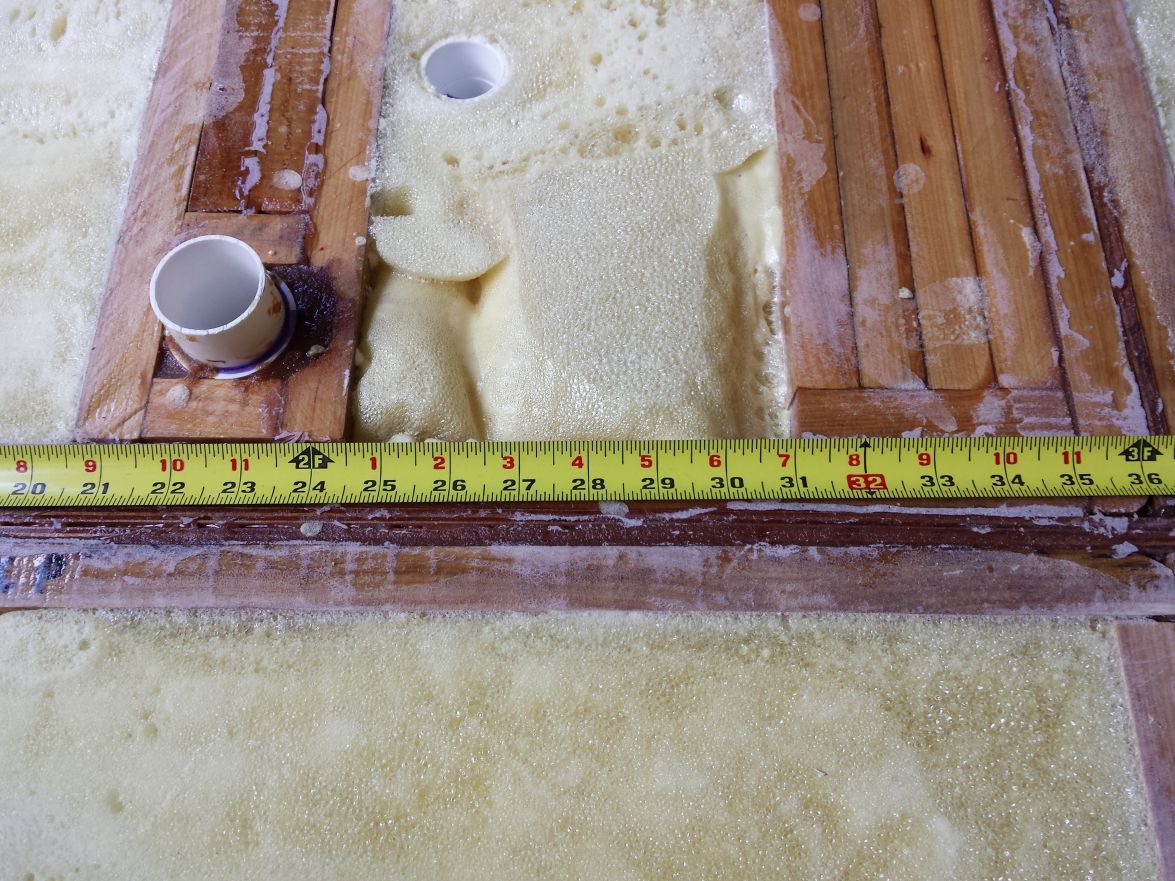
This is from the side
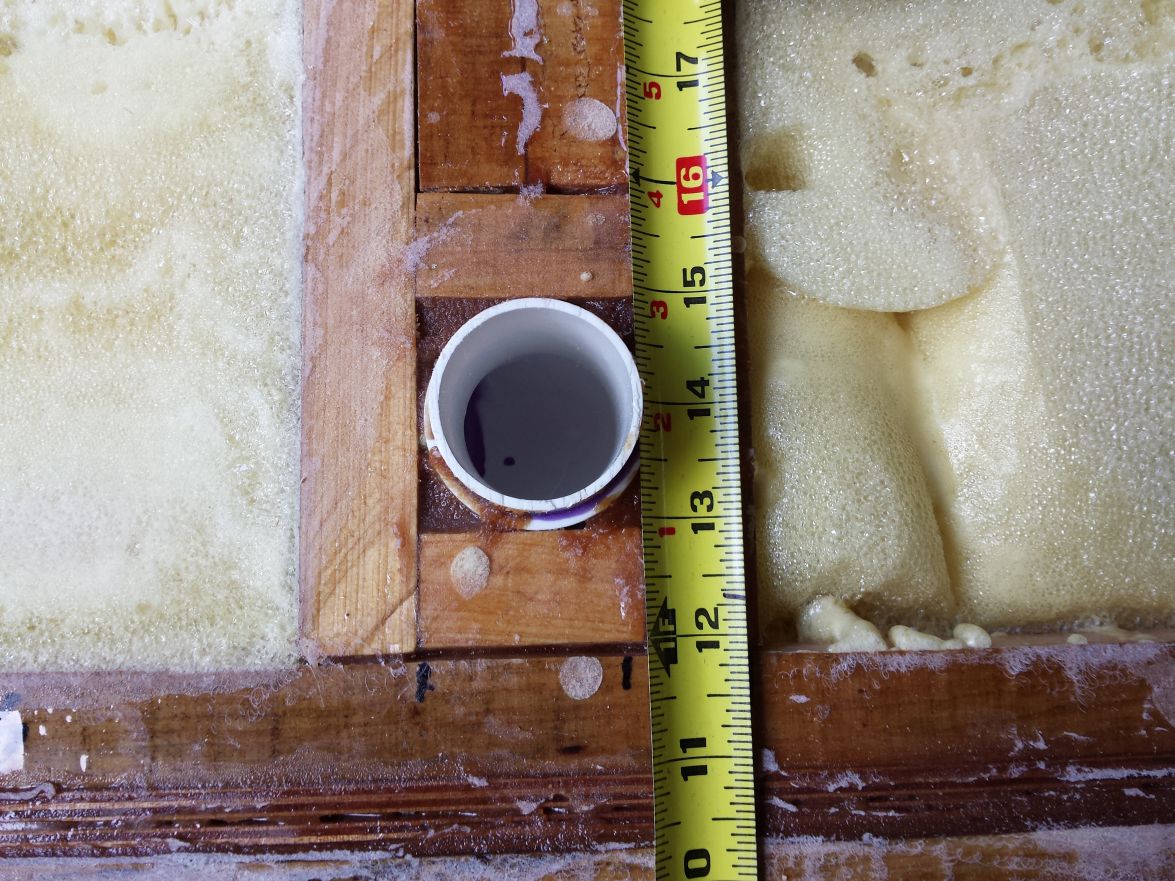
I hope this helps.
Jeff - I'll call you in a few minutes.
Steve
Re: Steve's FS18
Posted: Mon Jul 10, 2017 11:20 am
by K2FS18
looking good.
Re: Steve's FS18
Posted: Mon Jul 10, 2017 12:16 pm
by BB Sig
Looks great! You've gotten a lot done since I last saw it.
Re: Steve's FS18
Posted: Mon Jul 10, 2017 1:25 pm
by Dutch1
K2FS18 wrote: ↑Mon Jul 10, 2017 11:20 amlooking good.
BB Sig wrote: ↑Mon Jul 10, 2017 12:16 pm
Looks great! You've gotten a lot done since I last saw it.
Thank you! I took off last week and this week to make as much progress as I could on it. If this rain would just stop I'd like to paint either the inside with primer or the outside. We're in that typical summer pattern of rain every day now so it will be interesting.
Steve
Re: Steve's FS18
Posted: Mon Jul 10, 2017 2:01 pm
by Larry B
Steve,
Thats some very nice work there.

Re: Steve's FS18
Posted: Mon Jul 10, 2017 2:29 pm
by Jeff
Great work Dutch1!! Send us more photo's as you progress!! Also, we will get you in a Jack Plate but no hurry!! Jeff
Re: Steve's FS18
Posted: Mon Jul 10, 2017 2:29 pm
by Jeff
Great work Dutch1!! Send us more photo's as you progress!! Also, we will get you in a Jack Plate but no hurry!! Jeff
Re: Steve's FS18
Posted: Mon Jul 10, 2017 6:05 pm
by Dutch1
Thanks ya'll.
I haven't talked myself out of the clear coat on the top of the sole but I have a few questions for those of you who would know.
1. Would a clear coat with some sort of additive for non-slip look good? Or would it take away from the wood too much? I remember CL doing it on cypress (I think) strips on his sole a while back. Tom - Don't you own that boat now?
2. Would a clear coat last as long as a good topside paint? With it being darker would it hold more heat?
Thanks for the info!
Re: Steve's FS18
Posted: Mon Jul 10, 2017 10:36 pm
by TomW1
Dutch1, Cracker built a one of a kind GF18 for a customer three or four years ago in which he used 100 year old cyprus for the sole. He used an EMC clear coat with a sprinkling of non-skid in one of the layers. It should last as long as a painted sole. The non-skid is small glass balls or pellets and you can talk to Jamie at the store here to get the right one. I will tell you it is a beautiful boat he built for his client, he sent me pics as he was building it. The guy put a 90 HP motor on it and I had to work up a propeller for Larry that would choke down the speed at top rpm's, even that was not enough so Larry built a throttle stop that would keep the guy from killing him self. Last story 6 months after delivery the guy brought the boat to Larry for repairs after hitting a dock.
I do own Larry's OD18 No Excuse but it is painted inside and out. I am repainting the inside this summer as he used LPU and he told me it would need to be repainted. The outside is Sterling and beautiful.
Tom
Re: Steve's FS18
Posted: Tue Jul 11, 2017 7:42 pm
by Aripeka Angler
Hi Steve,
I appreciate the measurements you posted. Thank you very much!
Re: Steve's FS18
Posted: Wed Jul 12, 2017 5:56 pm
by Dutch1
Thank you Tom and you're welcome AA. I have a handful more if you need them.
Steve
Re: Steve's FS18
Posted: Wed Jul 12, 2017 6:07 pm
by Dutch1
TomW1 - I do have one other question for you. The prop on the Mercury I'm using is pretty beat up. Will you please send me some numbers for the best replacement prop for this motor?
2011 Mercury 25hp 4-stroke. All manual.
Thanks!
Steve
Re: Steve's FS18
Posted: Thu Jul 13, 2017 12:07 am
by TomW1
Dutch1 wrote: ↑Wed Jul 12, 2017 6:07 pm
TomW1 - I do have one other question for you. The prop on the Mercury I'm using is pretty beat up. Will you please send me some numbers for the best replacement prop for this motor?
2011 Mercury 25hp 4-stroke. All manual.
Thanks!
Steve
Steve, I am going to need some numbers from you to be able to do this.
Boat weight as built. Jacques lists it as 200-265 I need you to be as accurate as possible.
Load in boat as it leaves the dock, your weight plus passengers if any, fuel gallons, cooler and ice, bait well size if you have one.
I normally work up specs for a SS prop for these shallow draft boats as they will last longer. Is that okay.
Tom
Re: Steve's FS18
Posted: Thu Jul 13, 2017 3:00 pm
by Dutch1
Tom,
Sounds good. I'll touch base with you when I'm about done. I still have some work to do before we get to that point. I'm trying to find some scales to weigh this thing so I will know once it's done.
Thank you!
Re: Steve's FS18
Posted: Mon Dec 11, 2017 4:39 pm
by Dutch1
Re: Steve's FS18
Posted: Mon Dec 11, 2017 4:52 pm
by Jeff
Dutch1, Excellent progress and really good to see your grandfather still building with you!! Happy holidays, Jeff
Re: Steve's FS18
Posted: Mon Dec 11, 2017 5:06 pm
by Dutch1
Re: Steve's FS18
Posted: Mon Dec 11, 2017 5:10 pm
by Dutch1
Jeff wrote: ↑Mon Dec 11, 2017 4:52 pm
Dutch1, Excellent progress and really good to see your grandfather still building with you!! Happy holidays, Jeff
Thanks Jeff. I couldn't keep Grandad away from this build when I'm able to make any progress. He loves working on it because it gives him something to do and he's learning as we go along. He gives his advice and we keep on building. And, of course, I'm very thankful he is willing and able to help me with this build!!
Re: Steve's FS18
Posted: Mon Dec 11, 2017 5:38 pm
by Dutch1
Here's the bait well. I looked all over and couldn't find anything the size I wanted so we decided to make our own. Grandad sanded down the bottom of a 3 gallon bucket so it would be smooth.
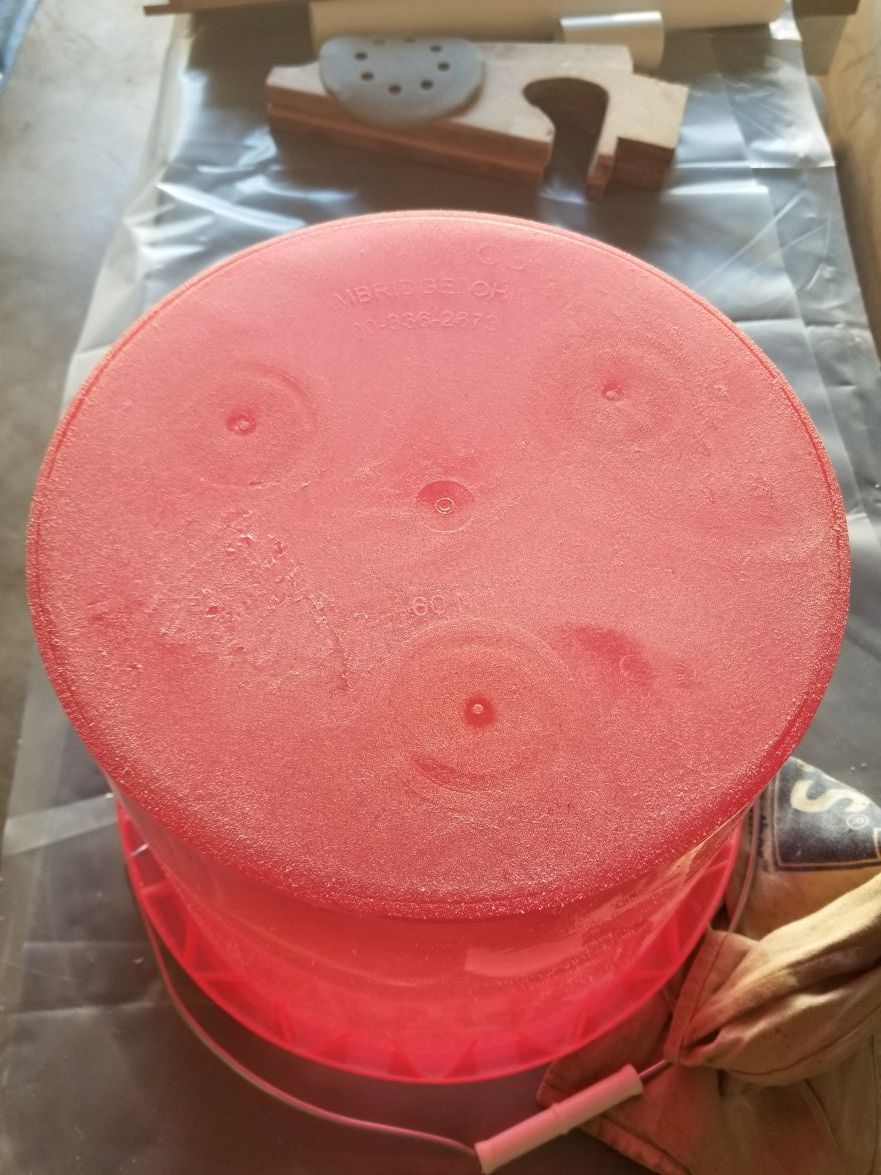
We snipped away the edges so it wouldn't pool epoxy and make it impossible to remove.
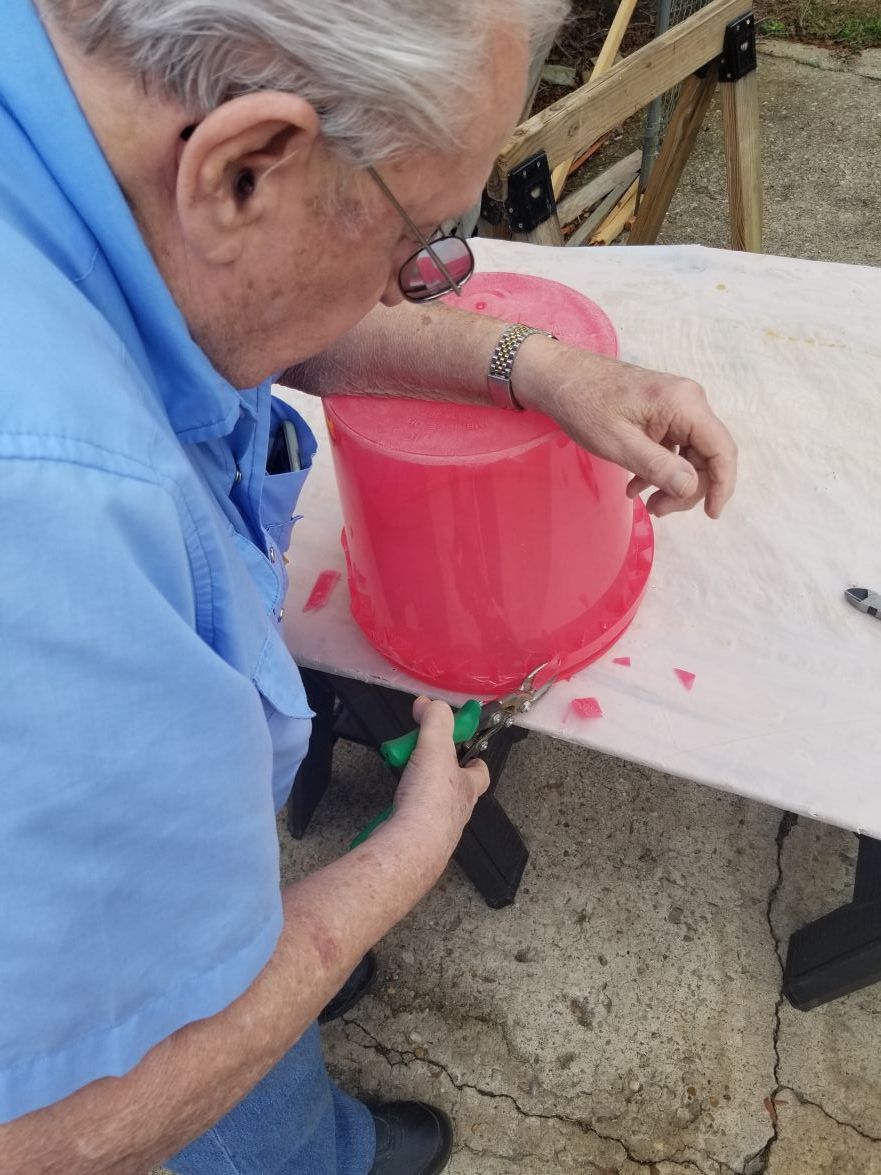
The bottom of the bucket stuck up a little and I didn't want water to not drain out the middle of the bottom. So we heated it up with a heat gun and made the shape I was looking for in the bottom and the drain.
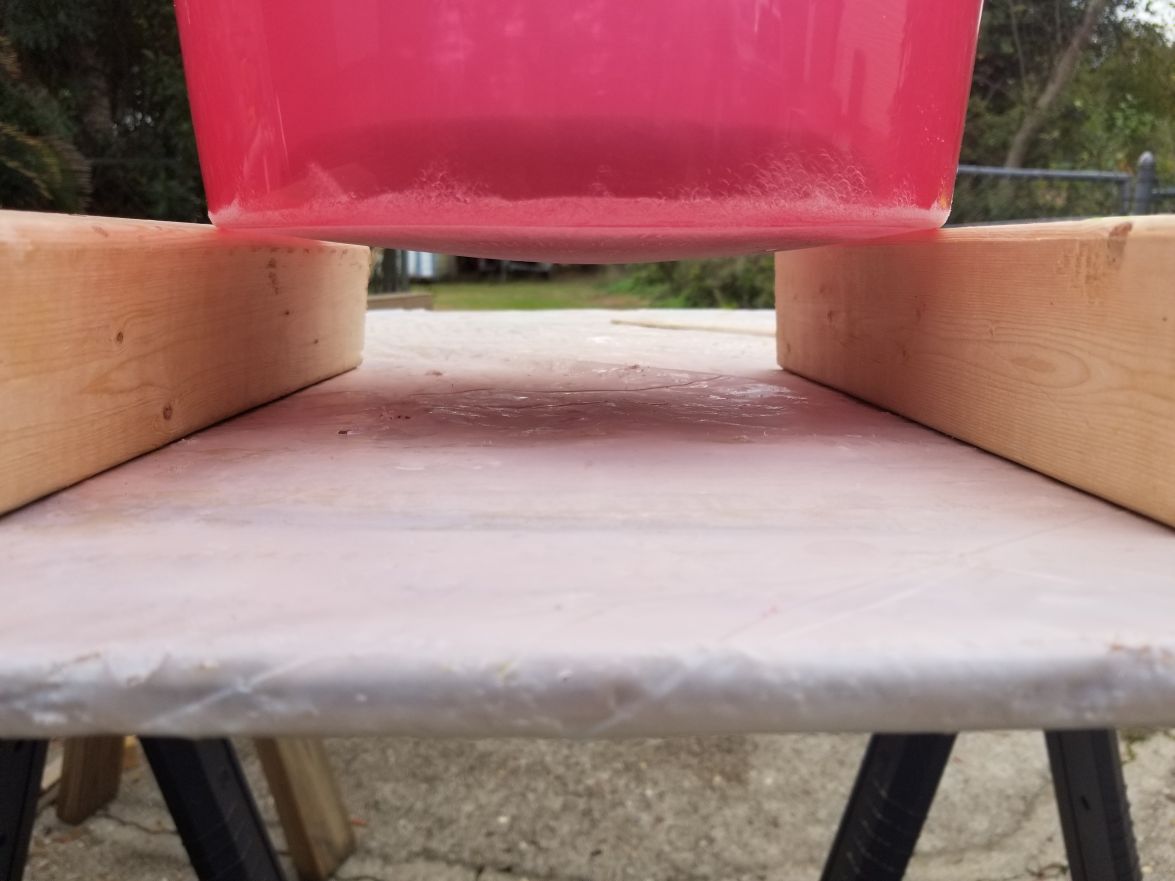
I used a piece of the wood cutout from one of the many holes I've cut and some weight.
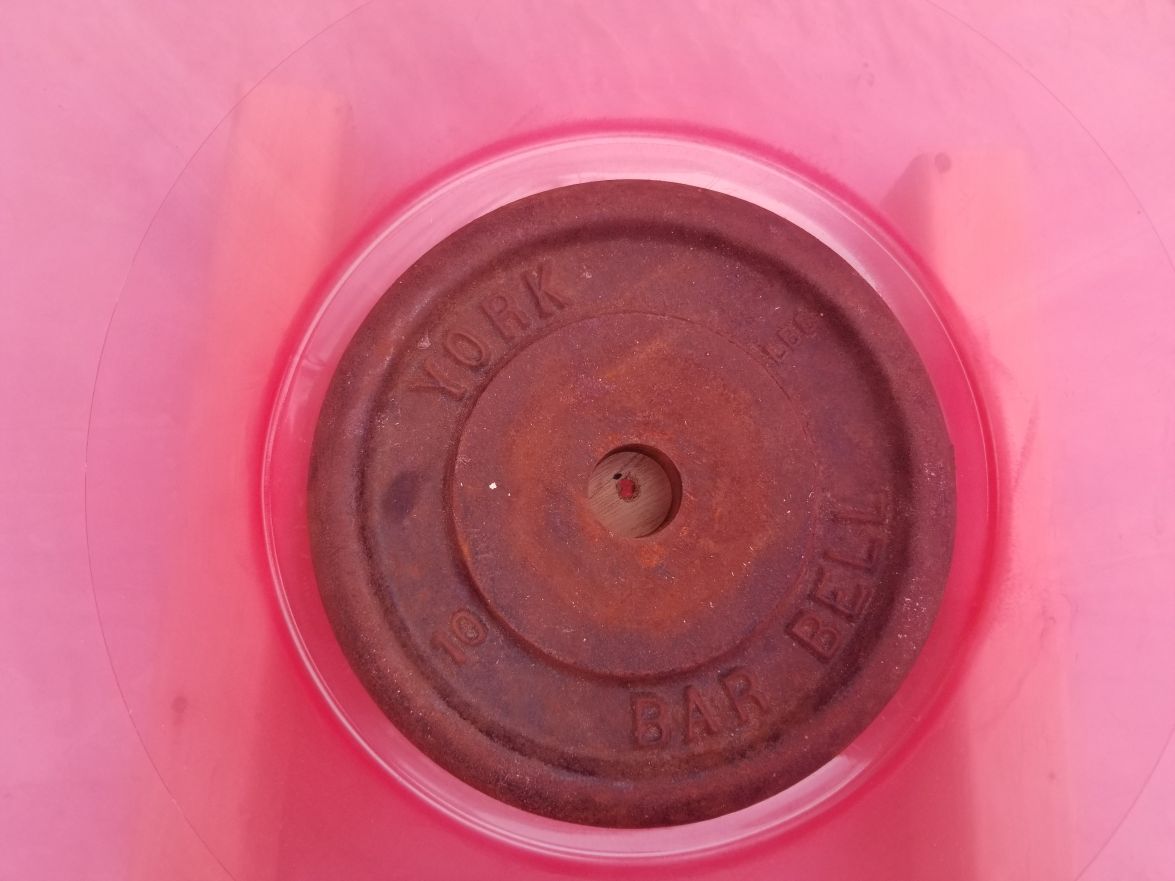
I think we did pretty good since this was the first one we've ever made. I put three coats of car wax on the bucket so it wouldn't stick. It didn't but it was still a pain in the but to remove and I destroyed the bucket.
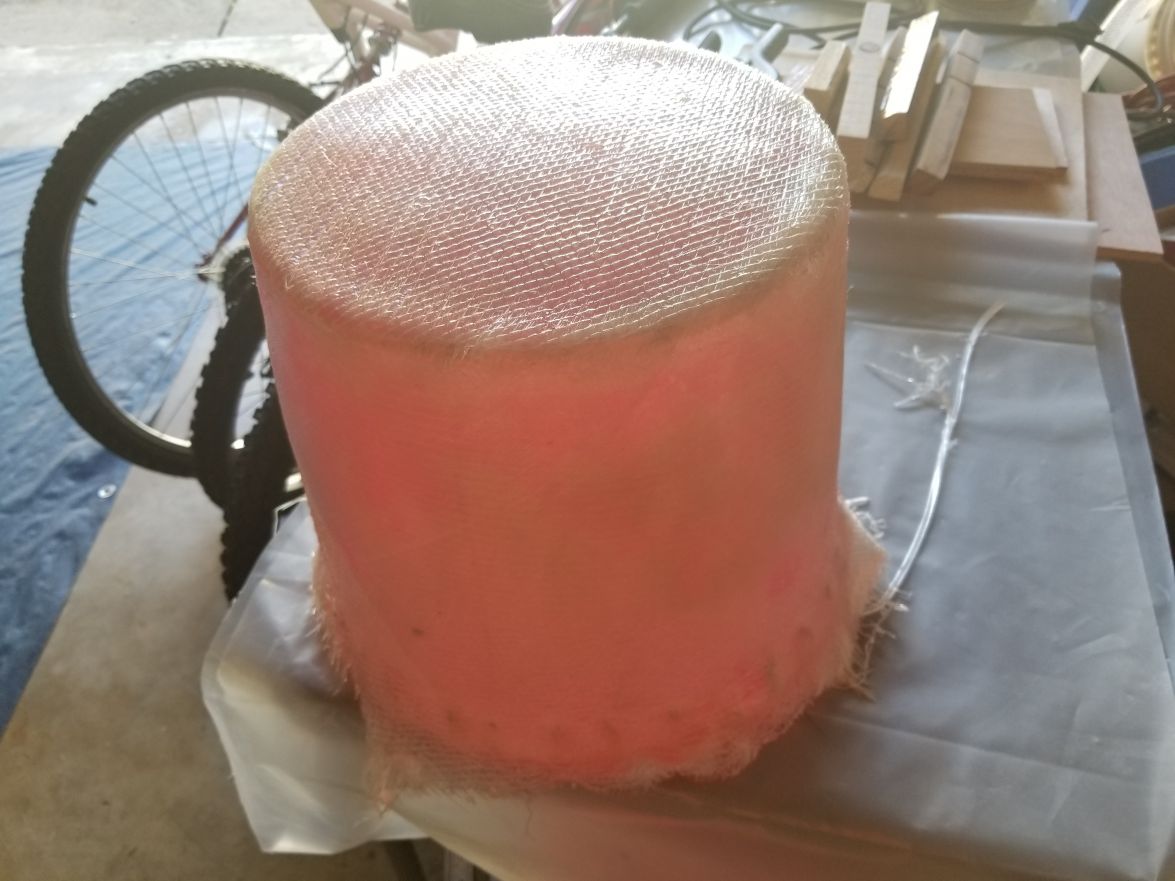
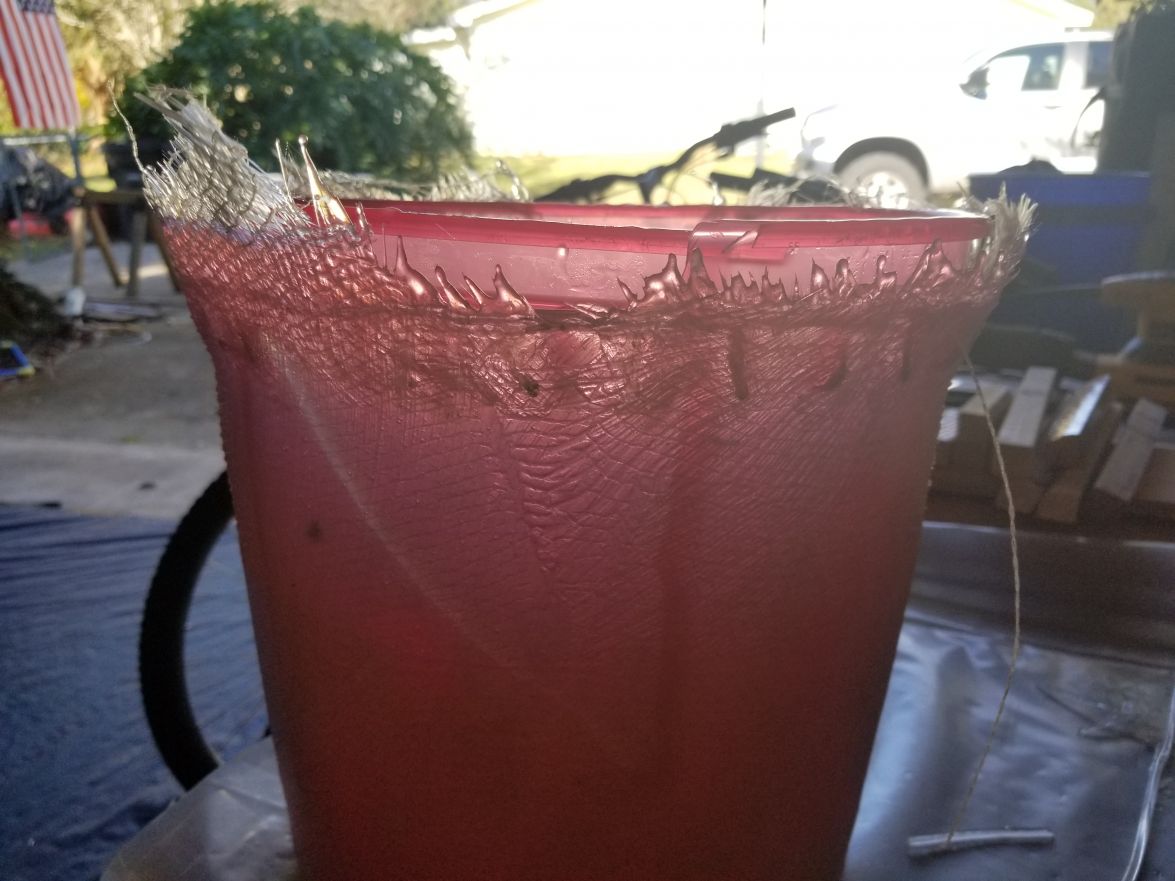
Curing in the sun..
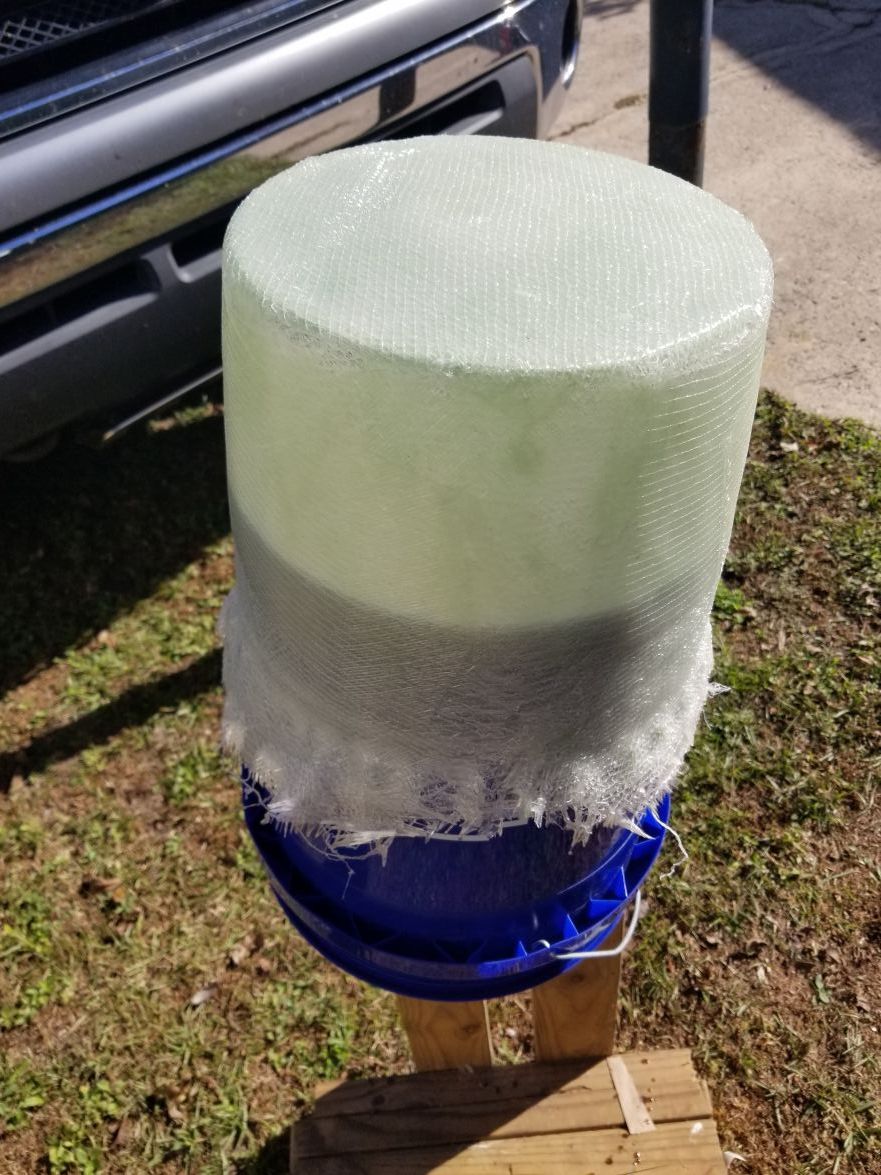
All I have left to post are the hatch pics. That's been a learning experience and will take more time than I have right now. I'll post the rest later tonight.
If ya'll see anything I'm screwing up on PLEASE say something. This is the best I've come up with for how I plan to use this boat. And, of course, ask me any questions. I have a lot more pics. Or I can take them.
Re: Steve's FS18
Posted: Tue Dec 12, 2017 10:24 pm
by K2FS18
Welcome back. Looking good.
Re: Steve's FS18
Posted: Tue Dec 12, 2017 10:35 pm
by Aripeka Angler
I really like the baitwell, fantastic idea.
Does it seem strong enough with one layer of glass?
Re: Steve's FS18
Posted: Wed Dec 13, 2017 11:33 pm
by Dutch1
Thanks K2FS18 and AA!
AA,
It is the extra 12oz I had left over with some 6oz tape wrapped around it. I placed a piece big enough to go over it one time with cuts. Then another the same size, then the tape around it and 4 pieces over the bottom. After I removed it I didn't like how thin it was at the bend over the edge. If you look close at the pic it is still pretty thin in 2 spots. I'm thinking about using some milled fiberglass and making it kind of thick to build up those spots and fill it in. The problem with this in my mind is adhesion. I may sand it down pretty good in those areas. I haven't made my mind up yet. I'd love some of yall's advice.
I'm very pleased with how it turned out. It is STRONG. The only "weak" spot I see is on the bend over the edge where the fiberglass opened up. When I cut out the holes in the bottom and side I'll post pics to show how thick they are.
Steve
Re: Steve's FS18
Posted: Mon Jan 01, 2018 3:50 pm
by Dutch1
I need some advice on whether or not to add scuppers. Here's why.
Where I plan to primarily fish this boat I know I will have to travel a good distance quartering into the waves to get back to the landing in the summer due to southerly winds. I'll mainly fish in the safety of the creeks but if the wind pops up I'll get caught in waves when I make my way back to the landing. You know how reliable those wind forecasts can be... I can't make up my mind if I want the drains from the sole to go directly to scuppers on both sides or into the bilge (motor well area) and use a bilge pump.
I haven't bought them yet and I think the angle of the transom will help in water coming back into the sole area if I don't make them flat.
What do you think? It would be nice to not to have to rely on a bilge pump.
Re: Steve's FS18
Posted: Mon Jan 01, 2018 8:51 pm
by Aripeka Angler
Hi Steve,
Your boat is looking great! Most of the guys who build this boat drain the cockpit at the rear bulkhead with drain tubes that span the stern compartment and exit the transom. The stern compartment is open to stringers and requires a drain or a bilge pump.
I fully foamed in all of the area under my full length sole including the forward and aft compartments. I have no bilge to collect water. I drilled the scupper holes through the sides of the hull just in front of the rear bulkhead. My forward and stern compartment soles are higher than the cockpit and drain to the center of the boat via plugable drains. To drain the cockpit through the side of the hull requires some pre-planning. I raised the sole 1.25 inches. The forward and rear compartments are 1" higher than the cockpit.
Re: Steve's FS18
Posted: Mon Jan 01, 2018 10:36 pm
by Dutch1
Thanks for the information Richard. I did the same thing with foam and I put 1/4 deck fore and aft. The entire bottom of the boat is foam except for the small motor well area in the pic below. This is all I would consider a bilge. The pipe is a drain from the future bait well.
I was thinking about a scupper on both sides of this bilge section using a hose connected to the fittings I concocted to drain from the cockpit and out through the transom. I just re-read what I typed earlier and wasn't very clear. I hope this helps. I'm thinking about using the angle of the transom and letting the scupper stick/angle up a little so the water won't go back through and into the cockpit unless the hull was deeper than the top of the hose that connected it to the cockpit drain. I'm looking at the recessed threaded thru hull scupper from TH Marine.
http://thmarine.com/recessed-flapper-sc ... rettyPhoto
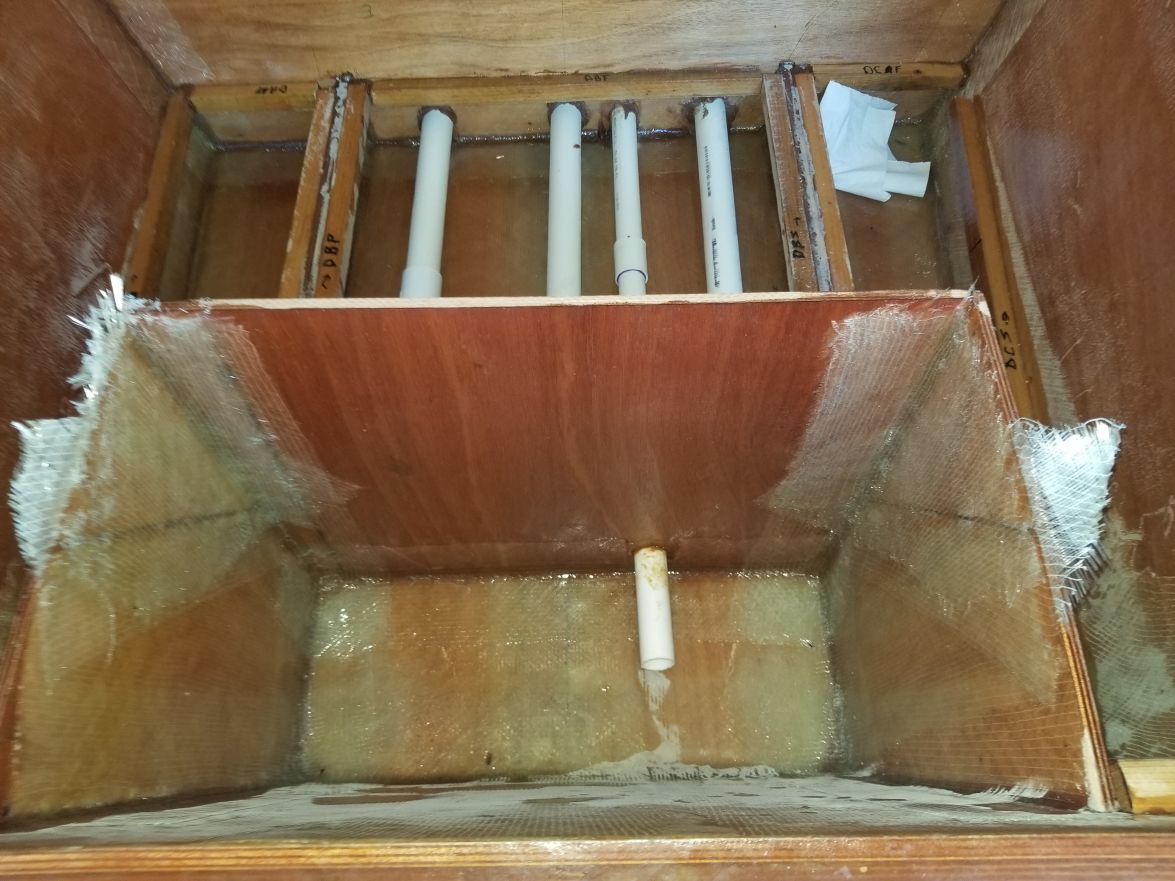
Re: Steve's FS18
Posted: Tue Jan 02, 2018 5:26 pm
by K2FS18
Steve, I would use scuppers if possible. My decks and bilge don't drain quick enough when I start to take on side waves. I may go back and add side scuppers in front of the last bulk head.
Re: Steve's FS18
Posted: Tue Jan 02, 2018 8:39 pm
by Aripeka Angler
Why not do both? If you expect to take a wave or two over the gunwales a bilge pump would give you piece of mind over just having scuppers.
Re: Steve's FS18
Posted: Wed Jan 03, 2018 6:16 pm
by Dutch1
Aripeka Angler wrote: ↑Tue Jan 02, 2018 8:39 pm
Why not do both? If you expect to take a wave or two over the gunwales a bilge pump would give you piece of mind over just having scuppers.
I hear ya. Thanks to you and KSFS18 for the feedback!
Re: Steve's FS18
Posted: Thu Jan 04, 2018 10:58 am
by joe2700
Aripeka Angler wrote: ↑Tue Jan 02, 2018 8:39 pm
Why not do both? If you expect to take a wave or two over the gunwales a bilge pump would give you piece of mind over just having scuppers.
To me if I'm taking waves scuppers are giving me peace of mind over bilge pumps, not the other way around. You could have bilge pumps under the deck just in case water gets where it shouldn't, but if you have scuppers to clear the deck just rely on those without adding a mechanical point of failure into the mix.
Re: Steve's FS18
Posted: Thu Jan 04, 2018 7:27 pm
by Aripeka Angler
joe2700 wrote: ↑Thu Jan 04, 2018 10:58 am
Aripeka Angler wrote: ↑Tue Jan 02, 2018 8:39 pm
Why not do both? If you expect to take a wave or two over the gunwales a bilge pump would give you piece of mind over just having scuppers.
To me if I'm taking waves scuppers are giving me peace of mind over bilge pumps, not the other way around. You could have bilge pumps under the deck just in case water gets where it shouldn't, but if you have scuppers to clear the deck just rely on those without adding a mechanical point of failure into the mix.
Hi Joe,
I think Steve is asking about scuppers from a bilge below the waterline, not deck scuppers or deck drains.
I suggested adding a bilge pump in addition to the scuppers the builder wants to install.
Does he really need a pump? Probably not. But if it was my boat and I had any anxiety, I would throw one in for piece of mind.
Re: Steve's FS18
Posted: Thu Jan 04, 2018 9:07 pm
by Dutch1
I was thinking about installing the scuppers above the water line on the transom for the purpose of draining the cockpit area only. The rear compartment area would drain into the bilge/motor well area in the previous pic. Sorry if I confused anyone.
Re: Steve's FS18
Posted: Sat Jan 06, 2018 10:39 am
by joe2700
Aripeka Angler wrote: ↑Thu Jan 04, 2018 7:27 pm
Hi Joe,
I think Steve is asking about scuppers from a bilge below the waterline, not deck scuppers or deck drains.
I suggested adding a bilge pump in addition to the scuppers the builder wants to install.
Does he really need a pump? Probably not. But if it was my boat and I had any anxiety, I would throw one in for piece of mind.
I can't picture that. As far as I know below the waterline a bilge pump is the only option since water doesn't flow up on it's own. Above the waterline you can either have scuppers or a pump or both. I mean a hole below the waterline would work while you were on a plane, but I don't think that's what he was saying.
Dutch1 wrote: ↑Thu Jan 04, 2018 9:07 pm
I was thinking about installing the scuppers above the water line on the transom for the purpose of draining the cockpit area only. The rear compartment area would drain into the bilge/motor well area in the previous pic. Sorry if I confused anyone.
If you will ever be out in exposed waters like you say you are I think scuppers to drain the deck are great piece of mind over relying on a pump. You can always add some mechanism to seal them in sheltered waters.
Re: Steve's FS18
Posted: Sun Jan 07, 2018 9:48 am
by Dutch1
Thanks Richard and Joe2700 for the responses!
Re: Steve's FS18
Posted: Mon Jan 15, 2018 12:11 pm
by Dutch1
Afternoon all,
I want to put a seat post mount up front on the deck in between the two hatches. It will be about a inch from the station. I've been thinking about stiffening the area under the deck so there won't be any flex when people shift around or lean on it. What have people done in the past to do this or do I need to worry about it all all? I had planned to add some backing to the deck where the screws will go and was also thinking about a brace down to the bottom of the station.
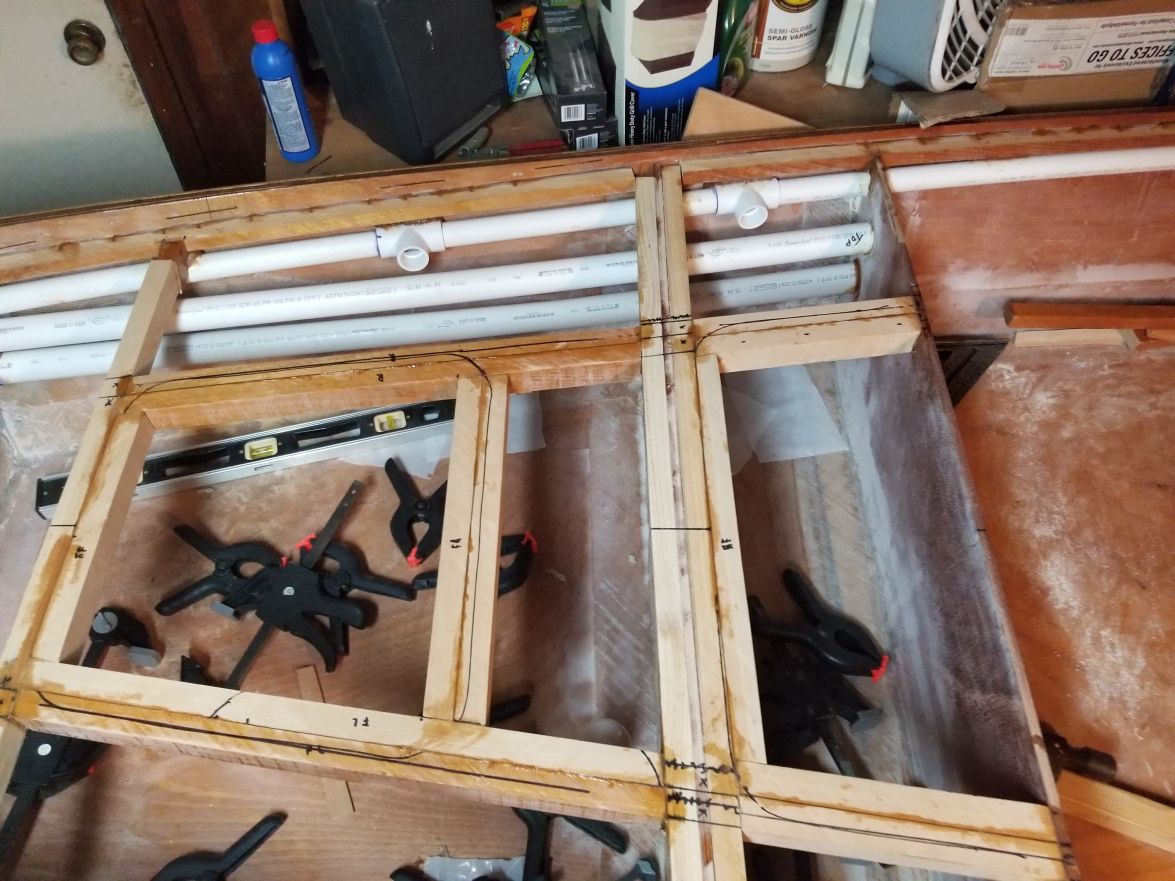
Re: Steve's FS18
Posted: Mon Jan 15, 2018 12:37 pm
by swglenn
Lay your pedestal seat mount on the deck and see where the holes lie. If you are fortunate they will be inside the hatch cleat area. I added a backer plate of 9mm ply under the seat and then added some additional cleats under that so the pedestal bolts went into the gap between the hatch cleat and the seat cleat. I used long bolts and fender washers that can bridge gap between the cleats and a nylock nut that won't back off later. You could just add the plywood backer plate and probably be good.
Re: Steve's FS18
Posted: Mon Jan 15, 2018 7:42 pm
by Aripeka Angler
Dutch1 wrote: ↑Mon Jan 15, 2018 12:11 pm
Afternoon all,
I want to put a seat post mount up front on the deck in between the two hatches. It will be about a inch from the station. I've been thinking about stiffening the area under the deck so there won't be any flex when people shift around or lean on it. What have people done in the past to do this or do I need to worry about it all all? I had planned to add some backing to the deck where the screws will go and was also thinking about a brace down to the bottom of the station.
I know the spot where you plan to install the pedestal seat post.
I would put in a piece of 1/2" blocking underneath the deck. An angle "kicker" of plywood under the blocking back to the bulkhead would make it rock solid.
Re: Steve's FS18
Posted: Mon Jan 15, 2018 10:21 pm
by Dutch1
Thanks!!
Re: Steve's FS18
Posted: Sun Jan 28, 2018 10:28 am
by Dutch1
Yesterday was a good long work day since it got up to 70. I was able to get a lot done finishing things up, sanding, and working on the small bait well/console thing. I have everything routed out for the hatches and sanded. I think I'm done with those. Everything is sanded and ready for primer except for where the rod holders will go. I'll have to fair around those when they are installed. Of course, today it's flooding and I'm not going to paint. Grandad also made some supports for the area where a seat post base will go with some cypress. Those are glued in place. I'll post the pics tonight. I don't like the front rod holders. I have to mess around with those some more. Something told me to not install them yet because I really didn't like them and I would see them all the time. It would drive me nuts.
Now to spend some money to finish. I have to go buy:
1. Two 1 1/2" scuppers
2. Wire, bus block, switches
3. Hatch latches. Figure out which type of hatch latches I want to use on the hatches and the console.
4. Inside paint. I still don't know what color I'm going with on the inside. I'm going to paint Awlgrip blue tone white on the outside.
I may go ahead and flip it, prep for paint and finish the console while I wait on a good painting day. I can also get the motor running (hopefully without having to spend too much) and perform maintenance on it. Decisions decisions.... Hard to guess the weather in N. Florida. I'm really pushing to get done by spring but the cold days and painting has me worried.
Re: Steve's FS18
Posted: Fri Feb 02, 2018 2:02 am
by Dutch1
Sorry to my friends that have been following for not keeping the pics updated.. Please find them below.
The bait well weighed in right at 2lbs. It's about 3/16" to 1/8" thick depending on where you measure. Thicker at the bottom than the top. I thickened up some epoxy with milled fiberglass and that sealed up the inside very well and took care of any holes that were at the bend. I still don't know what kind of paint I'm going to use on the inside.
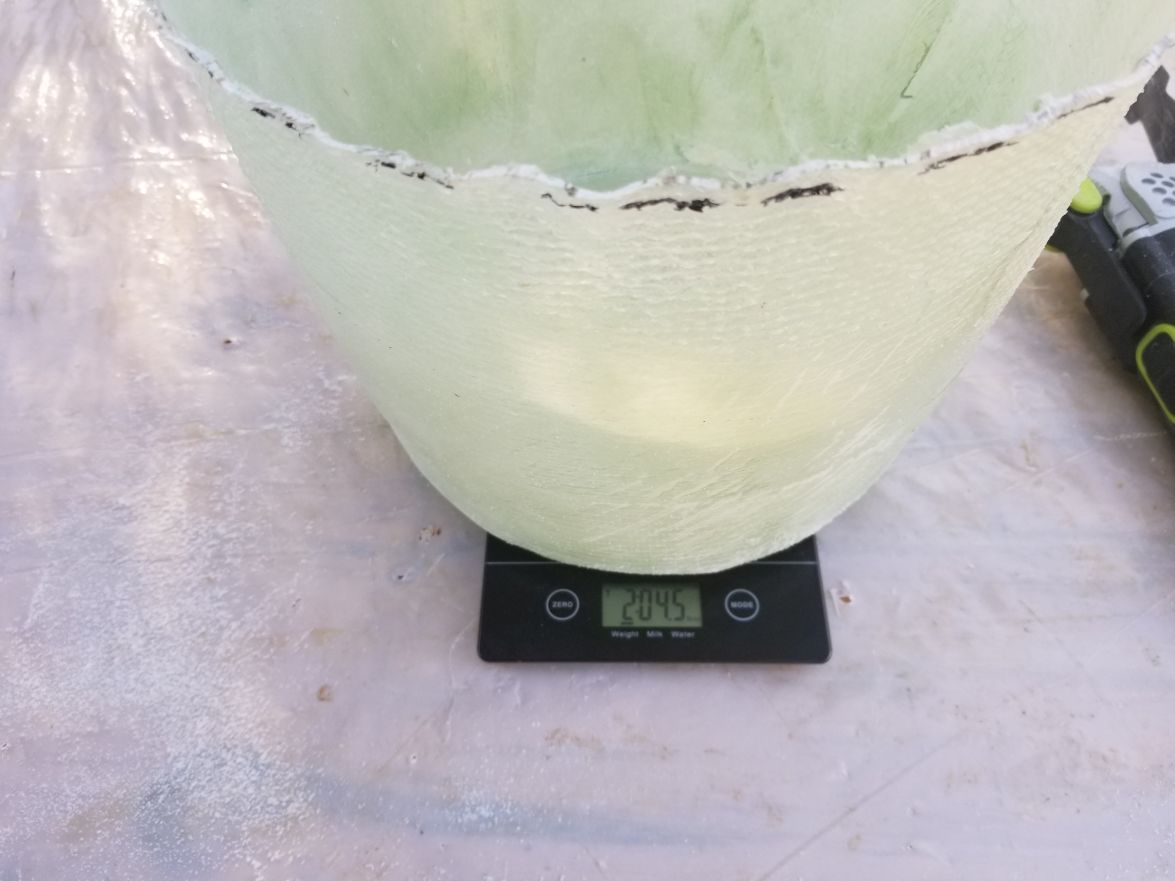
The small console is coming along well. I don't think I need to fiberglass it as I've seen others do. I'm going to use magnets on the bottom to keep the access hatch closed. This will give me a large enough opening in case I need to do anything inside and I won't have to use a latch.
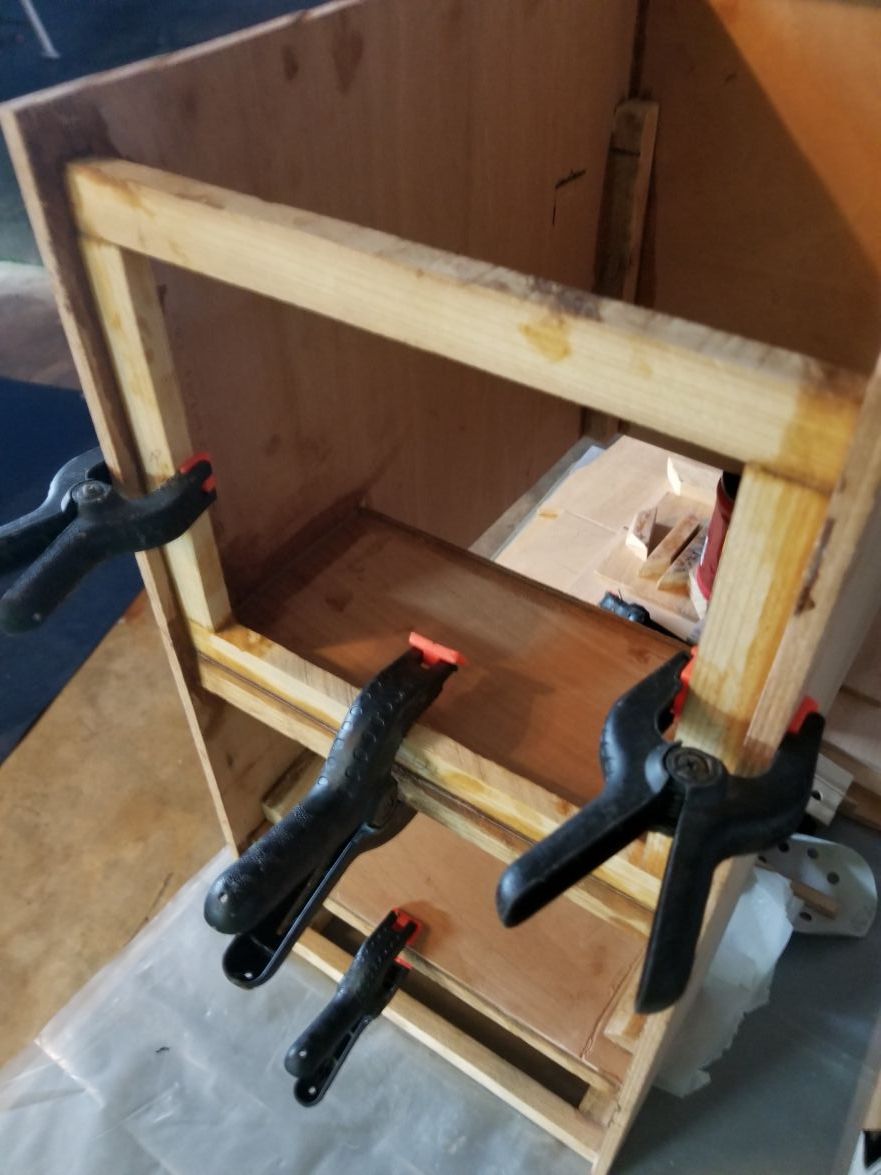
I'm going to add some foam around this bait well so I can also use it for a cooler for drinks when I'm not using it for bait.

I've finished with the hatch drains. Here's a few pics of how they turned out. I haven't made a decision on how I want to finish up the front of this hatch area. I'll more than likely lower the bulkhead an add a lip on the hatch cover.
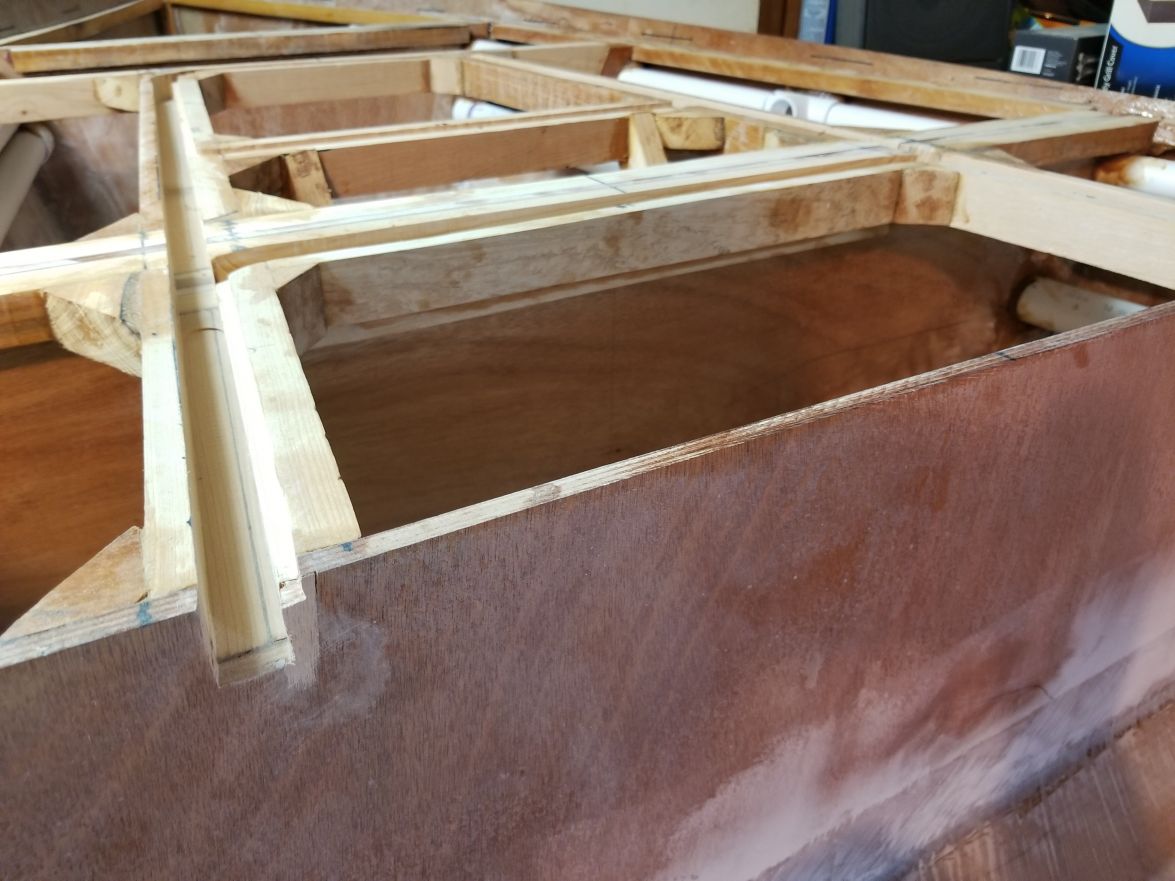
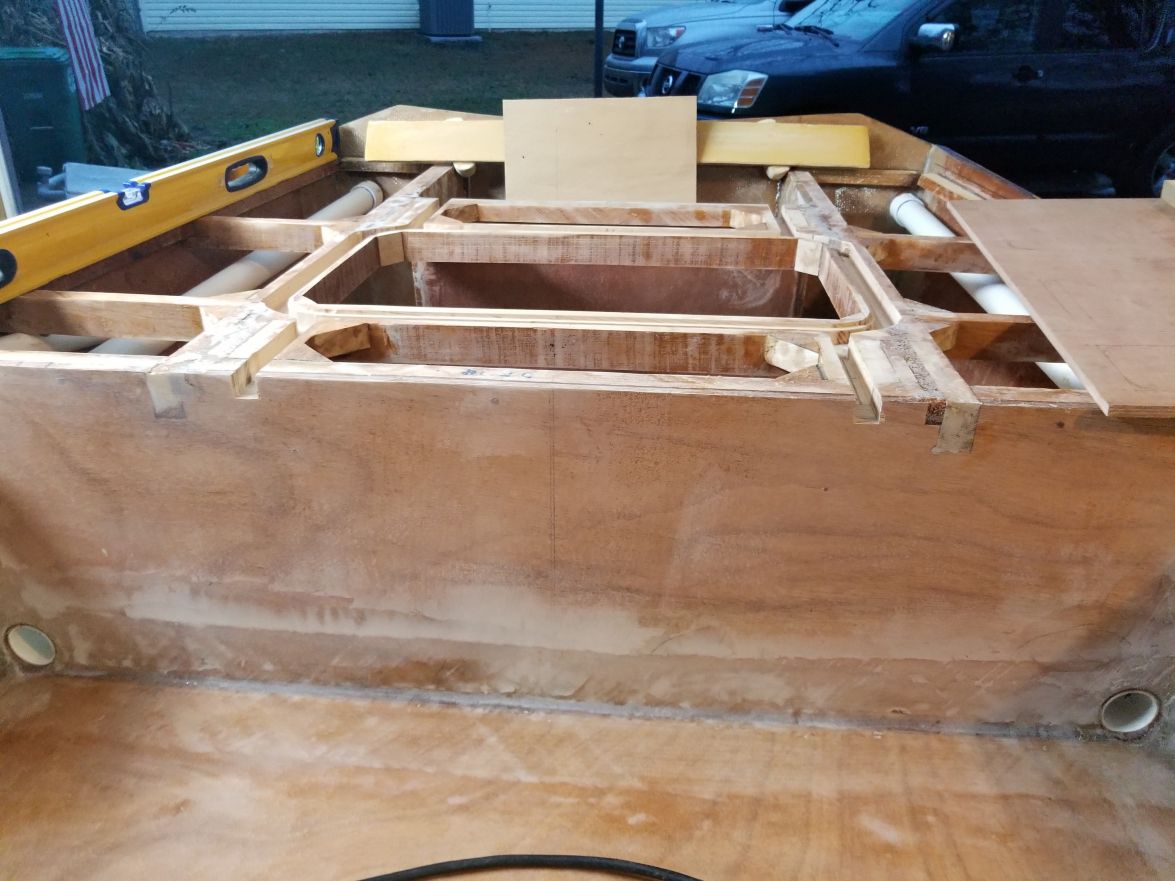
I'm going to put a seal on the 1/4" lip. The hatch will rest on wood instead of the seal.
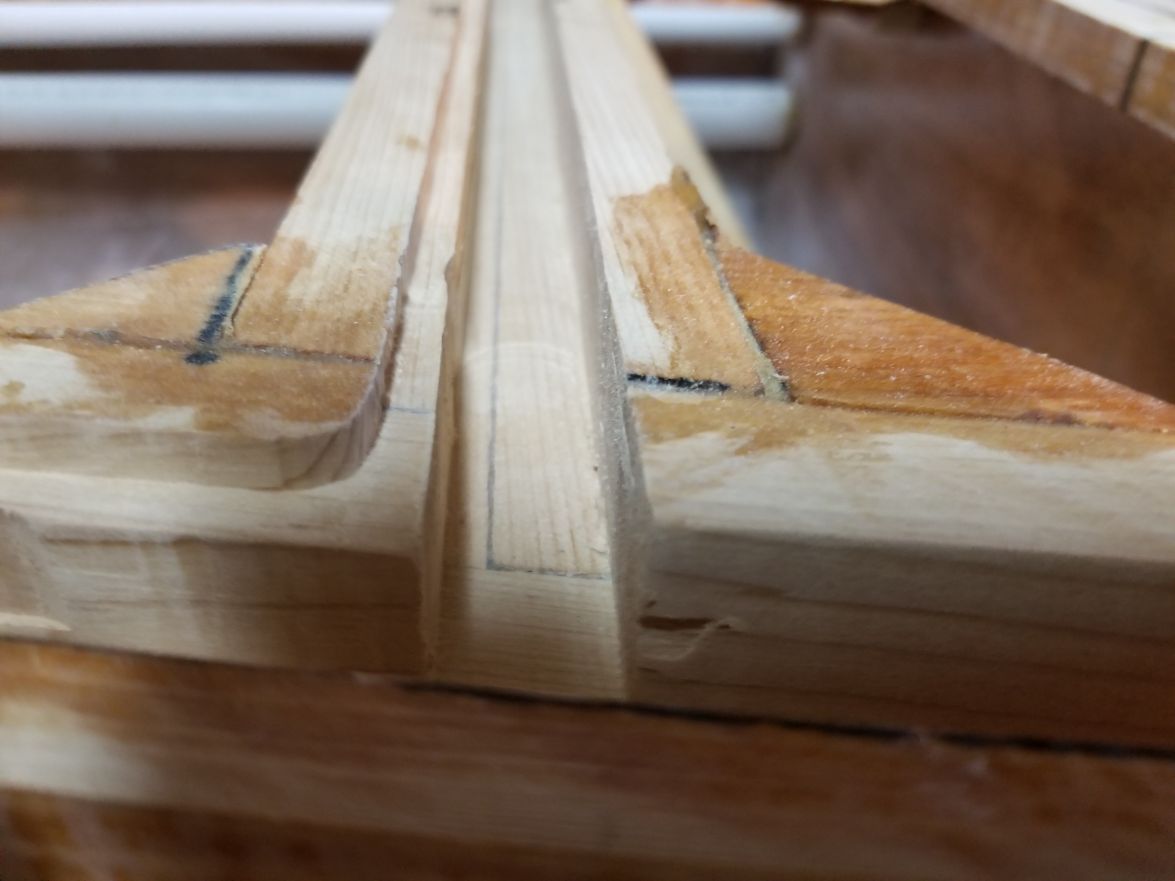
I didn't like how the drains from the hatch originally turned out. I ended up filling them and moving them in a little. I like the way it turned out now.

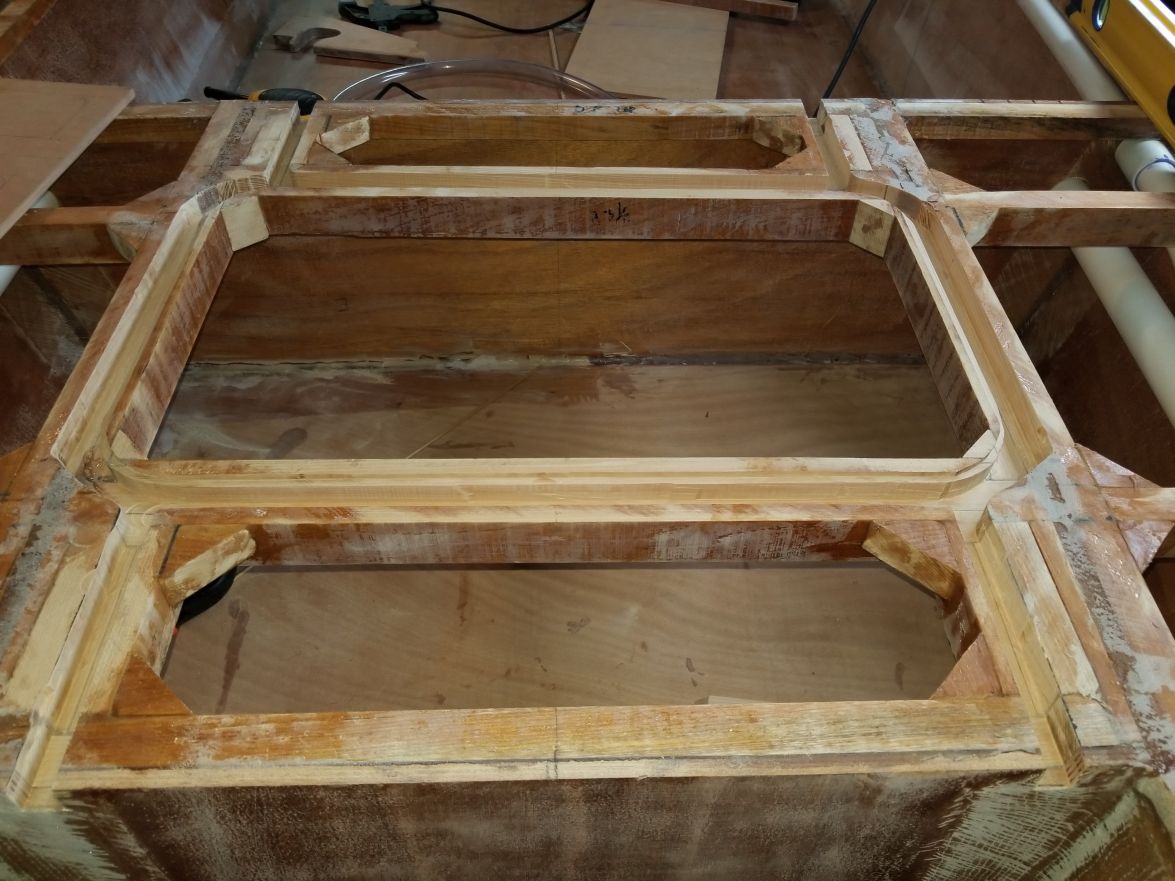
I cut an inch off the rod holders and it completely messed up the look of the lower slot. In trying to open it up a little I didn't like the look of it so I decided to fill it in some and I think they turned out well.
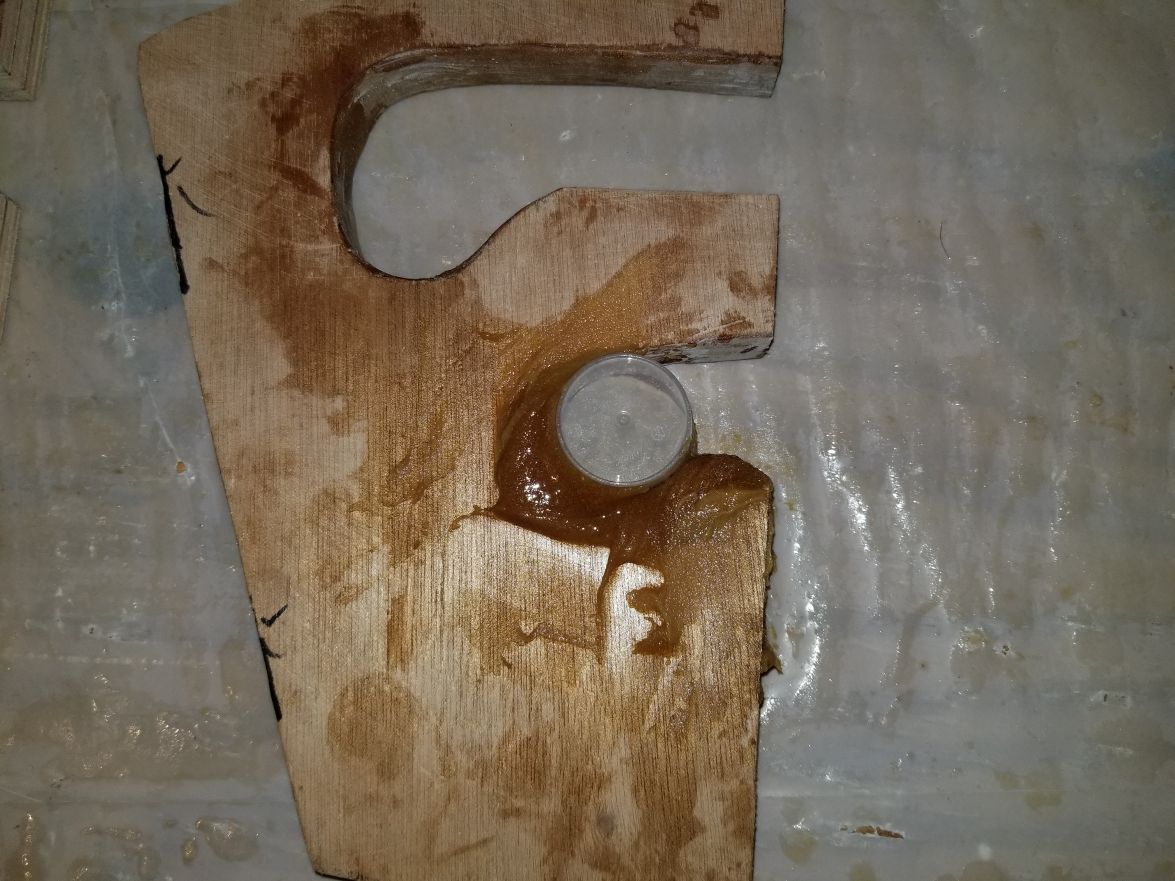
and finished
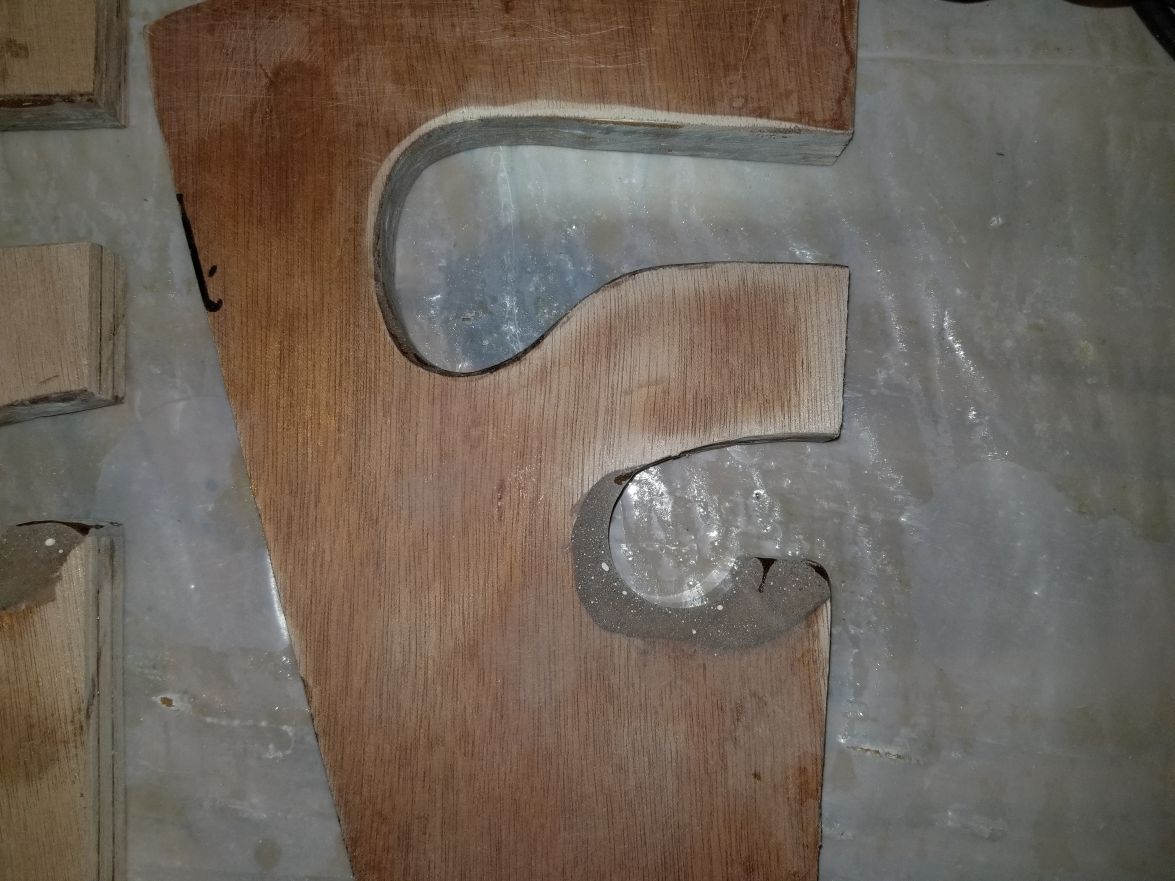
Here's a pic of how I strengthened up the area where a seat base will go. The braces are angled back from the bulkhead to under the cross support for the hatches.
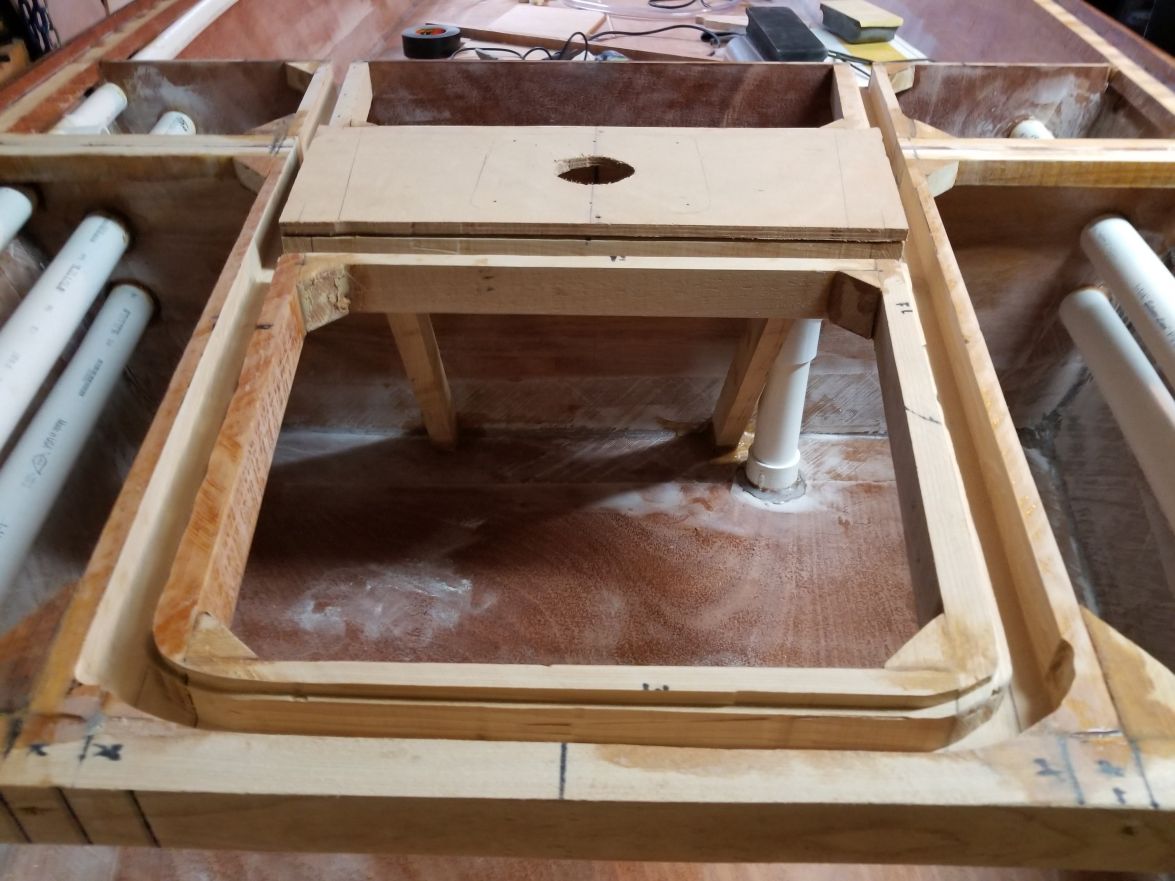
I'll set and fiberglass the rod holders in this weekend. My plan is to finish the console this weekend and get some work done on the hatch covers. And then wait on a good day to paint the primer on the inside.
Re: Steve's FS18
Posted: Fri Feb 02, 2018 4:48 am
by glossieblack
Very nice work.
Re: Steve's FS18
Posted: Fri Feb 02, 2018 6:04 am
by peter-curacao
I used a tinted industrial 2 component paint (AP Thane) on the inside of my bait well and tubes, holds up great.
Is there a reason you made your gutters square instead of half round?
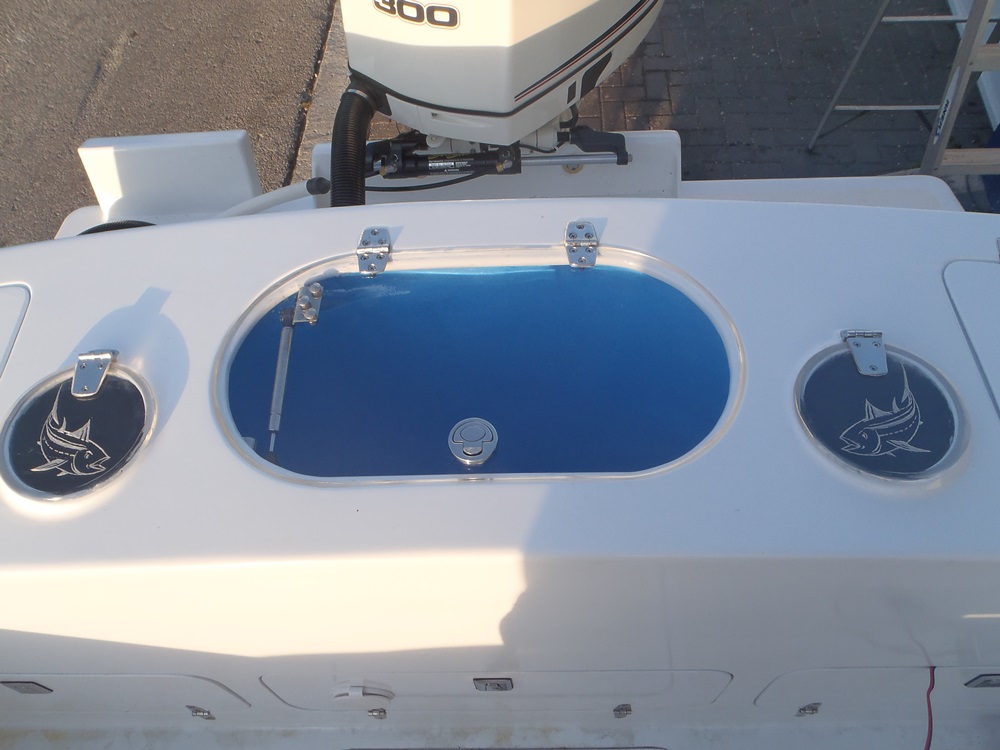
Re: Steve's FS18
Posted: Fri Feb 02, 2018 6:14 am
by OrangeQuest
Really looking good Steve! I like the way you have all your gutters blending together.
Peter C. are the fish decals are were they etched into the lids? Very clean look.
Re: Steve's FS18
Posted: Fri Feb 02, 2018 6:27 am
by peter-curacao
OrangeQuest wrote: ↑Fri Feb 02, 2018 6:14 am
Peter C. are the fish decals are were they etched into the lids? Very clean look.
Thx I engraved them into the lids, it's somewhere in my thread
Re: Steve's FS18
Posted: Fri Feb 02, 2018 8:10 am
by Dutch1
Thanks Glossieback, Peter, and Orangequest!
peter-curacao wrote: ↑Fri Feb 02, 2018 6:04 am
I used a tinted industrial 2 component paint (AP Thane) on the inside of my bait well and tubes, holds up great.
Is there a reason you made your gutters square instead of round?
Thanks for the info. I'll check it out today. I didn't have a round bit and am just to cheap to buy one for a one time use. It was 30 something bucks at Lowe's. The router isn't mine. I borrowed it from a friend.
Re: Steve's FS18
Posted: Fri Feb 02, 2018 11:03 am
by peter-curacao
Dutch1 wrote: ↑Fri Feb 02, 2018 8:10 am
Thanks Glossieback, Peter, and Orangequest!
peter-curacao wrote: ↑Fri Feb 02, 2018 6:04 am
I used a tinted industrial 2 component paint (AP Thane) on the inside of my bait well and tubes, holds up great.
Is there a reason you made your gutters square instead of round?
Thanks for the info. I'll check it out today. I didn't have a round bit and am just to cheap to buy one for a one time use. It was 30 something bucks at Lowe's. The router isn't mine. I borrowed it from a friend.
Okay clear! I was a bit worried about dirt collecting in the corners causing damage/rot overtime, the paint maybe at americancoatings.com ?
http://americancoatings.com/images/SU_SERIES_new.pdf
Re: Steve's FS18
Posted: Fri Feb 02, 2018 7:15 pm
by Dutch1
Hmm. That's a good point. I think I'll look into rounding them up a bit. I'm going to check out the paint now. Thanks again!
Re: Steve's FS18
Posted: Fri Feb 02, 2018 8:02 pm
by Browndog
Looking really good!
Re: Steve's FS18
Posted: Fri Feb 02, 2018 8:27 pm
by Jeff
Agree, really well done!! Jeff
Re: Steve's FS18
Posted: Sat Feb 03, 2018 6:50 pm
by Dutch1
Thanks Browndog and Jeff.
I got a few more things done today with the console. I'm going to wait until I paint the baitwell before I install it in the console. I'm concentrating on the face of the console getting the holes cut out and everything set in place. I'm going to work until I get tired tonight. It's supposed to rain tomorrow and I have to attend a recital for my daughter. Any boat work is going to happen today. But hey, progress is progress!!
Re: Steve's FS18
Posted: Sat Feb 03, 2018 7:38 pm
by Jeff
Absolutely Dutch1!!! Hope your Grandfather is still giving you a hand!!! Jeff
Re: Steve's FS18
Posted: Sat Feb 03, 2018 10:52 pm
by Dutch1
Jeff,
He helps out every Saturday I work on it. I feel for the person that thinks they are going with me on the first fishing trip. He called that spot long ago. I even got him a new rod/reel for Christmas. He (and I) can't wait to slime it up. He's never caught a red and it would be a highlight of my life to get a pic of him holding a decent redfish in a boat we built.
Steve
Re: Steve's FS18
Posted: Sun Feb 04, 2018 12:01 am
by Dutch1
Jeff & Jacques,
I have a question. Can I leave the inside of my baitwell unpainted and it be ok? It is made with marine epoxy and fiberglass. The only reason I was going to paint it was to keep the uv rays off of the epoxy. The inside has a coat of marine epoxy with milled glass. I don't know if this matters for your answer but I wanted you to know. It will be covered when not in use but when there is bait in there it will be open.
I found a thread at livebaitlarry
http://livebaitlarry.com/index.php?main_page=page&id=30. Some suggested painting inside and some didn't. BUT, they all had plastic tanks. If the epoxy will be fine, I was thinking about painting the outside of the baitwell to a darker color and then when I foam around it it will be permanently sealed. With the sticky nature of the foam, even if the paint separated from the baitwell it will still stay there forever.
Re: Steve's FS18
Posted: Sun Feb 04, 2018 5:42 am
by OrangeQuest
Really like the way you did your bait well and the way you documented the way you guys made it. I may try to make mine the same way. I have lots of 5 gallon buckets!
Ken J
Re: Steve's FS18
Posted: Sun Feb 04, 2018 8:56 am
by Jeff
Dutch1, I will let Jacques give you his opinion as he certainly knows better than I!!! I don’t know why you can’t just leave it without paint but again, give Jacques a little time to respond!!! Jeff
Re: Steve's FS18
Posted: Sun Feb 04, 2018 9:06 am
by peter-curacao
I did a lot of reading on it at the time I was building mine, based on all the reading I came to the conclusion blue for the well and black for the tubes was the best way to go, production boats often leave there wells white because the extra effort is to expensive
Re: Steve's FS18
Posted: Sun Feb 04, 2018 9:33 am
by Dutch1
Thanks OrangeQuest, Jeff, and Peter.
I have everything ready for the final glue up for the console but I can't since the baitwell isn't painted. I just don't want to rush now and pay for it later. The console doesn't have to be done now. But it would be nice to wrap it up and set it aside until it's ready to be installed. I'm also curious to see what Jacques says on the marine epoxy and how it will hold up to the uv rays for other projects I have in mind. I think it would be unrealistic to expect and bare coated epoxy project to last outside unpainted in the sun and look good but I have a hunch the baitwell will be fine. We'll see what Jacques says.
Re: Steve's FS18
Posted: Sun Feb 04, 2018 9:43 am
by peter-curacao
What's the reason not to paint it, if I may ask? It's only a small job to do. Btw I didn't paint the outside either, it was also foamed in place.
Re: Steve's FS18
Posted: Sun Feb 04, 2018 10:10 am
by Jaysen
I thought the paint provided an additional "seal" to prevent the eventual saturation of the epoxy by water. Less of an issue for trailered hulls (hence the graphite/Alum-Oxide finishes, but it was more important on wells. There were some comments on that by JM bout 1-1.5 years ago. I'll try to find it.
That said, I would think the small effort to put some chemically neutral paint in there would add a lot to the finished feel of the boat. Unless you want to show off the "naked work"...
Re: Steve's FS18
Posted: Sun Feb 04, 2018 10:18 am
by Jaysen
My search foo is uber weak this morning. I could not find the thread my feeble brain remembered. Hopefully someone will find it or JM will chime in.
Re: Steve's FS18
Posted: Sun Feb 04, 2018 10:45 am
by OrangeQuest
One reason I can think of to not paint is if you wanted to see the bait at night without glare maybe put a light under the bait well or on the side to light it up and all the bait will be easier to see. But not sure, I have only used buckets or cooler for bait and shining a light in them to find the bait glares back.
Re: Steve's FS18
Posted: Sun Feb 04, 2018 10:57 am
by peter-curacao
OrangeQuest wrote: ↑Sun Feb 04, 2018 10:45 am
One reason I can think of to not paint is if you wanted to see the bait at night without glare maybe put a light under the bait well or on the side to light it up and all the bait will be easier to see. But not sure, I have only used buckets or cooler for bait and shining a light in them to find the bait glares back.
Not sure but I think that has to do with the distance of the light to the water, I had a light under the lip of my well shining away from me (see pic) and I never experienced the back glare
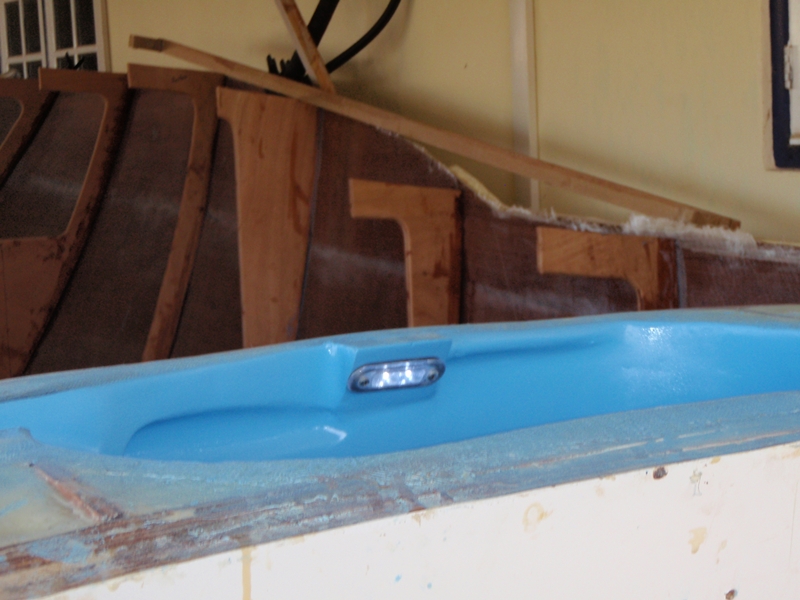
Re: Steve's FS18
Posted: Sun Feb 04, 2018 12:42 pm
by narfi
I think one big advantage in favor of painting is ease of cleaning down the road.
Re: Steve's FS18
Posted: Sun Feb 04, 2018 6:54 pm
by Dutch1
Good discussion. Thank you everyone. I think it would look nicer to be finished with a coat of paint. And, as mentioned it would help for cleaning up. I just don't want to lose any momentum on the build due to cold weather and I'm running out of things to do before painting.
Peter,
It isn't that I don't want to paint the baitwell. It will be a pita once it's installed to paint it. The access hole is only 6 inches.
Re: Steve's FS18
Posted: Sun Feb 04, 2018 7:03 pm
by peter-curacao
Dutch1 wrote: ↑Sun Feb 04, 2018 6:54 pm
Peter,
It isn't that I don't want to paint the baitwell. It will be a pita once it's installed to paint it. The access hole is only 6 inches.
Paint it cover it up with newspaper or something before installing, that's what I did, after installing rip out the paper from the 6 " hole, way easier than painting afterwards
Re: Steve's FS18
Posted: Wed Feb 07, 2018 11:43 pm
by Dutch1
Jeff wrote: ↑Sun Feb 04, 2018 8:56 am
Dutch1, I will let Jacques give you his opinion as he certainly knows better than I!!! I don’t know why you can’t just leave it without paint but again, give Jacques a little time to respond!!! Jeff
Jeff,
I never heard from Jacques on this. Will someone ping him for me? I don't think he normally watches this part of the forum and I can't PM him.
Thanks!!
Re: Steve's FS18
Posted: Thu Feb 08, 2018 6:05 am
by Jeff
Dutch1, I will get this to Jacques this morning!!! Jeff
Re: Steve's FS18
Posted: Thu Feb 08, 2018 9:30 am
by jacquesmm
I did not follow this because it was in the "non technical" section.
You don't have to paint it but I would paint it. Looks better, easier to clean.
The only epoxy you must paint is the one exposed to the sub UV's.
Re: Steve's FS18
Posted: Sun Feb 11, 2018 10:37 am
by Dutch1
Thanks Jacques!!
I'm going to paint it. I have to modify when I'm going to finish what a little bit but that is OK. I want it right and always value your input.
Steve
Re: Steve's FS18
Posted: Mon May 28, 2018 8:47 am
by Dutch1
A few people have pinged me on the status of my build. We flipped it about March when I had an open weekend where we weren't off somewhere with my daughters soccer team or it wasn't raining. The flip back over was a hoot. The two guys that helped me flip it weren't strong enough. I was on the transom using the two scupper holes to lift it and they were on the front. I could fit two fingers in each hole. The plan was to lift it off and walk to the back and lay it on the ground. Roll it over, then place it back on the strongback. They could only go about 2ft at a time. They said they couldn't get a grip. We walked it back to about the last three feet and I had to set it down as I was holding the entire boat up by myself and had been since we started moving it. Next time I'll get some tires or something I can set it down on during the move. It was a spur of the moment decision to flip it with no planning. Long story short, we got two kids to come over and help and were able to move it just fine. It looked good on the ground and it gave me an idea of what it will look like on the water. OF COURSE, about the time we rolled it back in the garage I thought about pictures. Since I was holding the entire thing up by myself with only the front resting on the strongback I'd estimate around 300-350 for the weight. I'm trying to find a big game scale so I can weigh it to know for sure. Sorry to those following for no pics. . .
I'll have to repair the bottom in the front where it wore through the graphite. It was just resting on a 2x4. Like an idiot, I didn't put anything in between to cushion it. It's about a 2 inch spot right where it rested on the 2x4. Lesson learned.
I touched up some spots on the hull that needed a little more fairing. I haven't touched it since.
I jacked my left knee up soon after this and had to ice it down most nights. I couldn't sit, stand or kneel for very long so I couldn't touch the boat. I finally decided to go get it checked out and they did an MRI. Turns out I had a piece of cartilage torn off of the end of my femur. I just had it scoped and they cleaned things up. Soon, real soon, I'll be back at it again.
I'll take any recovery advice from those of you that have had knee surgeries. This was my first. They just scoped it and cleaned up the cartilage. HOPEFULLY, this will last me for years.
Re: Steve's FS18
Posted: Mon May 28, 2018 11:37 am
by Jeff
Dutch1, that is a really painful recovery!! I hope you will take it easy and give yourself time to properly recover!!! Jeff
Re: Steve's FS18
Posted: Mon May 28, 2018 10:02 pm
by Dutch1
Thanks Jeff! I'm going back to work tomorrow. I have to walk up about 60 steps or a steep hill to get there from where we park so I'm not looking forward to it. If it doesn't work I'll just come home. I don't want to mess it up before it heals. I've done that to too many injuries in the past.
Steve
Re: Steve's FS18
Posted: Tue May 29, 2018 7:40 am
by Jeff
Dutch1, just take it slow and don't over do it!! Jeff
Re: Steve's FS18
Posted: Mon Jun 25, 2018 2:35 am
by Dutch1
Well the knee is good enough to be able to stand for long periods of time which is perfect for the boat build. I still can't go up or down stairs very well but that will come with time.
I've made a lot of progress since my last pics so if anyone is interested in something specific let me know. I've been good about taking pictures but didn't take one when I flipped it back over.
This is that little console I've been messing around with.
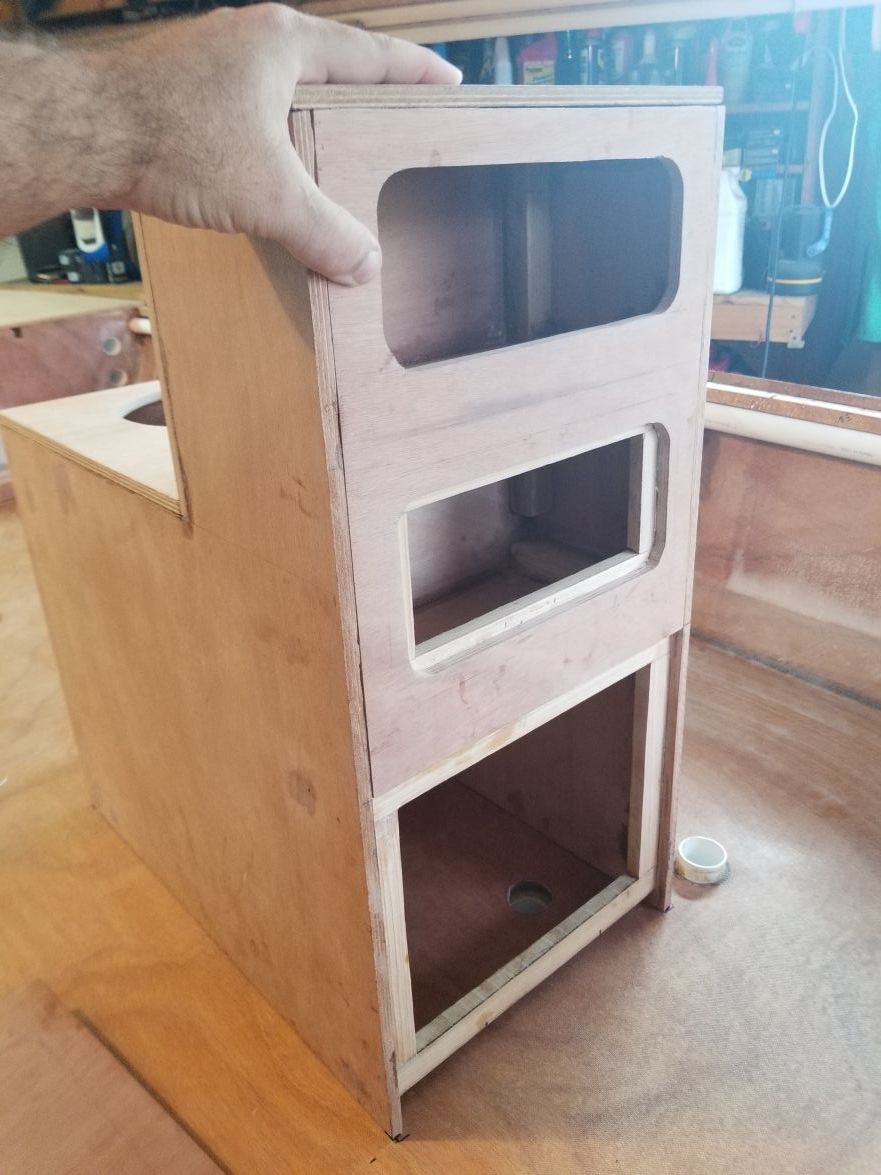
I got the rod holders installed and everything faired. I hated covering that wood up.
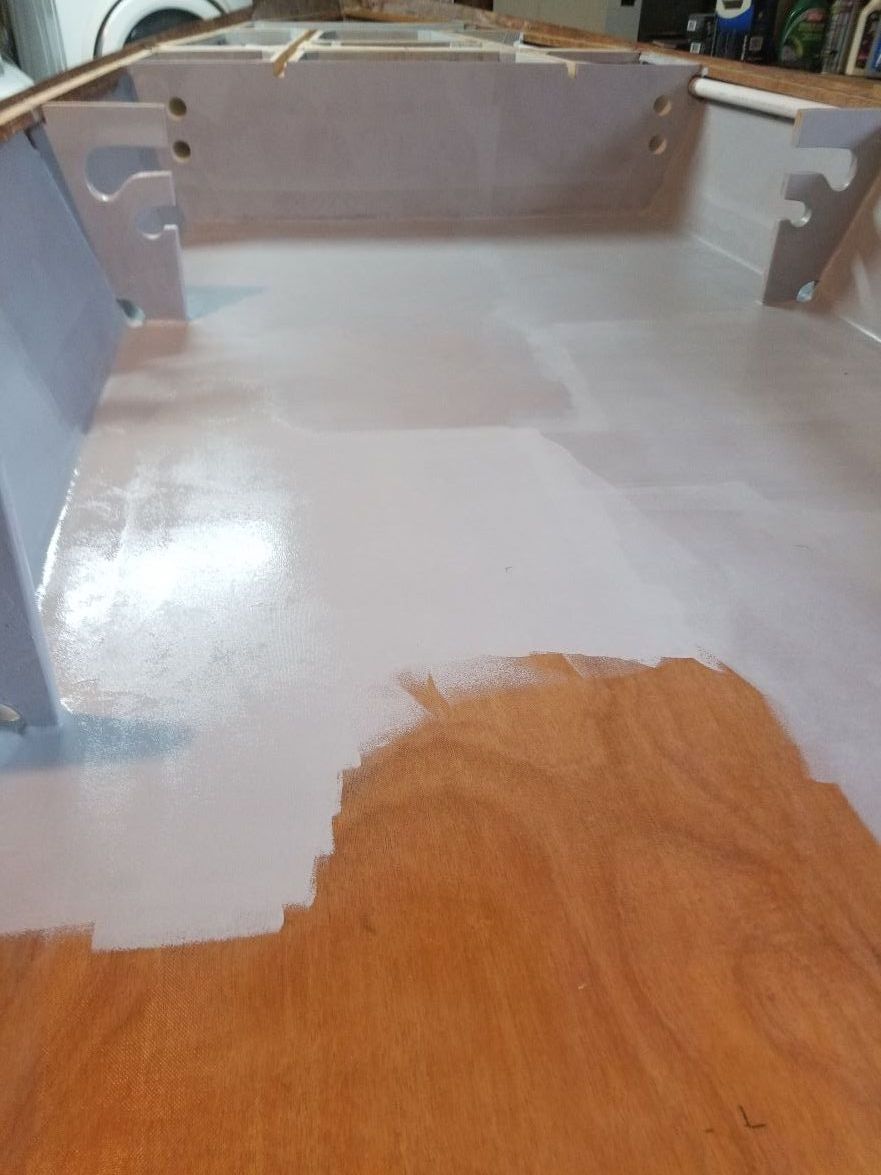
All primed up on the inside. I haven't primed compartment A. I still haven't made up my mind if I want to do anything at all with it.
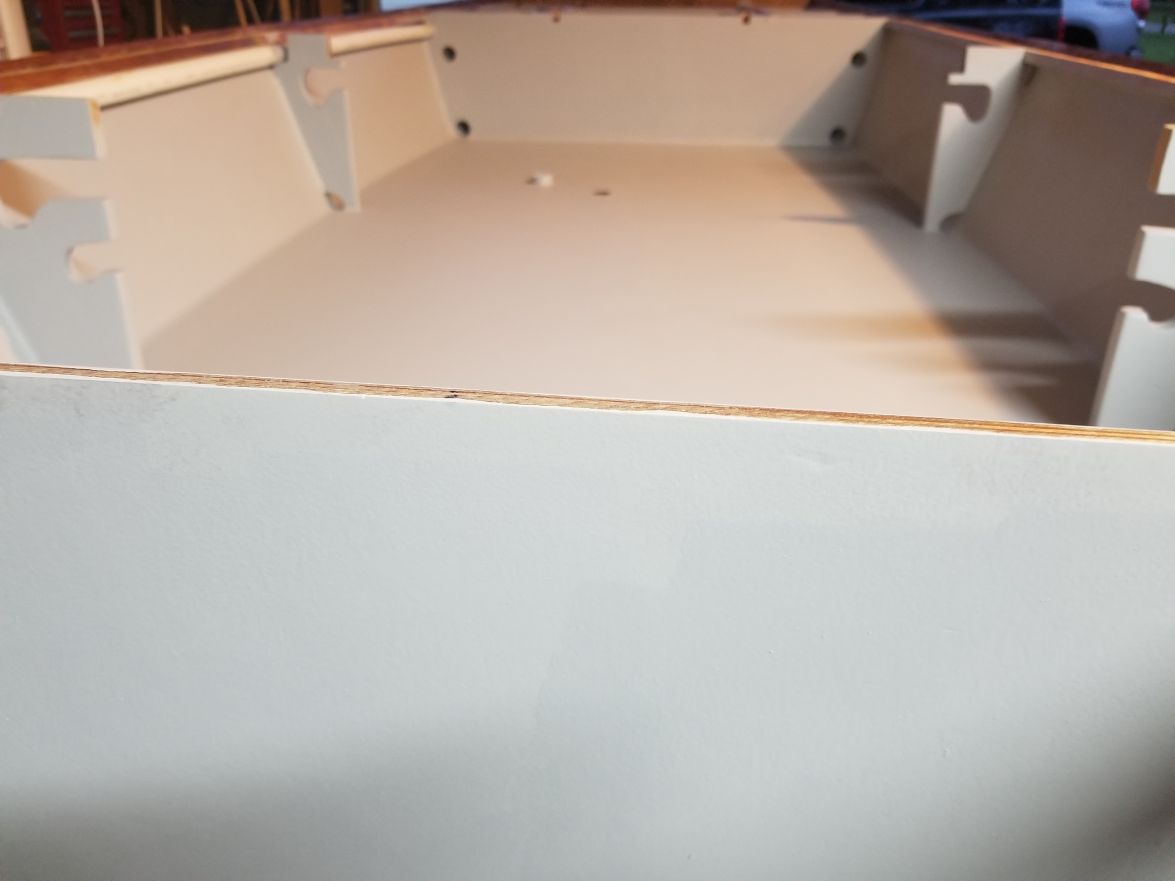
You can see where I brought the rod holders in to give me a little more room to walk around the console and grab bar.
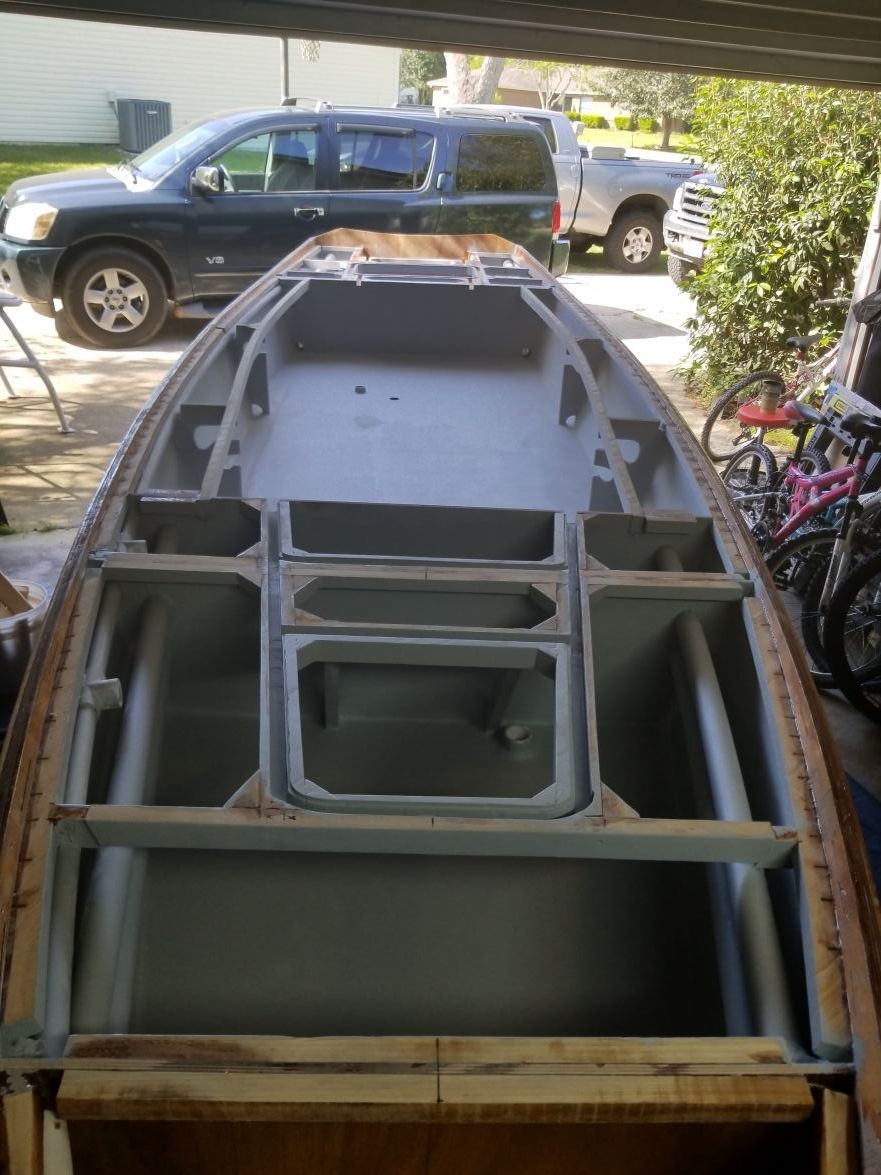
I really like the Awlgrip paint. But, JESUS it stinks! It covered very well. I started out mixing 4oz of topcoat, 2oz of converter, and 1 oz of reducer. This allowed me to cover the transom and one side. It kept wanting to bubble so I added another half oz of reducer for the other side. The amount worked perfectly. It rolled well and tipped easily but kept wanting to have a bubble here and there. I'm sure I have brush strokes somewhere. I had never done this but did do my research on what to expect. This is over that GREY primer... As you can see it covered nicely. Two coats would work but I'm going for three. The primer should be covered after tomorrow night.
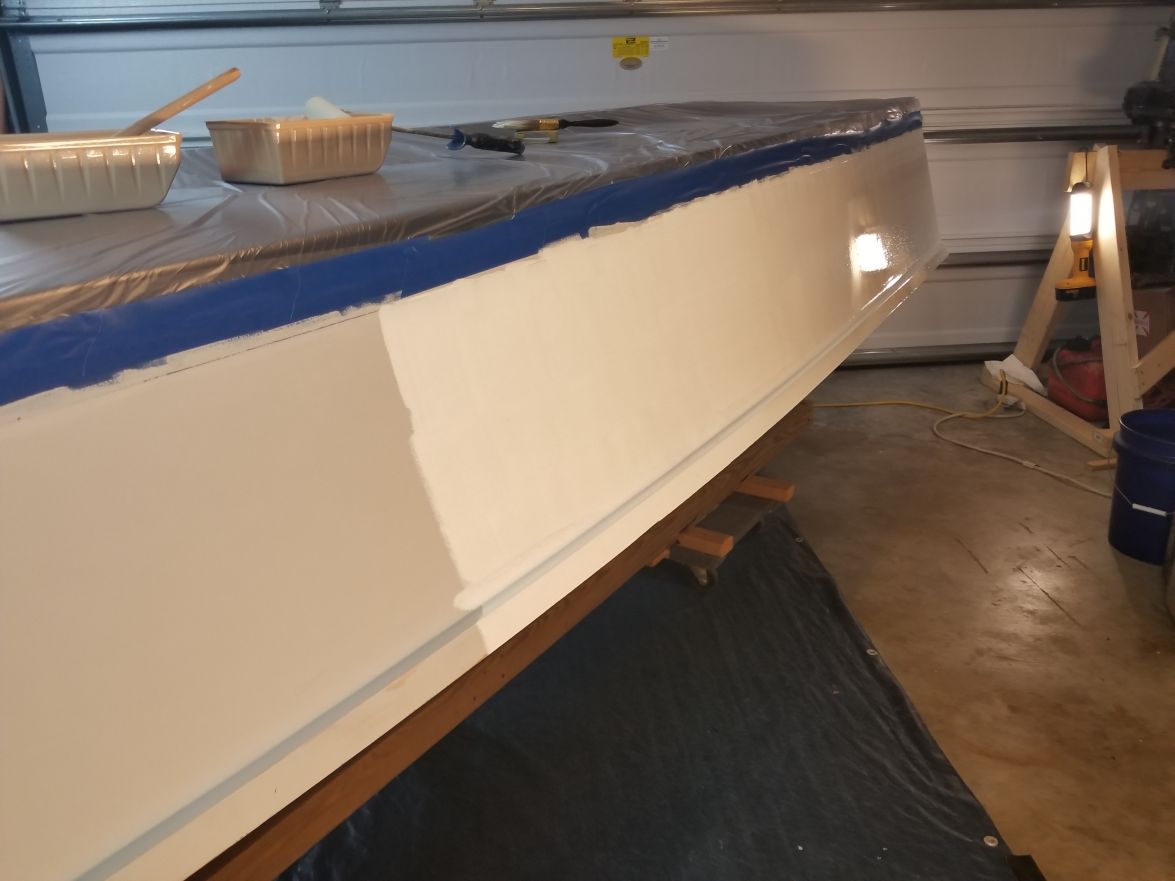
This is the other side where I added the extra .5oz of reducer. I used 4oz of topcoat, 2oz of converter, and 1.5oz of reducer for this side. I was very pleased how easy it was to use this paint. I had about an ounce of paint left. It's in the fridge waiting for tomorrow night. I'll also add that this side looked to flatten out smoother. It bubbled right and tipping this side was easier.
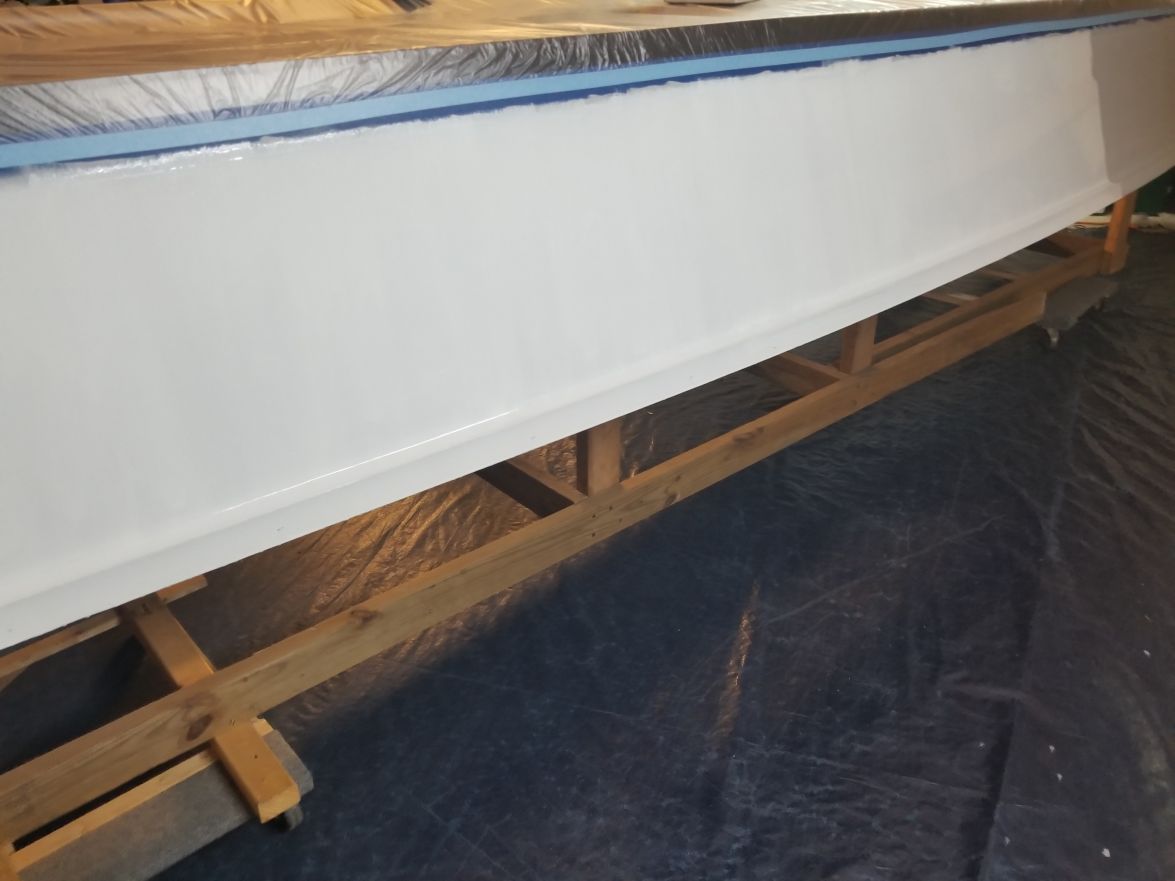
I read in the awlgrip paint application guide that I can paint another coat as long as it's been 16 hours and not over 24 without having to sand when you roll and tip. My plan is to put another coat on tomorrow night. Then Tuesday, sand it to get any imperfections (bugs, etc.) out and put the final coat on it.
I also read that if I had sprayed, I could have put three coats on it within 4 hours. Lesson learned. I'll be spraying the inside with the right converter and reducer. I don't have the equipment, but I'll find some. I really like the idea of having the inside painted in one day. Then I can wire this thing up!
Again, if anyone wants other pics let me know.
Re: Steve's FS18
Posted: Mon Jun 25, 2018 7:56 am
by Jeff
Dutch1, glad to hear you are back in action, well somewhat anyway!! Your FS18 is really looking good!! AwlGrip is a great paint but yes, like EMC, the stuff smells like hell!! But a nice finish you will have when complete!! Hope your grandfather is doing well!! Jeff
Re: Steve's FS18
Posted: Mon Jun 25, 2018 11:19 am
by Bogieman
Wow! Nice looking build.
Re: Steve's FS18
Posted: Mon Jun 25, 2018 10:38 pm
by Dutch1
Thank you Jeff and Bogieman.
Jeff - Grandad is helping out when I work on it. He helped me Saturday in prepping for a last coat of primer and then painting the primer on the hull. He wasn't available yesterday when I put the first coat on it. He came over tonight and helped sand and roll while I tipped. He'll be here tomorrow night to put the final coat on God willing!
I ended up sanding the hull tonight. I had some sags in a few spots where I went back and screwed with it after I had gone by. I know, I wasn't supposed to do that but it was too tempting to "fix it". The transom looked bad in the light. The first side had a lot of what felt like dust in the paint but I think it was just how it was mixed with not enough reducer. The other side with the 1 1/2oz of reducer was smooth as glass. I went over everything lightly with some 220 grit. It took out any bugs and sags just fine.
I wanted to take a minute to give more details on the paint so far. I never could find much information in the other FS18 threads so I wanted to put what I used here. Hopefully, this will help someone in the future.
The mix I liked and worked for me was the 4oz of paint, 2oz of converter, and 1 1/2oz of reducer. To cover the sides of the hull the first time took two batches with about an ounce left over. I put that in a container and left it in the fridge until tonight. Tonight I mixed up the same 7 1/2oz batch above with the ounce left over from last night and I was able to cover the entire hull. Granted this is just the sides and transom since I have graphite on the bottom.
My plan is to sand and get the third coat on tomorrow night. I'll give it a week to harden good and then flip it back over. While it's hardening I still have to fix one spot on the graphite that wore down from it sitting directly on the strongback while I worked on the inside. I won't make that mistake again.
Re: Steve's FS18
Posted: Mon Jun 25, 2018 11:13 pm
by K2FS18
Steve, glad to see your back on it. I know how temping it is to try to get the perfect finish. You will always have a brush stroke, bug trail or sag/holiday. Won't really matter after a few trips out, you will have enough scratches and mares that those original things will no longer be noticeable. also, just consider them birth marks.
You are on the home stretch now, this part goes really fast and slow at the same time.
Careful about spraying the paint. You will want the proper safety gear. Do not want to get that in your lungs.
K2
Re: Steve's FS18
Posted: Tue Jun 26, 2018 10:36 pm
by Dutch1
Hey Ken! Good to hear from you.
That stuff smells bad enough. I couldn't imaging inhaling a mist of it. That would be bad news for sure.
I've made up my mind that it's is as good as it is going to be. I'm going to finish it. I fished a tournament a few weeks ago and chased a giant red on my yak down the shoreline a hundred yards before I spooked him. The first thought that I had was if I had the boat done I could be fishing instead of paddling. That re-ignited the fire to get it done.
Do you have any updates to your rig or videos?
Re: Steve's FS18
Posted: Thu Jun 28, 2018 10:31 am
by K2FS18
Yep, I have been tweaking the motor mount height on the JP. Made several brackets and such and none really preformed that well. went back to just adding 2.5" height of plywood to the JP motor mount. That seems to be the sweet spot. Also in the process of adding a compression plate to the lower unit. Hopefully this will let me run the motor higher so that I can get skinny as needed here on our coast. I will post pics soon.
Always something to mess around with when you build your own boat. Last trip out I came back with a 6 item list. JP and compression plate are all that remains to be completed.
K2
Re: Steve's FS18
Posted: Sat Jun 30, 2018 1:16 pm
by Dutch1
I have a feeling it will take me a while to get the motor set up right on my build too. It's ALL manual. Please let me know what you end up with so I can learn from your lessons. I probably won't even think about adding the poling platform until I get the motor figured out and it running with the right setup.
I was able to get a total of two coats on before the rain started this week. Going out right now to sand the hull real good and put hopefully the final coat on the outside before it rains tonight. It's about a 5 foot finish. From 5ft out it looks great but when you get close you start to see the brush strokes, etc. The first side still shows some brush strokes, the other side is like glass. We'll see how the third coat does.
I'm thinking about Awlgrip Ice Blue for the inside. I think something a little darker on the inside would be easier on the eyes.
Re: Steve's FS18
Posted: Mon Jul 02, 2018 10:10 am
by Dutch1
No luck on painting Saturday. I did get it sanded though. I sanded the one side with the brush strokes until they were gone. Waste of paint but that is ok. I learned. I have some pics where you can see the brush strokes in the reflection. I bought some 4inch foam brushes to use for this coat. I think iwill do better with those instead of a paint brush.
Re: Steve's FS18
Posted: Mon Jul 02, 2018 10:36 am
by pee wee
In my experience the single most important thing you can do to get a smooth paint job (after good prep work) is to get the right viscosity with thinners or reducers.
With the right consistency the stuff will flow out and need practically no tipping at all. That typically means a pretty thin coat, but it's worth it to get great results with little effort and frustration. The ideal proportions will vary from day to day, even hour to hour, and is specific to the application method you use, so you have to work on a sample piece and adjust until you have it right. Use that information (you made a note of it, right?) to get into the ballpark the next time.
Re: Steve's FS18
Posted: Mon Jul 02, 2018 12:15 pm
by Dutch1
Peewee,
Thanks for the information! I noted how much reducer I used. My problem was my first coat on one side didn't have enough reducer and it showed the brush strokes. But I'll admit I tried to "fix" some spots by tipping back over them. It was my first time rolling and tipping.
I do have aquestion.. Do I have to tip on a vertical side? I think it would sag if I had it too thick. But, the last time I painted, it looked perfect when i rolled it. I almost didn't tip but figured I'd better.
Re: Steve's FS18
Posted: Mon Jul 02, 2018 12:50 pm
by seaslug
Getting the amount of reducer just right will help the paint flow out nicely, but as far as tipping after rolling, it's not required, but can result in a smoother finish. I don't tip the flat sections like the decks, but just roll out with the foam roller and it lays down nicely. On the vertical areas, like the hull sides and transom, only roll a very little area, say 16" along the hull, than go back and give a very light tip vertically, not sideways, or you'll get sags. One quick tip lightly, up or down, doesn't matter, than leave it alone and move on. If you mess with it, you'll just create more problems. A very good quality natural bristle brush is essential for a good finish, never a chip brush, or some other cheap junk brush. I like to use a 3 inch natural bristle high quality brush, that I only use for tipping Awlgrip, than put it away for the next Awlgrip job. The quality of the brush really makes a difference, as well as working along the hull fast and not going back unless you see an especially hideous drip that just can't be left alone when it's your final coat. If you wait until you're too far down the hull before going back you'll just create more of a mess, because the paint will drag and not smooth out. None of my paint jobs are perfect, but Awlgrip is so shiny you never notice the imperfections on the sides of the boat. Good luck. Mike
Re: Steve's FS18
Posted: Mon Jul 02, 2018 1:51 pm
by Dutch1
Thanks Mike. I admit it is my fault it has the brush strokes on the one side. I used a $15 brush from a paint store that I thought was good enough. Bought specifically for this job. Oh well.
I only rolled about a foot at a time for the first coat but I kept going back and messing with it since there wasn't enough reducer. I figured the amount out. I just had to get the grooves of off one side. Now for a day of no rain. I'll probably do two more coats since I had to sand it so much.
Re: Steve's FS18
Posted: Mon Jul 09, 2018 11:47 pm
by Dutch1
I was able to put two more coats of topcoat on the hull during the 4th of July week. I ended up sanding the one side pretty good to remove the grooves from the paint where I didn't use enough reducer on the very first coat. By the time I figured out the right mix the damage was already done and it needed to be sanded out.
This first pic is the side that had the brush strokes.
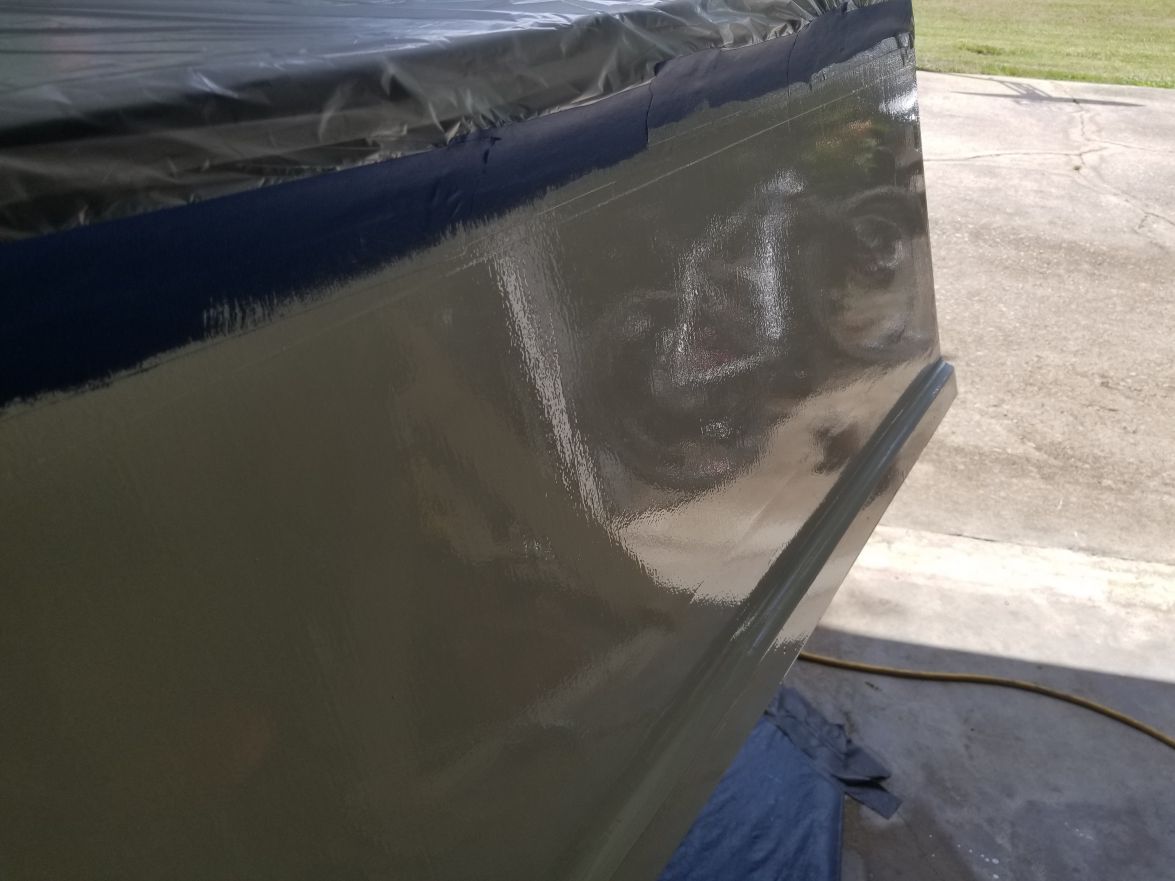
This is the same side after sanding and two more coats. It looks a lot better. You can't really see any blemishes until you are real close.

This is the other side that looked great with the first coat.
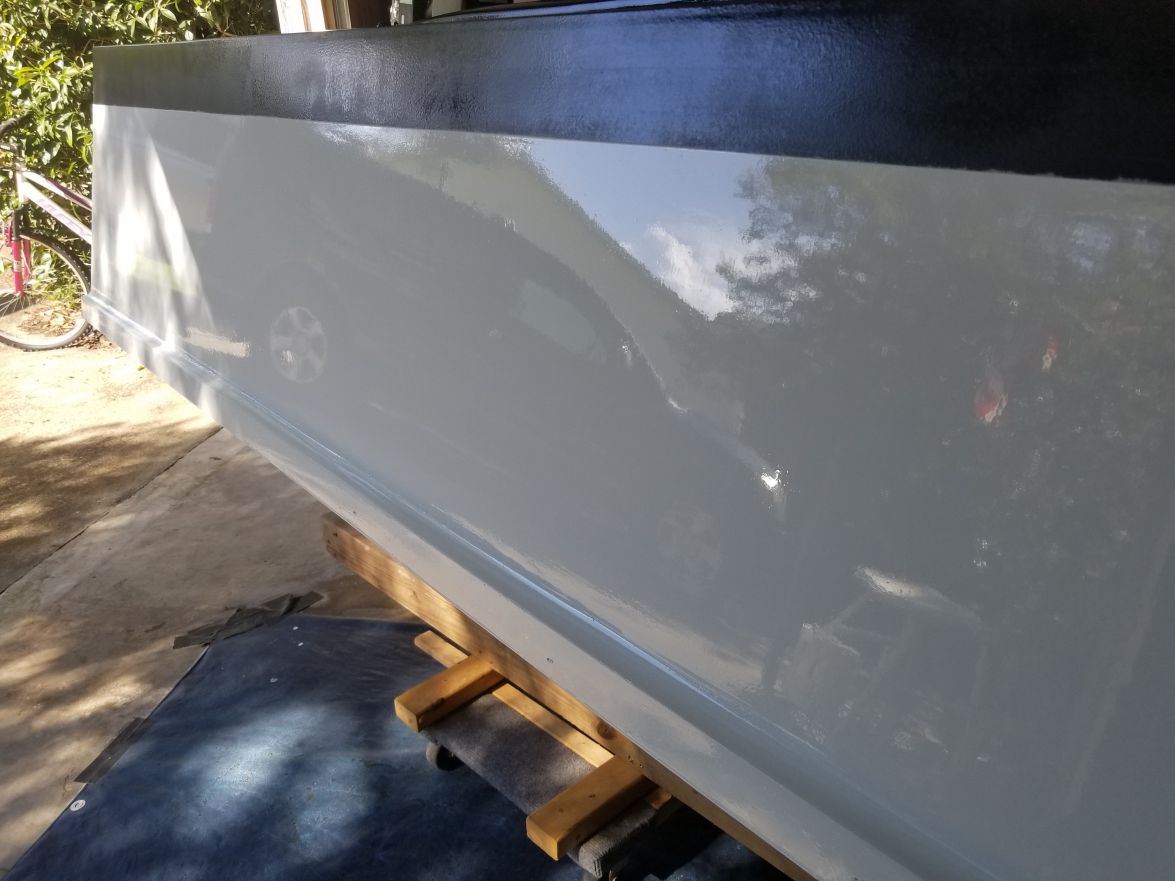
Right now I'm trying to figure out what to do where the topcoat bled under the blue 3m tape I used onto the graphite edge. If you zoom into the pic you can see it on the edge. I think what happened was when I liberally wiped down the hull with denatured alcohol prior to paint it got under the tape and degraded the glue. At least that is what I'm thinking. I know I had it stuck well at one point.
And, I have to give credit to my grandad. He rolled the paint while I tipped both days this past week. It was about 90-95 degrees out and I know it was hotter than that in the garage with no fans on while we painted. I hope I live that long and can hang with my grandkid(s) at that age!!
Re: Steve's FS18
Posted: Tue Jul 10, 2018 2:06 am
by Fuzz
That clean of reflections tells me you did a really good job finishing and painting.
And yes we should all be so lucky to be in that good of shape in our later years.
Re: Steve's FS18
Posted: Tue Jul 10, 2018 9:10 am
by Bogieman
Wow! Very nice.
Re: Steve's FS18
Posted: Tue Jul 10, 2018 10:44 am
by Eric1
Y'all did a great job!
Re: Steve's FS18
Posted: Tue Jul 10, 2018 12:54 pm
by Jeff
Nice work and glad your grand is going strong!!!! Jeff
Re: Steve's FS18
Posted: Tue Jul 10, 2018 1:51 pm
by BB Sig
Nice work!
Re: Steve's FS18
Posted: Thu Jul 12, 2018 8:19 pm
by Dutch1
Thanks everyone! I've decided to go ahead and put another coat of graphite/epoxy on the bottom instead of just repairing the one spot. I'm going to tape about a 1/4" above the edge to cover where the topside bled onto the graphite. I'll make sure it will be thick where the repair is needed. Now the trick will be to make sure I can keep the graphite from bleeding under the tape on the topside. Woo hoo!!
Re: Steve's FS18
Posted: Thu Jul 12, 2018 9:19 pm
by johnstonjosh
Looks really nice! I tried to clean the lines up between the topside and graphite before opting for a 1/4 inch grey pinstripe from autozone. One roll was enough to do the whole transition. It let there be a small color transition from black to white and covered any flaws in the line. I was also in a hurry and lost patience
Re: Steve's FS18
Posted: Fri Jul 13, 2018 10:39 am
by Eric1
Your boat looks great!
Re: Steve's FS18
Posted: Fri Jul 13, 2018 11:24 pm
by Dutch1
Thanks JohnstonJosh and Eric!
I found some reflective 1/4" vinyl pinstripe tape I might give a try.
https://www.stripeman.com/1-4-x-50-refl ... ripe-roll/
I didn't want to use another color so if I do it I'm just going to order a roll of black. I figure having a black reflective pinstripe will help other drivers see it when I'm driving down the road and pulling out in traffic and it won't introduce another color on the boat.
The only challenge installing will be bending the pinstripe on the front where I took the graphite up to the rail. It's 50/50 whether or not I do it.
Re: Steve's FS18
Posted: Sat Aug 04, 2018 11:53 pm
by Dutch1
Hello all. Just a quick update. I ended up wet sanding the whole bottom and putting another coat of graphite on since I couldn't figure out how to blend the new coat with the existing on the edge and the spot I needed to fix. I found some 1/2" automotive vinyl trim tape from Sherman Williams and it worked great! I could make the bend from the bottom to the top of the bow without it wrinkling. It turned out great and I like the sharper line. Except the one spot where Grandad "fixed" it. I've learned to let those be "Grandad fingerprints" in the build. I just left it.
I have some buddies coming over tomorrow at 2 to flip it back over. I'll take some pics during this flip. Unlike I did last time. . . Can't wait to get back to the interior to finish this thing up.
Steve
Re: Steve's FS18
Posted: Sun Feb 03, 2019 12:05 pm
by Dutch1
Time for some updates. A lot has gone on since my last update in August. Between the hurricane, helping my brother getting out of his house from the hurricane damage and moving, the election and it's impact(s) to my job, my job, a job offer, grandad in and out of the hospital, family pet getting sick and eventually dying, and so on and so on. Sounds like life right?? Needless to say the boat build was the least of my concerns for the last few months.
The good news is I did get some work done on the boat in between all of that. It's good therapy because I have to concentrate on what I'm doing and it helps me forget while I'm working.
The interior is done and painted minus the decks. All I have left to do is wire up everything, install the decks and hatch covers, fair and paint, mount the motor, and then it's done. I only wish it was as easy as that sentence makes it sound.
My other dilemma has been getting it registered. The "not me" ghost has entered the picture and no one can seem to find my inspection report at the DMV. I had it inspected the first week of October. I got a copy of my report from FWC a few weeks ago. I just found out the DMV has no record of it this past week. I think my next step will be to call the Governor's office since this seems to be an issue between FWC and the DHSMV. Frankly, I don't have time to deal with it right now but if the boat was completed and sitting on a trailer it would be a different discussion.
Enjoy the pics and let me know if you have any questions.
Re: Steve's FS18
Posted: Sun Feb 03, 2019 12:12 pm
by Dutch1
Here's the flip. I had a couple of buddies come over and it didn't take any time.
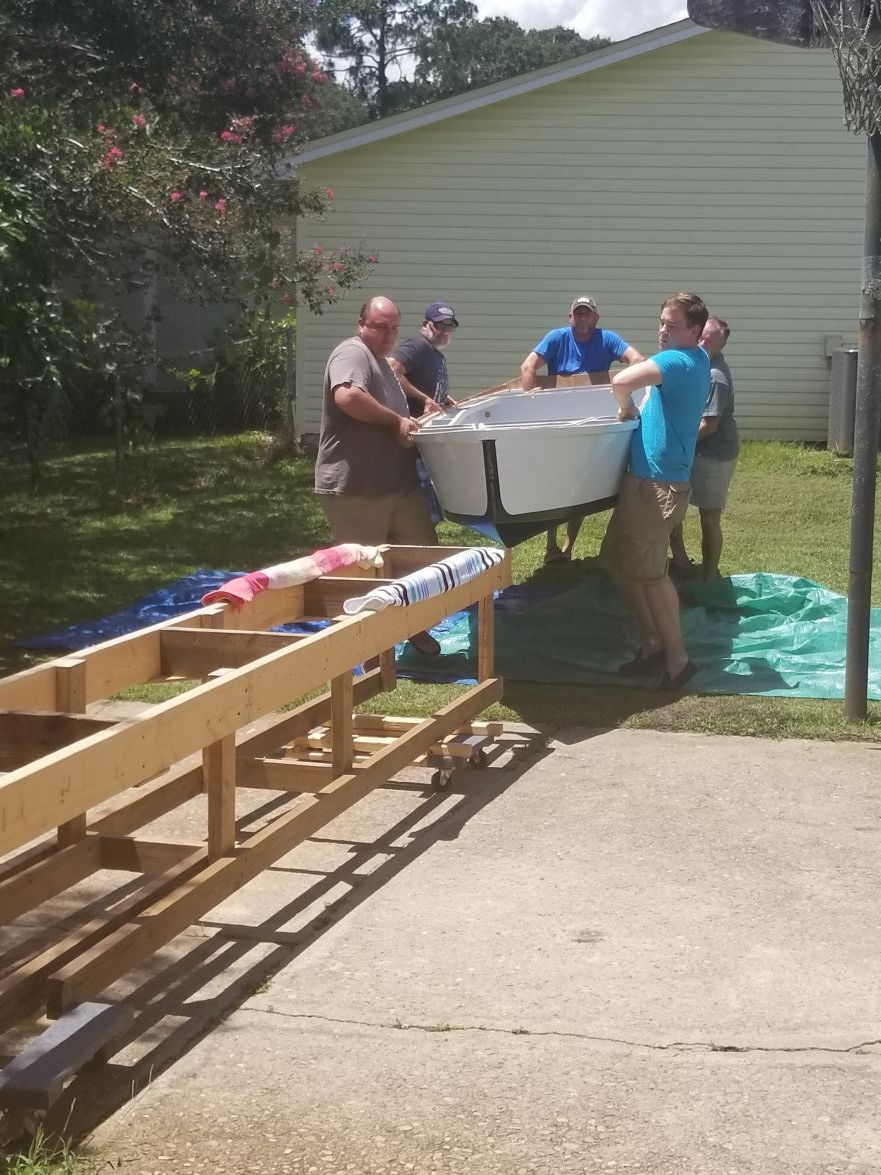
I'm still curious what the weight is. I can easily pick it up from the transom . I think I'm going to get the truck (with a full tank of gas) and trailer weighed at the scrap yard. Then when the boat's on weigh it again.
Re: Steve's FS18
Posted: Sun Feb 03, 2019 12:19 pm
by Dutch1
I had this happen when I installed the bolt holes for the gas tank. I drilled the hole, used an allen wrench to mill out the foam and make a pocket for the epoxy.
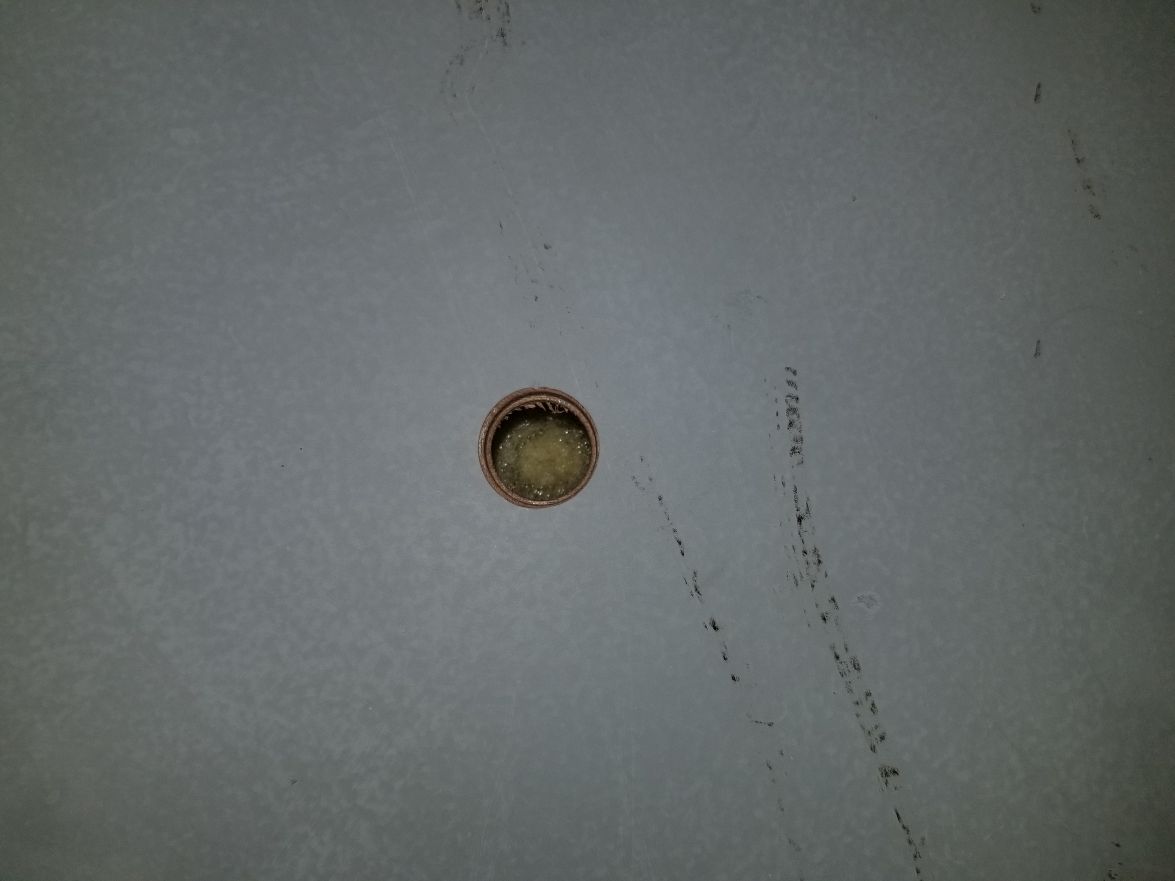
I used fast hardener, filled the hole and poked the bolt with the nut on it in the epoxy. I always go check on wet epoxy for a few hours afterwards. I walked back out after about 10 minutes and this is what I saw. I pulled off the epoxy before it was completely hardened but put the bolt back in the leftover hole to show how much it pushed it back out for the picture. The other hole was fine as you can see. I can only assume it heated up the air in that spot and since the air didn't have anywhere to go it pushed out the bolt.
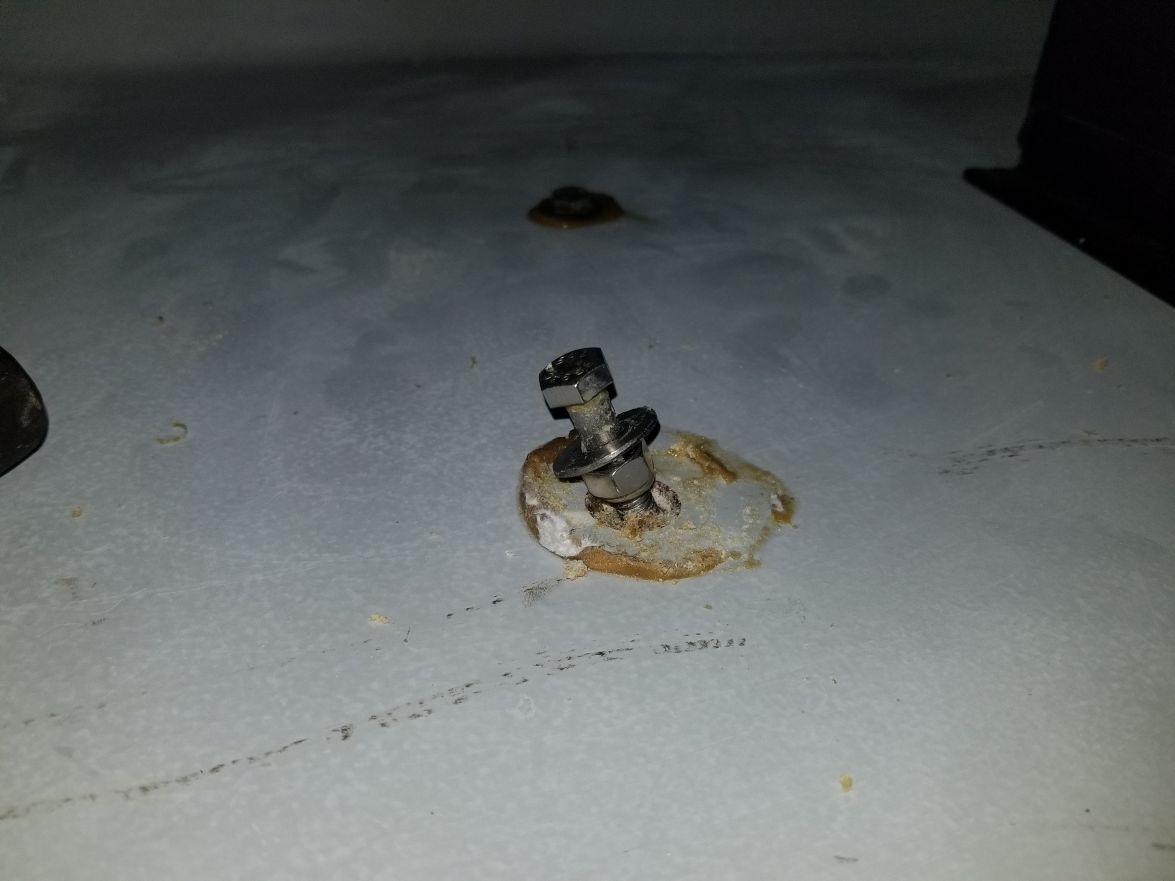
Re: Steve's FS18
Posted: Sun Feb 03, 2019 12:29 pm
by Dutch1
I had originally planned to have a small box welded on the grab bar for switches and a place for the cell, wallet, etc. I ended up deciding to build the small console with the 3 gallon bait well which could serve as a beer cooler. I mean beverage holder. The challenge was all of the conduit was already covered with foam and the deck by the time I decided to do the console. So, I'm still going to run all of the wires through the grab bar and into the console. I've been trying to figure out the transition from the bar to the console and came up with this idea. Basically, the wood will go around the grab bar with the wires going through it into the console. A solid piece of wood would have problems later so I laminated a big piece to use. After looking at it and taking these pics, I built one that was wider so I could just use long bolts to clamp the two pieces around the grab bar and mount it to the console. That build isn't done yet. I'll finish it before I wire it up.
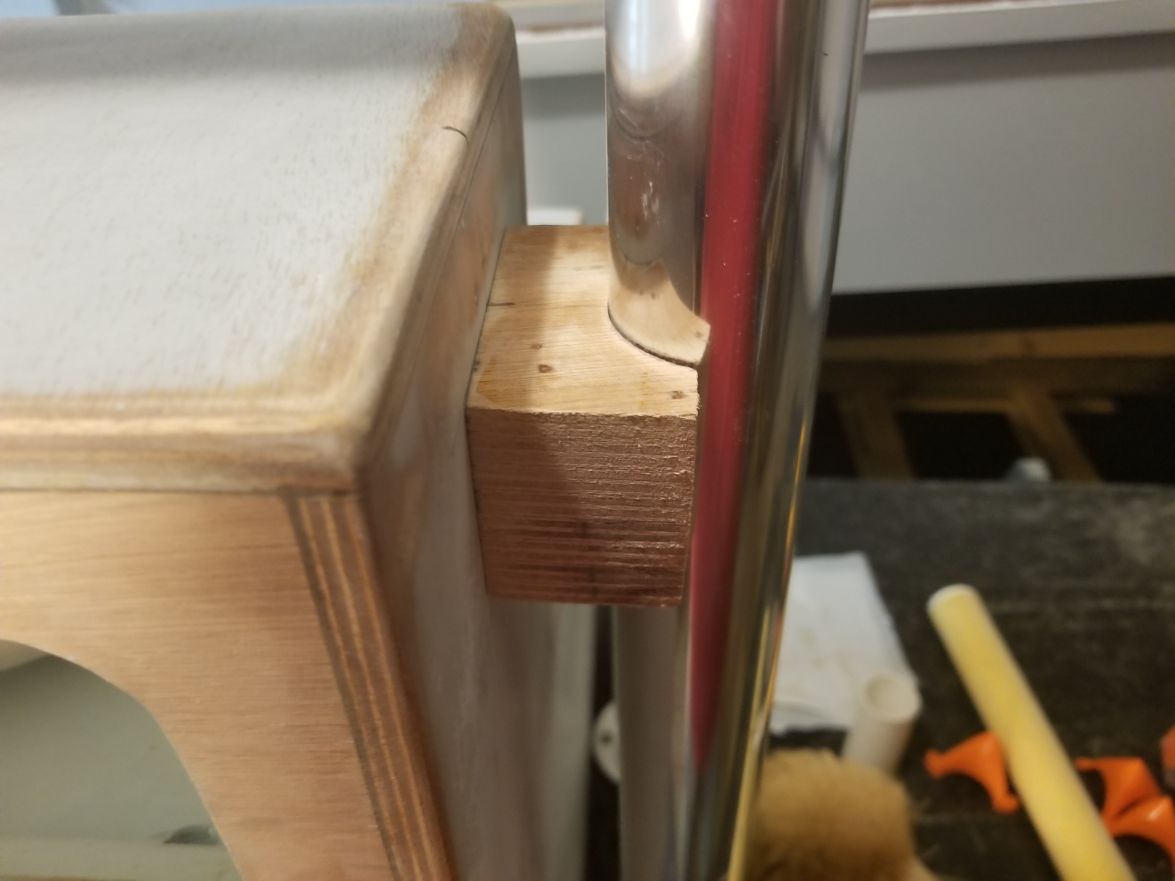
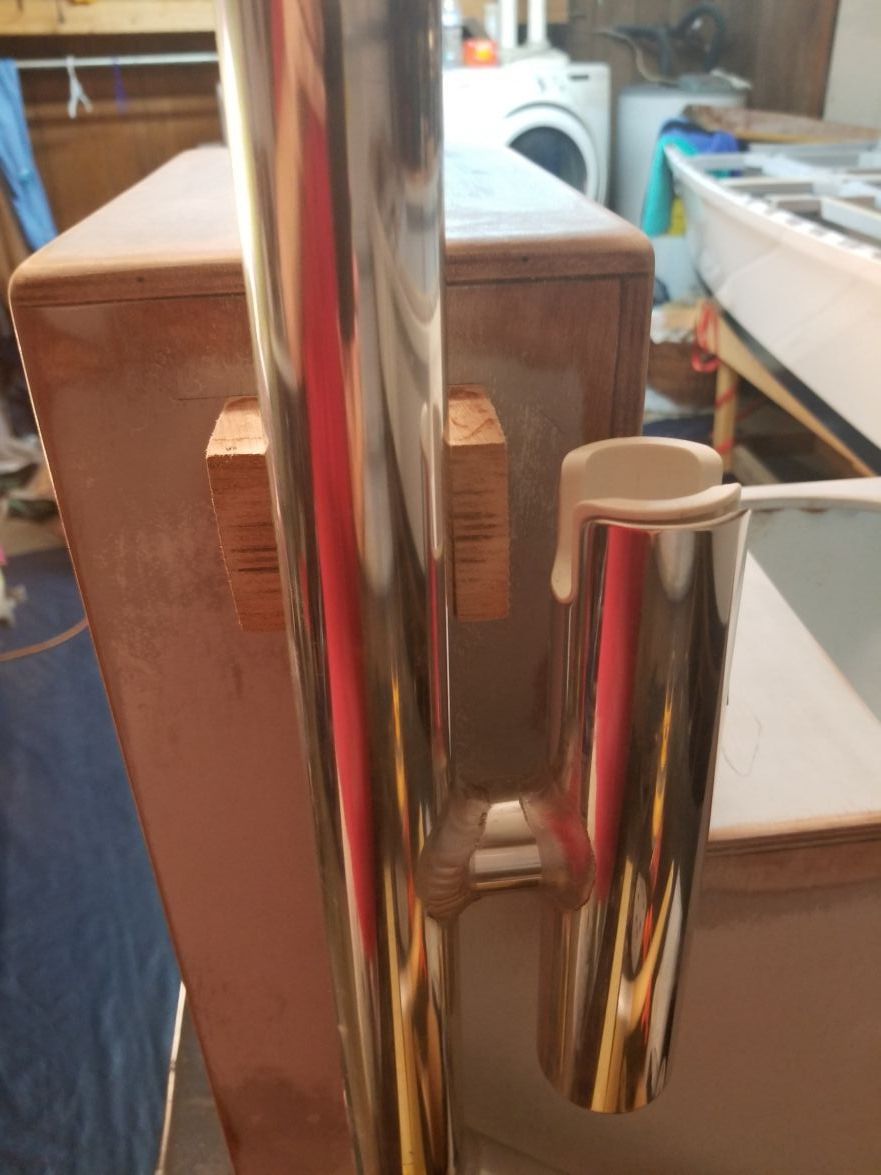
Re: Steve's FS18
Posted: Sun Feb 03, 2019 12:34 pm
by Dutch1
I foamed the inside of the bait well so it could double as a cooler. I figure it will hold ice with the cushion on the top and this foam for a little while. Better than no insulation. And, it filled the voids well.
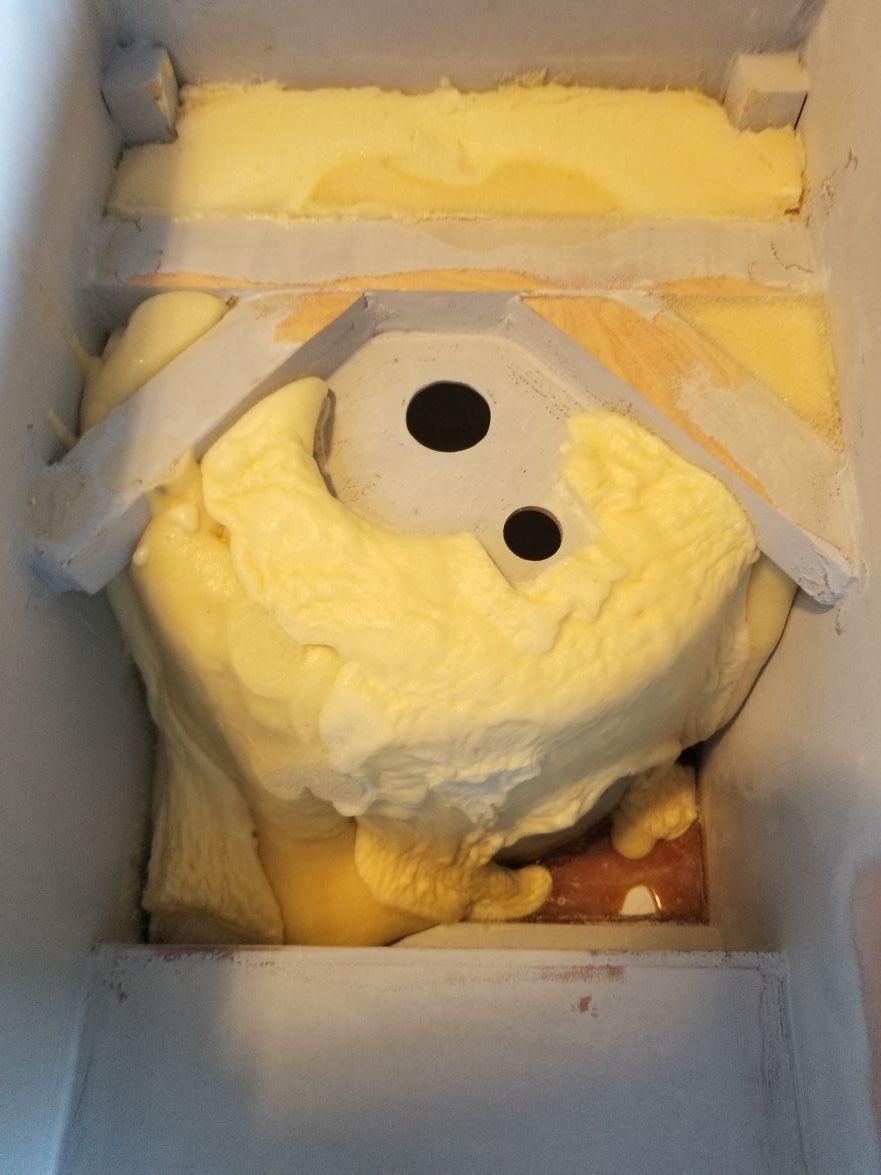
Re: Steve's FS18
Posted: Sun Feb 03, 2019 12:40 pm
by Dutch1
Re: Steve's FS18
Posted: Sun Feb 03, 2019 12:57 pm
by Dutch1
Re: Steve's FS18
Posted: Sun Feb 03, 2019 1:35 pm
by Rollbar
What component did you use/MFG to spray?
Loos very nice!
Re: Steve's FS18
Posted: Sun Feb 03, 2019 6:36 pm
by Dutch1
Thank you! I used an 8 gallon air compressor with a cheap spray gun from Harbor Freight. The only thing I will add before I use it again is a moisture filter/canister in the line.
Re: Steve's FS18
Posted: Sun Feb 03, 2019 8:12 pm
by OrangeQuest
It goods really good!
Re: Steve's FS18
Posted: Sun Feb 03, 2019 9:38 pm
by Rollbar
Dutch1 wrote: ↑Sun Feb 03, 2019 6:36 pm
Thank you! I used an 8 gallon air compressor with a cheap spray gun from Harbor Freight. The only thing I will add before I use it again is a moisture filter/canister in the line.
Nice!
What was the stuff (product) you sprayed (missed that)?
Re: Steve's FS18
Posted: Sun Feb 03, 2019 10:15 pm
by Dutch1
Rollbar wrote: ↑Sun Feb 03, 2019 9:38 pm
Dutch1 wrote: ↑Sun Feb 03, 2019 6:36 pm
Thank you! I used an 8 gallon air compressor with a cheap spray gun from Harbor Freight. The only thing I will add before I use it again is a moisture filter/canister in the line.
Nice!
What was the stuff (product) you sprayed (missed that)?
The inside is Awlgrip ice blue.
Re: Steve's FS18
Posted: Mon Feb 04, 2019 1:32 pm
by Dutch1
OrangeQuest wrote: ↑Sun Feb 03, 2019 8:12 pm
It goods really good!
Thank you!
Re: Steve's FS18
Posted: Mon Feb 04, 2019 1:54 pm
by Jeff
Really well done Dutch1!! Jeff
Re: Steve's FS18
Posted: Mon Feb 04, 2019 4:54 pm
by Dutch1
Thanks Jeff!
Re: Steve's FS18
Posted: Thu Feb 14, 2019 11:36 pm
by Dutch1
I need some advice on the hardware for the hatches. Are there some brands/types I should avoid? I'm finding everything from $5 chrome hinges at Academy to $65 a set for the nice shiny stuff. I just want a dang hinge that won't mess up for several years. Same thing for the latches. Locking or not. Too many choices and I don't know what to avoid.
I've been holding off on ordering some and will have to make a decision soon. I'm leery of ordering off the internet without holding it in my hand first.
What does everyone recommend?
Re: Steve's FS18
Posted: Fri Feb 15, 2019 6:19 am
by seaslug
Google Gemlux, they have top quality stainless hinges and hardware. Been using their stuff for years with zero problems. Mike
Re: Steve's FS18
Posted: Fri Feb 15, 2019 4:44 pm
by Dutch1
Will do. Thanks!
Re: Steve's FS18
Posted: Fri Feb 15, 2019 5:28 pm
by K2FS18
Glad to see you are back at it.
Ken
Re: Steve's FS18
Posted: Sun Feb 17, 2019 5:26 am
by Team Above Avg
seaslug wrote: ↑Fri Feb 15, 2019 6:19 am
Google Gemlux, they have top quality stainless hinges and hardware. Been using their stuff for years with zero problems. Mike
+1 for Gem Lux. If you aren't overly picky about the exact look you are going for with hinges, they have killer deals in their clearance section. A couple of regular style SS hinges for $1.50 each or their 1st generation friction hinges for $5 each (gen 2 sell for $25/per). The friction hinges supposedly keep the hatches in place with out slamming shut. I bought twice as much of the friction hinges as I plan on using so that way if they ever go bad I have plenty of extras to replace.
http://www.gemlux.com/catalog/Item-Specials
Re: Steve's FS18
Posted: Sun Feb 17, 2019 6:12 am
by OrangeQuest
Thanks for posting the link. I only need 4 hinges but at those prices I picked up two types with extras as back ups.
Re: Steve's FS18
Posted: Sun Feb 17, 2019 9:57 am
by Jeff
Good deal!!! Jeff
Re: Steve's FS18
Posted: Sun Feb 17, 2019 10:20 am
by OrangeQuest
Jeff wrote: ↑Sun Feb 17, 2019 9:57 am
Good deal!!! Jeff
Bad news is their shipping cost doubled my cost. For $2.00 more than their cheapest rate I paid for UPS ground. That's another hinge!
So maybe a bigger order would help in the savings.
Re: Steve's FS18
Posted: Mon Feb 18, 2019 3:23 pm
by Dutch1
Thanks for the information everyone!
It's supposed to be warm this weekend so I'm going to hit it pretty hard and see what I can get done.
Ken, I'm glad to be back at it!
Re: Steve's FS18
Posted: Tue Feb 19, 2019 7:51 pm
by BB Sig
Great looking spray job! I might have to call you and get your rates...
Re: Steve's FS18
Posted: Sun Mar 03, 2019 4:57 pm
by Dutch1
Thank you! Not a problem. Call anytime!
Re: Steve's FS18
Posted: Sun May 26, 2019 10:36 am
by Dutch1
I've been working here and there on the boat. Just gathering hardware to finish it up. A few items I have left to buy are the fuse panel, a large removable inspection cover and some kind of white running light. I put the decks back on and have been working to get the hatches looking good. I hope to get the drip edges on them today. I finally figured out how to line the edge and be able to add a bead of epoxy/flour for the drip edge. I tried K2FS18s method but kept breaking the strips. Lowe's sells these 13x19 plastic sheets of paper for 2 bucks. I went there with the intention of buying some really thin plexiglass but realized that wouldn't work. I started walking around and walked by all of there signs. I first saw the corrugated plastic but didn't want the ridges in the corners to deal with. Then I noticed the blank plastic signs. PERFECT. It will bend around the edges and the epoxy "shouldn't" stick to it though I'll probably put some packing tape on it anyway. I'll post some pics on the process. Success or failure....
I also took Peter's advice and bought a rounded router bit to round out the bottom of the channels for the hatches. It's been bugging me for a while since he mentioned it. But, I didn't account for losing another 3/8" of wood when I measured up everything for those channels. They are rounded now but I don't think there's enough wood for strength on the front section in case someone steps on the channel when the hatch is open. Which will happen at some point. I was going to sand the paint off and add another piece of cypress but then figured a 3/8 layer of plywood on there would add the strength I was looking for. Since I'm sanding the bottom of the channels I had to use my phone with the front camera and see the progress to make sure the paint it gone so the glue will stick. Yesterday it was 97 outside and I don't know what it was inside the garage but it was HOT!
More to come. I'll try to get some updated pics loaded. I'm trying to use this long weekend to get a few things done on the boat.
Re: Steve's FS18
Posted: Sun May 26, 2019 2:04 pm
by BB Sig
Glad to hear you're doing okay. I was on 27 Friday and thought I need to come take a look.
Re: Steve's FS18
Posted: Sun May 26, 2019 2:22 pm
by Dutch1
Just give me a call when you are around.
Re: Steve's FS18
Posted: Mon May 27, 2019 11:25 pm
by Dutch1
Got a lot done this weekend but spent time with the family each evening when it cooled off enough. I'll take the family time. And, of course took this evening off to grill and spend some more time with the family celebrating Memorial day.
This week is the last week of school so I'll be able to work at night during the week this week.
More to come.
Re: Steve's FS18
Posted: Mon Jul 08, 2019 9:48 am
by thb
Steve,
How is your build coming along. Did you get the wiring sorted out?
I finally had my console lifted into the boat yesterday so my wiring and other hookups can proceed. You are welcome to have a look anytime you are down this way.
Regards
Tom in Steinhatchee
Re: Steve's FS18
Posted: Sat Jul 13, 2019 7:40 pm
by Dutch1
Hey Tom,
Sorry, I just saw your post. If I would have seen it I would have come on down this week to check out your build. I guess I need to turn on post notifications for my build.
I've gotten a lot done the last two weeks even though to look at it doesn't show much progress. That's a tough time to get through. I'm getting ready to paint my console one more time before I wire the boat. I finally have everything I need to finish and am looking forward to using this thing. It's exactly what I want for where I fish. I'll paint the console tomorrow or one night this week and then start wiring as soon as it's dry. I may run wires that don't go to the console first.
I did set up a small test bed for the wiring to figure out how I wanted everything configured. That was time well spent. Now, I'm just looking for a good label for the wires that doesn't fall off later.
Tell you what, let's see who can get their wiring done first. What do you say?
Re: Steve's FS18
Posted: Sun Jul 14, 2019 9:27 am
by thb
Hi Steve,
I bought one of those labeling machines which uses labels which you can stick on wiring. It is a Rhino 5200. You can buy different width labels and even heat shrink material to print on. I have a bunch more labels to print out and have yet to try the heat shrink tubing labels. So far the stick on ones have stayed in place.
Wiring is a PITA but to make it look neat is an art which I need to master. Other issue I have is my switch panel has in line fuses built in for every two switches. I really don't need these fuses as everything will be run thru the Blue Seas fuse panel. Have yet to figure all this out so talking about it helps. I am in no rush. Grouping and clamping wires inside the console is going to take some thought.
Regards
Tom
Re: Steve's FS18
Posted: Sun Jul 14, 2019 8:43 pm
by Dutch1
Tom,
I ended up using the blue sea fuse panel too. Thanks for the info on the labeler. I'll check it out. I'm definitely going to try and do a neat job of wiring. I could sling some wires together and call it good enough like I've seen done plenty of times but I want it right.
More to come
Steve
Re: Steve's FS18
Posted: Mon Jul 15, 2019 5:28 am
by OrangeQuest
A good idea would be to draw out your wiring in diagram style so years from now if something starts acting up you don't have to remember what went where. Little foot notes with brand and type of switches, fuses, terminal blocks and on and on. If you note everything from wire size to connectors then will make quick look up to upgrade or repair.
Re: Steve's FS18
Posted: Mon Jul 15, 2019 10:36 am
by Dutch1
OrangeQuest wrote: ↑Mon Jul 15, 2019 5:28 am
A good idea would be to draw out your wiring in diagram style so years from now if something starts acting up you don't have to remember what went where. Little foot notes with brand and type of switches, fuses, terminal blocks and on and on. If you note everything from wire size to connectors then will make quick look up to upgrade or repair.
That's a great idea. I drew one up originally but a detailed one would be nice to have around even for my simple boat. I'd just have to remember where I put the dang thing if I ever needed it!!! I have that problem too....
Re: Steve's FS18
Posted: Mon Jul 15, 2019 3:14 pm
by OrangeQuest
Every boat needs a place for the registration papers an cell phones that keeps thing dry, no matter what, but handy. I put a 6" piece of PVC pipe it is capped at one end and has a screw off deck plate on the other that the motor tool kit, a few spare things and the proof of registration. Doesn't take much to laminate a diagram and roll it up and put it on the boat with a few spare things.
Re: Steve's FS18
Posted: Mon Jul 15, 2019 6:30 pm
by Dutch1
Another good tip. Thanks!
Re: Steve's FS18
Posted: Sun Sep 15, 2019 4:55 pm
by Dutch1
Time for some updates and pics...
This is the transition I came up with to get the wiring from the grab bar to inside the console. The only thing I would change is I would have flipped it so the bolts go through all layers of plywood instead of in between. It would have been stronger that way but if it breaks, I know how to make another one that works fine.
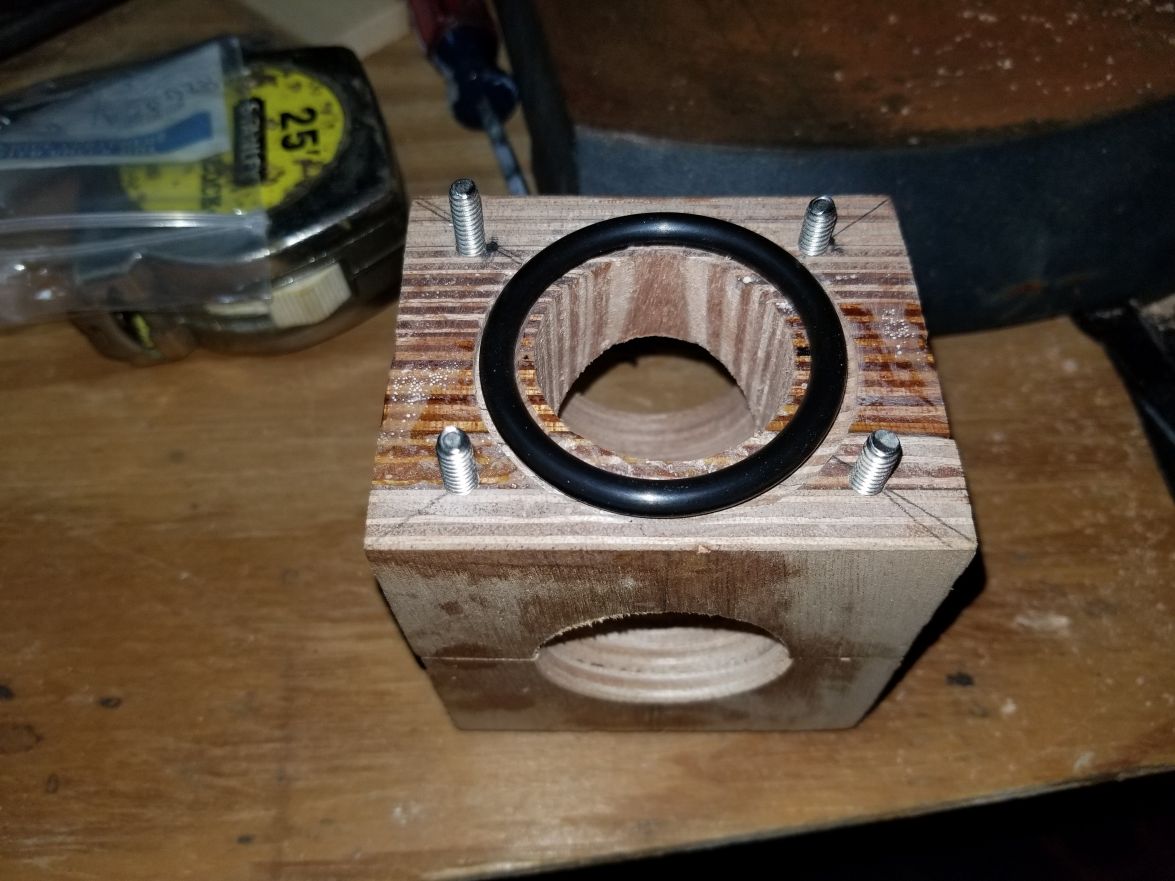
Re: Steve's FS18
Posted: Sun Sep 15, 2019 4:59 pm
by Dutch1
I took some good advice from this forum and bought a rounded bit so I could round out the bottom of the channels for the hatches. I went a little lower to get rid of that lip after the pics but you get the before and after.
Before:
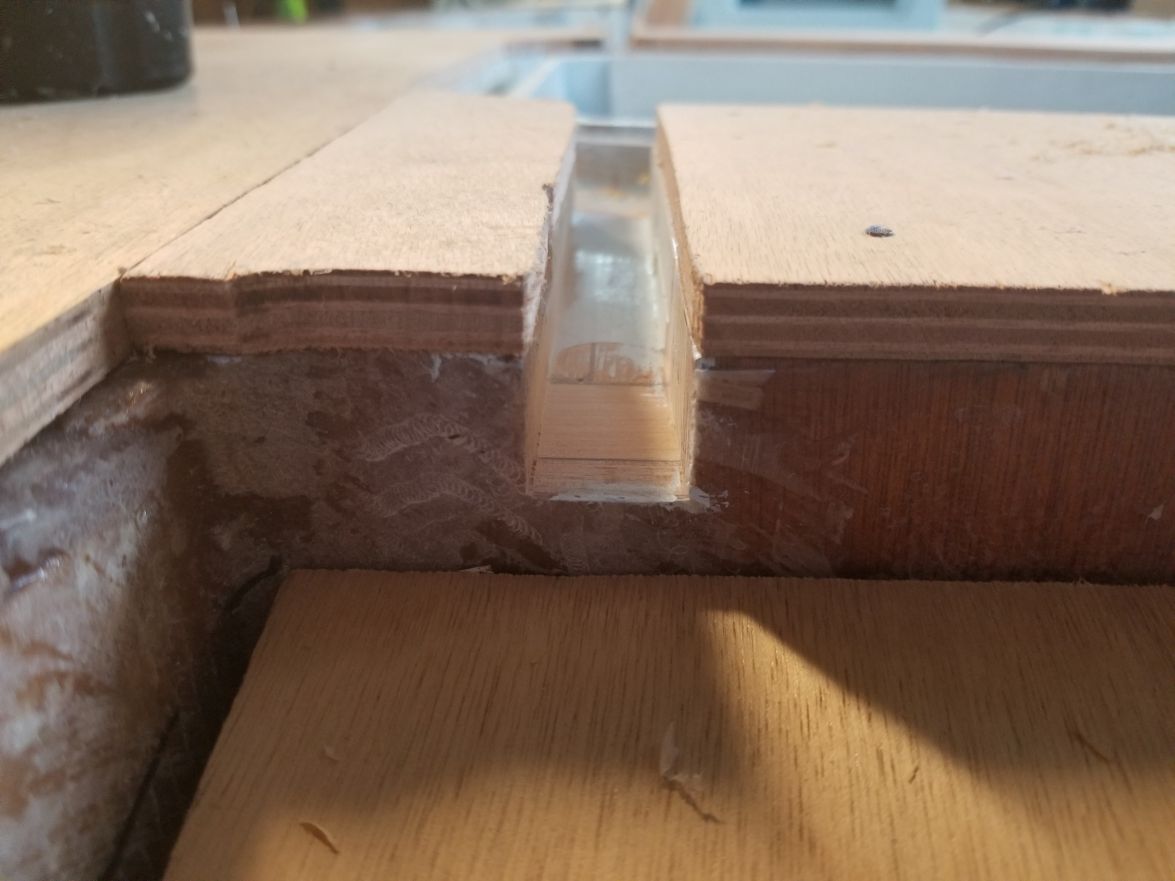
After:
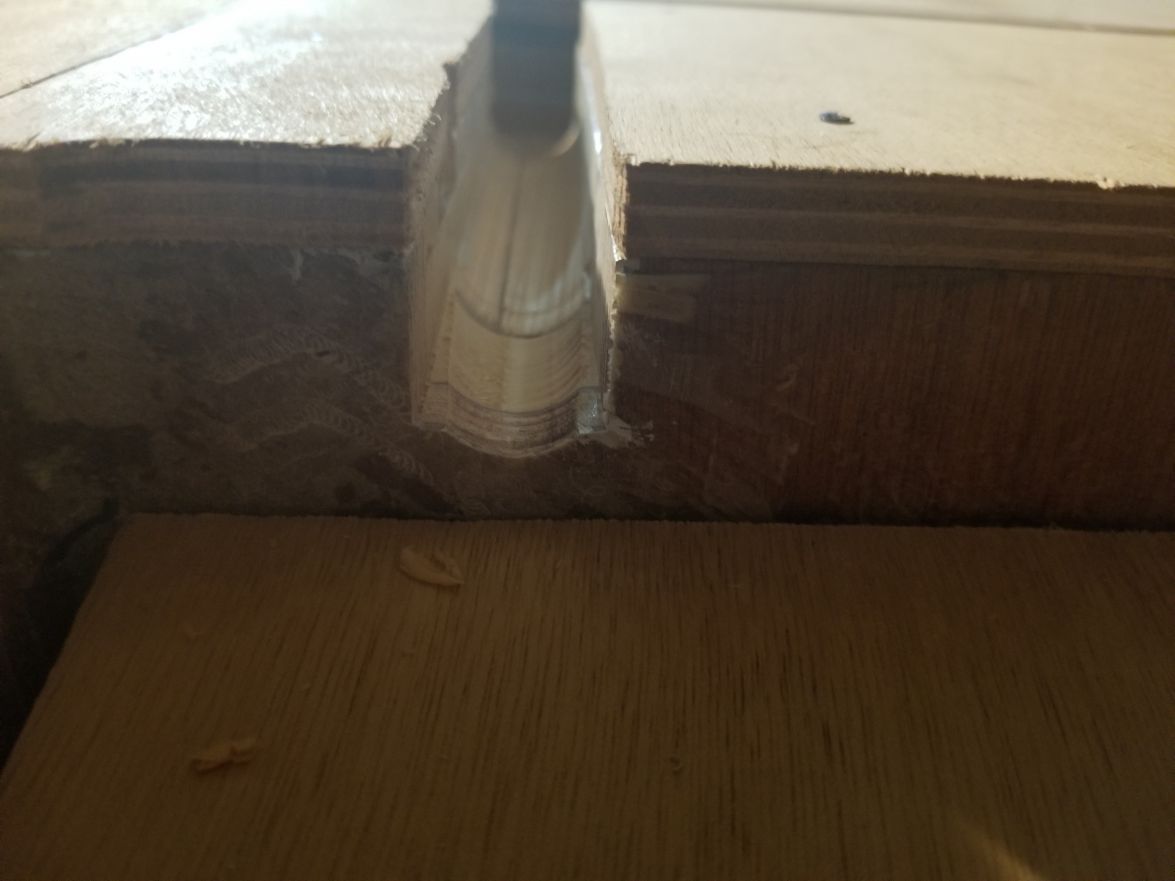
Re: Steve's FS18
Posted: Sun Sep 15, 2019 5:03 pm
by Dutch1
Time for some wiring...I've been both looking forward to and dreading this for a while. . .I didn't know if I could get it through and into the grab bar and into the console. Here goes.
It's about this big with a tranducer cable, nmea cable, power and ground for 5 switches, and phone charger.
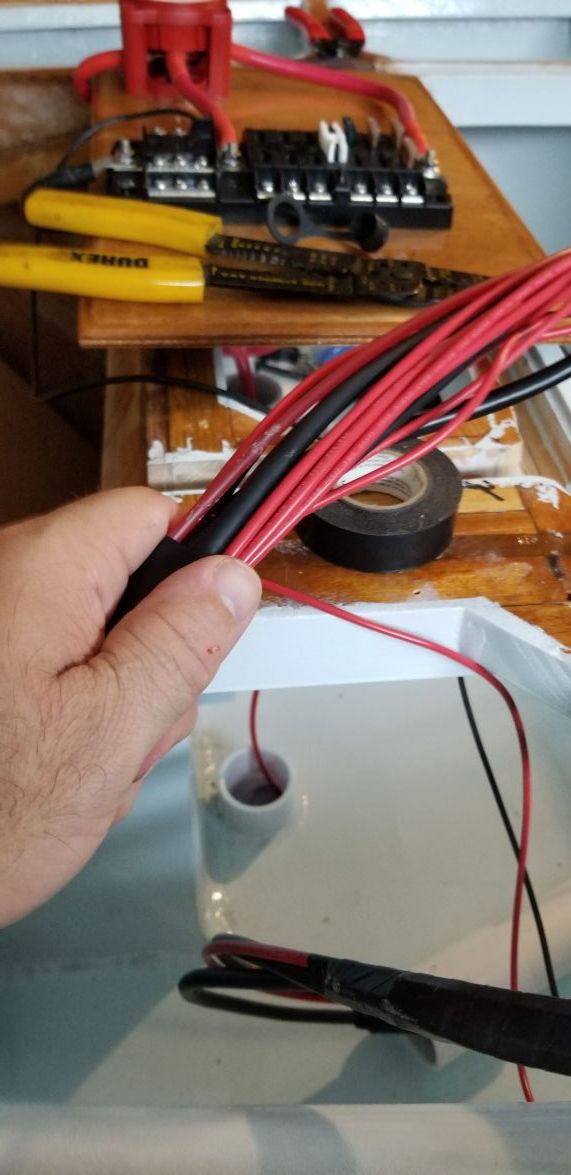
Re: Steve's FS18
Posted: Sun Sep 15, 2019 5:17 pm
by Dutch1
All that dreading and planning for nothing. It wasn't as hard as I thought it would be. I pulled it through to the sole, then through the grab bar, then into the console and pulled it all tight. I even realized I forgot wires for the charger and got the fish tape through with no problem and pulled two more wires.
Here's half of the piece I built all painted up and ready for installation. You can see the wiring harness coming up through the sole in the background.
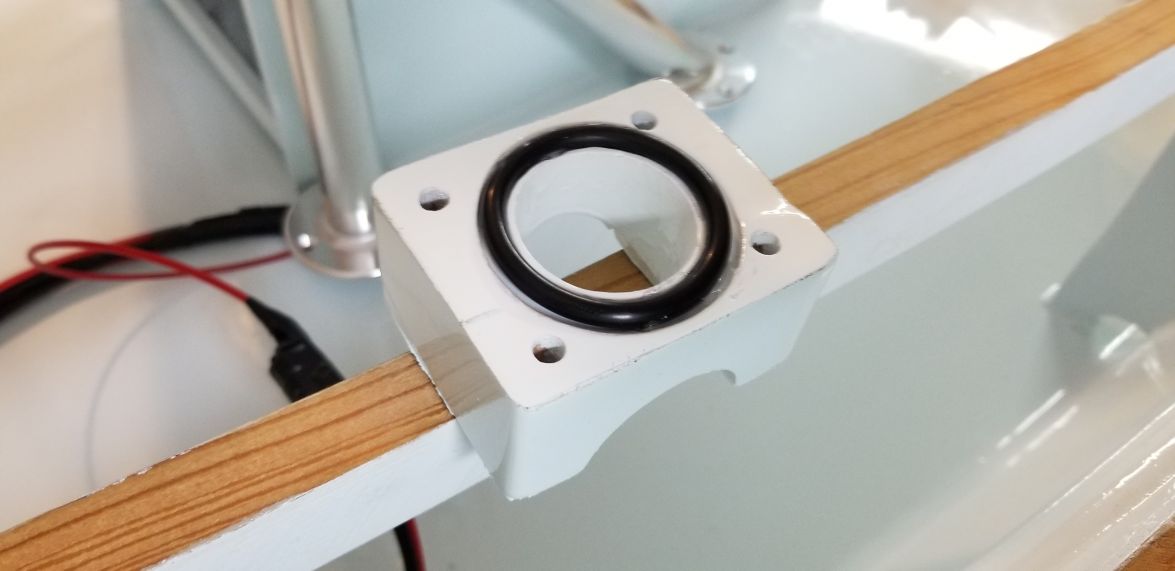
All together and a HUGE sigh of relief!!!
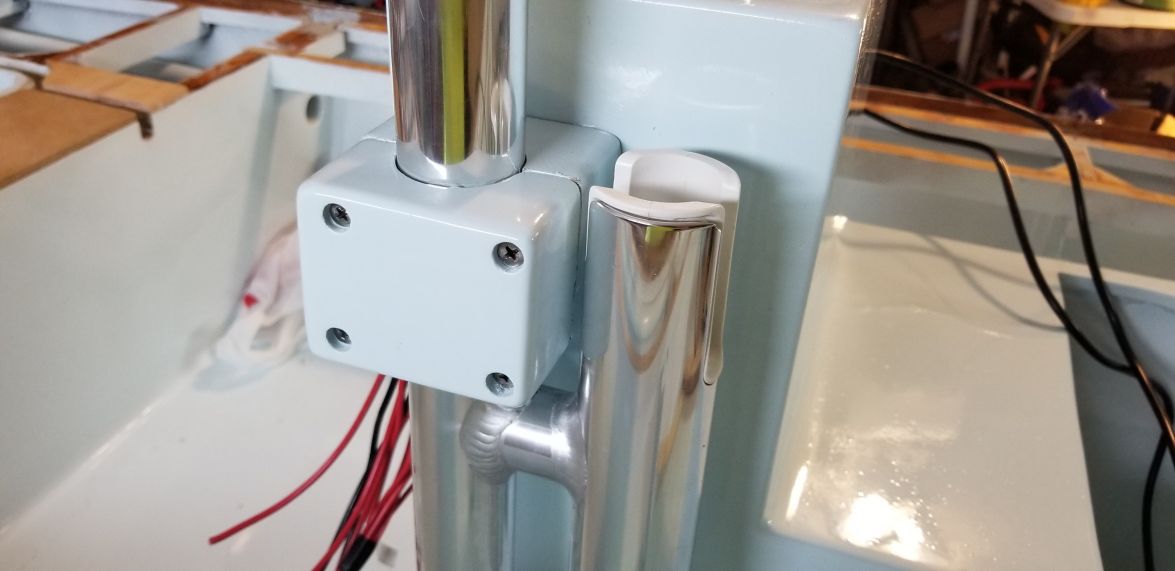
I didn't know if labels would make it through the process of pulling them through the conduit so I listed out my switches on a piece of paper and gave them dots for which one it was. Then used a sharpie to put that number of dots on the wire so I knew which one was which once it was into the console.
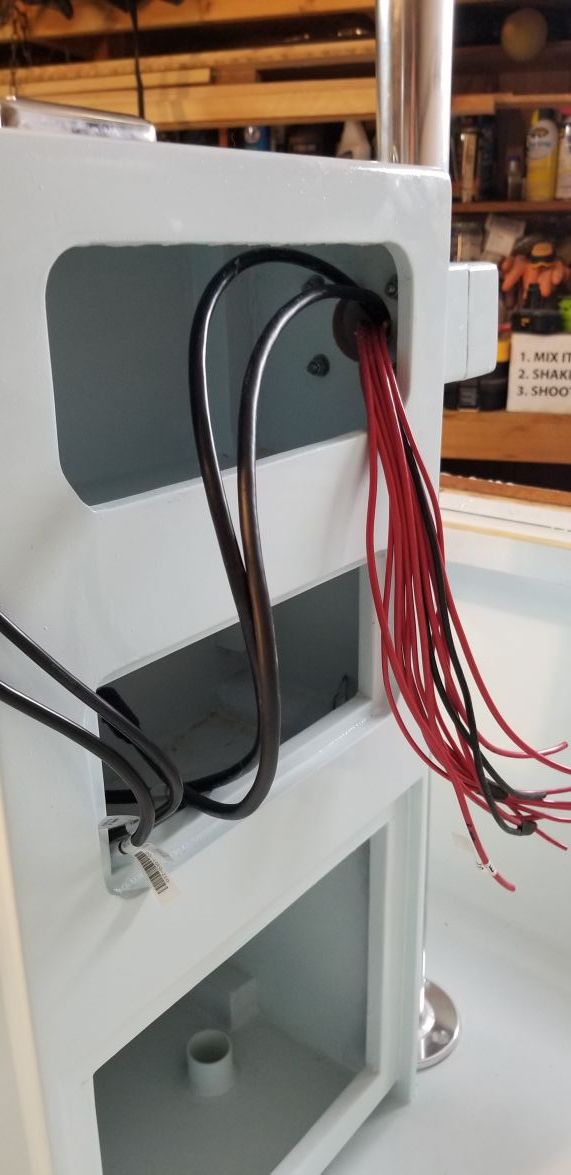
Switches and labels installed. I just used a regular label maker and bent them back over onto themselves. It was not easy to separate when I tried. Who knows, I may open the cover to loose labels in there in the future. I just didn't want to spend $100 on a label maker for wiring. I don't do this enough to merit that expense. But, they are nice!! I pulled most of the excess wiring back through but left enough where I could get the cover off and work on it comfortably if I had to.
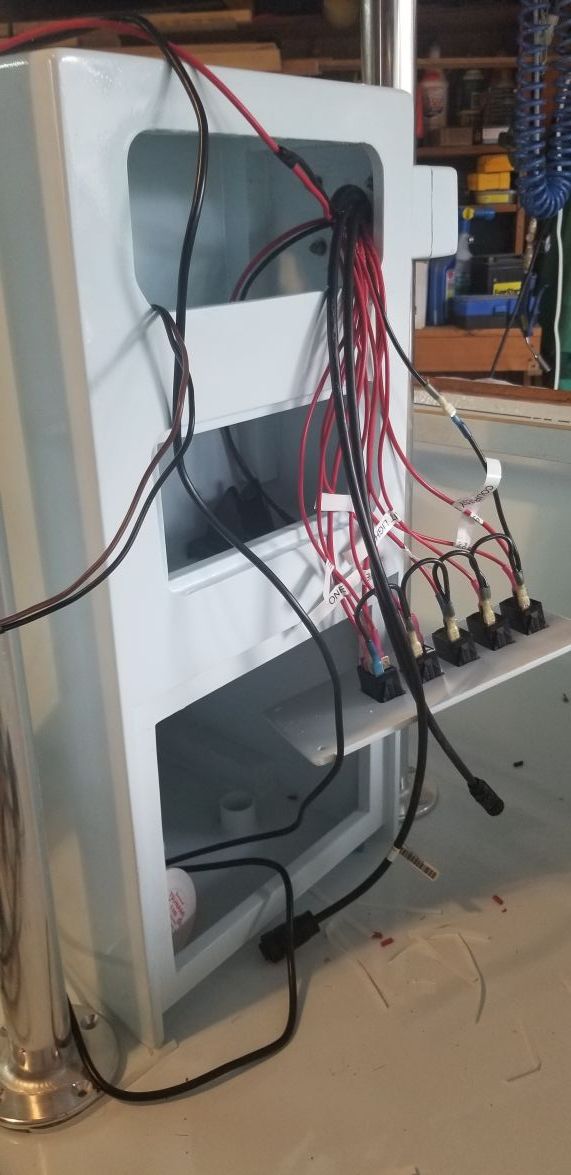
Re: Steve's FS18
Posted: Sun Sep 15, 2019 5:25 pm
by Dutch1
Here's the bait well setup. It went it ok. It was a little tricky with silicone one the ends to make sure it was still there and get everything tightened up. I'm pleased with it and it will be nice to have a small 3 gallon bait well when I want one. It will serve as a small cooler when bait isn't needed.

Re: Steve's FS18
Posted: Sun Sep 15, 2019 5:35 pm
by Dutch1
Here's a few more pics of the fuse panel setup.
I tried to give each line a drip edge so water would drip instead of go all the way to the connection. Still running a few wires to the panel in this pic.
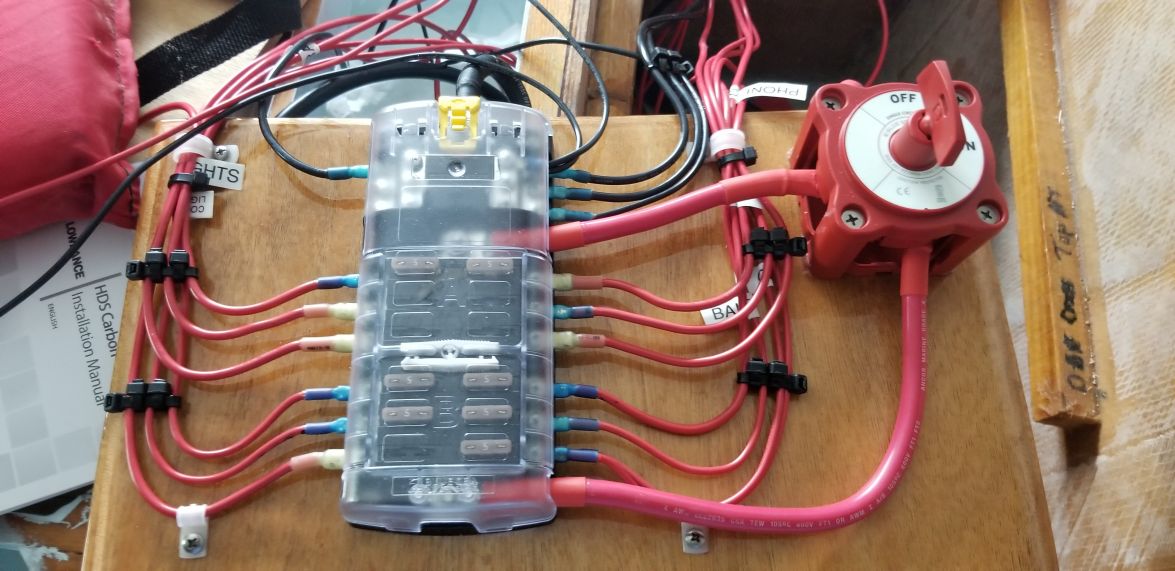
Tidying up everything with zip ties.
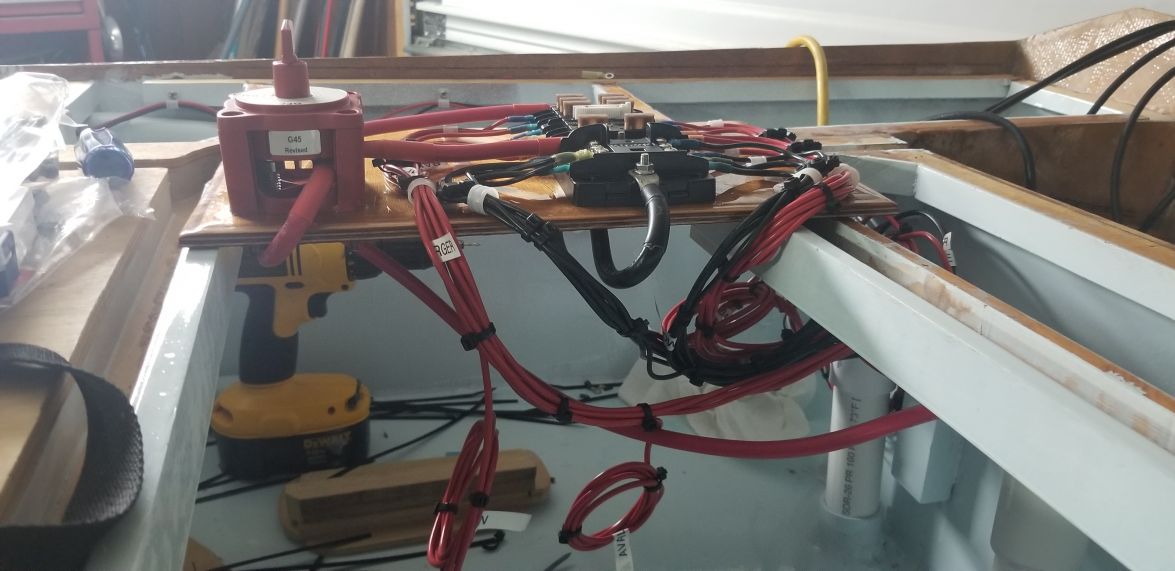
Final result. It will have two holes in the panel and fits over two bolts mounted inside the hatch. I have wing nuts (with lock washers) on them holding it on. If needed at some point in the future, I can pull it up and onto the deck to make working with it easier instead of crawling around upside down inside the hatch.
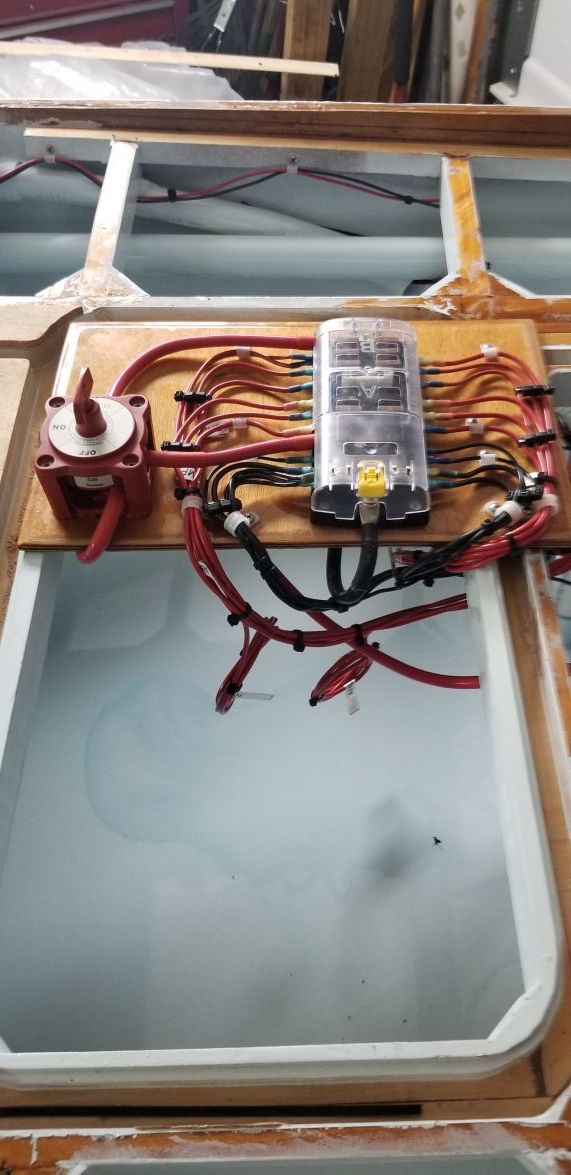
Re: Steve's FS18
Posted: Sun Sep 15, 2019 5:39 pm
by Fuzz
Being able to pull the wiring out to get to it is a smart move. you will thank yourself many times over.
Re: Steve's FS18
Posted: Sun Sep 15, 2019 5:44 pm
by Dutch1
Here's my gas tank install. I built a place for the lip of the tank to slide into when I completed that area.
Showing how the lip of the tank goes under the space allowed.
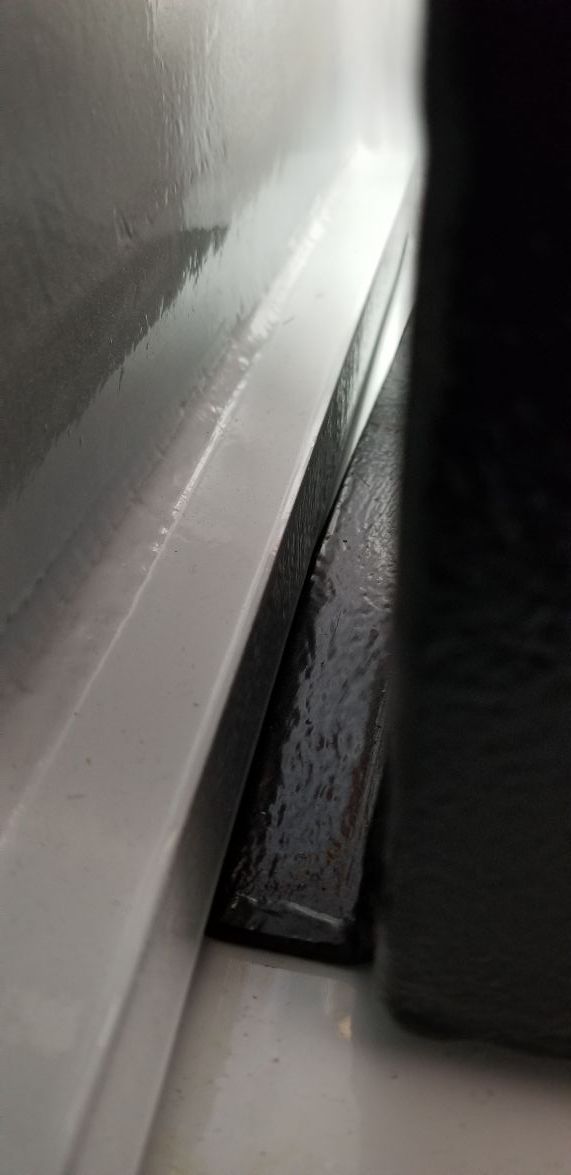
Tucked in as planned.
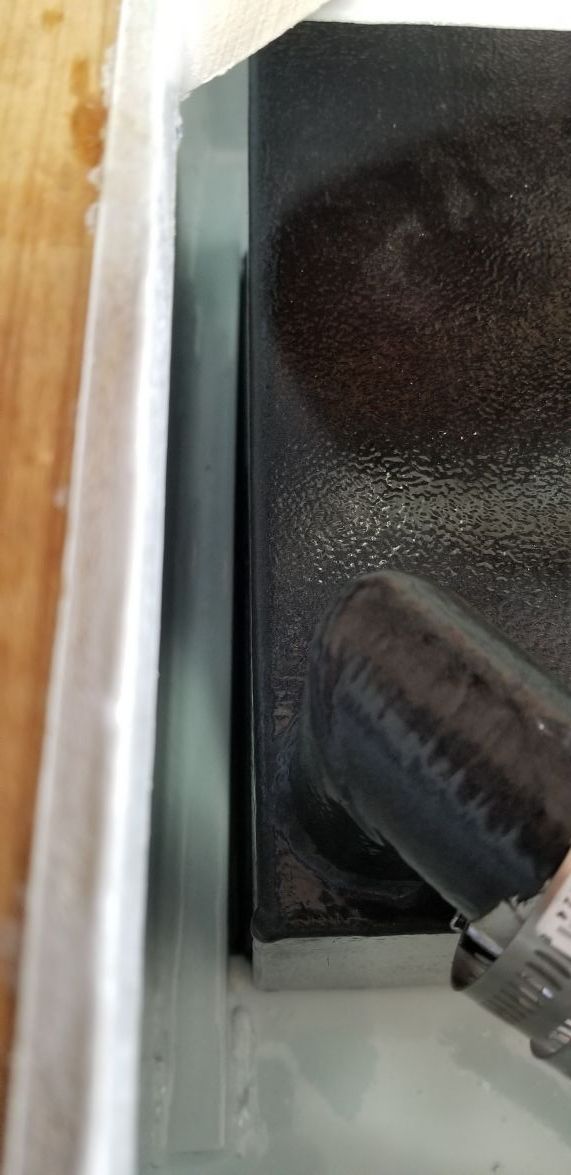
Temporarily installed but I had to use several washers because I can't get my hands on 1" stainless bolts. I'll change it out once I get the right size bolts. I used rubber washers to lift it in the front and hold it snug in the back.
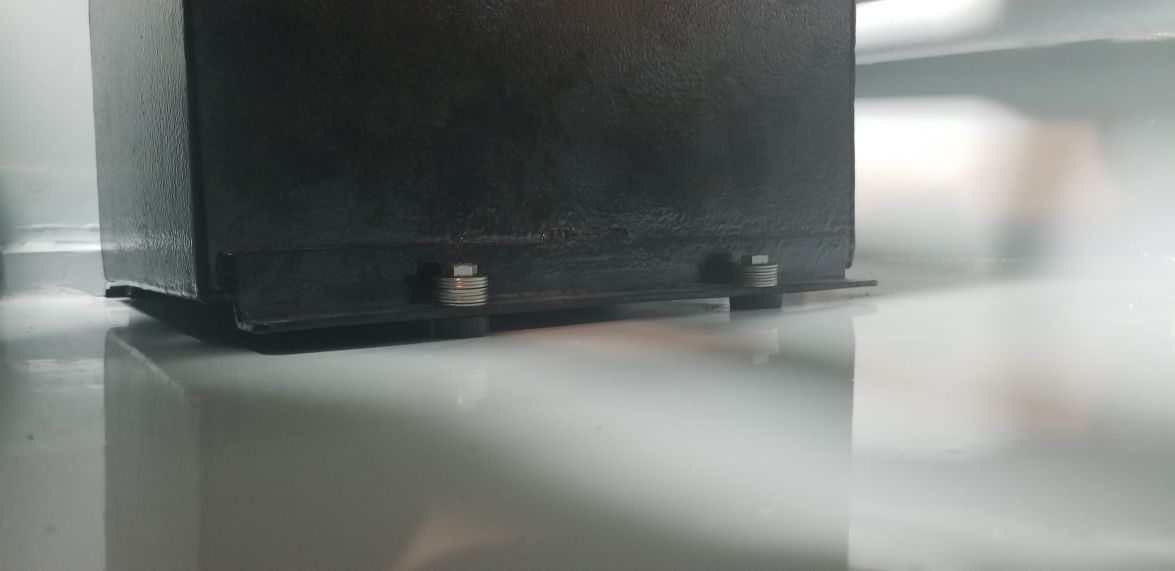
Re: Steve's FS18
Posted: Sun Sep 15, 2019 5:46 pm
by Dutch1
Fuzz wrote: ↑Sun Sep 15, 2019 5:39 pm
Being able to pull the wiring out to get to it is a smart move. you will thank yourself many times over.
Thanks Fuzz. I also wanted to be able to show people (by looking in through the hatch) what that beautiful wood looks like without paint all over it.
Re: Steve's FS18
Posted: Sun Sep 15, 2019 6:18 pm
by Dutch1
All the wiring for what I have now is completed. I have to run the nmea backbone when it comes in Wednesday. I bought the starter kit but picked the wrong one without a backbone. Kind of need that... Once I purchase the trolling motor I"ll install it but it will have it's own dedicated battery up front by the other one. And I'll plug it into the nmea backbone that will be sitting there waiting for a connection.
I installed oznium cool white led lights in the compartments with reed switches. When you open a hatch, the light comes on and back off when closed. I moved the reed switch to the underside of the channel for the hatch and had to use some strong magnets to get it to work. After a few tries, I got the right combination and it works perfect. You can see the compartment light in the bottom of the pic below.
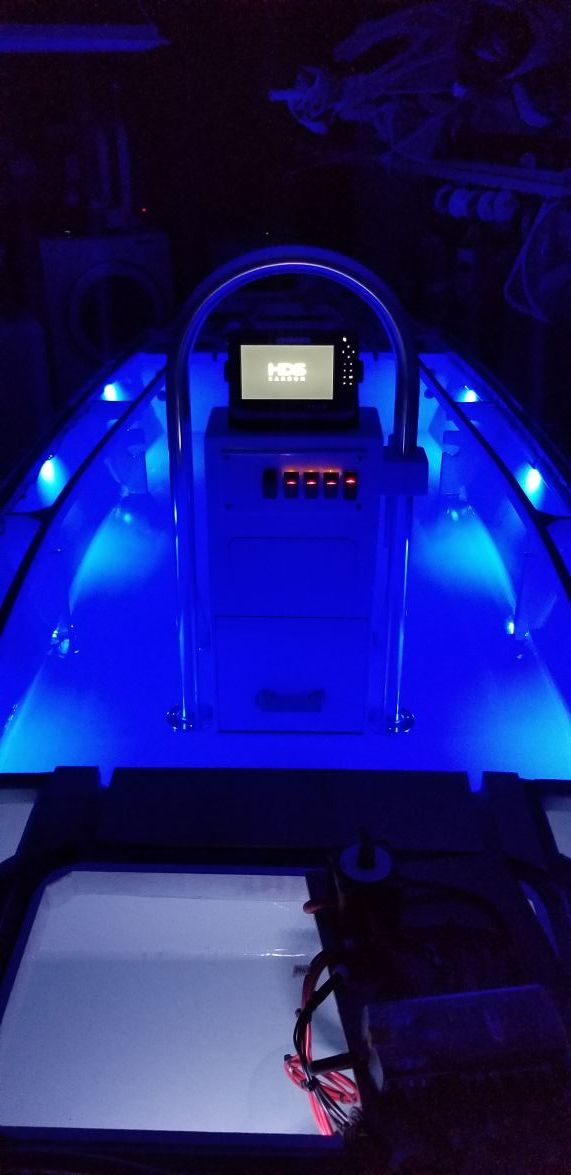
Here's a pic of the interior courtesy lights. They are also oznium lights and I'm pleased with them. They'll look better with the decks installed.
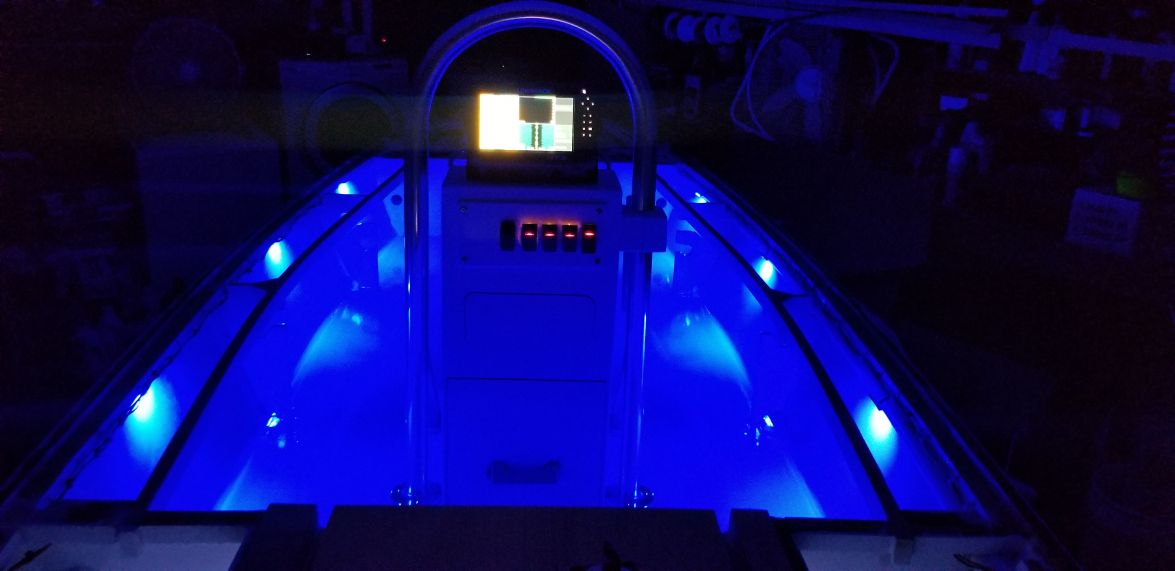
I'm going out now to start taping up to get ready to start gluing down the decks. More to come...
Steve
Re: Steve's FS18
Posted: Sun Sep 15, 2019 6:20 pm
by Dutch1
OH, and THB how's your wiring coming along? Who won?
Re: Steve's FS18
Posted: Sun Sep 15, 2019 6:31 pm
by Dutch1
One more thing. Be sure NOT to lay a cable clam on paint when it's still curing. It had been a day or two after painting when I placed mine on top of the console and it looked like this when I picked it up a week later. The only thing I can think of is the paint was still curing and the rubber base reacted somehow. I couldn't get it to come off and it's a good thing it was very close to where I wanted it or I would have sanded and touched it up with paint. I also had to grind away on the cover a little to get the transducer plug to go through. I forgot how hard stainless is..
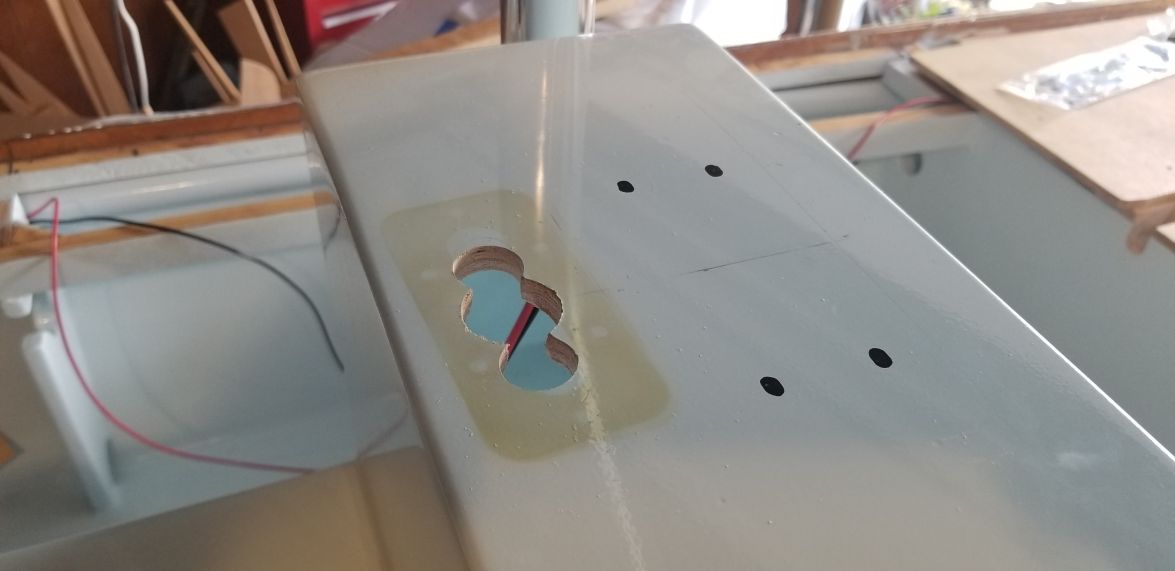
Installed and everything checks out.The middle compartment will get some kind of latch and hinge. I just haven't found the right combination I liked yet. And, I have to paint the bottom panel that comes off to access the bait well area one more time. It's still just primed in this pic.

Re: Steve's FS18
Posted: Mon Sep 16, 2019 11:22 am
by Jeff
Nice work Dutch1!!! Jeff
Re: Steve's FS18
Posted: Mon Sep 16, 2019 12:33 pm
by BB Sig
Nice work!
Re: Steve's FS18
Posted: Mon Sep 16, 2019 12:53 pm
by narfi
Looking great!
Re: Steve's FS18
Posted: Mon Sep 16, 2019 1:36 pm
by Dutch1
Thanks Jeff, BB, and Narfi! It's been fun!
Re: Steve's FS18
Posted: Mon Sep 30, 2019 3:45 pm
by K2FS18
Looking great!! So close to being complete.
Re: Steve's FS18
Posted: Wed Oct 02, 2019 11:30 pm
by Dutch1
K2FS18 wrote: ↑Mon Sep 30, 2019 3:45 pm
Looking great!! So close to being complete.
Thanks man! I only have the front deck to glue down left. I got my trolling motor quick release Monday and waited to see how I wanted to mount it on the front before I glued anything up front. Once it's down, I'll get my hatches completed. BTW, I FAILED in following how you did your drip line. It was too hot and kicked before I could shape it. Ended up sanding it all off. I'm going to use small strips of 1/4 ply.
Then fiberglass the decks, fair, then fair some more, then more, and paint. I'm going to put some non-skid down. I'm on the home stretch now...
Thanks for checking in!
Steve
Re: Steve's FS18
Posted: Thu Oct 03, 2019 7:41 am
by Jeff
Almost done Steve!!!!! Hope your grandfather is well!! Jeff
Re: Steve's FS18
Posted: Sat Oct 05, 2019 10:49 am
by Dutch1
Yep, almost done but can't work on it today. Too many other things that need my attention. Grandad is well. We're going to work on it again tomorrow afternoon.
Re: Steve's FS18
Posted: Sun Jan 19, 2020 1:17 pm
by Dutch1
Time for some updates. I've been working on it as I can. We got a lot done over the Thanksgiving weekend but hardly anything around Christmas. Just too much going on. Everything is primed and I'm waiting on some decent warmer weather so I can paint it with the Awlgrip paint. Here's some pics of the progress..
Here's the installed panel. I ended up finding some plastic spacers from Ace that I am using instead of the wood ones in the pic under the wing nuts.
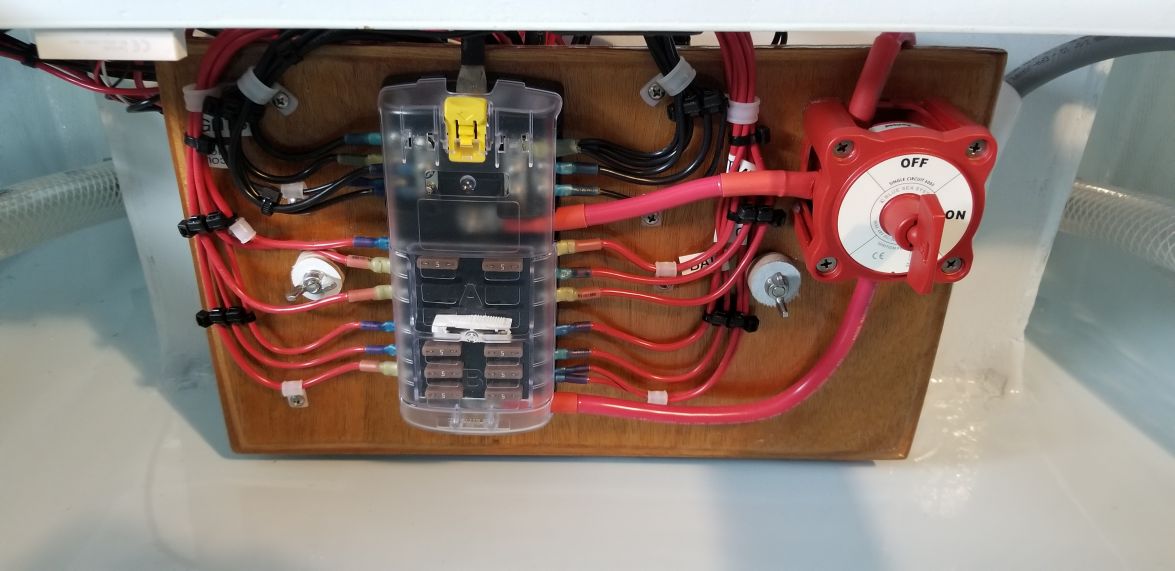
I taped up inside where epoxy might squish out. Then while the epoxy is still pliable, I pull the tape and have a nice clean edge underneath. Sure some tape gets caught but not much. It's time consuming though..
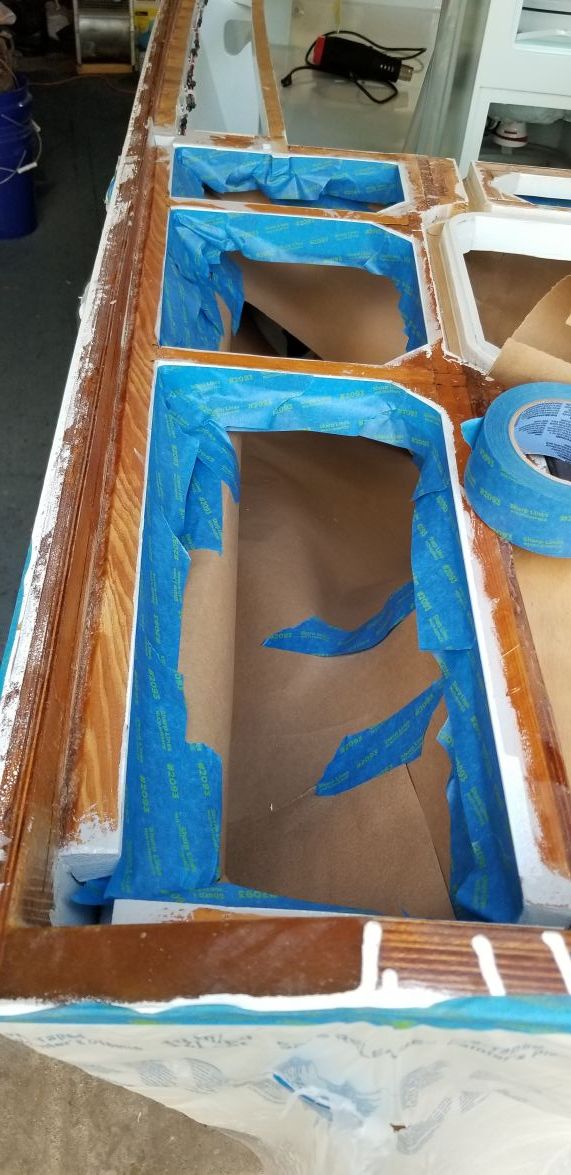
We also picked up two new blue heelers to replace Rosie who passed last December. It's like having two pups on steriods. I love the breed. It's like having babies again...
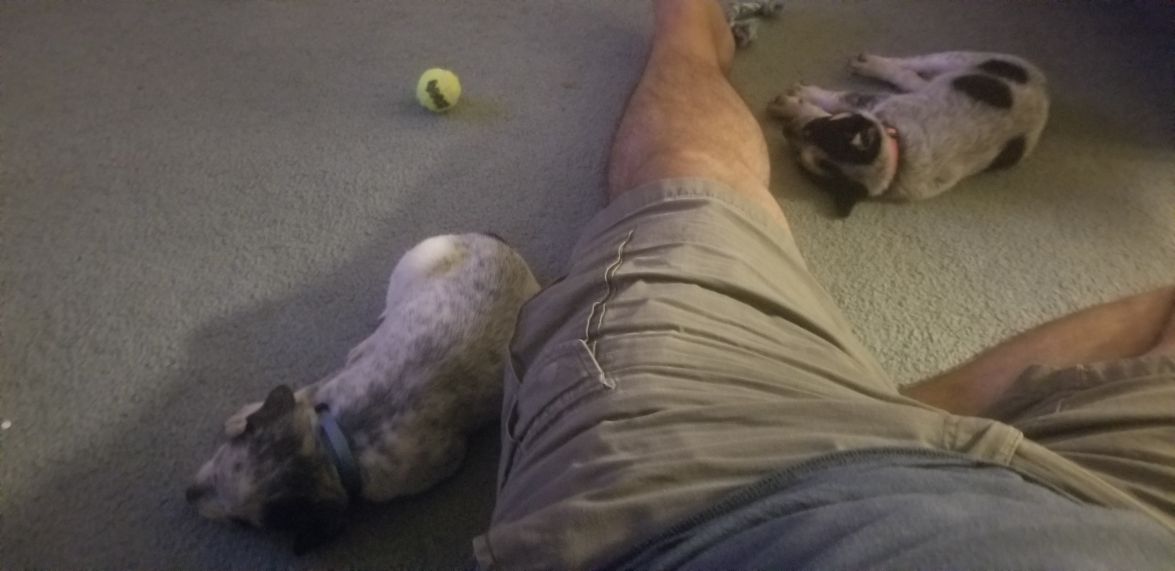
This is a rough up of what's up front for the trolling motor. I plan on going flounder gigging so I installed a 12v plug for lights. The only thing I'm not sure about right now is how I'll pass the NMEA cable through here but I'll worry about that when I buy the trolling motor.
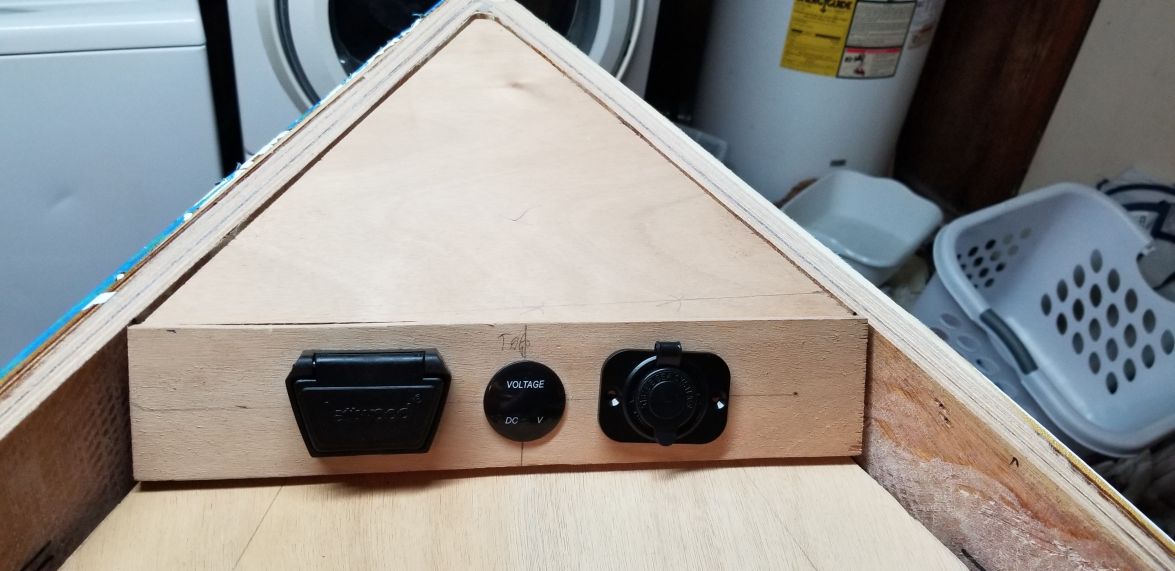
More updates soon..
Re: Steve's FS18
Posted: Sun Jan 19, 2020 11:49 pm
by fallguy1000
Nice work on the panel.
Re: Steve's FS18
Posted: Mon Jan 20, 2020 9:44 am
by Jeff
Great looking pups Steve!! Also very nice work on your panel!! Jeff
Re: Steve's FS18
Posted: Mon Jan 20, 2020 12:22 pm
by Dutch1
Thanks Jeff and FallGuy!
some more updates...
This is in Compartment A. Power for the trolling motor, voltage meter, and the 12v plug with room for others in the future if needed. I added some non-skid in the epoxy when I put down the fiberglass thinking this will keep things from sliding around so much.
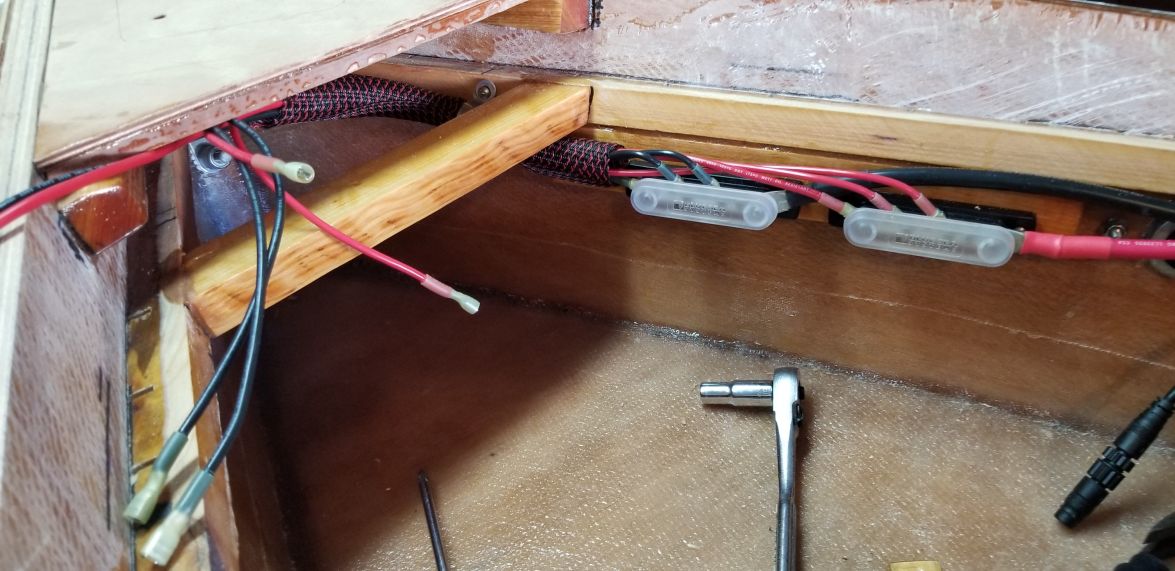
I taped up the front section like I did the back.
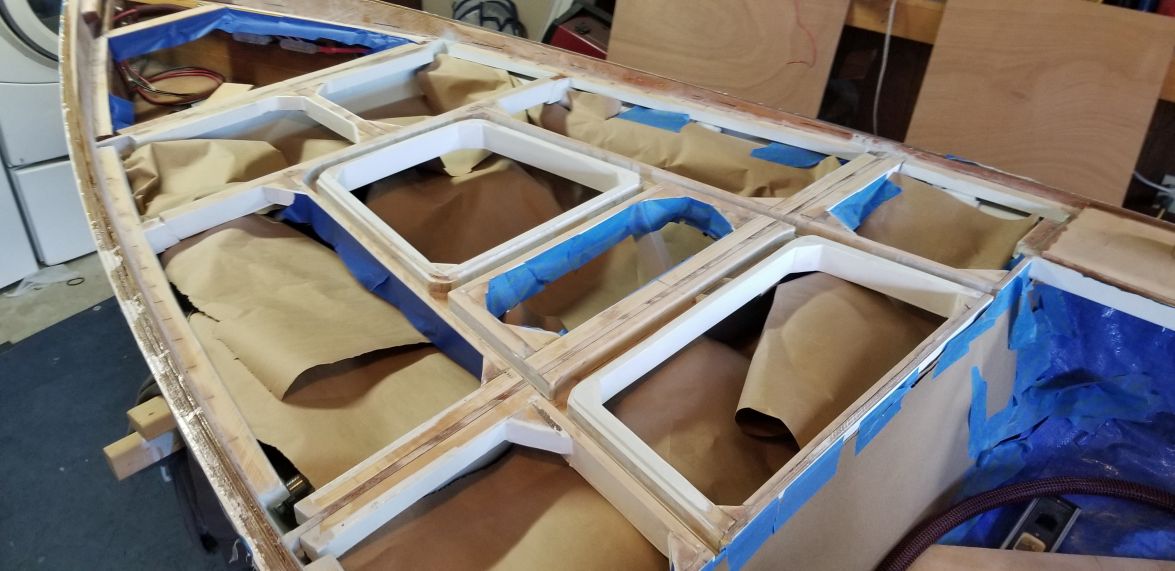
I didn't like the angle or the rounded edge on the rails so I flattened them out some with the grinder and a flapper disk and added some thickened epoxy to square it back up. It didn't take much at all but I liked the way it turned out.
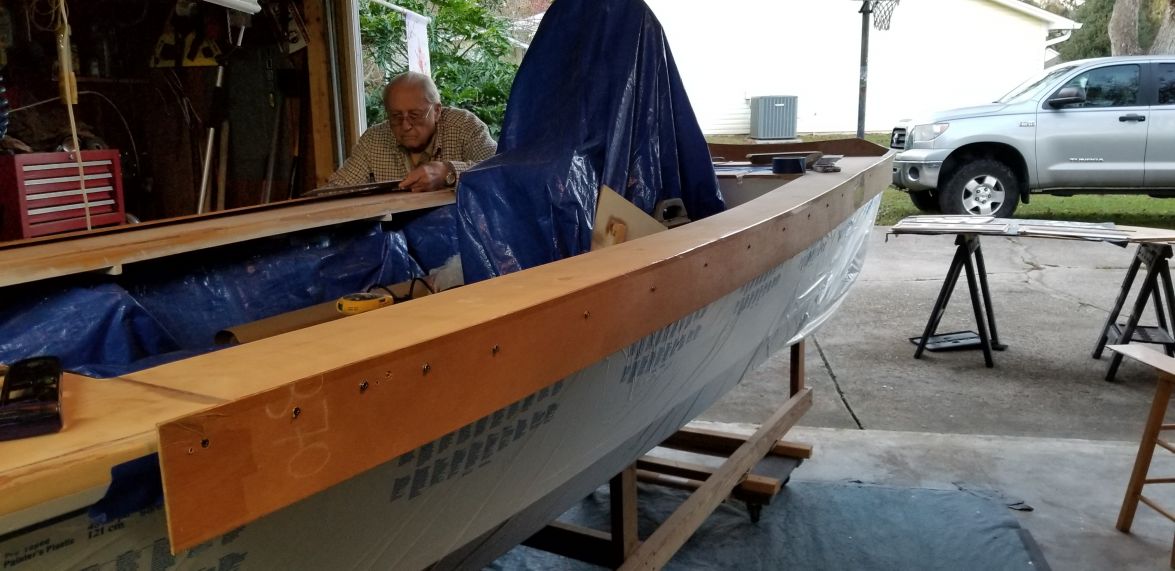
Fiberglass going down. It was a pain in the butt getting it up and over the rails without lifting.

More updates soon...
Re: Steve's FS18
Posted: Mon Jan 20, 2020 12:41 pm
by Jeff
Nice electrical work!!!! Jeff
Re: Steve's FS18
Posted: Fri Jan 31, 2020 6:13 pm
by Dutch1
Getting ready to put topside on this weekend. Here's a few pics of the process to get here.
All faired up and ready to go. Only a few little spots to fill still. I think I'm going to grind down that nose so I can bend some taco rail around it.
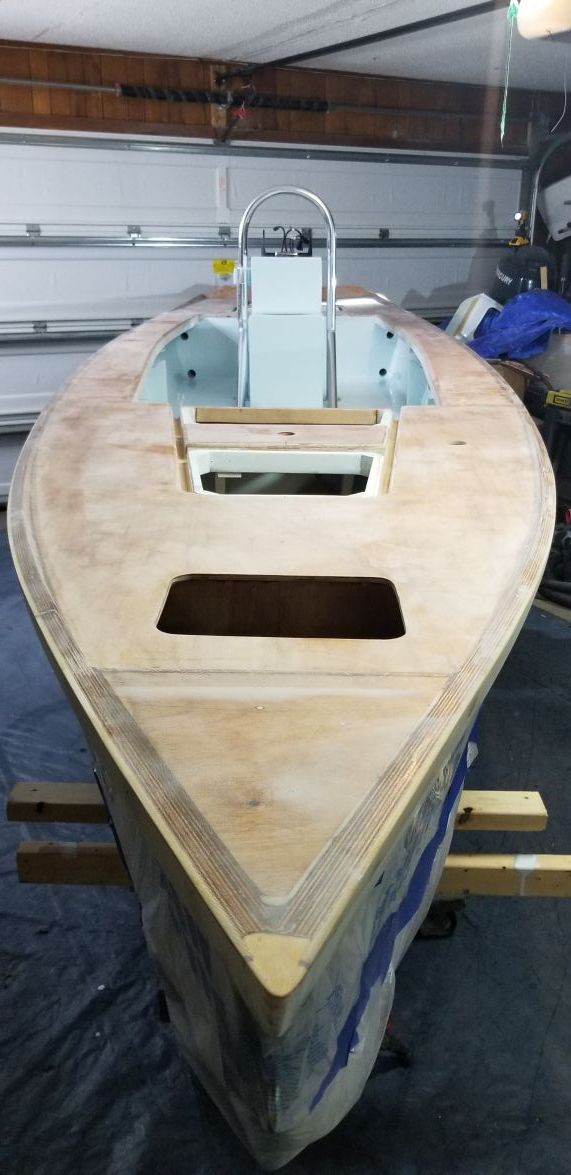
Haven't had the tarp off in a while so it was nice seeing the whole package again.
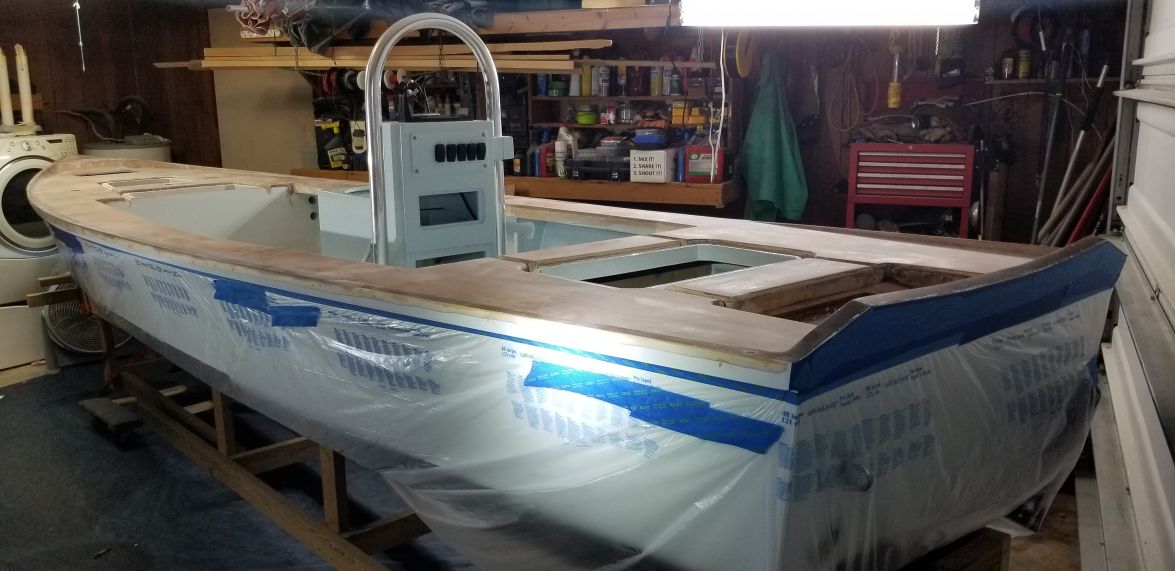
Primer going down. Used System Three primer
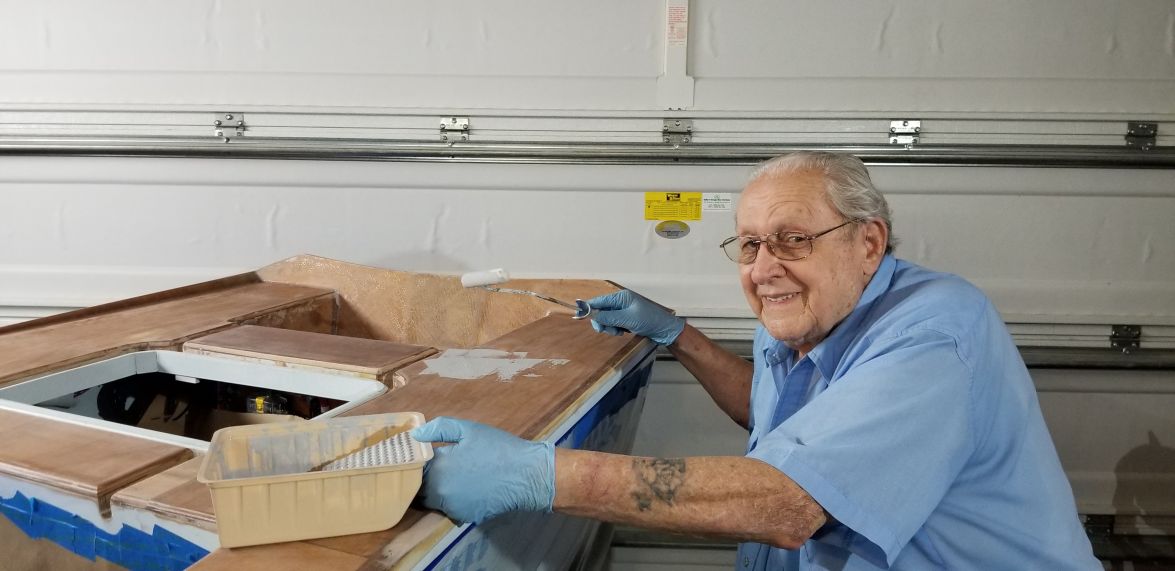
Primed up and ready for topcoat. Very pleased with the way everything looks. Very few spots to touch up. And that's being super picky.
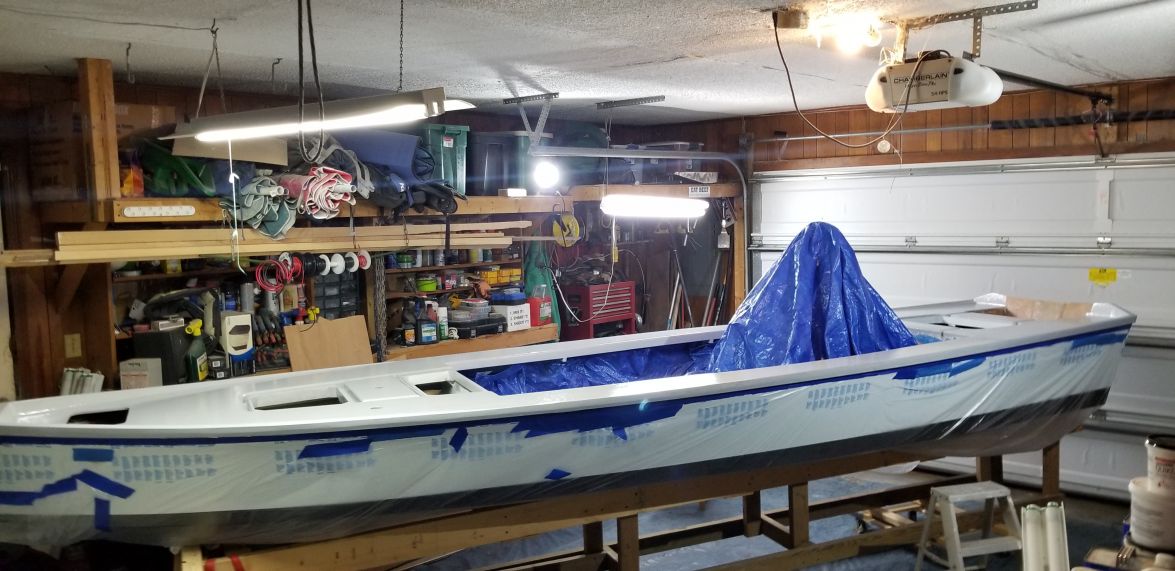
I've been waiting for some warm(er) weather to paint. We should have it Sunday and really Monday so I will get it painted. I'm going to remake the hatch cover over the battery compartment. I want a lip that goes over.
More to come. .
Re: Steve's FS18
Posted: Fri Jan 31, 2020 8:18 pm
by OrangeQuest
Really looking good!
Re: Steve's FS18
Posted: Wed Feb 05, 2020 9:43 pm
by Dutch1
Thanks OrangeQuest
I didn't get the painting done Monday like I planned. I wanted to fair the transom where it isn't painted in the pic above and one spot on the bow. It's supposed to be nice this weekend. The plan was to not paint the transom spot yet but now I can get it all done at one time.
We'll see what I can get done this weekend.
Re: Steve's FS18
Posted: Thu Feb 06, 2020 7:35 am
by Jeff
Looking really good Dutch1!! Glad to see your grandfather is continuing to assist you!!! Jeff
Re: Steve's FS18
Posted: Thu Feb 06, 2020 2:11 pm
by VT_Jeff
Love the look of that console/grab rail Dutch, I'm going to plow through the build and see if there's more detail on that. I've been trying to come up with ideas for my FS14LS grab rail, I like yours a lot, nice work!
Re: Steve's FS18
Posted: Fri Feb 07, 2020 8:14 pm
by Dutch1
Jeff and VT_Jeff - Thank you!!
VT_Jeff - If you don't find what you are looking for shoot me a PM. I took a ton more pics than I uploaded here.
Steve
Re: Steve's FS18
Posted: Sun Apr 05, 2020 11:19 am
by K2FS18
Steve, you have gotten a lot completed since I last checked in. Very impressive work. Really like the attention to detail with your wiring. It’s crazy how much wire is used in these little boats. So close to being completed, cant wait to see you get it in the water.
Ken
Re: Steve's FS18
Posted: Tue Apr 07, 2020 7:08 am
by Dutch1
Thanks Ken. Good to hear from you and thanks for the compliments! I jumped in here before heading in to work to get my mind on something else for a little while. Been working my butt off lately in response to COVID but I'm just blessed and thankful to be working right now and still have my health. I literally haven't touched the boat in a month since this started. I put some quik fair down a while back but haven't even gone back to smooth that out. And, I'm holding on to any funds right now until I know what is going to happen. It may sit for a while longer. Plus, I don't think I can even get the final registration done anyway since everything is closed. I wonder how much the ticket would be for an unregistered boat? Almost worth it right now. I could use some line therapy.
I agree on the wiring. There's a lot packed into that little boat from a functionality standpoint. I'm planning to use it for a lot of things. Not just getting skinny.
Thanks for checking in.
Steve
Re: Steve's FS18
Posted: Fri Jun 19, 2020 5:01 pm
by BB Sig
How are you doing Steve? Any line therapy yet?
Re: Steve's FS18
Posted: Thu Apr 08, 2021 3:19 pm
by Dutch1
BB,
Very little to answer your question. I think I've been once. Just too busy with work. Sorry for the late response. This is the first time I've logged on the site in a while.
I did clean up the garage so I could work on the boat and finish it up a few weekends ago. The boat was doing a real good job as a long shelf in the garage during the last year. I have what I need to finish it up. Paint, non-skid, rub rails, trailer (Thanks BBC!), etc. Now it's just a matter or doing it. The boat is even registered!!!
I'm thinking about trying to find a new yammy 25 for her. COVID put a damper on me finding a trolling motor I was looking for months back. Maybe the stocks have returned to normal. I haven't stopped to check.
Steve
Re: Steve's FS18
Posted: Mon Aug 29, 2022 11:42 am
by Dutch1
First time logging in here in a while. Funny how life can get in the way.
Spent some time going through ol' Cracker Larry's posts. Miss that guys input! Looks like a lot of other builds going on which is good to see.
I'm officially tired of walking around my boat in the garage. I'm going to make the time to get this thing done. There's literally so little left. But, a lot of prep for paint for top coat and then non-skid. Oh, and finish the hatch covers. 2 left. Boy, would I do things differently were I to do it again. Starting with buying some different tools and not doing most of it by hand. BTW, project boats make great shelves/storage in garages and hold all sorts of things they were never intended to hold. . . It's just in the way and I'd rather be fishing.
I've seen it many times on here before just start with small bites. But, this time I think I'm going to get the 2 hatch covers done first before I continue on with prepping for paint. The drip edge has been the biggest pita. I finished the back one and am pleased with the look. I'll post some picks soon.
Re: Steve's FS18
Posted: Mon Aug 29, 2022 12:04 pm
by Jeff
Good to hear from you Dutch1!! I hope your grandfather is also well!!! Jeff