Page 1 of 1
Jason fs 18 cnc build rounded chine
Posted: Sun Jan 15, 2017 6:04 pm
by Jsheaffer
Good afternoon all. Im jason and im going to try the fs18 cnc rounded chine. This is my first build. I have recd the material glued the stringers and set up the jig. O have a few questions already.
1 the mdf molds in the pdf are labeled as bow d and e.tjey are not they are bow c and d. The only e mold is plywood which the instructions say should be reserved for later. Can someone confirm this for me.
2 this is a dumb one. Im ready to glue the cnc joints. As i underatand the process is to connect the joints, wet them with epoxy, lay fiberglass tape and rewet, the cover with plastic and pressure. What role if any do butt blocks play at thisbstage.
3 should i epixy and tape bothe sides of the pabels and bottom now or just the outside for now. Im pretty sure its outside firat then inside later.
4 last and dumbest..for the rounded chine the cnc has scores where all the cuts are..do i splice the pabels first and then make jigsaw cuts over the scores and through the splices or just cut the scores up to the splices. Sorry for the questions but i am very new to this.
5one last thing, when i glued the stringers together they cane together pretty easily but the cnc slots on the stringer plywood were a bit too narrow to fit over the mdf. Im worried about this because of the firat question. I rechecked and rechecked over and over but im sure the mdf mold with the curve is a c mold and not a d mold. Thanks for the feedback.
Re: Jason fs 18 cnc build rounded chine
Posted: Mon Jan 16, 2017 1:16 am
by Dutch1
Hey Jason. I'll admit, I'm jealous of your CNC kit. That would have been nice. I think you are asking about splicing some long panels in one or two questions. I'll take a shot at answering those. I wouldn't rely on the piece of plastic and weight trick. That cost me a lot of time sanding later. Splice both sides, not just one. The long panels are pretty flimsy until you get everything stitched and by splicing one side it could splinter or break if it bent too much moving it around. Get a barrel roller and use it to lay the fiberglass down on the wood.
I did the following for my splices:
1) paint on some epoxy with a chip brush on the splice area where the fiberglass will lay.
2) lay the fiberglass tape on the splice
3) use the barrel roller to seat/press the fiberglass down on the wood (you may have to spread some more epoxy on the fiberglass to get it soaked). It will depend on how much epoxy you painted on at first. You want the fiberglass as close to the wood as possible. The barrell roller does this very well.
4) Once you have the fiberglass wetted out, squeegee out the excess epoxy and leave it alone. DO NOT cover with plastic.
I figured this out after some bad looking splices from using the plastic covered with a piece of wood and some weight trick. I will never do that again.
I have some long panel splice before and after pics on my build thread
http://forums.bateau2.com/viewtopic.php ... 7&start=20
Others here will have to answer the cnc, rounded chine and station questions. Good luck with your build!
Re: Jason fs 18 cnc build rounded chine
Posted: Mon Jan 16, 2017 1:26 am
by Dutch1
I will add. Don't cover with plastic and add weight unless you have to... If the long panels wanted to warp I would lay plastic over it and add the weight. If it tries to warp the fiberglass would keep trying to lift up and you will know you have to weigh it down until it dries.
Re: Jason fs 18 cnc build rounded chine
Posted: Mon Jan 16, 2017 12:50 pm
by Jsheaffer
Thanks for the feedback dutch. Thats seems logical to me i used too much weigth when gluing the transom and it led to some sanding. No big deal on the transom because its a small surface area. The whole boat however..different story.
Re: Jason fs 18 cnc build rounded chine
Posted: Mon Jan 16, 2017 1:12 pm
by jacquesmm
Jsheaffer wrote: ↑Sun Jan 15, 2017 6:04 pm
Good afternoon all. Im jason and im going to try the fs18 cnc rounded chine. This is my first build. I have recd the material glued the stringers and set up the jig. O have a few questions already.
1 the mdf molds in the pdf are labeled as bow d and e.tjey are not they are bow c and d. The only e mold is plywood which the instructions say should be reserved for later. Can someone confirm this for me.
Correct. That text must be some leftover from a "cut and paste" from another kit. In this kit, we had enough room on ply sheet to make the bow mold from plywood. I will correct the text.
2 this is a dumb one. Im ready to glue the cnc joints. As i underatand the process is to connect the joints, wet them with epoxy, lay fiberglass tape and rewet, the cover with plastic and pressure. What role if any do butt blocks play at thisbstage.
It's puzzle joints, there a no butt blocks. I wonder if you received the kit building notes. They show the differences between the kit and the standard boat.
Was there a a set of printed pages in the package? Sometimes, people overlook them while unpacking. That may also explain the bow mold question.
For the puzzle joints: do a dry run, assemble without epoxy. Once everything goes together smoothly, disassemble and coat the edges with epoxy. See pictures in our gallery. Put the parts on a sheet of plastic, press the puzzle together, cover with another plastic sheet, add a weight and let it cure.
3 should i epixy and tape bothe sides of the pabels and bottom now or just the outside for now. Im pretty sure its outside firat then inside later.
No tape over the puzzle joints.
4 last and dumbest..for the rounded chine the cnc has scores where all the cuts are..do i splice the pabels first and then make jigsaw cuts over the scores and through the splices or just cut the scores up to the splices. Sorry for the questions but i am very new to this.
In most cases, the kerfs (scores) are sufficient. If the panel does not bend enough, cut through the kerfs.
5one last thing, when i glued the stringers together they cane together pretty easily but the cnc slots on the stringer plywood were a bit too narrow to fit over the mdf. Im worried about this because of the firat question. I rechecked and rechecked over and over but im sure the mdf mold with the curve is a c mold and not a d mold. Thanks for the feedback.
The notches are tight, you may have to sand them a little bit. I design the notches with a 50th gap but if there is a little bit of humidity, it may not be enough. Sand them wider.
Re: Jason fs 18 cnc build rounded chine
Posted: Mon Jan 16, 2017 2:39 pm
by Jsheaffer
Wow thanks for the rapid response. This answers everything. The kit has pictures of the cutouts. I recd a collection of pdfs some time ago six pages i think that are for the cnc cut but they refernece other pdf including one titled puzzle, have never recd those (i dont think) having said that im relieved that i have everything, im pretty much good to go. Shoukd have this all joined and ready for assembly by the end of the weeend. This forum is great.
Re: Jason fs 18 cnc build rounded chine
Posted: Sun Jan 22, 2017 2:29 pm
by Jsheaffer
Hello all. Update on the boat.
Squared up and set the jig
Glued all the panels_just finished today. I had yo glue the hull panels first and then set up and do the side panels due to space limitation.s frankly im glad i did it this way in hindsight. Epixy is messy and has a little bit of a learning curve. The cnc puzzle joints are great and i would add that the rubber hammer is absolute must.
In regards to the epixy. My jounts seem strong but there is some bilubbling from the plastic wrinkling. My plan is to sand out the wrinkles and then apply ansecond liggtwr coat over the seams. Probably overkill because the joints seem ok, i was moving the pabels around by myself and didnt notice any issues. I have lots of pucs and will post at some point. My computer is old and diesnt like bateau for some reason so ill have to upload the pics from the bucket at work some time.
The assembly and cnc kit are really nice to work with, someone who knew what theybqere doing could have the pueces assembled and glued and probably hun in three day weekend. I have been scrambling at work due to a major accident that shutdown large parts of my hospital. Very long hours past two weeks but im still going to squeak work in this week. Ideally the boat is stitched and glues by next sunday. After that..fiberglass..learning curve is steep.
Re: Jason fs 18 cnc build rounded chine
Posted: Sun Jan 22, 2017 2:58 pm
by Jeff
Jason, send us some build photos when you have time!! Jeff
Re: Jason fs 18 cnc build rounded chine
Posted: Tue Jan 24, 2017 4:13 pm
by Jsheaffer
Re: Jason fs 18 cnc build rounded chine
Posted: Tue Jan 24, 2017 4:23 pm
by Jsheaffer
HUll laid out, ready for epoxy
Re: Jason fs 18 cnc build rounded chine
Posted: Tue Jan 24, 2017 4:24 pm
by Jsheaffer
 Viewed 1197 times")
- glued together
Re: Jason fs 18 cnc build rounded chine
Posted: Tue Jan 24, 2017 4:25 pm
by Jsheaffer
 Viewed 1196 times")
- stringers/transom glued
Re: Jason fs 18 cnc build rounded chine
Posted: Tue Jan 24, 2017 4:27 pm
by Jsheaffer
 Viewed 1195 times")
- puzzle joint
Re: Jason fs 18 cnc build rounded chine
Posted: Tue Jan 24, 2017 7:11 pm
by Jeff
Jason, excellent progress!! Glad you are getting some time away from work!! Jeff
Re: Jason fs 18 cnc build rounded chine
Posted: Wed Jan 25, 2017 12:37 pm
by Jsheaffer
Stitched the bottom of the hull together last night, need to do a bit of work on the side panels tonight, then hang them tomorrow. I want to have the entire hull stitched and glued before sunday. I have I believe made an error that I want to get some feedback on before I get further.
When I glued the transom together I ended up with all three pieces nicely aligned and firmly adhered. The problem is when I glued the panel with the cutouts for the stringers I hastily applied glue to the entire panel. Now there is hardened epoxy where the stringers fit in. My guess is I will have to sand out all the epoxy in those grooves in order to effectively glue the transom on when it is time correct. Or can I epoxy to a surface that already has epoxy on it? I don't have a pic right this second, but Ill post one if what Im asking is confusing. Thanks--J
Re: Jason fs 18 cnc build rounded chine
Posted: Wed Jan 25, 2017 7:40 pm
by pee wee
You can epoxy to an already epoxied surface, I'd get a piece of sandpaper in there and try to rough up the surface a bit first, though.
Re: Jason fs 18 cnc build rounded chine
Posted: Wed Jan 25, 2017 8:46 pm
by Jsheaffer
Thanks-Roughing it up is no problem. -J
Re: Jason fs 18 cnc build rounded chine
Posted: Sat Jan 28, 2017 4:59 pm
by Jsheaffer
Well. I stitched boat together and am having some doubts
1) the mdf bow mold does to sit flush on the a bulkgead. It sticks up over the A frame by almost a full inch. The notch is fully flushes and is banged in as far as it goes but its still sticks above the a frame. I was thinking that this was by design then i looked through some other buildsto be sure and the bow molds appear flush with the a frame. So is my bow mold supposed to be flush with a or is it part of the rounded chine design to be sticking above. Im thinking its not because the panels do not extend to the leading edge of the a frame and they are flush with all the other molds and frames.
2. The transom notches did not fit properly on the stringers. The nitches had to be extrnded about 3/8 of an inch to make the transom sit flush with the bottom of the boat. Also im concerned that the transom itself is stickimg out a bit . Should the transoms bow side be flush with the panels and bottom hull. Currently i have it secured so that the transom is about half sticking out. In other words the panels and bottom hull are tacked to about the middle of the middle ply.
I will try to upload some pics
Re: Jason fs 18 cnc build rounded chine
Posted: Sat Jan 28, 2017 5:02 pm
by Jsheaffer
Re: Jason fs 18 cnc build rounded chine
Posted: Sat Jan 28, 2017 5:03 pm
by Jsheaffer
Re: Jason fs 18 cnc build rounded chine
Posted: Sat Jan 28, 2017 5:05 pm
by Jsheaffer
Re: Jason fs 18 cnc build rounded chine
Posted: Sat Jan 28, 2017 5:06 pm
by Jsheaffer
Re: Jason fs 18 cnc build rounded chine
Posted: Sat Jan 28, 2017 5:07 pm
by jacquesmm
Yes please, post pictures.
Frame A and the bow mold must lone up at the bow/keel side. Do not try to line up any part of the bow mold. It should not sit flush on the strongbacks or on anything else. Only the tip of A matters.
Stringers and transom must be flush. When you run a straight edge on the frames/molds, the rear edge of the transom must be lined up.
The goal is to have a straight bottom, nothing should stick out.
Notches are sometimes tight, you may have to open them with a rasp or a grinder.
Re: Jason fs 18 cnc build rounded chine
Posted: Sat Jan 28, 2017 5:07 pm
by Jsheaffer
Re: Jason fs 18 cnc build rounded chine
Posted: Sat Jan 28, 2017 5:09 pm
by jacquesmm
We posted at the same time, I see your pictures now.
It looks really good. There should have been a little more slack in the stitches at the bow and that would have moved the hull skin panels back a little to cover the transom but it is really good the way it is.
For those who wonder why they see only side kerfed, that is because the kerfs (slits) on the other panels are on the inside.
It bends just as well and saves a sheet of plywood.
Re: Jason fs 18 cnc build rounded chine
Posted: Sat Jan 28, 2017 5:16 pm
by Jsheaffer
Re: Jason fs 18 cnc build rounded chine
Posted: Sat Jan 28, 2017 5:24 pm
by Jsheaffer
Ok so jacques in your opinipn do i need realign the transom so that the hull skin completely covers it or am i good to go. I can unscrew and either try banging it in or maybe stitch it in. I think problem is i laid the entire hull about 3quarters of an inch too far forward. Argh. Ill prob have to lift the entire thing of the jig to fix the bow mold so that it rests properly on the a frame.
Re: Jason fs 18 cnc build rounded chine
Posted: Sat Jan 28, 2017 5:26 pm
by Jsheaffer
I know this last bit is kind of elementary. I was going to start tabbing between the zip ties until i realized the issue with the bow mold and transom. When i do should i mix the epoxy with wood filler to make the putty or just use straight epoxy. Seems like i have seen it both ways.
Re: Jason fs 18 cnc build rounded chine
Posted: Sat Jan 28, 2017 6:01 pm
by jacquesmm
Jsheaffer wrote: ↑Sat Jan 28, 2017 5:24 pm
Ok so jacques in your opinipn do i need realign the transom so that the hull skin completely covers it or am i good to go. I can unscrew and either try banging it in or maybe stitch it in. I think problem is i laid the entire hull about 3quarters of an inch too far forward. Argh. Ill prob have to lift the entire thing of the jig to fix the bow mold so that it rests properly on the a frame.
Not worth the troubles. The hull shape is as designed and the transom will be just as strong the way it is.
When you say frame A sticking out, do you mean sticking out at the sheer? I see that.
It's the hull panels pushing on it. I don't see much radius in that rounded chine. I think that is the problem. If you round it more, the frame will be able to go up 1".
You do that but cutting through the kerfs, then the panels will take a rounder shape and A can go up.
Look at other pictures of rounded chines, for example in the Jetabout thread. We are not shy about cutting if we want a nice radius,
You decide if you like the chine radius the way it is or want more.
If you want more, grab that jig saw and cut through the kerfs.
PS: that will be the last post for today. It's Saturday and my wife wants my attention for dinner . . .

Re: Jason fs 18 cnc build rounded chine
Posted: Mon Jan 30, 2017 9:43 am
by Jsheaffer
Disregard my last post. I epoxy glued the seams yesterday with the stuff in the kit. I am definitely not a detail guy when it comes to this kind of thing. I glued the seams and transom (but not he stringers) yesterday andwill cut the zips tonight. I tend to rush projects like this so it got messy... Nothing a bit of sanding wont fix. Im already resigned to ordering more epoxy and whatnot after flipping the boat. Next time I will get this right

Ill post pics this evening. Plan is to cut zips, reeopxy seams, tape this week and throw a fiberglass party on Saturday.!!
Re: Jason fs 18 cnc build rounded chine
Posted: Mon Jan 30, 2017 11:27 am
by Jeff
Enjoy the fiberglass party!!! Jeff
Re: Jason fs 18 cnc build rounded chine
Posted: Mon Jan 30, 2017 7:51 pm
by Jsheaffer
Seams are glued. Popping stitches this evening. Sharp xac t onis def a plus.
Re: Jason fs 18 cnc build rounded chine
Posted: Mon Jan 30, 2017 7:53 pm
by Jsheaffer
Boat w assistant builders
Re: Jason fs 18 cnc build rounded chine
Posted: Mon Jan 30, 2017 7:54 pm
by Jsheaffer
Re: Jason fs 18 cnc build rounded chine
Posted: Mon Jan 30, 2017 8:04 pm
by jacquesmm
Now, if you put pretty girls in the picture, we have to say it looks good.
It's great to have the family involved.
Re: Jason fs 18 cnc build rounded chine
Posted: Mon Jan 30, 2017 10:37 pm
by Jsheaffer
Well thats my son. I keep telling my wife to cut his hair and she wont listen. He is pretty though. Here is a pic from tonight, this a seam by the transom which ended up with a gap. This epoxy resin is really strong. I just filled
d the gap and shaped it with a paint stirrer. Ill make it pretty when i do the gaps and drill holes.
Re: Jason fs 18 cnc build rounded chine
Posted: Wed Feb 01, 2017 9:48 pm
by Jsheaffer
I keep getting the following error. Not possible to determine the dimensions of photo check url. Sometimes it uploads from my phone most times it doea not. Suggestions?
Re: Jason fs 18 cnc build rounded chine
Posted: Thu Feb 02, 2017 6:36 am
by Jeff
Jason, I will ask Jamie to reach out to you this morning. Jeff
Re: Jason fs 18 cnc build rounded chine
Posted: Fri Feb 03, 2017 2:12 pm
by Jsheaffer
Greetings, have finished fiberglassing seams. One qurstion, it seemd to be i vaguely remember seeing something about double layering certain seams. Am i imagining this?thanks.
Re: Jason fs 18 cnc build rounded chine
Posted: Fri Feb 03, 2017 3:41 pm
by joe2700
Jsheaffer wrote: ↑Fri Feb 03, 2017 2:12 pm
Greetings, have finished fiberglassing seams. One qurstion, it seemd to be i vaguely remember seeing something about double layering certain seams. Am i imagining this?thanks.
Should be in the lamination schedule, maybe near the end of the plans.
Re: Jason fs 18 cnc build rounded chine
Posted: Fri Feb 03, 2017 3:57 pm
by jacquesmm
Yes, I show the number of layers on the plans or in the notes.
Don't forget the overlaps with the wide fabric, see the drawings.
Re: Jason fs 18 cnc build rounded chine
Posted: Sun Feb 05, 2017 1:50 pm
by Jsheaffer
Fiberglassed yesterday. Wife turned out to be better at this than me. I mixed she painted. Whole process took about two and a hal hours. At this point i have used two bottles of part a and one bottle of b. Curious to know if thats about right. Im thinking about the fairing and sanding it seems to me that will be a saturday after reading. Lools like a n hour two to aply three hours to curr and then hand sanding. I have an ro sander and i bought an inexpensive dlexible hand sander. Does one do the job better than the other? The videos i watched seem like most people use the longboard. I fiberglassed the whole outside of the boat, so ill prob need to order a bit more epoxy and fiberglass. The boat looks ok to my eyes of course they are inexperienced. Also it looks like the site uploads pice taken from the vertical aspect but less from the horizontal. I have quite a few pics showing the taping and etc id like to post but the website doesnt like them..hope everyone enjoys the super bowl.
Re: Jason fs 18 cnc build rounded chine
Posted: Sun Feb 05, 2017 4:44 pm
by pee wee
Yes, I noticed that when I view a pic in your posts is may appear horizontally, but when I click on it, it displays vertically. Strange.
It looks like you've got gallon jugs of both part a and part b, so it sounds like you're getting the mixes just right. If you were way off you'd be wondering why you couldn't sand the stuff!
Re: Jason fs 18 cnc build rounded chine
Posted: Sun Feb 05, 2017 4:46 pm
by Jeff
Jason, very nice glass work to you and your wife!! Jeff
Re: Jason fs 18 cnc build rounded chine
Posted: Mon Feb 06, 2017 6:10 pm
by Jsheaffer
Is pine sufficient for the keel, or is it better to have a harder wood. I can only remember a couple posts about this and it seems to me that pine was used for the skeg. I found mahogany for the rub rail.
Re: Jason fs 18 cnc build rounded chine
Posted: Mon Feb 06, 2017 10:21 pm
by Newt
Jsheaffer wrote: ↑Mon Feb 06, 2017 6:10 pm
Is pine sufficient for the keel, or
is it better to have a harder wood. I can only remember a couple posts about this and it seems to me that pine was used for the skeg. I found mahogany for the rub rail.
How many oyster reefs are you going to run over?
Newt
Re: Jason fs 18 cnc build rounded chine
Posted: Tue Feb 07, 2017 1:12 pm
by TomW1
As I recall the skeg on the FS18 is not that big. You can use pine but best is southern yellow pine old growth if you can find it at a local lumber yard. Then cover it with fiberglass and coat with the epoxy carbon mix like the rest of the hull bottom. A skeg is almost a replaceable part on a shallow water boat but you can do what you can to not replace it very often.
Re: Jason fs 18 cnc build rounded chine
Posted: Tue Feb 07, 2017 1:28 pm
by Jsheaffer
Galveston Bay=Lots of oyster. Have beached a boat on a reef plenty of times. Thanks for the heads up.
Re: Jason fs 18 cnc build rounded chine
Posted: Tue Feb 07, 2017 2:36 pm
by jacquesmm
The skeg isn't going to protect much from oysters.
One extra layer of glass and graphite coating will help.
Re: Jason fs 18 cnc build rounded chine
Posted: Tue Feb 07, 2017 5:45 pm
by Jsheaffer
Thanks Jaques. Extra fiberglass it us.
Re: Jason fs 18 cnc build rounded chine
Posted: Wed Feb 08, 2017 8:31 am
by topwater
Run a piece of aluminum flat stock along the skeg or if it were me a piece of 316 stainless hollow back rub rail with the screw holes
already in it.
Re: Jason fs 18 cnc build rounded chine
Posted: Wed Feb 08, 2017 1:06 pm
by TomW1
Topwater thanks for reminding me. When Cracker Larry was building his OD18 we discussed this and he ended up with a piece of aluminum and a anti-corrosion tab like on a motor( the proper name is eluding me). It should be in his build notes.
Re: Jason fs 18 cnc build rounded chine
Posted: Sat Feb 11, 2017 3:04 pm
by Jsheaffer
Built and gkued skeg today.
Re: Jason fs 18 cnc build rounded chine
Posted: Sat Feb 11, 2017 4:42 pm
by Dougster
Nice use of SHS clamps

Dougster
Re: Jason fs 18 cnc build rounded chine
Posted: Sun Apr 02, 2017 6:34 pm
by Jsheaffer
Greetings haven't posted anything in a while for two reasons one, had a death in family that's has prevented me from doing anything on the boat up until this week. 2 Have to admit I made a real dumb mistake. When I glassed the keel somehow I got the A and B mixed up. Didn't harden, what a mess. took me three weeks to clean it all and start over on the keel. Its glassed and done. Today I used the quick fair kit that came with the supplies. I used all the product and it barely covered the hull. If I remember the ideas is to sand and smooth and apply multiple coats. I will need more quick fair. My question is since it took me both 437 ml A and both 236 ml B to get the hull and keel faired, how much can I expect to use for subsequent coats. Also..this is a dumb question..do people fair the sides too or do we just paint over the fiberglass...Thanks--J
Re: Jason fs 18 cnc build rounded chine
Posted: Sun Apr 02, 2017 11:38 pm
by Fuzz
First, always remember, the only dumb question is the one not asked.
As for fairing I always use way more quick fair than most. When it comes to fairing the bottom is the part that counts as for how the boat will run. The sides are what you and others will see after it is flipped. I bet most folks spend much more time fairing the sides as that is what will be seen. If you do not fair the sides some I think you will regret it IMHO.
Re: Jason fs 18 cnc build rounded chine
Posted: Mon Apr 03, 2017 8:43 am
by BarraMan
I put a lot of effort into fairing the bottom to make sure it was true. The sides were much easier.
I think you will regret it if you don't fair the sides.
Re: Jason fs 18 cnc build rounded chine
Posted: Mon Apr 03, 2017 9:43 am
by bateau-webmaster
Jason,
Yeah, 1.5 quarts really isn't enough for that kit, I'm thinking we should bump it up to either a 3 quart, or maybe a 1.5 gallon kit. Personally if you've used up the 1.5 quarts that came with your kit, I would say, order a 3 quart, and go from there. If you still have the sides to do, you will easily use up twice what you have used so far.
Re: Jason fs 18 cnc build rounded chine
Posted: Mon Apr 03, 2017 2:49 pm
by K2FS18
Jason, I bought an additional 3 qt then another 1.5 qt for my build. I faired ever thing, sides, insides, sole, decks, etc. While you are buying, add 5lbs of wood flour, you will soon start using that instead of EZfillet. Also fill your really low areas with epoxy putty instead of the quickfair.
Re: Jason fs 18 cnc build rounded chine
Posted: Mon Apr 03, 2017 4:27 pm
by Jeff
Really good guidance K2FS18!!! Jeff
Re: Jason fs 18 cnc build rounded chine
Posted: Sat Jun 10, 2017 12:23 am
by Jsheaffer
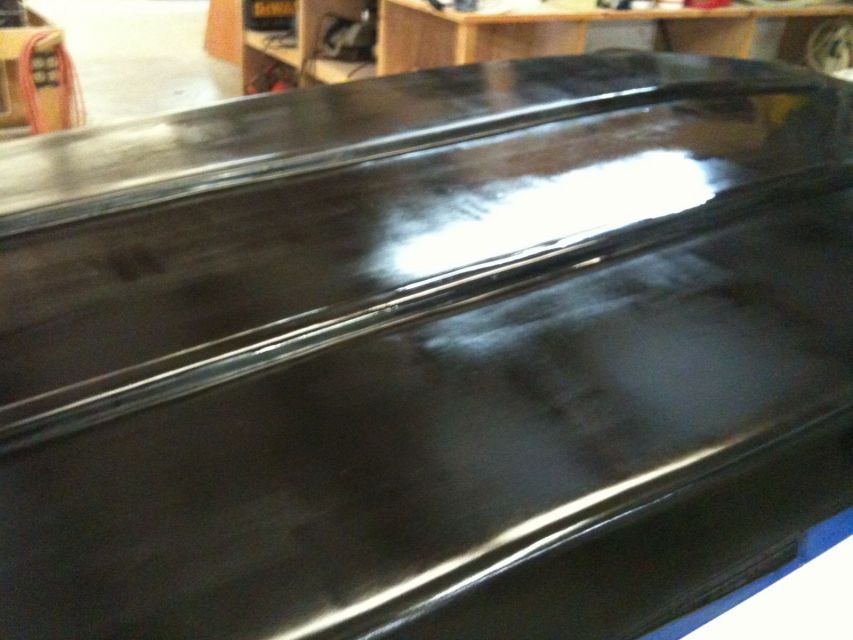
Sick of fairing. Time to move on
Re: Jason fs 18 cnc build rounded chine
Posted: Sat Jun 10, 2017 12:25 am
by Jsheaffer
Graphite epoxy bottom. Cracker larry recipe.
Re: Jason fs 18 cnc build rounded chine
Posted: Sat Jun 10, 2017 12:27 am
by Jsheaffer
Have spent a month fairingg and smoothung the boat. Itll never be perfect. Plus im no master craftsmen by any stretch. Todays lesson...use good brushes. Pain in the ass getting brush fibers out of graphite epixy goo.
Re: Jason fs 18 cnc build rounded chine
Posted: Sat Jun 10, 2017 12:31 am
by Jsheaffer
Priming the sides tomorrow. Also purchased the rubrails from houston hardwoods. Have 108 inches of 1/4 in by 3 in african mohag rubrail waiting. Im getting it tomorroq. Hopefully have the boat primed and rub rails installed by end of week. Fishing is good. Real good right now. At this rate boat will be ready just in time to sit int he garage when the fishing sucks again.
Re: Jason fs 18 cnc build rounded chine
Posted: Sat Jun 10, 2017 5:03 am
by glossieblack
Nice work Jason.

Re: Jason fs 18 cnc build rounded chine
Posted: Sat Jun 10, 2017 5:55 am
by Aripeka Angler
Yes, nice work! I used the same species of wood that you are using for the rub rail on my XF20. The boat is 10 years old, the rub rail is still rock solid. I had to laminate it in 3/8" thick strips, it doesn't like to bend.
Re: Jason fs 18 cnc build rounded chine
Posted: Sat Jun 10, 2017 5:42 pm
by Jsheaffer
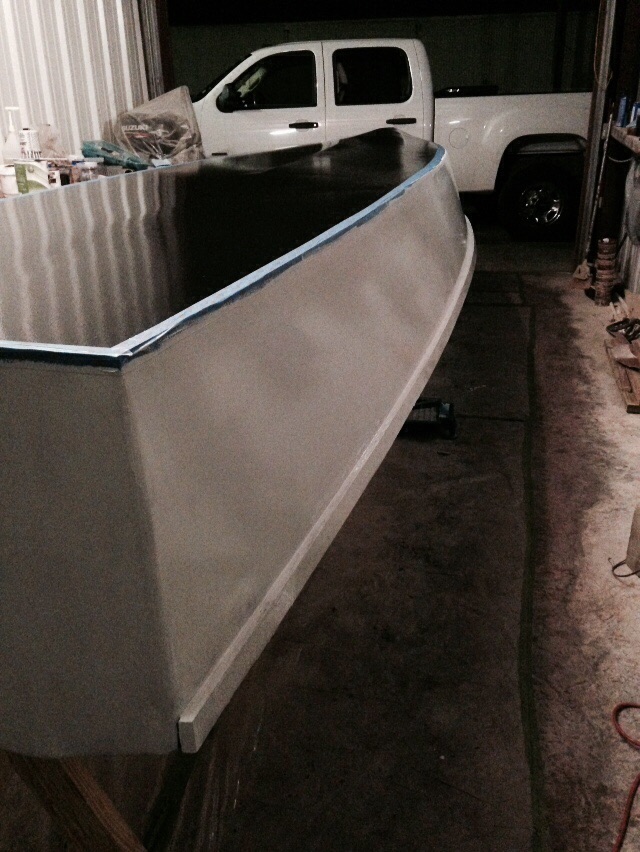
Started on rub rail. The first 9 ft took all my clamps so i went ahead and gkued it and mocked up the rest. This will be a bit of a process. Looks like it will take me the better part of a week.
Re: Jason fs 18 cnc build rounded chine
Posted: Sun Jun 11, 2017 10:21 am
by pee wee
While it's nice to have lots of clamps, there are times when even a lot isn't enough! For those occasions I have a box full of PVC rings- take a length of PVC (4" or 6" diameter works well) and chop it up into lengths about an inch or inch and a half (the wider the piece the stronger the clamp pressure), and make a cut through one side so it can be sprung open. They aren't as nice to use as regular spring clamps, but they're cheap and sure come in handy when you need twenty or fifty more clamps.
Re: Jason fs 18 cnc build rounded chine
Posted: Sun Jun 11, 2017 11:53 am
by Jsheaffer
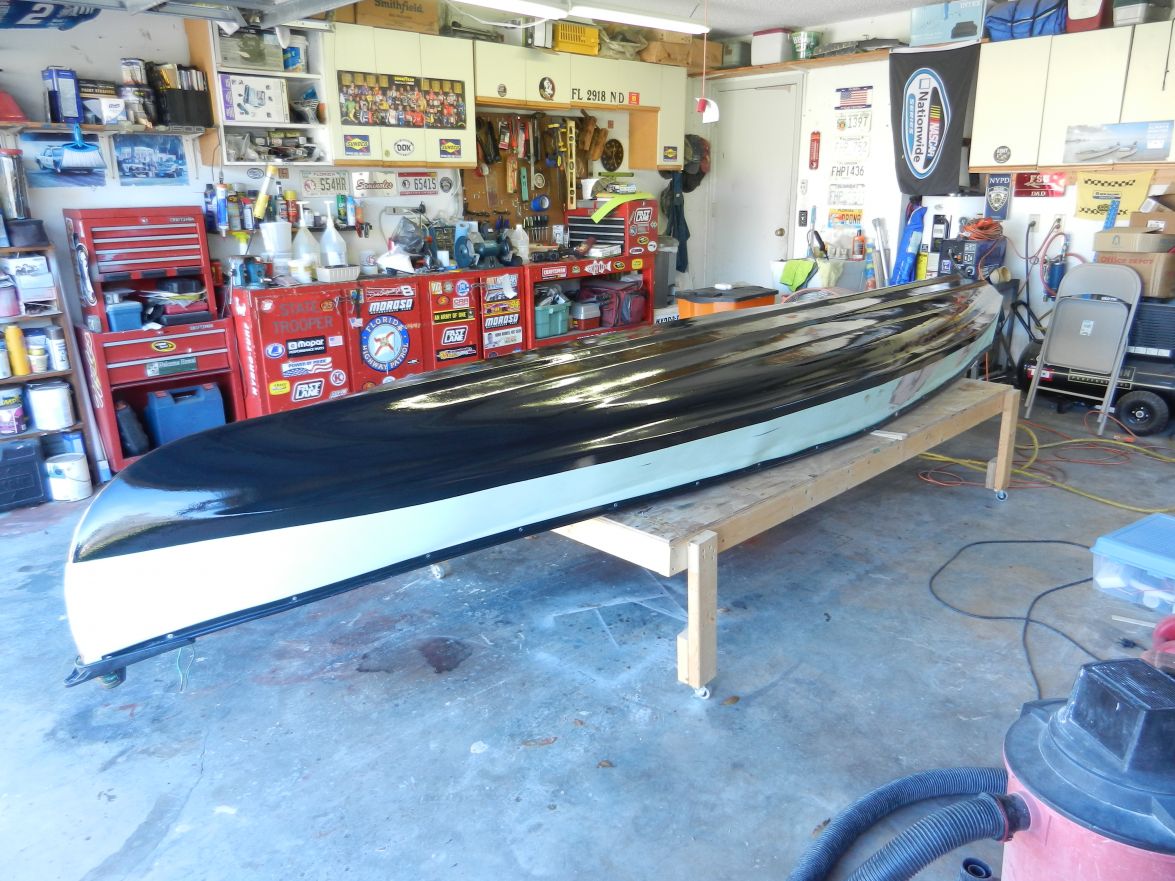
Nice tip on the clamps. Clamp shirtage is slowing me down. Question to the forum.. i have applied two layers of graphite epoxy to the hill, sanded it progressively to 220. Its smooth but looks like hell. Any thouggts on cosmetic. Is it counterproductive to paint over the graphite?
Re: Jason fs 18 cnc build rounded chine
Posted: Sun Jun 11, 2017 12:32 pm
by terrulian
It will look like hell; it's not paint. You have to kind of put away your normal expectations of what a finish should look like. I tried a lot of different methods including those of Cracker Larry and it came out OK but that's it.
I would say painting over it serves no purpose. The reason for the epoxy/graphite is that it is harder than paint and will hold up better to the abuse it gets on a rocky beach. Plus the paint will, if anything, emphasize the lack of perfection in the surface created by the epoxy/graphite.
Re: Jason fs 18 cnc build rounded chine
Posted: Sun Jun 11, 2017 2:08 pm
by TomW1
Yep it is not going to look like paint and no one is going to see it and the fish sure are not going to care. Put an other layer on, use the roll and tip method and be happy. Sand if you don't want a shiny bottom.
Re: Jason fs 18 cnc build rounded chine
Posted: Sun Jun 11, 2017 5:07 pm
by Aripeka Angler
I have never had any luck putting graphite epoxy bottom coating on with a brush. Not any luck roll and tipping it either. The cheap chip brushes are terrible and I'm not using a corona brush in graphite.
The first graphite job I did on my XF20 was terrible, I put too much on. I tried everything, it still looked like crap. This is when I figured out that this is not a two coat process.
This is my second bottom job that I put on my son's GF12. It was totally done with cigar shaped foam rollers designed for epoxy.
This is like coat number 4...
It's dark, but this is the finished product. I put on six super thin coats...
Re: Jason fs 18 cnc build rounded chine
Posted: Mon Jun 12, 2017 12:11 am
by Jsheaffer
First of all im super envious of your shop. Ok i have applied two layers and they looked fine after application. I started sanding it and it took on this gray color thats is not attractive. Im seeimg yours is jet black. Do u still intend to sand it? Or are you done. The finish on mine is smooth and i guess thats whats important. I used foam rollers without a problem. The only brush i used was for the keel and thats when i had the brustles come out. Was only a couple hairs but still enough to be irritating.
Here is what it looks like after sanding it to the 220 grit
.
Also on an unrelated note i was having hell getting pics posted from my note 5 to the site. It got drenched in a thunderstorm while fishing the other day and i switched to this samsung j3 and everything is posting just fine. Not sure if its the note 5 or some glitch with my phone in particular. Im planning to flip this boat next weekend. Good night all.
Re: Jason fs 18 cnc build rounded chine
Posted: Mon Jun 12, 2017 6:09 am
by Jaysen
Did you wet sand or dry sand that? Wet sanding is recommended.
The other thing that pops into my mind is graphite content. What was the ratio of graphite to epoxy?
Re: Jason fs 18 cnc build rounded chine
Posted: Mon Jun 12, 2017 6:28 am
by Aripeka Angler
Your graphite job looks pretty good to me!
If you want to try to get it a little blacker, clean the boat really good with denatured alcohol and put on another really thin coat of graphite/epoxy.
On our GF12, I did not sand between coats or after the final coat, no sanding whatsoever. As soon as it tacked up, I put on another thin coat. It was an all day process.
Re: Jason fs 18 cnc build rounded chine
Posted: Mon Jun 12, 2017 8:42 am
by Noles309
Aripeka Angler wrote: ↑Mon Jun 12, 2017 6:28 am
Your graphite job looks pretty good to me!
If you want to try to get it a little blacker, clean the boat really good with denatured alcohol and put on another really thin coat of graphite/epoxy.
On our GF12, I did not sand between coats or after the final coat, no sanding whatsoever. As soon as it tacked up, I put on another thin coat. It was an all day process.
Yep thats how I have done it as well. No sanding at all and I also used the skinny foam cigar rollers. They definitely worked best for me. I think I did 4 coats and my sons Gheenoe rebuild.
Re: Jason fs 18 cnc build rounded chine
Posted: Mon Jun 12, 2017 9:36 am
by willg
I did something similar. Three coats using west system epoxy rollers, no tipping and no sanding b/w coats (applied within the chemical bond window). I used a heat gun on the final coat to smooth out some of the bubbles.
I agree your graphite looks great. I bet with another coat or two you will be happy with the result.
Re: Jason fs 18 cnc build rounded chine
Posted: Mon Jun 12, 2017 9:50 am
by Jsheaffer
Dry sanded..mix was 9 oz epoxy to 1.5 oz graphite
I ll apply some thin layers with foam rollers. Ive been using the home depot ones so im not sure whete to get sknny cigar rollers. Shoukd i rough up the layer with 80 grit before apllying a new layer or just wipe it down with the alcohol and proceed. I shouldvr done more research on this before proceeding sorry for all the questions.
Re: Jason fs 18 cnc build rounded chine
Posted: Mon Jun 12, 2017 9:57 am
by Jaysen
Yes on the alcohol at this point.
1 Wet sand next time.
2 30% by volume... so 3 units graphite to 9 units epoxy. That's likely why you are more grey than black.
3 I use Lowes rollers. you need to replace after each coat. you will never get a mirror finish with these. it's the BOTTOM of the boat, right?
4 Do not sand. Just coat, wait for mild set, coat, repeat.
5 Do not sand
6 Don't sand it. Fish don't care. you'll rarely see it.
Remember to use light coats. try to do it with 6oz vs 9oz epoxy (2 graphite) to force a thin thin coat. Plan 4 coats not 2 (or 6 instead of 3). It really does help.
And don't sand. You wont be happy until you get up into the 1k grit. Ask me how I know.
Re: Jason fs 18 cnc build rounded chine
Posted: Mon Jun 12, 2017 12:49 pm
by Jsheaffer
Ok, more black, lighter coat, no sanding stop being anal. Got it. Thanks all.
Re: Jason fs 18 cnc build rounded chine
Posted: Fri Jun 16, 2017 11:31 pm
by Mikem59
Some great advice already posted. I'll just add that I used a 3 oz. of graphite to 9 oz. epoxy on mine and wet sanded between coats. Applied with a Lowe's tight nap roller. Based on the advice and pics from the others, skipping the sanding and using a different roller sure looks like the way to go. Although I wish mine had come out more glossy and smooth, I was pleased, especially since it is the bottom of the boat.
Here's a peak at mine:
Keep up the good work

Re: Jason fs 18 cnc build rounded chine
Posted: Sat Jul 01, 2017 9:00 pm
by Jsheaffer
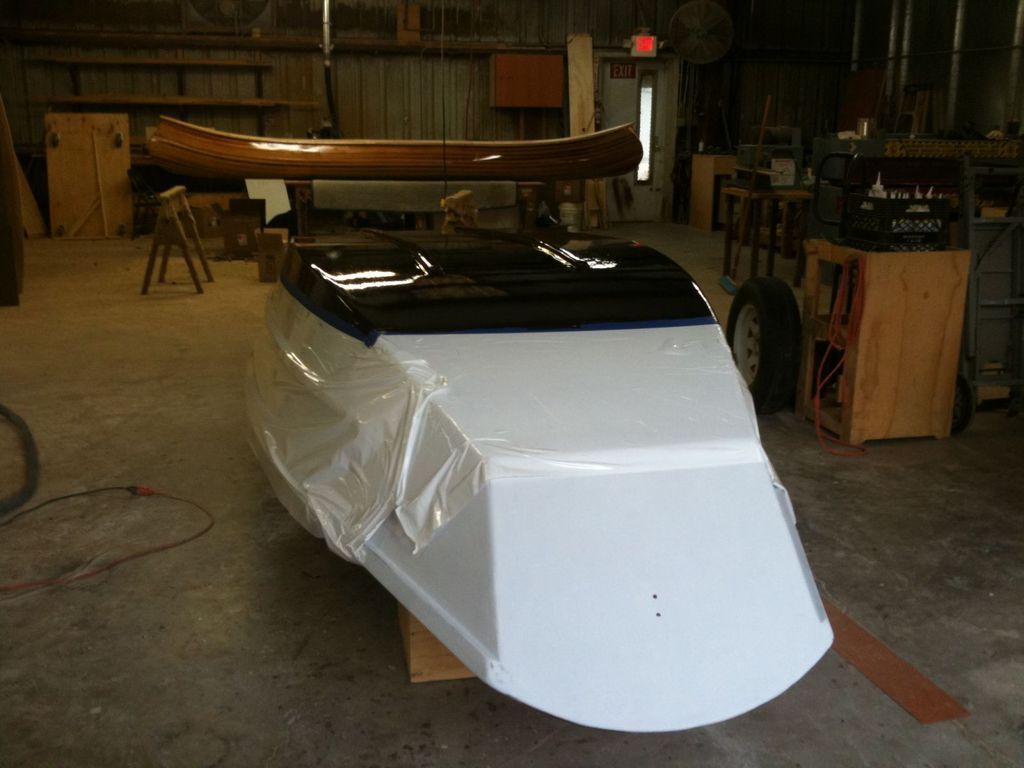
Ok ik made the corrections to the bottom of the boat and it came ou t satisfactory. I flipped her today after installing the rubrail. Here is what she looks like.
Re: Jason fs 18 cnc build rounded chine
Posted: Sat Jul 01, 2017 9:01 pm
by Jsheaffer
You'll notice that the bottom of the boat is not visible
Re: Jason fs 18 cnc build rounded chine
Posted: Sat Jul 01, 2017 9:07 pm
by Fuzz
Very nice looking
Re: Jason fs 18 cnc build rounded chine
Posted: Sat Jul 01, 2017 10:28 pm
by fitzclf
Reached a milestone congrats! Did you graphite, prime, then rubrails?
Re: Jason fs 18 cnc build rounded chine
Posted: Sun Jul 02, 2017 4:52 am
by Eric1
Kicking butt!
Re: Jason fs 18 cnc build rounded chine
Posted: Sun Jul 02, 2017 7:59 am
by blueflood
Pretty slick, Jason
Re: Jason fs 18 cnc build rounded chine
Posted: Sun Jul 02, 2017 8:06 am
by BB Sig
Looks great! Congrats on the milestone.
Re: Jason fs 18 cnc build rounded chine
Posted: Sun Jul 02, 2017 8:58 am
by Jeff
Looks great!! Congrats on the milestone!! Jeff
Re: Jason fs 18 cnc build rounded chine
Posted: Sun Jul 02, 2017 10:27 pm
by Jsheaffer
Thanks all. I did g graphite then rub rails and then prime. Have no idea if that matters. I'm working in a space that is too small and the flip made me aware of this. Got so.e cleanup work to do to clean off excess epoxy and stuff. I have to make an order for s9ome more rd fillet and then I'm pretty sure I can get at least the seam taped. A buddy of mine is going to loan a 15 go mercury for a starter motor which actually works for me. Now I can have a trailer built first. I'm toying with the idea of mounting the battery and fuel tank towards the bow in separatge compartments. I think the extra ballast will help get on plane when I'm solo. Any thoughts?
Re: Jason fs 18 cnc build rounded chine
Posted: Sun Jul 02, 2017 11:43 pm
by TomW1
Jsheaffer wrote: ↑Sun Jul 02, 2017 10:27 pm
Thanks all. I did g graphite then rub rails and then prime. Have no idea if that matters. I'm working in a space that is too small and the flip made me aware of this. Got so.e cleanup work to do to clean off excess epoxy and stuff. I have to make an order for s9ome more rd fillet and then I'm pretty sure I can get at least the seam taped. A buddy of mine is going to loan a 15 go mercury for a starter motor which actually works for me. Now I can have a trailer built first. I'm toying with the idea of mounting the battery and fuel tank towards the bow in separatge compartments. I think the extra ballast will help get on plane when I'm solo.
Any thoughts?
That will definitely help you, also use a tiller extension.
Re: Jason fs 18 cnc build rounded chine
Posted: Mon Jul 03, 2017 5:38 am
by Aripeka Angler
Jsheaffer wrote: ↑Sun Jul 02, 2017 10:27 pm
I'm toying with the idea of mounting the battery and fuel tank towards the bow in separatge compartments. I think the extra ballast will help get on plane when I'm solo. Any thoughts?
That's the way I'm going to build "Bare Bones".
I'm probably also going to install trim tabs.
Congratulations on the flip
Re: Jason fs 18 cnc build rounded chine
Posted: Tue Jul 04, 2017 12:26 am
by Dutch1
Jason,
I'm doing something similar to what Ken did on his FS18. I'm going to use the area he made behind station B for my battery. But, I don't plan on having it open as he did. I decided on an internal tank. It will be installed all the way up near station A. I'll need as much weight forward I can get. The page that shows his build in this area is below.
https://forums.bateau2.com/viewtopic.ph ... &start=110
Hope this helps.
Steve
Re: Jason fs 18 cnc build rounded chine
Posted: Tue Jul 04, 2017 8:11 am
by Jeff
Dutch1, just sold K2FS18 a Bob's Machine Shop (BMS) Jack Plate for his FS18. He bought the same one that AA bought for his FS18 build!! Just call me when you are ready as I think we have narrowed the choices for the FS18!!! Hope everyone enjoys our country's anniversary today!!! Jeff
Re: Jason fs 18 cnc build rounded chine
Posted: Sun Sep 17, 2017 2:06 pm
by Jsheaffer
Bit of a lull in the build as life has happened aka work plus hurrican harvey and whatever else is on the way. Finally got back on the build today and finished taping all the seams. Im planning to fiber glass tbe entire interio which im pretty surr neans i need to order about 7 more yards. Pretty sure i only have enough for half the interior. Anyways ill order more clotb this evening and hooefully finish glassing the inside this week.
6715086851792029240.jpg[/attachment]
Re: Jason fs 18 cnc build rounded chine
Posted: Sun Sep 17, 2017 4:07 pm
by Jeff
Looks good JSheaffer!!! Glad you are back building!! Jeff