Page 1 of 1
FS14 new build - South Shore MA
Posted: Mon Jul 13, 2020 10:46 am
by Nelly
Hello,
Starting a new thread to accompany a FS14 build that my son and I have embarked on. We picked up the CNC kit on Friday afternoon and got to work this weekend. Got all of the pre-cut pieces out of the plywood sheets and got the long bottom/side pieces put together with epoxy.
We were able to build the strongback/jig last weekend and so had that ready to go. By Sunday morning, we had braced the frames to the strongback and put the three-part clamping board section of the transom together with epoxy and set aside to cure. By the end of the day we were laying bottom pieces on just to see how it looked. We'll be zip-tying next.
Question for everyone - how do you align the transom for screwing to the strongback? Is it first attached via drywall screws to the bottom/side panels, then attached to the strongback once in place with the sides and bottom?
Look forward to taking advantage to all of the collective wisdom on this forum!
Bob
Re: FS14 new build - South Shore MA
Posted: Mon Jul 13, 2020 11:26 am
by Jeff
Welcome Bob!!! Really good start to the build!!! Jeff
Re: FS14 new build - South Shore MA
Posted: Mon Jul 13, 2020 1:17 pm
by PapaDave
Great project to work on with your son. Wonderful to see a family building team. Take a lot of pictures. The transom is not screwed to the bottom or side panels during assembly. Screw some cleats on the stringers and attach the transom to them with 4-6 screws. The screws will be removed afterward and filled with thickened epoxy.This will give you the correct transom angle and hold it in place until the epoxy cures. Take a look at the pictures from the FS18 build which is the exact same process as your boat. I am just South of you in Connecticut if you need some assistance. Have fun, Dave
Re: FS14 new build - South Shore MA
Posted: Mon Jul 13, 2020 1:26 pm
by PapaDave
Sometimes you need to put a screw in the side panel at the transom to prevent it from moving but do not drive it in or your panel will not remain fair on the side.
Re: FS14 new build - South Shore MA
Posted: Mon Jul 13, 2020 4:10 pm
by VT_Jeff
Nelly wrote: ↑Mon Jul 13, 2020 10:46 am
Question for everyone - how do you align the transom for screwing to the strongback? Is it first attached via drywall screws to the bottom/side panels, then attached to the strongback once in place with the sides and bottom?
Bob
Welcome Bob!
The transom is not normally connected to the strongback. I used grooves in my transom to assist with the alignment to the stringers, and then clamped a jack to the transom so it would not put too much weight on the stringers and cause them to sag/twist. The grooves are not required and not usually used.
Hope this helps and happy building!
Jeff
Re: FS14 new build - South Shore MA
Posted: Mon Jul 13, 2020 6:20 pm
by BB Sig
Nothing to add except welcome!

Oh yeah, we like it when you keep posting pictures!

Re: FS14 new build - South Shore MA
Posted: Mon Jul 13, 2020 8:59 pm
by OrangeQuest
Hi! Welcome to the forum!
To make it easier to get the stringers and frames back out after you fill the gaps where your panels all come together, Put tape on the edges where the panels touch the frames and stringers. If you really want it to look neat tape the inside of the seams so the fillets don't go all the way through the gaps. Then you will not need the tape on the frames and stringers.
Again,
Welcome to the forum.
Re: FS14 new build - South Shore MA
Posted: Tue Jul 14, 2020 12:25 am
by Fuzz
Like the others have said welcome. It is great to see family builds.
Re: FS14 new build - South Shore MA
Posted: Tue Jul 14, 2020 12:50 pm
by Coach
Great to see another build in MA! I am just north of you.
Good luck with the build and have fun! The guys on this forum are a tremendous resource.
All willing to help answer questions as you go.
Re: FS14 new build - South Shore MA
Posted: Mon Jul 20, 2020 9:41 pm
by Nelly
Lost almost a week as we were away over the weekend enjoying beautiful Nantucket. Got back at it tonight and finished up in the dark. We got the panels mostly stitched together. Might need to monkey with it a little bit, but used PVC inside the stitches up at the bow. Still some minor alignment issues and might need another 2-4 stitches on the panels up toward the bow, but otherwise happy with how it’s coming together. Next: thickened epoxy welds.
For those who have used tape inside the seams, Is it too late to do this? If not, is it worth the time and energy to crawl up under the boat to apply tape inside between the stitches?
Also think I’ll use a couple of drywall screws into the stringers, and maybe two on the sides (not 100% tightened down) to hold the transom in place....or can you just stitch it with zip ties? Seems like extra work to attach new piece of wood to the stringer just for the purpose of screwing the transom to it? Am I missing something?
Re: FS14 new build - South Shore MA
Posted: Mon Jul 20, 2020 11:53 pm
by Fuzz
As long as the transom is where it belongs and will stay there when glueing I would not worry about it.
About the packing tape on the inside it would save you some sanding but that is up to you. If I had me a nice young limber helper I would give that job to him
Re: FS14 new build - South Shore MA
Posted: Tue Jul 21, 2020 11:08 am
by jacquesmm
Tape inside: not worth it. You will be able to fill that corner after flipping the hull.
Be stingy with the putty from outside, you don't want to have big globs of putty dropping inside.
No screws in the stringers please, let the panels take their natural fair shape even if they pull away a little bit from the framing.
Re: FS14 new build - South Shore MA
Posted: Tue Jul 21, 2020 12:28 pm
by VT_Jeff
Fuzz wrote: ↑Mon Jul 20, 2020 11:53 pm
If I had me a nice young limber helper I would give that job to him
I have a semi-young semi-limber wife who did the inside taping for me, it work out nicely, the inside was really clean when I flipped. Have the same helper pull the tape off before too much timer passes, I waited till I flipped and some was hard to get off.
" Seems like extra work to attach new piece of wood to the stringer just for the purpose of screwing the transom to it? Am I missing something?"
The 1X1 blocks I used to attach my transom to the stringers made it much simpler: clamp the blocks flush to end of the stringers, drill and screw them on, then clamp the transom to the blocks, drill and screw it on. 10 minute job. Screwing directly into the stringers will be screwing into plywood endgrain which is not advisable normally.
Edit: I now realize you already have your panels stitched together without the transom on so it may be a little more work to attach the transom as I advised bit I still think it's the way to go. You can probably just slide the stitched "hull" forward and out of the way to do it.
Re: FS14 new build - South Shore MA
Posted: Sun Aug 02, 2020 1:54 pm
by Nelly
Cutting glass cloth for bottom - don’t get the plans suggestion to “use leftover on the other side”
I’ve cut the glass for the port side of the bottom, Am I supposed to use the leftover on the starboard side? Or do the mean save that glass for the inside of the hull? I don't want to run out. More detail here in the plans would have been helpful.
Bob
Re: FS14 new build - South Shore MA
Posted: Sun Aug 02, 2020 3:02 pm
by jacquesmm
That fiberglass layout looks fine.
There is no absolute rule about fiberglass cutting as long as you cover what we specify and overlap layers. In most cases, the builder will use 50" wide glass but many use 36" wide. Then some will want to cover the side all the way to the sheer.
I can't specify a fiberglass cutting scheme with so many options, it would create confusion but what you did looks fine.
Use some left overs to completely cover the transom in an out.
Re: FS14 new build - South Shore MA
Posted: Mon Aug 03, 2020 7:40 am
by Nelly
got the keel, chines, transom corners glassed yesterday. It was hot and windy which created a challenge with epoxy. I was mixing 6oz batches at a time and on occasion it was getting very thick while wetting out the glass with the chip brushes. Eventually moved to a roller which helped us keep up with the epoxy.
Went the the beach for a couple of hours, came back and decided to glass the whole bottom while epoxy was still tacky. This was where we really started to go through the epoxy, mixing 9oz at a time.
But the on the seams and in the corners we had air bubbles develop which we just couldn't press/roll out. I guess we'll learn with how to deal with those next. Also covered with plastic sheeting but doing so at 9:00 last night in poor lighting - not sure how effective this will be in having the desired peel ply effect.
It was anything but perfect, but glad to have gotten it all done yesterday. Thanks Jacques for chiming in - we'll have to go back and glass up the rest of the transom.
Re: FS14 new build - South Shore MA
Posted: Mon Aug 03, 2020 9:09 am
by joe2700
Nelly wrote: ↑Mon Aug 03, 2020 7:40 am
But the on the seams and in the corners we had air bubbles develop which we just couldn't press/roll out. I guess we'll learn with how to deal with those next. Also covered with plastic sheeting but doing so at 9:00 last night in poor lighting - not sure how effective this will be in having the desired peel ply effect.
From the pictures it looks like the corners are too sharp for 12oz biaxial or other thick fiberglass to make the bend which would cause those bubbles at the edges. I think I used a 1/2" radius but you might be able to get away with a little less. From the pictures it looks like you just broke the edge to something closer to 1/8" radius.
Re: FS14 new build - South Shore MA
Posted: Mon Aug 03, 2020 9:46 am
by Nelly
thanks - realizing now that there wasn't enough radius. I was focused more on filling the gaps rather than creating a significantly rounded edge when welding seams with thickened epoxy.
The remedy is to grind/sand away the bubbles/air pockets and re-glass, correct? I think I'm going to have a lot to re-do. Ouch. Not going to uncover it or touch it until the Isiasis comes through here tomorrow night.
Re: FS14 new build - South Shore MA
Posted: Mon Aug 03, 2020 10:38 am
by VT_Jeff
Nelly wrote: ↑Mon Aug 03, 2020 7:40 am
...on occasion it was getting very thick while wetting out the glass with the chip brushes.
My .02: pour out the mixed epoxy as soon as you're done mixing over an area roughly the size that you will spread it and it will not kick nearly as fast as if you are serving it out the of pot as you go. If you're glassing a seam, pour it along the seam and then spread it up/down with the chip brush/squeegee/roller. Leave the pot upside down on a dry area while spreading to full empty it out.
I do feel your pain though. We did the inside of my boat recently as the thermometer was rising. We went to the river, not the beach, but came back to many air bubbles that I think were caused by outgassing as the plywood heated up.
Re: FS14 new build - South Shore MA
Posted: Mon Aug 03, 2020 10:44 am
by joe2700
VT_Jeff wrote: ↑Mon Aug 03, 2020 10:38 am
My .02: pour out the mixed epoxy as soon as you're done mixing over an area roughly the size that you will spread it and it will not kick nearly as fast as if you are serving it out the of pot as you go. If you're glassing a seam, pour it along the seam and then spread it up/down with the chip brush/squeegee/roller. Leave the pot upside down on a dry area while spreading to full empty it out.
I do feel your pain though. We did the inside of my boat recently as the thermometer was rising. We went to the river, not the beach, but came back to many air bubbles that I think were caused by outgassing as the plywood heated up.
Yea I also pour the epoxy out and use a plastic spreader to move it around when glassing large areas. For glassing a seam with 6" tape I actually prefer to saturate the glass on a plastic covered workbench then roll it up, carry it to the boat, and unroll it. Can't do that if it's too hot through as too much heat would build up when rolled up.
As you say Jeff glassing bare wood with rising temps will also create bubbles. Better to do it when the temp is falling and the wood will suck the epoxy in not blow bubbles out.
Re: FS14 new build - South Shore MA
Posted: Mon Aug 03, 2020 10:51 am
by VT_Jeff
Nelly wrote: ↑Mon Aug 03, 2020 9:46 am
Not going to uncover it or touch it until the Isiasis comes through here tomorrow night.
Good luck in the storm. If it were me, I'd wait till the epoxy had cured a week or more before grinding. I'm paranoid about getting epoxy sensitized and my understanding is that grinding/sanding green epoxy is a common cause.
Re: FS14 new build - South Shore MA
Posted: Mon Aug 03, 2020 10:53 am
by VT_Jeff
joe2700 wrote: ↑Mon Aug 03, 2020 10:44 am
For glassing a seam with 6" tape I actually prefer to saturate the glass on a plastic covered workbench then roll it up, carry it to the boat, and unroll it. Can't do that if it's too hot through as too much heat would build up when rolled up.
I just started doing that while adding some reinforcements here and there and really like that technique.
Re: FS14 new build - South Shore MA
Posted: Mon Aug 03, 2020 11:42 am
by Nelly
VT_Jeff wrote: ↑Mon Aug 03, 2020 10:51 am
Nelly wrote: ↑Mon Aug 03, 2020 9:46 am
Not going to uncover it or touch it until the Isiasis comes through here tomorrow night.
Good luck in the storm. If it were me, I'd wait till the epoxy had cured a week or more before grinding. I'm paranoid about getting epoxy sensitized and my understanding is that grinding/sanding green epoxy is a common cause.
forgive me, but what is "epoxy sensitized?"
I probably won't touch it until later in the week at earliest - after I have a chance to go get a new flap disc for the grinder, and let the weather come through.

I think it's supposed to be warm and less humid here later in the week so that should allow it to set up pretty nice - so I can grind it away

I like the idea of wetting it out, rolling it up and putting in place. May give that a shot where we are patching up these bubbles. My concern is the corners. I suspect the first layers had a tough time laying flat, but I just kept the process rolling, and so there may be bubbles under a few layers of more solid glass. Any idea how best to test these spots, or do I just grind away any areas I suspect might not be sound?
Re: FS14 new build - South Shore MA
Posted: Mon Aug 03, 2020 12:05 pm
by Dougster
I see it like Joe does: corners and edges not rounded enough. I've done that and my only solution was to grind out all suspect areas feather them out and re-tape. It's a little bit of a pita but not too hard. You can poke on suspect areas with an old pocket knife, box cutter, ice pick, what have you. Epoxy sensitivity is what happens to some folks when they have repeated exposure, even low grade. Grinding green glass has the risk of inhaling tiny particles and setting you up for trouble. Best to grind with a mask on and wear long sleeve shirt and pants. If you develop sensitivity it's pretty hard to work with epoxy after that, but folks do find a way.
Dougster
Re: FS14 new build - South Shore MA
Posted: Mon Aug 03, 2020 12:15 pm
by Nelly
Dougster wrote: ↑Mon Aug 03, 2020 12:05 pm
I see it like Joe does: corners and edges not rounded enough. I've done that and my only solution was to grind out all suspect areas feather them out and re-tape. It's a little bit of a pita but not too hard. You can poke on suspect areas with an old pocket knife, box cutter, ice pick, what have you. Epoxy sensitivity is what happens to some folks when they have repeated exposure, even low grade. Grinding green glass has the risk of inhaling tiny particles and setting you up for trouble. Best to grind with a mask on and wear long sleeve shirt and pants. If you develop sensitivity it's pretty hard to work with epoxy after that, but folks do find a way.
Dougster
Do you re-shape the edges with thickened epoxy to create a better radius after grinding?
What do you guys wear for mask/respirator? I have some simple N95 style masks but there are far from airtight on my face.
Re: FS14 new build - South Shore MA
Posted: Mon Aug 03, 2020 12:56 pm
by VT_Jeff
Nelly wrote: ↑Mon Aug 03, 2020 12:15 pm
What do you guys wear for mask/respirator? I have some simple N95 style masks but there are far from airtight on my face.
I use something like this:
https://www.lowes.com/pd/SAS-Safety-Dis ... 1002438976
Re: FS14 new build - South Shore MA
Posted: Mon Aug 03, 2020 12:58 pm
by joe2700
Nelly wrote: ↑Mon Aug 03, 2020 12:15 pm
Do you re-shape the edges with thickened epoxy to create a better radius after grinding?
What do you guys wear for mask/respirator? I have some simple N95 style masks but there are far from airtight on my face.
You shouldn't need to add material only remove it. If after grinding or sanding you don't have a somewhat smooth edge you might need to add some thickened epoxy, but for an outside corner I would try and just remove material until the radius is right. I start with a round-over bit on a router for places that are close to 90 degree corners and finish with a sander. Just use a sander with 40-60 grit for the rest.
Edit: I did use thickened epoxy to fill any gaps along the seam before glassing, just not to build anything up beyond that.
In the first pic in this post you can see how rounded my corners were before glassing:
https://forums.bateau2.com/viewtopic.ph ... 80#p389230
I use a 3m respirator with p100 particulate filter for and sanding or grinding. Only swap over the organic vapor cartridges when painting with a solvent.
Re: FS14 new build - South Shore MA
Posted: Mon Aug 03, 2020 1:05 pm
by VT_Jeff
joe2700 wrote: ↑Mon Aug 03, 2020 12:58 pm
I start with a round-over bit on a router for places that are close to 90 degree corners and finish with a sander. Just use a sander with 40-60 grit for the rest.
I used a block plane and was pretty happy with the results, and the fact that it didn't generate dust.
Re: FS14 new build - South Shore MA
Posted: Tue Aug 04, 2020 9:23 am
by Dougster
Same with me. I just removed material with my RO sander. Then tape or glass over carefully and you'll be fine.
Dougster
Re: FS14 new build - South Shore MA
Posted: Wed Aug 05, 2020 10:20 am
by Nelly
So, storm is gone and I removed the plastic sheeting over the glass. I've got a few questions for you guys.
There are obvious bubbles on the seams and corners that need to be ground and re-taped, or maybe, in spots, filled with epoxy via syringe.
There are lots of other areas on flat parts of the hull that are splotchy white. Do these need to be ground out and done over?
There are also areas where there were bubbles or seams in the plastic sheeting (not under the glass) that have a rougher surface - you can feel the texture of the cloth, even though it's coated in epoxy, translucent, and otherwise well "glued" to the wood. Are these areas ok, or do they need fixing too?
Re: FS14 new build - South Shore MA
Posted: Wed Aug 05, 2020 12:03 pm
by Dougster
Rough areas seem ok to me. White patches can be tested by poking at them with something sharp. If they give or are hollow grind 'em out and patch with glass if big. If small, quarter or so, I'd probably just fair 'em with epoxy and then fairing mix. The areas along the panel joins are long voids and the ones that I would worry over. I'd grind those out and re-tape/glass.
Dougster
Re: FS14 new build - South Shore MA
Posted: Wed Aug 05, 2020 1:59 pm
by VT_Jeff
On the ripples left by the sheets: if you let it cure good and hard and then hit it with a random orbital with like 60 or 80 grit(and a good face mask!) you should be able to knock all that crap down without too much trouble. If you don't wait long enough it will gum the paper up quickly. I've had to do the same when I got a bunch of fish eyes on my last build, I think I used a belt sander on that but I don't think you'll need that here.
Re: FS14 new build - South Shore MA
Posted: Wed Aug 05, 2020 7:33 pm
by joe2700
The rough areas are fine, thats what it would mostly look like if you didn't do the plastic. You'll sand down the binding string without sanding away the glass itself, then fill the weave with fairing compound to get it smooth.
I think you are probably making your life a little harder with the plastic since you will get an inconsistent surface. Personally I'd either use peelply or just leave it open to cure, but your choice. I left it open I believe that smooth surface in an indication of a very epoxy rich layup FYI. Not a problem for strength but will add the the weight and cost in epoxy.
The slightly cloudy areas are probably fine but the white areas need addressing as others have said.
Re: FS14 new build - South Shore MA
Posted: Wed Aug 05, 2020 9:55 pm
by Nelly
appreciate all of the input!
Re: FS14 new build - South Shore MA
Posted: Thu Aug 06, 2020 11:28 am
by fallguy1000
Screwdriver test it all.
Edges are voids. Get an injection needle 0.064" and sam drill bit. Cut a hole with the bit and another one 10" away and inject epoxy until it flows from the other hole. Tape the holes when you pull the needle. Move to the hole that leaked and continue until injected fully.
It might take two days.
When u inject; one hole is needed for venting air and one for the needle. So two holes for each void.
Re: FS14 new build - South Shore MA
Posted: Thu Aug 06, 2020 4:11 pm
by Nelly
fallguy1000 wrote: ↑Thu Aug 06, 2020 11:28 am
Screwdriver test it all.
Edges are voids. Get an injection needle 0.064" and sam drill bit. Cut a hole with the bit and another one 10" away and inject epoxy until it flows from the other hole. Tape the holes when you pull the needle. Move to the hole that leaked and continue until injected fully.
It might take two days.
When u inject; one hole is needed for venting air and one for the needle. So two holes for each void.
kinda like changing lower unit oil on an outboard - open both screws and fill from the bottom....so it pushes all the air out the other side.
Thanks for the tip!
Re: FS14 new build - South Shore MA
Posted: Thu Aug 06, 2020 6:00 pm
by fallguy1000
Nelly wrote: ↑Thu Aug 06, 2020 4:11 pm
fallguy1000 wrote: ↑Thu Aug 06, 2020 11:28 am
Screwdriver test it all.
Edges are voids. Get an injection needle 0.064" and sam drill bit. Cut a hole with the bit and another one 10" away and inject epoxy until it flows from the other hole. Tape the holes when you pull the needle. Move to the hole that leaked and continue until injected fully.
It might take two days.
When u inject; one hole is needed for venting air and one for the needle. So two holes for each void.
kinda like changing lower unit oil on an outboard - open both screws and fill from the bottom....so it pushes all the air out the other side.
Thanks for the tip!
It will not work well otherwise. I have several hundred holes experience.
Re: FS14 new build - South Shore MA
Posted: Tue Aug 18, 2020 9:41 am
by Nelly
Been a frustrating couple of weeks. Was buried under a work project last week and didn't have much time to devote to the boat. It's been hard to motivate too, as we've just been grinding off voids and bad laminations and re-taping most of the exterior seams.
We got everything re-taped and sanded this weekend, and was excited to move things forward for the first time in while. Last night, started with the first coat of fairing material made of epoxy and the purple stuff in the epoxy kit (name escapes me). Mixed a "loose slurry" and spread over the hull with a drywall knife and the smaller plastic spreaders.
After finishing, saw that there were showers headed our way, so covered the boat with tarps overnight. Unfortunately, the tarps did not keep 100% of the water off, there was plenty of water under the tarps, on the still-tacky epoxy this morning. Seems to be a bit of a mess - the tarps also stuck to the epoxy in spots too. So looks like maybe this last step was yet another waste of time/materials that will need to be sanded off and re-done.
On the plus side, I was albe to pick up a used 2006 Mercury 4 stroke locally yesterday. It's in great shape, and I think will push the boat beautifully. Can't wait to be able to hang it on the transom.
Re: FS14 new build - South Shore MA
Posted: Wed Aug 26, 2020 5:58 pm
by Nelly
Hi all - question for you. What do you recommend for paint? First: bottom primer. System 3 yacht primer? Something else? I see lots of talk about graphite on the bottom as a topcoat, but what about antifouling paint? If it stays in the water when complete, I'd like to keep the growth down. But first things first - what are the options for primer?
I saw this post from another builder's site and thought it was a good guide, offering some alternatives to the system 3 stuff.
https://saltboatworks.com/choosing-paint-primer/
Any thoughts? I don't intend to use a gun - will roll/brush everything. And how much of it do I need to prime the exterior, bottom and sides? Is it worth it to buy a full gallon or can I get by with a quart?
Thanks!
Re: FS14 new build - South Shore MA
Posted: Wed Aug 26, 2020 9:43 pm
by Dan_Smullen
I finished painting the bottom of mine a few weeks ago using Alexseal as a the top coat.
It is my understanding that S3 Yacht Primer acts as a great seal coat over epoxy and fairing compound. I almost killed myself trying to sand it with 320, and ultimately covered it with Alexseal surfacing primer.
If I had it to do over, I would have covered with 4 coats of S3, then sanded only to 120 grit before transitioning into the Alexseal line. Counting on the S3 as a barrier coat, and the $$$ primer to provide a smooth substrate under finish paint.
For a boat to be left in the water, anti fouling paint is a must I think. I believe S3 will make a good seal coat to be used under anti fouling paint.
Re: FS14 new build - South Shore MA
Posted: Wed Aug 26, 2020 11:29 pm
by Fuzz
Your boat is big enough to buy a gallon of primer. I think a quart would have you not putting on as many coats as you really should.
Re: FS14 new build - South Shore MA
Posted: Thu Aug 27, 2020 8:10 am
by VT_Jeff
I recommend epoxy/graphite for the bottom and then put your anti fouling paint over that if needed. The epoxy graphite, to me, is much easier and faster to apply as you can do multiple coats wet on wet, no sanding in between, and you dont need a perfect surface before you apply.
Re: FS14 new build - South Shore MA
Posted: Thu Aug 27, 2020 4:43 pm
by TomW1
The others have said it pretty well. S3 as the primer 3 coats before sanding smooth. 3 coats of graphite/epoxy 255-33% ratio. It should be smooth so you may need to wet sand, it is messy. Only if your keeping your boat in salt water a good salt water paint. I am partial to the Interlux ablatives.
Tom
Re: FS14 new build - South Shore MA
Posted: Fri Aug 28, 2020 1:46 am
by cracked_ribs
If you're graphiting the bottom, I'll just share one tip: I have seen lots of talk about sifting and othe careful procedures...I never did any of that and you could read your watch in the reflection off my graphite.
What I did was heat the resin by putting four ounces in a mixing cup, in a big pot of hot tap water. When it got good and hot, I mixed in maybe 50% by volume graphite powder. The resin is really watery at that point and mixes really smooth. I'd let it sit (usually in the fridge or freezer) for a bit for the bubbles to work out, then mix in the catalyst once it dropped down to just warm. It's still a bit thin at that point; you pour it on and use a spreader, working fast. It mostly self-levels and you get a smooth, glossy surface with basically no effort.
Re: FS14 new build - South Shore MA
Posted: Fri Aug 28, 2020 3:55 am
by Fuzz
That sounds like a pretty slick trick there CrackedRibs
Re: FS14 new build - South Shore MA
Posted: Sat Aug 29, 2020 1:24 am
by cracked_ribs
Thanks, it works well enough in small batches, although I admit I have never tried it on a really large boat. Still, I have done multiple batches on smaller boats to good effect.
Re: FS14 new build - South Shore MA
Posted: Sat Aug 29, 2020 8:02 am
by Nelly
Thanks for that tip cracked_ribs.
I've cut a bunch of ply strips for the rubrail from the leftovers I had lying around. Wondering how to handle the curved shape of the hull as you get toward the bow. If I keep these pieces straight, it will align under or above the sheer line. I know this rubrail serves a structural purpose and don't want to do it the wrong way. I also don't want it to look bad, nor do I really want to have to cut curved strips. I know the general recommendation is to work with relatively short strips, but even so, these will not butt flush with each other if aligned to keep with the boat's natural sheer. Any thoughts on this?
Re: FS14 new build - South Shore MA
Posted: Sat Aug 29, 2020 9:18 am
by Dougster
With difficulty, using dowels in pre-drilled holes I was barely able to torture ply rubrails on to the LB22. Wouldn't try it again. It's too late now but some guys have traced the sheer line onto some ply or whatever, using the side panels before they were put in place. You may consider using hardwood instead of ply? Or maybe get a long roll of paper and lay out the sheer line on it using the plans and use that as a template to cut ply rails. I'm kind of thinking out loud, maybe other's have better ideas.
Dougster
Re: FS14 new build - South Shore MA
Posted: Sat Aug 29, 2020 10:57 am
by jacquesmm
Nelly wrote: ↑Sat Aug 29, 2020 8:02 am
I've cut a bunch of ply strips for the rubrail from the leftovers I had lying around. Wondering how to handle the curved shape of the hull as you get toward the bow.
Use the leftover plywood from the side panel as a template.
That is the exact curve.
Re: FS14 new build - South Shore MA
Posted: Sat Aug 29, 2020 4:06 pm
by Nelly
The reason I bought the CNC kit was to avoid making cuts like this. I don't have a woodshop. I'm doing this with hand tools in my backyard. It should be part of the bill of materials.
Has anyone done this with straight pieces?
Because most of my scrap has now been cut into straight pieces, I will need to source other ply - does the rubrail need to be marine ply? I may just make it out of a regular 1/4' 4x8' sheet from Lowes. It's the furthest part of the boat from the water line, after all.
Re: FS14 new build - South Shore MA
Posted: Sat Aug 29, 2020 5:11 pm
by Fuzz
All of the things mentioned would make life easier. Before I went and got more plywood give what you have a try. It might be crude but brute force also works for some things. Lots of clamps. Drill holes and insert dowels. Might have to use temporary screws. Heck you can even use bolts with large flat washers where you might have put dowels. You have the marine plywood already so give it a try. Try without glue first
Re: FS14 new build - South Shore MA
Posted: Sat Aug 29, 2020 7:45 pm
by VT_Jeff
Nelly, with a circular saw set with the blade just deep enough to cut through ply it's simple to cut the gentle curve you need for the rub rail. You could use lowes stuff but if it were me I'd pick up a sheet of 4mm oukume from boulter plywood in medford ma and cut the rubrails from that, which is basically exactly what I did, using either the leftover cnc piece or the actual sheer as the template. Practice with the circular saw on some scrap first, you'll see how easy it is.
Re: FS14 new build - South Shore MA
Posted: Sat Aug 29, 2020 9:10 pm
by seaslug
I've built the FS18, FS14LS, SK14, and GF16, and have not needed to cut the rub rail pieces on a curve. I rip either cedar or fir, preferably knot free, to 1/4" x 1 1/2" and use a lot of clamps. Never needed dowels or screws, just worked down the hull 1 clamp at a time. On the FS18 and FS14 I finished with a 3/8" x 1 1/2" strip of rock hard maple, that I coated with epoxy, than varnished. The FS14, being shorter in length, and with more beam than the Fs18, made the bend at the bow almost impossible, but by not trying to force the strip to bend and twist in 2 directions, I left a gap in the bottom, clamped with wood shims, making the rub rail vertical, or 90 degrees off the deck, if you can visualize what I'm saying. After the flip I filled in the gap with thickened epoxy. I personally think it looks better done this way for a flats style boat with a flat uncambered deck. I'll see if I can post some pics that may help. Good luck, Mike
Re: FS14 new build - South Shore MA
Posted: Sat Aug 29, 2020 10:35 pm
by GuyP
Nelly,
I’m building an FS19. I cut three layers of straight 3” strips out of 6mm meranti. They were a little challenging near the bow as the rub rail curves down at first going aft then back up again. I’d start at the bow gluing and clamping as you work toward the stern. You’ll need strong c clamps for the bow work but can use weaker pvc pipe clamps for the straight sections. Here’s two pics of mine but don’t have any pics doing the bow. You need that long piece free to bend into place as you tightly apply the clamp pressure. Just keep your joints in one layer a foot or two away from joints on previous layers. Good luck.
Re: FS14 new build - South Shore MA
Posted: Sat Aug 29, 2020 11:07 pm
by Nelly
Thanks for the ideas, all. Seaslug, I can visualize what you're talking about and might give that a shot. I also wondered if it would make sense to just let the rubrail run on a straight line to the bow and then trim the sheer of the plywood sides down to match, essentially lowering the sheer slightly. This might also serve to create a little more of a bay boat look which I’d be ok with.
Re: FS14 new build - South Shore MA
Posted: Sun Aug 30, 2020 7:02 am
by seaslug
I clamp my rub rail after the flip. I don't like the idea of working upside down, not being able to see the sheer line, making sure I don't end up with a droopy bow, or some other problem. much easier to work this way as well.
Re: FS14 new build - South Shore MA
Posted: Wed Oct 14, 2020 6:24 pm
by Nelly
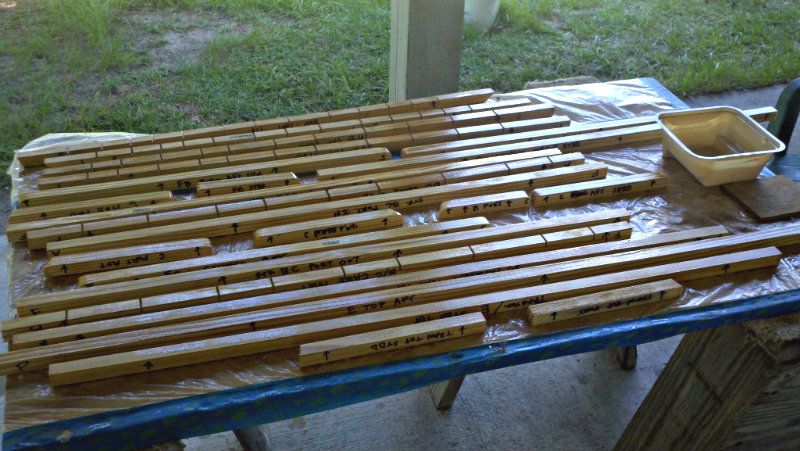
Been about a month since the last post. We cut strips, made a rubrail. It seemed way more time consuming that it needed to be, as I had to work with only a few dozen clamps, limiting the amount of rail I could epoxy at a time. But layer after layer, we got it on.
Also have gone through multiple rounds of fairing, and have now put two coats of two-part epoxy primer on the bottom of the boat. And now, without an indoor space to work in the colder weather, I'm reluctant to flip the boat and move forward glassing stringers and frames, knowing that it'll have to sit outside all winter. I think I'd rather have it upside down and covered than sitting open and rightside up, potentially catching rain and snow, etc.
Anyhow, will attach some progress pics shortly. Thanks for all the suggestions on the rail.
Bob
Re: FS14 new build - South Shore MA
Posted: Wed Oct 28, 2020 9:23 pm
by VT_Jeff
Great progress Bob! Glad the rubrails worked out, fairing /primer look great, that's a huge step! Shame you need to stop for the winter, maybe someone has an unused garage bay in the area?
Re: FS14 new build - South Shore MA
Posted: Sun Jun 13, 2021 8:33 pm
by Nelly
After hibernating for the winter, upside down on the jig sitting on saw horses in the backyard, the boat project has come back online I’m happy to say. It first got a coat of paint, then was flipped and put on a refurbished trailer. Got the seams glassed last weekend and got the bottom completely glassed yesterday. Time to move onto stringers and frames.
Re: FS14 new build - South Shore MA
Posted: Sun Jun 13, 2021 10:12 pm
by VT_Jeff
Welcome back! I love the sledgehammer, the perfect tool to persuade some trailer springs into position!
Re: FS14 new build - South Shore MA
Posted: Mon Jun 14, 2021 7:46 am
by Jeff
Welcome back!!! Jeff
Re: FS14 new build - South Shore MA
Posted: Mon Jun 14, 2021 11:35 am
by Nelly
VT_Jeff wrote: ↑Sun Jun 13, 2021 10:12 pm
Welcome back! I love the sledgehammer, the perfect tool to persuade some trailer springs into position!
That mini sledge is very handy, let me tell you!
Re: FS14 new build - South Shore MA
Posted: Mon Jun 14, 2021 11:41 am
by Nelly
Question for the group - I'm thinking about the stringers, frames, seat tops, decking etc. I know the stringers and frames are glassed to the hull, but how much of that surface area needs to be either 1) coated in epoxy or 2) coated in epoxy AND covered in a layer of glass? So, for instance, with a bench top or deck (which we plan to put down over stringers) - are these just painted with a 2-part paint, or do they need to be epoxy covered, or do they need a layer of glass? Not sure how extensively these need coating/protection from the elements.
Thanks in advance for your insights.
Re: FS14 new build - South Shore MA
Posted: Mon Jun 14, 2021 12:02 pm
by VT_Jeff
Nelly wrote: ↑Mon Jun 14, 2021 11:41 am
Question for the group - I'm thinking about the stringers, frames, seat tops, decking etc. I know the stringers and frames are glassed to the hull, but how much of that surface area needs to be either 1) coated in epoxy or 2) coated in epoxy AND covered in a layer of glass? So, for instance, with a bench top or deck (which we plan to put down over stringers) - are these just painted with a 2-part paint, or do they need to be epoxy covered, or do they need a layer of glass? Not sure how extensively these need coating/protection from the elements.
Thanks in advance for your insights.
It's a great question and often debated. Many feel that every surface needs to be glassed to avoid checking, jaques does not feel this way, ironically. I glassed all my exposed surfaces to protect against dents that could lead to intrusion, mostly. Many/most/all here will tell you that all surfaces HAVE to be epoxy coated at least, though the author of one of my lapstrake boat-building books disagrees and only likes to seal the edges of plywood, feeling that intrusion is inevitable and non-epoxied surfaces are far easier to repair and don't trap water like encapsulated panels do.
So I feel it's personal choice, weighing effort/cost/risk, much like the foam/no foam debate.
Re: FS14 new build - South Shore MA
Posted: Mon Jun 14, 2021 2:57 pm
by cape man
I am of the "seal everything in epoxy and put glass over the exposed sides that may get dinged with an anchor or other heavy object" crowd. I also glassed the stringers and bulkheads to the bottom of the hull. Doesn't cost that much more given everything else you are doing, and will make her last much longer and without worries.
Re: FS14 new build - South Shore MA
Posted: Mon Jun 14, 2021 3:31 pm
by TomW1
I want fiberglass on all exposed surfaces. I have found that using glass strand in an epoxy mix gives all other surfaces greater protection from water intrusion. It is only $5.85 a lb. and used at 25% per mix adds strength also. Use it to coat all the surfaces not covered by fiberglass. It is in the store. If you don't use it make sure you cover every thing with epoxy.
Tom
Re: FS14 new build - South Shore MA
Posted: Mon Jun 14, 2021 9:15 pm
by Browndog
I am also of the opinion of coating in epoxy as a minimum requirement. I’ve built five boats in the last 6 years and everyone of them, no matter the size, had every piece of marine plywood completely coated in epoxy, most with multiple coats, and most every exposed surface covered in at least 4 oz cloth. They are all holding up well despite many bumps along the way.
Re: FS14 new build - South Shore MA
Posted: Thu Jun 17, 2021 12:48 pm
by Nelly
TomW1 wrote: ↑Mon Jun 14, 2021 3:31 pm
I want fiberglass on all exposed surfaces. I have found that using glass strand in an epoxy mix gives all other surfaces greater protection from water intrusion. It is only $5.85 a lb. and used at 25% per mix adds strength also. Use it to coat all the surfaces not covered by fiberglass. It is in the store. If you don't use it make sure you cover every thing with epoxy.
Tom
If mixing in glass strand with the epoxy - can that still be rolled or brushed or does it need to be handled and applied differently? It must the thicker than straight epoxy but wondering how difficult that makes it to apply across larger surfaces (thinking bench-tops, decking, etc.). Thanks.
Re: FS14 new build - South Shore MA
Posted: Thu Jun 17, 2021 1:54 pm
by Dan_Smullen
It must feel good to be making progress again! Glass and hull shape look great.
Re: FS14 new build - South Shore MA
Posted: Thu Jun 17, 2021 2:14 pm
by Reid
Nelly,
Let me preface my response by saying that everyone has their own way of doing things, no way is wrong or right, it is simply what works for them. I personally do not like mixing in chopped strand into my epoxy. I find it more difficult to spread neatly. If I am going to cover decking, seats, or the sole I prefer to cover with some lightweight woven cloth (6 oz. or 10 oz.). I don't over-saturate the cloth and in the end I am left with a nice uniform surface that I can fair very easily.
Good luck!
-Reid
Nelly wrote: ↑Thu Jun 17, 2021 12:48 pm
TomW1 wrote: ↑Mon Jun 14, 2021 3:31 pm
I want fiberglass on all exposed surfaces. I have found that using glass strand in an epoxy mix gives all other surfaces greater protection from water intrusion. It is only $5.85 a lb. and used at 25% per mix adds strength also. Use it to coat all the surfaces not covered by fiberglass. It is in the store. If you don't use it make sure you cover every thing with epoxy.
Tom
If mixing in glass strand with the epoxy - can that still be rolled or brushed or does it need to be handled and applied differently? It must the thicker than straight epoxy but wondering how difficult that makes it to apply across larger surfaces (thinking bench-tops, decking, etc.). Thanks.
Re: FS14 new build - South Shore MA
Posted: Thu Jun 17, 2021 9:28 pm
by TomW1
Nelly wrote: ↑Thu Jun 17, 2021 12:48 pm
TomW1 wrote: ↑Mon Jun 14, 2021 3:31 pm
I want fiberglass on all exposed surfaces. I have found that using glass strand in an epoxy mix gives all other surfaces greater protection from water intrusion. It is only $5.85 a lb. and used at 25% per mix adds strength also. Use it to coat all the surfaces not covered by fiberglass. It is in the store. If you don't use it make sure you cover every thing with epoxy.
Tom
If mixing in glass strand with the epoxy - can that still be rolled or brushed or does it need to be handled and applied differently? It must the thicker than straight epoxy but wondering how difficult that makes it to apply across larger surfaces (thinking bench-tops, decking, etc.). Thanks.
No I only use it on interior spaces and on frames and the like and on areas that do not call for cloth. I use about a 15% mix that brushes or rolls on fairly evenly. The strands provide additional protection over pure epoxy.
Reid totally agree cover decking, sole and seats with cloth.
Tomm
Re: FS14 new build - South Shore MA
Posted: Sat Jun 26, 2021 7:38 pm
by Nelly
Slow progress - just welded the stringers down today after grinding out bubbles and rough spots from the full interior glassing a couple of weeks ago. Also drilled. 1.75” hole in the bottom of the transom for the drain plug.
Threw the seat top and forward casting deck on for giggles, just to see how it would look. That inspired me to hang the outboard on the transom to see what it looked like in a more complete stage than it actually is. I like it!
Re: FS14 new build - South Shore MA
Posted: Sat Jun 26, 2021 11:29 pm
by Fuzz
Looks ready for a test run
Re: FS14 new build - South Shore MA
Posted: Sun Jun 27, 2021 7:18 am
by Jeff
Nice progress!! Jeff
Re: FS14 new build - South Shore MA
Posted: Mon Jul 05, 2021 9:21 am
by Nelly
Still making baby step progress. The rain here in New England has not helped this build progress over the past few days. Thought we had a window to do some work yesterday but of course it started to drizzle as soon as the epoxy was mixed…We scrambled a bit, got the boat under cover and got the stringers glassed in.
Now we need to make some layout decisions. Where to put the fuel tank? Should we eliminate the middle bench and have a nice open deck mid-ship? That’s what my partner wants, along with a leaning post and cooler tied-down as a seat. If we do this I know I need to leave 3” of the frames to retain structural integrity. Not sure I trust myself to measure and cut them correctly, though. Might just be simpler to plow ahead with the middle bench in tact, as in the plans.
Overall, I love the lines of this little skiff. She looks pretty good sitting level on the trailer!!!
Re: FS14 new build - South Shore MA
Posted: Mon Jul 05, 2021 10:46 am
by Jeff
Nice!! Jeff
Re: FS14 new build - South Shore MA
Posted: Mon Aug 09, 2021 10:23 pm
by Nelly
Sorry to say that there's been very little progress in the past month. Second-rainiest July on record did not make it any easier to build outdoors over the past month, but there's also a lot more going on with my kids and family this July vs. last. Either way, I've got some time over the next few weeks and want to get this project back up and running.
I'm trying to finalize the deck layout, and I spent time today working with PVC pipe to make chase tubes from the middle bench seat back to the stern - one on the outside of both stringers. They will be encased in buoyancy foam, over which I plan to put a sole. I'm wondering how I can seal the holes in the sole through which I'll bring the chase tubes when the epoxy and glass won't adhere to the PVC? I've read some old posts where it's been recommended to just glass over the PVC about 3-6" above where it comes through the deck. I'm having a hard time visualizing how this might be done and can't find any good posts describing (or showing) this process for glassing in chase tubes. I don't want water to get beneath the deck and eventually into the foam.
Anyone have any suggestions, or know of prior builds/posts that would show this in more detail?
Thanks!
Re: FS14 new build - South Shore MA
Posted: Mon Aug 23, 2021 10:51 am
by Nelly
Doesn’t look like a lot of progress; the project has been moving slowly, for sure.
Got all of the bulkheads glassed in place and also installed PVC chase tubes for fuel and electrical running from the mid bench back to the stern.
Working on installing cleats for the sole. Doing this even in areas which will be under the benches - I’m assuming you don’t want to leave foam-filled areas uncovered, even if they’re under a bench seat, etc. Is this overkill or the right way to proceed?
After cleats are in place I’ll be pouring foam in the port and starboard sections, leaving the center open for access and drainage.
After foam goes down, we’ll put the sole down, work on the seat top, casting deck and rear area cover. That’ll mean another round of cleating…..

Question - the cleats are simple rough pine 1x2 - do these need to be totally covered in epoxy? They are going to be covered with a sole and seemingly protected from any water, but I suppose moisture could work in and start to rot them eventually If not coated. Maybe I’m answering my own question.
Also, the hot glue method of attaching - is this the easiest way to affix cleats to areas that are unclampable? If so - is there a good how-to on the forum on how to do this while also using thickened epoxy for the permanent attachment?
Re: FS14 new build - South Shore MA
Posted: Mon Aug 23, 2021 3:27 pm
by VT_Jeff
Nelly wrote: ↑Mon Aug 09, 2021 10:23 pm
I'm wondering how I can seal the holes in the sole through which I'll bring the chase tubes when the epoxy and glass won't adhere to the PVC?
What I did was to build some "dams" out of marine plywood that go around the hole in the sole, maybe 4" high, so that standing water on the sole is not working directly on the pvc joint, which is tough to get a seal with as you've learned. You can then bring the pvc through a plywood cap on top of the dam and seal it as you normally would.
This is where my steering cable and electric come through the sole to my "console". I still need to paint it, it didn't make the final cut for my last paint session.
Re: FS14 new build - South Shore MA
Posted: Mon Aug 23, 2021 3:58 pm
by cape man
Rough up the surface of the PVC with 30 or 60 grit sand paper and epoxy mixed with wood flour will stick to it (based on a Cracker Larry recommendation and proven for 10 + years on my OD 18).
Re: FS14 new build - South Shore MA
Posted: Tue Aug 24, 2021 10:07 am
by pee wee
Nelly wrote: ↑Mon Aug 23, 2021 10:51 am
Working on installing cleats for the sole. Doing this even in areas which will be under the benches - I’m assuming you don’t want to leave foam-filled areas uncovered, even if they’re under a bench seat, etc. Is this overkill or the right way to proceed?
You should cover the foam, even if it's just to provide a bottom to your storage area.
After foam goes down, we’ll put the sole down, work on the seat top, casting deck and rear area cover. That’ll mean another round of cleating…..
Yes.
Question - the cleats are simple rough pine 1x2 - do these need to be totally covered in epoxy? They are going to be covered with a sole and seemingly protected from any water, but I suppose moisture could work in and start to rot them eventually If not coated. Maybe I’m answering my own question.
Yes, you are! If you want the boat to last as long as possible, ALL wood should be coated in multiple coats of epoxy.
Also, the hot glue method of attaching - is this the easiest way to affix cleats to areas that are unclampable? If so - is there a good how-to on the forum on how to do this while also using thickened epoxy for the permanent attachment?
There are no un-clampable places, but there are places that are very difficult to clamp. If you go that route, apply the thickened epoxy to the cleat but leave a couple spots dry, put a good glob of hot glue on and stick it accurately to where it goes. Note: some hot glues set up quickly, some allow for movement for a few seconds after it's stuck.
If you're looking for a good example to follow, it would be hard to beat Cracker Larry. Note that he labelled all his cleats and double coated them before installation.
 viewtopic.php?p=287210#p287210
Re: FS14 new build - South Shore MA
Posted: Mon Jun 20, 2022 1:47 pm
by Nelly
Project is back online for summer #3 and just needs to get done. What started as a cute pandemic quarantine project is now the “get that thing the hell out of the backyard” project.
And we haven’t had good enough weather to work outdoors until the last few weeks. So here we are, trying to get across the finish line.
Question for the team- how to I strengthen the rear deck? I’ve cleated the sides but there’s just too much sag in the middle. I glassed the underside and will glass the top but I don’t think that will give it enough strength. Plans call for a batten running across for further support. No other detail or pictures provided. I’m thinking it needs a support from the deck underneath or the actual bottom of the hull. Also second guessing a hatch this big, especially with so little support beneath. I want to be able to stand on this thing. Seems the plans are really deficient in this area. I’d love to hear ideas on how people have shored this up. Thank you.
Re: FS14 new build - South Shore MA
Posted: Tue Jun 21, 2022 9:41 am
by pee wee
I don't have those plans, but if you want to see how other builders have addressed the area you could check their builds. Here's a photo from one:

Re: FS14 new build - South Shore MA
Posted: Tue Jun 21, 2022 1:01 pm
by VT_Jeff
I used some doug fir to make supports under my rear(and forward) deck. Mine is overly-complicated due to the openings/hatches but if you run some solid wood from the transom to your frame and around your hatch, will probably be fine. Connecting it to the stringers below will add some insurance. I considered this but ultimately did not, seems strong enough without.
viewtopic.php?t=64576&start=250
Re: FS14 new build - South Shore MA
Posted: Tue Jun 21, 2022 5:58 pm
by TomW1
You definately need more support under that deck, I would suggest another frame behind the opening at the minimum. That would be the starting point and then depending. walls on each end of the opening. That opening may be to wide and you may need to add a beam/wall in the opening at the half way point. You probably should as that would be one big hatch.
Tom
Re: FS14 new build - South Shore MA
Posted: Sun Jun 26, 2022 10:36 pm
by Nelly
Thanks for those responses. I basically used some scrap strapping to run across the underneath portion of this decking, tying it into the braces on the sides of the boat. I also am going to build some support down to the hill for either side of the motor well cutout.
Disappointing that they sell this CNC kit cut this way with no guidance on how to support this decking/hatch.
Re: FS14 new build - South Shore MA
Posted: Sun Jun 26, 2022 10:37 pm
by Nelly
Oh, and I caught a nice striper this weekend too!
Re: FS14 new build - South Shore MA
Posted: Mon Jun 27, 2022 8:52 am
by Jeff
Great catch!!! Jeff
Re: FS14 new build - South Shore MA
Posted: Mon Jun 27, 2022 9:14 am
by VT_Jeff
Nelly wrote: ↑Sun Jun 26, 2022 10:37 pm
Oh, and I caught a nice striper this weekend too!
Damn son, nice fish! Cape Cod?
Re: FS14 new build - South Shore MA
Posted: Mon Jun 27, 2022 9:55 am
by Nelly
VT_Jeff wrote: ↑Mon Jun 27, 2022 9:14 am
Nelly wrote: ↑Sun Jun 26, 2022 10:37 pm
Oh, and I caught a nice striper this weekend too!
Damn son, nice fish! Cape Cod?
Close, but a little further north. This was out of Scituate, MA which is about 25 miles southeast of Boston.
Re: FS14 new build - South Shore MA
Posted: Mon Jun 27, 2022 11:52 am
by cape man
Oh, and I caught a nice striper this weekend too!
Talk about an understatement!!! WOW!
Re: FS14 new build - South Shore MA
Posted: Mon Aug 15, 2022 8:47 am
by Nelly
More progress in recent weeks, although it's been slow. Primed and painted the areas under the seat tops/decks. Decks are down and now moving on to fairing out the inside of the boat. Hoping to splash soon!
Re: FS14 new build - South Shore MA
Posted: Thu Sep 01, 2022 7:32 am
by Nelly
Getting closer to the finish line:
Re: FS14 new build - South Shore MA
Posted: Thu Sep 01, 2022 7:46 am
by wpstarling
Looking good, how do you open your hatches? I don't see any holes or hinges/latches on them
Re: FS14 new build - South Shore MA
Posted: Thu Sep 01, 2022 8:14 am
by Nelly
wpstarling wrote: ↑Thu Sep 01, 2022 7:46 am
Looking good, how do you open your hatches? I don't see any holes or hinges/latches on them
Haha - great observation. Pull latches and hinges are still on the to-do list. Figured I’d wait until painting was complete.
Re: FS14 new build - South Shore MA
Posted: Thu Sep 01, 2022 8:18 am
by wpstarling
Nelly wrote: ↑Thu Sep 01, 2022 8:14 am
wpstarling wrote: ↑Thu Sep 01, 2022 7:46 am
Looking good, how do you open your hatches? I don't see any holes or hinges/latches on them
Haha - great observation. Pull latches and hinges are still on the to-do list. Figured I’d wait until painting was complete.
Ah nice. I waited until after paint as well but wish I hadn't. Made it more difficult to not get epoxy on the paint when I drilled and filled holes. I managed it but it does require more attention and care.
Either way it's almost ready to splash!
Re: FS14 new build - South Shore MA
Posted: Mon Sep 05, 2022 8:55 am
by Nelly
Finally got her in the water!
Re: FS14 new build - South Shore MA
Posted: Mon Sep 05, 2022 10:49 am
by mhd
CONGRATULATIONS!
Launch day is always something special. Boat looks fantastic!!! Big smiles all round I'm sure.
Cheers,
Mick
Re: FS14 new build - South Shore MA
Posted: Mon Sep 05, 2022 11:36 am
by cape man
Awesome picture of the Captain! You'll remember that moment forever!
Re: FS14 new build - South Shore MA
Posted: Mon Sep 05, 2022 12:33 pm
by Jeff
Congrats!!!! Jeff
Re: FS14 new build - South Shore MA
Posted: Mon Sep 05, 2022 5:38 pm
by TomW1
Congrats on the launch.
Tom
Re: FS14 new build - South Shore MA
Posted: Wed Sep 07, 2022 10:14 pm
by Nelly
Thanks all - really great to get her on the water! Appreciate all the help and advice you've provided along the way!